Page 1 of 6 Mojoblock Installation Manual scratch-resistant, oversize jaw inserts for the Harbor Freight motorcycle tire-changing stand DISCLAIMER: By using this product, you assume all risk and responsibility for any injuries to yourself or others, related to your use or misuse of this equipment. You also agree to release and discharge any and all liability and claims against the manufacturer for any damages or injury of any kind.
Transcript
Page 1 of 6
Mojoblock Installation Manual
scratch-resistant, oversize jaw inserts for the Harbor
Freight motorcycle tire-changing stand
DISCLAIMER: By using this product, you assume all risk and responsibility for any injuries to
yourself or others, related to your use or misuse of this equipment. You also agree to release and
discharge any and all liability and claims against the manufacturer for any damages or injury of
any kind.
Page 2 of 6
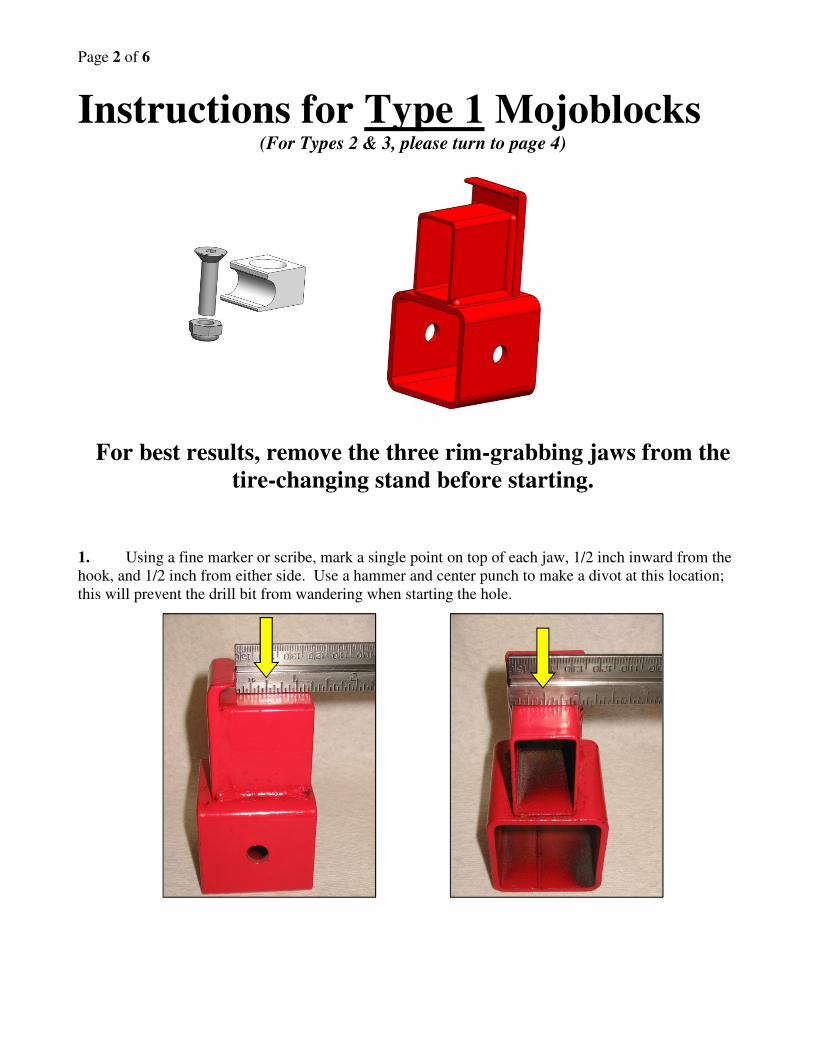
Instructions for Type 1 Mojoblocks (For Types 2 & 3, please turn to page 4)
For best results, remove the three rim-grabbing jaws from the
tire-changing stand before starting.
1. Using a fine marker or scribe, mark a single point on top of each jaw, 1/2 inch inward from the
hook, and 1/2 inch from either side. Use a hammer and center punch to make a divot at this location;
this will prevent the drill bit from wandering when starting the hole.
Page 3 of 6
2. Drill a small (1/16” or 1/8”) pilot hole at the location on each jaw marked in step 1. Using this
small hole as a pilot, drill a 5/16” hole.
3. Attach a Mojoblock to the top of each jaw as shown, using one bolt, one washer, and one nylon-
insert nut for each Mojoblock. Do not overtighen the screw, it will split the plastic!
5. Reinstall the jaws on the tire-changing stand.
Page 4 of 6
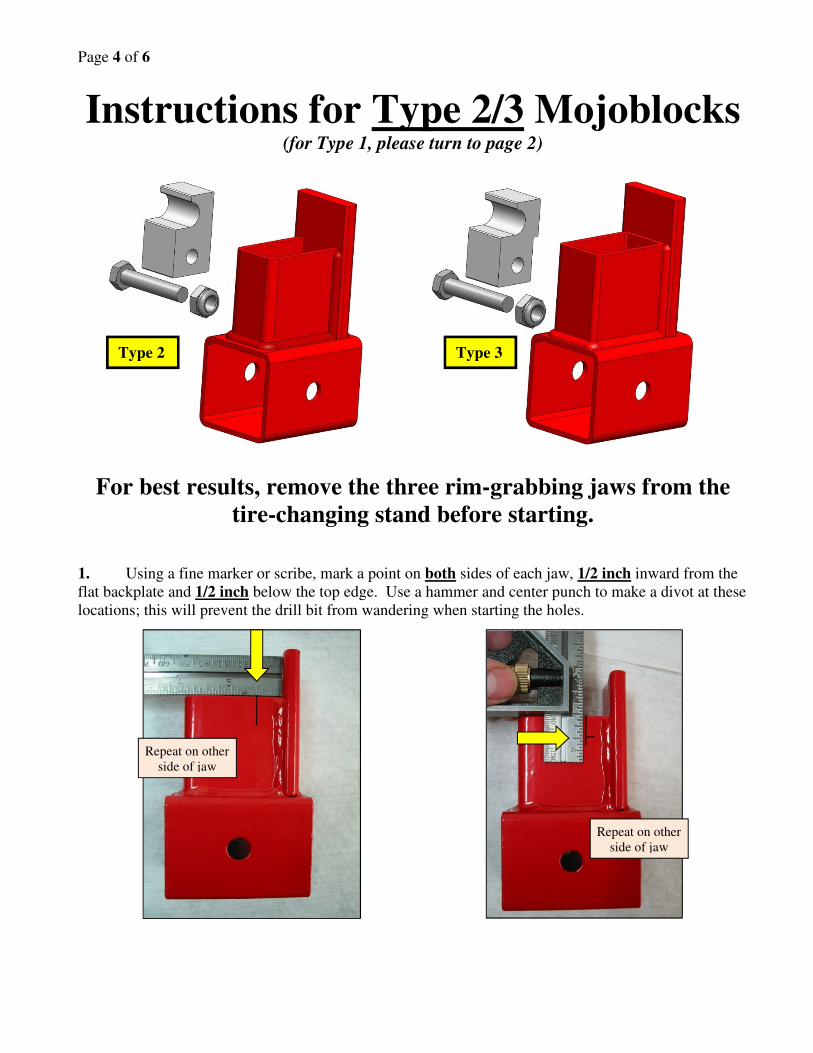
Instructions for Type 2/3 Mojoblocks (for Type 1, please turn to page 2)
For best results, remove the three rim-grabbing jaws from the
tire-changing stand before starting.
1. Using a fine marker or scribe, mark a point on both sides of each jaw, 1/2 inch inward from the
flat backplate and 1/2 inch below the top edge. Use a hammer and center punch to make a divot at these
locations; this will prevent the drill bit from wandering when starting the holes.
Type 2 Type 3
Repeat on other
side of jaw
Repeat on other
side of jaw
Page 5 of 6
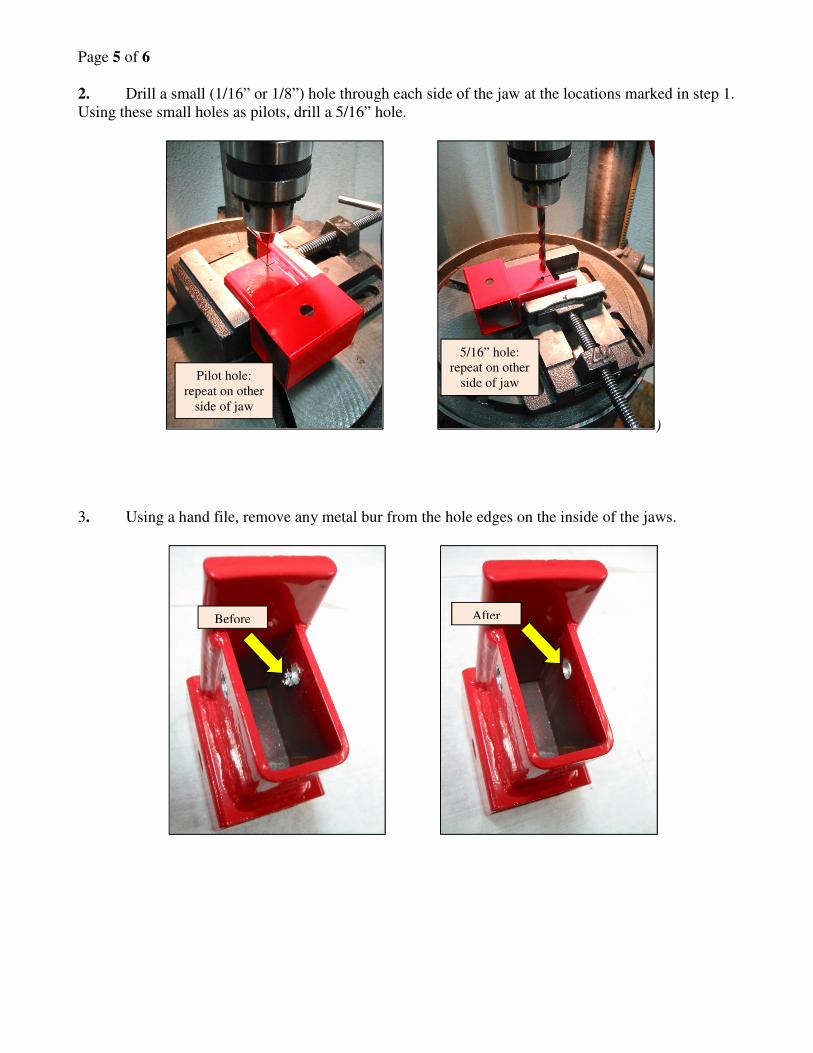
2. Drill a small (1/16” or 1/8”) hole through each side of the jaw at the locations marked in step 1.
Using these small holes as pilots, drill a 5/16” hole.
)
3. Using a hand file, remove any metal bur from the hole edges on the inside of the jaws.
Before After
.
Pilot hole:
repeat on other
side of jaw
5/16” hole:
repeat on other
side of jaw
Page 6 of 6
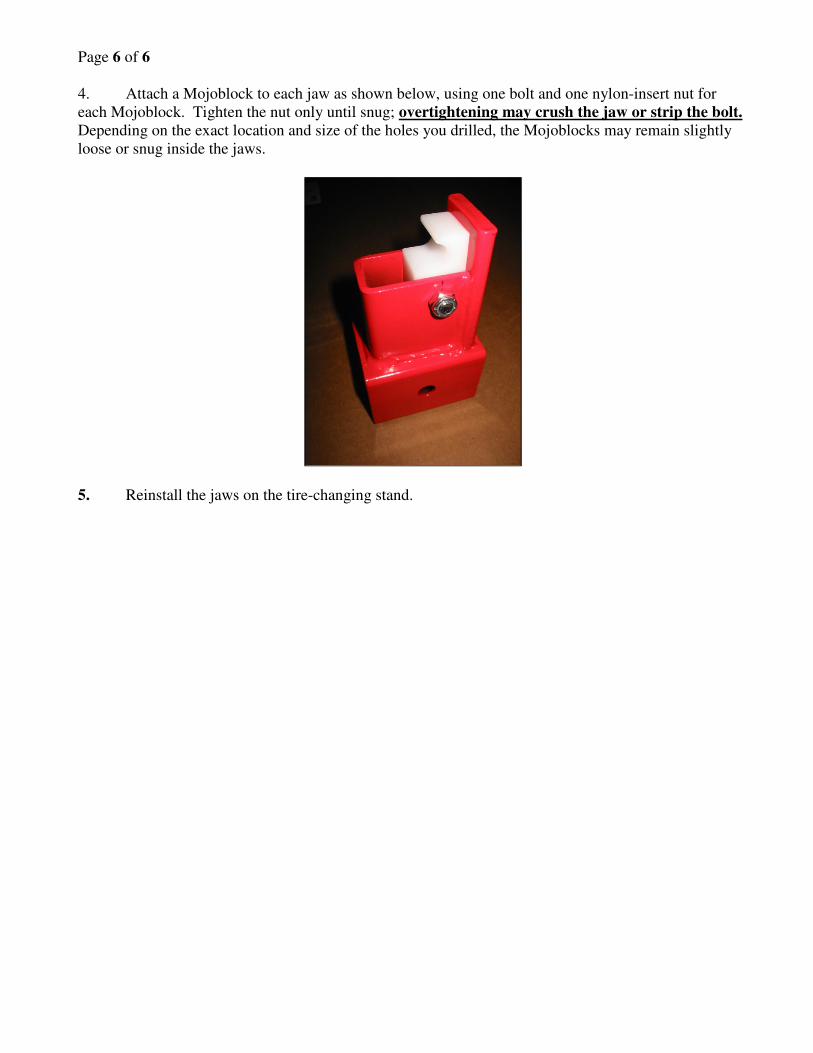
4. Attach a Mojoblock to each jaw as shown below, using one bolt and one nylon-insert nut for
each Mojoblock. Tighten the nut only until snug; overtightening may crush the jaw or strip the bolt.
Depending on the exact location and size of the holes you drilled, the Mojoblocks may remain slightly