20
MWP III Total Wrist Prosthesis Surgical Technique
| Date post: | 11-Aug-2018 |
| Category: |
Documents |
| Upload: | nguyendiep |
| View: | 217 times |
| Download: | 1 times |
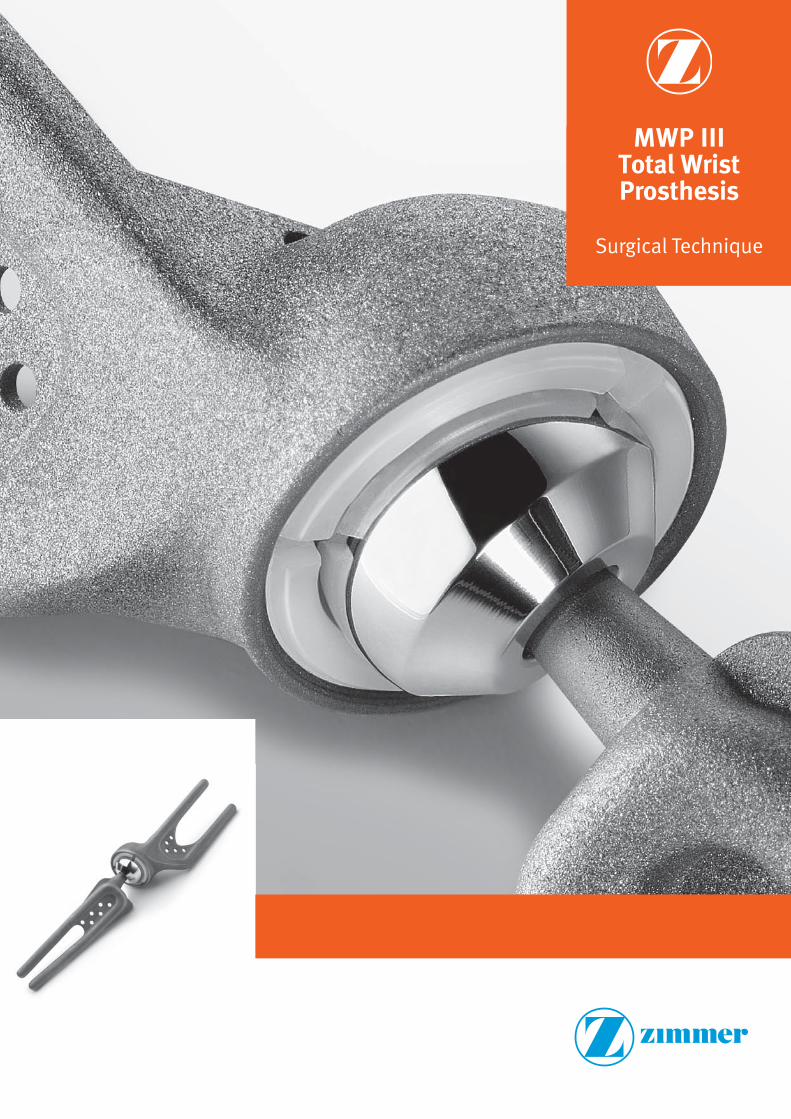
MWP III Total Wrist Prosthesis
Surgical Technique

DisclaimerThis document is intended exclusively for physicians and is not intended for laypersons.
Information on the products and procedures contained in this document is of a general nature and does not represent and does not constitute medical advice or recommendations. Because this information does not purport to constitute any diagnostic or therapeutic statement with regard to any individual medical case, each patient must be examined and advised individually, and this document does not replace the need for such examination and/or advice in whole or in part.
Information contained in this document was gathered and compiled by medical experts and qualified Zimmer personnel. The information contained herein is accurate to the best knowledge of Zimmer and of those experts and personnel involved in its compilation. However, Zimmer does not assume any liability for the accuracy, completeness or quality of the information in this document, and Zimmer is not liable for any losses, tangible or intangible, that may be caused by the use of this information.
3MWP III Uncemented Total Wrist Prosthesis – Surgical Technique
Surgical TechniqueMWP III Uncemented Total Wrist Prosthesis
Table of Contents
MWP III Uncemented Total Wrist Prosthesis 4
Indications 4
Contraindications 4
Biomechanical Concept 5
Description of the Implants 7
The Carpal Component 7
The Inlay 7
The Ball Head 8
The Radial Component 8
Preoperative Planning 9
Surgical Technique 10
Positioning the Patient 10
Approach 10
Bone Resection 11
Preparing the Prosthesis Scar 11
Preparing the Socket Seat 12
Preparing the Radius 12
Introducing the Prosthesis 13
Possibility of Correction 14
Bending of the Anchoring Limbs 14
Reuse of the Taper and/or Thread Connection 14
Closing the Wound 14
Postoperative Treatment 15
Case Study 15
Implants 16
Instruments 18
References 19

4 MWP III Uncemented Total Wrist Prosthesis – Surgical Technique
Indications A total prosthesis for the wrist is indicated in case of painful, functionally impairing joint damage as a result of rheumatoid arthritis or degenerative arthrosis.
Note:
But joint replacement only makes sense
when surgery for preserving mobility (e.g.
partial carpal arthrodesis) is no longer possi
ble and radiocarpal arthro desis has
to be taken into conside ra tion. Reverting to
arthrodesis is always a possibility.
A total prosthesis, therefore, means gaining
precious time above all for patients with
rheumatoid arthritis.
Contraindications• Lack of motivation on the part
of the patient
• Heavy manual work
• Unfavorable local preconditions such as tendon insufficiency or insufficient bone stock
MWP III Uncemented Total Wrist Prosthesis

5MWP III Uncemented Total Wrist Prosthesis – Surgical Technique
The aim of developing a total wrist prosthesis was to achieve wrist function as near normal as possible and reconstruction of the carpus. Since the very complex kinematics of the wrist are not at all easy to copy, a compromise had to be found. The fact that, generally speaking, the center of motion of the wrist is situated consistently in the head of the capitate bone was a crucial factor in the decision to use a ballandsocket joint, this being the simplest form of joint.
In addition, a ballandsocket joint enables free mobility in all directions, as well as some distraction.
The MWP III total wrist prosthesis, designed for uncemented anchoring, is a direct further development of the cemented wrist prosthesis implanted for the first time in 1971 and that has been constantly improved on since then.
It is designed as a ballandsocket joint and consists of a proximal ball component and a distal socket component. The tried and tested Durasul® Highly Crosslinked Polyethylene CoCrMo pairing is used for articulation. The instrument set with positioning guides has been revised.
Biomechanical Concept

6
nonenglish translation margin >
Immediate mechanical stability (primary fixation) is achieved both by means of the anchoring stems fitting proximally into the radius and distally into the carpus and into the metacarpal bones and thanks to the function of the anchoring fin. Secondary anchoring is enabled by biological integration of the prosthesis surface into the adjoining bone structure (osseointegration).
The wrist prosthesis is made of the highperformance forged Protasul®100 Ti6Al7Nb alloy, and has a matte, roughblasted surface.
The ball head is made of the Protasul20 Co28Cr6Mo alloy. The radial component and the ball are coupled by means of a tapered plugandsocket connection.
The cup inlay, made of Durasul highly crosslinked UHMW polyethylene, is screwed into the shell intraoperatively.
Thanks to the modular nature of the ball head, alongside the matched use of:
•small radial component – small carpal component or
•large radial component – large carpal component.
the following combination is also possible:
•large radial component – small carpal component
It is also possible, theoretically, to combine a small radial component with a large carpal component, although from the clinical point of view this will be found only rarely.
Carpal Component Size L
Carpal Component Size S
Inlay Size L
Inlay Size S
Ball Head Size L
Ball Head Size S
Radial Component Size L
Radial Component Size S
MWP III Uncemented Total Wrist Prosthesis – Surgical Technique
7
Description of the Implants
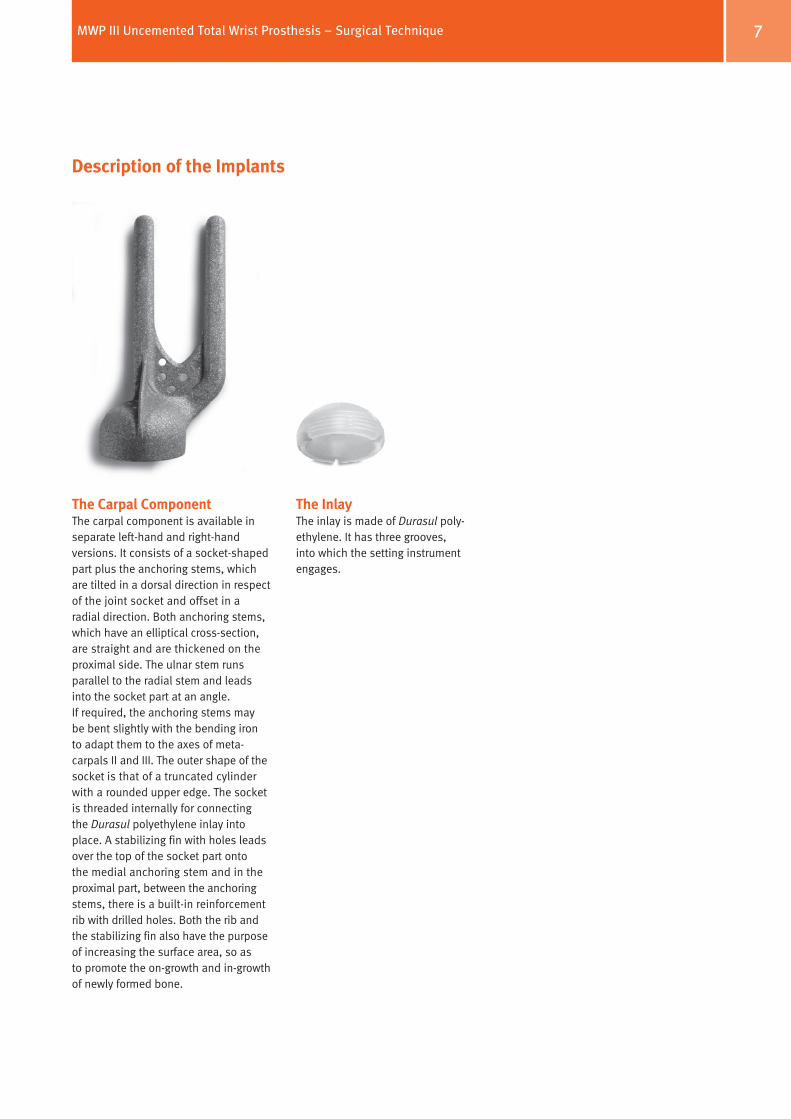
The Carpal ComponentThe carpal component is available in separate lefthand and righthand versions. It consists of a socketshaped part plus the anchoring stems, which are tilted in a dorsal direction in respect of the joint socket and offset in a radial direction. Both anchoring stems, which have an elliptical crosssection, are straight and are thickened on the proximal side. The ulnar stem runs parallel to the radial stem and leads into the socket part at an angle. If required, the anchoring stems may be bent slightly with the bending iron to adapt them to the axes of metacarpals II and III. The outer shape of the socket is that of a truncated cylinder with a rounded upper edge. The socket is threaded internally for connecting the Durasul polyethylene inlay into place. A stabilizing fin with holes leads over the top of the socket part onto the medial anchoring stem and in the proximal part, between the anchoring stems, there is a builtin reinforcement rib with drilled holes. Both the rib and the stabilizing fin also have the purpose of increasing the surface area, so as to promote the ongrowth and ingrowth of newly formed bone.
The Inlay The inlay is made of Durasul polyethylene. It has three grooves, into which the setting instrument engages.
MWP III Uncemented Total Wrist Prosthesis – Surgical Technique
8
nonenglish translation margin >
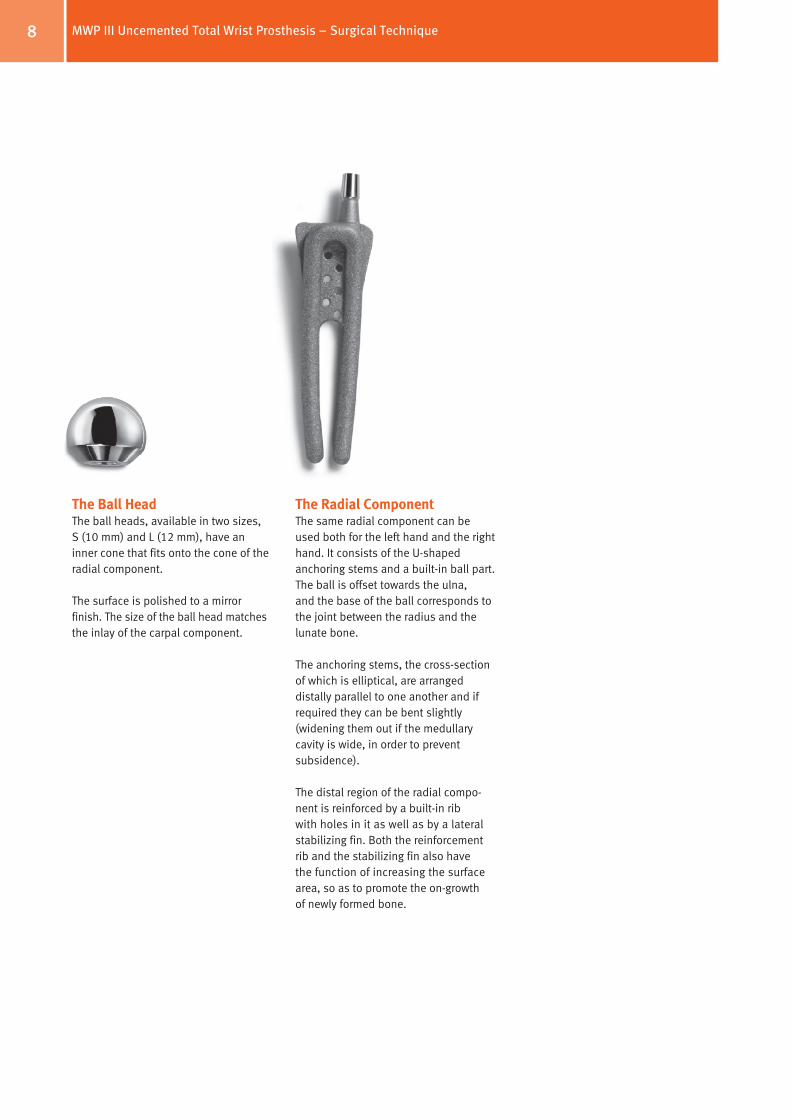
The Ball HeadThe ball heads, available in two sizes, S (10 mm) and L (12 mm), have an inner cone that fits onto the cone of the radial component.
The surface is polished to a mirror finish. The size of the ball head matches the inlay of the carpal component.
The Radial ComponentThe same radial component can be used both for the left hand and the right hand. It consists of the Ushaped anchoring stems and a builtin ball part. The ball is offset towards the ulna, and the base of the ball corresponds to the joint between the radius and the lunate bone.
The anchoring stems, the crosssection of which is elliptical, are arranged distally parallel to one another and if required they can be bent slightly (widening them out if the medullary cavity is wide, in order to prevent subsidence).
The distal region of the radial component is reinforced by a builtin rib with holes in it as well as by a lateral stabilizing fin. Both the reinforcement rib and the stabilizing fin also have the function of increasing the surface area, so as to promote the ongrowth of newly formed bone.
MWP III Uncemented Total Wrist Prosthesis – Surgical Technique

9
Preoperative Planning
Carry out preoperating planning with the help of templates, thanks to which the size of the prosthesis can be established, both for the left hand and for the right hand.
Templates on a 1:1 scale are available for all 4 pairing options:
Lit. No. 06.01142.000x
Meuli Wrist Prostheses MWP3UncementedThe reference number must correspond to that of the prosthesis to be implanted. © All rights reserved, Centerpulse Orthopedics Ltd, CH-8404 Winterthur, Switzerland, 11/2003, Lit.No. 06.01142.000-WL 7 611814 650522
25 cm
5 cm
10 cm
15 cm
20 cm
5 cm 10 cm 15 cm
Magnification 1 :1
REF 05.95502.097 Protasul-100REF 05.95502.098 Protasul-100REF 05.95503.009 Protasul-20REF 05.95501.009 Protasul-100
REF 05.95502.097 Protasul-100REF 05.95502.098 Protasul-100REF 05.95503.009 Protasul-20REF 05.95501.006 Protasul-100
Radius Part LCarpal Part LHead L
Radius Part SCarpal Part LHead L
Right/ Left
MWP III Uncemented Total Wrist Prosthesis – Surgical Technique
10
Surgical Technique
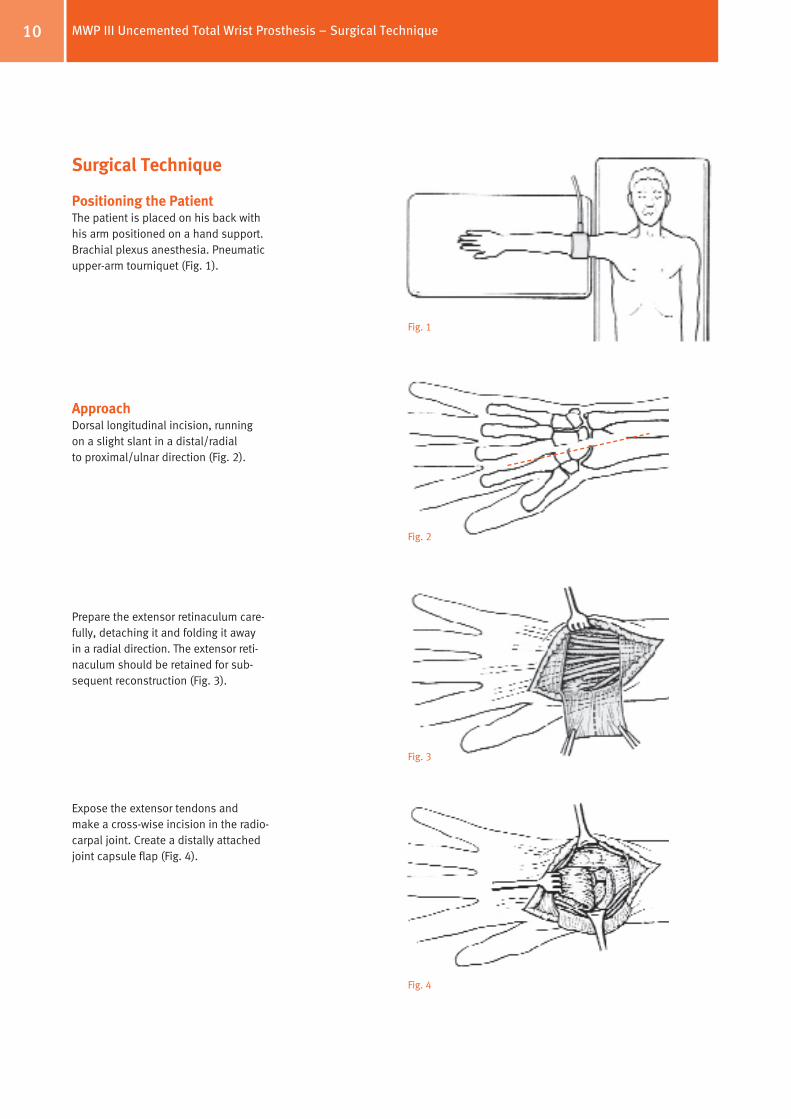
Positioning the PatientThe patient is placed on his back with his arm positioned on a hand support. Brachial plexus anesthesia. Pneumatic upperarm tourniquet (Fig. 1).
ApproachDorsal longitudinal incision, running on a slight slant in a distal/radial to proximal/ulnar direction (Fig. 2).
Prepare the extensor retinaculum carefully, detaching it and folding it away in a radial direction. The extensor reti na culum should be retained for subsequent reconstruction (Fig. 3).
Expose the extensor tendons and make a crosswise incision in the radiocarpal joint. Create a distally attached joint capsule flap (Fig. 4).
Fig. 1
Fig. 2
Fig. 3
Fig. 4
MWP III Uncemented Total Wrist Prosthesis – Surgical Technique
11
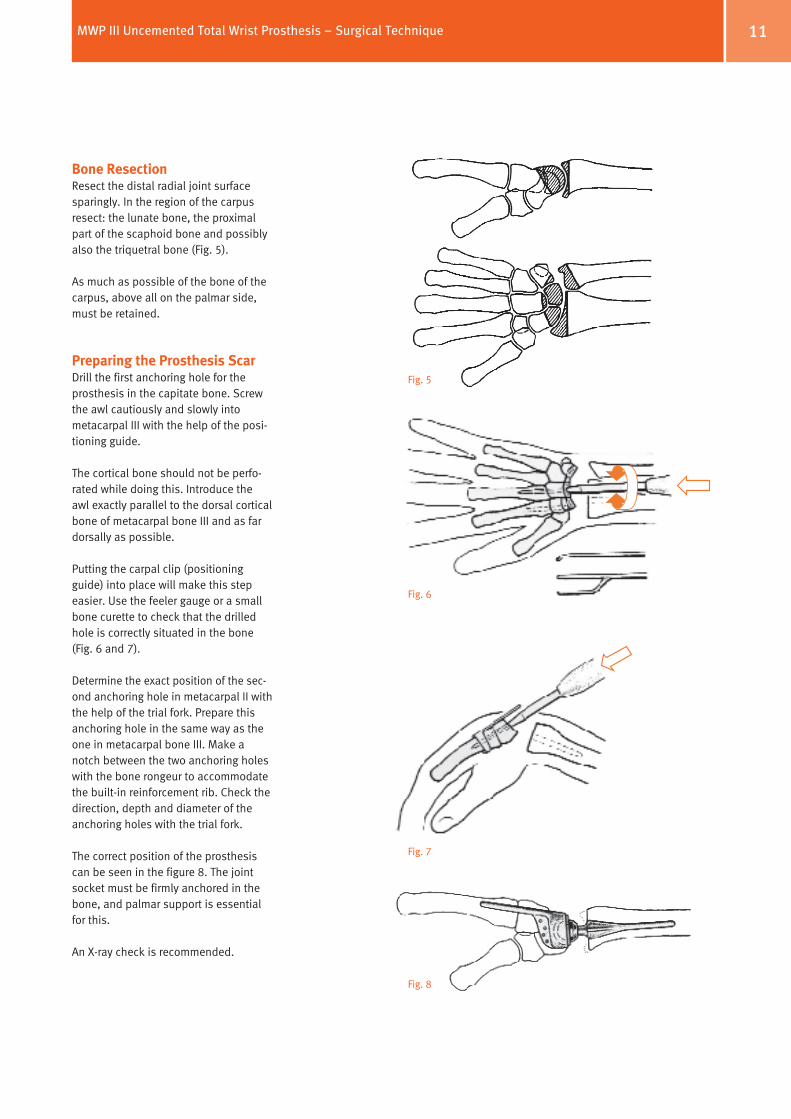
Bone ResectionResect the distal radial joint surface sparingly. In the region of the carpus resect: the lunate bone, the proximal part of the scaphoid bone and possibly also the triquetral bone (Fig. 5).
As much as possible of the bone of the carpus, above all on the palmar side, must be retained.
Preparing the Prosthesis ScarDrill the first anchoring hole for the prosthesis in the capitate bone. Screw the awl cautiously and slowly into metacarpal III with the help of the positioning guide.
The cortical bone should not be perforated while doing this. Introduce the awl exactly parallel to the dorsal cortical bone of metacarpal bone III and as far dorsally as possible.
Putting the carpal clip (positioning guide) into place will make this step easier. Use the feeler gauge or a small bone curette to check that the drilled hole is correctly situated in the bone (Fig. 6 and 7).
Determine the exact position of the second anchoring hole in metacarpal II with the help of the trial fork. Prepare this anchoring hole in the same way as the one in metacarpal bone III. Make a notch between the two anchoring holes with the bone rongeur to accommodate the builtin reinforcement rib. Check the direction, depth and diameter of the anchoring holes with the trial fork.
The correct position of the prosthesis can be seen in the figure 8. The joint socket must be firmly anchored in the bone, and palmar support is essential for this.
An Xray check is recommended.
Fig. 5
Fig. 6
Fig. 8
Fig. 7
MWP III Uncemented Total Wrist Prosthesis – Surgical Technique
12
nonenglish translation margin >
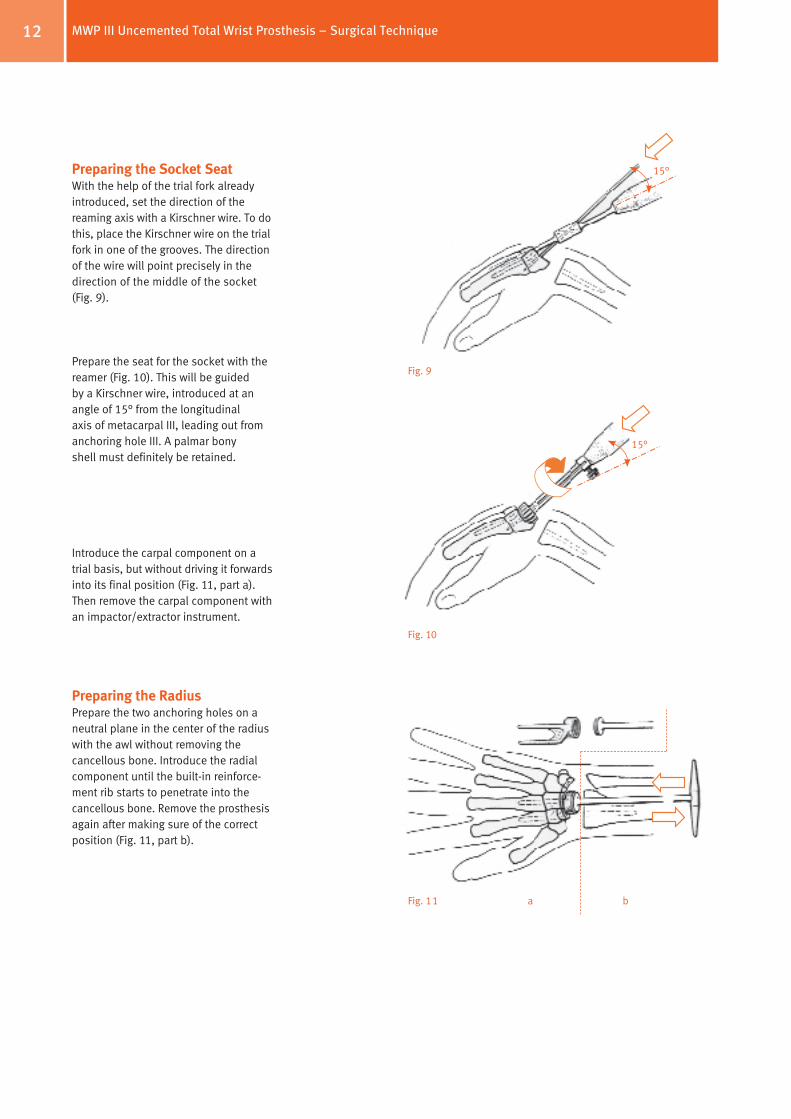
Preparing the Socket SeatWith the help of the trial fork already introduced, set the direction of the reaming axis with a Kirschner wire. To do this, place the Kirschner wire on the trial fork in one of the grooves. The direction of the wire will point precisely in the direction of the middle of the socket (Fig. 9).
Prepare the seat for the socket with the reamer (Fig. 10). This will be guided by a Kirschner wire, introduced at an angle of 15° from the longitudinal axis of metacarpal III, leading out from anchoring hole III. A palmar bony shell must definitely be retained.
Introduce the carpal component on a trial basis, but without driving it forwards into its final position (Fig. 11, part a). Then remove the carpal component with an impactor/extractor instrument.
Preparing the RadiusPrepare the two anchoring holes on a neutral plane in the center of the radius with the awl without removing the cancellous bone. Introduce the radial component until the builtin reinforcement rib starts to penetrate into the cancellous bone. Remove the prosthesis again after making sure of the correct position (Fig. 11, part b).
Fig. 9
Fig. 10
Fig. 11 a b
15°
15°
MWP III Uncemented Total Wrist Prosthesis – Surgical Technique
13
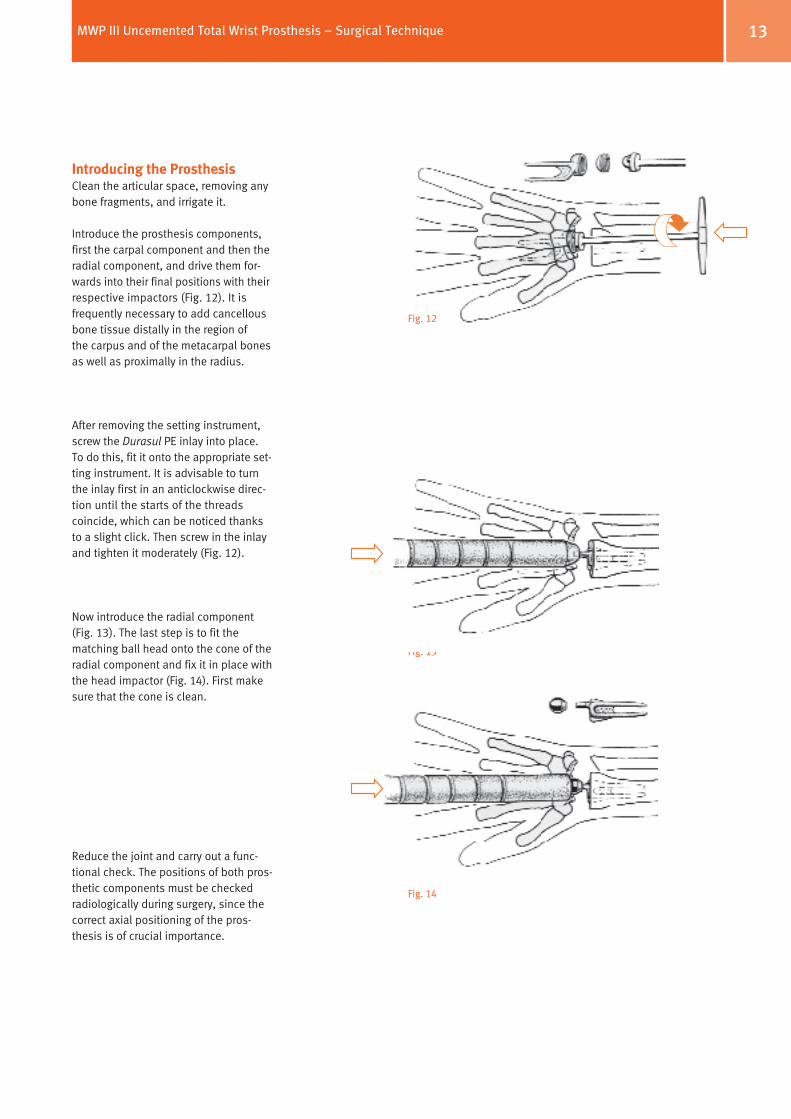
Introducing the ProsthesisClean the articular space, removing any bone fragments, and irrigate it.
Introduce the prosthesis components, first the carpal component and then the radial component, and drive them forwards into their final positions with their respective impactors (Fig. 12). It is frequently necessary to add cancellous bone tissue distally in the region of the carpus and of the metacarpal bones as well as proximally in the radius.
After removing the setting instrument, screw the Durasul PE inlay into place. To do this, fit it onto the appropriate setting instrument. It is advisable to turn the inlay first in an anticlockwise direction until the starts of the threads coincide, which can be noticed thanks to a slight click. Then screw in the inlay and tighten it moderately (Fig. 12).
Now introduce the radial component (Fig. 13). The last step is to fit the matching ball head onto the cone of the radial component and fix it in place with the head impactor (Fig. 14). First make sure that the cone is clean.
Reduce the joint and carry out a functional check. The positions of both prosthetic components must be checked radiologically during surgery, since the correct axial positioning of the prosthesis is of crucial importance.
Fig. 12
Fig. 13
Fig. 14
MWP III Uncemented Total Wrist Prosthesis – Surgical Technique
14
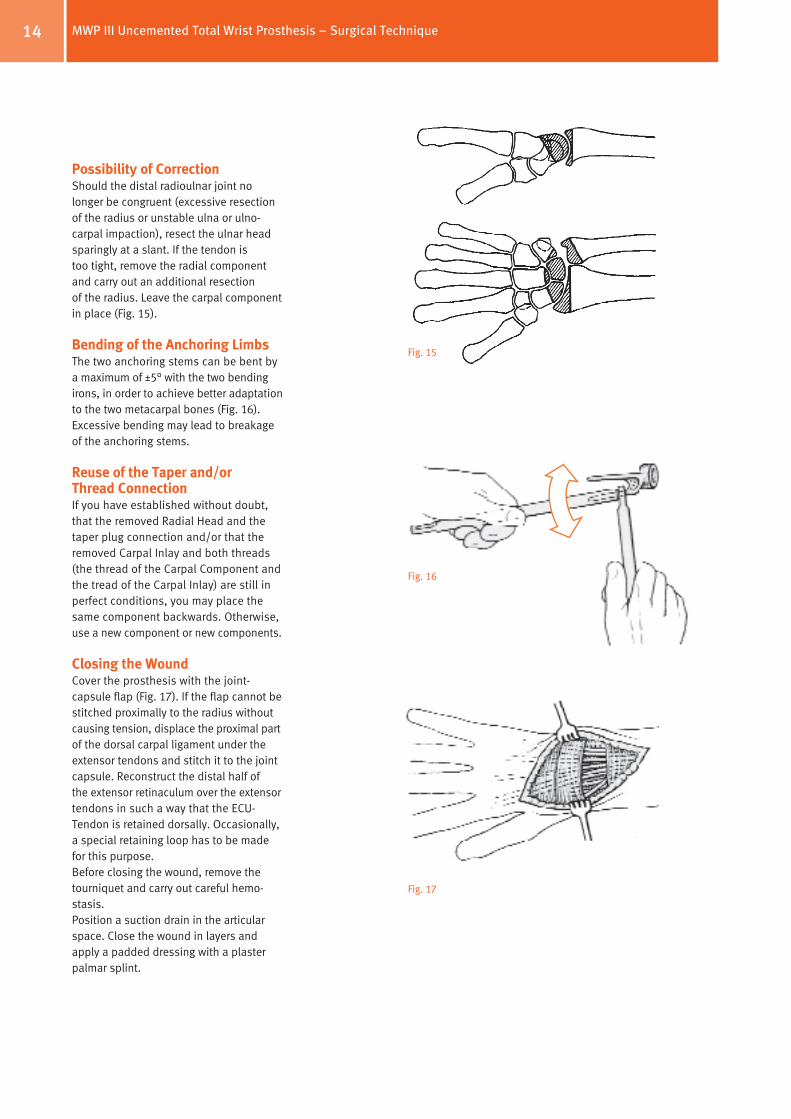
Possibility of CorrectionShould the distal radioulnar joint no longer be congruent (excessive resection of the radius or unstable ulna or ulno carpal impaction), resect the ulnar head sparingly at a slant. If the tendon is too tight, remove the radial component and carry out an additional resection of the radius. Leave the carpal component in place (Fig. 15).
Bending of the Anchoring LimbsThe two anchoring stems can be bent by a maximum of ±5° with the two bending irons, in order to achieve better adaptation to the two metacarpal bones (Fig. 16). Excessive bending may lead to breakage of the anchoring stems.
Reuse of the Taper and/or Thread ConnectionIf you have established without doubt, that the removed Radial Head and the taper plug connection and/or that the removed Carpal Inlay and both threads (the thread of the Carpal Component and the tread of the Carpal Inlay) are still in perfect conditions, you may place the same component backwards. Otherwise, use a new component or new components.
Closing the WoundCover the prosthesis with the joint capsule flap (Fig. 17). If the flap cannot be stitched proximally to the radius without causing tension, displace the proximal part of the dorsal carpal ligament under the extensor tendons and stitch it to the joint capsule. Reconstruct the distal half of the extensor retinaculum over the extensor tendons in such a way that the ECUTendon is retained dorsally. Occasionally, a special retaining loop has to be made for this purpose. Before closing the wound, remove the tourniquet and carry out careful hemostasis. Position a suction drain in the articular space. Close the wound in layers and apply a padded dressing with a plaster palmar splint.
Fig. 15
Fig. 16
Fig. 17
MWP III Uncemented Total Wrist Prosthesis – Surgical Technique

15MWP III Uncemented Total Wrist Prosthesis – Surgical Technique
It is the responsibility of the doctor to decide which postoperative treatment is appropriate depending on each patient’s health condition.
Postoperative Treatment
Case Study
66yearold patient, rheumatoid arthrosis
Preoperative
10 years postoperative
A dynamic splint may be necessary if there is a tendency towards malpositioning.
In the first place, reliable stability must always be achieved. Mobility will depend on the patient’s needs. It should never be forced at the expense of stability or in order to reach extreme positions.
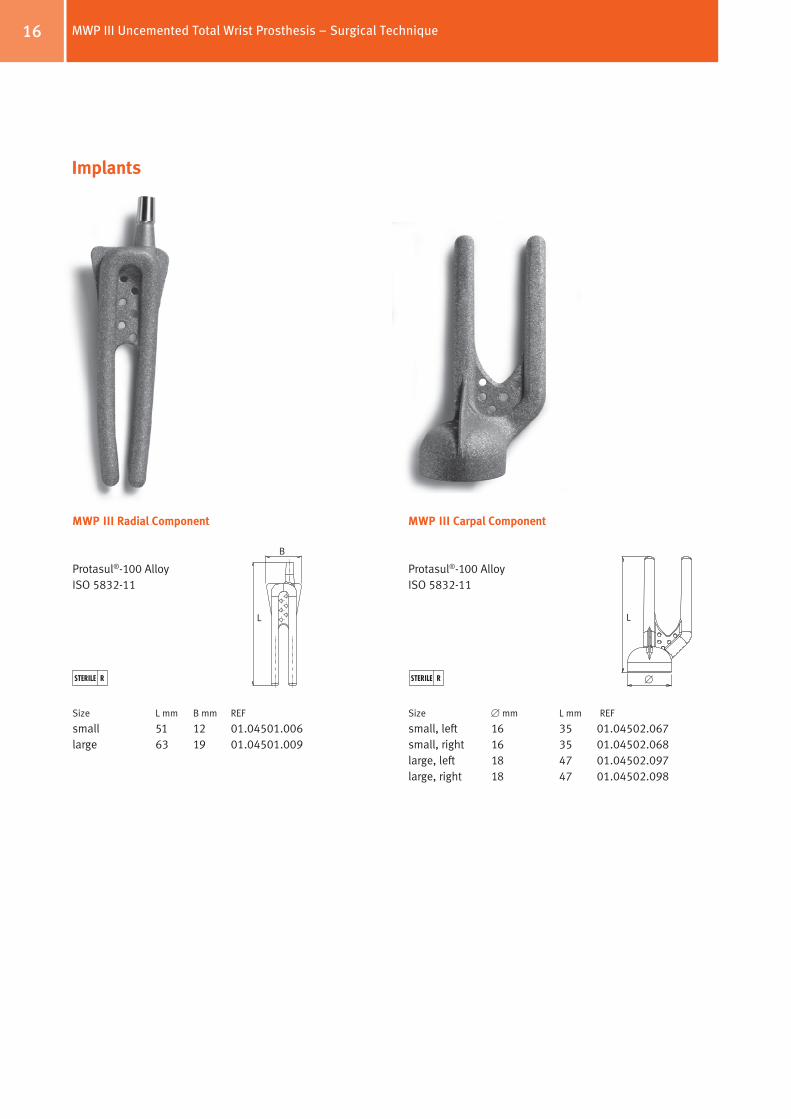
MWP III Carpal Component
Protasul®100 Alloy ISO 583211
Size [ mm L mm REF
small, left 16 35 01.04502.067small, right 16 35 01.04502.068large, left 18 47 01.04502.097large, right 18 47 01.04502.098
16
Implants
L
[
MWP III Radial Component
Protasul®100 Alloy ISO 583211
Size L mm B mm REF
small 51 12 01.04501.006 large 63 19 01.04501.009
L
B
MWP III Uncemented Total Wrist Prosthesis – Surgical Technique

17
MWP III Durasul® Inlay
Durasul® PE ISO 58341/ISO 58342
Size [ mm REF
small 10 (for ball head 10 mm) 01.04504.006 large 12 (for ball head 12 mm) 01.04504.009
A
MWP III Ball Head
Protasul®20ISO 583212
Size [ mm REF
small 10 01.04503.006
large 12 01.04503.009
[ A
[
MWP III Uncemented Total Wrist Prosthesis – Surgical Technique

18
Instruments
Item REF
MWP Instrument tray (complete) ZS01.04534.000
Tray Cover 01.00029.029
MWP Tray (empty) 01.04534.100
MWP Insert I for tray (empty) 01.04534.110
MWP Carpal Trial Fork small left/right 05.95530.065
MWP Carpal Trial Fork large left/right 05.95530.095
MWP Remove Hook 05.95530.013
MWP Carpal Setting Instrument large 05.95530.098
MWP Inlay Setting Instrument small 05.95530.069
MWP Head Impactor 05.95530.012
MWP Carpal Impactor 05.95530.010
Item REF
MWP Bending Iron (2 pieces) 05.95530.016
MWP Carpal Shell Reamer large 05.95531.097
MWP Carpal Shell Reamer small 05.95531.067
MWP Awl 05.95532.005
MWP Carpal Setting Instrument small 05.95530.068
MWP Radius Removing Instrument 05.95530.014
MWP Inlay Setting Instrument large 05.95530.099
MWP Radius Setting Instrument 05.95530.011
MWP Carpal Clip (2 pieces) 05.95532.002
MWP Kirschner Wire short (2 pieces) 05.95531.006
MWP Kirschner Wire long (2 pieces) 05.95531.007
MWP Feeler Gauge 05.95530.015
All instruments
MWP III Uncemented Total Wrist Prosthesis – Surgical Technique

19
Meuli HC, Fernandez DL (1995) Uncemented total wrist arthroplasty. J Hand Surg 20 A: 115–122
Meuli HC (2000), Meuli prosthesis. In: Hand Arthroplasties (Ed. SimmenAllieuLluchStanley) Martin Dunitz – London
References
MWP III Uncemented Total Wrist Prosthesis – Surgical Technique
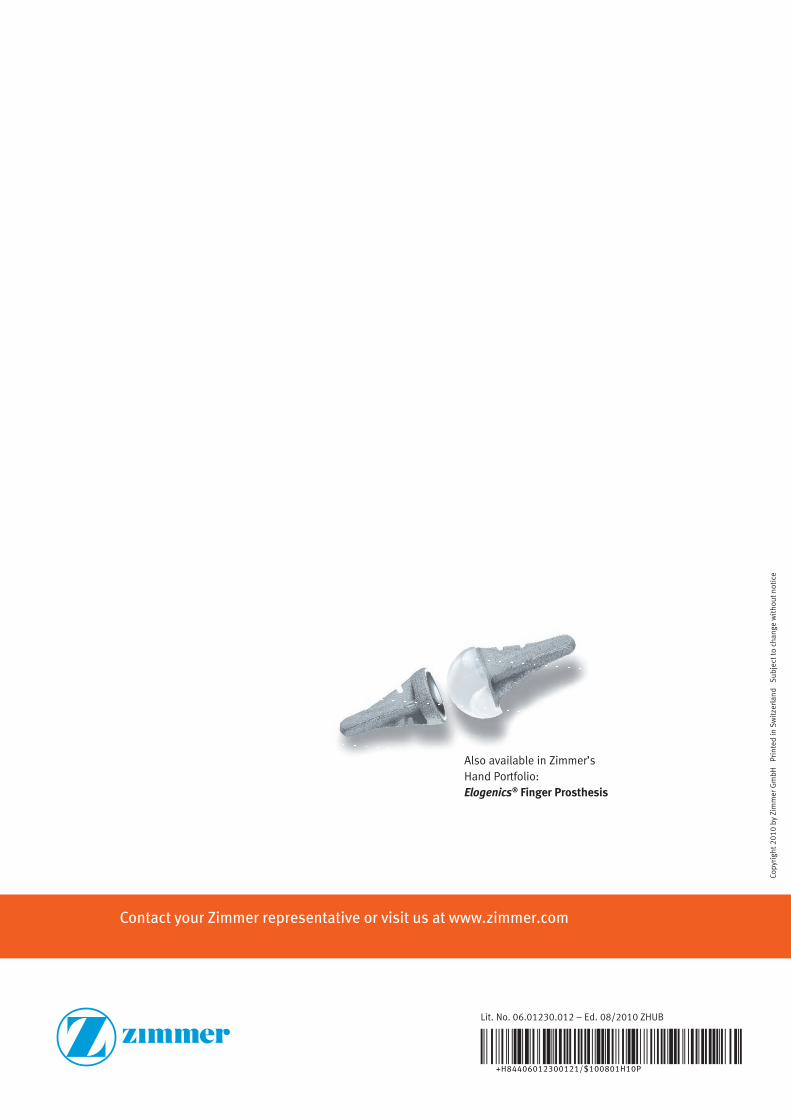
Also available in Zimmer’s Hand Portfolio: Elogenics® Finger Prosthesis
Contact your Zimmer representative or visit us at www.zimmer.com
Copy
righ
t 201
0 by
Zim
mer
Gm
bH
Prin
ted
in S
wit
zerla
nd
Subj
ect t
o ch
ange
wit
hout
not
ice
Lit. No. 06.01230.012 – Ed. 08/2010 ZHUB
+H84406012300121/$100801H10P


