32
1 NATIONAL PARK SERVICE MANUAL FOR THE HANDLING AND FIRING OF COEHORN MORTARS IN INTERPRETIVE DEMONSTRATIONS

1
NATIONAL PARK SERVICE MANUAL FOR THE HANDLING AND FIRING
OF COEHORN MORTARS
IN INTERPRETIVE DEMONSTRATIONS

2
INTRODUCTION
This manual sets forth the procedures required to demonstrate the Coehorn Mortar three (3) person drill in areas administered by the National Park Service. It also provides instruction on proper maintenance and inspection procedures. This manual draws heavily on established NPS 18th century field artillery procedures in wide use throughout the system. Persons using this mortar manual must be intimately familiar with the NPS artillery manual, its practice, drill, laboratory of necessary items and safety.

3
TABLE OF CONTENTS
Page Introduction to the Coehorn Mortar 4 Implements and Equipment 5 Nomenclature of Mortar 6 Care and Maintenance 7 Drill 9 Misfire Procedures 24 Demonstration Checklist 26 Appendix 28 For Further Reading 31

4
INTRODUCTION TO THE COEHORN MORTAR
Mortars are short tube artillery pieces designed to throw a bomb (exploding shell). Mounted on a solid wood or metal bed with the tube angled at 45 degrees (although some versions were adjustable) mortars throw their bomb high over enemy fortifications to explode on structures and/or personnel. Unlike 20th century mortars used in infantry support their predecessors are primarily siege guns. Mortars come in two basic configurations, land and sea with sea mortars having a longer chase and deeper powder chamber. Unlike field guns gauged by weight of round (3 pdr, 12 pdr etc.), mortars are measured by bore size at muzzle (4.5 inches, 13 inches etc.). Additional difference to field guns is shape of bore. Field guns have a straight bore whereas mortars narrow at the breech with a power chamber. This allows a light powder charge to loft the fragile bomb out the muzzle without fracture prior to the fuse detonating the bomb. In the seventeenth century, a Dutchmen, Baron Menno van Coehorn invented a light mortar that artillerymen could easily move and amend. It is from his model that small mortars derive this name. Field guns have a specified drill to load whereas mortars of the 17th and 18th century had no measured command drill for loading. It was a process of trial and error. Adjustment in range is made in varying powder charges, change in angle and fuse length. For safety the following drill is instituted when using a mortar in demonstration under NPS supervision. The drill is adapted from the NPS three person swivel gun drill and other features found in the standard NPS field artillery manual. ***An important safety component of this drill is its design for use with mortars having a straight bore and no powder chamber. New reproduction mortars made in this manner represent the safest means to demonstrate the piece. Historically loose powder was ladled or placed by hand in the powder chamber. With no powder chamber the added danger of a hand in the bore, misalignment of an odd shaped cartridge or lingering embers due to poor sponging is eliminated.

5
IMPLEMENTS AND EQUIPMENT The following list of implements and equipment are considered to be the minimum levels for conducting safe demonstrations with the Coehorn Mortar. Implement Minimum No. Recommendation Material Sponge/Rammer 1 Ash or Hardwood; Wool Carpet or Sheepskin Worm 1 Ash or Hardwood; Iron or Steel hook Sponge Bucket 1 Wood or Iron Priming Pouch 1 Leather Gunner’s Haversack 1 Leather Thumbstall 2 Leather Priming Wire/Pick 2 Brass Linstock w/slow match 1 Hardwood Gauntlets 2 pr. Leather Lantern w/optional post 1 Tin or Wood/Glass Limber Chest 1 Wood w/brass hardware Misfire Kit 1 First Aid Kit 1 Safety Rope & Posts # Needed to Mark Range Personal Protection 3 pair Foam Ear Plugs Equipment 1 pair Safety Goggles

6
NOMENCLATURE OF COEHORN MORTAR Key A = Muzzle F = Bed B = Chase G = Cap Squares C = Reinforcement H = Keys, Chain and Staples D = Vent I = Ring (located on bed below muzzle) E = Trunnion J = Carry Handles
A
B
I→ C
G D E
H
←J F

7
CARE AND MAINTENANCE Mortar and Bed
1. After each day’s firing the tube and vent are thoroughly cleaned with fresh water. Vent is cleared of dirt with a soft brush or pipe cleaner. If a bronze tube, metal is polished with a non-abrasive cleaner (Brasso, Never-dull etc.)
2. Vent is inspected and measured. A diameter of .2” is accepted; above .3” the
gun should not be use.
3. A Gun Book detailing the gun’s record of programs, property information, vent diameter checks and other notations is kept up to date.
4. Bed is inspected for rot, cracks, dents and/or missing hardware. Paint as needed to protect wood and hardware plus maintain appearance.
Limber Chest
1. The chest should be properly made, having non-sparking materials on the inside. All nails, screw-heads are countersunk and the heads puttied over.
2. The lid, attached with brass hinges, should fit snugly and be provided with a lock. The chest is to be kept locked when not serving ammunition.
3. The chest is clean and free of spilled powder. All equipment and ammunition is neatly and securely stored in the chest.

8
Implements and Equipment
1. Wooden implements should be free from serious cracks and splinters. Paint or linseed oil as necessary.
2. Rammer and sponge heads are securely fastened with hardwood dowels and no sparking metals are used in the construction. Prior to placement of a new sponge the dowel end should be soaked in linseed oil.
3. Leather equipment should be clean and kept free of dirt and loose powder. To protect leather use a quality leather preservative to prevent drying and cracking.
4. Sponges are cleaned after each day’s demonstrations with fresh water and spun dry. Baby shampoo helps to wash and protect fibers. Scrutinize frequently and replace sponge if inspection finds deteriorated fibers, dry rot or loose threads.

9
COEHORN MORTAR DRILL Three persons are required to present the firing demonstration. Additional personnel may serve as line watchers, interpreters and crowd control. Position #1 (Gun Captain) – Is responsible for overall command of piece, giving drill commands and loading. They take up position to the right of the gun during loading and firing. Equipment: pair of leather gauntlets, sponge rammer, worm, water bucket and PPE. Position #2 (Gunner) – Is responsible for tending vent and priming piece. They take up position to the left of the gun during loading and firing. Equipment: priming pouch w/priming wire and quill primers, thumb stall or left hand leather gauntlet and PPE. Position #3 (Powder Monkey) – Is responsible for tending limber chest, handling cartridge and firing piece. They take up position behind limber chest. Equipment: gunner’s haversack, linstock and PPE. Position of mortar and equipment for drill and demonstration: View down range ← mortar w/bucket ← linstock, lantern, misfire kit & first aid, offset left of mortar, 5 yards behind Limber Chest location → 10 yards behind mortar & offset right to avoid falling primers
10
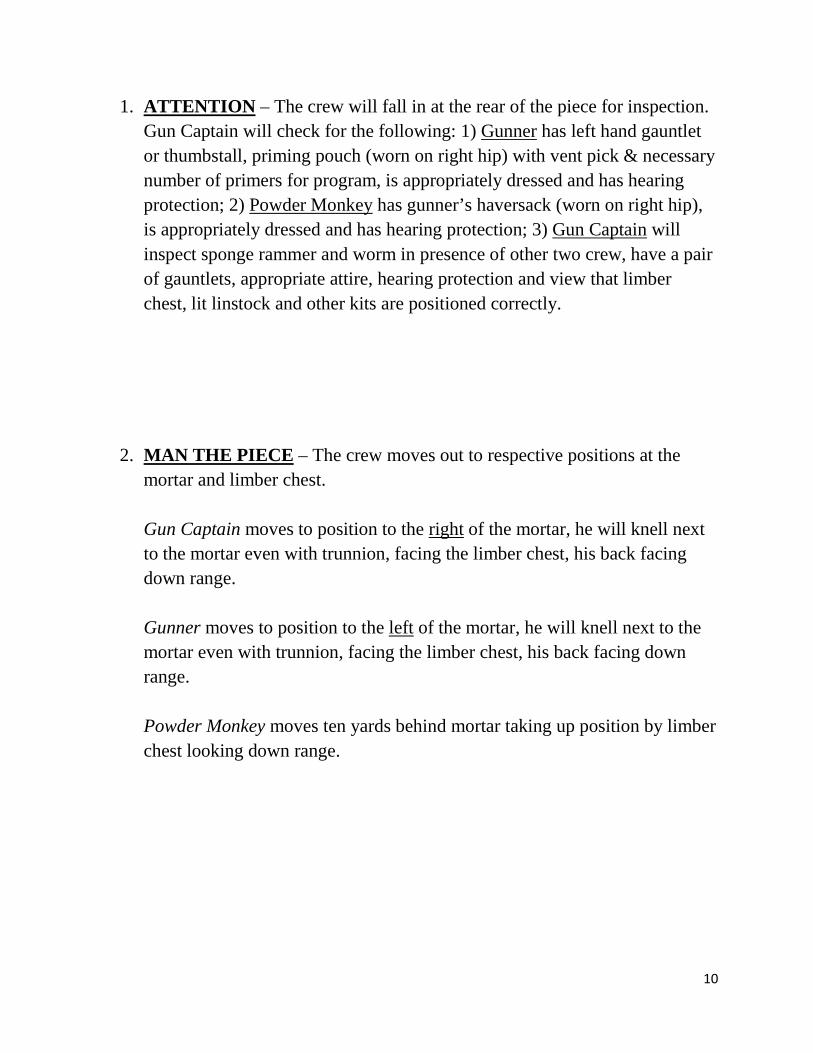
1. ATTENTION – The crew will fall in at the rear of the piece for inspection. Gun Captain will check for the following: 1) Gunner has left hand gauntlet or thumbstall, priming pouch (worn on right hip) with vent pick & necessary number of primers for program, is appropriately dressed and has hearing protection; 2) Powder Monkey has gunner’s haversack (worn on right hip), is appropriately dressed and has hearing protection; 3) Gun Captain will inspect sponge rammer and worm in presence of other two crew, have a pair of gauntlets, appropriate attire, hearing protection and view that limber chest, lit linstock and other kits are positioned correctly.
2. MAN THE PIECE – The crew moves out to respective positions at the mortar and limber chest. Gun Captain moves to position to the right of the mortar, he will knell next to the mortar even with trunnion, facing the limber chest, his back facing down range. Gunner moves to position to the left of the mortar, he will knell next to the mortar even with trunnion, facing the limber chest, his back facing down range. Powder Monkey moves ten yards behind mortar taking up position by limber chest looking down range.

11
Position of Gunner Position of Gun Captain ↓ ↓
Final Position of Mortar Crew @ Man the Piece
Powder Monkey

12
3. SEARCH THE PIECE – Upon the command, the Gunner removes vent pick from pouch with left hand and with same hand inserts pick into vent. If unobstructed the Gunner shouts CLEAR. Upon this the Gun Captain using his right hand inserts the worm down the bore. Grasping of worm shaft will be with palm up and thumb facing down range. The Captain’s head will remain looking back towards limber chest and requires use of peripheral vision. If no obstructions are found, Gun Captain yells CLEAR.
Gunner @ Search Piece

13
Gun Captain @ Search Piece

14
4. ADVANCE SPONGE – Upon the command the Gun Captain, using his right hand, grasps the sponge shaft with palm up and thumb facing down range. The sponge head should be damp but not ringing wet. Spin or shake off excess wetness if needed. Place sponge head on muzzle face or below but not in muzzle of the bore. Again, Gun Captain is using peripheral vision to place sponge at advance – head remains parallel to bore looking back.
Gun Captain @ Advance Sponge

15
5. TEND VENT – At command, Gunner places thumb of left hand on vent field to cover vent. Thumb is covered with a thumbstall or leather gauntlet to ensure a complete seal. From this point forward the thumb is not removed until the command of PRIME is given. A good, airtight seal must be maintained during the sponging and ramming of the cartridge for safety. All crew will observe that the thumb remains in place during this critical time.
Gunner @ Tend Vent

16
6. SPONGE PIECE – At command the Gun Captain will enter the sponge into the muzzle with his peripheral vision. The sponge head is pushed to the breech using the right hand, still palm up on the staff. When it contacts the bottom of the bore, turn the sponge at least one and a half turns or more. More is better, and two or three full turns are preferred. Continue holding the staff with palm up while pressing and sponging breech face. In the NPS artillery drill, eye contact is maintained by these two positions during this process. As the turning of their heads towards muzzle exposes the face it is best only on this gun to continue peripheral vision of the vent by both members. Once done with sponging it is removed from barrel with right hand, palm up, and placed with worm by bucket.
Sponge Piece
Use Peripheral Vision

17
7. HANDLE CARTRIDGE – At command Powder Monkey opens limber chest and retrieves one cartridge placing it in haversack. Walking directly to the Gun Captain the Powder Monkey keeps to the right of the mortar to avoid the lit linstock positioned left midway to mortar. Once facing Gun Captain the Powder Monkey places the cartridge into the palms of the Gun Captain. The Gun Captain then cradles the cartridge with both hands against breast while the Powder Monkey does an about face and returns to limber chest. Upon return to limber chest the Powder Monkey removes haversack and places either in or next to chest.

18
8. CHARGE WITH CARTRIDGE – At command the Gun Captain will cradle cartridge in right hand, palm up, with cartridge positioned to enter muzzle ensuring powder end in first. Using peripheral vision the right hand is placed below muzzle to allow cartridge to glide off hand into barrel. As most mortars are angled at 45 degrees the cartridge easily slides into the barrel down to breech. Avoid placing hand over muzzle or turning head to view this operation.

19
9. RAM DOWN CARTRIDGE – At command the Gun Captain will pick up sponge rammer in right hand and insert rammer into muzzle (using peripheral vision). The shaft is held with palm up and thumb out. In one, clean stroke ram the cartridge home to the breech. Do not pound on the cartridge. When the cartridge feels fully seated the Gun Captain withdraws the rammer and clears it of the muzzle placing by the bucket.

20
10. PRIME At this command the Gunner is permitted to remove his thumb from the vent. The Gunner removes the priming wire from their pouch with their left hand and grasps wire using thumb and forefinger. Do not place any fingers in the loop at top of priming wire or use a cupped hand to push the wire into the vent. Insert wire into vent feeling for slight pressure against foil cartridge. Gently push through foil; at this point you can spin the priming wire to ensure the puncture is open in the foil. While this is occurring the Gun Captain should be viewing (peripherally) the priming watching for tell-tale push through foil and sound of the penetration. After returning the wire to the pouch, the Gunner removes a quill primer and using thumb and forefinger or fore and middle fingers of left hand, place the primer in vent. If primer does not slide easily in vent onto cartridge do not push top of the primer with hand or a finger. Use your priming wire (the flat of the loop) to gently push into place.
Priming Step 1

21
Priming Step 2
11. GUNNERS RETIRE – At this command, both the Gunner and Gun Captain stand up and take an angled distance rearward (5 yards) from the mortar. The Gunner will oblique to the right while the Gun Captain does so to the left from the mortar. The Gunner then does a right about to face down range and observe for range safety. The Gun Captain will turn facing the mortar to view and command firing.
Gun Captain at safe distance of Retire

22
12. MAKE READY – At this command, the Powder Monkey moves forward to retrieve the linstock and moves into position behind and to the left of the mortar. He should be angled with his back facing down range and viewing the Gun Captain waiting on verbal and visual command.
13. FIRE – On final confirmation that no visitors are down range the Gun Captain will give verbal and visual command to fire. The Powder Monkey will lean towards vent keeping body away from muzzle blast. The linstock is swept across the primer from breach towards muzzle.

23
After successful firing demonstration the following commands are given:
14. SEARCH PIECE – see command #3; NOTE: continue searching until the tines of the worm produce no additional cartridge remains.
15. ADVANCE SPONGE – see command #4.
16. TEND VENT – see command #5
17. SPONGE PIECE – see command #6
18. SECURE PIECE – Command declares mortar is clear and ready for next program. Crew is dismissed.

24
MISFIRE PROCEDURES
LEVEL ONE The fire command is given and the quill primer goes “zippp” and nothing happens. Don’t panic. This may just be a hang fire so everyone holds position and waits. The Powder Monkey should be watching the vent area for wisp of smoke. After three (3) minutes from the last seen wisp of smoke you can proceed to next course of action. In the meantime, buy some time with interpretation to avoid uneasiness and indecision translated to the audience.
After your wait, the Powder Monkey retires rearward to allow the Gunner to approach the mortar. The Gunner knells to the left of the piece and well behind the muzzle. The Gunner removes the spent quill with the priming wire, re-picks and primes with a fresh quill. While doing the re-pick the Gunner believes he is not piercing the cartridge – DO NOT RE-RAM! The level is now 2 and the program is scrubbed.
Once re-primed, the Gunner retires and the Powder Monkey moves forward with linstock. Upon command the mortar is fired. After the initial firing attempt, two (2) additional re-primes are permitted.
LEVEL TWO Re-priming has not been effective. Do not re-prime again. This is a Level Two misfire. The interpretive program is now over and the audience should be dispersed. Clearing of the mortar is a hazardous and delicate procedure. Do not attempt to unload through the muzzle until all evidence of smoke from the muzzle and vent has ceased.
Your will need the following equipment and should be available in your misfire kit.
• Gauntlets • Priming Wire • Water Supply • Bucket (s) and/or Hose

25
• Two (2) large veterinary syringes or turkey basters • Worm • Sponge Bucket • Eye and Ear Personal Protection Equipment
After waiting at least ten (10) minutes, two experience gunners will perform the following procedure to unload the cartridge from the muzzle.
1. #1 person will knell on right side of mortar, back towards muzzle, wearing gauntlets, eye and ear protection. #2 takes up a position to the left oblique of the first with necessary equipment.
2. #1 will begin injecting water with syringes into the vent. #2 hands the syringes to #1. Two more syringes of water are introduced into the vent for a total of three (3).
3. #1 takes the priming wire and places it in the vent to re-pick the charge. *Note – as the barrel is in a fixed elevation the step of raising the muzzle is not necessary.
4. #1 then continues injecting water via syringe into the vent until it overflows. 5. Fill the bore with water using buckets and/or hose. 6. WAIT FIVE MINUTES! 7. With welder’s gauntlets one individual will use the worm to remove the
round. 8. The cartridge is placed in the sponge bucket and broken up to dissolve the
powder. 9. The fouled water is disposed of as prescribed by the written misfire plan and
sponge bucket is re-filled. 10. Lift up the back end of mortar bed to drain water from bore. Wipe off any
excess water from bed.

26
COEHORN MORTAR CHECKLIST
() Your overall impression is favorable
The Tube:
() The tube is clean and free of dust and corrosion () No sign of external damage or strain (dents, cracks, etc.) () Inside of the bore is clean and relatively smooth () No internal signs of damage (bulges, lodgments, pits, etc.) () No sign of corrosion damage at breech of the bore () On iron mortar with liner, the liner is secure () The vent is clear and of acceptable size () No signs of cracks or bending around the trunnions () No signs of weakness at the chaplets on bronze tubes The Bed: () There are no signs of deterioration (rot, insect damage) which would cause
an unsafe demonstration () No serious cracks; deep cracks have been repaired () All mounted iron work (cap squares, keys, handles) are present and in
working order () Mortar tube fits into bed, no slop in trunnion grove Equipment: () All necessary equipment is present () Sponge is in good condition and fitted to the bore () Rammer head is secure and free of cracks () Small items in good condition (linstock, thumbstall, buckets etc.) () Prongs of the worm are sharp and not bent () Haversack is clean and free of spilled powder () Priming pouch is clean and fee of spilled powder or old quills; is equipped
with priming wire () The gun book is being kept up to date

27
Before the Demonstration: () The gun has been inspected, inside and out. Bore is clean of foreign
material. () Accessory equipment is in good condition – sponge head is in good repair,
rammer and sponge head secure on staff, etc. () Sponge head fits bore snugly, but not too tight () Ammunition boxes, haversacks, etc. are clean and free of spilled powder () Ammunition is properly prepared with only the rounds on hand for day’s
demonstrations () Equipment is on hand to handle a misfire () The required number of personnel is present to fire the mortar () The mortar is situated safely in relation to visitors – down range is 100
yards, 50 yards flanking mortar each side for total of 100 yards parallel () A clearly physical barrier delineates the demonstration area from spectators () Mortar crew has a clear view of down range and spectator area () All distance requirements are meet: spectators 12 yards from gun & 7 yards
from ammunition box; mortar & ammunition box 10 yards apart () Determine if weather will affect program safety () First kit and PPE is on hand; have emergency communication system During: () Crew is following approved manual for mortar and have received prior
training () The sponge is adequately damp but not soaking wet () Implements are held properly and the vent is being tended to as proscribed () Gauntlets used are not too stiff to impede drill () The sponge is kept clean and does not contact the ground () If there is a misfire, it is handled safely and properly After: () After firing, the piece is wormed and then washed and dried () All weapons, explosives and accessory pieces are accounted for () The weapon is secured and stored properly () The demonstration area is inspected for cartridge debris and smoldering
residue () Sponge head is thoroughly rinsed out and dried () All remaining explosives are promptly returned to proper storage area

28
APPENDIX
Table of Maximum Load for Coehorn Mortars
Bore Size Maximum Blank Charge 4.5” muzzle
w/2 ¼” straight bore 5 oz. Fg
or Cannon Grade 5.82” muzzle
w/2 ⅝” chamber 6 oz. Fg
or Cannon Grade 6 ½“ powder chamber or
larger 16 oz. ceiling, no charges
higher Bore size for powder charge will be based on the mortar’s powder chamber diameter, NOT MUZZLE DIAMETER. For those weapons for which a service charge is unknown, the maximum blank load will not exceed 2.5 ounces of Fg or Cannon grade powder for every 1 inch of powder chamber diameter (up to 16 ounces maximum charge ceiling).
Range Requirements
• A physical barrier must separate visitors from the demonstration area and extend 50 yards beyond left and right flank of gun(s)
• Ammunition chest must be at least 7 yards away from visitors • Mortar must be at least 12 yards away from visitors • No visitors must be forward of the plane of the muzzle face • There must be at least 100 yards of clear area down range

29

30
Procedures for Demonstrating a Chambered Mortar This manual is designed for reproduction mortars with a straight bore. Understanding quality reproductions of mortars with a powder chamber exist in the NPS or will be encountered by volunteer groups the following actions are required to demonstrate such guns.
1. The drill is the same for both types of mortars.
2. The cartridge is designed to easily fit into the powder chamber without the use or assistance of the gunner’s hand inserted in or over the muzzle. Only the rammer is used to provide placement and final fit of cartridge against the breech face of powder chamber.
3. Sponging the bore requires a bit more effort and time. The sponge must fit the powder chamber diameter to swab the breech face and sides. Upon exit of chamber the sponge is brushed along the bore in a corkscrew fashion to touch the entire bore surface towards muzzle.
4. Frequency of demonstrations will lapse over a longer wait between programs. Standard NPS time between artillery demonstrations is ten (10) minutes. With a chambered mortar the wait is thirty (30) minutes between firing demonstrations. In addition, after the firing demonstrations the crew will conduct the following safety secure:
a. After firing the crew conducts standard drill to search and sponge piece.
b. At completion of search and sponge the gunner keeps thumb on vent. c. Gun captain will carefully pour water (from sponge bucket) into
muzzle of mortar filling the bore to muzzle. d. Gunner will keep thumb on vent for one (1) minute. e. After one minute, drain bore of water and wipe down mortar and bed. f. At completion of safety secure and thirty minute wait the mortar is
ready for next demonstration.

31
Procedures for Use of Friction Primers
in Mortar Demonstrations As friction primers were the common method for firing Cohorn mortars in the 19th century the following instructions are for their use in demonstrations.
1. At command “Prime” the Gunner will pierce cartridge with vent pin. He will then place a friction primer in vent. The Gun Captain, using his index and middle fingers of right hand will hold the primer in place.
2. Gunner will open (unravel) lanyard to a position 45 degrees to his right to pick up. The Gunner will attach lanyard hook to primer. The Gunner will retire to stand by handle end of lanyard.
3. Gunner will carefully pickup lanyard and slowly draws slack from lanyard. 4. Once enough slack is drawn to prevent lanyard from slipping from primer, the Gun
Captain Gun retires to his position at firing. 5. Slack is removed from lanyard at “make ready.” 6. Lanyard is pull in one smooth motion at “fire.”
Items of caution and exercise:
If lanyard falls off primer prior to firing, the lanyard shall be placed on the ground while the Gun Captain approaches carefully. The Gun Captain will re-hook lanyard; Gunner will then slowly pull slack out. Gun Captain retires to firing position and drill continues.
If during practice firing you notice the primer flying far enough back to audience then one of two options should be employed. 1) Move the mortar forward downrange and widen the gap between gun and spectators. 2) Employee a barrier of wood (a board) behind the gun to block the primer. This should be a free standing barrier stout enough to stop the primer. Placement should be not more than two feet from vent/rear of piece.

32
FOR FURTHER READING
Gooding, S. James, An Introduction to British Artillery in North America, Ottawa, 1965. Manucy, Albert, Artillery Through the Ages, Washington, 1949. Muller, John, Treatise of Artillery, London, 1757. Reprinted 1965, by Museum Restoration Service, Ottawa. Peterson, Harold L., Round Shot and Rammer, Harrisburg, 1969.
Finis
NPS/FONE/2018


