16
Office 2007 New Look & Feel IT Training & Development (818) 677-1700 [email protected] www.csun.edu/it/training Information Technology Office 2007 User Guide

Office 2007 New Look & Feel
IT Training & Development
(818) 677-1700
www.csun.edu/it/training
Information Technology Office 2007 User Guide


Insert Application with Version – Document Name Page i
Table of Contents
The New Look in Office 2007 ................................................................................................. 1
New Look and Feel ............................................................................................................ 1
Things to Note about 2007 ..................................................................................................... 1
Changes to Note ................................................................................................................ 1
Tools and Function ................................................................................................................. 2
Ribbon, Tabs and Toolbar .................................................................................................. 2
Security Warning .................................................................................................................... 6
Page Setup ............................................................................................................................ 7
Saving and Printing ................................................................................................................ 8
Saving the Document ......................................................................................................... 8
Printing a File ..................................................................................................................... 8
Closing and Exiting ................................................................................................................ 9
How To Learn More ..............................................................................................................10
Microsoft on the Web ........................................................................................................10
Training and Support .............................................................................................................11
IT Training .........................................................................................................................11

Office 2007 – New Look & Feel Page 1
THE NEW LOOK IN OFFICE 2007
New Look and Feel
The Office 2007 suite of software, which includes Excel, Word, Access and PowerPoint, now has a new look and feel to the layout of the menus and toolbars.
• The traditional toolbars, as we knew them in previous versions have been reorganized into a Ribbon.
• The tools you were familiar with in previous versions are now displayed in tabs on the Ribbon, rather than in menus on the toolbar.
• A Microsoft logo has been added to the upper left-hand corner of each window. This logo is an active File menu. When selected, it will display a menu list that includes common functions such as Open, Save, Print, and Close.
This documentation will introduce you to new terminology and provide information on where to locate necessary elements.
THINGS TO NOTE ABOUT 2007
Changes to Note
Office 2007 uses a new format when saving documents. This new format IS NOT Backwards compatible. This means that if you share a document you have created in 2007 with someone who is using a lower version of MS Office applications, they will not be able to open your document.
What Are Your Options?
a. Save to a lower version. When saving your document, from the Save As dialog box, in the Save as type field, choose MS Office option for 97-2003.
i. This will allow users with versions other than 2007 to open and work in your document.
b. Those users who are working in a lower version of a MS Office application can download and install a compatibility pack. This will enable them to open a document saved in 2007 format without your having to remember to save it as a lower version. The URL for more information is provided below.
http://www.microsoft.com/downloads/details.aspx?FamilyId=941B3470-3AE9-4AEE-8F43-C6BB74CD1466&displaylang=en

Office 2007 – New Look & Feel Page 2
TOOLS AND FUNCTION
Ribbon, Tabs and Toolbar
The most commonly used terms and functions of Office 2007 are the Microsoft Office button, the Quick Access tool bar, the Tab bar and the Ribbon.
Terms and Function
Figure 1 – The New Look of the Toolbar (Ribbon)
1. Microsoft Office Button – Replaces the File menu. It contains common file and
system commands and more (see Figure 2).
• Commands found: o Open o Save o Print
Figure 2 – Microsoft Office Button Options

Office 2007 – New Look & Feel Page 3
2. Quick Access Toolbar – Contains shortcuts for commonly used tools (see Figure 1). This toolbar is customizable. It contains those shortcuts you use the most. By default, this toolbar contains:
• Undo • Redo
3. Tab Bar – Replaces the menus traditionally used in previous Office versions. The Tab
Bar contains tabs. Each tab when selected, displays groups of tools and commands in the Ribbon associated with the tab (see Figure 3).
For example, the Home tab contains the following commands:
o Font Formatting o Alignment o Number Formatting o Styles o Editing
Figure 3 – Tab Bar
4. Ribbon – When a tab is selected, the ribbon displays a grouping of tools for that tab (see Figure 4).
Using the Ribbon
Figure 4 – The Ribbon
1. Tab Bar – Area that displays tools and commands in the Ribbon. Each tab displays different functions.
2. Command Button – Shortcut icons on the Ribbon to perform a specific function.

Office 2007 – New Look & Feel Page 4
3. Group – A collection of command functions related to that specific grouping.
4. The Launcher – Opens a dialog box that provides more options for the selected group (see Figure 5).
5. Help – A button that displays Office 2007 help topics.
Figure 5 – Using the Launcher to Open a Group’s Dialog Box
Mini Toolbar
The Mini toolbar is a set of formatting tools that appear when you first select text. It appears as a ghostly apparition. If you move the mouse pointer into the toolbar, it becomes more solid. Select a command to apply (see Figure 6).
Figure 6 – Mini Toolbar
Customizing the Quick Access Toolbar
The Quick Access toolbar displays the Undo, Redo and Save command buttons. This toolbar can be customized to meet your personal needs.
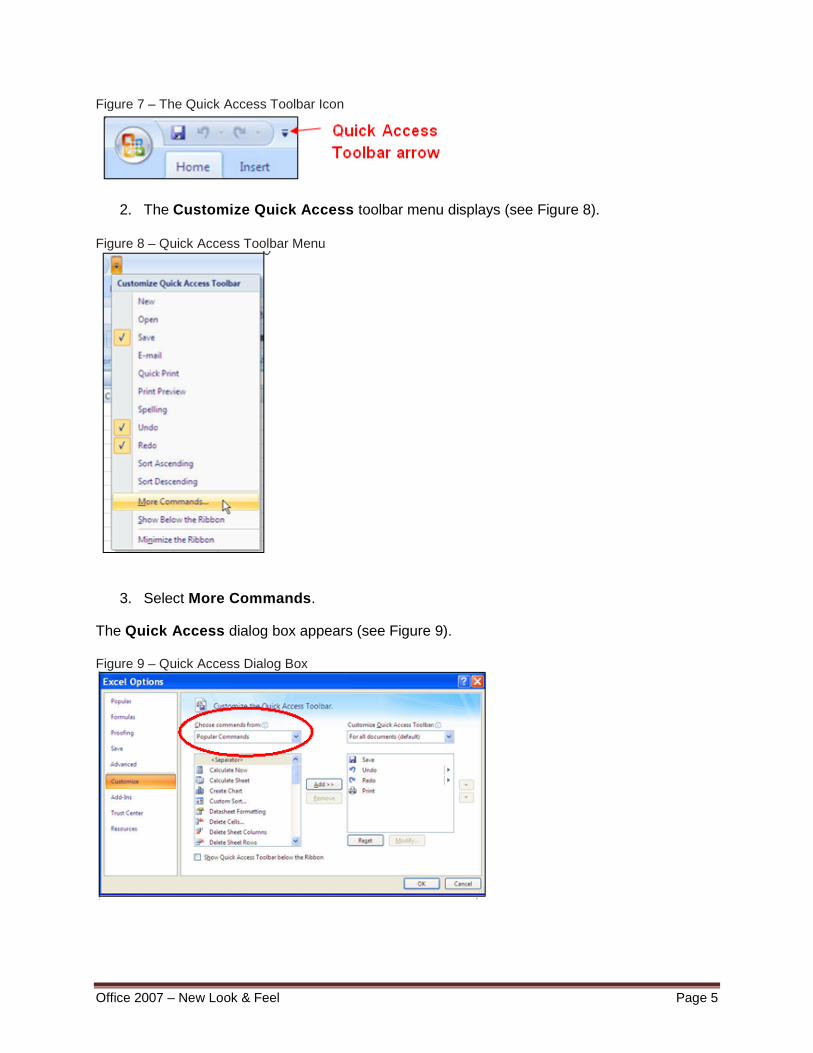
1. Select the Customizable Quick Access toolbar arrow (see Figure 7).
Office 2007 – New Look & Feel Page 5
Figure 7 – The Quick Access Toolbar Icon
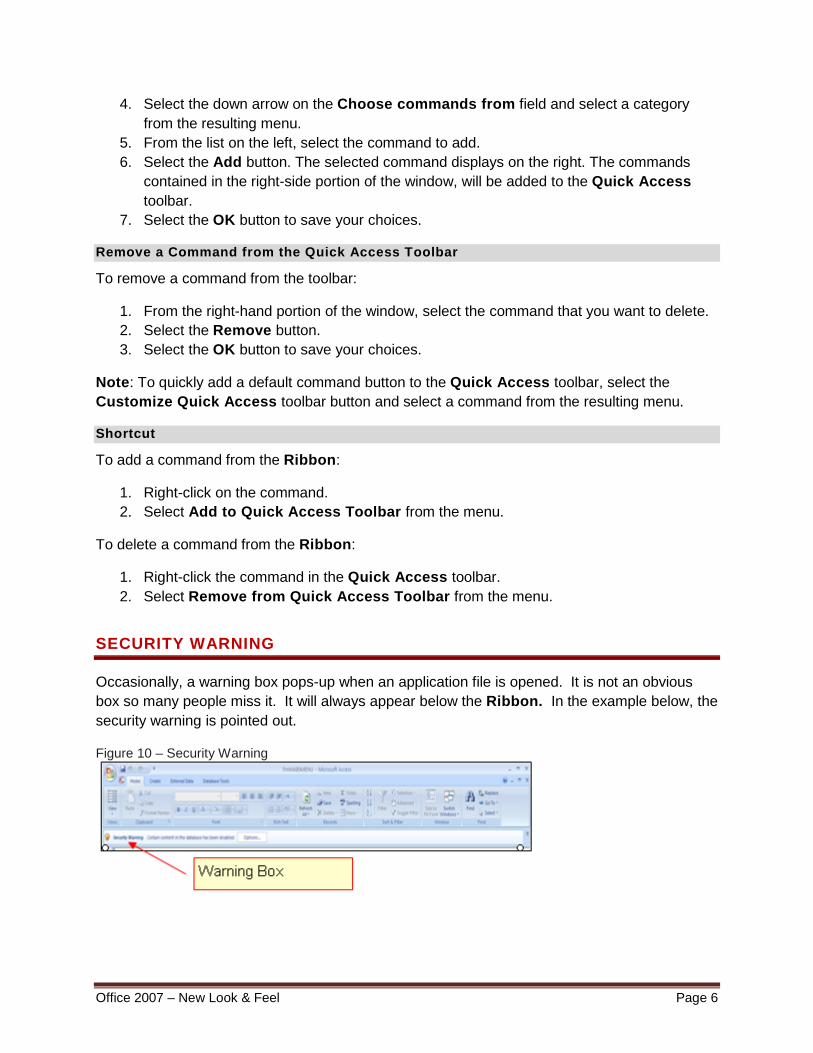
2. The Customize Quick Access toolbar menu displays (see Figure 8).
Figure 8 – Quick Access Toolbar Menu
3. Select More Commands.
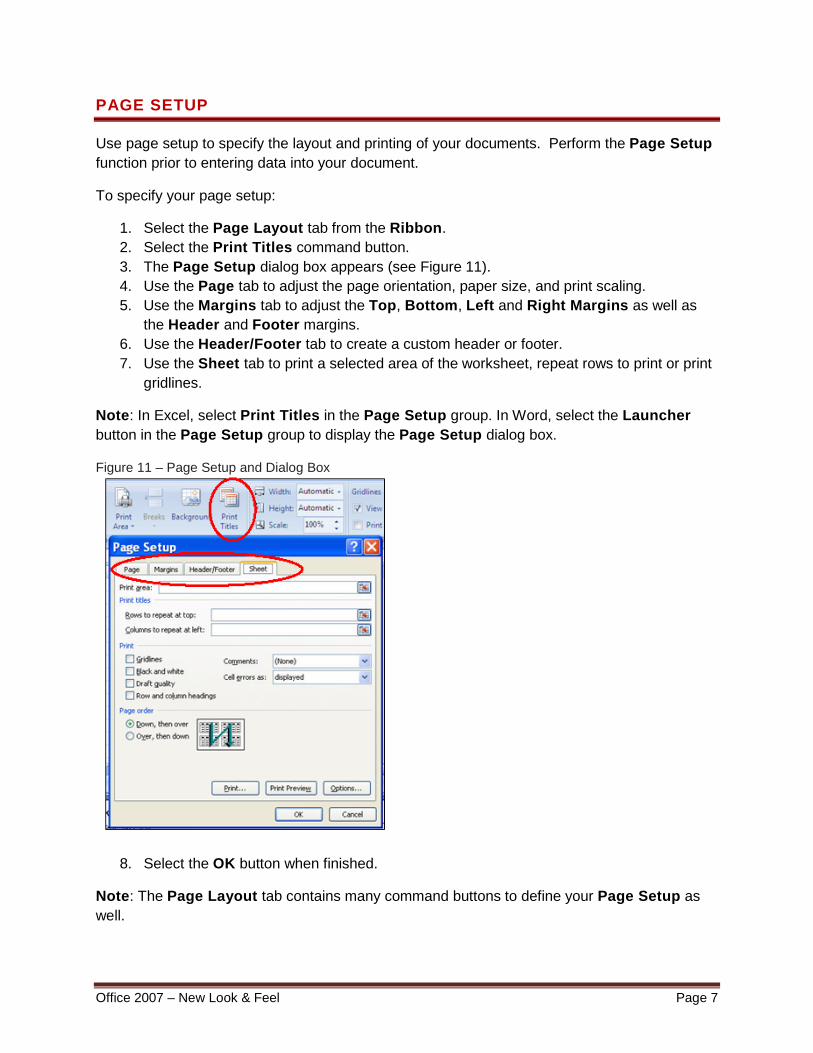
The Quick Access dialog box appears (see Figure 9).
Figure 9 – Quick Access Dialog Box
Office 2007 – New Look & Feel Page 6
4. Select the down arrow on the Choose commands from field and select a category from the resulting menu.
5. From the list on the left, select the command to add. 6. Select the Add button. The selected command displays on the right. The commands
contained in the right-side portion of the window, will be added to the Quick Access toolbar.
7. Select the OK button to save your choices.
Remove a Command from the Quick Access Toolbar
To remove a command from the toolbar:
1. From the right-hand portion of the window, select the command that you want to delete. 2. Select the Remove button. 3. Select the OK button to save your choices.
Note: To quickly add a default command button to the Quick Access toolbar, select the Customize Quick Access toolbar button and select a command from the resulting menu.
Shortcut
To add a command from the Ribbon:
1. Right-click on the command. 2. Select Add to Quick Access Toolbar from the menu.
To delete a command from the Ribbon:
1. Right-click the command in the Quick Access toolbar. 2. Select Remove from Quick Access Toolbar from the menu.
SECURITY WARNING
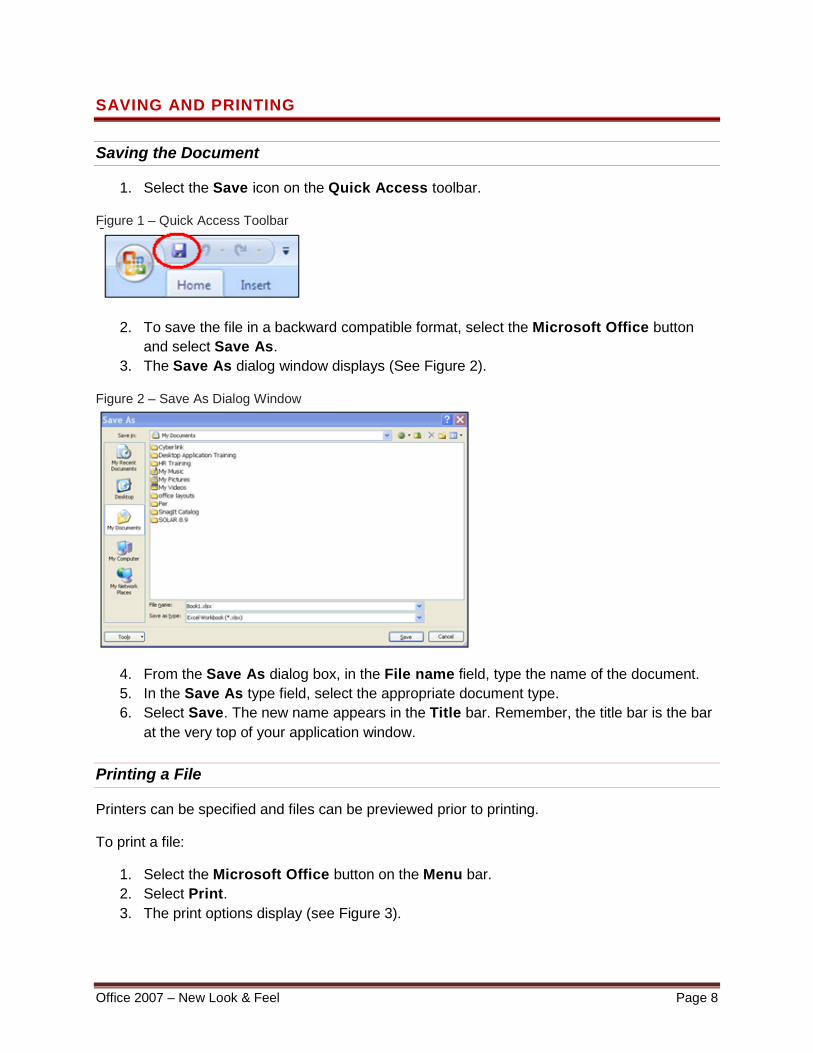
Occasionally, a warning box pops-up when an application file is opened. It is not an obvious box so many people miss it. It will always appear below the Ribbon. In the example below, the security warning is pointed out.
Figure 10 – Security Warning
Office 2007 – New Look & Feel Page 7
PAGE SETUP
Use page setup to specify the layout and printing of your documents. Perform the Page Setup function prior to entering data into your document.
To specify your page setup:
1. Select the Page Layout tab from the Ribbon. 2. Select the Print Titles command button. 3. The Page Setup dialog box appears (see Figure 11). 4. Use the Page tab to adjust the page orientation, paper size, and print scaling. 5. Use the Margins tab to adjust the Top, Bottom, Left and Right Margins as well as
the Header and Footer margins. 6. Use the Header/Footer tab to create a custom header or footer. 7. Use the Sheet tab to print a selected area of the worksheet, repeat rows to print or print
gridlines.
Note: In Excel, select Print Titles in the Page Setup group. In Word, select the Launcher button in the Page Setup group to display the Page Setup dialog box.
Figure 11 – Page Setup and Dialog Box
8. Select the OK button when finished.
Note: The Page Layout tab contains many command buttons to define your Page Setup as well.
Office 2007 – New Look & Feel Page 8
SAVING AND PRINTING
Saving the Document
1. Select the Save icon on the Quick Access toolbar.
Figure 1 – Quick Access Toolbar
2. To save the file in a backward compatible format, select the Microsoft Office button and select Save As.
3. The Save As dialog window displays (See Figure 2).
Figure 2 – Save As Dialog Window
4. From the Save As dialog box, in the File name field, type the name of the document. 5. In the Save As type field, select the appropriate document type. 6. Select Save. The new name appears in the Title bar. Remember, the title bar is the bar
at the very top of your application window.
Printing a File
Printers can be specified and files can be previewed prior to printing.
To print a file:
1. Select the Microsoft Office button on the Menu bar. 2. Select Print. 3. The print options display (see Figure 3).

Office 2007 – New Look & Feel Page 9
Figure 3 – Microsoft Office Button Menu – Print Options
4. Select Quick Print to print one copy to your default printer. 5. Select Print Preview to view the document before printing. 6. Select Print to display the Print dialog box. Be sure to specify the printer to use, the
number of copies, and specific pages to print. 7. Select Print.
CLOSING AND EXITING
There are multiple ways to close a file.
1. Select the Microsoft Office button. 2. Select Close. 3. From the menu, select Close (see Figure 1).
Figure 1 – Closing a File
Office 2007 – New Look & Feel Page 10
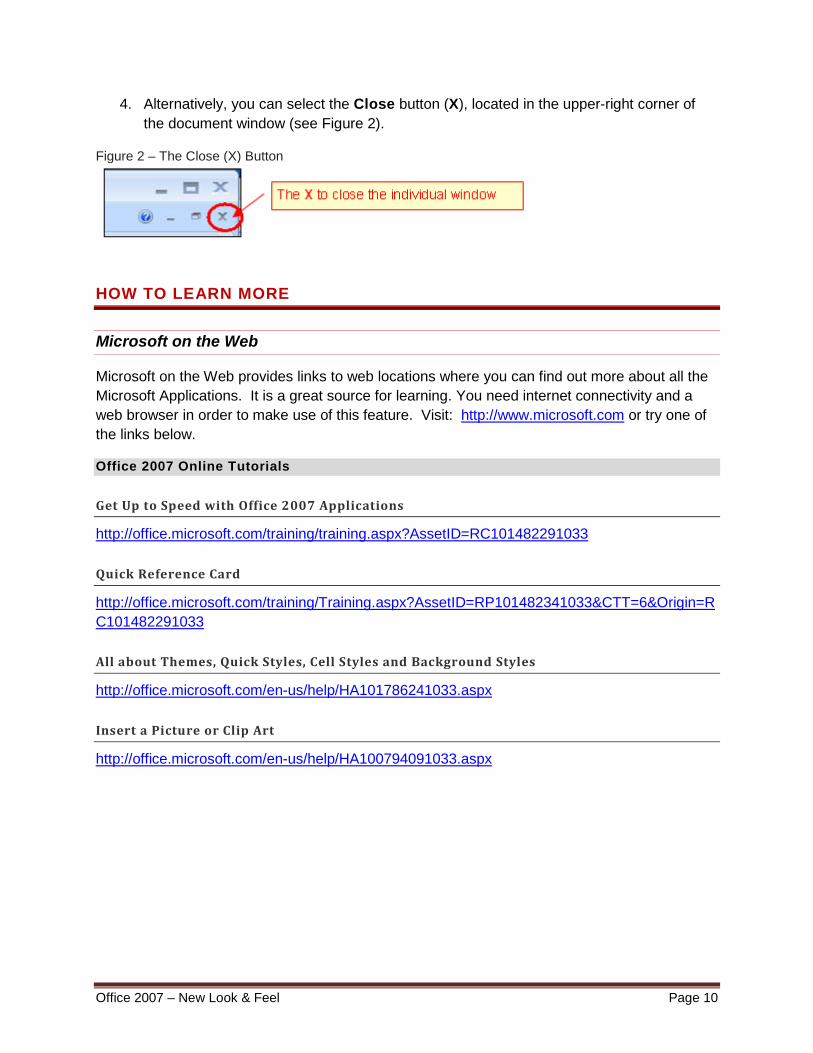
4. Alternatively, you can select the Close button (X), located in the upper-right corner of the document window (see Figure 2).
Figure 2 – The Close (X) Button
HOW TO LEARN MORE
Microsoft on the Web
Microsoft on the Web provides links to web locations where you can find out more about all the Microsoft Applications. It is a great source for learning. You need internet connectivity and a web browser in order to make use of this feature. Visit: http://www.microsoft.com or try one of the links below.
Office 2007 Online Tutorials
Get Up to Speed with Office 2007 Applications
http://office.microsoft.com/training/training.aspx?AssetID=RC101482291033
Quick Reference Card
http://office.microsoft.com/training/Training.aspx?AssetID=RP101482341033&CTT=6&Origin=RC101482291033
All about Themes, Quick Styles, Cell Styles and Background Styles
http://office.microsoft.com/en-us/help/HA101786241033.aspx
Insert a Picture or Clip Art
http://office.microsoft.com/en-us/help/HA100794091033.aspx

Office 2007 – New Look & Feel Page 11
TRAINING AND SUPPORT
IT Training
Contact Us: IT Training & Development Phone: (818) 677-1700 or x1700 (on campus) Email:
Troubleshooting and Support If you experience problems getting started with Office 2007 contact the Help Center at x1400 or [email protected].

Office 2007 – New Look & Feel Page 12
NOTES

office07_new_look_051410 05/14/10
IT’s technology training guides are the property of California State University, Northridge. They are intended for non-profit educational use only. Please do not use this material without citing the source


