12
Manual Parts Washer Operating Instructions & Warranty Information Service Line Inc. 2320 Zinga Dr. Reedsburg, WI 53959 1-800-774-7900 www.renegadepartswashers.com Revised 03/24/09
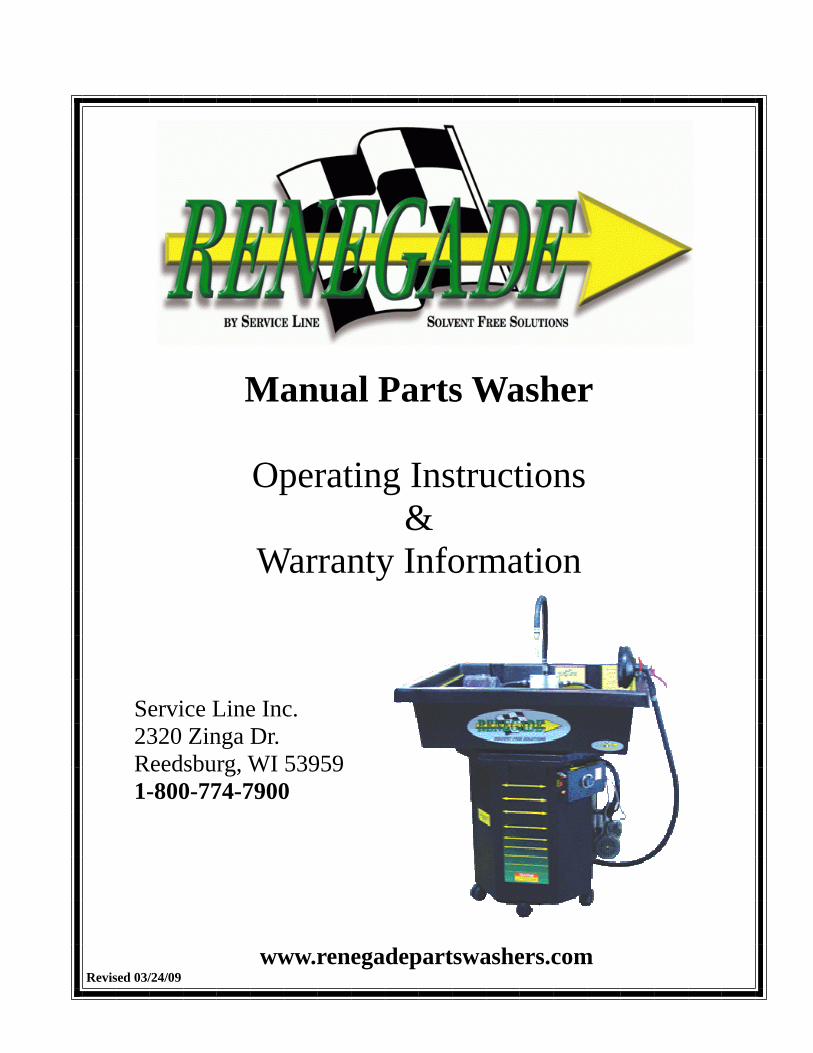
Manual Parts Washer
Operating Instructions &
Warranty Information
Service Line Inc. 2320 Zinga Dr. Reedsburg, WI 53959 1-800-774-7900 www.renegadepartswashers.com Revised 03/24/09

SETTING UP THE RENEGADE Once the RENEGADE parts washer is unbound and off the shipping skid………….. • Open the accessory kit bag,
• Attach the main fountain, Use Teflon tape or silicone on the fountain threads. (use 2 crescent wrenches to attach the main fountain,
one to hold the valve securely, the other to tighten the fountain hose.) • Place the scrub pads in the scrub pad holder. (the chrome wire holder to the left of the main fountain) • Attach all brushes and scraper to the magnetic bar on the left. • Attach the work light (if included) with the 2 bolts provided. • Place the red hook on the right side of the sink. (this hook holds your spray gun) • Prepare your RENEGADE with detergent. Remove the oil towel tray from the inside of the holding tank and set it aside. Empty
(1) 5-gallon pail of detergent into the holding tank. (always use genuine RENEGADE Liquid Parts Wash for maximum cleaning performance, failure to use Genuine RENEGADE Liquid Parts Wash will void your warranty)
• Using the empty 5-gallon pail for measurement, add 15 gallons of water (3 pails) to the holding tank. (If cold water is used, there
will be approximately 90 minutes of warm up time. If hot water is used, there will be approximately 45 minutes of warm up time) • Once your RENEGADE is filled, lift the lid and place the oil towel tray inside the base. Place (1) oil towel (included in the acces-
sory kit) into the oil towel tray and close the lid. • Plug your RENEGADE in and adjust the thermostat. (we recommend that you turn your thermostat to 140 degrees, then adjust as
needed) • Fill out your warranty card and return it to Service Line, Inc. • Place your owner’s manual in a safe place.
If you have any questions or issues, please call Service Line, Inc. immediately and request to speak with Technical Support.
1-800-774-7900
Thank you – for joining us on our Endeavour to eliminate hazardous chemicals
from the work place.
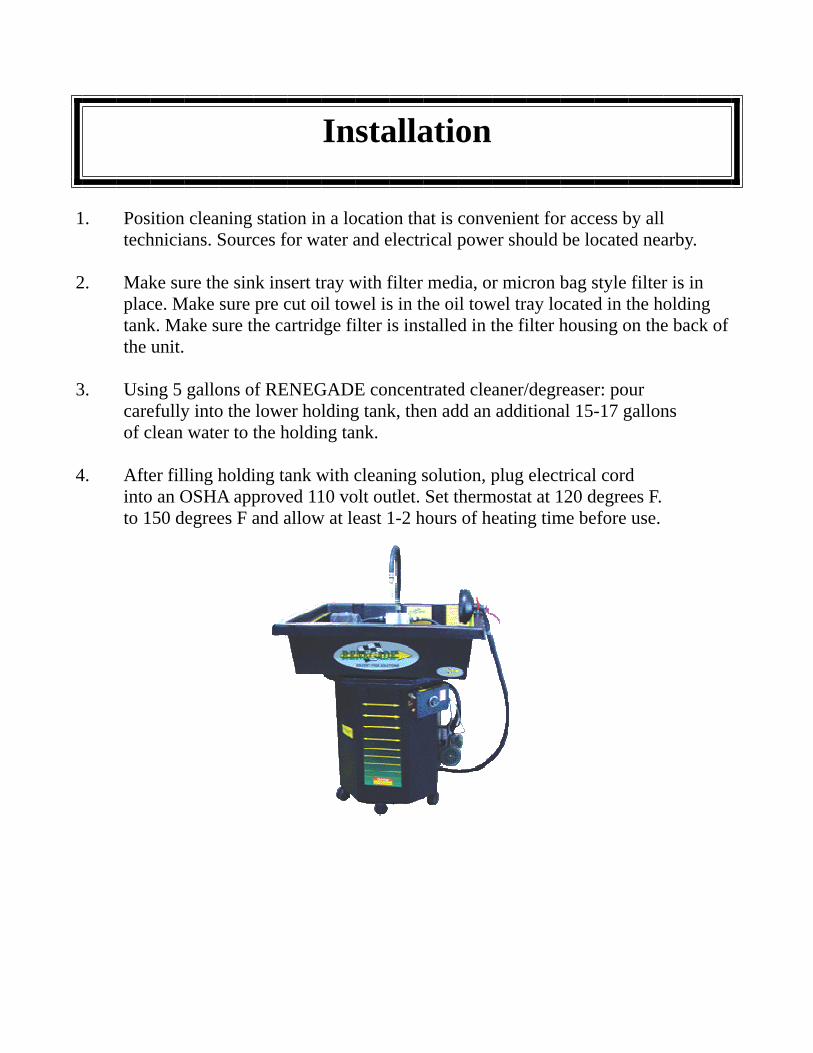
Installation
1. Position cleaning station in a location that is convenient for access by all technicians. Sources for water and electrical power should be located nearby. 2. Make sure the sink insert tray with filter media, or micron bag style filter is in place. Make sure pre cut oil towel is in the oil towel tray located in the holding tank. Make sure the cartridge filter is installed in the filter housing on the back of the unit. 3. Using 5 gallons of RENEGADE concentrated cleaner/degreaser: pour carefully into the lower holding tank, then add an additional 15-17 gallons of clean water to the holding tank. 4. After filling holding tank with cleaning solution, plug electrical cord into an OSHA approved 110 volt outlet. Set thermostat at 120 degrees F. to 150 degrees F and allow at least 1-2 hours of heating time before use.
Contents
Contents 1 Important Safety Instructions! 2-3 Who Should Use This Manual? 4 General Information 4 Safety Instructions 4 Operation 5 Maintenance 6 Troubleshooting Guide 7 Electrical Systems Diagrams 8 Warranty 9
1

“IMPORTANT SAFETY INSTRUCTIONS”
When using your shop equipment, basic safety precautions should always be followed, including the following:
1. Read all instructions 2. Care must be taken as burns can occur from touching hot parts. 3. Do not operate equipment with a damaged cord or if the equipment has been dropped or damaged – until it has been examined by qualified Renegade technician. 4. Do not let the cord hang over edge of table, bench, counter, or come in contact with hot manifolds or moving fan blades. 5. If an extension cord is necessary, a cord with a current rating equal to or more than that of equipment should be used. Cords rated for less current than the equip- ment may overheat. Care should be taken to arrange the cord so that it will not be tripped over or pulled. 6. Always unplug electrical equipment from electrical outlet when not in use. Never use the cord to pull the plug from the outlet. Grasp plug and pull to disconnect. 7. Let equipment cool completely before putting away. Loop cord loosely around equipment when storing. 8. To reduce the risk of fire, do not operate equipment in the vicinity of open containers of flammable (gasoline). 9. Adequate ventilation should be provided when working on operating internal combustion engines. 10. Keep hair, loose clothing, fingers, and all other body parts away from moving Parts on machine. 2

11. To reduce the risk of electric shock, do not use on wet surfaces or expose to rain. 12. Use only as described in this manual. Use only manufacturer’s recommended attachments. 13. ALWAYS WEAR SAFETY GLASSES. Everyday eyeglasses only have impact resistant lenses, they are NOT safety glasses. 14. “This product is to be located where mechanical ventilation providing a minimum of four air changes per hour exists.” Or the equivalent.
“SAVE THESE INSTRUCTIONS”
3

Introduction & Safety
Who Should Use This Manual? This manual has been prepared for the owner and all those responsible for the safe installation, operation, and maintenance of this parts cleaning system. To answer any additional questions please call toll free 1-800-774-7900. General Information The TMB parts washers have been designed to replace hazardous solvents in the work place. The general design and construction of this parts cleaning station has been dictated to Service Line by end users like yourself. By replacing hazardous chemicals in the work place, it makes for a cleaner and safer environment. Safety Instructions
ALWAYS wear approved eye protection and gloves while operating this parts washer
READ this manual before using this cleaning station
ALWAYS as with any cleaning unit use common sense while operating this washer.
4

Operation
1. MACHINE WARM-UP Before attempting to clean parts make sure your cleaning solution has reached operating temp. (this is indicated by the light located below the power switch on front of control panel, once the machine has reached the desired temperature the light will turn off. 2. To activate solution pump, flip rocker switch to the on position (switch will “light” up) 3. To activate flow-through parts brush, turn valve on stationary fountain off, turn valve on flow-through brush on. 4. To activate Power Gun, turn off all valves on main fountain. 5. Switch for lamp is located on the top of light. (the light is also hard wired into the pump switch so every time you turn the pump on the light will get power) 6. Parts magnet is located on the left hand side of sink, this will hold clean parts while other parts are being cleaned.
5

Maintenance
1. Check water level daily. 2. Wipe out and clean sink daily. 3. Remove Micro-Bag filter and clean weekly. (Optional Part ) 4. Remove and clean stainless steel basket daily. (Optional Part ) 5. Remove and clean sink tray and foam and replace oil towel weekly, or as necessary. 6. Change cartridge filter when solution flow slows down 7. Add cleaning solution (3 parts water, 1 part RENEGADE detergent) when needed.
8. Dispose of old filters in the same manner as oil filters are disposed of. Follow local regulations when disposing of any filters.
6

Troubleshooting Guide
Problem Probable Cause Suggested Remedy Poor cleaning Solution has not reached operating Wait for solution to warm up Performance Temp. Add more Renegade Detergent Solution has become diluted by 1 part Renegade detergent 3 part adding water water. Heater not working Check water level Pump not pumping All fountains are shut-off Turn on valve Or pumping very Cartridge filter plugged Replace Filter Slowly Cracked or broken hose Replace Hose Solution won’t drain Plugged Micro-Bag filter Clean or replace Micro-Bag filter
7

120V TMB 4000
15A Fuse
Low Water Switch N/O
Low Water Alarm
Pump Switch
WWW CR1 1 2
I I CR1 3 5
Pump Motor I I CR1 3 6
Heater Indicator Light
A
8
Temp Limit Switch N/O
Work Light Foot Pedal
Thermostat N/O Heating Element
Version 072307 / Updated 1-4-09
Warranty
Service Line warrants the cleaning station listed in this manual to be free from all defects in material and workmanship for a period
Of (1) year from the date purchased by original end user, Provided: (a) they are given normal and proper use, care and maintained as listed in this
Manual, all electrical and installations must be made in accordance with Service Line’s specifications.
Service Line warrants the general construction of the “sink and holding tank” to be free from all defects in material and workmanship for a period of (5) years provided:
(a) they are given normal and proper use as listed in this manual. (5 year warranty does not include any parts or accessories mounted to the “sink and holding tank”)
The following items are not covered by this warranty:
Heating elements (if damage is caused by low water supply).
This warranty does not cover any electrical components that come in contact with cleaning solution if the detergent used is not approved by Service Line, in writing prior
to using in this unit.
All warranty items must be returned to Service Line prepaid freight Service Line does not reimburse any labor and is only responsible for bad or
defective part.
THERE ARE NO WARRANTIES WHICH EXTEND BEYOND THE DESCRIPTION AND WARRANTIES CONTAINED HEREIN. THE WARRANTIES EXPRESSED HEREIN ARE IN LIEU OF ANY OTHER WARRANTIES, EXPRESSED OR IMPLIED. ANY IMPLIED WARRANTY OF MERCHANTABILITY AND IMPLIED WARRANTY FITNESS FOR A
PARTICULAR PURPOSE OR APPLICATION ARE HEREBY EXCLUDED. BUYERS REMEDY IS LIMITED TO, AND SERVICE LINE’S
MAXIMUM LIABILITY SHALL NOT EXCEED EITHER, (a) REPAIR OR REPLACEMENT OF THE DEFECTIVE PART OF PRODUCT OR, AT SERVICE LINE’S OPTION, (b) RE
TURN OF THE PRODUCT AND REFUND OF THE PURCHASE PRICE. SUCH REMEDY SHALL BE ENTIRE AND ONLY REMEDY
Some states do not allow exclusion or limitation of incidental or consequential damages, so the
above limitation may not apply to you. This warranty gives you specific legal rights, and you may also have other rights which vary from state to state.
Service Line reserves the right under its “Product Improvement” policy to change construction or design details and furnish equipment when so altered without reference to illustrations or specifications.
Rev. 6-25-97 / Amended 12-6-2000
9


