26
Operations and Maintenance Manual
MAXAM Owner's and Maintenance Manual (Rev. 4 / 2015) © Copyright 2015 Hussey Seating Company
Prior to operating your new MAXAM Telescopic Gym Seating unit, please read and understand the operating and maintenance instructions in this Owner's Manual.
Operations and Maintenance Manual

MAXAM Owner's and Maintenance Manual (Rev. 4 / 2015) © Copyright 2015 Hussey Seating Company
Prior to operating your new MAXAM Telescopic Gym Seating unit, please read and understand the operating and maintenance instructions in this Owner's Manual.
1.0 Congratulations on Your MAXAM Purchase 2.0 MAXAM Product Drawing Package 3.0 MAXAM Operating Instructions 3.1 Quick Reference Pocket Guide 4.0 Applications 4.1 Flex-Row Operation 4.2 Manual and Integral Power Operating Instructions 4.3 Operation of the Key Switch Control 4.4 Wall-Attached Telescopic Gym Seating Operating Instructions 4.5 Recessed Telescopic Gym Seating Operating Instructions 4.6 Free-Standing Telescopic Gym Seating Operating Instructions 4.7 Portable Telescopic Gym Seating Operating Instructions 4.8 Reverse-Fold Telescopic Gym Seating Operating Instructions 5.0 Accessories 5.1 Access Panel (Hatchway) 5.2 Motion Monitor 5.3 Scorer’s Table 5.4 Classic Wood Backrest 5.5 Contour Backrest 5.6 Metro Chair 5.7 Manual Ball Fender Curtain 5.8 Aisle Closure Curtain 5.9 End Closure Curtain 5.10 Rail System 5.11 Transportable Rail System 5.12 Partition Rail System 5.13 Transition Rail System 5.14 Portable Power Assist 5.15 Recoverable Truncation 6.0 MAXAM Recommended Preventive Maintenance & Inspection 6.1 Maintenance Report Log
7.0 MAXAM Inspection Requirements 7.1 Inspection Report Log
8.0 MAXAM Recommended Care and Safety Instructions
9.0 MAXAM Recommended Care and Cleaning Instructions
10.0 MAXAM Troubleshooting and Basic Part Identification
11.0 MAXAM IMPACT Customer Feedback Program
Safety Warning Notes will be identified with this symbol.
TABLE OF CONTENTS

MAXAM Owner's and Maintenance Manual (Rev. 4 / 2015) © Copyright 2015 Hussey Seating Company
Prior to operating your new MAXAM Telescopic Gym Seating unit, please read and understand the operating and maintenance instructions in this Owner's Manual.
Hussey Seating Company congratulates you on your new MAXAM Telescopic Gymnasium Seating purchase.
MAXAM, the latest innovation in telescopic gymnasium seating from the world’s leading expert, provides superior flexibility, superior safety, and superior value.
Please take the appropriate time to read and understand this manual to make the most of your MAXAM purchase. You will not only understand the features and benefits that your new product has to offer, but you will also gain an understanding of the product’s preventive maintenance requirements which will help extend the product’s life.
Congratulations and Thank You,Hussey Seating Company
1.0 Congratulations on Your MAXAM Purchase
MAXAM Owner's and Maintenance Manual (Rev. 4 / 2015) © Copyright 2015 Hussey Seating Company
Prior to operating your new MAXAM Telescopic Gym Seating unit, please read and understand the operating and maintenance instructions in this Owner's Manual.
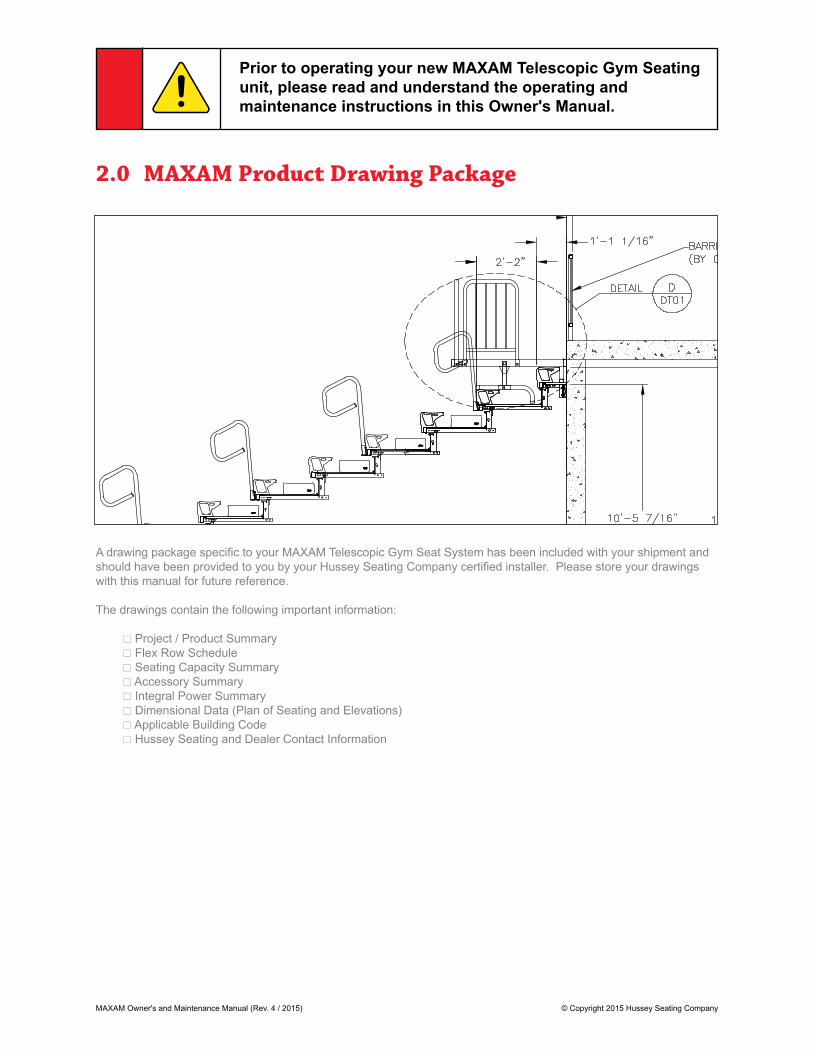
A drawing package specific to your MAXAM Telescopic Gym Seat System has been included with your shipment and should have been provided to you by your Hussey Seating Company certified installer. Please store your drawings with this manual for future reference.
The drawings contain the following important information:
* Project / Product Summary * Flex Row Schedule * Seating Capacity Summary * Accessory Summary * Integral Power Summary * Dimensional Data (Plan of Seating and Elevations) * Applicable Building Code * Hussey Seating and Dealer Contact Information
2.0 MAXAM Product Drawing Package

MAXAM Owner's and Maintenance Manual (Rev. 4 / 2015) © Copyright 2015 Hussey Seating Company
Prior to operating your new MAXAM Telescopic Gym Seating unit, please read and understand the operating and maintenance instructions in this Owner's Manual.
To Close System:
Step 1: Rotate and secure center aisle hand rails into the non-used position.
Step 2: Remove front steps at all aisle locations and store on first row deck.
Step 3: Clear path of all people. Clear any obstruction from front, rear, underside and top of seating system.
Step 4: Close system with pendant control, wireless transmitter, power assist, key switch control or manual operating handles.
Never leave pendant control unattended.
3.0 MAXAM Operating Instructions
The following instructions will outline the basic safe operating instruction for opening and closing a MAXAM Telescopic Gym Seating System. The following Quick Reference Pocket Guide is a tool which can be used to help ensure a safe procedure is followed. For detailed instructions per application, please reference section 4.0 Applications.
3.1 Quick Reference Pocket Guide
Cut on dotted line and fold:
To Open System:
Step 1: Clear any obstruction from front or rear of system.
Step 2: Open system with pendant control, wireless transmitter, power assist, key switch control or manual operating handles.
Step 3: Verify that Flex-Row modules or first rows are open and LOCKED at all aisle locations.
Step 4: Install front steps at all aisle locations.
Step 5: Rotate and secure center aisle hand rails into the used position.
To Close System:
Step 1: Rotate and secure center aisle hand rails into the non-used position.
Step 2: Remove front steps at all aisle locations and store on first row deck.
Step 3: Clear path of all people. Clear any obstruction from front, rear, underside and top of seating system.
Step 4: Close system with pendant control, wireless transmitter, power assist, key switch control or manual operating handles.
Never leave pendant control unattended.
To Open System:
Step 1: Clear any obstruction from front or rear of system.
Step 2: Open system with pendant control, wireless transmitter, power assist, key switch control or manual operating handles.
Step 3: Verify that Flex-Row modules or first rows are open and LOCKED at all aisle locations.
Step 4: Install front steps at all aisle locations.
Step 5: Rotate and secure center aisle hand rails into the used position.

MAXAM Owner's and Maintenance Manual (Rev. 4 / 2015) © Copyright 2015 Hussey Seating Company
Prior to operating your new MAXAM Telescopic Gym Seating unit, please read and understand the operating and maintenance instructions in this Owner's Manual.
4.1 Flex-Row Operation
The Flex-Row feature provides a flexible seating solution to meet the changing needs of the facility and, specifically, the current event.
Standard Flex-Row modules range from 2 to 7 seats wide, and can also accommodate full section lengths. The Flex-Row modules can be configured for custom layouts while the system is either open or closed. Once configuration layout has been decided, you may begin the setup process. Step 1: The Flex-Row modules are held closed by friction locks. To open each Flex Row, simply pull with enough force to disengage the friction locks, and fully extend the module until it locks open. Verify module is locked open by pushing on it to verify it is locked open (if it closes, the lock is not engaged - pull module fully open until lock is engaged).
Flex-Row units at all aisle locations must be opened while the seating system is open. It is extremely important to ensure that all Flex-Row units in use are fully opened and locked into position. If the Flex-Row unit is not locked into position, close the unit and reopen until the latch engages and the unit is locked into place.
Step 2: Continue the opening procedure until you have reached the desired configuration. The MAXAM Seating System may be operated while the Flex-Row modules are either open or closed.
Step 3: To Close: It is easiest to unlock the Flex-Row while not applying any load in either the opening or closing direction. This is best achieved by holding the Flex-Row steady with one hand while pulling the release lever with the other. Once the lock has been released, simply push the front of the module to close the unit to a locked position. An adjustable spring retention clip holds the flex row in the closed position (so it will not open when the bleacher closes).
Step 4: The module is now closed. If desired, you may change the configuration of the Flex-Row layout to meet your seating needs or simply continue to operate the system with your current layout.
4.0 Applications
MAXAM Owner's and Maintenance Manual (Rev. 4 / 2015) © Copyright 2015 Hussey Seating Company
Prior to operating your new MAXAM Telescopic Gym Seating unit, please read and understand the operating and maintenance instructions in this Owner's Manual.
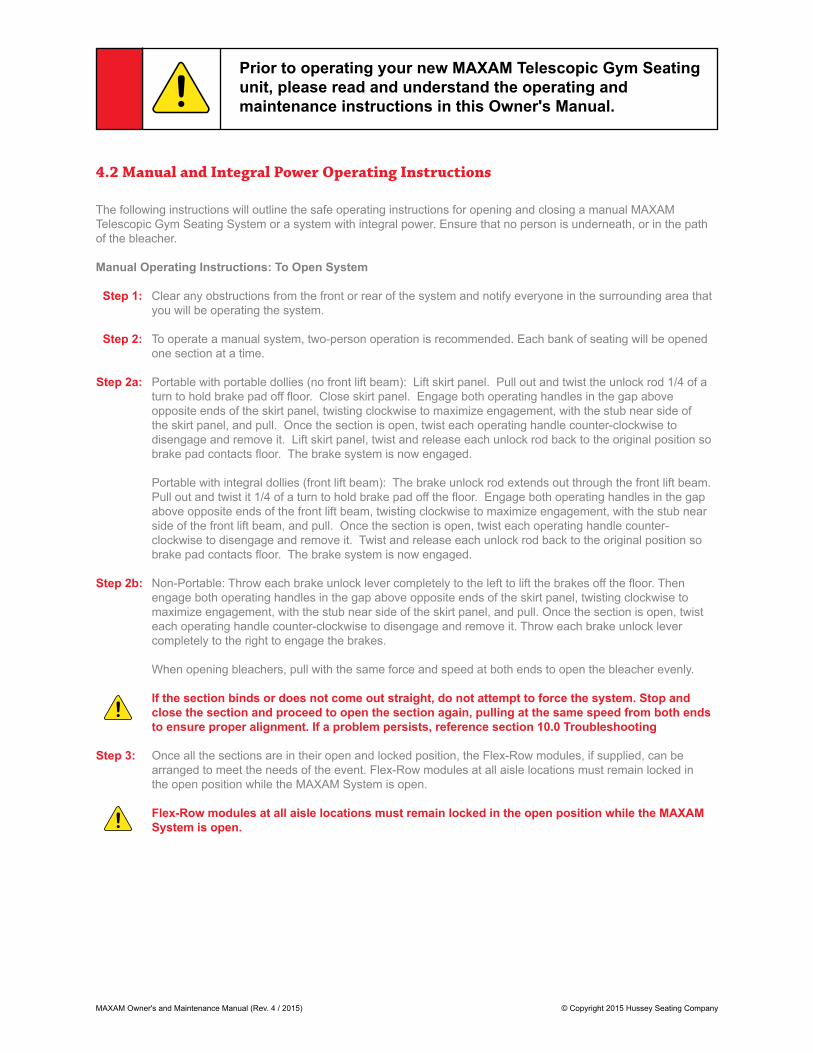
4.2 Manual and Integral Power Operating Instructions
The following instructions will outline the safe operating instructions for opening and closing a manual MAXAM Telescopic Gym Seating System or a system with integral power. Ensure that no person is underneath, or in the path of the bleacher.
Manual Operating Instructions: To Open System
Step 1: Clear any obstructions from the front or rear of the system and notify everyone in the surrounding area that you will be operating the system.
Step 2: To operate a manual system, two-person operation is recommended. Each bank of seating will be opened one section at a time.
Step 2a: Portable with portable dollies (no front lift beam): Lift skirt panel. Pull out and twist the unlock rod 1/4 of a turn to hold brake pad off floor. Close skirt panel. Engage both operating handles in the gap above opposite ends of the skirt panel, twisting clockwise to maximize engagement, with the stub near side of the skirt panel, and pull. Once the section is open, twist each operating handle counter-clockwise to disengage and remove it. Lift skirt panel, twist and release each unlock rod back to the original position so brake pad contacts floor. The brake system is now engaged.
Portable with integral dollies (front lift beam): The brake unlock rod extends out through the front lift beam. Pull out and twist it 1/4 of a turn to hold brake pad off the floor. Engage both operating handles in the gap above opposite ends of the front lift beam, twisting clockwise to maximize engagement, with the stub near side of the front lift beam, and pull. Once the section is open, twist each operating handle counter- clockwise to disengage and remove it. Twist and release each unlock rod back to the original position so brake pad contacts floor. The brake system is now engaged.
Step 2b: Non-Portable: Throw each brake unlock lever completely to the left to lift the brakes off the floor. Then engage both operating handles in the gap above opposite ends of the skirt panel, twisting clockwise to maximize engagement, with the stub near side of the skirt panel, and pull. Once the section is open, twist each operating handle counter-clockwise to disengage and remove it. Throw each brake unlock lever completely to the right to engage the brakes.
When opening bleachers, pull with the same force and speed at both ends to open the bleacher evenly.
If the section binds or does not come out straight, do not attempt to force the system. Stop and close the section and proceed to open the section again, pulling at the same speed from both ends to ensure proper alignment. If a problem persists, reference section 10.0 Troubleshooting
Step 3: Once all the sections are in their open and locked position, the Flex-Row modules, if supplied, can be arranged to meet the needs of the event. Flex-Row modules at all aisle locations must remain locked in the open position while the MAXAM System is open.
Flex-Row modules at all aisle locations must remain locked in the open position while the MAXAM System is open.
MAXAM Owner's and Maintenance Manual (Rev. 4 / 2015) © Copyright 2015 Hussey Seating Company
Prior to operating your new MAXAM Telescopic Gym Seating unit, please read and understand the operating and maintenance instructions in this Owner's Manual.
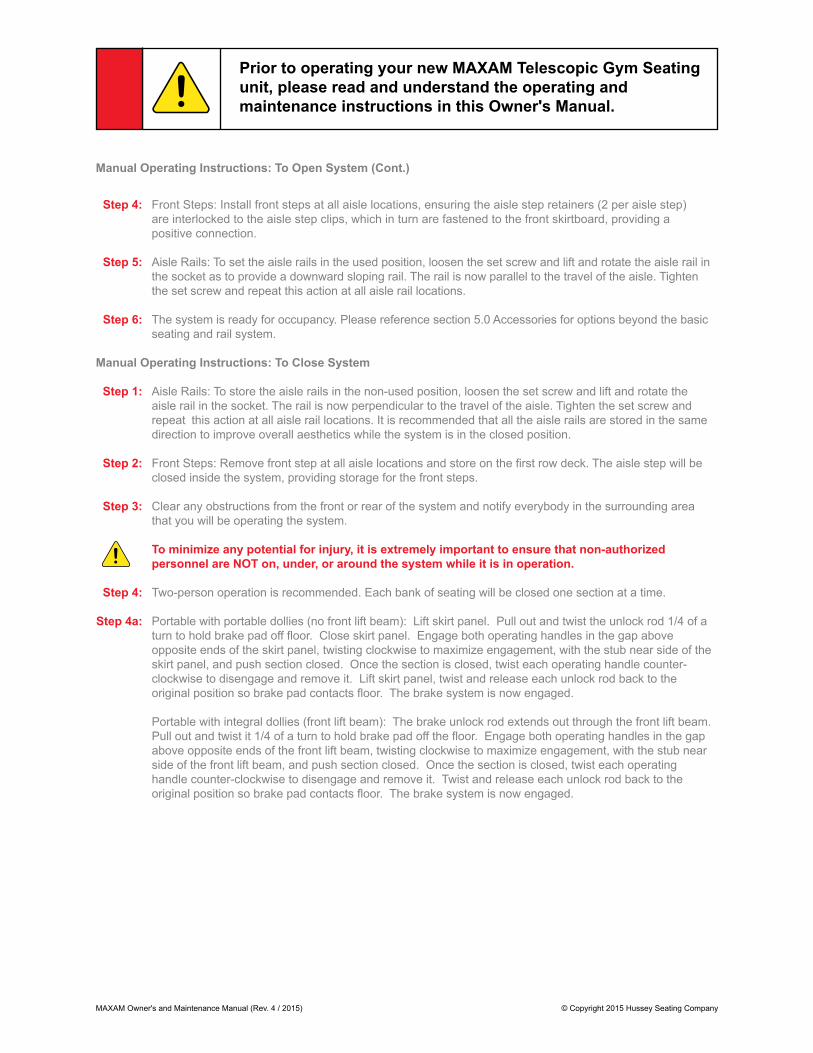
Manual Operating Instructions: To Open System (Cont.)
Step 4: Front Steps: Install front steps at all aisle locations, ensuring the aisle step retainers (2 per aisle step) are interlocked to the aisle step clips, which in turn are fastened to the front skirtboard, providing a positive connection.
Step 5: Aisle Rails: To set the aisle rails in the used position, loosen the set screw and lift and rotate the aisle rail in the socket as to provide a downward sloping rail. The rail is now parallel to the travel of the aisle. Tighten the set screw and repeat this action at all aisle rail locations.
Step 6: The system is ready for occupancy. Please reference section 5.0 Accessories for options beyond the basic seating and rail system.
Manual Operating Instructions: To Close System
Step 1: Aisle Rails: To store the aisle rails in the non-used position, loosen the set screw and lift and rotate the aisle rail in the socket. The rail is now perpendicular to the travel of the aisle. Tighten the set screw and repeat this action at all aisle rail locations. It is recommended that all the aisle rails are stored in the same direction to improve overall aesthetics while the system is in the closed position.
Step 2: Front Steps: Remove front step at all aisle locations and store on the first row deck. The aisle step will be closed inside the system, providing storage for the front steps.
Step 3: Clear any obstructions from the front or rear of the system and notify everybody in the surrounding area that you will be operating the system.
To minimize any potential for injury, it is extremely important to ensure that non-authorized personnel are NOT on, under, or around the system while it is in operation.
Step 4: Two-person operation is recommended. Each bank of seating will be closed one section at a time.
Step 4a: Portable with portable dollies (no front lift beam): Lift skirt panel. Pull out and twist the unlock rod 1/4 of a turn to hold brake pad off floor. Close skirt panel. Engage both operating handles in the gap above opposite ends of the skirt panel, twisting clockwise to maximize engagement, with the stub near side of the skirt panel, and push section closed. Once the section is closed, twist each operating handle counter- clockwise to disengage and remove it. Lift skirt panel, twist and release each unlock rod back to the original position so brake pad contacts floor. The brake system is now engaged.
Portable with integral dollies (front lift beam): The brake unlock rod extends out through the front lift beam. Pull out and twist it 1/4 of a turn to hold brake pad off the floor. Engage both operating handles in the gap above opposite ends of the front lift beam, twisting clockwise to maximize engagement, with the stub near side of the front lift beam, and push section closed. Once the section is closed, twist each operating handle counter-clockwise to disengage and remove it. Twist and release each unlock rod back to the original position so brake pad contacts floor. The brake system is now engaged.
MAXAM Owner's and Maintenance Manual (Rev. 4 / 2015) © Copyright 2015 Hussey Seating Company
Prior to operating your new MAXAM Telescopic Gym Seating unit, please read and understand the operating and maintenance instructions in this Owner's Manual.
Manual Operating Instructions: To Close System (Cont.)
Step 4b: Non-Portable: If equipped with Flex Row modules, unlock the modules by pulling the release lever, and pushing them closed until they lock in the closed position.
Throw each brake unlock lever completely to the left to lift the brakes off the floor. Then engage both operating handles in the gap above opposite ends of the skirt panel, twisting clockwise to maximize engagement, with the stub near side of the skirt panel, and push. Once the section is closed, twist each operating handle counter-clockwise to disengage and remove it. Throw each brake unlock lever completely to the right to engage the brakes. When closing bleachers, push with the same force and speed at both ends to close the bleacher evenly.
If the sections bind or do not close evenly, do not force the system. Stop and open the section and proceed to close the section again with equal force and speed applied at each end. If the problem persists, reference section 10.0 Troubleshooting.
Step 5: The system is now closed. If desired, you may configure the Flex-Row layout to meet your seating needs.
Integral Power Operating Instructions: To Open System
Step 1: Clear any obstructions from the front or rear of system and notify everyone in the surrounding area that you will be operating the system.
Step 2: To operate an integral power system, plug the pendant control into the pendant receptacle and latch the safety latch to ensure the pendant remains connected during the operating process. Push and hold the open button to activate the system. It is recommended that you walk alongside the system while operating to verify that the system remains clear of all obstructions during this process. It is also important to visually check the alignment of the system during this operation.
Step 2: To operate an integral power system with the optional wireless controller, active the controller by swiping it directly in front of the access control unit. An audio "beep" and a visual light on the remote indicates that it is activated. It will automatically time out after approximately 10 seconds of inactivity, and will need to be reactived by swiping it again directly in front of the access control unit. It is recommended that you walk alongside the system while operating to verify that the system remains clear of all obstructions during this process. It is also important to visually check the alignment of the system during this operation.
NEVER LEAVE PENDANT CONTROL UNATTENDED! Reference sections 4.4 - 4.8 for pendant receptacle locations for your specific application and layout.
If the system does not come out straight or binds, do not attempt to force the system. Stop and close the section and proceed to open the system again.
If the problem persists, reference section 10.0 Troubleshooting. If system is provided with limit switches, the "override" switch will need to be selected to the "ON" position in order to close a partially opened bleacher. The override switch overrides all limit switches. The normal position is "OFF" which enables all limit switches.
Step 3: Once all the sections are in their open and locked position, the Flex-Row modules (if supplied) can be arranged to meet the needs of the event.
First Tier Rows and Flex-Row modules at all aisle locations must remain locked in the open position while the MAXAM Telescopic Gymnasium Seating System is in use.
(with removable pendant control)
(with wireless remote control)
MAXAM Owner's and Maintenance Manual (Rev. 4 / 2015) © Copyright 2015 Hussey Seating Company
Prior to operating your new MAXAM Telescopic Gym Seating unit, please read and understand the operating and maintenance instructions in this Owner's Manual.
Step 4: Front Steps: Install front steps at all aisle locations, ensuring the aisle step retainers (2 per aisle step) are interlocked to the aisle step clips, which in turn are fastened to the front skirtboard, providing a positive connection.
Step 5: Aisle Rails: To set the aisle rails in the used position, loosen the set screw and lift and rotate the aisle rail in the socket so as to provide a downward sloping rail. The rail is now parallel to the travel of the aisle. Tighten the set screw and repeat this action at all aisle rail locations.
Step 6: The system is ready for use. Please reference Section 5.2 Accessories for options beyond the basic seating and rail system.
Integral Power Operating Instructions: To Close System
Step 1: Aisle Rails: To store the aisle rails in the non-used position, loosen the set screw and lift and rotate the aisle rail. The rail is now perpendicular to the travel of the aisle. Tighten the set screw and repeat this action at all aisle rail locations. It is recommended that all the aisle rails be stored in the same direction to improve overall aesthetics while the system is in the closed position.
Step 2: Front Steps: Remove front step at all aisle locations and store on the first row deck. The aisle step will be closed inside the system, providing storage for the front steps.
Step 3: Clear any obstructions from the front or rear of the system and notify everybody in the surrounding area that you will be operating the system.
To minimize any potential for injury, it is extremely important to ensure that non-authorized personnel are NOT on, under, or around the system while it is in operation.
Step 4: To operate an integral power system, plug the pendant control into the pendant receptacle and latch the safety latch to ensure the pendant remains connected during the operating process. (If using a Key Switch Control, proceed to section 5.1.2a) Press and hold the close button to activate the system. It is recommended that you walk alongside the system while operating to verify that the system remains clear of all obstructions during this process. It is also important to visually check the alignment of the system during this operation.
Step 4: To operate an integral power system with the optional wireless controller, active the controller by swiping it directly in front of the access control unit. An audio "beep" and a visual light on the remote indicates that it is activated. It will automatically time out after approximately 10 seconds of inactivity, and will need to be reactived by swiping it again directly in front of the access control unit. It is recommended that you walk alongside the system while operating to verify that the system remains clear of all obstructions during this process. It is also important to visually check the alignment of the system during this operation.
NEVER LEAVE PENDANT CONTROL UNATTENDED! Reference sections 4.4 - 4.8 for pendant receptacle locations per application and layout.
If the system does not close evenly or binds, do not attempt to force the system. Stop and open the section and proceed to close the system again.
If the problem persists, reference section 10.0 Troubleshooting
Step 5: The system is now closed. If desired, you may configure the Flex-Row layout to meet your seating needs.
(with removable pendant control)
(with wireless remote control)

MAXAM Owner's and Maintenance Manual (Rev. 4 / 2015) © Copyright 2015 Hussey Seating Company
Prior to operating your new MAXAM Telescopic Gym Seating unit, please read and understand the operating and maintenance instructions in this Owner's Manual.
4.3 Operation of the Key Switch Control
The operator should always possess the key. Leaving the key unattended in the key switch would allow someone other than the trained bleacher operator to power the system.
Forward Fold Bleachers: To open a forward fold bleacher (wall attached, free standing or recessed), insert the key into the switch, rotate counterclockwise to the FOR position, hold until the bleacher reaches the desired position. Then turn the key back to the OFF position and remove it.
To close a forward fold bleacher, insert the key into the switch, rotate clockwise to the REV position, hold until the bleacher reaches the desired position. Then turn the key back to the OFF position and remove it. Reverse Fold Bleachers: To open a reverse fold bleacher, insert the key into the switch, rotate clockwise to the REV position, hold until the bleacher reaches the desired position. Then turn the key back to the OFF position and remove it.
To close a reverse fold bleacher, insert the key into the switch (SEE diagram below) , rotate counter- clockwise to the FOR position, hold until the bleacher reaches the desired position. Then turn the key back to the OFF position and remove it.
Key Switch Control Diagram
4.4 Wall-Attached Telescopic Gym Seating Operating InstructionsReference 5.1.2 for basic operating instructions
Wall-Attached Pendant Locations:On most systems installed with access to both ends, the pendant receptacle will be installed on the left-hand side (as you view the seating from the front) under the second tier / row.
Systems installed with access to the right end only will have the pendant receptacle under the second tier / row on the right end of the system.
Systems installed wall-to-wall will have the pendant under the flip-up skirtboard on the far left of the seating system.
Wall-Attached Wireless Control Locations:On systems with wireless control, the access control unit, for activation of the controller, will be located on the left hand end of the bank, on the skirt panel face.
Wall-Attached Manual Systems:
To minimize any potential for injury, it is extremely important to ensure that the Rail System is in use at all times.
NEVER USE A SECTION WITHOUT THE RAIL SYSTEM.
MAXAM Owner's and Maintenance Manual (Rev. 4 / 2015) © Copyright 2015 Hussey Seating Company
Prior to operating your new MAXAM Telescopic Gym Seating unit, please read and understand the operating and maintenance instructions in this Owner's Manual.
4.5 Recessed Telescopic Gym Seating Operating InstructionsReference section 4.2 for basic operating instructions.
Recessed Pendant Locations:Reference section 4.4 for pendant or wireless control locations.
If the MAXAM seating system stores in a wall pocket, remember to remove top removable end rails and aisle hand rails to ensure operating clearance to underside of the recess, if required.
To minimize any potential for injury, it is extremely important to ensure that the Rail System is in use at all times.
NEVER USE A SECTION WITHOUT THE RAIL SYSTEM.
4.6 Freestanding Telescopic Gym Seating Operating InstructionsReference section 4.2 for basic operating instructions.
Freestanding Pendant Locations:Reference section 4.4 for pendant or wireless control locations.
Freestanding Manual Systems:
To minimize any potential for injury, it is extremely important to ensure that the End Rail System is in use at all times.
NEVER USE A SECTION WITHOUT THE END RAIL SYSTEM.
4.7 Portable Telescopic Gym Seating Operating InstructionsReference section 4.2 for basic manual operating instructions.
Integral Dolly Operating Instructions: The portable MAXAM Seating System has the option of a built-in dolly system. To activate the dolly system, verify that the unit is closed and all frames are engaged onto the lift beams. Using the ratchet straps located at the back of each frame line, attach the hook on the end of the strap to the eye nut on the back of the first tier riser. Wind the ratchet straps until the straps are tight. Once this step has been verified, proceed to lift the system by inserting the lift activator (drive gun), into the receptacle located at each frame line on the frontor rear lift beam. Power the activator and lift each side a little at a time until the entire system is off the floor.
The stand must be operated by a cordless drill (lift activator or drive gun) in the clutch mode or the lifting system will be damaged.
Once the system is free and clear of ground obstructions/friction, you may begin the transportation process. If you have two drive guns, you may lift both sides at once.
Portable Dolly Operating Instructions: The MAXAM system also has the option of an external, or “portable,” dolly system. To operate, verify that the system is closed and all frames are engaged onto the rear lift beam. Using the ratchet straps located on the rear lift beam, attach the hook end of each strap to the eye nut on the back of the first tier riser. Wind the ratchet straps until the straps are tight. Lift the skirtboard and roll the dollies under the first tier, using the yellow dolly guides to position the dollies. Push the dollies all the way under the first tier until the frame of the dolly is flush against the rear lift beam. Using the hydraulic pumps on the dollies, raise the bleacher until it is free and clear of ground obstructions.

MAXAM Owner's and Maintenance Manual (Rev. 4 / 2015) © Copyright 2015 Hussey Seating Company
Prior to operating your new MAXAM Telescopic Gym Seating unit, please read and understand the operating and maintenance instructions in this Owner's Manual.
To transport the system, it is recommended that you move the unit in the end- to-end direction to provide a more stable means of transportation. This may be accomplished manually or by using an additional means of power, such as a fork truck. Lower system into new location by reversing the drive gun, lowering each side half-way, then all the way.
To ensure safety, never travel at speeds greater than 3 m.p.h. (4.8 k.p.h.) or travel down ramps. Travel at a steady speed to reduce potential of tipping.
While transporting a portable seating section system, use a spotter to verify that the travel path remains clear and free of any obstructions during travel.
To locate and place the portable sections, it is recommended to have markings on the floor or use floor pintles.
Operating Clearances of 1 1/2” [38mm] between sections must be maintained.
To minimize any potential for injury, it is extremely important to ensure that the end rail system is in use at all times.
NEVER USE A SECTION WITHOUT THE END RAIL SYSTEM.
4.8 Reverse Fold Telescopic Gym Seating Operating InstructionsReference section 4.2 for basic operating instructions.
Reverse Fold Pendant Locations:The pendant is located on the side of the top frame on the far left (as you view the seating from the front) of the seating system.
Reverse Fold Wireless Control Locations:The access control unit, for activation of the controller, will be located on a bracket that is installed on the top tier frame column (no rear panel). If the unit has a rear panel, the access control unit will be installed on the inside (frame side) end of the rear panel.
As with any telescopic gym seat product, it is important to walk alongside the Reverse Fold Telescopic Gym Seating System while it is in operation. Prior to operating the system, make all personnel in the immediate area aware of product movement.

MAXAM Owner's and Maintenance Manual (Rev. 4 / 2015) © Copyright 2015 Hussey Seating Company
Prior to operating your new MAXAM Telescopic Gym Seating unit, please read and understand the operating and maintenance instructions in this Owner's Manual.
5.1 Access Panel (Hatchway)An Access Panel, or hatchway, is located on a selected tier of a wall-to-wall seating system in order to provide access to the underside of the seating system. To remove the Access Panel, remove the two fasteners and lift the panel.
Remember to reinstall the fasteners after you have completed your task and closed the panel.
5.0 AccessoriesThe following section will highlight the accessories, their function, and the operation procedure (if necessary) to ensure safe operation.
5.2 Motion MonitorThe Motion Monitor is mounted at the rear wall on top of the junction box during the installation of the MAXAM Telescopic Gym Seating System. In addition to the standard audible warning, the Motion Monitor provides a visible warning, in the form of a flashing light, to alert personnel in the vicinity that the seating system is in motion. The Motion Monitor is only operating when the pendant control is activated.
5.3 Scorer’s TableThe Scorer’s Table is a portable table with c-type legs. It provides a table solution which can be used as an integral feature of the seating system or a stand-alone product. The table can be stored on any deck of the seating system when not in use.
5.4 Classic Wood BackrestOnce the seating system is opened completely, the backrest can be flipped up off the deck and, by applying a downward pressure, locked into the used position.
To store the backrest, lift it from the locked position and rotate it back onto the deck. To extend the life of the product, DO NOT DROP the backrest onto the deck.
MAXAM Owner's and Maintenance Manual (Rev. 4 / 2015) © Copyright 2015 Hussey Seating Company
Prior to operating your new MAXAM Telescopic Gym Seating unit, please read and understand the operating and maintenance instructions in this Owner's Manual.
5.5 Contoured Backrest Contoured Backrest may be in modules from one to seven units ganged together. Reference 5.2.5 for operating instructions.
5.6 Metro ChairsMetro Chairs are either single or double units which are operated manually. Once the seating system is opened completely, lift the Metro chair from the deck and rotate it upright into the locked position. To unlock, simply use the built-in unlock catch to unlock the chair(s). Once unlocked, rotate the chair(s) downward and place on the deck.
5.7 Manual Ball Fender CurtainThe Manual Ball Fender Curtain prevents balls and other debris from being lodged in the top row when the seating system is not in use. It is also used as a deterrent to people from climbing the system when it is in the closed position.
To install the manual ball fender curtain, simply remove it from storage and attach the curtain to the two tracks provided on the top two rows, using the integrated Velcro strips. To remove, simply reverse directions.
5.8 Aisle Closure CurtainsThe Aisle Closure Curtains prevent items from being stored on the decking in the unused position and also helps to deter people from climbing the system in the closed position.
To install the aisle closure curtain system, simply attach the top of the curtain to the nose at the top of the aisle when the system is in the open position. Drape the curtain down the aisle and proceed to close the system; connect the bottom of the curtain once the system is closed. To remove,simply reverse directions.
Alternate installation assembly: Attach the curtain on the aisles once the seating system is completely closed.
5.9 End Closure CurtainThe Closure End Curtain is integral to the operation of the seating system. Once the seating system is opened, the end closure prevents unauthorized access to the underside of the seating system.
To gain access, do not open the system completely. By doing this, you can lift the bottom of the curtain and have plenty of access to the underside of the system.
MAXAM Owner's and Maintenance Manual (Rev. 4 / 2015) © Copyright 2015 Hussey Seating Company
Prior to operating your new MAXAM Telescopic Gym Seating unit, please read and understand the operating and maintenance instructions in this Owner's Manual.
5.11 Transportable Rail SystemThe Transportable Rail System provides a truly portable end rail solution, in which the rail and socket can be removed from one end of a bank of seating and reattached at another end.
5.12 Partition Rail SystemThe Partition Rail System provides a deterrent to spectator access to the top decks of a partially closed bank of seating. This rail system is used in conjunction with the transportable end rail system to provide spectator safety. When not in use, it may be removed for storage.
5.13 Transition Rail SystemThe Transition Rail System is a custom rail to meet custom applications; typically these rails are not removed. If they are removed, loosen the two tamper-proof set screws and remove the rail prior to closing the bleacher. The rail can be stored separately.
5.14 Portable Power AssistTo operate a seating system with a Portable Power Assist, simply lift the hinged skirtboard, position the Power Assist into position, engage the brackets, and activate the power in the open direction until the system is fully opened and locked into position. To close, reverse the procedure.
When the system is being opened, use extreme caution to avoid running over the power cord with the seating system.
5.15 Recoverable TruncationRecoverable truncations are designed to provide temporary space in front of a bleacher section, to accommodate egress space, cluster ADA seating, etc. Components typically consist of safety rails with supports. The space may be recovered at any time to reclaim all the bleacher seating.
When a system is designed with a recoverable truncation, “program supports” are provided to transmit some of the system’s vertical load from the higher tiers down to the floor and also to provide sockets for the front guard rails.
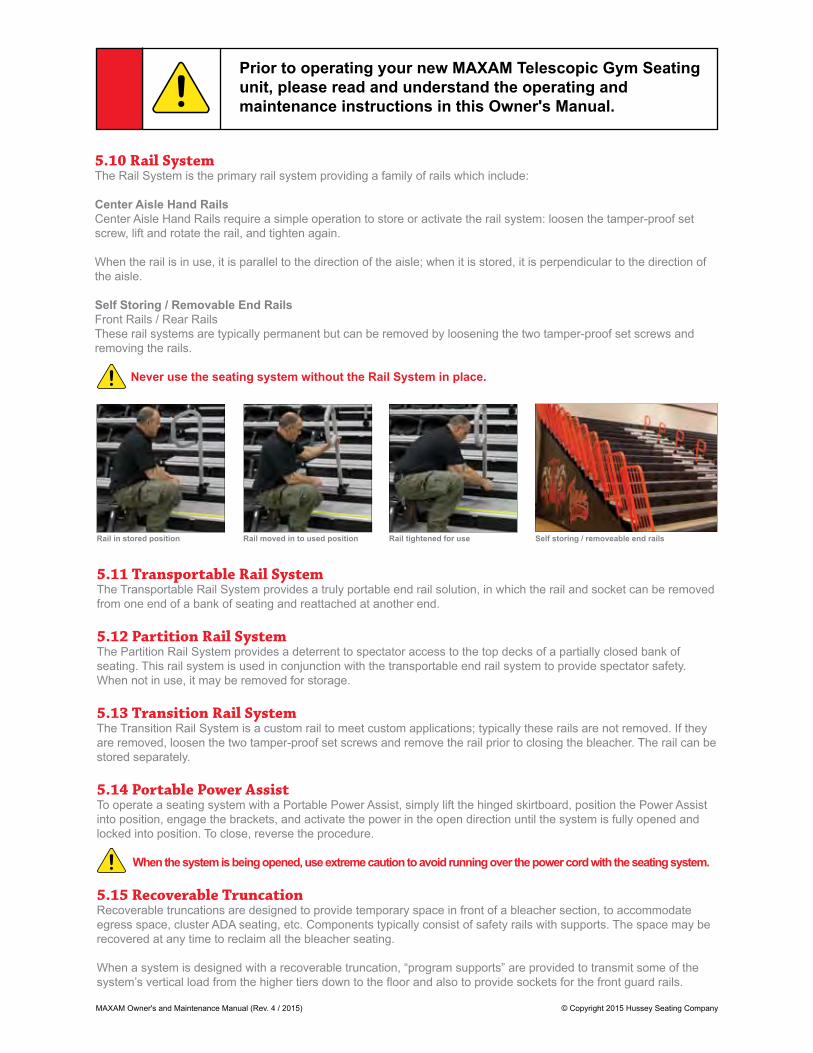
5.10 Rail SystemThe Rail System is the primary rail system providing a family of rails which include:
Center Aisle Hand RailsCenter Aisle Hand Rails require a simple operation to store or activate the rail system: loosen the tamper-proof set screw, lift and rotate the rail, and tighten again.
When the rail is in use, it is parallel to the direction of the aisle; when it is stored, it is perpendicular to the direction of the aisle.
Self Storing / Removable End RailsFront Rails / Rear RailsThese rail systems are typically permanent but can be removed by loosening the two tamper-proof set screws and removing the rails.
Never use the seating system without the Rail System in place.
Rail in stored position Rail moved in to used position Rail tightened for use Self storing / removeable end rails
MAXAM Owner's and Maintenance Manual (Rev. 4 / 2015) © Copyright 2015 Hussey Seating Company
Prior to operating your new MAXAM Telescopic Gym Seating unit, please read and understand the operating and maintenance instructions in this Owner's Manual.
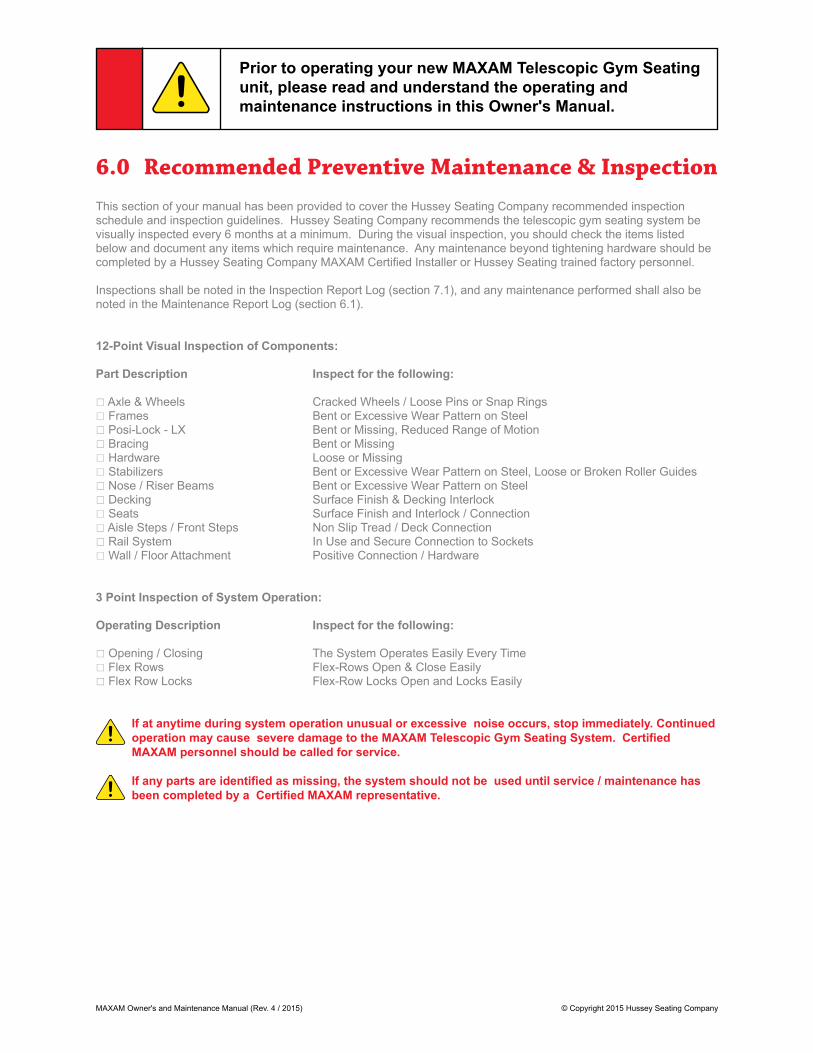
This section of your manual has been provided to cover the Hussey Seating Company recommended inspection schedule and inspection guidelines. Hussey Seating Company recommends the telescopic gym seating system be visually inspected every 6 months at a minimum. During the visual inspection, you should check the items listed below and document any items which require maintenance. Any maintenance beyond tightening hardware should be completed by a Hussey Seating Company MAXAM Certified Installer or Hussey Seating trained factory personnel.
Inspections shall be noted in the Inspection Report Log (section 7.1), and any maintenance performed shall also be noted in the Maintenance Report Log (section 6.1).
12-Point Visual Inspection of Components:
Part Description Inspect for the following:
* Axle & Wheels Cracked Wheels / Loose Pins or Snap Rings* Frames Bent or Excessive Wear Pattern on Steel* Posi-Lock - LX Bent or Missing, Reduced Range of Motion* Bracing Bent or Missing * Hardware Loose or Missing* Stabilizers Bent or Excessive Wear Pattern on Steel, Loose or Broken Roller Guides* Nose / Riser Beams Bent or Excessive Wear Pattern on Steel* Decking Surface Finish & Decking Interlock* Seats Surface Finish and Interlock / Connection* Aisle Steps / Front Steps Non Slip Tread / Deck Connection* Rail System In Use and Secure Connection to Sockets* Wall / Floor Attachment Positive Connection / Hardware
3 Point Inspection of System Operation:
Operating Description Inspect for the following:
* Opening / Closing The System Operates Easily Every Time * Flex Rows Flex-Rows Open & Close Easily * Flex Row Locks Flex-Row Locks Open and Locks Easily
If at anytime during system operation unusual or excessive noise occurs, stop immediately. Continued operation may cause severe damage to the MAXAM Telescopic Gym Seating System. Certified MAXAM personnel should be called for service.
If any parts are identified as missing, the system should not be used until service / maintenance has been completed by a Certified MAXAM representative.
6.0 Recommended Preventive Maintenance & Inspection
MAXAM Owner's and Maintenance Manual (Rev. 4 / 2015) © Copyright 2015 Hussey Seating Company
Prior to operating your new MAXAM Telescopic Gym Seating unit, please read and understand the operating and maintenance instructions in this Owner's Manual.
SE
CTI
ON
RO
WPA
RT
PR
OB
LEM
FOLL
OW
-UP
AC
TIO
N /
CO
MM
EN
TD
ATE
INS
PE
CTE
D B
Y
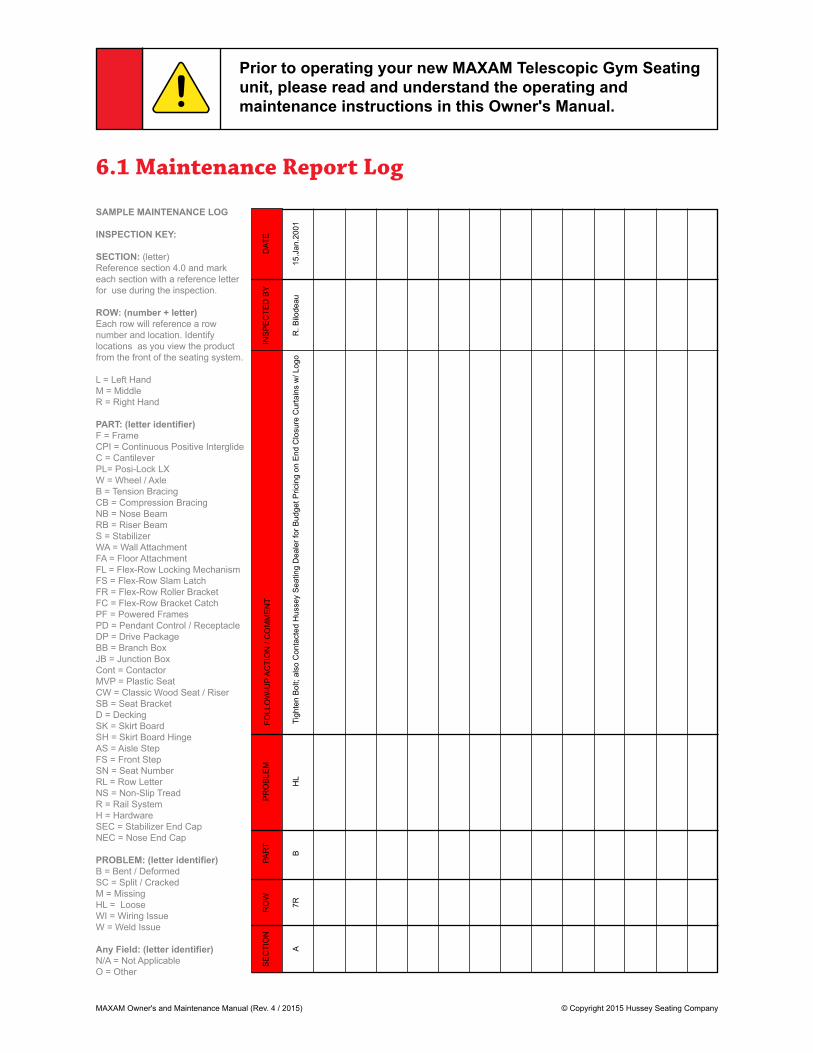
SAMPLE MAINTENANCE LOG
INSPECTION KEY:
SECTION: (letter)Reference section 4.0 and mark each section with a reference letter for use during the inspection.
ROW: (number + letter)Each row will reference a row number and location. Identify locations as you view the product from the front of the seating system.
L = Left Hand M = MiddleR = Right Hand
PART: (letter identifier)F = FrameCPI = Continuous Positive InterglideC = Cantilever PL= Posi-Lock LXW = Wheel / AxleB = Tension BracingCB = Compression BracingNB = Nose BeamRB = Riser BeamS = StabilizerWA = Wall AttachmentFA = Floor AttachmentFL = Flex-Row Locking MechanismFS = Flex-Row Slam LatchFR = Flex-Row Roller BracketFC = Flex-Row Bracket CatchPF = Powered FramesPD = Pendant Control / ReceptacleDP = Drive PackageBB = Branch BoxJB = Junction BoxCont = ContactorMVP = Plastic SeatCW = Classic Wood Seat / RiserSB = Seat BracketD = DeckingSK = Skirt BoardSH = Skirt Board HingeAS = Aisle StepFS = Front StepSN = Seat NumberRL = Row LetterNS = Non-Slip TreadR = Rail SystemH = HardwareSEC = Stabilizer End CapNEC = Nose End Cap
PROBLEM: (letter identifier)B = Bent / DeformedSC = Split / CrackedM = MissingHL = LooseWI = Wiring IssueW = Weld Issue
Any Field: (letter identifier)N/A = Not ApplicableO = Other
A7R
BH
LTi
ghte
n B
olt;
also
Con
tact
ed H
usse
y S
eatin
g D
eale
r for
Bud
get P
ricin
g on
End
Clo
sure
Cur
tain
s w
/ Log
o15
.Jan
.200
1R
. Bilo
deau
6.1 Maintenance Report Log
MAXAM Owner's and Maintenance Manual (Rev. 4 / 2015) © Copyright 2015 Hussey Seating Company
Prior to operating your new MAXAM Telescopic Gym Seating unit, please read and understand the operating and maintenance instructions in this Owner's Manual.
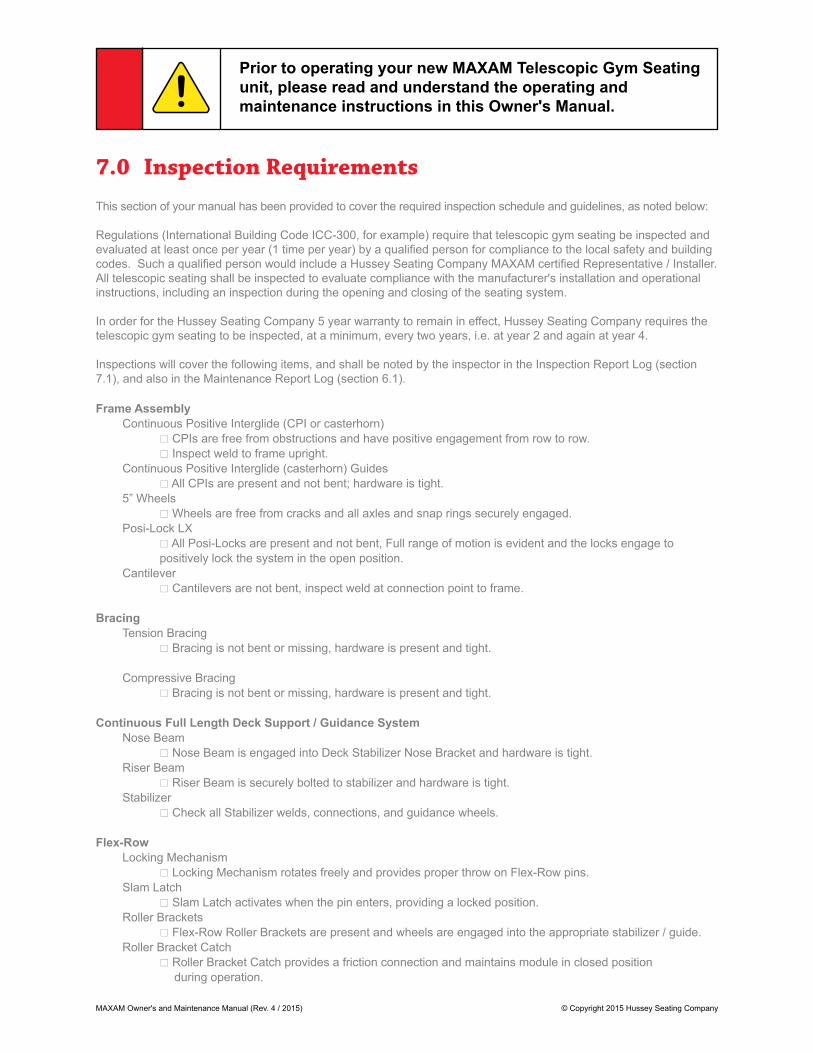
This section of your manual has been provided to cover the required inspection schedule and guidelines, as noted below:
Regulations (International Building Code ICC-300, for example) require that telescopic gym seating be inspected and evaluated at least once per year (1 time per year) by a qualified person for compliance to the local safety and building codes. Such a qualified person would include a Hussey Seating Company MAXAM certified Representative / Installer. All telescopic seating shall be inspected to evaluate compliance with the manufacturer's installation and operational instructions, including an inspection during the opening and closing of the seating system.
In order for the Hussey Seating Company 5 year warranty to remain in effect, Hussey Seating Company requires the telescopic gym seating to be inspected, at a minimum, every two years, i.e. at year 2 and again at year 4.
Inspections will cover the following items, and shall be noted by the inspector in the Inspection Report Log (section 7.1), and also in the Maintenance Report Log (section 6.1).
Frame Assembly Continuous Positive Interglide (CPI or casterhorn) * CPIs are free from obstructions and have positive engagement from row to row. * Inspect weld to frame upright. Continuous Positive Interglide (casterhorn) Guides * All CPIs are present and not bent; hardware is tight. 5” Wheels * Wheels are free from cracks and all axles and snap rings securely engaged. Posi-Lock LX * All Posi-Locks are present and not bent, Full range of motion is evident and the locks engage to positively lock the system in the open position. Cantilever * Cantilevers are not bent, inspect weld at connection point to frame.
Bracing Tension Bracing * Bracing is not bent or missing, hardware is present and tight.
Compressive Bracing * Bracing is not bent or missing, hardware is present and tight.
Continuous Full Length Deck Support / Guidance System Nose Beam * Nose Beam is engaged into Deck Stabilizer Nose Bracket and hardware is tight. Riser Beam * Riser Beam is securely bolted to stabilizer and hardware is tight. Stabilizer * Check all Stabilizer welds, connections, and guidance wheels.
Flex-Row Locking Mechanism * Locking Mechanism rotates freely and provides proper throw on Flex-Row pins. Slam Latch * Slam Latch activates when the pin enters, providing a locked position. Roller Brackets * Flex-Row Roller Brackets are present and wheels are engaged into the appropriate stabilizer / guide. Roller Bracket Catch * Roller Bracket Catch provides a friction connection and maintains module in closed position during operation.
7.0 Inspection Requirements
MAXAM Owner's and Maintenance Manual (Rev. 4 / 2015) © Copyright 2015 Hussey Seating Company
Prior to operating your new MAXAM Telescopic Gym Seating unit, please read and understand the operating and maintenance instructions in this Owner's Manual.
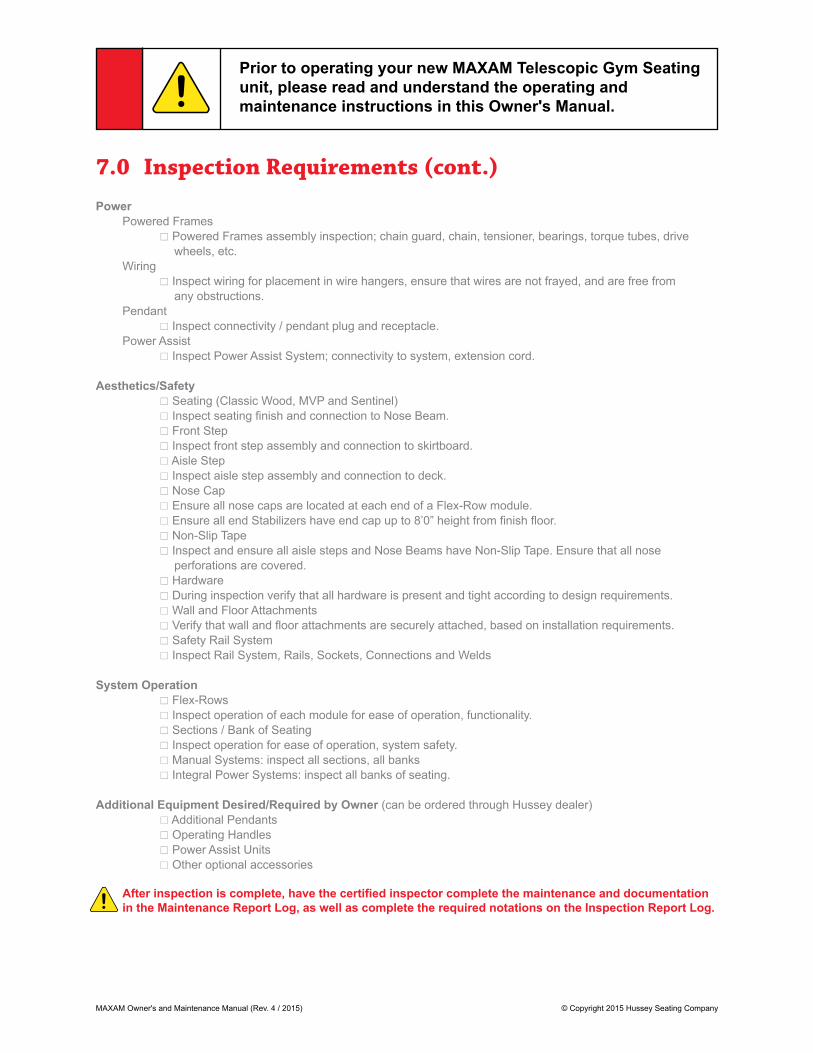
Power Powered Frames * Powered Frames assembly inspection; chain guard, chain, tensioner, bearings, torque tubes, drive wheels, etc. Wiring * Inspect wiring for placement in wire hangers, ensure that wires are not frayed, and are free from any obstructions. Pendant * Inspect connectivity / pendant plug and receptacle. Power Assist * Inspect Power Assist System; connectivity to system, extension cord.
Aesthetics/Safety * Seating (Classic Wood, MVP and Sentinel) * Inspect seating finish and connection to Nose Beam. * Front Step * Inspect front step assembly and connection to skirtboard. * Aisle Step * Inspect aisle step assembly and connection to deck. * Nose Cap * Ensure all nose caps are located at each end of a Flex-Row module. * Ensure all end Stabilizers have end cap up to 8’0” height from finish floor. * Non-Slip Tape * Inspect and ensure all aisle steps and Nose Beams have Non-Slip Tape. Ensure that all nose perforations are covered. * Hardware * During inspection verify that all hardware is present and tight according to design requirements. * Wall and Floor Attachments * Verify that wall and floor attachments are securely attached, based on installation requirements. * Safety Rail System * Inspect Rail System, Rails, Sockets, Connections and Welds
System Operation * Flex-Rows * Inspect operation of each module for ease of operation, functionality. * Sections / Bank of Seating * Inspect operation for ease of operation, system safety. * Manual Systems: inspect all sections, all banks * Integral Power Systems: inspect all banks of seating.
Additional Equipment Desired/Required by Owner (can be ordered through Hussey dealer) * Additional Pendants * Operating Handles * Power Assist Units * Other optional accessories
After inspection is complete, have the certified inspector complete the maintenance and documentation in the Maintenance Report Log, as well as complete the required notations on the Inspection Report Log.
7.0 Inspection Requirements (cont.)
MAXAM Owner's and Maintenance Manual (Rev. 4 / 2015) © Copyright 2015 Hussey Seating Company
Prior to operating your new MAXAM Telescopic Gym Seating unit, please read and understand the operating and maintenance instructions in this Owner's Manual.
DAT
EIN
SP
EC
TED
BY
HU
SS
EY
SE
ATIN
GC
ER
TIFI
CAT
ION
NO
.C
OM
ME
NT
DAT
EM
AIN
TEN
AN
CE
P
ER
FOR
ME
D B
Y:
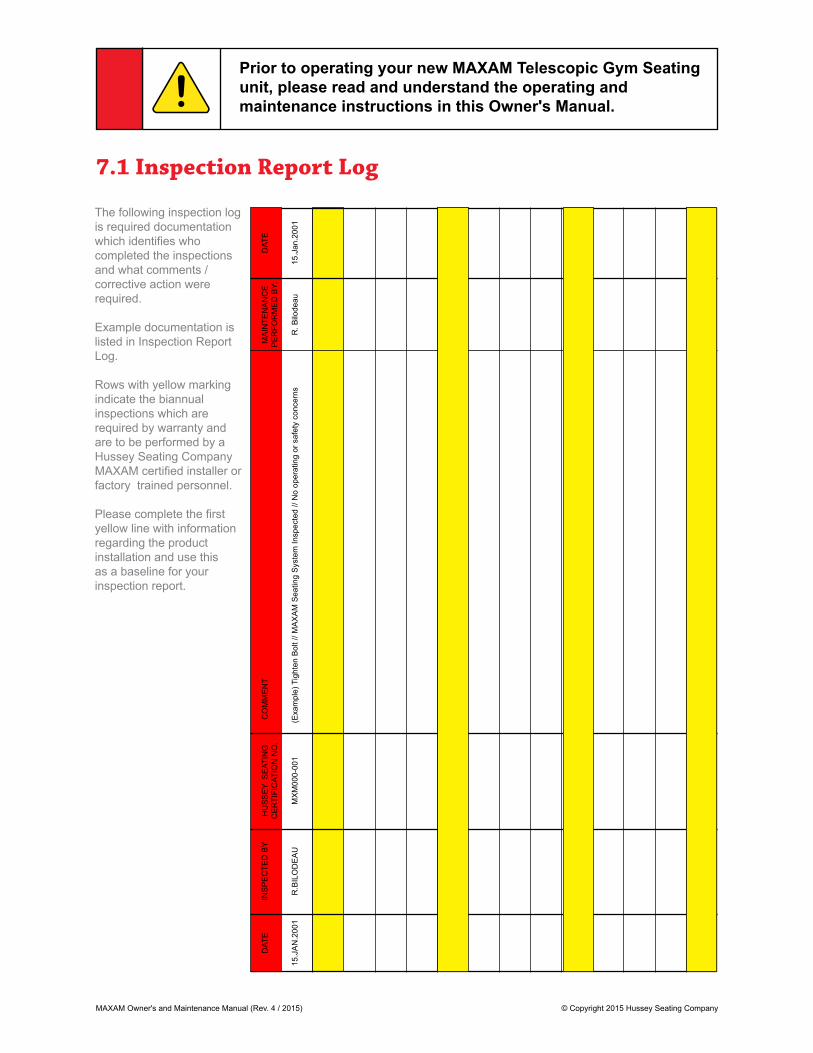
The following inspection log is required documentation which identifies who completed the inspections and what comments / corrective action were required.
Example documentation is listed in Inspection Report Log.
Rows with yellow marking indicate the biannual inspections which are required by warranty and are to be performed by a Hussey Seating Company MAXAM certified installer or factory trained personnel.
Please complete the first yellow line with information regarding the product installation and use this as a baseline for your inspection report.
15.J
AN
.200
1R
.BIL
OD
EA
UM
XM
000-
001
(Exa
mpl
e) T
ight
en B
olt /
/ MA
XA
M S
eatin
g S
yste
m In
spec
ted
// N
o op
erat
ing
or s
afet
y co
ncer
ns15
.Jan
.200
1R
. Bilo
deau
7.1 Inspection Report Log

MAXAM Owner's and Maintenance Manual (Rev. 4 / 2015) © Copyright 2015 Hussey Seating Company
Prior to operating your new MAXAM Telescopic Gym Seating unit, please read and understand the operating and maintenance instructions in this Owner's Manual.
This section of the manual provides care and safety instructions to properly maintain the operation of the MAXAM system, as well as spectator / personnel safety.
The MAXAM Telescopic Gym Seating System is designed to create flexible interior seating solutions for a facility. The seating system is designed to provide seats, aisles, and walking surfaces for easy and safe spectator access when the system or Flex-Row modules are in the open and locked position.
Recommended Care: The following notes are important to the operation, safety, and aesthetic appearance of the MAXAM system.
To prevent personal injury or damage to the understructure:
Do not allow people to climb, sit, or stand on tiers other than the Flex-Row modules of the MAXAM system while closed.
Do not allow unauthorized personnel to operate the seating system (excluding Flex-Row).
Do not allow persons to stand, sit, or ride on the MAXAM system during the opening or closing operation.
Do not allow unauthorized personnel access to underside of the seating system.
Before operating the seating system, check under the MAXAM system for people or obstructions. Remove obstructions or people prior to system operation.
NEVER LEAVE PENDANT CONTROL UNATTENDED!
Do not leave any section or bank open without Flex-Row modules being open at the aisle locations.
Do not use any section or bank of seating without the Safety Rail System.
Verify that front aisle steps or portable front steps are securely attached prior to use. Please avoid water or excess moisture coming in contact with the MAXAM telescopic gym seating system. Spectators wearing wet or soaked clothing should not be allowed onto the system.
8.0 Recommended Care and Safety Instructions

MAXAM Owner's and Maintenance Manual (Rev. 4 / 2015) © Copyright 2015 Hussey Seating Company
Prior to operating your new MAXAM Telescopic Gym Seating unit, please read and understand the operating and maintenance instructions in this Owner's Manual.
This section of the manual provides care and cleaning instructions to properly maintain the operation and aesthetic appearance of the MAXAM system.
Facility: Prior to opening or closing the telescopic gym seating system, all loose debris and dust should be removed from the facility floor to ensure proper operating conditions. Keep the entire area under the bleacher clean and free from debris. Do not store any materials underneath the bleacher. Dirt, debris, or obstructions will affect bleacher performance.
Decking: Cleaning plywood or polydeck decking should occur after each event or at a minimum every six months during the scheduled preventive maintenance.
After each event, use a broom to move loose dirt and debris to the end of each row and remove from the telescopic seating system. If spills of food or drink have occurred, they should be cleaned using a damp mop.
Do not allow water or drink spills to stand on the product for an extended period of time as this will result in surface deterioration.
Wood Seats: Seat and Wood Backrest: Cleaning seats, risers, and wood backrests should occur every six months at a minimum or as required based on the frequency of use.
Plastic Seats: MVP Seat and Contoured Backrest: Cleaning seats and contoured backrests should occur every six months at a minimum or as required based on the frequency of use.
A cleaner with citric base (orange, lemon) works best for all high-density polyethylene (HDPE) plastic components.
Chairs: Cleaning plastic chair components and fabric should occur every six months at a minimum or as required based on the frequency of use.
Rails: Cleaning of rail system should occur every six months at a minimum or as required based on the frequency of use.
Recommended cleaning solution for all surface materials listed above is a mild soap and warm water mixture used with a sponge or cloth. For stubborn stains, use common household cleaning supplies.
DO NOT use harsh chemicals or products containing bleach.
Failure to keep the telescopic gym seating system and the floor beneath clean may lead to excessive wear and operational problems, shortening product life.
9.0 Recommended Care and Cleaning Instructions
MAXAM Owner's and Maintenance Manual (Rev. 4 / 2015) © Copyright 2015 Hussey Seating Company
Prior to operating your new MAXAM Telescopic Gym Seating unit, please read and understand the operating and maintenance instructions in this Owner's Manual.
This section will highlight basic troubleshooting for opening / closing a MAXAM Telescopic Gym Seating System.
System will not open: Inspect floor to ensure it is clear of any obstructions. Manual Systems: ensure that equal forces are being applied at both ends during opening operation. If powered, reference “Power will not operate” (below).
If the system makes excessive noise during the opening operation or still does not open after completing basic troubleshooting, contact your Hussey Seating dealer to have a MAXAM certified installer service the product prior to continued use.
System will not close: Inspect floor to ensure it is clear of any obstructions. Manual Systems: ensure that the brake is disengaged and both ends are being closed with equal speed and force. Inspect Posi-Lock LX System and verify that they are unlocking automatically during closing operation. Inspect the manual second row unlock and verify that they are disengaged prior to closing. If powered, reference “Power will not operate” (below).
If the system makes excessive noise during the closing operation or still does not close after completing basic troubleshooting, contact your Hussey Seating dealer to have a MAXAM certified installer service the product prior to continued use.
Power will not operate: Verify pendant control is securely connected to the system. Check circuit breaker on pendant controller, reset if required. Check and reset circuit breakers on motors behind the hinged skirtboard.
If the system makes excessive noise during the opening or closing operation, or still does not open or close after completing basic troubleshooting, contact your Hussey Seating dealer to have a MAXAM certified installer service the product prior to continued use.
10.0 Basic Troubleshooting and Part Identification
MAXAM Owner's and Maintenance Manual (Rev. 4 / 2015) © Copyright 2015 Hussey Seating Company
Prior to operating your new MAXAM Telescopic Gym Seating unit, please read and understand the operating and maintenance instructions in this Owner's Manual.
11.0 MAXAM IMPACT Customer Feedback ProgramYour satisfaction and goodwill are important to your dealer and to Hussey Seating Company. Normally, any concerns with the sales transaction or the operation of your MAXAM will be resolved by your dealer’s sales or customer serviceteam. Sometimes, however, despite the best intentions of all concerned, misunderstandings can occur. If your concern has not been resolved to your satisfaction, the following steps should be taken:
Step One: Discuss your concern with a member of the dealership management team. Normally concerns can be quickly resolved at that level. If the matter has already been reviewed with this sales and customer service team, contact the general manager or owner of the dealership.
Step Two: If, after contacting a member of the dealership management, it appears your concern cannot be resolved by the dealership without further help, contact customer service at Hussey Seating Company.
MAXAM IMPACTTo provide direct customer feedback, contact Hussey Customer Service.
HUSSEY SEATING COMPANY38 Dyer Street ExtensionNorth Berwick, ME 03906 USA
Tel: 1.800.341.0401 (USA)Tel: +1 207.676.2271Fax: +1 [email protected]
We encourage you to call Hussey Seating Company in order to give your inquiry prompt attention. Please have the following information available to give to the Customer Service team member.
Order Number Project Name Product Type Model Rise Row Spacing Installation Date Dealership Name
When contacting Hussey Seating Company, please remember that your concern will likely be resolved at the dealer level; for that reason we suggest you follow Step One first.
A MAXAM IMPACT survey may be sent directly to you. We ask that you complete the survey and return it so we may continue to improve our products and services to exceed your seating solution expectations.

MAXAM Owner's and Maintenance Manual (Rev. 4 / 2015) © Copyright 2015 Hussey Seating Company
Prior to operating your new MAXAM Telescopic Gym Seating unit, please read and understand the operating and maintenance instructions in this Owner's Manual.
Hussey Seating Company™
The Hussey Seating Company story dates back to 1835 with William Hussey’s tremen-dously successful plow design, and thus, the Hussey Plow Company was born. As times changed over the next sixty years, the family set about reinventing the business, evolving into the company that is now seating the world. Today, under the sixth generation of family leadership, Hussey Seating Company is proud to be known as the leading manufacturer of seating solutions throughout the world – in stadiums, arenas, schools, universities, col-leges, places of worship and anywhere people gather.
Hussey. Your partner for seating solutions.
38 Dyer Street ExtensionNorth Berwick, Maine 03906 USAToll Free (USA) 1.800.341.0401Tel: +1.207.676.2271 n Fax: [email protected] n www.husseyseating.com
©2015 Hussey Seating Company. All rights reserved. Hussey Seating™, MAXAM®, and Flex-Row™ are registered trademarks of Hussey Seating Company.


