70
Oracle® Directory Server Enterprise Edition Installation Guide 11 g Release 1 (11.1.1.5.0) Part No: 821–1218 May 2011
Oracle® Directory Server Enterprise EditionInstallation Guide11 g Release 1 (11.1.1.5.0)
Part No: 821–1218May 2011
Copyright © 2010, 2011, Oracle and/or its affiliates. All rights reserved.
License Restrictions Warranty/Consequential Damages Disclaimer
This software and related documentation are provided under a license agreement containing restrictions on use and disclosure and are protected by intellectualproperty laws. Except as expressly permitted in your license agreement or allowed by law, you may not use, copy, reproduce, translate, broadcast, modify, license,transmit, distribute, exhibit, perform, publish or display any part, in any form, or by any means. Reverse engineering, disassembly, or decompilation of this software,unless required by law for interoperability, is prohibited.
Warranty Disclaimer
The information contained herein is subject to change without notice and is not warranted to be error-free. If you find any errors, please report them to us in writing.
Restricted Rights Notice
If this is software or related documentation that is delivered to the U.S. Government or anyone licensing it on behalf of the U.S. Government, the following notice isapplicable:
U.S. GOVERNMENT RIGHTS
Programs, software, databases, and related documentation and technical data delivered to U.S. Government customers are "commercial computer software" or"commercial technical data" pursuant to the applicable Federal Acquisition Regulation and agency-specific supplemental regulations. As such, the use, duplication,disclosure, modification, and adaptation shall be subject to the restrictions and license terms set forth in the applicable Government contract, and, to the extentapplicable by the terms of the Government contract, the additional rights set forth in FAR 52.227-19, Commercial Computer Software License (December 2007).Oracle America, Inc., 500 Oracle Parkway, Redwood City, CA 94065.
Hazardous Applications Notice
This software or hardware is developed for general use in a variety of information management applications. It is not developed or intended for use in any inherentlydangerous applications, including applications that may create a risk of personal injury. If you use this software or hardware in dangerous applications, then you shallbe responsible to take all appropriate fail-safe, backup, redundancy, and other measures to ensure its safe use. Oracle Corporation and its affiliates disclaim anyliability for any damages caused by use of this software or hardware in dangerous applications.
Trademark Notice
Oracle and Java are registered trademarks of Oracle and/or its affiliates. Other names may be trademarks of their respective owners.
Intel and Intel Xeon are trademarks or registered trademarks of Intel Corporation. All SPARC trademarks are used under license and are trademarks or registeredtrademarks of SPARC International, Inc. AMD, Opteron, the AMD logo, and the AMD Opteron logo are trademarks or registered trademarks of Advanced MicroDevices. UNIX is a registered trademark of The Open Group in the United States and other countries.
Third Party Content, Products, and Services Disclaimer
This software or hardware and documentation may provide access to or information on content, products, and services from third parties. Oracle Corporation andits affiliates are not responsible for and expressly disclaim all warranties of any kind with respect to third-party content, products, and services. Oracle Corporationand its affiliates will not be responsible for any loss, costs, or damages incurred due to your access to or use of third-party content, products, or services.
Redistribution and use in source and binary forms, with or without modification, are permitted provided that the following conditions are met: 1. Redistributions ofsource code must retain the above copyright notice, this list of conditions and the following disclaimer. 2. Redistributions in binary form must reproduce the abovecopyright notice, this list of conditions and the following disclaimer in the documentation and/or other materials provided with the distribution. 3. The name of theauthor may not be used to endorse or promote products derived from this software without specific prior written permission. THIS SOFTWARE IS PROVIDED BYTHE AUTHOR ‘‘AS IS'' AND ANY EXPRESS OR IMPLIED WARRANTIES, INCLUDING, BUT NOT LIMITED TO, THE IMPLIED WARRANTIES OFMERCHANTABILITY AND FITNESS FOR A PARTICULAR PURPOSE ARE DISCLAIMED. IN NO EVENT SHALL THE AUTHOR BE LIABLE FOR ANYDIRECT, INDIRECT, INCIDENTAL, SPECIAL, EXEMPLARY, OR CONSEQUENTIAL DAMAGES (INCLUDING, BUT NOT LIMITED TO, PROCUREMENTOF SUBSTITUTE GOODS OR SERVICES; LOSS OF USE, DATA, OR PROFITS; OR BUSINESS INTERRUPTION) HOWEVER CAUSED AND ON ANYTHEORY OF LIABILITY, WHETHER IN CONTRACT, STRICT LIABILITY, OR TORT (INCLUDING NEGLIGENCE OR OTHERWISE) ARISING IN ANYWAY OUT OF THE USE OF THIS SOFTWARE, EVEN IF ADVISED OF THE POSSIBILITY OF SUCH DAMAGE.
Copyright (c) 1990, 1993, 1994, 1995 The Regents of the University of California. All rights reserved. Redistribution and use in source and binary forms, with orwithout modification, are permitted provided that the following conditions are met: 1. Redistributions of source code must retain the above copyright notice, this listof conditions and the following disclaimer. 2. Redistributions in binary form must reproduce the above copyright notice, this list of conditions and the followingdisclaimer in the documentation and/or other materials provided with the distribution. 3. Neither the name of the University nor the names of its contributors maybe used to endorse or promote products derived from this software without specific prior written permission. THIS SOFTWARE IS PROVIDED BY THE REGENTSAND CONTRIBUTORS ‘‘AS IS'' AND ANY EXPRESS OR IMPLIED WARRANTIES, INCLUDING, BUT NOT LIMITED TO, THE IMPLIED WARRANTIES OFMERCHANTABILITY AND FITNESS FOR A PARTICULAR PURPOSE ARE DISCLAIMED. IN NO EVENT SHALL THE REGENTS OR CONTRIBUTORS BELIABLE FOR ANY DIRECT, INDIRECT, INCIDENTAL, SPECIAL, EXEMPLARY, OR CONSEQUENTIAL DAMAGES (INCLUDING, BUT NOT LIMITED TO,PROCUREMENT OF SUBSTITUTE GOODS OR SERVICES; LOSS OF USE, DATA, OR PROFITS; OR BUSINESS INTERRUPTION) HOWEVER CAUSED ANDON ANY THEORY OF LIABILITY, WHETHER IN CONTRACT, STRICT LIABILITY, OR TORT (INCLUDING NEGLIGENCE OR OTHERWISE) ARISING INANY WAY OUT OF THE USE OF THIS SOFTWARE, EVEN IF ADVISED OF THE POSSIBILITY OF SUCH DAMAGE. Copyright (c) 1995, 1996 The Presidentand Fellows of Harvard University. All rights reserved. Redistribution and use in source and binary forms, with or without modification, are permitted provided thatthe following conditions are met: 1. Redistributions of source code must retain the above copyright notice, this list of conditions and the following disclaimer. 2.Redistributions in binary form must reproduce the above copyright notice, this list of conditions and the following disclaimer in the documentation and/or othermaterials provided with the distribution. 3. Neither the name of the University nor the names of its contributors may be used to endorse or promote products derivedfrom this software without specific prior written permission. THIS SOFTWARE IS PROVIDED BY HARVARD AND ITS CONTRIBUTORS ‘‘AS IS'' AND ANYEXPRESS OR IMPLIED WARRANTIES, INCLUDING, BUT NOT LIMITED TO, THE IMPLIED WARRANTIES OF MERCHANTABILITY AND FITNESS FORA PARTICULAR PURPOSE ARE DISCLAIMED. IN NO EVENT SHALL HARVARD OR ITS CONTRIBUTORS BE LIABLE FOR ANY DIRECT, INDIRECT,INCIDENTAL, SPECIAL, EXEMPLARY, OR CONSEQUENTIAL DAMAGES (INCLUDING, BUT NOT LIMITED TO, PROCUREMENT OF SUBSTITUTEGOODS OR SERVICES; LOSS OF USE, DATA, OR PROFITS; OR BUSINESS INTERRUPTION) HOWEVER CAUSED AND ON ANY THEORY OF LIABILITY,WHETHER IN CONTRACT, STRICT LIABILITY, OR TORT (INCLUDING NEGLIGENCE OR OTHERWISE) ARISING IN ANY WAY OUT OF THE USE OFTHIS SOFTWARE, EVEN IF ADVISED OF THE POSSIBILITY OF SUCH DAMAGE.
110713@25097
Contents
Preface .....................................................................................................................................................7
1 Before You Install .................................................................................................................................17Quick Scan of Fully Installed and Running Directory Server Enterprise Edition ....................... 17
Software Files ................................................................................................................................ 17Data Files ....................................................................................................................................... 18Background Processes ................................................................................................................. 18
Directory Server Enterprise Edition Software Distributions ......................................................... 20Zip Distribution ........................................................................................................................... 21Native Distribution ...................................................................................................................... 21Comparison of Native Packages and Zip Distribution ............................................................ 21
File and Process Ownership on Unix Systems ................................................................................. 22Installation in Solaris Zones ............................................................................................................... 23
Part I Installing and Uninstalling Directory Server Enterprise Edition .................................................25
2 Installing Directory Server Enterprise Edition ............................................................................... 27Installing Directory Server Enterprise Edition Using Zip Distribution ....................................... 27
▼ To Install Directory Server Enterprise Edition Using Zip Distribution ................................ 28Pre-Configuring the Directory Server Enterprise Edition Installation ......................................... 29
▼ To Pre-Configure Directory Service Control Center .............................................................. 29▼ To Pre-Configure the DSCC Agent ........................................................................................... 30
Useful Information for Your Records ....................................................................................... 30Checking Your Directory Server Enterprise Edition Installation ................................................. 31
Creating Server Instances From Command Line ..................................................................... 31Creating Server Instances Using Directory Service Control Center ...................................... 33
Environment Variables ....................................................................................................................... 36
3
3 Uninstalling Directory Server Enterprise Edition .......................................................................... 39Removing Server Instances ................................................................................................................ 39
▼ To Delete a Directory Proxy Server Instance With DSCC ...................................................... 39▼ To Delete a Directory Proxy Server Instance From the Command Line .............................. 40▼ To Delete a Directory Server Instance With DSCC ................................................................. 40▼ To Delete a Directory Server Instance From the Command Line .......................................... 41
Removing the Software ....................................................................................................................... 41▼ To Unconfigure Directory Service Control Center ................................................................. 42▼ To Remove Directory Server Enterprise Edition Installed From the Zip Distribution ....... 42
4 Installing and Uninstalling Directory Server Enterprise Edition Using Native Packages ........43Preparing Your System for Directory Server Enterprise Edition Installation .............................. 43
▼ To Install Shared Components ................................................................................................... 43List of Packages Required Before Installing Directory Server Enterprise Edition ............... 45Location of Packages and Patches Required to Install Directory Server EnterpriseEdition ........................................................................................................................................... 49
Installing Directory Server Enterprise Edition ................................................................................ 51▼ To Install Directory Server Enterprise Edition ......................................................................... 51
Pre-Configuring the Directory Server Enterprise Edition Installation ................................. 52Uninstalling Directory Server Enterprise Edition ........................................................................... 52
▼ To Remove Directory Server Enterprise Edition ..................................................................... 52
Part II Appendixes ...........................................................................................................................................55
A Deploying the DSCC WAR File ............................................................................................................ 57Deploying the DSCC WAR File With a Supported Application Server ........................................ 57
▼ To Deploy the DSCC WAR File With GlassFish Application Server .................................... 58▼ To Deploy the DSCC WAR File With Tomcat ......................................................................... 59▼ To Deploy the DSCC WAR File With Oracle WebLogic Server ............................................ 61▼ To Deploy the DSCC WAR File With Oracle iPlanet Web Server ......................................... 62
B Working With Sun Cryptographic Framework on Solaris 10 Systems .........................................65Using Directory Server With Cryptographic Hardware on a Solaris 10 System .......................... 65
▼ To Use Directory Server With Cryptographic Hardware on a Solaris 10 System ................ 65
Contents
Oracle Directory Server Enterprise Edition Installation Guide • May 20114

Using Directory Proxy Server With Cryptographic Hardware on a Solaris 10 System .............. 67▼ To Use Directory Proxy Server With Cryptographic Hardware on a Solaris 10 System ..... 67
Index ......................................................................................................................................................69
Contents
5

6
Preface
The Installation Guide provides detailed instructions for installing and uninstalling theDirectory Server Enterprise Edition software. This guide also covers how to pre-configure thesoftware to make the installation operational and how to test if the installation is fullyoperational.
Who Should Use This BookThis Installation Guide is for administrators deploying Directory Server Enterprise Edition,Directory Service Control Center, and Identity Synchronization for Windows software. Thisdocument also covers configuration of Identity Synchronization for Windows.
If you are installing Directory Server Enterprise Edition software for evaluation purposes only,put this guide aside for now, and see Oracle Directory Server Enterprise Edition EvaluationGuide.
Before You Read This BookReview pertinent information in the Oracle Directory Server Enterprise Edition Release Notes.
If you are deploying Directory Server Enterprise Edition software in production, also reviewpertinent information in the Oracle Directory Server Enterprise Edition Deployment PlanningGuide.
Readers installing Identity Synchronization for Windows should be familiar with the followingtechnologies:
■ Directory Server■ Microsoft Active Directory or Windows NT authentication■ Lightweight Directory Access Protocol (LDAP)■ Java technology■ Extensible Markup Language (XML)■ Public-key cryptography and Secure Sockets Layer (SSL) protocol■ Intranet, extranet, and Internet security■ Role of digital certificates in an enterprise
7
How This Book Is OrganizedChapter 1, “Before You Install,” covers the information that you must know before installing theproduct.
Part I, “Installing and Uninstalling Directory Server Enterprise Edition,” covers the installationof Directory Server Enterprise Edition on supported systems.
Part II, “Appendixes,” covers all the additional information that you need to know to useDirectory Server Enterprise Edition.
Oracle Directory Server Enterprise Edition Documentation SetThis documentation set explains how to use Oracle Directory Server Enterprise Edition toevaluate, design, deploy, and administer directory services. In addition, it shows how to developclient applications for Directory Server Enterprise Edition.
The following table lists the documents that make up the Directory Server Enterprise Editiondocumentation set.
TABLE P–1 Directory Server Enterprise Edition Documentation
Document Title Contents
Oracle Directory Server Enterprise Edition ReleaseNotes
Contains the latest information about Directory Server Enterprise Edition,including known problems.
Oracle Directory Server Enterprise EditionEvaluation Guide
Introduces the key features of this release. Demonstrates how these featureswork and what they offer in the context of a deployment that you canimplement on a single system.
Oracle Directory Server Enterprise EditionDeployment Planning Guide
Explains how to plan and design highly available, highly scalable directoryservices based on Directory Server Enterprise Edition. Presents the basicconcepts and principles of deployment planning and design. Discusses thesolution life cycle, and provides high-level examples and strategies to use whenplanning solutions based on Directory Server Enterprise Edition.
Oracle Directory Server Enterprise EditionInstallation Guide
Explains how to install the Directory Server Enterprise Edition software. Showshow to configure the installed software and verify the configured software.
Oracle Directory Server Enterprise Edition Upgradeand Migration Guide
Provides instructions for upgrading versions 11.1.1.3, 7.x, and 6 installations,and instructions for migrating version 5.2 installations.
Oracle Directory Server Enterprise EditionAdministration Guide
Provides command-line instructions for administering Directory ServerEnterprise Edition.
For hints and instructions about using the Directory Service Control Center,DSCC, to administer Directory Server Enterprise Edition, see the online helpprovided in DSCC.
Preface
Oracle Directory Server Enterprise Edition Installation Guide • May 20118
TABLE P–1 Directory Server Enterprise Edition Documentation (Continued)Document Title Contents
Oracle Directory Server Enterprise Edition Reference Introduces technical and conceptual foundations of Directory ServerEnterprise Edition. Describes its components, architecture, processes, andfeatures.
Oracle Directory Server Enterprise Edition Man PageReference
Describes the command-line tools, schema objects, and other public interfacesthat are available through Directory Server Enterprise Edition. Individualsections of this document can be installed as online manual pages.
Oracle Directory Server Enterprise EditionDeveloper’s Guide
Shows how to develop directory client applications with the tools and APIs thatare provided as part of Directory Server Enterprise Edition.
Oracle Directory Server Enterprise EditionTroubleshooting Guide
Provides information for defining the scope of the problem, gathering data,and troubleshooting the problem areas by using various tools.
Oracle Identity Synchronization for Windows 6.0Deployment Planning Guide
Provides general guidelines and best practices for planning and deployingIdentity Synchronization for Windows.
Oracle Identity Synchronization for Windows 6.0Installation and Configuration Guide
Describes how to install and configure Identity Synchronization for Windows.
Additional Installation Instructions for OracleIdentity Synchronization for Windows 6.0
Provides installation instructions for Identity Synchronization for Windows6.0 SP1.
For an introduction to Directory Server Enterprise Edition, review the following documents inthe order in which they are listed.
Preface
9

FIGURE P–1 ODSEE Documentation Map
Which version of DS
are you using?
Familiar with LDAP?
Deployment Planning Guide
Architecture Reference
Evaluation Guide
Release Notes
Installation Guide
Evaluation Guide
Deployment Planning Guide
Release Notes
Installation Guide
Release Notes
Installation Guide
Release Notes
Installation Guide
Administration Guide
Man Page Reference
Troubleshooting Guide
Developer’s Guide
Upgrade & Migration Guide
(migration)
Upgrade & Migration Guide
(upgrade)
Upgrade & Migration Guide
(patch)
none
7.0 or 11.xnoyes
6.x5.2
Preface
Oracle Directory Server Enterprise Edition Installation Guide • May 201110
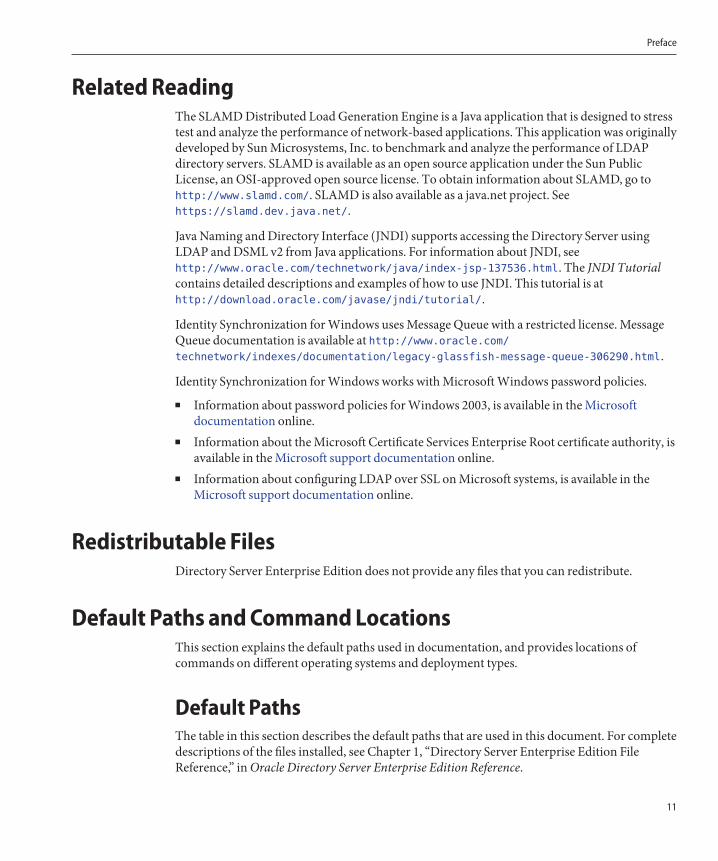
Related ReadingThe SLAMD Distributed Load Generation Engine is a Java application that is designed to stresstest and analyze the performance of network-based applications. This application was originallydeveloped by Sun Microsystems, Inc. to benchmark and analyze the performance of LDAPdirectory servers. SLAMD is available as an open source application under the Sun PublicLicense, an OSI-approved open source license. To obtain information about SLAMD, go tohttp://www.slamd.com/. SLAMD is also available as a java.net project. Seehttps://slamd.dev.java.net/.
Java Naming and Directory Interface (JNDI) supports accessing the Directory Server usingLDAP and DSML v2 from Java applications. For information about JNDI, seehttp://www.oracle.com/technetwork/java/index-jsp-137536.html. The JNDI Tutorialcontains detailed descriptions and examples of how to use JNDI. This tutorial is athttp://download.oracle.com/javase/jndi/tutorial/.
Identity Synchronization for Windows uses Message Queue with a restricted license. MessageQueue documentation is available at http://www.oracle.com/technetwork/indexes/documentation/legacy-glassfish-message-queue-306290.html.
Identity Synchronization for Windows works with Microsoft Windows password policies.
■ Information about password policies for Windows 2003, is available in the Microsoftdocumentation online.
■ Information about the Microsoft Certificate Services Enterprise Root certificate authority, isavailable in the Microsoft support documentation online.
■ Information about configuring LDAP over SSL on Microsoft systems, is available in theMicrosoft support documentation online.
Redistributable FilesDirectory Server Enterprise Edition does not provide any files that you can redistribute.
Default Paths and Command LocationsThis section explains the default paths used in documentation, and provides locations ofcommands on different operating systems and deployment types.
Default PathsThe table in this section describes the default paths that are used in this document. For completedescriptions of the files installed, see Chapter 1, “Directory Server Enterprise Edition FileReference,” in Oracle Directory Server Enterprise Edition Reference.
Preface
11
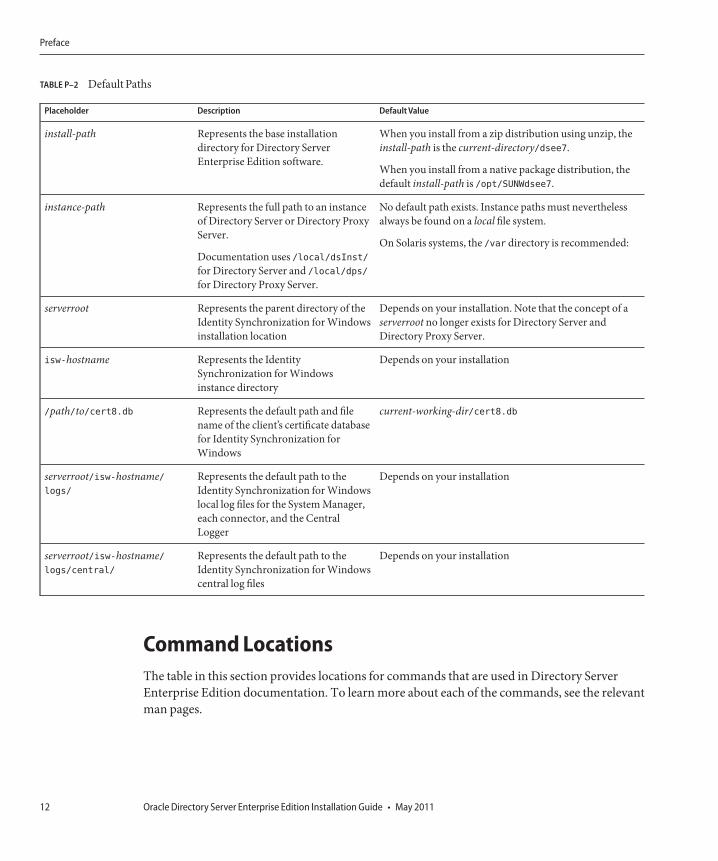
TABLE P–2 Default Paths
Placeholder Description Default Value
install-path Represents the base installationdirectory for Directory ServerEnterprise Edition software.
When you install from a zip distribution using unzip, theinstall-path is the current-directory/dsee7.
When you install from a native package distribution, thedefault install-path is /opt/SUNWdsee7.
instance-path Represents the full path to an instanceof Directory Server or Directory ProxyServer.
Documentation uses /local/dsInst/for Directory Server and /local/dps/
for Directory Proxy Server.
No default path exists. Instance paths must neverthelessalways be found on a local file system.
On Solaris systems, the /var directory is recommended:
serverroot Represents the parent directory of theIdentity Synchronization for Windowsinstallation location
Depends on your installation. Note that the concept of aserverroot no longer exists for Directory Server andDirectory Proxy Server.
isw-hostname Represents the IdentitySynchronization for Windowsinstance directory
Depends on your installation
/path/to/cert8.db Represents the default path and filename of the client’s certificate databasefor Identity Synchronization forWindows
current-working-dir/cert8.db
serverroot/isw-hostname/logs/
Represents the default path to theIdentity Synchronization for Windowslocal log files for the System Manager,each connector, and the CentralLogger
Depends on your installation
serverroot/isw-hostname/logs/central/
Represents the default path to theIdentity Synchronization for Windowscentral log files
Depends on your installation
Command LocationsThe table in this section provides locations for commands that are used in Directory ServerEnterprise Edition documentation. To learn more about each of the commands, see the relevantman pages.
Preface
Oracle Directory Server Enterprise Edition Installation Guide • May 201112
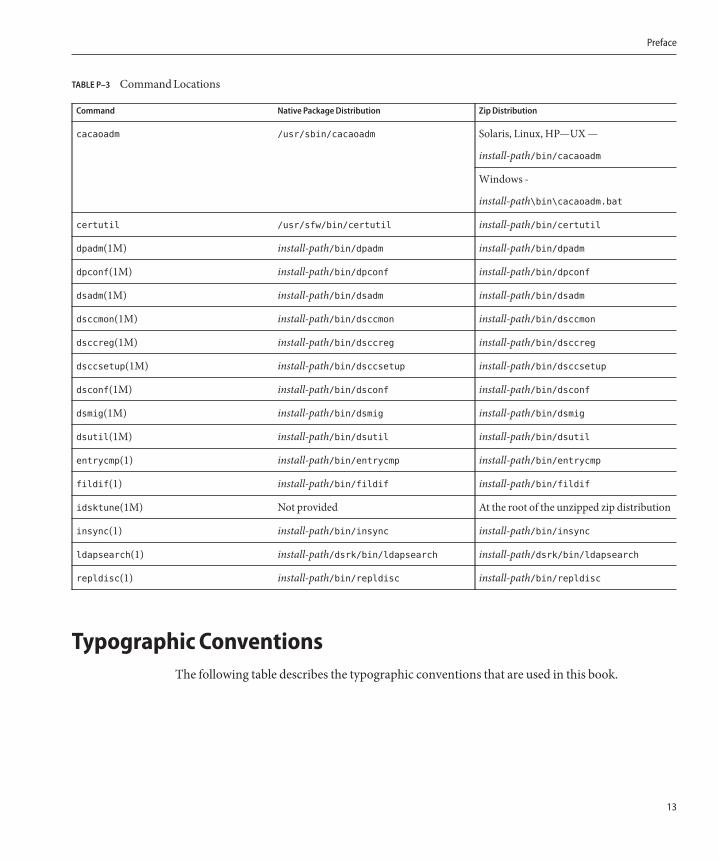
TABLE P–3 Command Locations
Command Native Package Distribution Zip Distribution
cacaoadm /usr/sbin/cacaoadm Solaris, Linux, HP—UX —
install-path/bin/cacaoadm
Windows -
install-path\bin\cacaoadm.bat
certutil /usr/sfw/bin/certutil install-path/bin/certutil
dpadm(1M) install-path/bin/dpadm install-path/bin/dpadm
dpconf(1M) install-path/bin/dpconf install-path/bin/dpconf
dsadm(1M) install-path/bin/dsadm install-path/bin/dsadm
dsccmon(1M) install-path/bin/dsccmon install-path/bin/dsccmon
dsccreg(1M) install-path/bin/dsccreg install-path/bin/dsccreg
dsccsetup(1M) install-path/bin/dsccsetup install-path/bin/dsccsetup
dsconf(1M) install-path/bin/dsconf install-path/bin/dsconf
dsmig(1M) install-path/bin/dsmig install-path/bin/dsmig
dsutil(1M) install-path/bin/dsutil install-path/bin/dsutil
entrycmp(1) install-path/bin/entrycmp install-path/bin/entrycmp
fildif(1) install-path/bin/fildif install-path/bin/fildif
idsktune(1M) Not provided At the root of the unzipped zip distribution
insync(1) install-path/bin/insync install-path/bin/insync
ldapsearch(1) install-path/dsrk/bin/ldapsearch install-path/dsrk/bin/ldapsearch
repldisc(1) install-path/bin/repldisc install-path/bin/repldisc
Typographic ConventionsThe following table describes the typographic conventions that are used in this book.
Preface
13
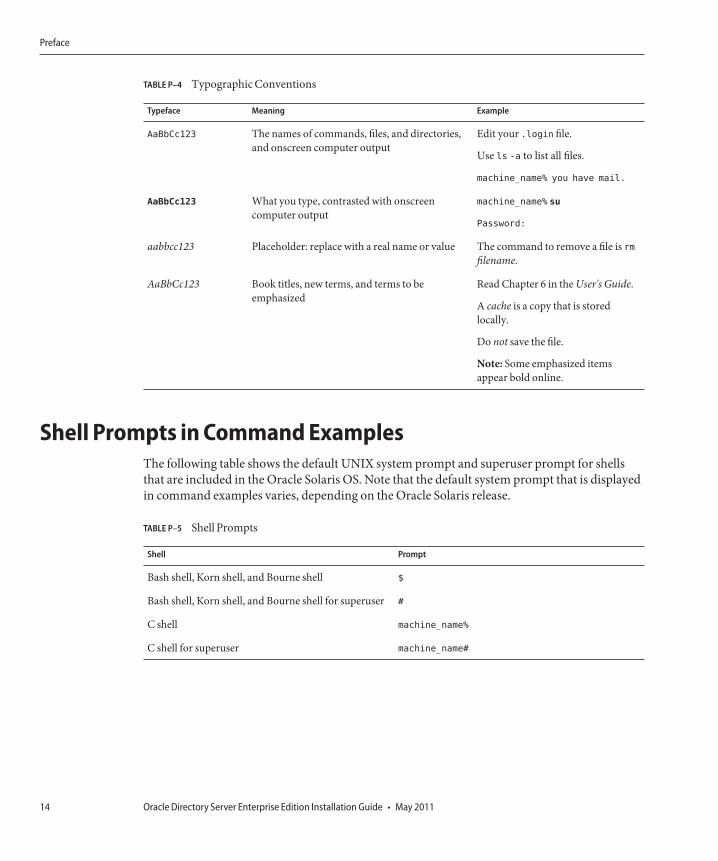
TABLE P–4 Typographic Conventions
Typeface Meaning Example
AaBbCc123 The names of commands, files, and directories,and onscreen computer output
Edit your .login file.
Use ls -a to list all files.
machine_name% you have mail.
AaBbCc123 What you type, contrasted with onscreencomputer output
machine_name% su
Password:
aabbcc123 Placeholder: replace with a real name or value The command to remove a file is rmfilename.
AaBbCc123 Book titles, new terms, and terms to beemphasized
Read Chapter 6 in the User's Guide.
A cache is a copy that is storedlocally.
Do not save the file.
Note: Some emphasized itemsappear bold online.
Shell Prompts in Command ExamplesThe following table shows the default UNIX system prompt and superuser prompt for shellsthat are included in the Oracle Solaris OS. Note that the default system prompt that is displayedin command examples varies, depending on the Oracle Solaris release.
TABLE P–5 Shell Prompts
Shell Prompt
Bash shell, Korn shell, and Bourne shell $
Bash shell, Korn shell, and Bourne shell for superuser #
C shell machine_name%
C shell for superuser machine_name#
Preface
Oracle Directory Server Enterprise Edition Installation Guide • May 201114
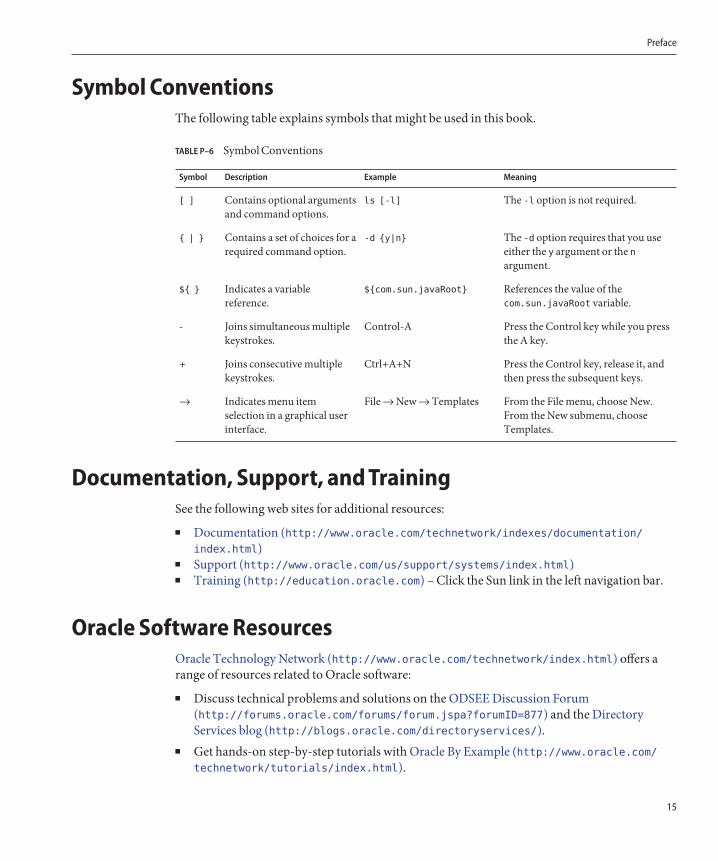
Symbol ConventionsThe following table explains symbols that might be used in this book.
TABLE P–6 Symbol Conventions
Symbol Description Example Meaning
[ ] Contains optional argumentsand command options.
ls [-l] The -l option is not required.
{ | } Contains a set of choices for arequired command option.
-d {y|n} The -d option requires that you useeither the y argument or the nargument.
${ } Indicates a variablereference.
${com.sun.javaRoot} References the value of thecom.sun.javaRoot variable.
- Joins simultaneous multiplekeystrokes.
Control-A Press the Control key while you pressthe A key.
+ Joins consecutive multiplekeystrokes.
Ctrl+A+N Press the Control key, release it, andthen press the subsequent keys.
→ Indicates menu itemselection in a graphical userinterface.
File → New → Templates From the File menu, choose New.From the New submenu, chooseTemplates.
Documentation, Support, and TrainingSee the following web sites for additional resources:
■ Documentation (http://www.oracle.com/technetwork/indexes/documentation/index.html)
■ Support (http://www.oracle.com/us/support/systems/index.html)■ Training (http://education.oracle.com) – Click the Sun link in the left navigation bar.
Oracle Software ResourcesOracle Technology Network (http://www.oracle.com/technetwork/index.html) offers arange of resources related to Oracle software:
■ Discuss technical problems and solutions on the ODSEE Discussion Forum(http://forums.oracle.com/forums/forum.jspa?forumID=877) and the DirectoryServices blog (http://blogs.oracle.com/directoryservices/).
■ Get hands-on step-by-step tutorials with Oracle By Example (http://www.oracle.com/technetwork/tutorials/index.html).
Preface
15
■ Download ODSEE 11g Example Files (http://www.oracle.com/technetwork/middleware/id-mgmt/learnmore/odsee11113-examples-350399.zip).
Preface
Oracle Directory Server Enterprise Edition Installation Guide • May 201116
Before You Install
Before installing Directory Server Enterprise Edition software in a production environment,obtain the plans for deployment that were created with the help of Oracle Directory ServerEnterprise Edition Deployment Planning Guide. With the plans in hand, read this section todetermine how to approach installation for your deployment.
This chapter includes the following sections.
■ “Quick Scan of Fully Installed and Running Directory Server Enterprise Edition” on page 17■ “Directory Server Enterprise Edition Software Distributions” on page 20■ “File and Process Ownership on Unix Systems” on page 22■ “Installation in Solaris Zones” on page 23
Quick Scan of Fully Installed and Running Directory ServerEnterprise Edition
After Directory Server Enterprise Edition is installed and running, the following elements arefound on your system:
■ Software Files■ Data Files■ Background Processes
Software FilesThe software files include executable files, resource files, and template files. These files arecopied on your system from the Directory Server Enterprise Edition distribution.
The software files are organized hierarchically below a single directory, installation-path, whichis chosen at the time of installation. The hierarchy below the installation path is called the
1C H A P T E R 1
17
installation layout. User commands are located in installation-path/bin andinstallation-path/dsrk/bin directories. For more information about information layout,see Chapter 1, “Directory Server Enterprise Edition File Reference,” in Oracle Directory ServerEnterprise Edition Reference.
Disk space occupied by installation-path is fixed and around 1GB.
Data FilesThere are two types of data files, that is, server instances and administration files.
Server Instances■ Contain user and configuration data for a single server.■ Multiple server instances can reside on the same host.■ Server instance location can be freely chosen. They can be separate from the
installation-path.■ Disk space occupied by a server instance is potentially unlimited.
For more information about server instances, see Chapter 2, “Directory Server Instances andSuffixes,” in Oracle Directory Server Enterprise Edition Administration Guide and Chapter 17,“Directory Proxy Server Instances,” in Oracle Directory Server Enterprise EditionAdministration Guide.
Administration Files■ Administration files are located in installation-path/var or /var/opt/SUNWdsee7
directory.■ Disk space occupied is limited, that is, a few hundred KB.
Background Processes■ Core Server Daemons (ns-slapd)
There is one daemon running per server instance. This daemon listens to the port that isconfigured in the server instance (389 by default) and processes the incoming LDAPrequests. This daemon reads and writers configuration and user data located in the serverinstance.
■ Common Agent Container (CACAO) Framework DaemonThis daemon allows Directory Service Control Center to start up server instances that existon remote hosts. The daemon listens on port 11162, by default, and hosts the DirectoryService Control Center Agent plug-in.
Quick Scan of Fully Installed and Running Directory Server Enterprise Edition
Oracle Directory Server Enterprise Edition Installation Guide • May 201118
Note – The CACAO service can only be managed by using the CACAO administrativecommand-line interface (cacaoadm). Managing the CACAO service by using the ServicesManager on Windows systems is not supported and can have undesirable results.
■ Application Server Daemon
The application server daemon listens to HTTP on port 8080, by default. The daemon hostsDirectory Service Control Center web application and present only on the host whereDirectory Service Control Center is deployed.
■ Directory Service Control Center Registry Daemon
This is a directory server instance for Directory Service Control Center's own use. Thedaemon listens to LDAP port 3998, by default. The daemon responds to requests fromDirectory Service Control Center and present only on the host where Directory ServiceControl Center is deployed.
Generally, all the elements listed above are rarely present on the same machine. A typicaldeployment would be laid out as follows:
■ One machine (the administration host) is dedicated to Directory Service Control Center.On this machine, only the Application Server daemon and the Directory Service ControlCenter registry daemon are running.
■ One or more machines are dedicated to server instances. Each machine hosts a single serverinstance. Only one core server daemon and the common agent container frameworkdaemons are running.
The following figure shows a typical sample deployment.
Quick Scan of Fully Installed and Running Directory Server Enterprise Edition
Chapter 1 • Before You Install 19
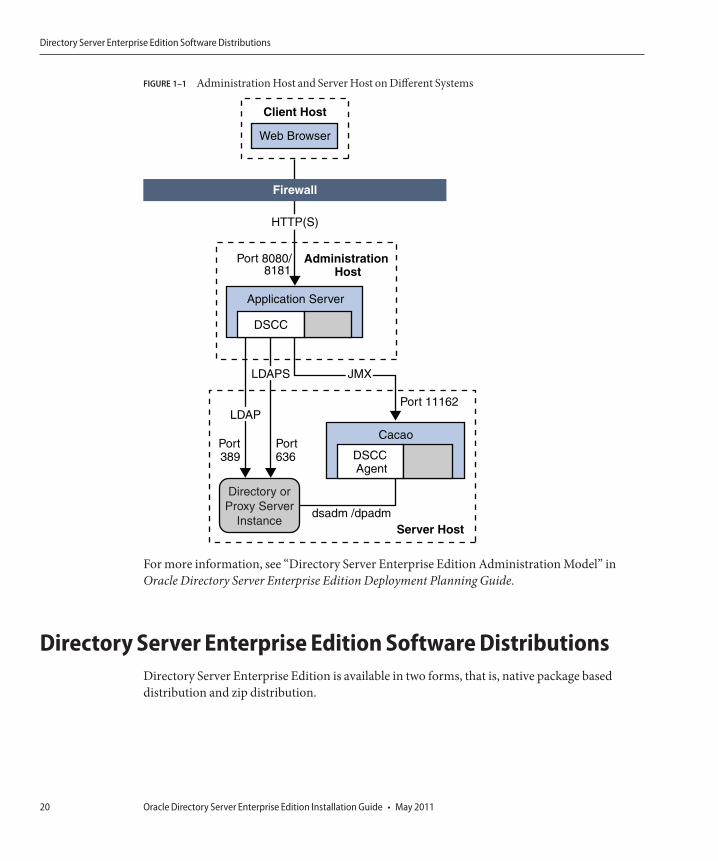
For more information, see “Directory Server Enterprise Edition Administration Model” inOracle Directory Server Enterprise Edition Deployment Planning Guide.
Directory Server Enterprise Edition Software DistributionsDirectory Server Enterprise Edition is available in two forms, that is, native package baseddistribution and zip distribution.
FIGURE 1–1 Administration Host and Server Host on Different Systems
Client Host
Server Host
Administration Host
Web Browser
Application Server
HTTP(S)
LDAP
LDAPS JMX
Port 8080/8181
Port389
Port 11162
dsadm /dpadm
Port 636
DSCC
Cacao
DSCC Agent
Directory orProxy Server
Instance
Firewall
Directory Server Enterprise Edition Software Distributions
Oracle Directory Server Enterprise Edition Installation Guide • May 201120
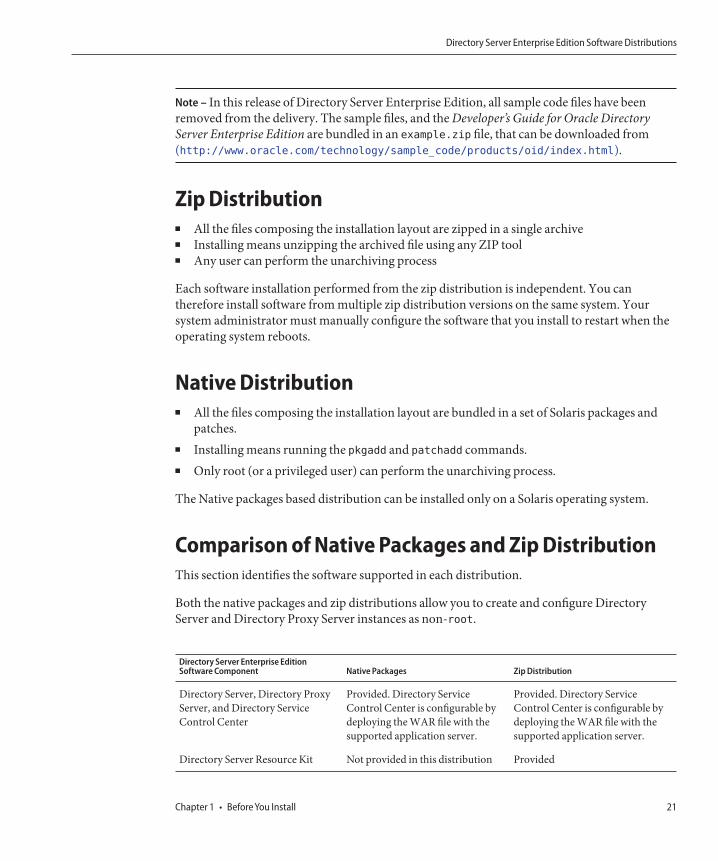
Note – In this release of Directory Server Enterprise Edition, all sample code files have beenremoved from the delivery. The sample files, and the Developer’s Guide for Oracle DirectoryServer Enterprise Edition are bundled in an example.zip file, that can be downloaded from(http://www.oracle.com/technology/sample_code/products/oid/index.html).
Zip Distribution■ All the files composing the installation layout are zipped in a single archive■ Installing means unzipping the archived file using any ZIP tool■ Any user can perform the unarchiving process
Each software installation performed from the zip distribution is independent. You cantherefore install software from multiple zip distribution versions on the same system. Yoursystem administrator must manually configure the software that you install to restart when theoperating system reboots.
Native Distribution■ All the files composing the installation layout are bundled in a set of Solaris packages and
patches.■ Installing means running the pkgadd and patchadd commands.■ Only root (or a privileged user) can perform the unarchiving process.
The Native packages based distribution can be installed only on a Solaris operating system.
Comparison of Native Packages and Zip DistributionThis section identifies the software supported in each distribution.
Both the native packages and zip distributions allow you to create and configure DirectoryServer and Directory Proxy Server instances as non-root.
Directory Server Enterprise EditionSoftware Component Native Packages Zip Distribution
Directory Server, Directory ProxyServer, and Directory ServiceControl Center
Provided. Directory ServiceControl Center is configurable bydeploying the WAR file with thesupported application server.
Provided. Directory ServiceControl Center is configurable bydeploying the WAR file with thesupported application server.
Directory Server Resource Kit Not provided in this distribution Provided
Directory Server Enterprise Edition Software Distributions
Chapter 1 • Before You Install 21

Directory Server Enterprise EditionSoftware Component Native Packages Zip Distribution
Identity Synchronization forWindows
Provided, but not installed with thenative package based distributioninstallation. For information aboutinstalling Identity Synchronizationfor Windows, see AdditionalInstallation Instructions for OracleIdentity Synchronization forWindows 6.0.
Provided, but not installed with thezip distribution installation. Forinformation about installingIdentity Synchronization forWindows, see AdditionalInstallation Instructions for OracleIdentity Synchronization forWindows 6.0.
File and Process Ownership on Unix SystemsOwnership of installed Directory Server Enterprise Edition elements depends on that softwaredistribution that you have installed. Assuming install-user is the user who runs unzipcommand and instance-owner is the user who creates a server instance, the ownershipassignment table looks like the following:
Installed Directory ServerEnterprise Edition Elements
Ownership
Zip Native
Software files install-user root
Data files - Administrative files install-user root or noaccess
Data files - Server instances instance-owner instance-owner
Processes - ns-slapd daemon instance-owner instance-owner
Processes - Common AgentContainer daemon
install-user root
Processes - Application Serverdaemon
install-user root or noaccess
Processes - Directory ServiceControl Center Registry daemon
any any
For files and processes related to the server instance, ownership can be freely chosen(instance-owner), no matter which distribution (ZIP or native) is used. Each server instancemay have a different owner.
For all other files, ownership must be assigned as follows:
■ Zip distribution: To a single user (install-user)■ Native distribution: To root or noaccess
File and Process Ownership on Unix Systems
Oracle Directory Server Enterprise Edition Installation Guide • May 201122
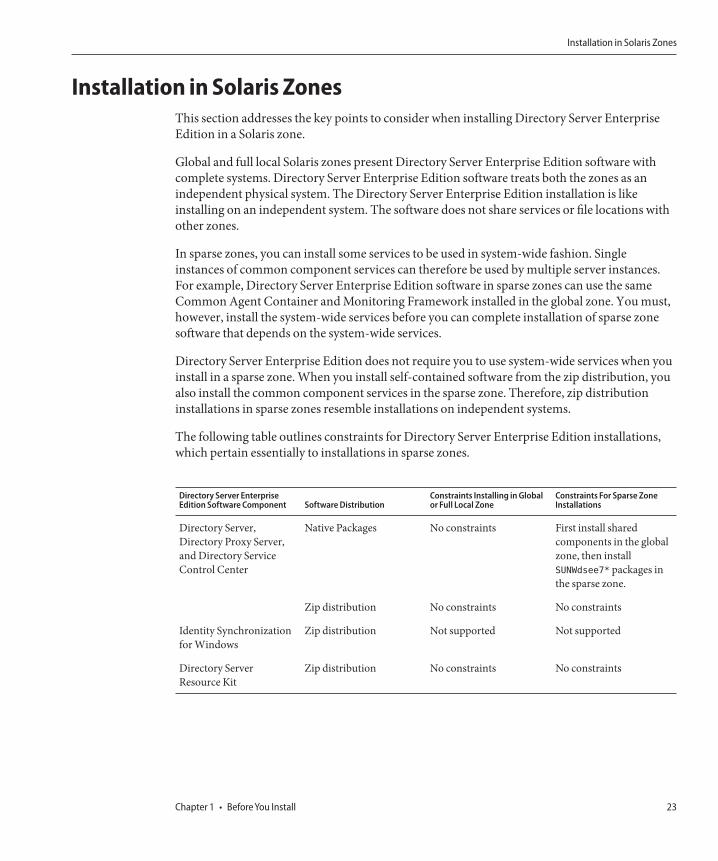
Installation in Solaris ZonesThis section addresses the key points to consider when installing Directory Server EnterpriseEdition in a Solaris zone.
Global and full local Solaris zones present Directory Server Enterprise Edition software withcomplete systems. Directory Server Enterprise Edition software treats both the zones as anindependent physical system. The Directory Server Enterprise Edition installation is likeinstalling on an independent system. The software does not share services or file locations withother zones.
In sparse zones, you can install some services to be used in system-wide fashion. Singleinstances of common component services can therefore be used by multiple server instances.For example, Directory Server Enterprise Edition software in sparse zones can use the sameCommon Agent Container and Monitoring Framework installed in the global zone. You must,however, install the system-wide services before you can complete installation of sparse zonesoftware that depends on the system-wide services.
Directory Server Enterprise Edition does not require you to use system-wide services when youinstall in a sparse zone. When you install self-contained software from the zip distribution, youalso install the common component services in the sparse zone. Therefore, zip distributioninstallations in sparse zones resemble installations on independent systems.
The following table outlines constraints for Directory Server Enterprise Edition installations,which pertain essentially to installations in sparse zones.
Directory Server EnterpriseEdition Software Component Software Distribution
Constraints Installing in Globalor Full Local Zone
Constraints For Sparse ZoneInstallations
Directory Server,Directory Proxy Server,and Directory ServiceControl Center
Native Packages No constraints First install sharedcomponents in the globalzone, then installSUNWdsee7* packages inthe sparse zone.
Zip distribution No constraints No constraints
Identity Synchronizationfor Windows
Zip distribution Not supported Not supported
Directory ServerResource Kit
Zip distribution No constraints No constraints
Installation in Solaris Zones
Chapter 1 • Before You Install 23

24
Installing and Uninstalling Directory ServerEnterprise EditionThis part includes the following chapters:
■ Chapter 2, “Installing Directory Server Enterprise Edition,” explains how to install theOracle Directory Server Enterprise Edition software, pre-configure the installation tomake it operational, and test the installation.
■ Chapter 3, “Uninstalling Directory Server Enterprise Edition,” explains how to uninstallthe Oracle Directory Server Enterprise Edition software.
■ Chapter 4, “Installing and Uninstalling Directory Server Enterprise Edition UsingNative Packages,” explains how to install and uninstall the Oracle Directory ServerEnterprise Edition software by using native packages.
P A R T I
25

26
Installing Directory Server Enterprise Edition
This chapter focuses on the zip distribution based installation.
Note – For information about the native package based installation, refer to Chapter 4,“Installing and Uninstalling Directory Server Enterprise Edition Using Native Packages.”
The installation procedure can be divided into the following steps:
1. Laying out the software elements in the chosen place on a host filesystem.See “Installing Directory Server Enterprise Edition Using Zip Distribution” on page 27.
2. Pre-configuring installation, that is, running the minimum set of commands to make thesoftware installation operational.See “Pre-Configuring the Directory Server Enterprise Edition Installation” on page 29.
3. Checking the installation, that is, running a few commands to confirm if the software is fullyoperational.See “Checking Your Directory Server Enterprise Edition Installation” on page 31.
For information about installing Identity Synchronization for Windows, refer to Oracle IdentitySynchronization for Windows 6.0 Installation and Configuration Guide and AdditionalInstallation Instructions for Oracle Identity Synchronization for Windows 6.0.
Installing Directory Server Enterprise Edition Using ZipDistribution
Before you proceed with the installation, check “Hardware and Operating SystemRequirements ” in Oracle Directory Server Enterprise Edition Release Notes..
You can install the zip distribution as a non-root user.
2C H A P T E R 2
27
▼ To Install Directory Server Enterprise Edition Using ZipDistribution
Download the Directory Server Enterprise Edition zip distribution binaries as specified in“Getting the Software” in Oracle Directory Server Enterprise Edition Release Notes.
When this operation is complete, you should have a zip file in your temporary space, forexample, /var/tmp/dsee
The zip file contains the Directory Server Enterprise Edition software, idsktune, the IdentitySynchronization for Windows software, and the relevant legal files.
Type the following commands to install the Directory Server Enterprise Edition software.# mkdir -p install-dir# cd /var/tmp/dsee# unzip -q ODSEE11_1_1_5_0_xxx.zip# cd ODSEE_ZIP_Distribution
# unzip -q sun-dsee7.zip -d install-dir# cd install-dir/dsee7
Note – You can remove the contents of /var/tmp/dsee at this point.
The install-dir directory is where all the software elements are placed. A minimum of 1 GByte ofspace is required in this directory.
The install-dir/dsee7 directory contains all of the Directory Server Enterprise Editioncomponents, with the exception of the idsktune utility. (idsktune is located in/var/tmp/dsee/ODSEE_ZIP_Distribution.) For the remainder of this guide, install-dir/dsee7 isreferred to as the install-path.
You are now ready to start working with the Directory Server Enterprise Edition installation.
Note – Directory Server Enterprise Edition 11g Release 1 (11.1.1.5.0) depends on the MicrosoftVisual C++ 2008 Redistributable Package. If your computer does not have Visual C++ 2008installed, you must install the Microsoft Visual C++ 2008 Redistributable Package (x86). Aversion of this package is provided with the Directory Server Enterprise Edition distribution,but it is recommended that you install the latest version from the Microsoft Download Centerat http://www.microsoft.com/downloads (Product family: Developer tools).
To use AES_256 with Java technology-based applications and utilities, you must download theJCE Unlimited Strength Jurisdiction Policy Files from http://www.oracle.com/technetwork/
java/javase/downloads/index.html and install them.
1
2
Installing Directory Server Enterprise Edition Using Zip Distribution
Oracle Directory Server Enterprise Edition Installation Guide • May 201128

If you are already using Directory Server version 6 or 5.2, and want to use the same legacyinstances with the 11g Release 1 (11.1.1.5.0) installation, refer to Oracle Directory ServerEnterprise Edition Upgrade and Migration Guide.
Pre-Configuring the Directory Server Enterprise EditionInstallation
After installing the Directory Server Enterprise Edition software successfully, you mustpre-configure the software to make it functional.
This section includes the following subsections:■ “To Pre-Configure Directory Service Control Center” on page 29■ “To Pre-Configure the DSCC Agent” on page 30
▼ To Pre-Configure Directory Service Control CenterThe Directory Service Control Center (DSCC) is a web-based interface to manage DirectoryServer and Directory Proxy Server instances.
Initialize the DSCC registry.$ install-path/bin/dsccsetup ads-create
Choose password for Directory Service Manager:directory-service-pwdConfirm password for Directory Service Manager:directory-service-pwd
Creating DSCC registry...
DSCC Registry has been created successfully
The value that you provide for directory-service-pwd, will be needed to authenticate the DSCClogin page and is also used as a DSCC registry password.
DSCC uses its own local instance of Directory Server to store information about your directoryservice configuration. The instance is referred to as the DSCC Registry.
Create the WAR file for DSCC.$ install-path/bin/dsccsetup war-file-create
Created dscc-war-file-path
Make a note of the dscc-war-file-path, which is the path of the DSCC war file.
Note the port and the path assigned to DSCC registry.# install-path/bin/dsccsetup status
...
Path of DSCC registry is dscc-registry-pathPort of DSCC registry is dscc-registry-port...
See Also
1
2
3
Pre-Configuring the Directory Server Enterprise Edition Installation
Chapter 2 • Installing Directory Server Enterprise Edition 29
The dscc-registry-port is the port assigned to the DSCC registry by dsccsetup ads-create. Thedefault port that is assigned to the DSCC registry is 3998.
Deploy the WAR file in any of the supported application server instance.
For example deployment procedures, refer to Appendix A, “Deploying the DSCC WAR File.”
▼ To Pre-Configure the DSCC AgentRegister the DSCC agent in Common Agent Container.$install-path/bin/dsccsetup cacao-reg
Configuring Cacao...
Cacao will listen on port dscc-agent-port
The dscc-agent-port specifies the port of the DSCC agent.
Note – On Windows 2008, for a non-administrator user, the Cacao configuration fails. To solvethis problem, set the following Windows registry parameters to zero:
HKLM\SOFTWARE\Microsoft\Windows\CurrentVersion\Policies\System\EnableInstallerDetection
HKLM\SOFTWARE\Microsoft\Windows\CurrentVersion\Policies\System\EnableLUA
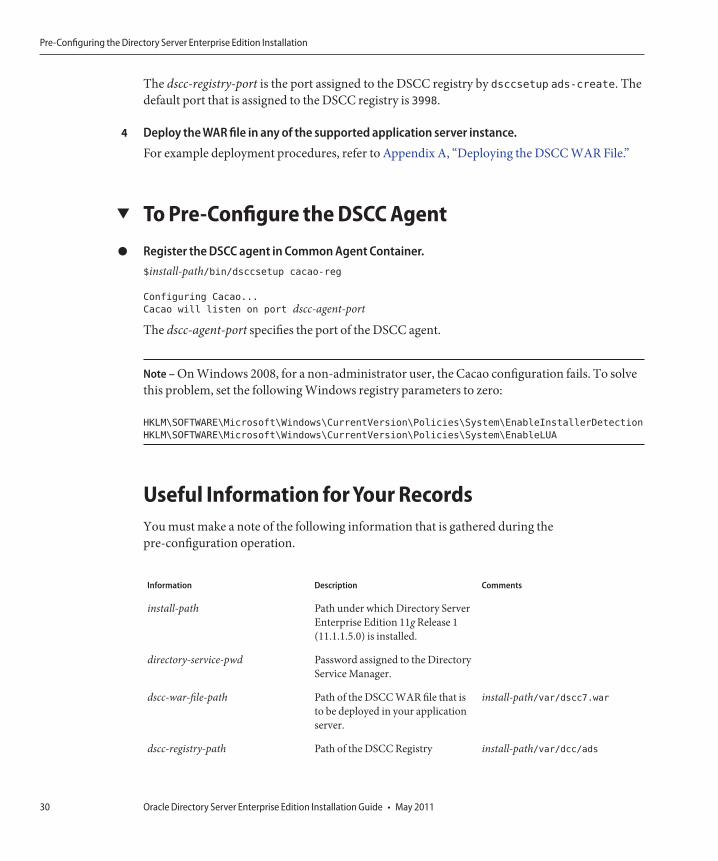
Useful Information for Your RecordsYou must make a note of the following information that is gathered during thepre-configuration operation.
Information Description Comments
install-path Path under which Directory ServerEnterprise Edition 11g Release 1(11.1.1.5.0) is installed.
directory-service-pwd Password assigned to the DirectoryService Manager.
dscc-war-file-path Path of the DSCC WAR file that isto be deployed in your applicationserver.
install-path/var/dscc7.war
dscc-registry-path Path of the DSCC Registry install-path/var/dcc/ads
4
●
Pre-Configuring the Directory Server Enterprise Edition Installation
Oracle Directory Server Enterprise Edition Installation Guide • May 201130
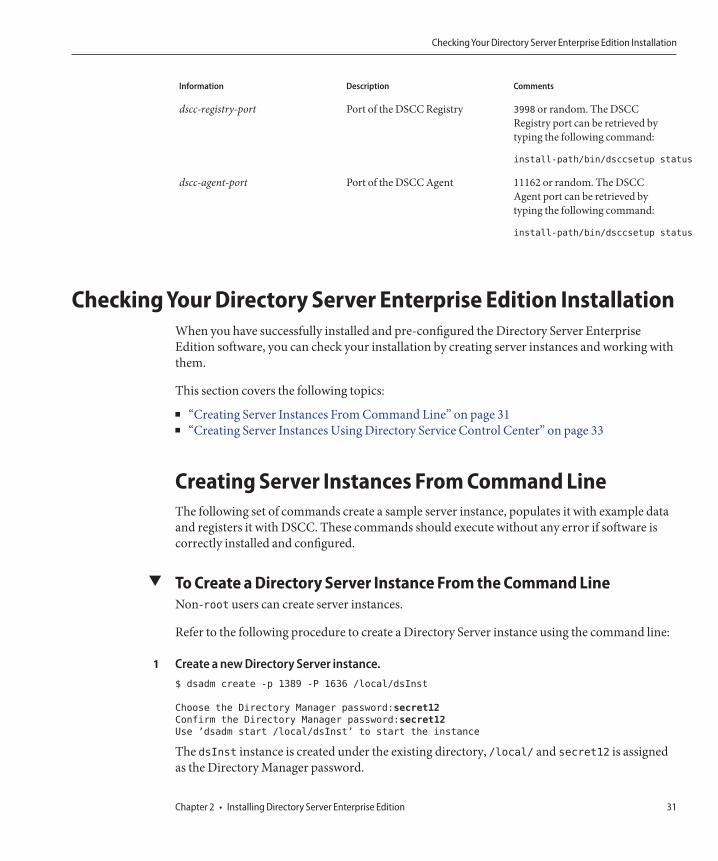
Information Description Comments
dscc-registry-port Port of the DSCC Registry 3998 or random. The DSCCRegistry port can be retrieved bytyping the following command:
install-path/bin/dsccsetup status
dscc-agent-port Port of the DSCC Agent 11162 or random. The DSCCAgent port can be retrieved bytyping the following command:
install-path/bin/dsccsetup status
Checking Your Directory Server Enterprise Edition InstallationWhen you have successfully installed and pre-configured the Directory Server EnterpriseEdition software, you can check your installation by creating server instances and working withthem.
This section covers the following topics:
■ “Creating Server Instances From Command Line” on page 31■ “Creating Server Instances Using Directory Service Control Center” on page 33
Creating Server Instances From Command LineThe following set of commands create a sample server instance, populates it with example dataand registers it with DSCC. These commands should execute without any error if software iscorrectly installed and configured.
▼ To Create a Directory Server Instance From the Command LineNon-root users can create server instances.
Refer to the following procedure to create a Directory Server instance using the command line:
Create a new Directory Server instance.$ dsadm create -p 1389 -P 1636 /local/dsInst
Choose the Directory Manager password:secret12
Confirm the Directory Manager password:secret12
Use ’dsadm start /local/dsInst’ to start the instance
The dsInst instance is created under the existing directory, /local/ and secret12 is assignedas the Directory Manager password.
1
Checking Your Directory Server Enterprise Edition Installation
Chapter 2 • Installing Directory Server Enterprise Edition 31
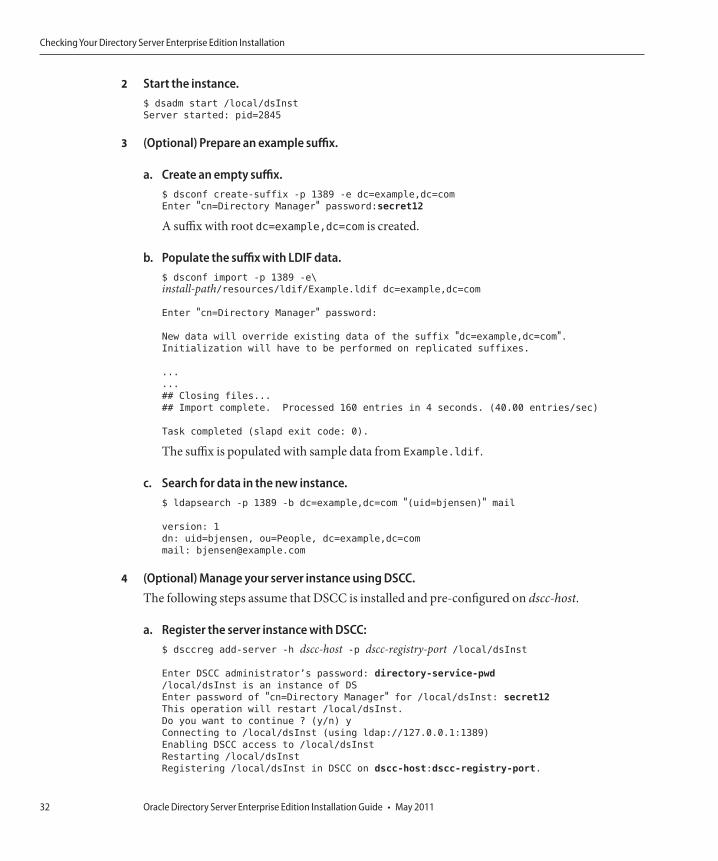
Start the instance.$ dsadm start /local/dsInst
Server started: pid=2845
(Optional) Prepare an example suffix.
a. Create an empty suffix.$ dsconf create-suffix -p 1389 -e dc=example,dc=com
Enter "cn=Directory Manager" password:secret12
A suffix with root dc=example,dc=com is created.
b. Populate the suffix with LDIF data.$ dsconf import -p 1389 -e\
install-path/resources/ldif/Example.ldif dc=example,dc=com
Enter "cn=Directory Manager" password:
New data will override existing data of the suffix "dc=example,dc=com".Initialization will have to be performed on replicated suffixes.
...
...
## Closing files...
## Import complete. Processed 160 entries in 4 seconds. (40.00 entries/sec)
Task completed (slapd exit code: 0).
The suffix is populated with sample data from Example.ldif.
c. Search for data in the new instance.$ ldapsearch -p 1389 -b dc=example,dc=com "(uid=bjensen)" mail
version: 1
dn: uid=bjensen, ou=People, dc=example,dc=com
mail: [email protected]
(Optional) Manage your server instance using DSCC.The following steps assume that DSCC is installed and pre-configured on dscc-host.
a. Register the server instance with DSCC:$ dsccreg add-server -h dscc-host -p dscc-registry-port /local/dsInst
Enter DSCC administrator’s password: directory-service-pwd
/local/dsInst is an instance of DS
Enter password of "cn=Directory Manager" for /local/dsInst: secret12
This operation will restart /local/dsInst.
Do you want to continue ? (y/n) y
Connecting to /local/dsInst (using ldap://127.0.0.1:1389)
Enabling DSCC access to /local/dsInst
Restarting /local/dsInst
Registering /local/dsInst in DSCC on dscc-host:dscc-registry-port.
2
3
4
Checking Your Directory Server Enterprise Edition Installation
Oracle Directory Server Enterprise Edition Installation Guide • May 201132

b. List the server that are currently registered into DSCC# dsccreg list-servers -h dscc-host -p dscc-registry-port
Enter DSCC administrator’s password: directory-service-pwd
Hostname Port sPort Type Owner Flags iPath Description
-------------- -------- ----- ---- ----- ----- ---------- -----------
current-host 1389 1636 DS uid /local/dsInst
(Optional) If you need to use the installation for production and want to clean the system, typethe following commands:# dsccreg remove-server -h dscc-host -p dscc-registry-port /local/dsInst
# dsadm delete /local/dsInst
You can add more suffixes, configure replication with other server instances, tune the instance,and generally proceed with other configuration operations.
See Part I, “Directory Server Administration,” in Oracle Directory Server Enterprise EditionAdministration Guide for instructions on configuring Directory Server with command-lineadministration tools.
For information about creating Directory Proxy Server instances using the command line, seeChapter 17, “Directory Proxy Server Instances,” in Oracle Directory Server Enterprise EditionAdministration Guide.
Creating Server Instances Using Directory ServiceControl CenterAfter successfully deploying DSCC, use the following procedure to create a sample DirectoryServer instance.
▼ To Create Server Instances with Directory Service Control CenterNon-root users can create server instances.
Refer to the following procedure to create server instances using DSCC.
Access DSCC by using http://dscc-host:port/dscc7.
Log in to DSCC as Directory Service Manager.Directory Service Manager's entry is stored in the DSCC registry. Directory Service Manageralso has administrator access to the server instances registered with DSCC.
a. Type the following values:* Directory Server Manager: admin
* Password: directory-service-pwd
5
Next Steps
1
2
Checking Your Directory Server Enterprise Edition Installation
Chapter 2 • Installing Directory Server Enterprise Edition 33
b. Click the Log In button.
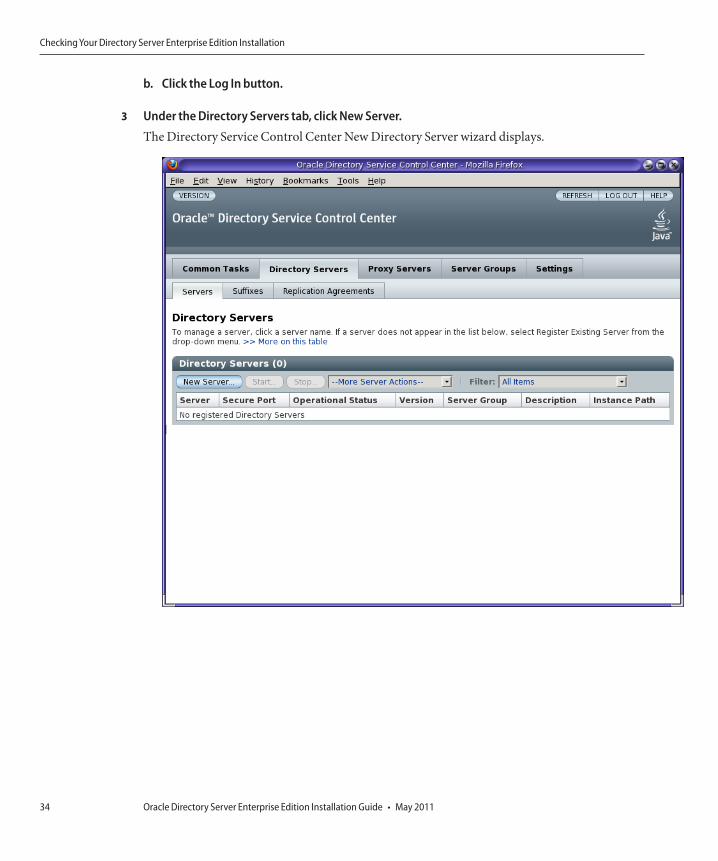
Under the Directory Servers tab, click New Server.
The Directory Service Control Center New Directory Server wizard displays.3
Checking Your Directory Server Enterprise Edition Installation
Oracle Directory Server Enterprise Edition Installation Guide • May 201134
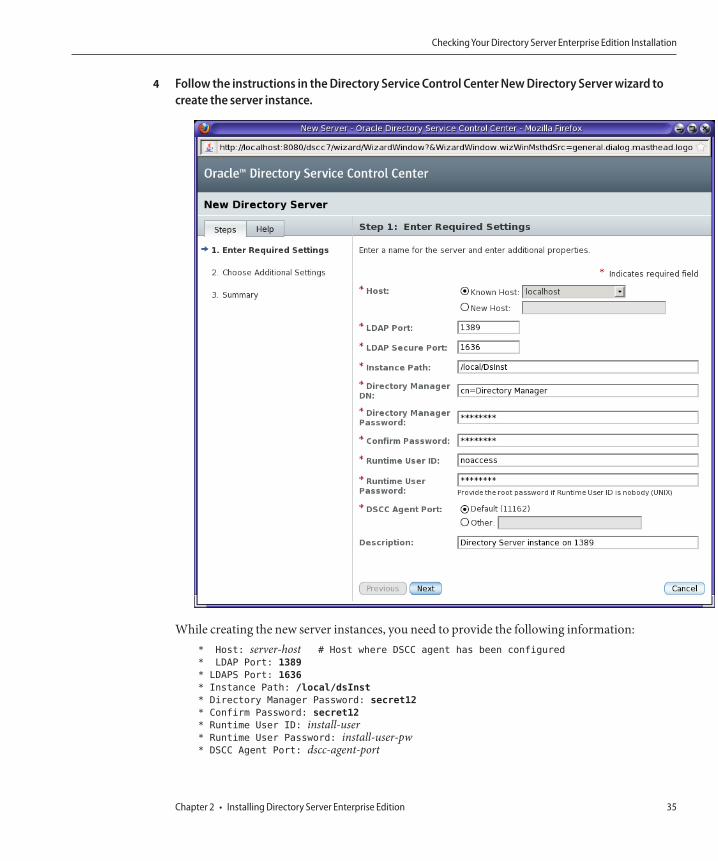
Follow the instructions in the Directory Service Control Center New Directory Server wizard tocreate the server instance.
While creating the new server instances, you need to provide the following information:* Host: server-host # Host where DSCC agent has been configured
* LDAP Port: 1389
* LDAPS Port: 1636
* Instance Path: /local/dsInst
* Directory Manager Password: secret12
* Confirm Password: secret12
* Runtime User ID: install-user* Runtime User Password: install-user-pw* DSCC Agent Port: dscc-agent-port
4
Checking Your Directory Server Enterprise Edition Installation
Chapter 2 • Installing Directory Server Enterprise Edition 35
Note – The instance path does not support non-ASCII characters.
Note – To successfully create an instance on Windows 2003 Primary Domain Controller, typedomainname\username in Runtime User Id.
Complete the create server instance process by following the instructions provided in thegraphical user interface.
(Optional) You can choose to delete the server instance by clicking Delete in the More ServerActions drop-down menu.
Similarly, you can create Directory Proxy Server instances using the Proxy Server tab.
For further configuration and administration of Directory Server and Directory Proxy Serverinstances, refer to Oracle Directory Server Enterprise Edition Administration Guide.
See the online help for Directory Service Control Center for hints on configuring DirectoryServer and Directory Proxy Server through the graphical user interface.
Note – If you setup your browser for your preferred language, DSCC may sometimes report fewmessages in other language. The language in which such messages are shown is the languagethat was effective when the dsccsetup cacao-reg command was executed. Such a languageusually is the default locale of the host.
Environment VariablesThis section lists environment variables that you can set to facilitate creating server instancesand using Directory Server Resource Kit and software development kits.
Environment Variable Description Reference
DIR_PROXY_HOST Hostname of Directory Proxy Server, used whenthe --hostname option is not specified.
dpconf(1M) command
DIR_PROXY_PORT Port number of Directory Proxy Server, usedwhen the --port and --secure-port options arenot specified.
dpconf(1M) command
DIRSERV_HOST Hostname of Directory Server, used when the--hostname option is not specified.
dsconf(1M) command
5
6
See Also
Environment Variables
Oracle Directory Server Enterprise Edition Installation Guide • May 201136
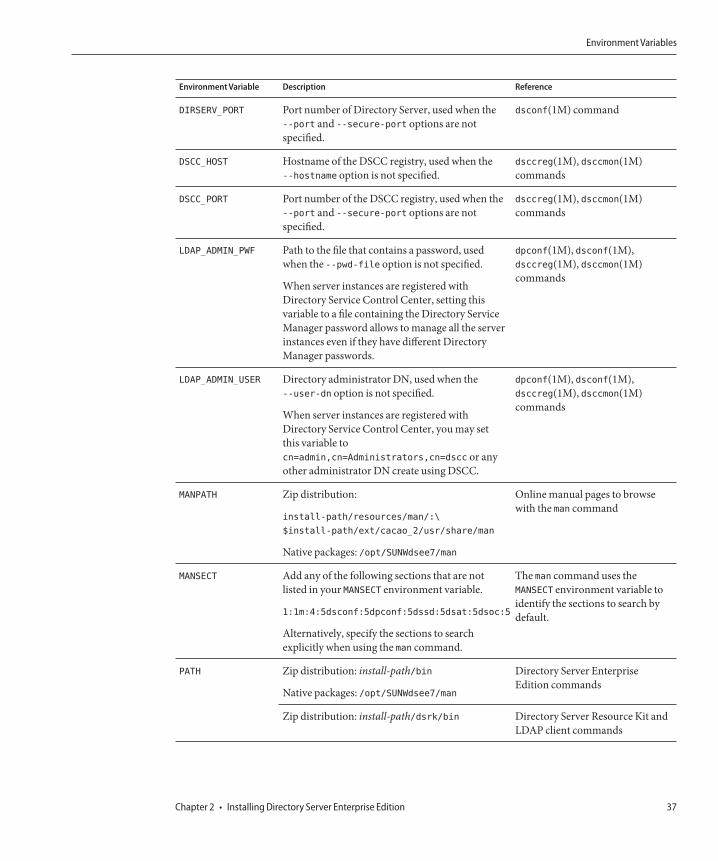
Environment Variable Description Reference
DIRSERV_PORT Port number of Directory Server, used when the--port and --secure-port options are notspecified.
dsconf(1M) command
DSCC_HOST Hostname of the DSCC registry, used when the--hostname option is not specified.
dsccreg(1M), dsccmon(1M)commands
DSCC_PORT Port number of the DSCC registry, used when the--port and --secure-port options are notspecified.
dsccreg(1M), dsccmon(1M)commands
LDAP_ADMIN_PWF Path to the file that contains a password, usedwhen the --pwd-file option is not specified.
When server instances are registered withDirectory Service Control Center, setting thisvariable to a file containing the Directory ServiceManager password allows to manage all the serverinstances even if they have different DirectoryManager passwords.
dpconf(1M), dsconf(1M),dsccreg(1M), dsccmon(1M)commands
LDAP_ADMIN_USER Directory administrator DN, used when the--user-dn option is not specified.
When server instances are registered withDirectory Service Control Center, you may setthis variable tocn=admin,cn=Administrators,cn=dscc or anyother administrator DN create using DSCC.
dpconf(1M), dsconf(1M),dsccreg(1M), dsccmon(1M)commands
MANPATH Zip distribution:
install-path/resources/man/:\
$install-path/ext/cacao_2/usr/share/man
Native packages: /opt/SUNWdsee7/man
Online manual pages to browsewith the man command
MANSECT Add any of the following sections that are notlisted in your MANSECT environment variable.
1:1m:4:5dsconf:5dpconf:5dssd:5dsat:5dsoc:5
Alternatively, specify the sections to searchexplicitly when using the man command.
The man command uses theMANSECT environment variable toidentify the sections to search bydefault.
PATH Zip distribution: install-path/bin
Native packages: /opt/SUNWdsee7/man
Directory Server EnterpriseEdition commands
Zip distribution: install-path/dsrk/bin Directory Server Resource Kit andLDAP client commands
Environment Variables
Chapter 2 • Installing Directory Server Enterprise Edition 37

38
Uninstalling Directory Server Enterprise Edition
This chapter guides you through removing the Directory Server Enterprise Edition softwareand covers the following topics:■ “Removing Server Instances” on page 39 describes how to remove server instances (before
the software can be uninstalled).■ “Removing the Software” on page 41 covers how to remove the software after all server
instances have been removed.
Removing Server InstancesBefore uninstalling the Directory Server Enterprise Edition software, you must remove all theserver instances.
The following sections describe how to remove Directory Proxy Server and Directory Serverinstances:■ “To Delete a Directory Proxy Server Instance With DSCC” on page 39■ “To Delete a Directory Proxy Server Instance From the Command Line” on page 40■ “To Delete a Directory Server Instance With DSCC” on page 40■ “To Delete a Directory Server Instance From the Command Line” on page 41
▼ To Delete a Directory Proxy Server Instance With DSCCAccess Directory Service Control Center.Use http://dscc-host:port/dscc7 or https://dscc-host:port/dscc7 to access DSCC, whereport depends on your application server configuration.
Under the Proxy Servers tab, select the server to delete and click Delete in the More ServerActions drop-down list.
3C H A P T E R 3
1
2
39
Delete the server instance with the Delete command in the action drop-down list.
▼ To Delete a Directory Proxy Server Instance From theCommand Line
(Optional) If you have used DSCC to manage the server instance, remove registration for theserver.$ dsccreg remove-server -h dscc-host -p dscc-registry-port /local/dps
Enter DSCC administrator’s password: directory-service-pwd
/local/dps is an instance of DPS
Enter password of "cn=Proxy Manager" for /local/dps:
Unregistering /local/dps from DSCC on hostname.Connecting to /local/dps
Disabling DSCC access to /local/dps
For details, see the dsccreg(1M) man page.
Delete the server instance.$ dpadm delete /local/dps
Directory Proxy Server instance ’/local/dps’ stopped
Directory Proxy Server instance ’/local/dps’ removed.
After you have removed all server instances on the system, go to “Removing the Software” onpage 41.
▼ To Delete a Directory Server Instance With DSCC
Caution – Deleting a Directory Server instance completely removes all the instance files,including all LDAP entries managed by the instance. Before you delete an instance, back upyour data as described in Chapter 8, “Directory Server Backup and Restore,” in Oracle DirectoryServer Enterprise Edition Administration Guide.
Access Directory Service Control Center.Use http://dscc-host:port/dscc7 or https://dscc-host:port/dscc7 to access DSCC, whereport depends on your application server configuration.
Under the Directory Servers tab, select the server to delete and click Delete in the More ServerActions drop-down list.
Delete the server instance with the Delete command in the action drop-down list.
3
1
2
See Also
1
2
3
Removing Server Instances
Oracle Directory Server Enterprise Edition Installation Guide • May 201140

▼ To Delete a Directory Server Instance From theCommand LineDeleting a Directory Server instance completely removes all the files under the instance-pathdirectory. If the databases and logs are saved in another directory, they are not removed whenyou delete the Directory Server instance.
Before you delete a server instance, back up your data as described in Chapter 8, “DirectoryServer Backup and Restore,” in Oracle Directory Server Enterprise Edition Administration Guide.
(Optional) If you have used DSCC to manage the server instance, remove registration for theserver.$ dsccreg remove-server -h dscc-host -p dscc-registry-port /local/dsInst
Enter DSCC administrator’s password: directory-service-pwd
/local/dsInst is an instance of DS
Enter password of "cn=Directory Manager" for /local/dsInst:
This operation will restart /local/dsInst.
Do you want to continue ? (y/n) y
Unregistering /local/dsInst from DSCC on hostname.Connecting to /local/dsInst
Disabling DSCC access to /local/dsInst
Restarting /local/dsInst
For details, see dsccreg(1M)
Delete the server instance.$ dsadm delete /local/dsInst
Server stopped
/local/dsInst deleted
After you have removed all the server instances on the system, go to “Removing the Software”on page 41.
Removing the SoftwareAfter you have removed all the server instances that depend on the installed product, you canremove the Directory Server Enterprise Edition software.
The following sections describe how to unconfigure and remove the Directory ServerEnterprise Edition software:
■ “To Unconfigure Directory Service Control Center ” on page 42■ “To Remove Directory Server Enterprise Edition Installed From the Zip Distribution” on
page 42
1
2
See Also
Removing the Software
Chapter 3 • Uninstalling Directory Server Enterprise Edition 41

▼ To Unconfigure Directory Service Control CenterUndeploy DSCC from your application server.
Run dsccsetup dismantle to remove and clean up the DSCC installation.For example, on a Solaris system the following command removes DSCC.$ ./dsccsetup dismantle
***
Unregistering DSCC Agent from Cacao...
Stopping Cacao...
***
Deleting DSCC Registry...
All server registrations will be definitively erased.
Existing server instances will not be modified.
Do you really want to delete the DSCC Registry ? [y/n]y
Directory Server instance ’install-path/dsee7/var/dcc/ads’ stopped
DSCC Registry has been deleted successfully
***
Deleted install-path/dsee7/var/dscc7.war***
On a Windows system, the following command removes DSCC.
C:\install-path\bin>dsccsetup.exe dismantle
On Solaris, the dsccsetup command is located in install-path/bin. See “Default Paths” onpage 11 to determine the default install-path for your system.
▼ To Remove Directory Server Enterprise EditionInstalled From the Zip Distribution
Remove Directory Server Enterprise Edition with a system command.$ rm -r install-path
On Windows, delete the install-path folder or run the following commands to remove thecomponents:
C:\>del /s install-pathC:\>del install-path
1
2
●
Removing the Software
Oracle Directory Server Enterprise Edition Installation Guide • May 201142
Installing and Uninstalling Directory ServerEnterprise Edition Using Native Packages
Using native packages, you can install Directory Server Enterprise Edition only on the Solarisoperating system. This procedure can only be performed by the root user.
This chapter contains all the information related to installing and uninstalling Directory ServerEnterprise Edition using native packages, and covers the following topics:
■ “Preparing Your System for Directory Server Enterprise Edition Installation” on page 43■ “Installing Directory Server Enterprise Edition” on page 51■ “Uninstalling Directory Server Enterprise Edition” on page 52
Preparing Your System for Directory Server Enterprise EditionInstallation
To prepare your system for the Directory Server Enterprise Edition installation, you mustinstall the shared components mentioned in this section. You must install the sharedcomponents in the sequence specified in the tables below:
▼ To Install Shared ComponentsInstall the packages in the “List of Packages Required Before Installing Directory ServerEnterprise Edition”on page 45.Based on your operating system and system architecture, see an appropriate table. For example,if you are working on a Solaris 10 SPARC system, see Table 4–1. Each component has one ormore related packages. Each package has the minimum version required to be installed on yoursystem. If the required package is not installed on your system, install the package or if theminimum required version of the package is not installed, install the corresponding patch thatis mentioned in the PatchId column.
4C H A P T E R 4
1
43
For each package, retrieve the current version of the package installed.
For the complete list of packages, refer to “List of Packages Required Before Installing DirectoryServer Enterprise Edition” on page 45.# pkgparam -v pkgname VERSION PATCHLIST
■ If pkgname is not installed, refer to “Location of Packages and Patches Required to InstallDirectory Server Enterprise Edition” on page 49 to locate the directory to find the packagepkglocation.
Type the following command to install packages:
# pkgadd -d pkglocation pkgname■ If one of the packages has no value for PATCHLIST or a revision lower than the required
version number, install the required patch. Refer to “Location of Packages and PatchesRequired to Install Directory Server Enterprise Edition” on page 49 to locate the directoryto find the patch patchlocation.
Type the following command to install patches:
# cd patchlocation
# patchadd PATCHID
Verify that the JVM version used by the Common Agent Container is 1.6.0 or later.
a. Get the JVM used by the Common Agent Container./usr/sbin/cacaoadm get-param -v java-home
b. Get the version of this JVM.<JAVA_HOME>/bin/java -version
c. If the JVM version is not 1.6.0 or later, install a supported JVM version and then setjava-home to version 1.6.0 or later./usr/sbin/cacaoadm set-param java-home=<JAVA_1.6.0>
If you encounter problems with an existing Java ES installation after you have upgraded theshared components, refer to the README file of the NSS/NSPR patch. The compatibility issuedescribed in this file might be the reason for the problem.
Note – To use AES_256 with Java-based applications and utilities, you must download the JCEUnlimited Strength Jurisdiction Policy Files from http://www.oracle.com/technetwork/
java/javase/downloads/index.html and install them.
2
3
Troubleshooting
Preparing Your System for Directory Server Enterprise Edition Installation
Oracle Directory Server Enterprise Edition Installation Guide • May 201144
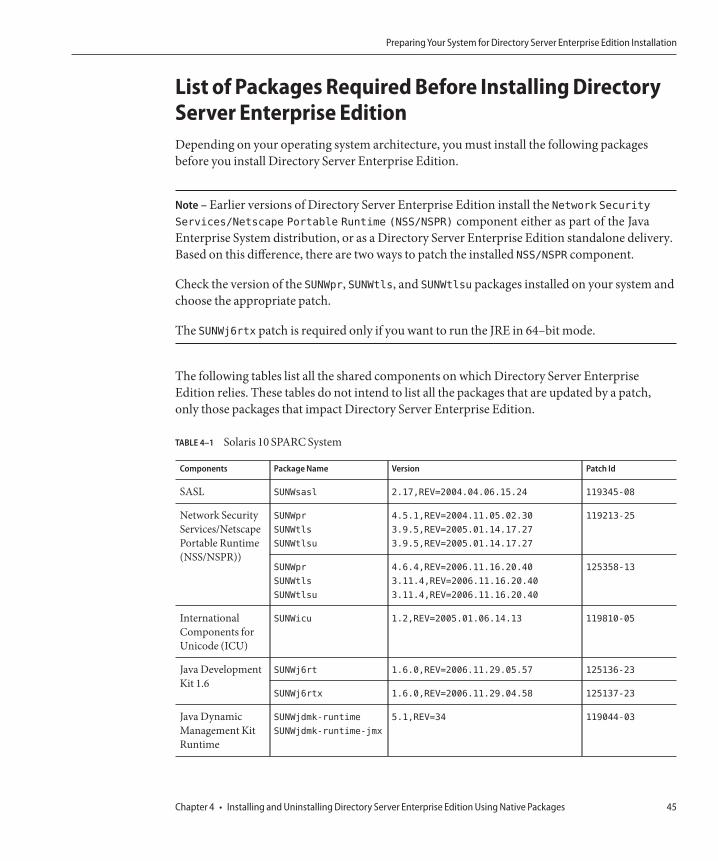
List of Packages Required Before Installing DirectoryServer Enterprise EditionDepending on your operating system architecture, you must install the following packagesbefore you install Directory Server Enterprise Edition.
Note – Earlier versions of Directory Server Enterprise Edition install the Network SecurityServices/Netscape Portable Runtime (NSS/NSPR) component either as part of the JavaEnterprise System distribution, or as a Directory Server Enterprise Edition standalone delivery.Based on this difference, there are two ways to patch the installed NSS/NSPR component.
Check the version of the SUNWpr, SUNWtls, and SUNWtlsu packages installed on your system andchoose the appropriate patch.
The SUNWj6rtx patch is required only if you want to run the JRE in 64–bit mode.
The following tables list all the shared components on which Directory Server EnterpriseEdition relies. These tables do not intend to list all the packages that are updated by a patch,only those packages that impact Directory Server Enterprise Edition.
TABLE 4–1 Solaris 10 SPARC System
Components Package Name Version Patch Id
SASL SUNWsasl 2.17,REV=2004.04.06.15.24 119345-08
Network SecurityServices/NetscapePortable Runtime(NSS/NSPR))
SUNWpr
SUNWtls
SUNWtlsu
4.5.1,REV=2004.11.05.02.30
3.9.5,REV=2005.01.14.17.27
3.9.5,REV=2005.01.14.17.27
119213-25
SUNWpr
SUNWtls
SUNWtlsu
4.6.4,REV=2006.11.16.20.40
3.11.4,REV=2006.11.16.20.40
3.11.4,REV=2006.11.16.20.40
125358-13
InternationalComponents forUnicode (ICU)
SUNWicu 1.2,REV=2005.01.06.14.13 119810-05
Java DevelopmentKit 1.6
SUNWj6rt 1.6.0,REV=2006.11.29.05.57 125136-23
SUNWj6rtx 1.6.0,REV=2006.11.29.04.58 125137-23
Java DynamicManagement KitRuntime
SUNWjdmk-runtime
SUNWjdmk-runtime-jmx
5.1,REV=34 119044-03
Preparing Your System for Directory Server Enterprise Edition Installation
Chapter 4 • Installing and Uninstalling Directory Server Enterprise Edition Using Native Packages 45
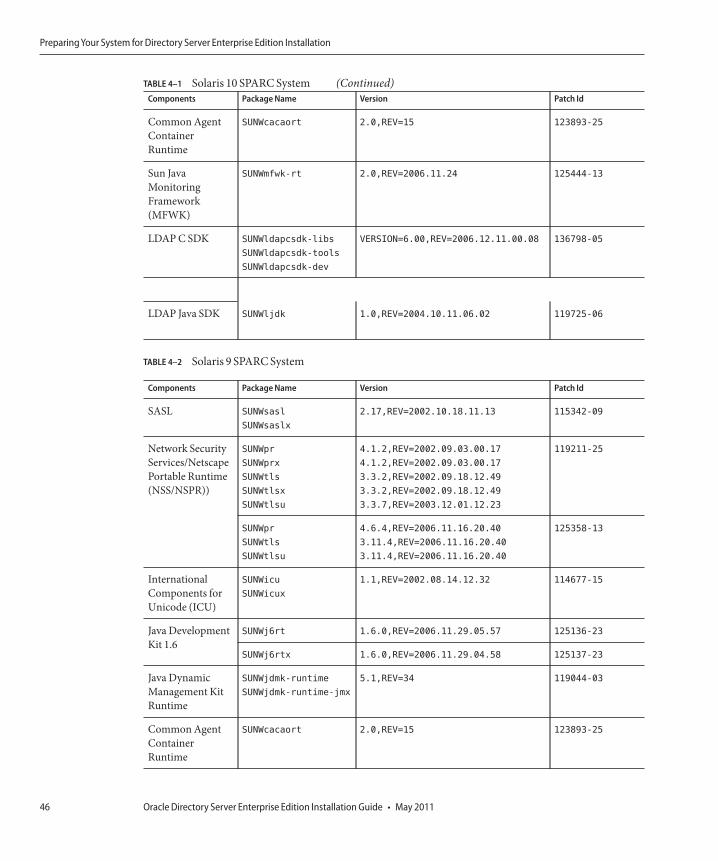
TABLE 4–1 Solaris 10 SPARC System (Continued)Components Package Name Version Patch Id
Common AgentContainerRuntime
SUNWcacaort 2.0,REV=15 123893-25
Sun JavaMonitoringFramework(MFWK)
SUNWmfwk-rt 2.0,REV=2006.11.24 125444-13
LDAP C SDK SUNWldapcsdk-libs
SUNWldapcsdk-tools
SUNWldapcsdk-dev
VERSION=6.00,REV=2006.12.11.00.08 136798-05
LDAP Java SDK SUNWljdk 1.0,REV=2004.10.11.06.02 119725-06
TABLE 4–2 Solaris 9 SPARC System
Components Package Name Version Patch Id
SASL SUNWsasl
SUNWsaslx
2.17,REV=2002.10.18.11.13 115342-09
Network SecurityServices/NetscapePortable Runtime(NSS/NSPR))
SUNWpr
SUNWprx
SUNWtls
SUNWtlsx
SUNWtlsu
4.1.2,REV=2002.09.03.00.17
4.1.2,REV=2002.09.03.00.17
3.3.2,REV=2002.09.18.12.49
3.3.2,REV=2002.09.18.12.49
3.3.7,REV=2003.12.01.12.23
119211-25
SUNWpr
SUNWtls
SUNWtlsu
4.6.4,REV=2006.11.16.20.40
3.11.4,REV=2006.11.16.20.40
3.11.4,REV=2006.11.16.20.40
125358-13
InternationalComponents forUnicode (ICU)
SUNWicu
SUNWicux
1.1,REV=2002.08.14.12.32 114677-15
Java DevelopmentKit 1.6
SUNWj6rt 1.6.0,REV=2006.11.29.05.57 125136-23
SUNWj6rtx 1.6.0,REV=2006.11.29.04.58 125137-23
Java DynamicManagement KitRuntime
SUNWjdmk-runtime
SUNWjdmk-runtime-jmx
5.1,REV=34 119044-03
Common AgentContainerRuntime
SUNWcacaort 2.0,REV=15 123893-25
Preparing Your System for Directory Server Enterprise Edition Installation
Oracle Directory Server Enterprise Edition Installation Guide • May 201146

TABLE 4–2 Solaris 9 SPARC System (Continued)Components Package Name Version Patch Id
Sun JavaMonitoringFramework(MFWK)
SUNWmfwk-rt 2.0,REV=2006.11.24 125444-13
LDAP C SDK SUNWldapcsdk-libs
SUNWldapcsdk-tools
SUNWldapcsdk-dev
6.00,REV=2006.12.11.00.08 136798-05
LDAP Java SDK SUNWljdk 1.0,REV=2004.10.11.06.02 119725-06
TABLE 4–3 Solaris 10 x86 or Solaris 10 x64 System
Components Package Name Version Patch Id
SASL SUNWsasl 2.17,REV=2003.07.18.13.13 119346-08
Network SecurityServices/NetscapePortable Runtime(NSS/NSPR))
SUNWpr
SUNWtls
SUNWtlsu
4.6.4,REV=2006.11.16.21.41
3.11.4,REV=2006.11.16.21.41
3.11.4,REV=2006.11.16.21.41
125359-13
SUNWpr
SUNWtls
SUNWtlsu
4.5.1,REV=2004.11.05.03.44
3.9.5,REV=2005.01.14.19.03
3.9.5,REV=2005.01.14.19.03
119214-25
InternationalComponents forUnicode (ICU)
SUNWicu 1.2,REV=2005.01.06.14.13 119811-05
Java DevelopmentKit 1.6
SUNWj6rt 1.6.0,REV=2006.11.29.05.03 125138-23
SUNWj6rtx 1.6.0,REV=2006.11.29.02.51 125139-23
Java DynamicManagement KitRuntime
SUNWjdmk-runtime
SUNWjdmk-runtime-jmx
5.1,REV=34 119044-03
Common AgentContainerRuntime
SUNWcacaort 2.0,REV=15 123896-25
Sun JavaMonitoringFramework(MFWK)
SUNWmfwk-rt 2.0,REV=2006.11.24 125446-13
LDAP C SDK SUNWldapcsdk-libs
SUNWldapcsdk-tools
SUNWldapcsdk-dev
6.00,REV=2006.12.11.00.35 136800-05
Preparing Your System for Directory Server Enterprise Edition Installation
Chapter 4 • Installing and Uninstalling Directory Server Enterprise Edition Using Native Packages 47
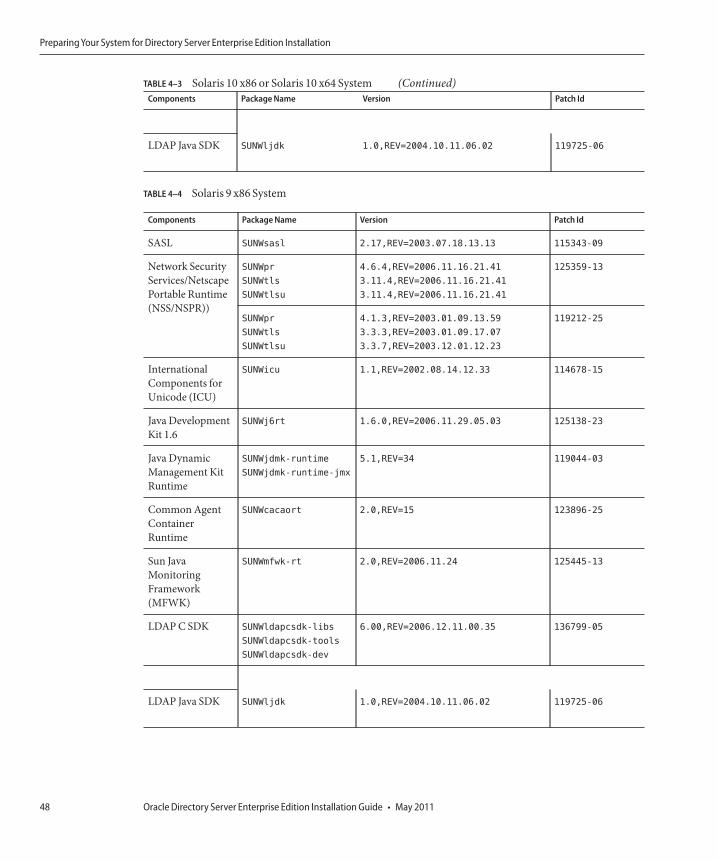
TABLE 4–3 Solaris 10 x86 or Solaris 10 x64 System (Continued)Components Package Name Version Patch Id
LDAP Java SDK SUNWljdk 1.0,REV=2004.10.11.06.02 119725-06
TABLE 4–4 Solaris 9 x86 System
Components Package Name Version Patch Id
SASL SUNWsasl 2.17,REV=2003.07.18.13.13 115343-09
Network SecurityServices/NetscapePortable Runtime(NSS/NSPR))
SUNWpr
SUNWtls
SUNWtlsu
4.6.4,REV=2006.11.16.21.41
3.11.4,REV=2006.11.16.21.41
3.11.4,REV=2006.11.16.21.41
125359-13
SUNWpr
SUNWtls
SUNWtlsu
4.1.3,REV=2003.01.09.13.59
3.3.3,REV=2003.01.09.17.07
3.3.7,REV=2003.12.01.12.23
119212-25
InternationalComponents forUnicode (ICU)
SUNWicu 1.1,REV=2002.08.14.12.33 114678-15
Java DevelopmentKit 1.6
SUNWj6rt 1.6.0,REV=2006.11.29.05.03 125138-23
Java DynamicManagement KitRuntime
SUNWjdmk-runtime
SUNWjdmk-runtime-jmx
5.1,REV=34 119044-03
Common AgentContainerRuntime
SUNWcacaort 2.0,REV=15 123896-25
Sun JavaMonitoringFramework(MFWK)
SUNWmfwk-rt 2.0,REV=2006.11.24 125445-13
LDAP C SDK SUNWldapcsdk-libs
SUNWldapcsdk-tools
SUNWldapcsdk-dev
6.00,REV=2006.12.11.00.35 136799-05
LDAP Java SDK SUNWljdk 1.0,REV=2004.10.11.06.02 119725-06
Preparing Your System for Directory Server Enterprise Edition Installation
Oracle Directory Server Enterprise Edition Installation Guide • May 201148
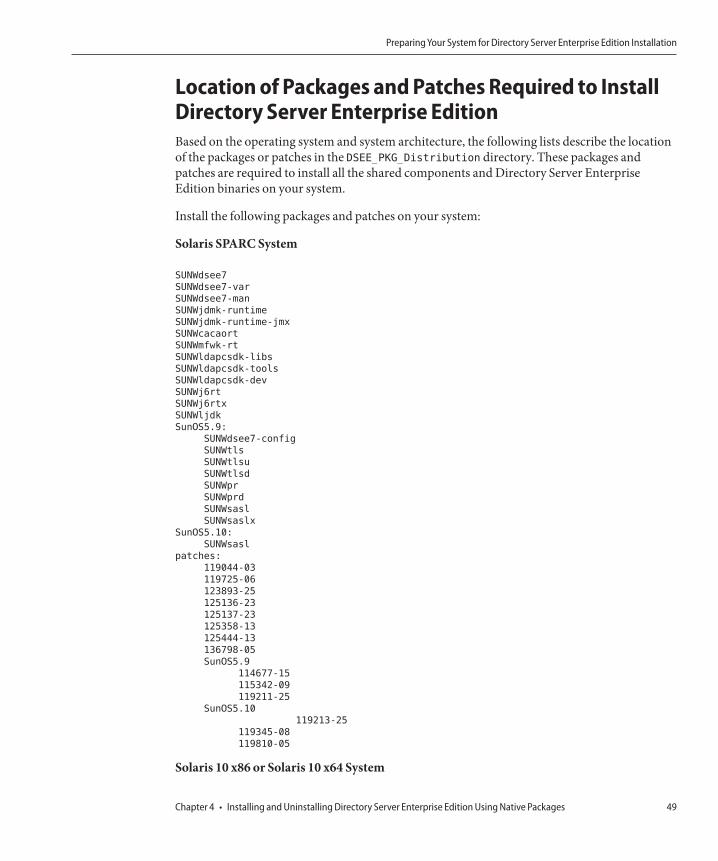
Location of Packages and Patches Required to InstallDirectory Server Enterprise EditionBased on the operating system and system architecture, the following lists describe the locationof the packages or patches in the DSEE_PKG_Distribution directory. These packages andpatches are required to install all the shared components and Directory Server EnterpriseEdition binaries on your system.
Install the following packages and patches on your system:
Solaris SPARC System
SUNWdsee7
SUNWdsee7-var
SUNWdsee7-man
SUNWjdmk-runtime
SUNWjdmk-runtime-jmx
SUNWcacaort
SUNWmfwk-rt
SUNWldapcsdk-libs
SUNWldapcsdk-tools
SUNWldapcsdk-dev
SUNWj6rt
SUNWj6rtx
SUNWljdk
SunOS5.9:
SUNWdsee7-config
SUNWtls
SUNWtlsu
SUNWtlsd
SUNWpr
SUNWprd
SUNWsasl
SUNWsaslx
SunOS5.10:
SUNWsasl
patches:
119044-03
119725-06
123893-25
125136-23
125137-23
125358-13
125444-13
136798-05
SunOS5.9
114677-15
115342-09
119211-25
SunOS5.10
119213-25
119345-08
119810-05
Solaris 10 x86 or Solaris 10 x64 System
Preparing Your System for Directory Server Enterprise Edition Installation
Chapter 4 • Installing and Uninstalling Directory Server Enterprise Edition Using Native Packages 49
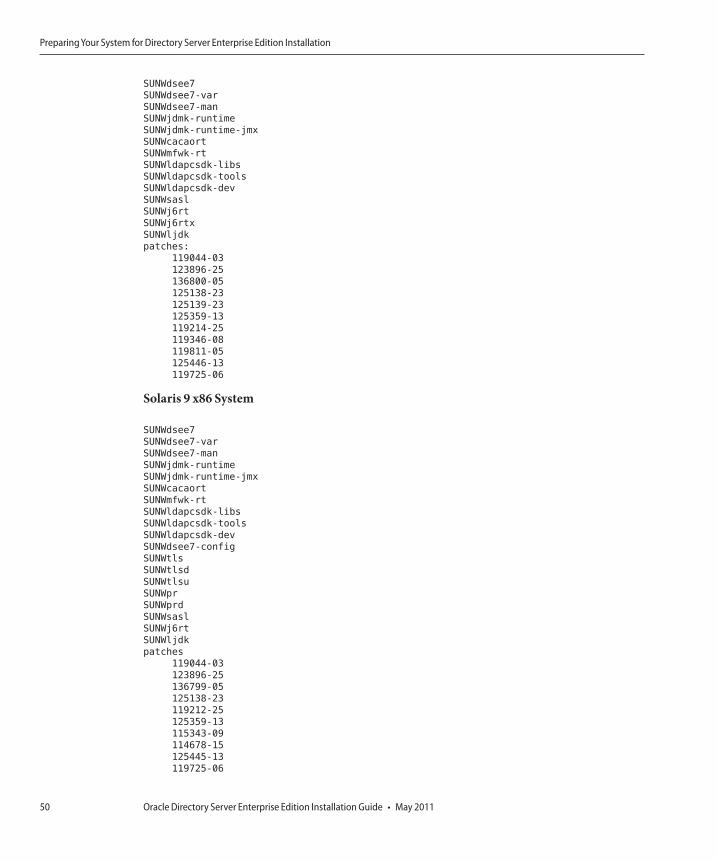
SUNWdsee7
SUNWdsee7-var
SUNWdsee7-man
SUNWjdmk-runtime
SUNWjdmk-runtime-jmx
SUNWcacaort
SUNWmfwk-rt
SUNWldapcsdk-libs
SUNWldapcsdk-tools
SUNWldapcsdk-dev
SUNWsasl
SUNWj6rt
SUNWj6rtx
SUNWljdk
patches:
119044-03
123896-25
136800-05
125138-23
125139-23
125359-13
119214-25
119346-08
119811-05
125446-13
119725-06
Solaris 9 x86 System
SUNWdsee7
SUNWdsee7-var
SUNWdsee7-man
SUNWjdmk-runtime
SUNWjdmk-runtime-jmx
SUNWcacaort
SUNWmfwk-rt
SUNWldapcsdk-libs
SUNWldapcsdk-tools
SUNWldapcsdk-dev
SUNWdsee7-config
SUNWtls
SUNWtlsd
SUNWtlsu
SUNWpr
SUNWprd
SUNWsasl
SUNWj6rt
SUNWljdk
patches
119044-03
123896-25
136799-05
125138-23
119212-25
125359-13
115343-09
114678-15
125445-13
119725-06
Preparing Your System for Directory Server Enterprise Edition Installation
Oracle Directory Server Enterprise Edition Installation Guide • May 201150
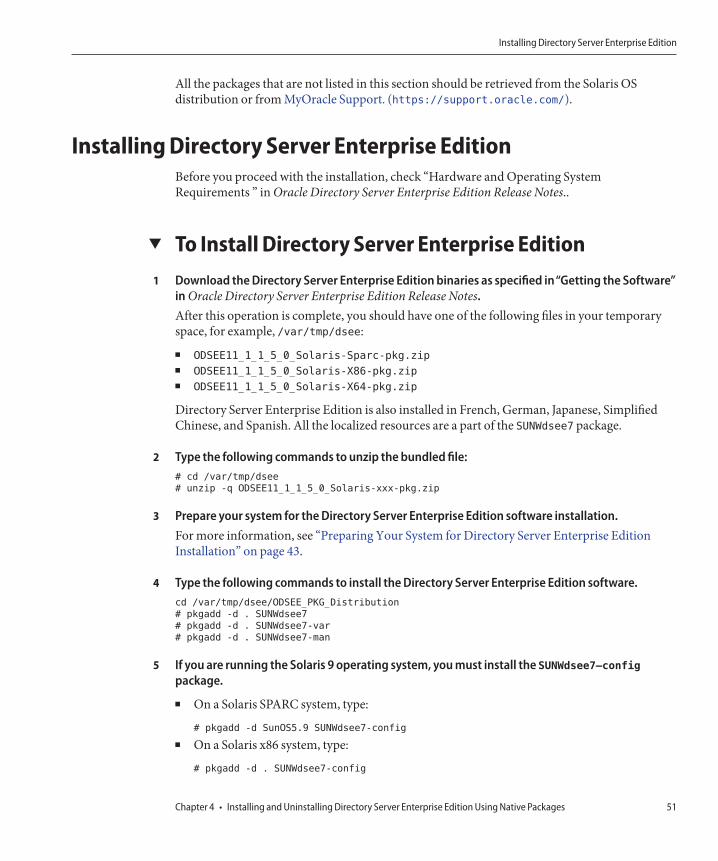
All the packages that are not listed in this section should be retrieved from the Solaris OSdistribution or from MyOracle Support. (https://support.oracle.com/).
Installing Directory Server Enterprise EditionBefore you proceed with the installation, check “Hardware and Operating SystemRequirements ” in Oracle Directory Server Enterprise Edition Release Notes..
▼ To Install Directory Server Enterprise EditionDownload the Directory Server Enterprise Edition binaries as specified in“Getting the Software”in Oracle Directory Server Enterprise Edition Release Notes.After this operation is complete, you should have one of the following files in your temporaryspace, for example, /var/tmp/dsee:■ ODSEE11_1_1_5_0_Solaris-Sparc-pkg.zip
■ ODSEE11_1_1_5_0_Solaris-X86-pkg.zip
■ ODSEE11_1_1_5_0_Solaris-X64-pkg.zip
Directory Server Enterprise Edition is also installed in French, German, Japanese, SimplifiedChinese, and Spanish. All the localized resources are a part of the SUNWdsee7 package.
Type the following commands to unzip the bundled file:# cd /var/tmp/dsee
# unzip -q ODSEE11_1_1_5_0_Solaris-xxx-pkg.zip
Prepare your system for the Directory Server Enterprise Edition software installation.For more information, see “Preparing Your System for Directory Server Enterprise EditionInstallation” on page 43.
Type the following commands to install the Directory Server Enterprise Edition software.cd /var/tmp/dsee/ODSEE_PKG_Distribution
# pkgadd -d . SUNWdsee7
# pkgadd -d . SUNWdsee7-var
# pkgadd -d . SUNWdsee7-man
If you are running the Solaris 9 operating system, you must install the SUNWdsee7–configpackage.
■ On a Solaris SPARC system, type:
# pkgadd -d SunOS5.9 SUNWdsee7-config
■ On a Solaris x86 system, type:
# pkgadd -d . SUNWdsee7-config
1
2
3
4
5
Installing Directory Server Enterprise Edition
Chapter 4 • Installing and Uninstalling Directory Server Enterprise Edition Using Native Packages 51

Pre-Configuring the Directory Server EnterpriseEdition InstallationThe pre-configuration steps are the same for both zip and native packages installations exceptthe following differences:
Key Difference Summary
Root privileges The dsccsetup must be executed with root privileges.
DSCC WAR file location The dsccsetup command generates DSCC WAR fileat /var/opt/SUNWdsee7/dscc7.war.
DSCC Registry location The dsccsetup command creates the DSCC registryunder /var/opt/SUNWdsee7/dcc/ads and sets itsowner to noaccess.
DSCC Registry startup DSCC Registry must be started as root. The registryruns as noaccess.
Application Server Hosting DSCC Application Server must have read-write access to theDSCC registry instance, that is,/var/opt/SUNWdsee7/dcc/ads. The easiest is to runthe Application Server as noaccess too.
DSCC Agent The dsccsetup command plugs the DSCC Agent intothe Common Agent Container framework availableon Solaris. Type man —s 5 cacao.
See “Pre-Configuring the Directory Server Enterprise Edition Installation” on page 29 and“Checking Your Directory Server Enterprise Edition Installation” on page 31.
Uninstalling Directory Server Enterprise EditionThe following procedure removes only the Directory Server Enterprise Edition 11g Release 1(11.1.1.5.0) software. Any prior version of Directory Server Enterprise Edition that is installedremains intact. The version 11g Release 1 (11.1.1.5.0) installation does not upgrade the version6.x software but performs the fresh installation.
▼ To Remove Directory Server Enterprise EditionRemove the server instances that depend on the software to be removed.For more information, see “Removing Server Instances” on page 39.
1
Uninstalling Directory Server Enterprise Edition
Oracle Directory Server Enterprise Edition Installation Guide • May 201152

Remove DSCC.For more information, see “To Unconfigure Directory Service Control Center ” on page 42.
Remove the Directory Server Enterprise Edition software.
a. If you are using the Solaris 9 operating system, remove the SUNWdsee7-config package.# pkgrm SUNWdsee7-config
b. Remove the following packages in the given sequence to remove Directory ServerEnterprise Edition software from your computer.# pkgrm SUNWdsee7-var
# pkgrm SUNWdsee7-man
# pkgrm SUNWdsee7
2
3
Uninstalling Directory Server Enterprise Edition
Chapter 4 • Installing and Uninstalling Directory Server Enterprise Edition Using Native Packages 53

54

AppendixesThis part contains the following appendixes:
■ Appendix A, “Deploying the DSCC WAR File”■ Appendix B, “Working With Sun Cryptographic Framework on Solaris 10 Systems”
P A R T I I
55

56
Deploying the DSCC WAR File
To access and manage server instances using a web-based interface, you must deploy the DSCCWAR file, supplied with the Directory Server Enterprise Edition software, with one of thesupported application servers.
This appendix describes the minimum requirements that must be met by the application serverand provides basic instructions on how to deploy the DSCC WAR file with the applicationserver. These procedures do not intend to cover all possible methods to deploy the WAR file fora specific application server. For more information pertaining to a specific application server,refer to the respective application server documentation.
Deploying the DSCC WAR File With a Supported ApplicationServer
The following application servers are supported for use with DSCC:
■ GlassFish Application Server 3.0.1+■ Tomcat 6.x■ Oracle iPlanet Web Server 7.0.9 (and Sun Java System Web Server 7.0+)■ Oracle WebLogic Server 10.3.4
Application server versions prior to those listed above are not supported.
In addition, your application server must comply with the following requirements:
■ All Java permissions must be granted to the DSCC application.By default, all the supported application servers grant these permissions to the DSCCapplication..
■ The tag pooling feature of your application server must be disabled.Tag pooling is disabled by default in all the supported application servers except Tomcat.
AA P P E N D I X A
57
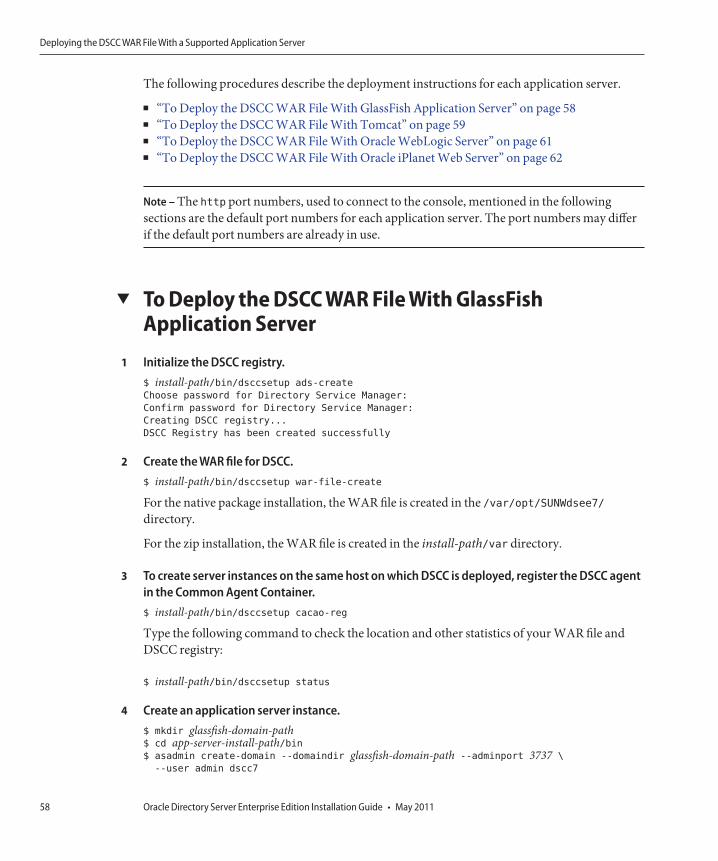
The following procedures describe the deployment instructions for each application server.
■ “To Deploy the DSCC WAR File With GlassFish Application Server” on page 58■ “To Deploy the DSCC WAR File With Tomcat” on page 59■ “To Deploy the DSCC WAR File With Oracle WebLogic Server” on page 61■ “To Deploy the DSCC WAR File With Oracle iPlanet Web Server” on page 62
Note – The http port numbers, used to connect to the console, mentioned in the followingsections are the default port numbers for each application server. The port numbers may differif the default port numbers are already in use.
▼ To Deploy the DSCC WAR File With GlassFishApplication Server
Initialize the DSCC registry.$ install-path/bin/dsccsetup ads-create
Choose password for Directory Service Manager:
Confirm password for Directory Service Manager:
Creating DSCC registry...
DSCC Registry has been created successfully
Create the WAR file for DSCC.$ install-path/bin/dsccsetup war-file-create
For the native package installation, the WAR file is created in the /var/opt/SUNWdsee7/directory.
For the zip installation, the WAR file is created in the install-path/var directory.
To create server instances on the same host on which DSCC is deployed, register the DSCC agentin the Common Agent Container.$ install-path/bin/dsccsetup cacao-reg
Type the following command to check the location and other statistics of your WAR file andDSCC registry:
$ install-path/bin/dsccsetup status
Create an application server instance.$ mkdir glassfish-domain-path$ cd app-server-install-path/bin$ asadmin create-domain --domaindir glassfish-domain-path --adminport 3737 \
--user admin dscc7
1
2
3
4
Deploying the DSCC WAR File With a Supported Application Server
Oracle Directory Server Enterprise Edition Installation Guide • May 201158
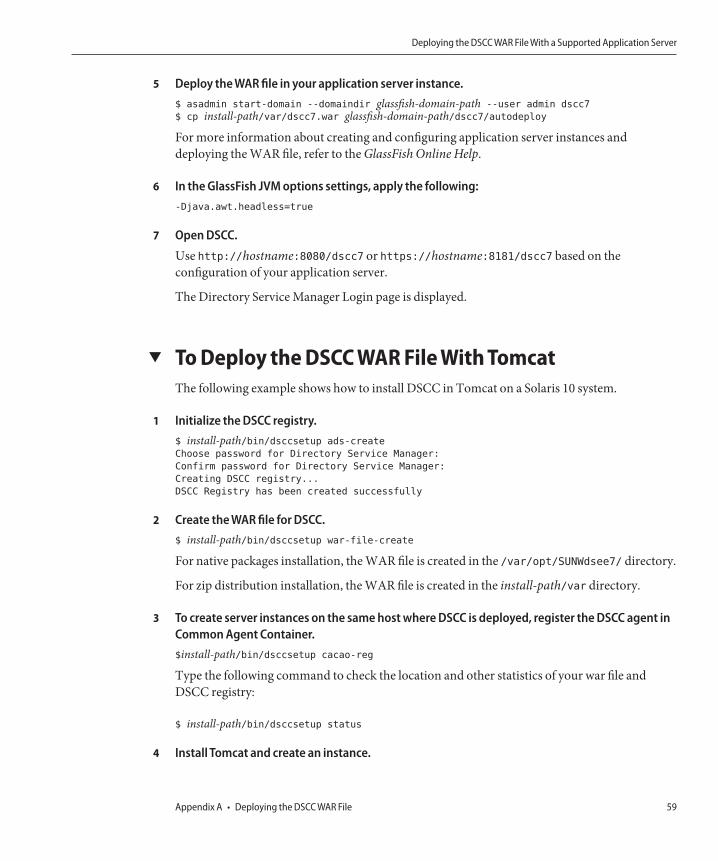
Deploy the WAR file in your application server instance.$ asadmin start-domain --domaindir glassfish-domain-path --user admin dscc7
$ cp install-path/var/dscc7.war glassfish-domain-path/dscc7/autodeploy
For more information about creating and configuring application server instances anddeploying the WAR file, refer to the GlassFish Online Help.
In the GlassFish JVM options settings, apply the following:-Djava.awt.headless=true
Open DSCC.
Use http://hostname:8080/dscc7 or https://hostname:8181/dscc7 based on theconfiguration of your application server.
The Directory Service Manager Login page is displayed.
▼ To Deploy the DSCC WAR File With TomcatThe following example shows how to install DSCC in Tomcat on a Solaris 10 system.
Initialize the DSCC registry.$ install-path/bin/dsccsetup ads-create
Choose password for Directory Service Manager:
Confirm password for Directory Service Manager:
Creating DSCC registry...
DSCC Registry has been created successfully
Create the WAR file for DSCC.$ install-path/bin/dsccsetup war-file-create
For native packages installation, the WAR file is created in the /var/opt/SUNWdsee7/ directory.
For zip distribution installation, the WAR file is created in the install-path/var directory.
To create server instances on the same host where DSCC is deployed, register the DSCC agent inCommon Agent Container.$install-path/bin/dsccsetup cacao-reg
Type the following command to check the location and other statistics of your war file andDSCC registry:
$ install-path/bin/dsccsetup status
Install Tomcat and create an instance.
5
6
7
1
2
3
4
Deploying the DSCC WAR File With a Supported Application Server
Appendix A • Deploying the DSCC WAR File 59
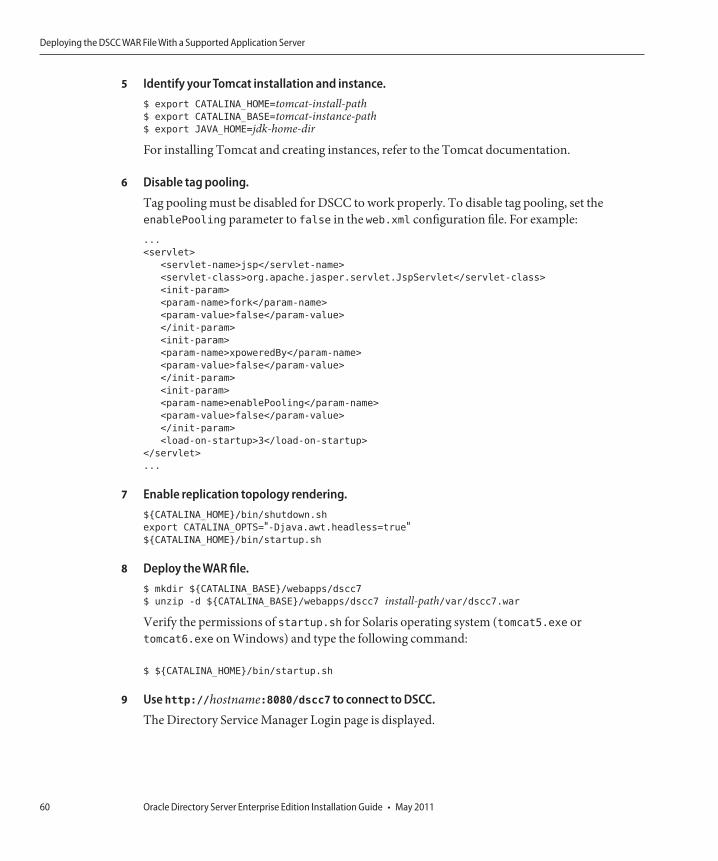
Identify your Tomcat installation and instance.$ export CATALINA_HOME=tomcat-install-path$ export CATALINA_BASE=tomcat-instance-path$ export JAVA_HOME=jdk-home-dir
For installing Tomcat and creating instances, refer to the Tomcat documentation.
Disable tag pooling.
Tag pooling must be disabled for DSCC to work properly. To disable tag pooling, set theenablePooling parameter to false in the web.xml configuration file. For example:...
<servlet>
<servlet-name>jsp</servlet-name>
<servlet-class>org.apache.jasper.servlet.JspServlet</servlet-class>
<init-param>
<param-name>fork</param-name>
<param-value>false</param-value>
</init-param>
<init-param>
<param-name>xpoweredBy</param-name>
<param-value>false</param-value>
</init-param>
<init-param>
<param-name>enablePooling</param-name>
<param-value>false</param-value>
</init-param>
<load-on-startup>3</load-on-startup>
</servlet>
...
Enable replication topology rendering.${CATALINA_HOME}/bin/shutdown.sh
export CATALINA_OPTS="-Djava.awt.headless=true"${CATALINA_HOME}/bin/startup.sh
Deploy the WAR file.$ mkdir ${CATALINA_BASE}/webapps/dscc7
$ unzip -d ${CATALINA_BASE}/webapps/dscc7 install-path/var/dscc7.war
Verify the permissions of startup.sh for Solaris operating system (tomcat5.exe ortomcat6.exe on Windows) and type the following command:
$ ${CATALINA_HOME}/bin/startup.sh
Use http://hostname:8080/dscc7 to connect to DSCC.
The Directory Service Manager Login page is displayed.
5
6
7
8
9
Deploying the DSCC WAR File With a Supported Application Server
Oracle Directory Server Enterprise Edition Installation Guide • May 201160
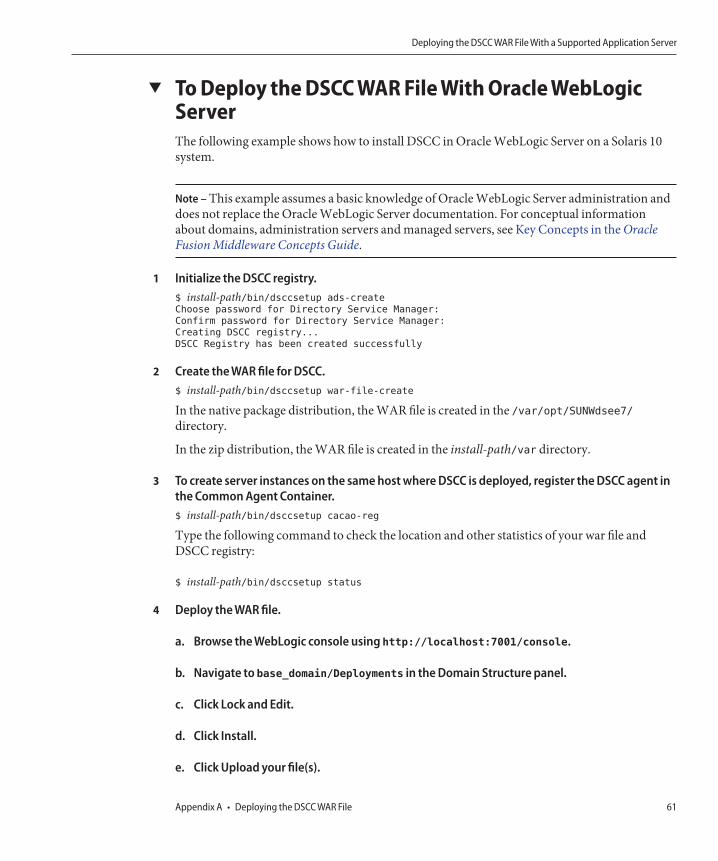
▼ To Deploy the DSCC WAR File With Oracle WebLogicServerThe following example shows how to install DSCC in Oracle WebLogic Server on a Solaris 10system.
Note – This example assumes a basic knowledge of Oracle WebLogic Server administration anddoes not replace the Oracle WebLogic Server documentation. For conceptual informationabout domains, administration servers and managed servers, see Key Concepts in the OracleFusion Middleware Concepts Guide.
Initialize the DSCC registry.$ install-path/bin/dsccsetup ads-create
Choose password for Directory Service Manager:
Confirm password for Directory Service Manager:
Creating DSCC registry...
DSCC Registry has been created successfully
Create the WAR file for DSCC.$ install-path/bin/dsccsetup war-file-create
In the native package distribution, the WAR file is created in the /var/opt/SUNWdsee7/directory.
In the zip distribution, the WAR file is created in the install-path/var directory.
To create server instances on the same host where DSCC is deployed, register the DSCC agent inthe Common Agent Container.$ install-path/bin/dsccsetup cacao-reg
Type the following command to check the location and other statistics of your war file andDSCC registry:
$ install-path/bin/dsccsetup status
Deploy the WAR file.
a. Browse the WebLogic console using http://localhost:7001/console.
b. Navigate to base_domain/Deployments in the Domain Structure panel.
c. Click Lock and Edit.
d. Click Install.
e. Click Upload your file(s).
1
2
3
4
Deploying the DSCC WAR File With a Supported Application Server
Appendix A • Deploying the DSCC WAR File 61

f. In Deployment Archive, select install-path/var/dscc7.war and click Next.
g. Select dscc7.war and click Next.
h. Select Install this deployment as an application and click Next.
i. Provide a Name for the deployment, accept the default Optional Settings and click Finish.
j. Click Activate Changes in the top left corner.
The dscc7 deployment must be in the active state.
Use http://hostname:port/dscc7 to connect to DSCC.The default port number for Oracle WebLogic Server is 7001.
The Oracle Directory Service Control Center authentication page is displayed.
▼ To Deploy the DSCC WAR File With Oracle iPlanet WebServerThe following example shows how to install DSCC in Oracle iPlanet Web Server on a Solaris 10system. The same procedure can be used for Sun Java System Web Server 7.0+.
Caution – If you install Oracle iPlanet Web Server as root, web server daemons run as awebservd user. In that case, the easiest way to make your deployment work successfully is toinstall Directory Server Enterprise Edition and pre-configure DSCC as a webservd user.
Initialize the DSCC registry.$ install-path/bin/dsccsetup ads-create
Choose password for Directory Service Manager:
Confirm password for Directory Service Manager:
Creating DSCC registry...
DSCC Registry has been created successfully
Create the WAR file for DSCC.$ install-path/bin/dsccsetup war-file-create
For native packages installation, the WAR file is created in the /var/opt/SUNWdsee7/ directory.
For zip distribution installation, the WAR file is created in the install-path/var directory.
To create server instances on the same host where DSCC is deployed, register the DSCC agent inCommon Agent Container.$install-path/bin/dsccsetup cacao-reg
5
1
2
3
Deploying the DSCC WAR File With a Supported Application Server
Oracle Directory Server Enterprise Edition Installation Guide • May 201162

Type the following command to check the location and other statistics of your war file andDSCC registry:
$ install-path/bin/dsccsetup status
Deploy the war file.
a. Browse the Oracle iPlanet Web Server console using https://hostname:8989.
b. Under the Common Tasks tab, click Add Web Application in the Virtual Server Tasks section.
c. In the Add Web Application form, provide the following values and click OK.
■ Web Application Location: install-path/var/dscc7.war■ URI: /dscc7
Enable server-side HTML
a. Click the Content Handling tab of the virtual server.
b. In the Parsed HTML/SSI section, click New and then OK.
c. In the main window, click Deployment Pending link located in the top right corner andcomplete deployment by following the wizard.
d. Edit the magnus.conf file of the virtual server:# vi web-server-install-path/https-example.com/config/magnus.conf
Add the following line:
type=magnus-internal/parsed-html exts=shtml
e. Under the Configurations tab, click the Refresh button.
f. Click Instance Configuration Modified in the top right corner and click Pull and deployconfiguration from virtual-server and click OK.
For the detailed information about enabling server-side HTML, see “Enabling Server-SideHTML” in Oracle iPlanet Web Server 7.0.9 Developer’s Guide.
Under the Configurations tab, select the configuration that you have created and click Start.
Use http://hostname:8080/dscc7 to connect to DSCC.The Directory Service Manager Login page displays.
4
5
6
7
Deploying the DSCC WAR File With a Supported Application Server
Appendix A • Deploying the DSCC WAR File 63

64
Working With Sun Cryptographic Frameworkon Solaris 10 Systems
This appendix briefly explains how to use the Sun Crypto Accelerator cards through the Suncryptographic framework on Solaris 10 systems with Directory Server and Directory ProxyServer. For more information about the framework, see the respective documentation.
■ “Using Directory Server With Cryptographic Hardware on a Solaris 10 System” on page 65■ “Using Directory Proxy Server With Cryptographic Hardware on a Solaris 10 System” on
page 67
Using Directory Server With Cryptographic Hardware on aSolaris 10 System
This procedure is designed for use with Sun Crypto Accelerator hardware. Perform thefollowing procedure as the same user who runs the Directory Server instance.
▼ To Use Directory Server With Cryptographic Hardwareon a Solaris 10 System
Set the PIN used to access the cryptographic framework by typing the pktool setpin
command.Set the PIN as the same user as the one running Directory Server.
Export the current Directory Server certificate to a PKCS#12 file.The following command shows how to perform this step if the Directory Server instance islocated under /local/ds/.$ dsadm export-cert -o cert-file /local/ds defaultCert
BA P P E N D I X B
1
2
65
Configure Directory Server to use the appropriate token when accessing the key material.Typically, the token is Sun Metaslot.$ dsconf set-server-prop ’ssl-rsa-security-device:Sun Metaslot’
Stop Directory Server.$ dsadm stop /local/ds
(Optional) If you have no other certificates in the existing certificate database for the DirectoryServer instance, remove the certificate database.$ rm -f /local/ds/alias/*.db
This optional step ensures that no certificates are stored in the software database.
Create a new certificate database backed by the Solaris cryptographic framework.If you have not removed the certificate database, you do not need to run the modutil -createline in this example.$ /usr/sfw/bin/64/modutil -create -dbdir /local/ds/alias -dbprefix slapd-
$ /usr/sfw/bin/64/modutil -add "Solaris Kernel Crypto Driver" -libfile \
/usr/lib/64/libpkcs11.so -dbdir /local/ds/alias -dbprefix slapd-
$ /usr/sfw/bin/64/modutil -enable "Solaris Kernel Crypto Driver" \
-dbdir /local/ds/alias -dbprefix slapd-
Import the PKCS#12 certificate that you exported.$ /usr/sfw/bin/64/pk12util -i cert-file \
-d /local/ds/alias -P slapd- -h "Sun Metaslot"$ /usr/sfw/bin/64/certutil -M -n "Sun Metaslot:defaultCert" -t CTu \
-d /local/ds/alias -P slapd-
If your accelerator board has a FIPS 140-2 keystore, for added security, make sure that theprivate key is stored on the device. Sun Crypto Accelerator 4000 and 6000 boards have FIPS140-2 keystores, for example. The exact process depends on the board.
Note – Make sure that the cryptographic hardware supports the cipher suites that you want touse. Not all hardware supports all the cipher suites. As a workaround, you can use dsconfssl-cipher-family to set specific suites.
Create a password file that contains the PIN needed to access the cryptographic framework.This file is required only when the password is changed in step 1.$ echo "Sun Metaslot:password" > /local/dsInst/alias/slapd-pin.txt
If the password has been changed in step 1, password is the new password, otherwise it is the onecurrently in use.
Start Directory Server.$ dsadm start /local/ds
3
4
5
6
7
8
9
Using Directory Server With Cryptographic Hardware on a Solaris 10 System
Oracle Directory Server Enterprise Edition Installation Guide • May 201166
Using Directory Proxy Server With Cryptographic Hardwareon a Solaris 10 System
This procedure is designed for use with Sun Crypto Accelerator hardware. Perform thefollowing procedure as the same user who runs the Directory Proxy Server instance.
▼ To Use Directory Proxy Server With CryptographicHardware on a Solaris 10 System
Stop Directory Proxy Server.$ dpadm stop /local/dps
Turn off the certificate database password storage.$ dpadm set-flags /local/dps cert-pwd-prompt=on
Choose the certificate database password:
Confirm the certificate database password:
Set the PIN used to access the cryptographic framework by typing the pktool setpin
command.Use the same password that you typed when turning off the certificate database passwordstorage.
Generate a key pair by using the cryptographic framework as the key store.$ keytool -genkeypair -alias defaultDPScert
-dname "ou=dps server,dc=example,dc=com" -keyalg RSA -sigalg MD5withRSA
-validity 3652 -storetype PKCS11 -keystore NONE -storepass pin-password
pin-password is the password that you set as the PIN with the pktool setpin command.
Edit the Directory Proxy Server configuration file, adding the following attributes to the baseentry, cn=config.serverCertificateNickName: defaultDPScert
certificateKeyStore: NONE
certificateKeyStoreType: PKCS11
Start Directory Proxy Server.$ dpadm start /local/dps
1
2
3
4
5
6
Using Directory Proxy Server With Cryptographic Hardware on a Solaris 10 System
Appendix B • Working With Sun Cryptographic Framework on Solaris 10 Systems 67

68

Index
Ccentral log directories, 12certificate database, default path, 12check, install, 31–36command line
Directory Server, 31–33server instance, 31–33
Ddefault locations, 11–13DIR_PROXY_HOST, 36DIR_PROXY_PORT, 36DIRSERV_HOST, 36DIRSERV_PORT, 37DSCC
Pre-configure, 29–30registry, 29server instance, 33–36
DSCC_HOST, 37DSCC_PORT, 37DSEE, uninstall, 39–42
Eenvironment variables, 36–37
DIR_PROXY_HOST, 36DIR_PROXY_PORT, 36DIRSERV_HOST, 36DIRSERV_PORT, 37
environment variables (Continued)DSCC_HOST, 37DSCC_PORT, 37LDAP_ADMIN_PWF, 37LDAP_ADMIN_USER, 37MANPATH, 37MANSECT, 37PATH, 37
Iinstall
check, 31–36DSEE
native, 51–52native, 43–53
shared components, 43–45Pre-configure, 29–31
Install, zip distribution, 27–29install-path, 12instance, Directory server, 31–33instance-path, 12isw-hostname directory, 12
JJava Naming and Directory Interface, 11
69
LLDAP_ADMIN_PWF, 37LDAP_ADMIN_USER, 37local log directory, 12
MMANPATH, 37MANSECT, 37Message Queue, 11
Nnative
DSEEprepare, 43–51
PPATH, 37Pre-configure
DSCC, 29–30install, 29–31server, 30
Rremove
DSCC, 42DSEE
zip, 42removing server instance
Directory Proxy Server, 39–40Directory Server, 40
command line, 41DSCC, 40
Sserver, Pre-configure, 30
server instancecommand line, 31–33DSCC, 33–36
serverroot directory, 12SLAMD Distributed Load Generation Engine, 11
Uuninstall
DSEE, 39–42native, 52–53
native, 43–53uninstallation
removing server instances, 39–41removing software, 41–42
Wwar, create, 29
ZZip distribution, install, 27–29
Index
Oracle Directory Server Enterprise Edition Installation Guide • May 201170


