Do You Have All Required Items?Install/Upgrade PathTrak Server/ClientUpgrade HCU/RPM’sInstall/Upgrade WebView 2.5Import UCD InfoCheck for carrier/UCD matchBegin Solving Problems!
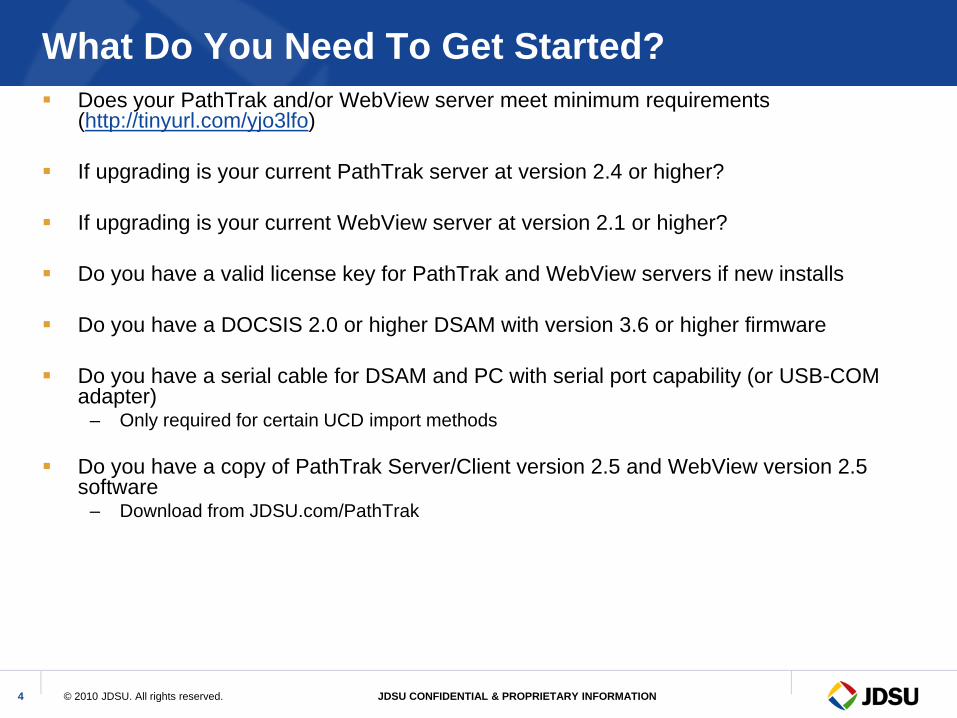
Upgrade PathTrak Server/Client – Simplified Instructions (From version 2.3 SP7 or higher) Server Upgrade from version 2.4 or higher:
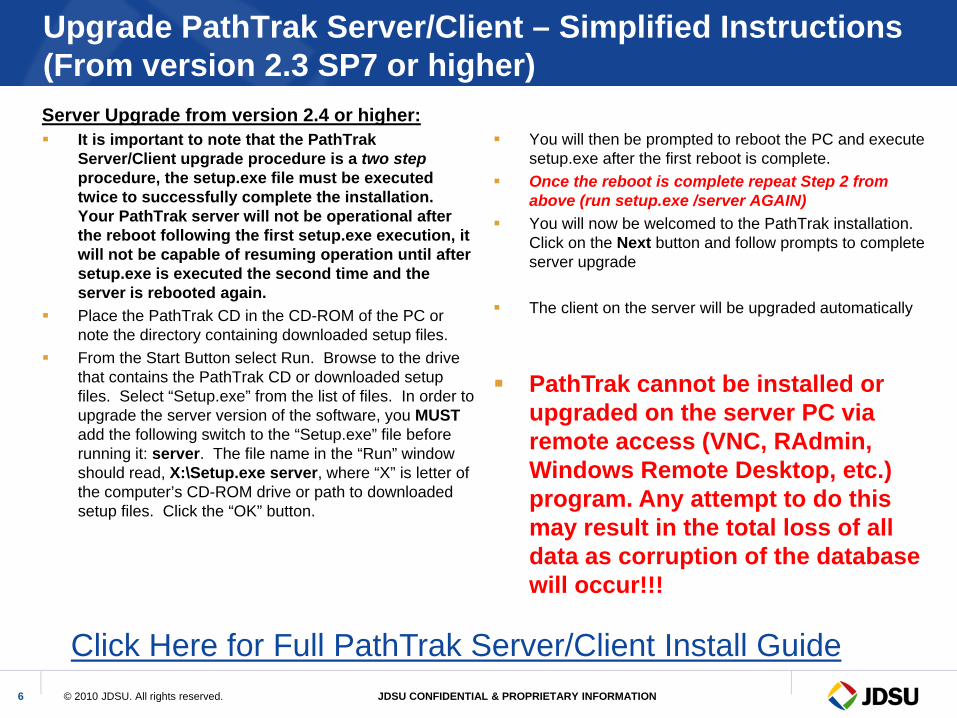
It is important to note that the PathTrakServer/Client upgrade procedure is a two stepprocedure, the setup.exe file must be executed twice to successfully complete the installation.Your PathTrak server will not be operational after the reboot following the first setup.exe execution, it will not be capable of resuming operation until after setup.exe is executed the second time and the server is rebooted again.Place the PathTrak CD in the CD-ROM of the PC or note the directory containing downloaded setup files.From the Start Button select Run. Browse to the drive that contains the PathTrak CD or downloaded setup files. Select “Setup.exe” from the list of files. In order to upgrade the server version of the software, you MUSTadd the following switch to the “Setup.exe” file before running it: server. The file name in the “Run” window should read, X:\Setup.exe server, where “X” is letter of the computer’s CD-ROM drive or path to downloaded setup files. Click the “OK” button.
You will then be prompted to reboot the PC and execute setup.exe after the first reboot is complete.Once the reboot is complete repeat Step 2 from above (run setup.exe /server AGAIN)You will now be welcomed to the PathTrak installation. Click on the Next button and follow prompts to complete server upgrade
The client on the server will be upgraded automatically
PathTrak cannot be installed or upgraded on the server PC via remote access (VNC, RAdmin, Windows Remote Desktop, etc.) program. Any attempt to do this may result in the total loss of all data as corruption of the database will occur!!!
Click Here for Full PathTrak Server/Client Install Guide
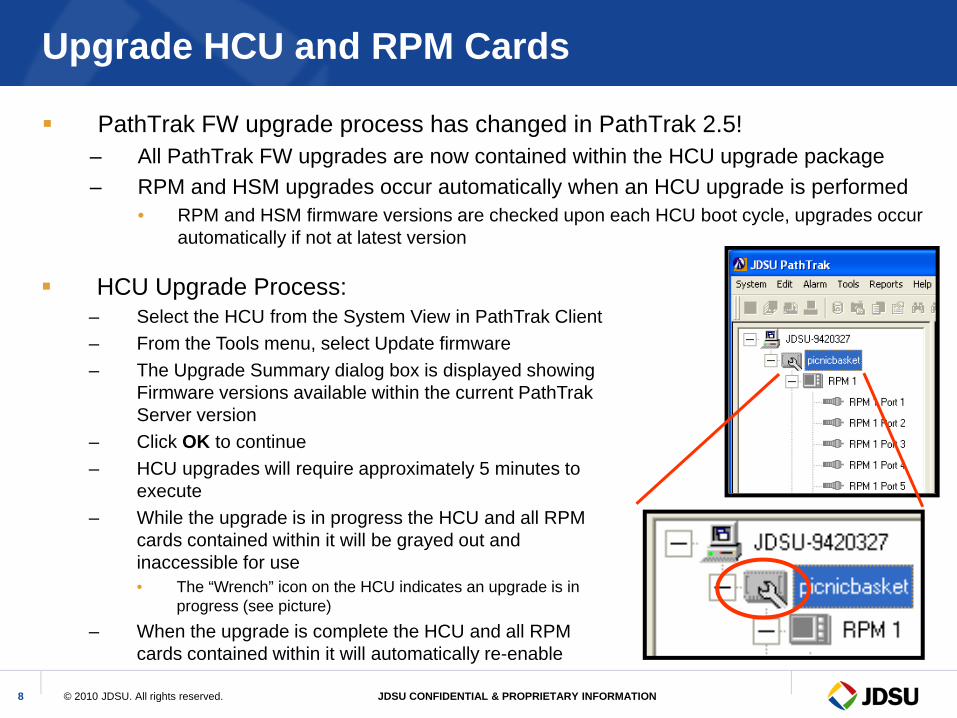
PathTrak FW upgrade process has changed in PathTrak 2.5!– All PathTrak FW upgrades are now contained within the HCU upgrade package– RPM and HSM upgrades occur automatically when an HCU upgrade is performed
• RPM and HSM firmware versions are checked upon each HCU boot cycle, upgrades occur automatically if not at latest version
HCU Upgrade Process:– Select the HCU from the System View in PathTrak Client– From the Tools menu, select Update firmware – The Upgrade Summary dialog box is displayed showing
Firmware versions available within the current PathTrak Server version
– Click OK to continue– HCU upgrades will require approximately 5 minutes to
execute – While the upgrade is in progress the HCU and all RPM
cards contained within it will be grayed out and inaccessible for use • The “Wrench” icon on the HCU indicates an upgrade is in
progress (see picture)– When the upgrade is complete the HCU and all RPM
cards contained within it will automatically re-enable
UCD Import InformationWhat is a UCD and why do I need to import them to fully utilize WebView 2.5?
UCD: Upstream Channel Descriptor– Information sent by the CMTS during the Range/Register process and typically every two seconds thereafter to all
cable modems telling them how to communicate on the DOCSIS network– The UCD contains information needed by WebView to decode the MAC address from an upstream DOCSIS
packet and to detect Codeword Errors• Examples of UCD Content: modulation type, symbol rate, preamble information, FEC settings, etc
– UCDs are frequently common across CMTS ports within a chassis as well as CMTSs of the same make/model within a system
– PathTrak automatically determines which UCD is associated with an upstream (if a match can be found)
What is the UCD Import Tool?– The UCD Import Tool is a standalone JDSU tool used to acquire Upstream UCD information from the
downstream(s) associated with upstreams on each node• In bonded downstream environments only Primary downstreams contain UCD information
– UCD Import Tool is installed on the WebView Server machine plus as many additional machines as desired (technician laptops, etc)
How does the import process work (High-Level):– The UCD Import Toll will command a DSAM with an RF connection to the HFC to begin the Range/Register
process on a specified downstream– The DSAM will capture needed UCD parameters from the downstream and feed them back to UCD Import Tool– The PC running the UCD Import Tool will then:
• Send UCD information directly to WebView server if LAN connectivity exists• Save the UCD information to a local file for future export if LAN connectivity does not exist
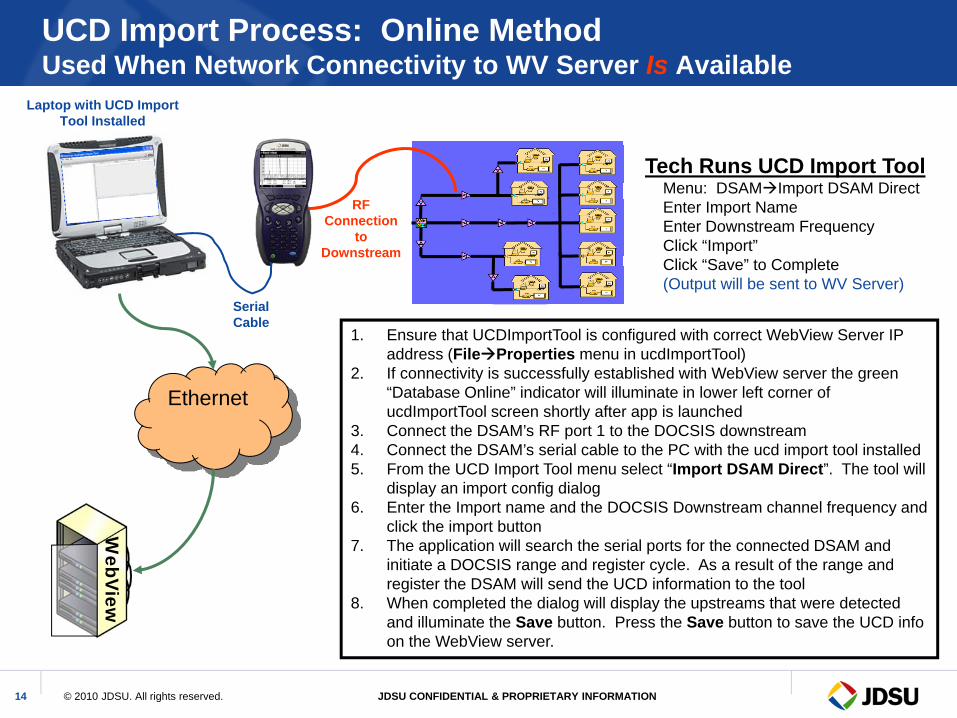
UCD Import Process: Online MethodUsed When Network Connectivity to WV Server Is Available
Serial Cable
Laptop with UCD Import Tool Installed
RF Connection
to Downstream
Tech Runs UCD Import ToolMenu: DSAM Import DSAM DirectEnter Import NameEnter Downstream FrequencyClick “Import”Click “Save” to Complete (Output will be sent to WV Server)
WebV
iew
Ethernet
1. Ensure that UCDImportTool is configured with correct WebView Server IP address (File Properties menu in ucdImportTool)
2. If connectivity is successfully established with WebView server the green “Database Online” indicator will illuminate in lower left corner of ucdImportTool screen shortly after app is launched
3. Connect the DSAM’s RF port 1 to the DOCSIS downstream 4. Connect the DSAM’s serial cable to the PC with the ucd import tool installed5. From the UCD Import Tool menu select “Import DSAM Direct”. The tool will
display an import config dialog 6. Enter the Import name and the DOCSIS Downstream channel frequency and
click the import button 7. The application will search the serial ports for the connected DSAM and
initiate a DOCSIS range and register cycle. As a result of the range and register the DSAM will send the UCD information to the tool
8. When completed the dialog will display the upstreams that were detected and illuminate the Save button. Press the Save button to save the UCD info on the WebView server.
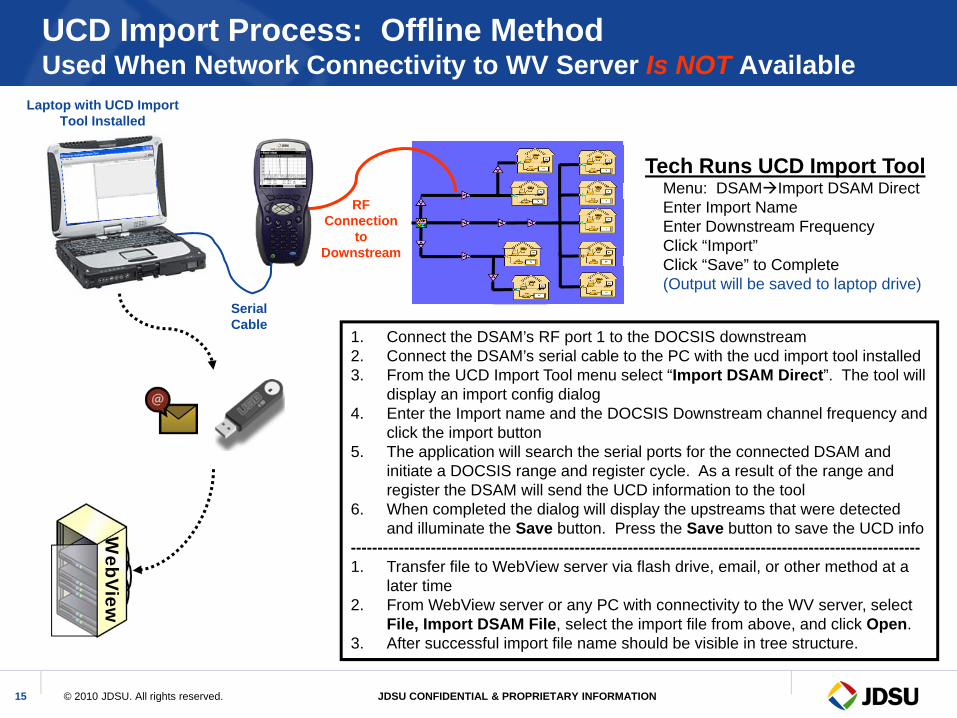
UCD Import Process: Offline MethodUsed When Network Connectivity to WV Server Is NOT Available
Serial Cable
Laptop with UCD Import Tool Installed
RF Connection
to Downstream
Tech Runs UCD Import ToolMenu: DSAM Import DSAM DirectEnter Import NameEnter Downstream FrequencyClick “Import”Click “Save” to Complete (Output will be saved to laptop drive)
WebV
iew
1. Connect the DSAM’s RF port 1 to the DOCSIS downstream 2. Connect the DSAM’s serial cable to the PC with the ucd import tool installed3. From the UCD Import Tool menu select “Import DSAM Direct”. The tool will
display an import config dialog 4. Enter the Import name and the DOCSIS Downstream channel frequency and
click the import button 5. The application will search the serial ports for the connected DSAM and
initiate a DOCSIS range and register cycle. As a result of the range and register the DSAM will send the UCD information to the tool
6. When completed the dialog will display the upstreams that were detected and illuminate the Save button. Press the Save button to save the UCD info
-----------------------------------------------------------------------------------------------------------1. Transfer file to WebView server via flash drive, email, or other method at a
later time2. From WebView server or any PC with connectivity to the WV server, select
File, Import DSAM File, select the import file from above, and click Open.3. After successful import file name should be visible in tree structure.
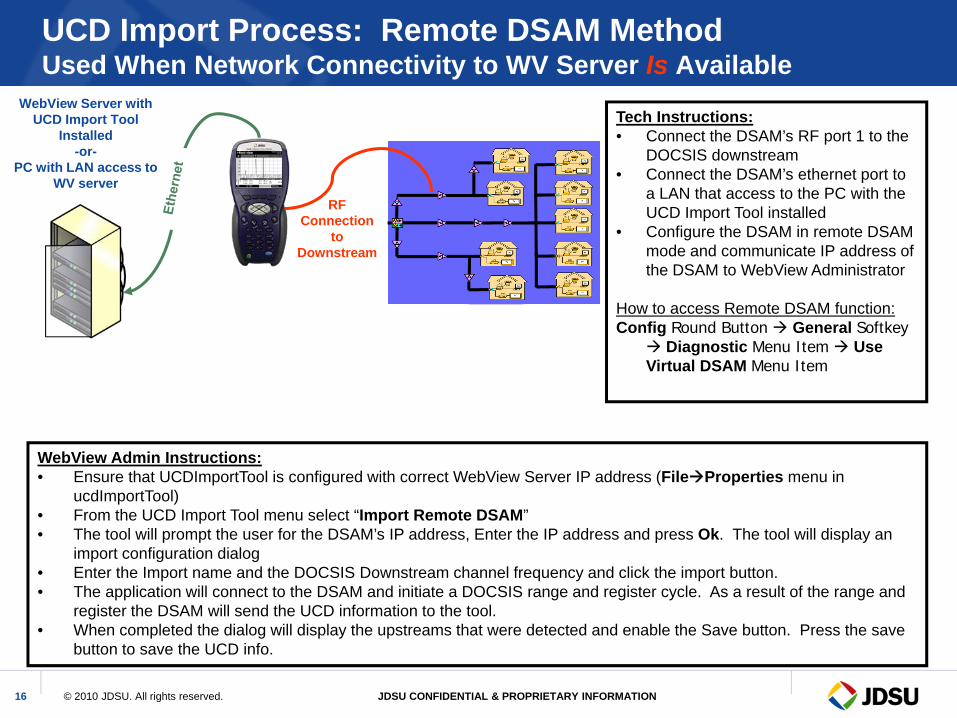
UCD Import Process: Remote DSAM MethodUsed When Network Connectivity to WV Server Is Available
WebView Server with UCD Import Tool
Installed-or-
PC with LAN access to WV server
RF Connection
to Downstream
WebView Admin Instructions:• Ensure that UCDImportTool is configured with correct WebView Server IP address (File Properties menu in
ucdImportTool)• From the UCD Import Tool menu select “Import Remote DSAM” • The tool will prompt the user for the DSAM’s IP address, Enter the IP address and press Ok. The tool will display an
import configuration dialog • Enter the Import name and the DOCSIS Downstream channel frequency and click the import button.• The application will connect to the DSAM and initiate a DOCSIS range and register cycle. As a result of the range and
register the DSAM will send the UCD information to the tool. • When completed the dialog will display the upstreams that were detected and enable the Save button. Press the save
button to save the UCD info.
Tech Instructions:• Connect the DSAM’s RF port 1 to the
DOCSIS downstream • Connect the DSAM’s ethernet port to
a LAN that access to the PC with the UCD Import Tool installed
• Configure the DSAM in remote DSAM mode and communicate IP address of the DSAM to WebView Administrator
How to access Remote DSAM function:Config Round Button General Softkey
Do You Have All Required Items?Install/Upgrade PathTrak Server/ClientUpgrade HCU/RPM’sInstall/Upgrade WebView 2.5Import UCD InfoCheck for carrier/UCD match
Note: It may take up to 15 minutes for imported UCD’s to be recognized by QAMTrak
Do You Have All Required Items?Install/Upgrade PathTrak Server/ClientUpgrade HCU/RPM’sInstall/Upgrade WebView 2.5Import UCD InfoCheck for carrier/UCD matchBegin Solving Problems!
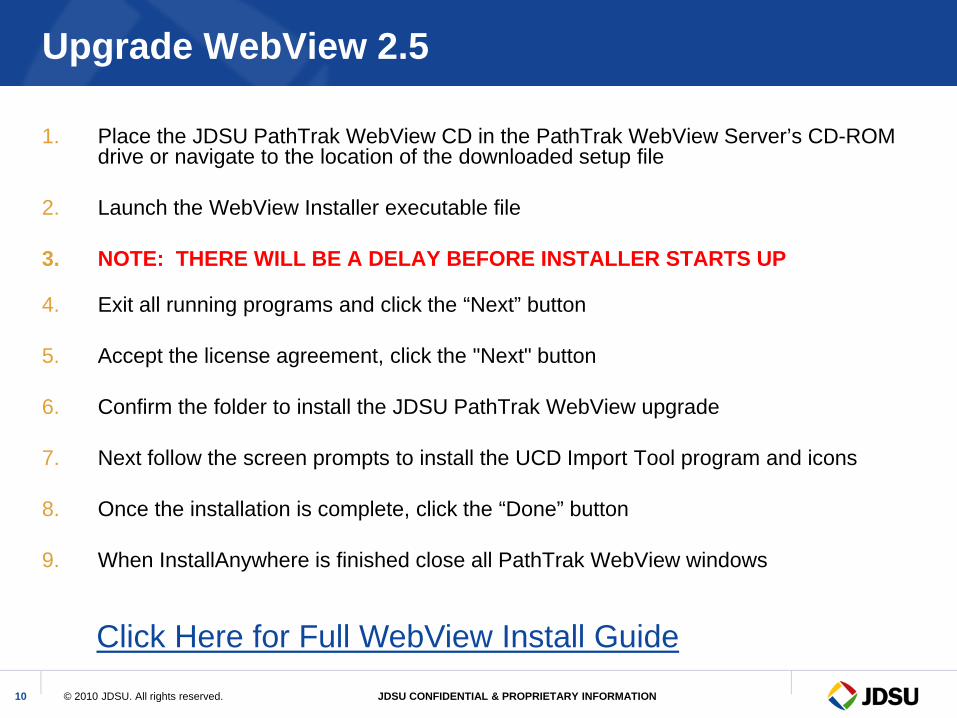
Click Here for WebView 2.5 User Training Video (71MB, 33 minutes)
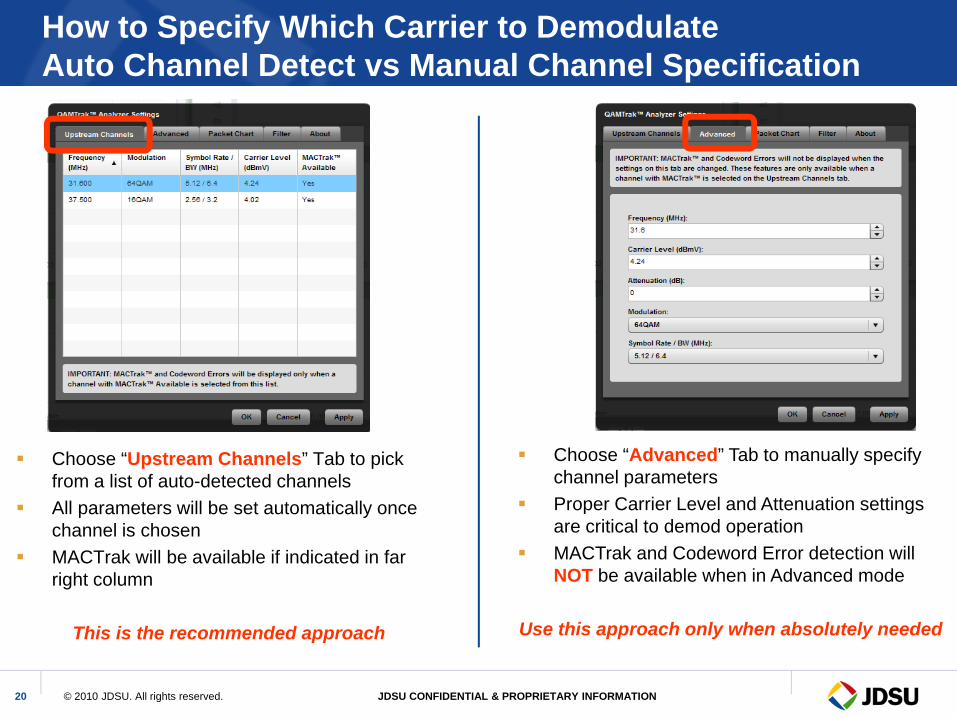
How to Specify Which Carrier to DemodulateAuto Channel Detect vs Manual Channel Specification
Choose “Upstream Channels” Tab to pick from a list of auto-detected channelsAll parameters will be set automatically once channel is chosenMACTrak will be available if indicated in far right column
This is the recommended approach
Choose “Advanced” Tab to manually specify channel parametersProper Carrier Level and Attenuation settings are critical to demod operationMACTrak and Codeword Error detection will NOT be available when in Advanced mode
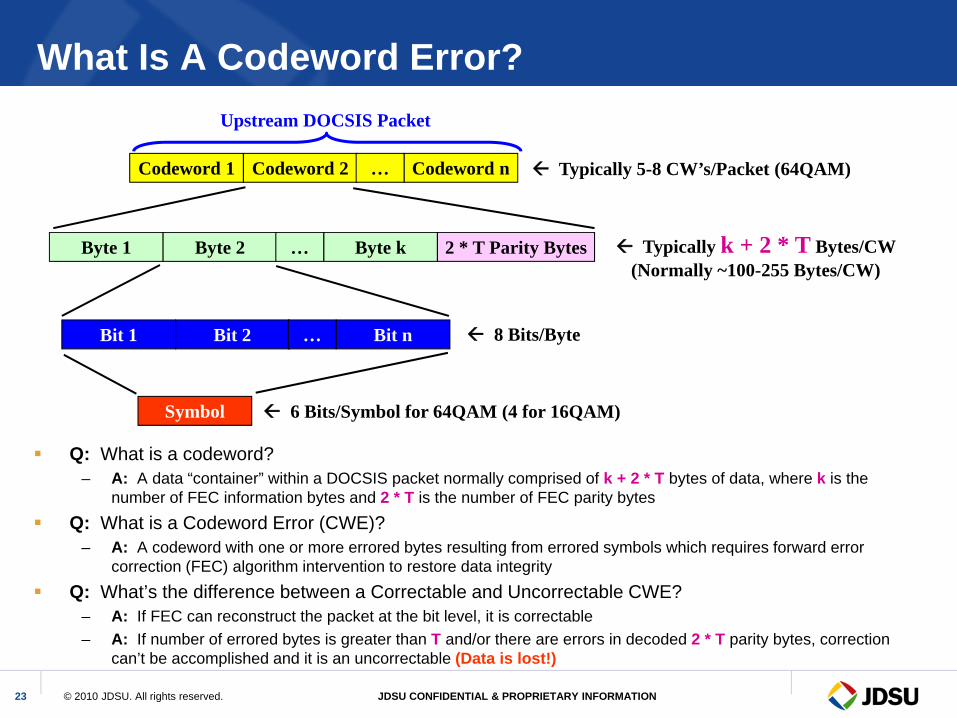
Q: What is a codeword?– A: A data “container” within a DOCSIS packet normally comprised of k + 2 * T bytes of data, where k is the
number of FEC information bytes and 2 * T is the number of FEC parity bytesQ: What is a Codeword Error (CWE)?
– A: A codeword with one or more errored bytes resulting from errored symbols which requires forward error correction (FEC) algorithm intervention to restore data integrity
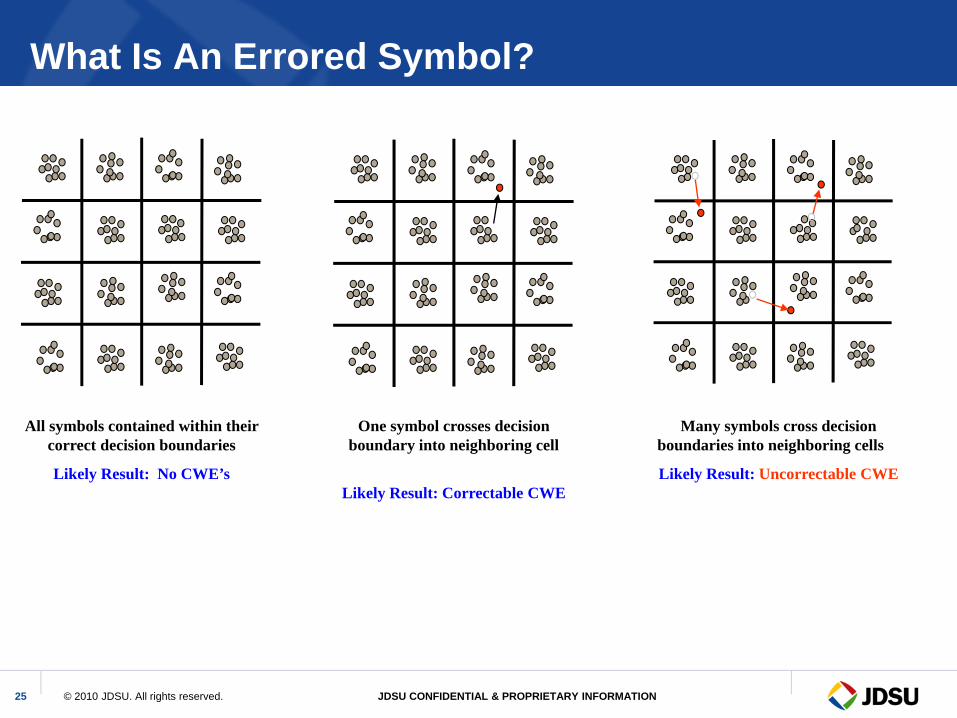
Q: What’s the difference between a Correctable and Uncorrectable CWE?– A: If FEC can reconstruct the packet at the bit level, it is correctable– A: If number of errored bytes is greater than T and/or there are errors in decoded 2 * T parity bytes, correction
can’t be accomplished and it is an uncorrectable (Data is lost!)
Codeword 1 Codeword 2 Codeword n…
Byte 1 Byte 2 Byte k…
Bit 1 Bit 2 Bit n…
Symbol
Typically 5-8 CW’s/Packet (64QAM)
Typically k + 2 * T Bytes/CW(Normally ~100-255 Bytes/CW)
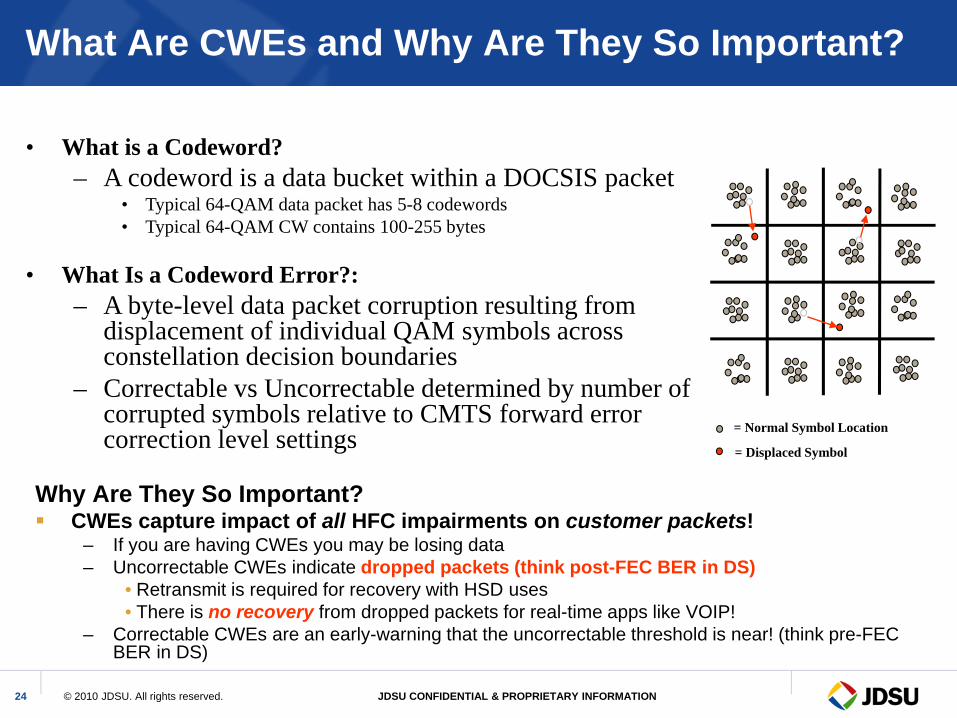
Why Are They So Important?CWEs capture impact of all HFC impairments on customer packets!
– If you are having CWEs you may be losing data– Uncorrectable CWEs indicate dropped packets (think post-FEC BER in DS)
• Retransmit is required for recovery with HSD uses• There is no recovery from dropped packets for real-time apps like VOIP!
– Correctable CWEs are an early-warning that the uncorrectable threshold is near! (think pre-FEC BER in DS)
• What is a Codeword?– A codeword is a data bucket within a DOCSIS packet
• Typical 64-QAM data packet has 5-8 codewords• Typical 64-QAM CW contains 100-255 bytes
• What Is a Codeword Error?: – A byte-level data packet corruption resulting from
displacement of individual QAM symbols across constellation decision boundaries
– Correctable vs Uncorrectable determined by number of corrupted symbols relative to CMTS forward error correction level settings = Normal Symbol Location
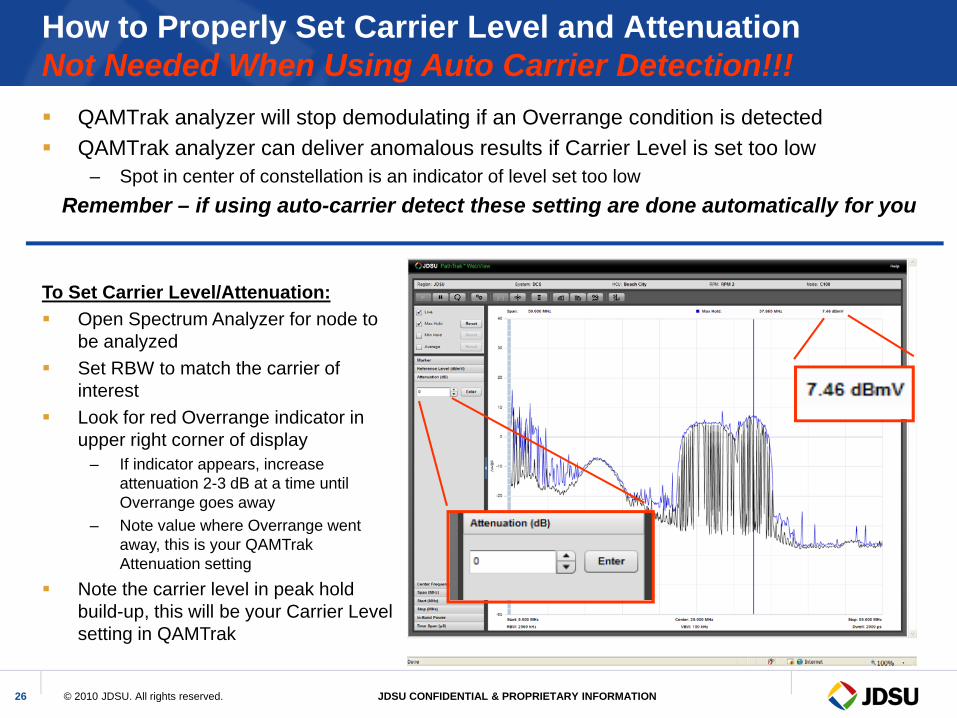
How to Properly Set Carrier Level and AttenuationNot Needed When Using Auto Carrier Detection!!!
QAMTrak analyzer will stop demodulating if an Overrange condition is detectedQAMTrak analyzer can deliver anomalous results if Carrier Level is set too low
– Spot in center of constellation is an indicator of level set too lowRemember – if using auto-carrier detect these setting are done automatically for you
To Set Carrier Level/Attenuation:Open Spectrum Analyzer for node to be analyzedSet RBW to match the carrier of interestLook for red Overrange indicator in upper right corner of display
– If indicator appears, increase attenuation 2-3 dB at a time until Overrange goes away
– Note value where Overrange went away, this is your QAMTrak Attenuation setting
Note the carrier level in peak hold build-up, this will be your Carrier Level setting in QAMTrak