+ All Categories
Home > Documents > PowerPoint Access Toolbar arrow Displayed...

PowerPoint Access Toolbar arrow Displayed...

Date post: 26-Jun-2020
Category:
Upload: others
View: 6 times
Download: 0 times
Share this document with a friend
5
Copyright © 2011 by Pearson Education Inc. publishing as Prentice Hall. All rights reserved. From Skills for Success with Microsoft® PowerPoint 2010 Comprehensive Create Custom Templates | Microsoft PowerPoint Chapter 8 More Skills: SKILL 14 | Page 1 of 5 Almost any command found on the Ribbon or in dialog boxes can be added as a button on the Quick Access Toolbar. For tasks that you frequently perform, you can save time by adding their button to the Quick Access Toolbar. To complete this document, you will need the following file: p08_Benefits You will save your documents as: Lastname_Firstname_p08_Benefits Lastname_Firstname_p08_Benefits_Snip 1. Start PowerPoint, and then open p08_Benefits. Save the file in your PowerPoint Chapter 8 folder as Lastname_Firstname_p08_Benefits 2. At the top of your screen, click the Customize Quick Access Toolbar arrow , and then compare your screen with Figure 1. The Customize Quick Access Toolbar menu displays a list of common commands with buttons currently displayed checked. PowerPoint CHAPTER 8 More Skills 14 Customize the Quick Access Toolbar Displayed buttons Customize Quick Access Toolbar arrow Figure 1
Transcript

Copyright © 2011 by Pearson Education Inc. publishing as Prentice Hall. All rights reserved.From Skills for Success with Microsoft® PowerPoint 2010 Comprehensive

Create Custom Templates | Microsoft PowerPoint Chapter 8 More Skills: SKILL 14 | Page 1 of 5

� Almost any command found on the Ribbon or in dialog boxes can be added as a button on theQuick Access Toolbar.

� For tasks that you frequently perform, you can save time by adding their button to the QuickAccess Toolbar.

To complete this document, you will need the following file:� p08_Benefits

You will save your documents as:� Lastname_Firstname_p08_Benefits� Lastname_Firstname_p08_Benefits_Snip

1. Start PowerPoint, and then open p08_Benefits. Save the file in your PowerPoint Chapter 8folder as Lastname_Firstname_p08_Benefits

2. At the top of your screen, click the Customize Quick Access Toolbar arrow , and thencompare your screen with Figure 1.

The Customize Quick Access Toolbar menu displays a list of common commands withbuttons currently displayed checked.

PowerPointCHAPTER 8

More Skills 14 Customize the Quick Access Toolbar

Displayed buttons

Customize QuickAccess Toolbar

arrow

Figure 1

Copyright © 2011 by Pearson Education Inc. publishing as Prentice Hall. All rights reserved.From Skills for Success with Microsoft® PowerPoint 2010 Comprehensive

Create Custom Templates | Microsoft PowerPoint Chapter 8 More Skills: SKILL 14 | Page 2 of 5

3. From the displayed Customize Quick Access Toolbar menu, click Slide Show fromBeginning to add the button to the Quick Access Toolbar as shown in Figure 2.

The button is added to the Quick Access Toolbar. When the Slide Show from theBeginning button is clicked, the slide show will start from the beginning of the presentation, regardless of which slide you have displayed.

Start Show fromthe Beginning

button

Figure 2

4. Click the Customize Quick Access Toolbar arrow , and then click the Quick Printbutton.

When the Quick Print button is clicked, the presentation will print directly withoutfirst opening the Print dialog box.

5. Click the Customize Quick Access Toolbar arrow , and then click More Commands.

6. In the PowerPoint Options dialog box, click the Customize Quick Access Toolbar boxarrow, and then click For Lastname_Firstname_p08_Benefits.

When a file name is selected, buttons added to the Quick Access Toolbar will displayonly when that file is open.

7. In the list of Popular Commands, click Format Background, and then click Add.

8. Scroll down the list of Popular Commands, click New Slide, and then click Add.

9. At the bottom of the PowerPoint Options dialog box, select the Show Quick AccessToolbar below the Ribbon check box. Compare your screen with Figure 3, and then click OK.

Copyright © 2011 by Pearson Education Inc. publishing as Prentice Hall. All rights reserved.From Skills for Success with Microsoft® PowerPoint 2010 Comprehensive

Create Custom Templates | Microsoft PowerPoint Chapter 8 More Skills: SKILL 14 | Page 3 of 5

10. Display Slide 2. On the Quick Access Toolbar, click the New Slide button arrow , andthen click Title and Content.

11. In the title placeholder, type Sign Up Today In the content placeholder, type Call HumanResources for a participation form

Current fileselected

Popular Commands

Two buttons added

Below the Ribboncheck box selected

Figure 3

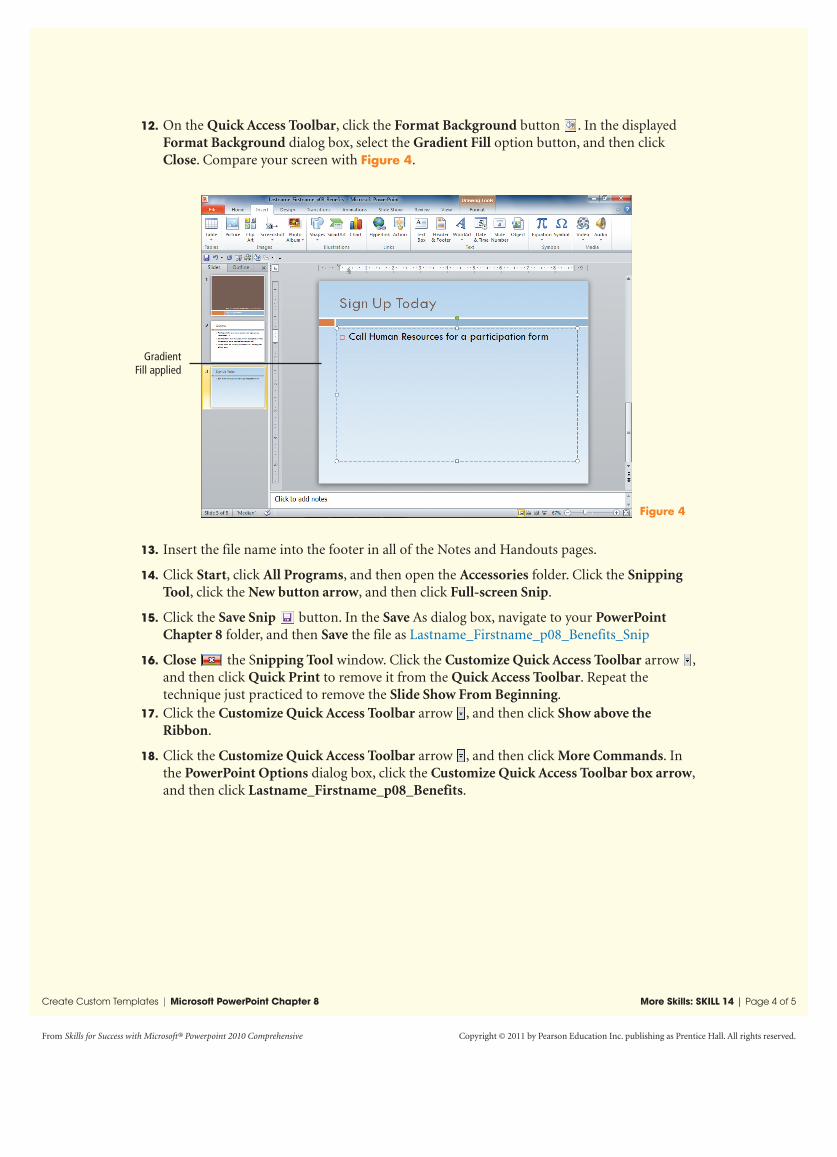
12. On the Quick Access Toolbar, click the Format Background button . In the displayedFormat Background dialog box, select the Gradient Fill option button, and then clickClose. Compare your screen with Figure 4.

Copyright © 2011 by Pearson Education Inc. publishing as Prentice Hall. All rights reserved.From Skills for Success with Microsoft® Powerpoint 2010 Comprehensive

Create Custom Templates | Microsoft PowerPoint Chapter 8 More Skills: SKILL 14 | Page 4 of 5

13. Insert the file name into the footer in all of the Notes and Handouts pages.

14. Click Start, click All Programs, and then open the Accessories folder. Click the SnippingTool, click the New button arrow, and then click Full-screen Snip.

15. Click the Save Snip button. In the Save As dialog box, navigate to your PowerPointChapter 8 folder, and then Save the file as Lastname_Firstname_p08_Benefits_Snip

16. Close the Snipping Tool window. Click the Customize Quick Access Toolbar arrow ,and then click Quick Print to remove it from the Quick Access Toolbar. Repeat the technique just practiced to remove the Slide Show From Beginning.

17. Click the Customize Quick Access Toolbar arrow , and then click Show above theRibbon.

18. Click the Customize Quick Access Toolbar arrow , and then click More Commands. Inthe PowerPoint Options dialog box, click the Customize Quick Access Toolbar box arrow,and then click Lastname_Firstname_p08_Benefits.

GradientFill applied

Figure 4

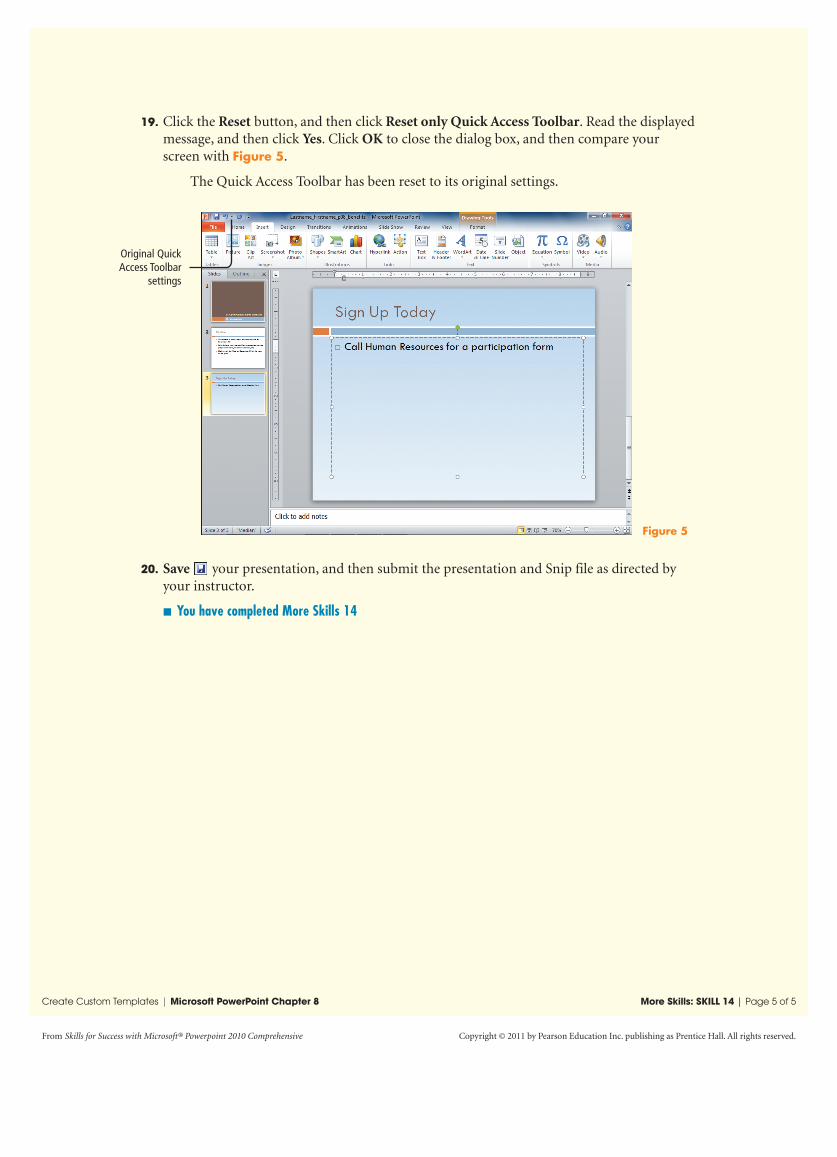
19. Click the Reset button, and then click Reset only Quick Access Toolbar. Read the displayedmessage, and then click Yes. Click OK to close the dialog box, and then compare yourscreen with Figure 5.

The Quick Access Toolbar has been reset to its original settings.

Copyright © 2011 by Pearson Education Inc. publishing as Prentice Hall. All rights reserved.From Skills for Success with Microsoft® Powerpoint 2010 Comprehensive

Create Custom Templates | Microsoft PowerPoint Chapter 8 More Skills: SKILL 14 | Page 5 of 5

20. Save your presentation, and then submit the presentation and Snip file as directed byyour instructor.

� You have completed More Skills 14

Original QuickAccess Toolbar

settings

Figure 5


Recommended