40
2big Dock Thunderbolt ™ 3 Professional RAID Storage | Dual Thunderbolt 3 | USB 3.1 | Docking Station design by neil poulton Quick Install Guide
2big Dock Thunderbolt™ 3Professional RAID Storage | Dual Thunderbolt 3 | USB 3.1 | Docking Station
design by neil poulton
Quick Install Guide
Print Date:2018-Mar-30 11:43:48 CDT Released; Prod Rel; C; 100827436 Seagate Confidential
2
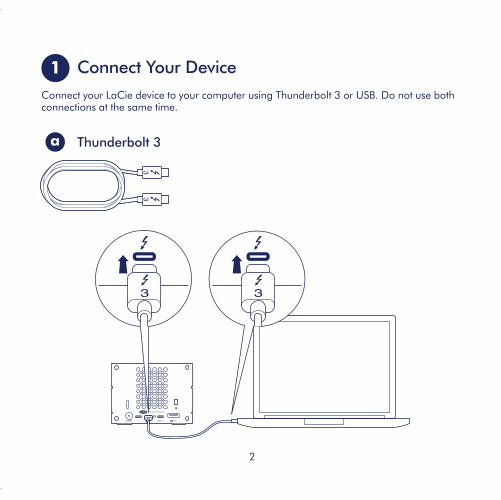
1 Connect Your DeviceConnect your LaCie device to your computer using Thunderbolt 3 or USB. Do not use both connections at the same time.
Thunderbolt 3a
Print Date:2018-Mar-30 11:43:48 CDT Released; Prod Rel; C; 100827436 Seagate Confidential
3
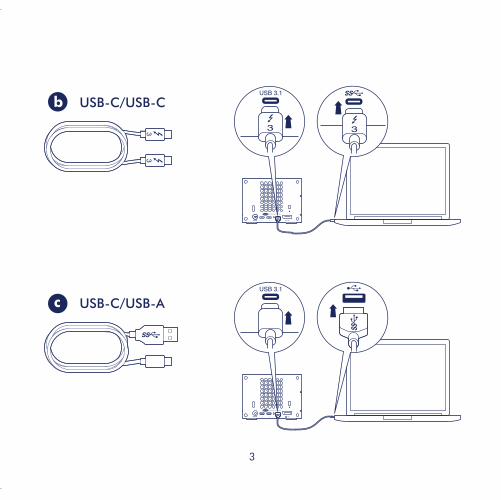
USB-C/USB-Cb
USB-C/USB-Ac
Print Date:2018-Mar-30 11:43:48 CDT Released; Prod Rel; C; 100827436 Seagate Confidential
4
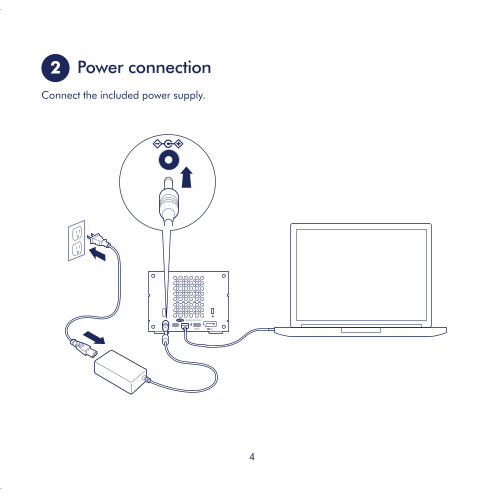
2 Power connectionConnect the included power supply.
Print Date:2018-Mar-30 11:43:48 CDT Released; Prod Rel; C; 100827436 Seagate Confidential
5
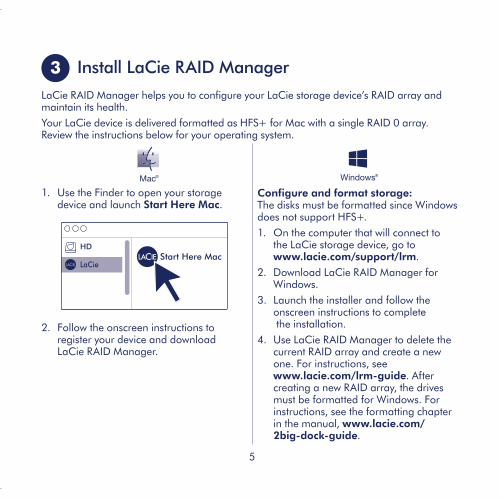
3 Install LaCie RAID ManagerLaCie RAID Manager helps you to configure your LaCie storage device’s RAID array and maintain its health.Your LaCie device is delivered formatted as HFS+ for Mac with a single RAID 0 array. Review the instructions below for your operating system.
1. Use the Finder to open your storage device and launch Start Here Mac.
Start Here MacLaCie
HD
2. Follow the onscreen instructions to
register your device and download LaCie RAID Manager.
Configure and format storage: The disks must be formatted since Windows does not support HFS+. 1. On the computer that will connect to
the LaCie storage device, go to www.lacie.com/support/lrm.
2. Download LaCie RAID Manager for Windows.
3. Launch the installer and follow the onscreen instructions to complete the installation.
4. Use LaCie RAID Manager to delete the current RAID array and create a new one. For instructions, see www.lacie.com/lrm-guide. After creating a new RAID array, the drives must be formatted for Windows. For instructions, see the formatting chapter in the manual, www.lacie.com/ 2big-dock-guide.
Print Date:2018-Mar-30 11:43:48 CDT Released; Prod Rel; C; 100827436 Seagate Confidential
6
Online resourcesTo learn more about managing your LaCie storage device and RAID array, see the online user manuals below.• LaCie 2big Dock Thunderbolt 3: www.lacie.com/2big-dock-guide• LaCie RAID Manager: www.lacie.com/lrm-guide
Changing the RAIDFor data redundancy, you can use LaCie RAID Manager to change the RAID array from the default RAID 0 to RAID 1. For more information on how to change the RAID, see www.lacie.com/lrm-guide. After changing the RAID array, make certain to format the drives for your operating system. For instructions on formatting, see the partitioning and formatting chapter in the user manual: www.lacie.com/2big-dock-guide.
Problems connecting with Thunderbolt 3 on WindowsIf the LaCie 2big Dock does not mount or is not detected by your PC, please go to www.lacie.com/support/2bigDockTBT3 to download and install the 2big Dock Thunderbolt 3 driver for Windows.If you continue to have problems using Thunderbolt 3 with Windows, check with your PC manufacturer for updates to the:• BIOS• Thunderbolt 3 firmware • Thunderbolt 3 drivers
Print Date:2018-Mar-30 11:43:48 CDT Released; Prod Rel; C; 100827436 Seagate Confidential
7
FR
1 Connexion du périphérique Connectez le périphérique LaCie à votre ordinateur via un port Thunderbolt 3 ou USB.
Ne pas utiliser ces deux connexions en même temps.
a : Thunderbolt 3 b : USB-C/USB-C c : USB-C/USB-A
2 Branchement électrique Raccordez le bloc d’alimentation fourni.
3 Installation de LaCie RAID Manager Le logiciel LaCie RAID Manager vous aide à configurer la matrice RAID de votre
périphérique de stockage LaCie et à assurer son intégrité.
Le périphérique LaCie est formaté par défaut en HFS+ pour Mac avec une seule matrice RAID 0. Pour tout complément d’informations sur votre système d’exploitation, référez-vous aux instructions ci-dessous.
Print Date:2018-Mar-30 11:43:48 CDT Released; Prod Rel; C; 100827436 Seagate Confidential
8
Mac Windows
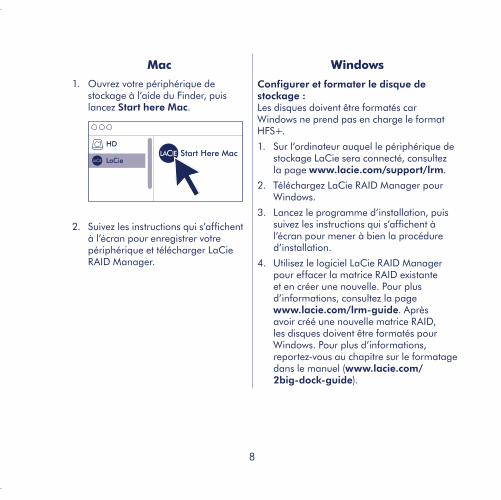
1. Ouvrez votre périphérique de stockage à l’aide du Finder, puis lancez Start here Mac.
Start Here MacLaCie
HD
2. Suivez les instructions qui s’affichent à l’écran pour enregistrer votre périphérique et télécharger LaCie RAID Manager.
Configurer et formater le disque de stockage : Les disques doivent être formatés car Windows ne prend pas en charge le format HFS+.
1. Sur l’ordinateur auquel le périphérique de stockage LaCie sera connecté, consultez la page www.lacie.com/support/lrm.
2. Téléchargez LaCie RAID Manager pour Windows.
3. Lancez le programme d’installation, puis suivez les instructions qui s’affichent à l’écran pour mener à bien la procédure d’installation.
4. Utilisez le logiciel LaCie RAID Manager pour effacer la matrice RAID existante et en créer une nouvelle. Pour plus d’informations, consultez la page www.lacie.com/lrm-guide. Après avoir créé une nouvelle matrice RAID, les disques doivent être formatés pour Windows. Pour plus d’informations, reportez-vous au chapitre sur le formatage dans le manuel (www.lacie.com/ 2big-dock-guide).
Print Date:2018-Mar-30 11:43:48 CDT Released; Prod Rel; C; 100827436 Seagate Confidential
9
Ressources en ligne
Pour tout complément d’informations sur la gestion de votre périphérique de stockage LaCie et sa matrice RAID, consultez les manuels d’utilisation en ligne suivants :
• LaCie 2big Dock Thunderbolt 3 : www.lacie.com/2big-dock-guide• LaCie RAID Manager : www.lacie.com/lrm-guide
Changer de niveau RAID
Afin d’assurer la redondance des données, utilisez le logiciel LaCie RAID Manager pour modifier la matrice RAID et passer d’un RAID 0 par défaut à un RAID 1. Pour tout complément d’informations sur le changement de niveau RAID, consultez la page www.lacie.com/lrm-guide.
Après avoir changé de niveau RAID, veillez à formater les disques selon le système d’exploitation installé. Pour en savoir plus sur le formatage, reportez-vous au chapitre sur le partitionnement et le formatage dans le manuel d’utilisation : www.lacie.com/2big-dock-guide.
Problèmes de connexion Thunderbolt 3 sous Windows
Si le disque LaCie 2big Dock n’est pas reconnu ou détecté par votre PC, rendez-vous sur la page www.lacie.com/support/2bigDockTBT3 pour télécharger et installer le pilote 2big Dock Thunderbolt 3 pour Windows.
Si les problèmes de connexion Thunderbolt 3 sous Windows persistent, adressez-vous au fabricant de votre ordinateur pour obtenir des mises à jour :
• du BIOS,• du firmware Thunderbolt 3,• des pilotes Thunderbolt 3.
Print Date:2018-Mar-30 11:43:48 CDT Released; Prod Rel; C; 100827436 Seagate Confidential
10
IT
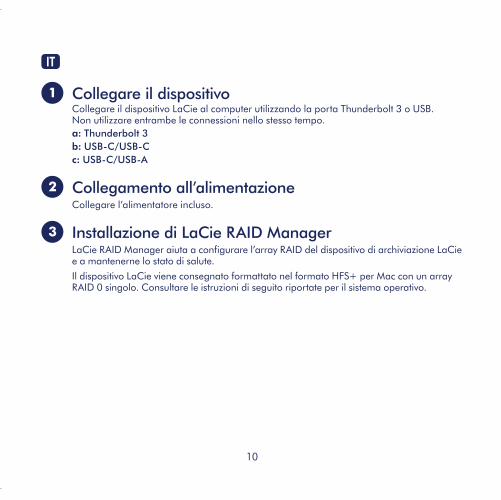
1 Collegare il dispositivo Collegare il dispositivo LaCie al computer utilizzando la porta Thunderbolt 3 o USB.
Non utilizzare entrambe le connessioni nello stesso tempo. a: Thunderbolt 3 b: USB-C/USB-C c: USB-C/USB-A
2 Collegamento all’alimentazione Collegare l’alimentatore incluso.
3 Installazione di LaCie RAID Manager LaCie RAID Manager aiuta a configurare l’array RAID del dispositivo di archiviazione LaCie
e a mantenerne lo stato di salute.
Il dispositivo LaCie viene consegnato formattato nel formato HFS+ per Mac con un array RAID 0 singolo. Consultare le istruzioni di seguito riportate per il sistema operativo.
Print Date:2018-Mar-30 11:43:48 CDT Released; Prod Rel; C; 100827436 Seagate Confidential
11
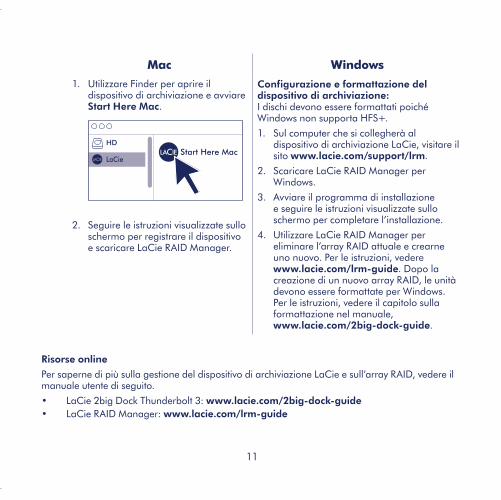
Mac Windows
1. Utilizzare Finder per aprire il dispositivo di archiviazione e avviare Start Here Mac.
Start Here MacLaCie
HD
2. Seguire le istruzioni visualizzate sullo schermo per registrare il dispositivo e scaricare LaCie RAID Manager.
Configurazione e formattazione del dispositivo di archiviazione: I dischi devono essere formattati poiché Windows non supporta HFS+.
1. Sul computer che si collegherà al dispositivo di archiviazione LaCie, visitare il sito www.lacie.com/support/lrm.
2. Scaricare LaCie RAID Manager per Windows.
3. Avviare il programma di installazione e seguire le istruzioni visualizzate sullo schermo per completare l’installazione.
4. Utilizzare LaCie RAID Manager per eliminare l’array RAID attuale e crearne uno nuovo. Per le istruzioni, vedere www.lacie.com/lrm-guide. Dopo la creazione di un nuovo array RAID, le unità devono essere formattate per Windows. Per le istruzioni, vedere il capitolo sulla formattazione nel manuale, www.lacie.com/2big-dock-guide.
Risorse online
Per saperne di più sulla gestione del dispositivo di archiviazione LaCie e sull’array RAID, vedere il manuale utente di seguito.
• LaCie 2big Dock Thunderbolt 3: www.lacie.com/2big-dock-guide• LaCie RAID Manager: www.lacie.com/lrm-guide
Print Date:2018-Mar-30 11:43:48 CDT Released; Prod Rel; C; 100827436 Seagate Confidential
12
Modifica del RAID
Per la ridondanza dei dati, è possibile utilizzare LaCie RAID Manager per modificare l’array RAID da RAID 0 predefinito a RAID 1. Per ulteriori informazioni su come modificare il RAID, vedere www.lacie.com/lrm-guide.
Dopo aver modificato l’array RAID, assicurarsi di formattare le unità per il sistema operativo. Per istruzioni sulla formattazione, vedere il capitolo sulla suddivisione e formattazione del manuale utente: www.lacie.com/2big-dock-guide.
Problemi durante il collegamento con Thunderbolt 3 su Windows
Se la 2big Dock di LaCie non si installa o non viene rilevata dal PC, consultare www.lacie.com/support/2bigDockTBT3 e scaricare e installare il driver di 2big Dock Thunderbolt 3 per Windows.
Se continuano a verificarsi problemi nell’utilizzo di Thunderbolt 3 con Windows, verificare gli aggiornamenti per:
• IOS• Firmware Thunderbolt 3• Driver di Thunderbolt 3
DE
1 Gerät anschließen Verbinden Sie das LaCie-Gerät über Thunderbolt 3 oder USB mit Ihrem Computer.
Verwenden Sie nicht beide Anschlüsse zugleich. a: Thunderbolt 3 b: USB-C/USB-C c: USB-C/USB-A
Print Date:2018-Mar-30 11:43:48 CDT Released; Prod Rel; C; 100827436 Seagate Confidential
13
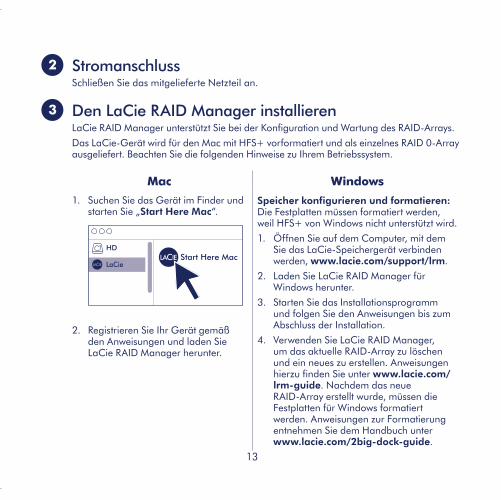
2 Stromanschluss Schließen Sie das mitgelieferte Netzteil an.
3 Den LaCie RAID Manager installieren LaCie RAID Manager unterstützt Sie bei der Konfiguration und Wartung des RAID-Arrays.
Das LaCie-Gerät wird für den Mac mit HFS+ vorformatiert und als einzelnes RAID 0-Array ausgeliefert. Beachten Sie die folgenden Hinweise zu Ihrem Betriebssystem.
Mac Windows
1. Suchen Sie das Gerät im Finder und starten Sie „Start Here Mac“.
Start Here MacLaCie
HD
2. Registrieren Sie Ihr Gerät gemäß den Anweisungen und laden Sie LaCie RAID Manager herunter.
Speicher konfigurieren und formatieren: Die Festplatten müssen formatiert werden, weil HFS+ von Windows nicht unterstützt wird.
1. Öffnen Sie auf dem Computer, mit dem Sie das LaCie-Speichergerät verbinden werden, www.lacie.com/support/lrm.
2. Laden Sie LaCie RAID Manager für Windows herunter.
3. Starten Sie das Installationsprogramm und folgen Sie den Anweisungen bis zum Abschluss der Installation.
4. Verwenden Sie LaCie RAID Manager, um das aktuelle RAID-Array zu löschen und ein neues zu erstellen. Anweisungen hierzu finden Sie unter www.lacie.com/ lrm-guide. Nachdem das neue RAID-Array erstellt wurde, müssen die Festplatten für Windows formatiert werden. Anweisungen zur Formatierung entnehmen Sie dem Handbuch unter www.lacie.com/2big-dock-guide.
Print Date:2018-Mar-30 11:43:48 CDT Released; Prod Rel; C; 100827436 Seagate Confidential
14
Online-Ressourcen
Weitere Informationen über das LaCie-Speichergerät und das RAID-Array finden Sie in der Online-Benutzerdokumentation.
• LaCie 2big Dock Thunderbolt 3: www.lacie.com/2big-dock-guide• LaCie RAID Manager: www.lacie.com/lrm-guide
Das RAID ändern
Wenn Sie Datenredundanz benötigen, können Sie im LaCie RAID Manager die RAID-Konfiguration von RAID 0 in RAID 1 ändern. Weitere Informationen zur Änderung der RAID-Konfiguration finden Sie unter www.lacie.com/lrm-guide.
Nach Änderung der RAID-Arraykonfiguration müssen Sie die Festplatte für Ihr Betriebssystem formatieren. Anweisungen zur Formatierung finden Sie im Kapitel zur Partitionierung und Formatierung im Benutzerhandbuch: www.lacie.com/2big-dock-guide.
Thunderbolt 3-Verbindungprobleme unter Windows
Wenn sich die LaCie 2big Dock nicht verbinden lässt oder von Ihrem Computer nicht erkannt wird, beachten Sie bitte die Hinweise unter www.lacie.com/support/2bigDockTBT3 und laden Sie den 2big Dock Thunderbolt 3-Treiber für Windows herunter und installieren Sie ihn.
Wenn danach immer noch Probleme mit Thunderbolt 3 unter Windows auftreten, beziehen Sie von Ihrem PC-Hersteller folgende Updates:
• BIOS• Thunderbolt 3-Firmware• Thunderbolt 3-Treiber
Print Date:2018-Mar-30 11:43:48 CDT Released; Prod Rel; C; 100827436 Seagate Confidential
15
ES
1 Conexión del dispositivo Conecte su dispositivo de LaCie al ordenador mediante Thunderbolt 3 o USB. No utilice
ambas conexiones al mismo tiempo. a: Thunderbolt 3 b: USB-C/USB-C c: USB-C/USB-A
2 Conexión de alimentación Conecte la fuente de alimentación incluida.
3 Instalación de LaCie RAID Manager LaCie RAID Manager le ayuda a configurar la matriz RAID de su dispositivo de
almacenamiento de LaCie y a mantenerlo en buen estado. Su dispositivo de LaCie se entrega formateado como HFS+ para Mac con una única
matriz RAID 0. Revise las instrucciones incluidas a continuación correspondientes a su sistema operativo.
Print Date:2018-Mar-30 11:43:48 CDT Released; Prod Rel; C; 100827436 Seagate Confidential
16
Mac Windows
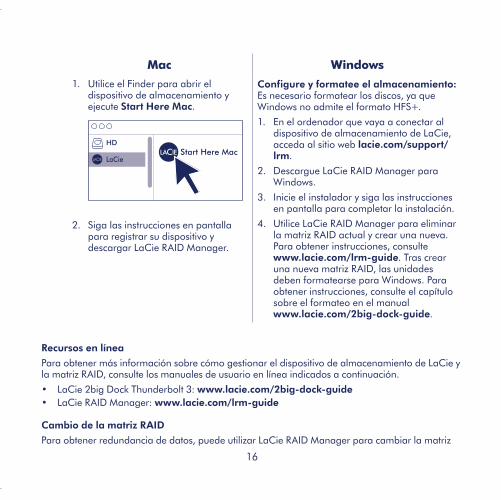
1. Utilice el Finder para abrir el dispositivo de almacenamiento y ejecute Start Here Mac.
Start Here MacLaCie
HD
2. Siga las instrucciones en pantalla para registrar su dispositivo y descargar LaCie RAID Manager.
Configure y formatee el almacenamiento: Es necesario formatear los discos, ya que Windows no admite el formato HFS+.
1. En el ordenador que vaya a conectar al dispositivo de almacenamiento de LaCie, acceda al sitio web lacie.com/support/lrm.
2. Descargue LaCie RAID Manager para Windows.
3. Inicie el instalador y siga las instrucciones en pantalla para completar la instalación.
4. Utilice LaCie RAID Manager para eliminar la matriz RAID actual y crear una nueva. Para obtener instrucciones, consulte www.lacie.com/lrm-guide. Tras crear una nueva matriz RAID, las unidades deben formatearse para Windows. Para obtener instrucciones, consulte el capítulo sobre el formateo en el manual www.lacie.com/2big-dock-guide.
Recursos en línea
Para obtener más información sobre cómo gestionar el dispositivo de almacenamiento de LaCie y la matriz RAID, consulte los manuales de usuario en línea indicados a continuación.
• LaCie 2big Dock Thunderbolt 3: www.lacie.com/2big-dock-guide• LaCie RAID Manager: www.lacie.com/lrm-guide
Cambio de la matriz RAID
Para obtener redundancia de datos, puede utilizar LaCie RAID Manager para cambiar la matriz
Print Date:2018-Mar-30 11:43:48 CDT Released; Prod Rel; C; 100827436 Seagate Confidential
17
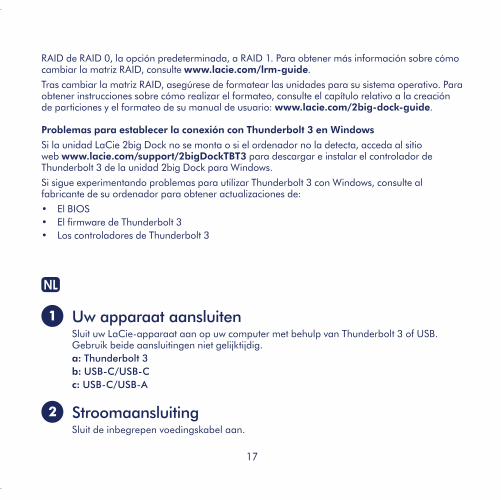
RAID de RAID 0, la opción predeterminada, a RAID 1. Para obtener más información sobre cómo cambiar la matriz RAID, consulte www.lacie.com/lrm-guide.
Tras cambiar la matriz RAID, asegúrese de formatear las unidades para su sistema operativo. Para obtener instrucciones sobre cómo realizar el formateo, consulte el capítulo relativo a la creación de particiones y el formateo de su manual de usuario: www.lacie.com/2big-dock-guide.
Problemas para establecer la conexión con Thunderbolt 3 en Windows
Si la unidad LaCie 2big Dock no se monta o si el ordenador no la detecta, acceda al sitio web www.lacie.com/support/2bigDockTBT3 para descargar e instalar el controlador de Thunderbolt 3 de la unidad 2big Dock para Windows.
Si sigue experimentando problemas para utilizar Thunderbolt 3 con Windows, consulte al fabricante de su ordenador para obtener actualizaciones de:
• El BIOS• El firmware de Thunderbolt 3• Los controladores de Thunderbolt 3
NL
1 Uw apparaat aansluiten Sluit uw LaCie-apparaat aan op uw computer met behulp van Thunderbolt 3 of USB.
Gebruik beide aansluitingen niet gelijktijdig. a: Thunderbolt 3 b: USB-C/USB-C c: USB-C/USB-A
2 Stroomaansluiting Sluit de inbegrepen voedingskabel aan.
Print Date:2018-Mar-30 11:43:48 CDT Released; Prod Rel; C; 100827436 Seagate Confidential

18
3 LaCie RAID Manager installeren LaCie RAID Manager helpt u om de RAID-array van uw LaCie-opslagapparaat te
configureren en te onderhouden .
Uw LaCie-apparaat is geformatteerd als HFS+ voor Mac met één RAID 0-array. Bekijk onderstaande instructies voor uw besturingssysteem.
Mac Windows
1. Gebruik de Finder om uw opslagapparaat te openen en start ‘Start Here Mac’.
Start Here MacLaCie
HD
2. Volg de instructies op het scherm om uw opslagapparaat te registreren en de LaCie Raid Manager te downloaden.
Opslag configureren en formatteren: De schijven moeten geformatteerd worden, omdat HFS+ niet door Windows ondersteund wordt.
1. Ga naar www.lacie.com/support/lrm op de computer die op het LaCie-opslagapparaat zal worden aangesloten.
2. Download LaCie RAID Manager voor Windows.
3. Start het installatieprogramma en volg de instructies op het scherm om de installatie te voltooien.
4. Gebruik LaCie RAID Manager om de huidige RAID-array te wissen en een nieuwe aan te maken. Raadpleeg voor instructies www.lacie.com/lrm-guide. Nadat u een nieuwe RAID-array heeft aangemaakt, moeten de schijven geformatteerd worden voor Windows. Raadpleeg voor instructies het hoofdstuk over formatteren in de handleiding: www.lacie.com/2big-dock-guide.
Print Date:2018-Mar-30 11:43:48 CDT Released; Prod Rel; C; 100827436 Seagate Confidential
19
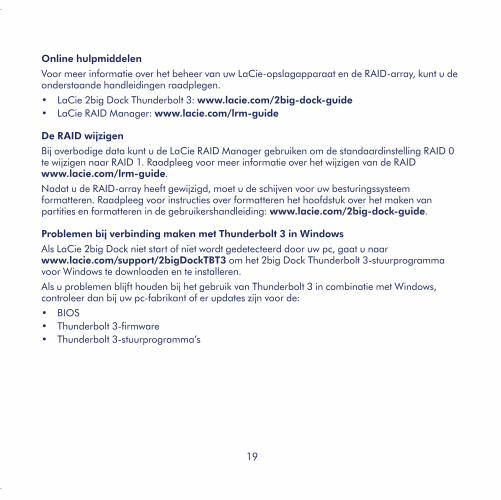
Online hulpmiddelen
Voor meer informatie over het beheer van uw LaCie-opslagapparaat en de RAID-array, kunt u de onderstaande handleidingen raadplegen.
• LaCie 2big Dock Thunderbolt 3: www.lacie.com/2big-dock-guide• LaCie RAID Manager: www.lacie.com/lrm-guide
De RAID wijzigen
Bij overbodige data kunt u de LaCie RAID Manager gebruiken om de standaardinstelling RAID 0 te wijzigen naar RAID 1. Raadpleeg voor meer informatie over het wijzigen van de RAID www.lacie.com/lrm-guide.
Nadat u de RAID-array heeft gewijzigd, moet u de schijven voor uw besturingssysteem formatteren. Raadpleeg voor instructies over formatteren het hoofdstuk over het maken van partities en formatteren in de gebruikershandleiding: www.lacie.com/2big-dock-guide.
Problemen bij verbinding maken met Thunderbolt 3 in Windows
Als LaCie 2big Dock niet start of niet wordt gedetecteerd door uw pc, gaat u naar www.lacie.com/support/2bigDockTBT3 om het 2big Dock Thunderbolt 3-stuurprogramma voor Windows te downloaden en te installeren.
Als u problemen blijft houden bij het gebruik van Thunderbolt 3 in combinatie met Windows, controleer dan bij uw pc-fabrikant of er updates zijn voor de:
• BIOS• Thunderbolt 3-firmware• Thunderbolt 3-stuurprogramma’s
Print Date:2018-Mar-30 11:43:48 CDT Released; Prod Rel; C; 100827436 Seagate Confidential
20
PT
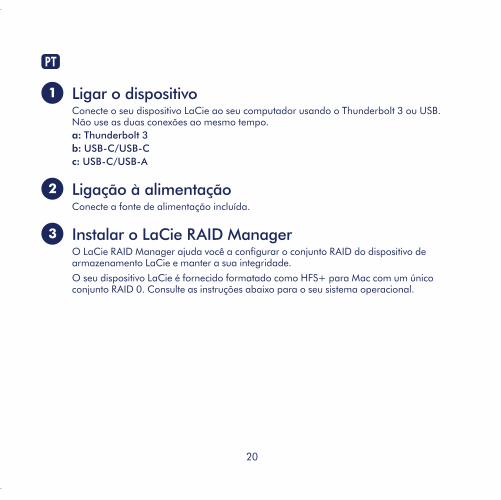
1 Ligar o dispositivo Conecte o seu dispositivo LaCie ao seu computador usando o Thunderbolt 3 ou USB.
Não use as duas conexões ao mesmo tempo. a: Thunderbolt 3 b: USB-C/USB-C c: USB-C/USB-A
2 Ligação à alimentação Conecte a fonte de alimentação incluída.
3 Instalar o LaCie RAID Manager O LaCie RAID Manager ajuda você a configurar o conjunto RAID do dispositivo de
armazenamento LaCie e manter a sua integridade.
O seu dispositivo LaCie é fornecido formatado como HFS+ para Mac com um único conjunto RAID 0. Consulte as instruções abaixo para o seu sistema operacional.
Print Date:2018-Mar-30 11:43:48 CDT Released; Prod Rel; C; 100827436 Seagate Confidential
21
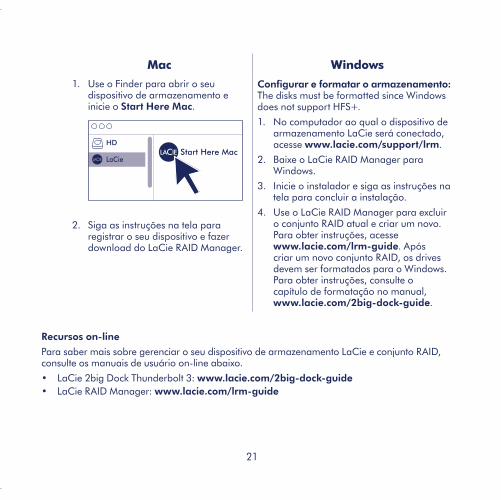
Mac Windows
1. Use o Finder para abrir o seu dispositivo de armazenamento e inicie o Start Here Mac.
Start Here MacLaCie
HD
2. Siga as instruções na tela para registrar o seu dispositivo e fazer download do LaCie RAID Manager.
Configurar e formatar o armazenamento: The disks must be formatted since Windows does not support HFS+.
1. No computador ao qual o dispositivo de armazenamento LaCie será conectado, acesse www.lacie.com/support/lrm.
2. Baixe o LaCie RAID Manager para Windows.
3. Inicie o instalador e siga as instruções na tela para concluir a instalação.
4. Use o LaCie RAID Manager para excluir o conjunto RAID atual e criar um novo. Para obter instruções, acesse www.lacie.com/lrm-guide. Após criar um novo conjunto RAID, os drives devem ser formatados para o Windows. Para obter instruções, consulte o capítulo de formatação no manual, www.lacie.com/2big-dock-guide.
Recursos on-line
Para saber mais sobre gerenciar o seu dispositivo de armazenamento LaCie e conjunto RAID, consulte os manuais de usuário on-line abaixo.
• LaCie 2big Dock Thunderbolt 3: www.lacie.com/2big-dock-guide• LaCie RAID Manager: www.lacie.com/lrm-guide
Print Date:2018-Mar-30 11:43:48 CDT Released; Prod Rel; C; 100827436 Seagate Confidential
22
Alterando o RAID
Para redundância de dados, você pode usar o LaCie RAID Manager para alterar o conjunto RAID do RAID padrão 0 para RAID 1. Para obter mais informações sobre como alterar o RAID, consulte www.lacie.com/lrm-guide.
Após alterar o conjunto RAID, formate os drives para o seu sistema operacional. Para obter instruções sobre formatação, veja o capítulo de particionamento e formatação no manual de usuário: www.lacie.com/2big-dock-guide.
Problemas para conectar com o Thunderbolt 3 no Windows
Se o LaCie 2big Dock não for instalado ou não for detectado pelo seu computador, acesse www.lacie.com/support/2bigDockTBT3 para fazer download e instalar o driver 2big Dock Thunderbolt 3 para o Windows.
Se você continuar com problemas para usar o Thunderbolt 3 com o Windows, verifique se o fabricante do seu computador disponibilizou atualizações para:
• BIOS• Firmware do Thunderbolt 3• Drivers do Thunderbolt 3
Print Date:2018-Mar-30 11:43:48 CDT Released; Prod Rel; C; 100827436 Seagate Confidential
23
RU
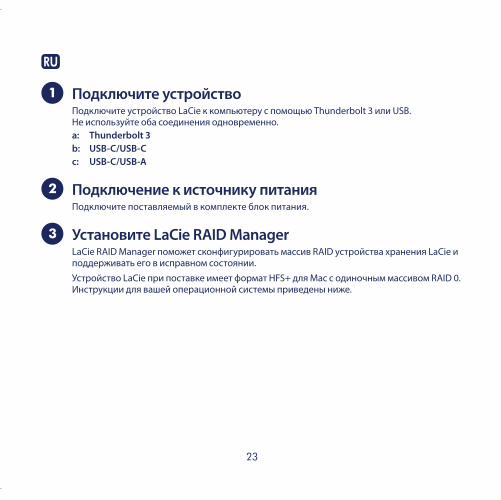
1 Подключите устройство Подключите устройство LaCie к компьютеру с помощью Thunderbolt 3 или USB.
Не используйте оба соединения одновременно. a: Thunderbolt 3 b: USB-C/USB-C c: USB-C/USB-A
2 Подключение к источнику питания Подключите поставляемый в комплекте блок питания.
3 Установите LaCie RAID Manager LaCie RAID Manager поможет сконфигурировать массив RAID устройства хранения LaCie и
поддерживать его в исправном состоянии.
Устройство LaCie при поставке имеет формат HFS+ для Mac с одиночным массивом RAID 0. Инструкции для вашей операционной системы приведены ниже.
Print Date:2018-Mar-30 11:43:48 CDT Released; Prod Rel; C; 100827436 Seagate Confidential
24
Mac Windows
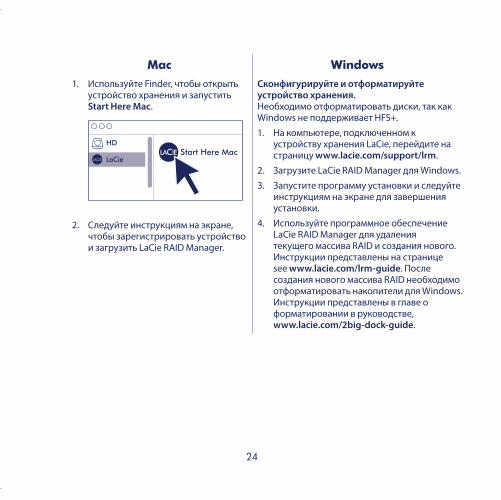
1. Используйте Finder, чтобы открыть устройство хранения и запустить Start Here Mac.
Start Here MacLaCie
HD
2. Следуйте инструкциям на экране, чтобы зарегистрировать устройство и загрузить LaCie RAID Manager.
Сконфигурируйте и отформатируйте устройство хранения. Необходимо отформатировать диски, так как Windows не поддерживает HFS+.
1. На компьютере, подключенном к устройству хранения LaCie, перейдите на страницу www.lacie.com/support/lrm.
2. Загрузите LaCie RAID Manager для Windows.
3. Запустите программу установки и следуйте инструкциям на экране для завершения установки.
4. Используйте программное обеспечение LaCie RAID Manager для удаления текущего массива RAID и создания нового. Инструкции представлены на странице see www.lacie.com/lrm-guide. После создания нового массива RAID необходимо отформатировать накопители для Windows. Инструкции представлены в главе о форматировании в руководстве, www.lacie.com/2big-dock-guide.
Print Date:2018-Mar-30 11:43:48 CDT Released; Prod Rel; C; 100827436 Seagate Confidential
25
Ресурсы в Интернете
Дополнительная информация об управлении устройством хранения LaCie и массивом RAID представлена в интерактивных руководствах пользователя ниже.
• LaCie 2big Dock Thunderbolt 3: www.lacie.com/2big-dock-guide• LaCie RAID Manager: www.lacie.com/lrm-guide
Изменение RAID
Для избыточности данных можно использовать LaCie RAID Manager, чтобы изменить массив RAID с принятого по умолчанию RAID 0 на RAID 1. Дополнительная информация о том, как изменить RAID, представлена на странице www.lacie.com/lrm-guide.
После изменения массива RAID обязательно отформатируйте накопители для вашей операционной системы. Инструкции по форматированию представлены в главе о создании разделов и форматировании в руководстве пользователя: www.lacie.com/2big-dock-guide.
Проблемы, связанные с Thunderbolt 3 на компьютерах Windows
Если LaCie 2big Dock не подключается или не распознается вашим ПК, перейдите на страницу www.lacie.com/support/2bigDockTBT3, чтобы загрузить и установить драйвер 2big Dock Thunderbolt 3 для Windows.
Если вам не удается устранить проблемы при использовании Thunderbolt 3 с Windows, обратитесь к производителю вашего ПК за следующими обновлениями:
• BIOS;• микропрограмма Thunderbolt 3;• драйверы Thunderbolt 3.
Print Date:2018-Mar-30 11:43:48 CDT Released; Prod Rel; C; 100827436 Seagate Confidential
26
ID
1 Sambungkan Perangkat Sambungkan perangkat LaCie ke komputer Anda dengan Thunderbolt 3 atau USB.
Jangan gunakan kedua jenis sambungan tersebut sekaligus. a: Thunderbolt 3 b: USB-C/USB-C c: USB-C/USB-A
2 Sambungan daya Sambungkan pasokan daya yang disertakan.
3 Instal LaCie RAID Manager LaCie RAID Manager membantu Anda mengonfigurasikan rangkaian RAID perangkat
penyimpanan LaCie Anda dan menjaga kesehatannya.
Perangkat LaCie Anda disediakan dalam format HFS+ untuk Mac dengan rangkaian RAID 0 tunggal. Tinjau petunjuk di bawah ini untuk sistem operasi Anda.
Print Date:2018-Mar-30 11:43:48 CDT Released; Prod Rel; C; 100827436 Seagate Confidential
27
Mac Windows
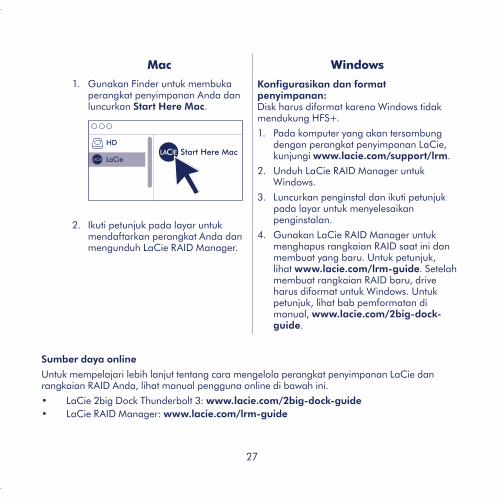
1. Gunakan Finder untuk membuka perangkat penyimpanan Anda dan luncurkan Start Here Mac.
Start Here MacLaCie
HD
2. Ikuti petunjuk pada layar untuk mendaftarkan perangkat Anda dan mengunduh LaCie RAID Manager.
Konfigurasikan dan format penyimpanan: Disk harus diformat karena Windows tidak mendukung HFS+.
1. Pada komputer yang akan tersambung dengan perangkat penyimpanan LaCie, kunjungi www.lacie.com/support/lrm.
2. Unduh LaCie RAID Manager untuk Windows.
3. Luncurkan penginstal dan ikuti petunjuk pada layar untuk menyelesaikan penginstalan.
4. Gunakan LaCie RAID Manager untuk menghapus rangkaian RAID saat ini dan membuat yang baru. Untuk petunjuk, lihat www.lacie.com/lrm-guide. Setelah membuat rangkaian RAID baru, drive harus diformat untuk Windows. Untuk petunjuk, lihat bab pemformatan di manual, www.lacie.com/2big-dock-guide.
Sumber daya online
Untuk mempelajari lebih lanjut tentang cara mengelola perangkat penyimpanan LaCie dan rangkaian RAID Anda, lihat manual pengguna online di bawah ini.
• LaCie 2big Dock Thunderbolt 3: www.lacie.com/2big-dock-guide• LaCie RAID Manager: www.lacie.com/lrm-guide
Print Date:2018-Mar-30 11:43:48 CDT Released; Prod Rel; C; 100827436 Seagate Confidential
28
Mengganti RAID
Untuk redundansi data, Anda dapat menggunakan LaCie RAID Manager untuk mengganti rangkaian RAID dari RAID 0 default ke RAID 1. Untuk informasi lebih lanjut tentang cara mengganti RAID, lihat www.lacie.com/lrm-guide.
Setelah mengganti rangkaian RAID, pastikan memformat drive untuk sistem operasi Anda. Untuk petunjuk tentang pemformatan, lihat bab pemartisian dan pemformatan di manual pengguna: www.lacie.com/2big-dock-guide.
Masalah menyambungkan dengan Thunderbolt 3 di Windows
Jika LaCie 2big Dock tidak terpasang atau tidak terdeteksi oleh PC Anda, harus kunjungi www.lacie.com/support/2bigDockTBT3 untuk mengunduh dan menginstal driver 2big Dock Thunderbolt 3 untuk Windows.
Jika Anda masih mengalami masalah dalam penggunaan Thunderbolt 3 dengan Windows, periksa produsen PC Anda untuk pembaruan ke:
• BIOS• Firmware Thunderbolt 3• Driver Thunderbolt 3
ZH_CN
1 连接您的设备 使用 Thunderbolt 3 或 USB 将您的 LaCie 设备连接到计算机。不要同时使用这些连接。 a:Thunderbolt3
b:USB-C/USB-C
c:USB-C/USB-A
2 电源连接 连接随附的电源。
Print Date:2018-Mar-30 11:43:48 CDT Released; Prod Rel; C; 100827436 Seagate Confidential
29
3 安装LaCieRAIDManager LaCie RAID Manager 可帮助您配置 LaCie 存储设备的 RAID 阵列并保持其运行状况。 您的 LaCie 设备提供时已格式化为 HFS+,以用于带单一 RAID 0 阵列的 Mac。 查看下面
适用于您的操作系统的说明。
Mac Windows
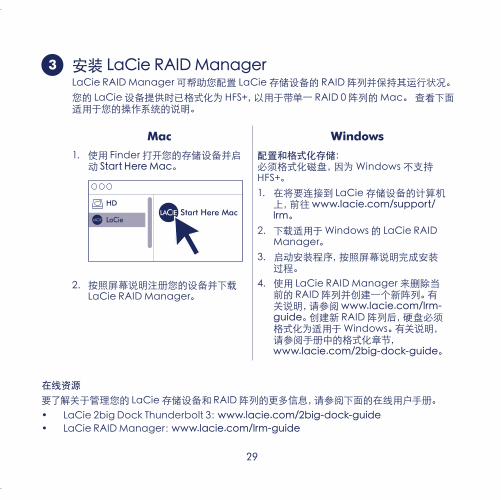
1. 使用 Finder 打开您的存储设备并启动 StartHereMac。
Start Here MacLaCie
HD
2. 按照屏幕说明注册您的设备并下载 LaCie RAID Manager。
配置和格式化存储: 必须格式化磁盘,因为 Windows 不支持 HFS+。 1. 在将要连接到 LaCie 存储设备的计算机
上,前往 www.lacie.com/support/lrm。
2. 下载适用于 Windows 的 LaCie RAID Manager。
3. 启动安装程序,按照屏幕说明完成安装 过程。
4. 使用 LaCie RAID Manager 来删除当前的 RAID 阵列并创建一个新阵列。有关说明,请参阅 www.lacie.com/lrm-guide。创建新 RAID 阵列后,硬盘必须 格式化为适用于 Windows。有关说明, 请参阅手册中的格式化章节, www.lacie.com/2big-dock-guide。
在线资源
要了解关于管理您的 LaCie 存储设备和 RAID 阵列的更多信息,请参阅下面的在线用户手册。• LaCie 2big Dock Thunderbolt 3:www.lacie.com/2big-dock-guide
• LaCie RAID Manager:www.lacie.com/lrm-guide
Print Date:2018-Mar-30 11:43:48 CDT Released; Prod Rel; C; 100827436 Seagate Confidential
30
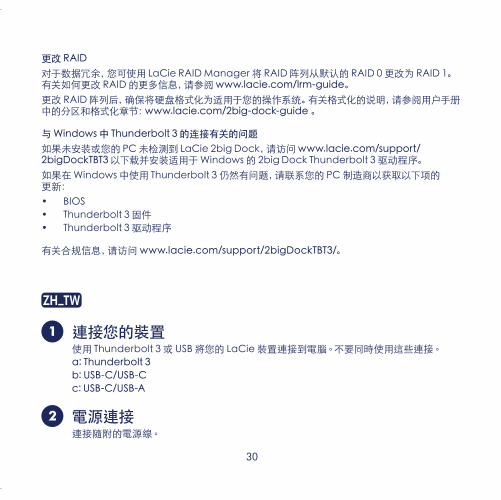
更改RAID
对于数据冗余,您可使用 LaCie RAID Manager 将 RAID 阵列从默认的 RAID 0 更改为 RAID 1。有关如何更改 RAID 的更多信息,请参阅 www.lacie.com/lrm-guide。更改 RAID 阵列后,确保将硬盘格式化为适用于您的操作系统。有关格式化的说明,请参阅用户手册中的分区和格式化章节:www.lacie.com/2big-dock-guide。
与Windows中Thunderbolt3的连接有关的问题
如果未安装或您的 PC 未检测到 LaCie 2big Dock,请访问 www.lacie.com/support/2bigDockTBT3 以下载并安装适用于 Windows 的 2big Dock Thunderbolt 3 驱动程序。如果在 Windows 中使用 Thunderbolt 3 仍然有问题,请联系您的 PC 制造商以获取以下项的 更新:• BIOS• Thunderbolt 3 固件• Thunderbolt 3 驱动程序
有关合规信息,请访问 www.lacie.com/support/2bigDockTBT3/。
ZH_TW
1 連接您的裝置 使用 Thunderbolt 3 或 USB 將您的 LaCie 裝置連接到電腦。不要同時使用這些連接。 a:Thunderbolt3
b:USB-C/USB-C
c:USB-C/USB-A
2 電源連接 連接隨附的電源線。
Print Date:2018-Mar-30 11:43:48 CDT Released; Prod Rel; C; 100827436 Seagate Confidential
31
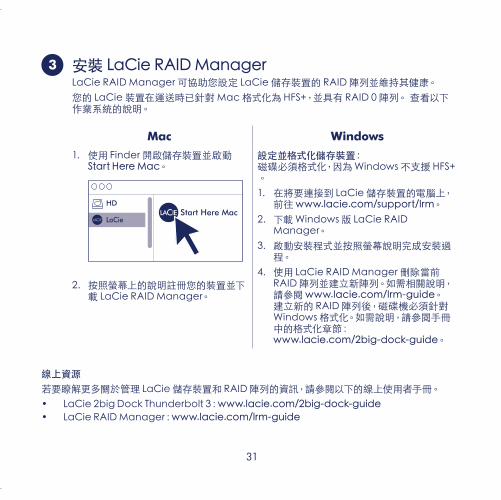
3 安裝LaCieRAIDManager LaCie RAID Manager 可協助您設定 LaCie 儲存裝置的 RAID 陣列並維持其健康。 您的 LaCie 裝置在運送時已針對 Mac 格式化為 HFS+,並具有 RAID 0 陣列。 查看以下
作業系統的說明。
Mac Windows
1. 使用 Finder 開啟儲存裝置並啟動 StartHereMac。
Start Here MacLaCie
HD
2. 按照螢幕上的說明註冊您的裝置並下載 LaCie RAID Manager。
設定並格式化儲存裝置:磁碟必須格式化,因為 Windows 不支援 HFS+。 1. 在將要連接到 LaCie 儲存裝置的電腦上,
前往 www.lacie.com/support/lrm。2. 下載 Windows 版 LaCie RAID
Manager。3. 啟動安裝程式並按照螢幕說明完成安裝過
程。4. 使用 LaCie RAID Manager 刪除當前
RAID 陣列並建立新陣列。如需相關說明,請參閱 www.lacie.com/lrm-guide。建立新的 RAID 陣列後,磁碟機必須針對 Windows 格式化。如需說明,請參閱手冊中的格式化章節: www.lacie.com/2big-dock-guide。
線上資源
若要瞭解更多關於管理 LaCie 儲存裝置和 RAID 陣列的資訊,請參閱以下的線上使用者手冊。• LaCie 2big Dock Thunderbolt 3:www.lacie.com/2big-dock-guide
• LaCie RAID Manager:www.lacie.com/lrm-guide
Print Date:2018-Mar-30 11:43:48 CDT Released; Prod Rel; C; 100827436 Seagate Confidential
32
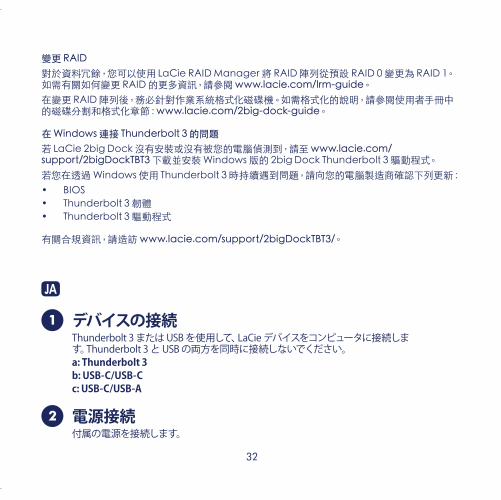
變更RAID
對於資料冗餘,您可以使用 LaCie RAID Manager 將 RAID 陣列從預設 RAID 0 變更為 RAID 1。如需有關如何變更 RAID 的更多資訊,請參閱 www.lacie.com/lrm-guide。在變更 RAID 陣列後,務必針對作業系統格式化磁碟機。如需格式化的說明,請參閱使用者手冊中的磁碟分割和格式化章節:www.lacie.com/2big-dock-guide。
在Windows連接Thunderbolt3的問題
若 LaCie 2big Dock 沒有安裝或沒有被您的電腦偵測到,請至 www.lacie.com/support/2bigDockTBT3 下載並安裝 Windows 版的 2big Dock Thunderbolt 3 驅動程式。若您在透過 Windows 使用 Thunderbolt 3 時持續遇到問題,請向您的電腦製造商確認下列更新:• BIOS• Thunderbolt 3 韌體• Thunderbolt 3 驅動程式
有關合規資訊,請造訪 www.lacie.com/support/2bigDockTBT3/。
JA
1 デバイスの接続 Thunderbolt 3 または USB を使用して、LaCie デバイスをコンピュータに接続しま
す。Thunderbolt 3 と USB の両方を同時に接続しないでください。 a:Thunderbolt3 b:USB-C/USB-C c:USB-C/USB-A
2 電源接続 付属の電源を接続します。
Print Date:2018-Mar-30 11:43:48 CDT Released; Prod Rel; C; 100827436 Seagate Confidential
33
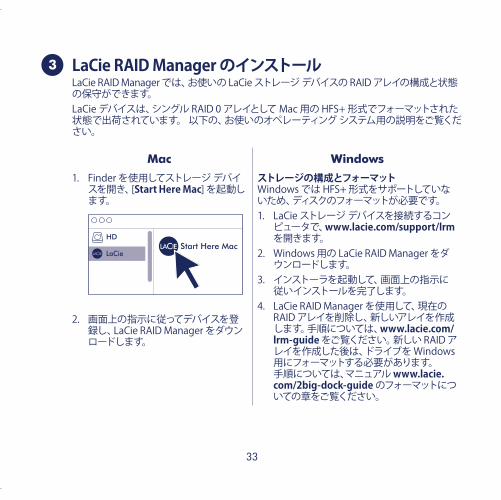
3 LaCieRAIDManagerのインストール LaCie RAID Manager では、お使いの LaCie ストレージ デバイスの RAID アレイの構成と状態
の保守ができます。 LaCie デバイスは、シングル RAID 0 アレイとして Mac 用の HFS+ 形式でフォーマットされた
状態で出荷されています。 以下の、お使いのオペレーティング システム用の説明をご覧ください。
Mac Windows
1. Finder を使用してストレージ デバイスを開き、[StartHereMac] を起動します。
Start Here MacLaCie
HD
2. 画面上の指示に従ってデバイスを登録し、LaCie RAID Manager をダウンロードします。
ストレージの構成とフォーマットWindows では HFS+ 形式をサポートしていないため、ディスクのフォーマットが必要です。 1. LaCie ストレージ デバイスを接続するコン
ピュータで、www.lacie.com/support/lrm を開きます。
2. Windows 用の LaCie RAID Manager をダウンロードします。
3. インストーラを起動して、画面上の指示に従いインストールを完了します。
4. LaCie RAID Manager を使用して、現在の RAID アレイを削除し、新しいアレイを作成します。手順については、www.lacie.com/lrm-guide をご覧ください。新しい RAID アレイを作成した後は、ドライブを Windows 用にフォーマットする必要があります。手順については、マニュアル www.lacie.com/2big-dock-guide のフォーマットについての章をご覧ください。
Print Date:2018-Mar-30 11:43:48 CDT Released; Prod Rel; C; 100827436 Seagate Confidential
34
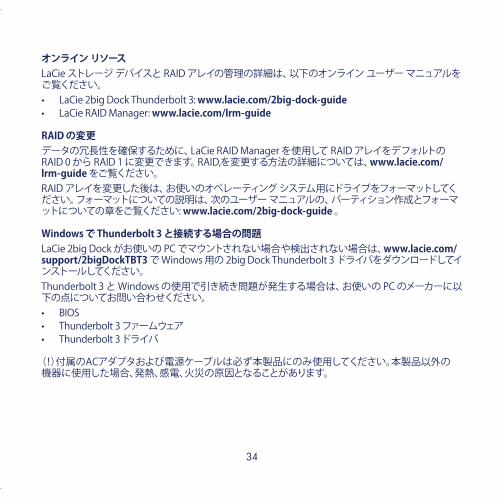
オンラインリソースLaCie ストレージ デバイスと RAID アレイの管理の詳細は、以下のオンライン ユーザー マニュアルをご覧ください。• LaCie 2big Dock Thunderbolt 3: www.lacie.com/2big-dock-guide• LaCie RAID Manager: www.lacie.com/lrm-guide
RAIDの変更データの冗長性を確保するために、LaCie RAID Manager を使用して RAID アレイをデフォルトの RAID 0 から RAID 1 に変更できます。RAID,を変更する方法の詳細については、www.lacie.com/lrm-guide をご覧ください。RAID アレイを変更した後は、お使いのオペレーティング システム用にドライブをフォーマットしてください。フォーマットについての説明は、次のユーザー マニュアルの、パーティション作成とフォーマットについての章をご覧ください: www.lacie.com/2big-dock-guide 。
WindowsでThunderbolt3と接続する場合の問題LaCie 2big Dock がお使いの PC でマウントされない場合や検出されない場合は、www.lacie.com/support/2bigDockTBT3 で Windows 用の 2big Dock Thunderbolt 3 ドライバをダウンロードしてインストールしてください。Thunderbolt 3 と Windows の使用で引き続き問題が発生する場合は、お使いの PC のメーカーに以下の点についてお問い合わせください。• BIOS• Thunderbolt 3 ファームウェア• Thunderbolt 3 ドライバ
(!)付属のACアダプタおよび電源ケーブルは必ず本製品にのみ使用してください。本製品以外の機器に使用した場合、発熱、感電、火災の原因となることがあります。
Print Date:2018-Mar-30 11:43:48 CDT Released; Prod Rel; C; 100827436 Seagate Confidential

35
Print Date:2018-Mar-30 11:43:48 CDT Released; Prod Rel; C; 100827436 Seagate Confidential
36
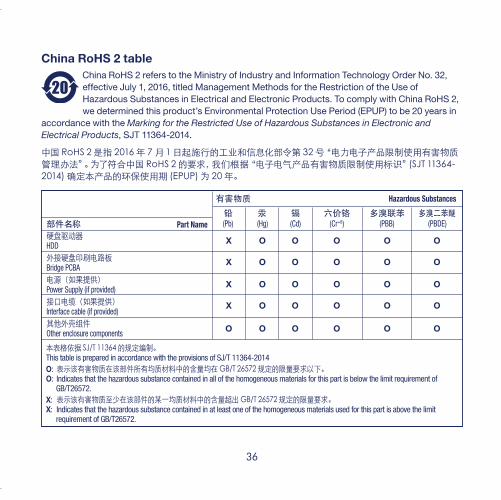
China RoHS 2 tableChina RoHS 2 refers to the Ministry of Industry and Information Technology Order No. 32, effective July 1, 2016, titled Management Methods for the Restriction of the Use of Hazardous Substances in Electrical and Electronic Products. To comply with China RoHS 2, we determined this product’s Environmental Protection Use Period (EPUP) to be 20 years in
accordance with the Marking for the Restricted Use of Hazardous Substances in Electronic and Electrical Products, SJT 11364-2014.
中国 RoHS 2 是指 2016 年 7 月 1 日起施行的工业和信息化部令第 32 号“电力电子产品限制使用有害物质管理办法”。为了符合中国 RoHS 2 的要求,我们根据“电子电气产品有害物质限制使用标识”(SJT 11364-2014) 确定本产品的环保使用期 (EPUP) 为 20 年。
OOOOOX
OOOOOX
OOOOOX
OOOOOX
OOOOOO
Hazardous Substances有害物质
Part Name (Pb) (Hg) (Cd) (Cr+6) (PBB) (PBDE)铅
部件名称汞 镉 六价铬 多溴联苯 多溴二苯醚
硬盘驱动器HDD外接硬盘印刷电路板Bridge PCBA电源(如果提供)Power Supply (if provided)接口电缆(如果提供)Interface cable (if provided)其他外壳组件Other enclosure components
本表格依据 SJ/T 11364 的规定编制。This table is prepared in accordance with the provisions of SJ/T 11364-2014O: 表示该有害物质在该部件所有均质材料中的含量均在 GB/T 26572 规定的限量要求以下。O: Indicates that the hazardous substance contained in all of the homogeneous materials for this part is below the limit requirement of
GB/T26572.X: 表示该有害物质至少在该部件的某一均质材料中的含量超出 GB/T 26572 规定的限量要求。X: Indicates that the hazardous substance contained in at least one of the homogeneous materials used for this part is above the limit
requirement of GB/T26572.
Print Date:2018-Mar-30 11:43:48 CDT Released; Prod Rel; C; 100827436 Seagate Confidential
37
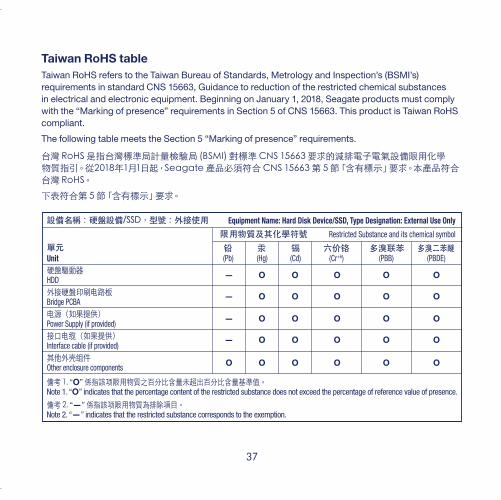
Taiwan RoHS tableTaiwan RoHS refers to the Taiwan Bureau of Standards, Metrology and Inspection’s (BSMI’s) requirements in standard CNS 15663, Guidance to reduction of the restricted chemical substances in electrical and electronic equipment. Beginning on January 1, 2018, Seagate products must comply with the “Marking of presence” requirements in Section 5 of CNS 15663. This product is Taiwan RoHS compliant.
The following table meets the Section 5 “Marking of presence” requirements.
台灣 RoHS 是指台灣標準局計量檢驗局 (BSMI) 對標準 CNS 15663 要求的減排電子電氣設備限用化學 物質指引。從2018年1月1日起,Seagate 產品必須符合 CNS 15663 第 5 節「含有標示」要求。本產品符合台灣 RoHS。下表符合第 5 節「含有標示」要求。
OOOOO—
OOOOO—
OOOOO—
OOOOO—
OOOOOO
限用物質及其化學符號
設備名稱:硬盤設備/SSD,型號:外接使用
Unit
Equipment Name: Hard Disk Device/SSD, Type Designation: External Use Only
Restricted Substance and its chemical symbol
(Pb) (Hg) (Cd) (Cr+6) (PBB) (PBDE)铅單元 汞 镉 六价铬 多溴联苯 多溴二苯醚
硬盤驅動器HDD外接硬盤印刷电路板Bridge PCBA电源(如果提供)Power Supply (if provided)接口电缆(如果提供)Interface cable (if provided)其他外壳组件Other enclosure components
備考 1. “O” 係指該项限用物質之百分比含量未超出百分比含量基準值。Note 1. “O” indicates that the percentage content of the restricted substance does not exceed the percentage of reference value of presence.
備考 2. “—” 係指該项限用物質為排除項目。Note 2. “—” indicates that the restricted substance corresponds to the exemption.
Print Date:2018-Mar-30 11:43:48 CDT Released; Prod Rel; C; 100827436 Seagate Confidential

38
Print Date:2018-Mar-30 11:43:48 CDT Released; Prod Rel; C; 100827436 Seagate Confidential
39
© 2018 Seagate Technology LLC. All rights reserved. Seagate, Seagate Technology, the Spiral logo, LaCie, and the LaCie logo are registered trademarks of Seagate Technology LLC in the United States and/or other countries. Thunderbolt and the Thunderboldt logo are trademarks of Intel Corporation in the U.S. and/or other countries. All other trademarks or registered trademarks are the property of their respective owners. Seagate reserves the right to change, without notice, product offerings or specifications. Seagate Technology LLC10200 S. De Anza Blvd.Cupertino, CA 95014 U.S.A.
PN: 100827436C 02/18
Seagate Singapore InternationalHeadquarters Pte. Ltd.Koolhovenlaan 11119 NB Schiphol-RijkThe Netherlands
Print Date:2018-Mar-30 11:43:48 CDT Released; Prod Rel; C; 100827436 Seagate Confidential
40
www.lacie.com
www.lacie.com/register
www.lacie.com/warranty
www.lacie.com/support/2bigDockTBT3
www.lacie.com/2big-dock-guide
www.lacie.com/lrm-guide
100827436C
Print Date:2018-Mar-30 11:43:48 CDT Released; Prod Rel; C; 100827436 Seagate Confidential


