8
RAIN GARDEN Construction Guide STORMWATER DEVICE INFORMATION SERIES
RAIN GARDENConstruction Guide
STORMWATER DEVICE INFORMATION SERIES

RAIN GARDEN Construction Guide
STORMWATER DEVICE INFORMATION SERIES
What are rain gardens?
Rain gardens help remove pollutants and slow down stormwater flows, recharge freshwater bodies and look attractive. They filter stormwater through soil mix and plants. These absorb and filter contaminants before stormwater flows to surrounding ground, pipes, drains and streams, and eventually to the sea.
1

RAIN GARDEN Construction Guide
STORMWATER DEVICE INFORMATION SERIESSix key components of a rain gardenRain gardens have six main elements, shown below.
1. Rain garden soil mix Most important component of rain garden – the soil filters pollutants. Usually sandy loam, loamy sand or loam.
4. Overflow systemBypass for excess flows when raingarden pond is full.
2. Ponding areaHolds stormwater runoff until it seeps through the planting mix and into the underdrain system. Usually max 200mm - 300mm lower than surrounding hard surfaces. Local authorities may have specific maximum depth and minimum capacity requirements for the ponding area. For safety reasons, ponding area should be max 300mm deep.
5. Mulch / pebble/ rock layerPrevents weeds and helps prevent soil drying out.
3. Plants (preferably native) Plants help filter pollutants and look attractive.Usually native plants - better suited to the extreme wet/dry conditions (such as ponding for up to 24 hrs).
Underdrain system (may not be included) If present, water drains through soil mix to underdrain, then is piped to stormwater network or waterways (e.g. stream, open water). Some free draining soils may not require underdrain, as runoff will drain to groundwater aquifers.
Grass buffer strip (may not be included) Grassed buffer strip between hard surface and garden as first stage filtration, removing larger particles and creating runoff sheet flow (to avoid erosion). Not always included in rain garden design, due to site constraints.
6. Sand layer (if included)Additional stormwater filter, removing pollutants passing through the planting bed. Also helps retain soils within the rain garden.
2
RAIN GARDEN Construction Guide
STORMWATER DEVICE INFORMATION SERIES
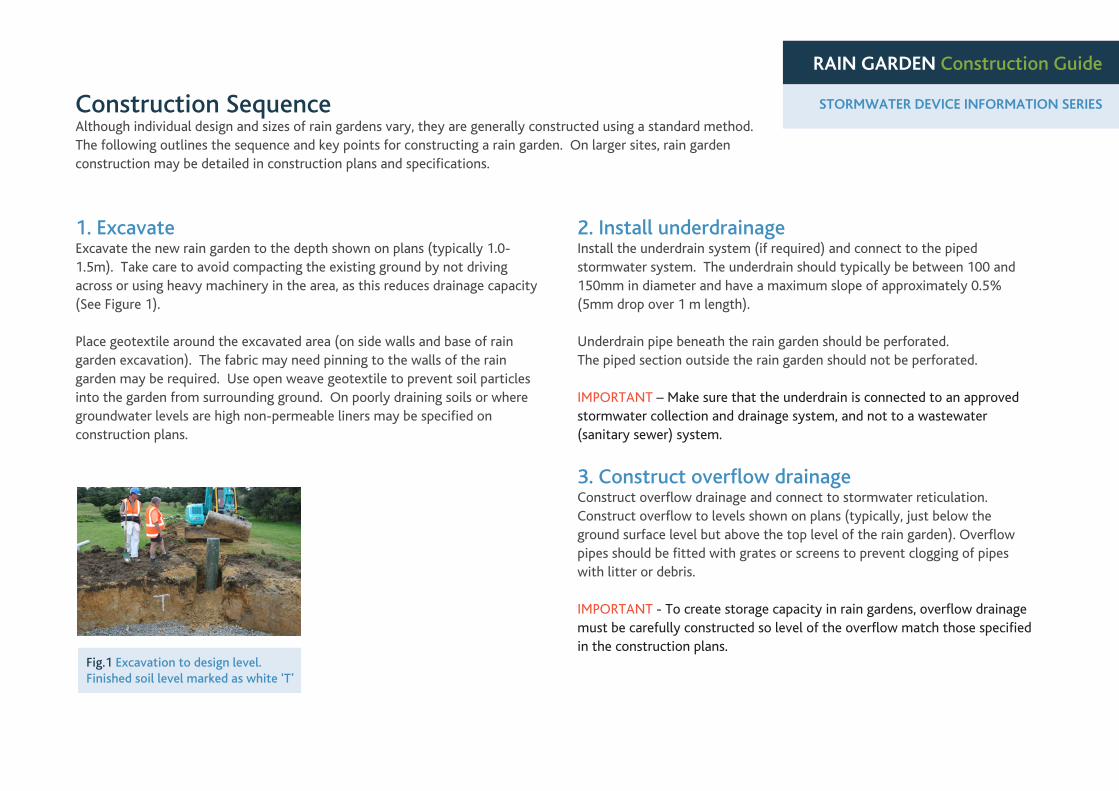
1. ExcavateExcavate the new rain garden to the depth shown on plans (typically 1.0-1.5m). Take care to avoid compacting the existing ground by not driving across or using heavy machinery in the area, as this reduces drainage capacity (See Figure 1).
Place geotextile around the excavated area (on side walls and base of rain garden excavation). The fabric may need pinning to the walls of the rain garden may be required. Use open weave geotextile to prevent soil particles into the garden from surrounding ground. On poorly draining soils or where groundwater levels are high non-permeable liners may be specified on construction plans.
2. Install underdrainageInstall the underdrain system (if required) and connect to the piped stormwater system. The underdrain should typically be between 100 and 150mm in diameter and have a maximum slope of approximately 0.5% (5mm drop over 1 m length).
Underdrain pipe beneath the rain garden should be perforated. The piped section outside the rain garden should not be perforated.
IMPORTANT – Make sure that the underdrain is connected to an approved stormwater collection and drainage system, and not to a wastewater (sanitary sewer) system.
3. Construct overflow drainage Construct overflow drainage and connect to stormwater reticulation. Construct overflow to levels shown on plans (typically, just below the ground surface level but above the top level of the rain garden). Overflow pipes should be fitted with grates or screens to prevent clogging of pipes with litter or debris.
IMPORTANT - To create storage capacity in rain gardens, overflow drainage must be carefully constructed so level of the overflow match those specified in the construction plans.
Construction SequenceAlthough individual design and sizes of rain gardens vary, they are generally constructed using a standard method. The following outlines the sequence and key points for constructing a rain garden. On larger sites, rain garden construction may be detailed in construction plans and specifications.
3
Fig.1 Excavation to design level. Finished soil level marked as white ‘T’
RAIN GARDEN Construction Guide
STORMWATER DEVICE INFORMATION SERIES
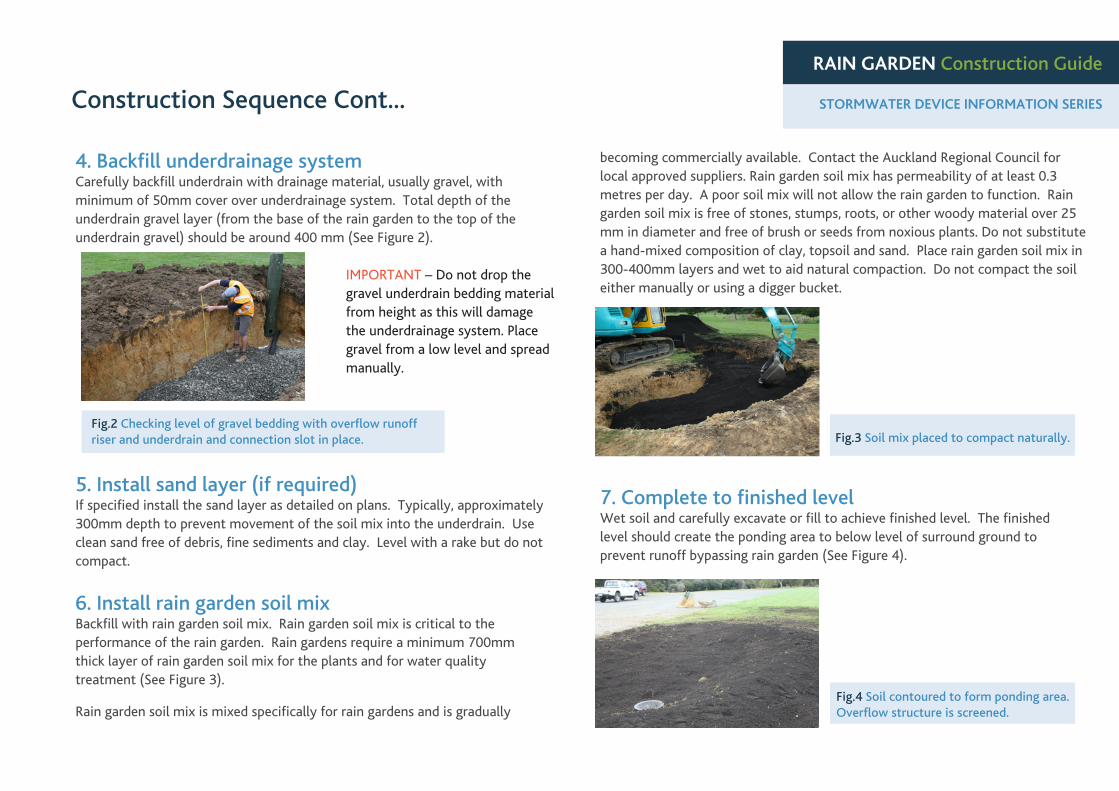
4. Backfill underdrainage systemCarefully backfill underdrain with drainage material, usually gravel, with minimum of 50mm cover over underdrainage system. Total depth of the underdrain gravel layer (from the base of the rain garden to the top of the underdrain gravel) should be around 400 mm (See Figure 2).
IMPORTANT – Do not drop the gravel underdrain bedding material from height as this will damage the underdrainage system. Place gravel from a low level and spread manually.
5. Install sand layer (if required)If specified install the sand layer as detailed on plans. Typically, approximately 300mm depth to prevent movement of the soil mix into the underdrain. Use clean sand free of debris, fine sediments and clay. Level with a rake but do not compact.
6. Install rain garden soil mixBackfill with rain garden soil mix. Rain garden soil mix is critical to the performance of the rain garden. Rain gardens require a minimum 700mm thick layer of rain garden soil mix for the plants and for water quality treatment (See Figure 3).
Rain garden soil mix is mixed specifically for rain gardens and is gradually
becoming commercially available. Contact the Auckland Regional Council for local approved suppliers. Rain garden soil mix has permeability of at least 0.3 metres per day. A poor soil mix will not allow the rain garden to function. Rain garden soil mix is free of stones, stumps, roots, or other woody material over 25 mm in diameter and free of brush or seeds from noxious plants. Do not substitute a hand-mixed composition of clay, topsoil and sand. Place rain garden soil mix in 300-400mm layers and wet to aid natural compaction. Do not compact the soil either manually or using a digger bucket.
7. Complete to finished levelWet soil and carefully excavate or fill to achieve finished level. The finished level should create the ponding area to below level of surround ground to prevent runoff bypassing rain garden (See Figure 4).
Construction Sequence Cont...
4
Fig.2 Checking level of gravel bedding with overflow runoff riser and underdrain and connection slot in place. Fig.3 Soil mix placed to compact naturally.
Fig.4 Soil contoured to form ponding area. Overflow structure is screened.
RAIN GARDEN Construction Guide
STORMWATER DEVICE INFORMATION SERIES
8. PlantingPlant as per design planting plan. If no plan is provided, use plant guidelines (right) and refer to Auckland Regional Council TP10 for guidance on appropriate plant species and planting of rain gardens.
IMPORTANT – Do not use fertilizers, herbicides or pesticides as they may impact or pollute downstream water quality.
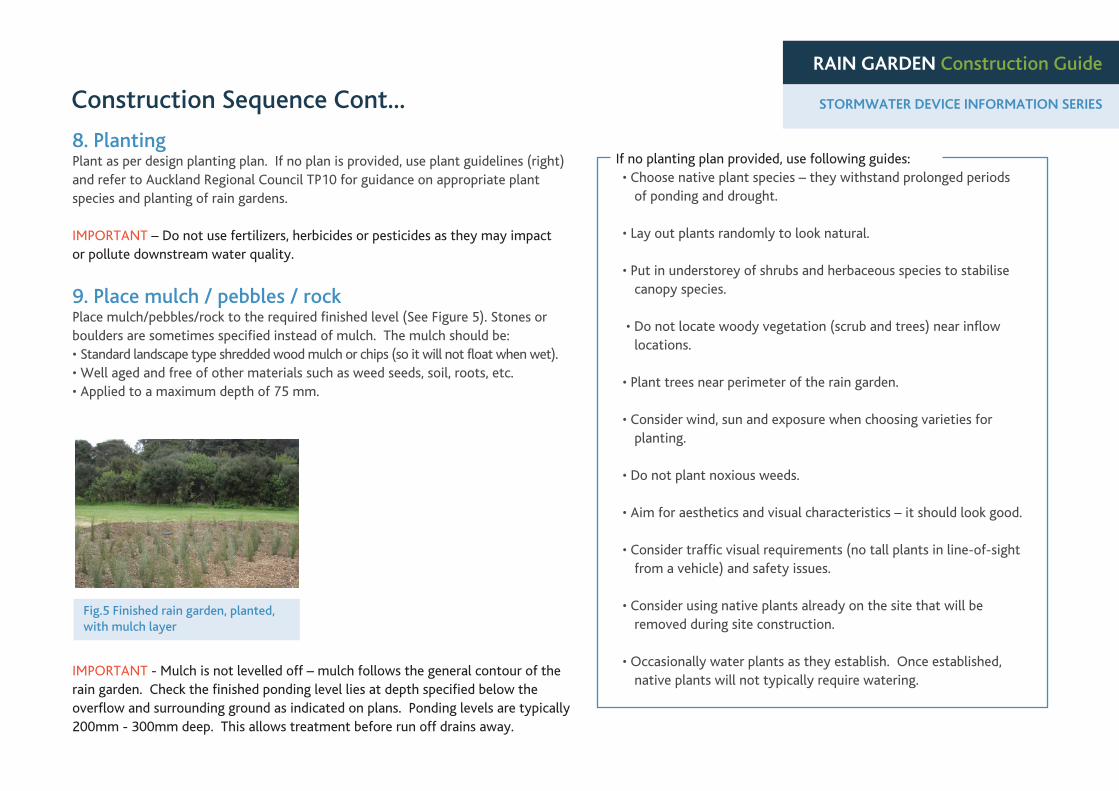
9. Place mulch / pebbles / rockPlace mulch/pebbles/rock to the required finished level (See Figure 5). Stones or boulders are sometimes specified instead of mulch. The mulch should be:• Standard landscape type shredded wood mulch or chips (so it will not float when wet).• Well aged and free of other materials such as weed seeds, soil, roots, etc.• Applied to a maximum depth of 75 mm.
IMPORTANT - Mulch is not levelled off – mulch follows the general contour of the rain garden. Check the finished ponding level lies at depth specified below the overflow and surrounding ground as indicated on plans. Ponding levels are typically 200mm - 300mm deep. This allows treatment before run off drains away.
If no planting plan provided, use following guides:• Choose native plant species – they withstand prolonged periods of ponding and drought.
• Lay out plants randomly to look natural.
• Put in understorey of shrubs and herbaceous species to stabilise canopy species.
• Do not locate woody vegetation (scrub and trees) near inflow locations.
• Plant trees near perimeter of the rain garden.
• Consider wind, sun and exposure when choosing varieties for planting.
• Do not plant noxious weeds.
• Aim for aesthetics and visual characteristics – it should look good.
• Consider traffic visual requirements (no tall plants in line-of-sight from a vehicle) and safety issues.
• Consider using native plants already on the site that will be removed during site construction.
• Occasionally water plants as they establish. Once established, native plants will not typically require watering.
5
Fig.5 Finished rain garden, planted, with mulch layer
Construction Sequence Cont...
RAIN GARDEN Construction Guide
STORMWATER DEVICE INFORMATION SERIES
10. Review levelsReview levels indicated on the plans. The rain garden requires ponded area between 200-300mm below the overflow and surrounding ground level. Install grass filter strip and/or kerb cuts. If included, grass filter strip creates a buffer between surrounding ground level and rain garden. Grass strips spread stormwater flow before it enters rain garden. Grass filter strips are not always included, particularly where stormwater run off directly from car parks and roadways to the rain garden.
Grass filter strips should be at least 1m wide and extend along the entire length of rain garden. Place topsoil to 100mm min depth and sow or hydroseed with appropriate grass seed, matching to final mulch level. Typically, kerb cuts are used alongside roads and in car parks. Kerb cuts must be 100mm min wide to allow sheet flow. Erosion prevention measures such as rip-rap (rocks set in concrete) may be required at inflow points.
In some car parks, individual parking blocks are set 500mm back from the edge of the carpark. Make sure a concrete strip at least 300mm wide is created between car park edge and rain garden to avoid loading the side of the rain garden.
11. Test the rain gardenTest the rain garden. If possible, inspect the bed after heavy rainfall, and monitor to check water level drains completely over 24 hours. If this is not possible, fill rain garden with reticulated water from a hydrant or nearby hose to a depth of approximately 200mm for testing over 24 hour period.
12. Completion and tidy upComplete surface treatment on adjacent areas. Remove erosion and sediment control devices such as silt fences and catch pit protection devices, particularly geotextile over catchpits.
Non permeable lining - Where non-permeable lining is specified for rain gardens the lining will typically extend along the base and side of the rain garden to prevent groundwater flows into the rain garden. Take care not to tear the lining when placing it. Ensure all seams, espe-cially around pipes punching through the liner, are properly sealed to prevent groundwater from entering the underdrain.
Observation wells - Some rain garden designs include observation wells, which often look like capped riser pipes. Observation wells are used to monitor water depths in the rain garden. Discharge and overflow pipes may also have inspection and clean-out access points (usually capped) so underdrainage system can be inspected and back washed for maintenance or to remove blockages.
6
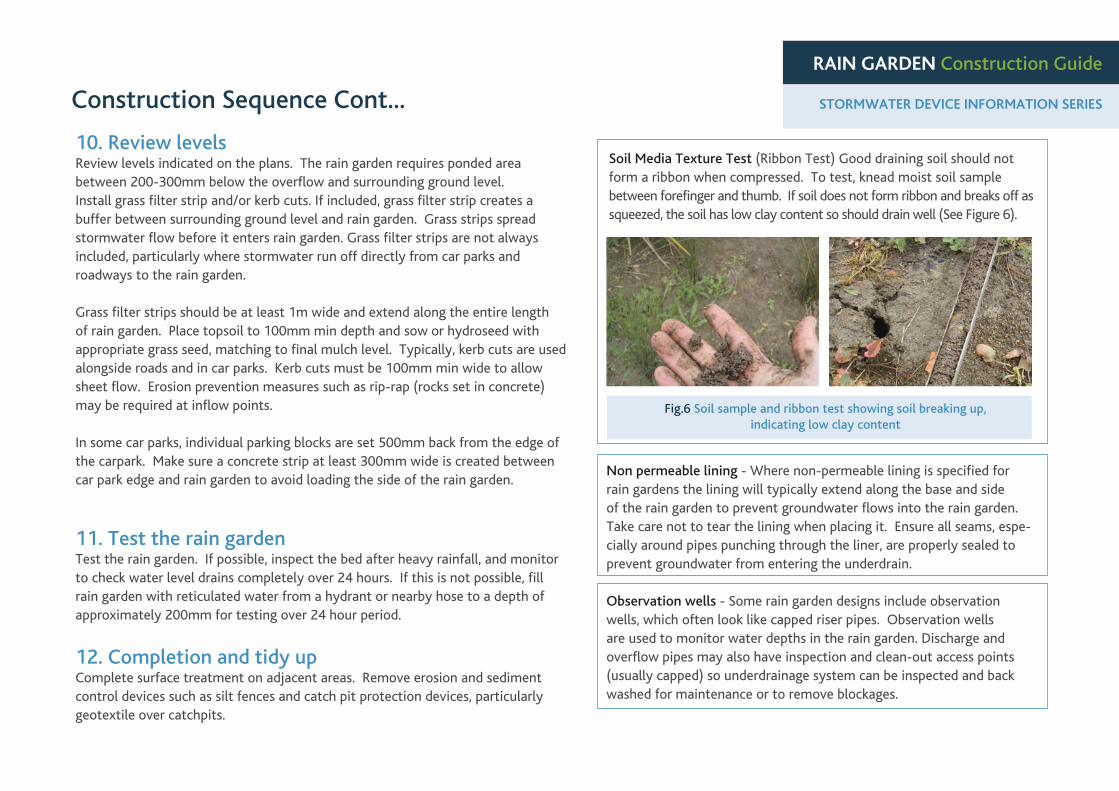
Soil Media Texture Test (Ribbon Test) Good draining soil should not form a ribbon when compressed. To test, knead moist soil sample between forefinger and thumb. If soil does not form ribbon and breaks off as squeezed, the soil has low clay content so should drain well (See Figure 6).
Fig.6 Soil sample and ribbon test showing soil breaking up, indicating low clay content
Construction Sequence Cont...

RAIN GARDEN Construction Guide
STORMWATER DEVICE INFORMATION SERIESQuick checks
Get approval by designer for all changes to original construction plans. Major changes need approval from the council.
Construct rain garden from bottom up with surrounding areas stabilised.Prevent soil and sediments generated from construction entering the raingarden.
Set accurate heights for each element of the rain garden, particularly the underdrain, existing surrounding ground level and inflow and overflow mechanisms. Changes to levels may cause the rain garden to fail to operate as intended.
Block or divert away any new or existing inlets and outlets from the rain garden.
Check the soil and other material composition as specified in the design.
Construction requirements may vary between local authorities. Confirm design specifications with the Council who approved resource consents for each project before construction.
Avoid
If possible, do not construct the rain garden until after surrounding areas have been stabilised and erosion is no longer a concern.
Do not trench and backfill rain garden in parts.
Do not compact the rain garden at any time. If possible allow time for natural settlement and compaction before planting. If not possible, consider dampening each layer of soil mix during placement in rain garden.
Do not drop gravel underdrain material from height as this will damage the underdrainage system. Place gravel from a low level and spread manually.
Unless specified, do not use geotextile between the soil layers as this may cause clogging resulting in waterlogging for long periods. This reduces the stormwater filtration capacity and may stress and kill the plants.
Do not use fertilisers, herbicides, pesticides.
7
Disclaimer
This publication is provided strictly subject to Auckland Council’s (AC) copyright and other intellectual property rights (if any) in the publication. Users of the publication may only access, reproduce and use the publication, in a secure digital medium or hard copy, for responsible genuine non-commercial purposes relating to personal, public service or educational purposes, provided that the publication is only ever accurately reproduced and proper attribution of its source, publication date and authorship is attached to any use or reproduction. This publication must not be used in any way for any commercial purpose without the prior written consent of AC. AC does not give any warranty whatsoever, including without limitation, as to the availability, accuracy, completeness, currency or reliability of the information or data (including third party data) made available via the publication and expressly disclaim (to the maximum extent permitted in law) all liability for any damage or loss resulting from your use of, or reliance on the publication or the information and data provided via the publication. The publication and information and data contained within it are provided on an “as is” basis.


