+ All Categories
Home > Documents > RESIN COLOUR BANGLES - Resin Obsession€¦ · 64 Project Intermediate RESIN COLOUR BANGLES Create...

RESIN COLOUR BANGLES - Resin Obsession€¦ · 64 Project Intermediate RESIN COLOUR BANGLES Create...

Date post: 21-May-2018
Category:
Upload: buikhanh
View: 226 times
Download: 2 times
Share this document with a friend
2
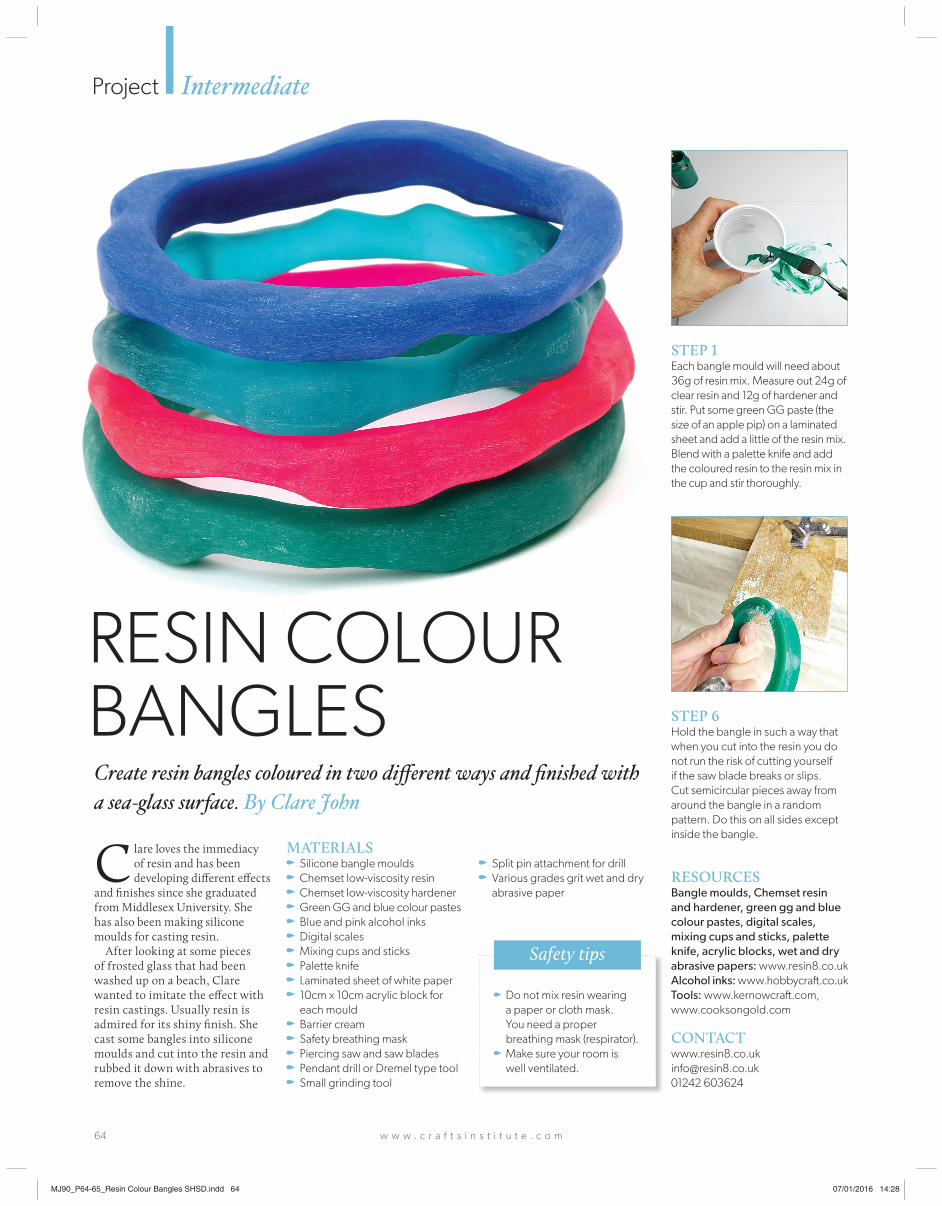
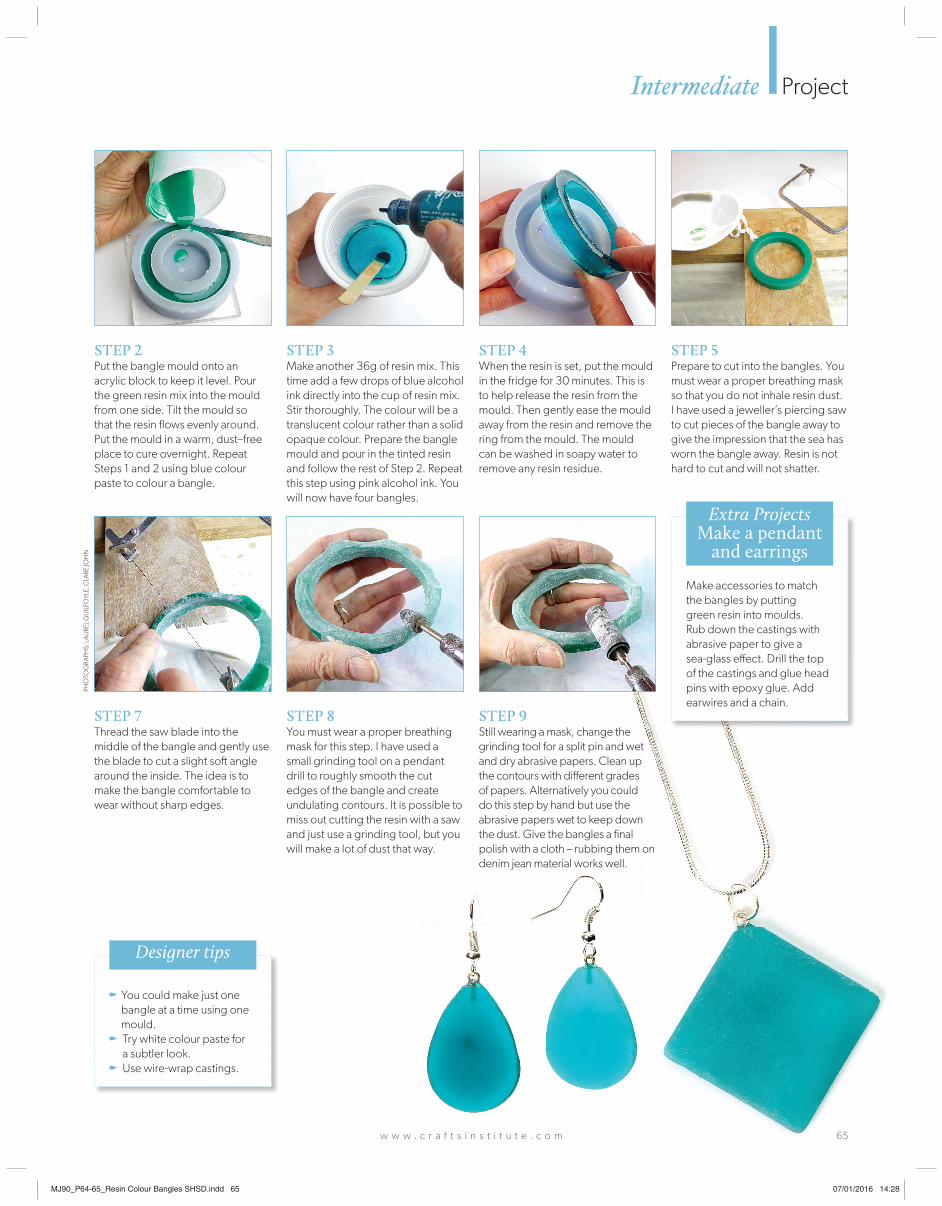
www.craftsinstitute.com 64 Project Intermediate RESIN COLOUR BANGLES Create resin bangles coloured in two dierent ways and nished with a sea - glass surface. By Clare John C lare loves the immediacy of resin and has been developing different effects and finishes since she graduated from Middlesex University. She has also been making silicone moulds for casting resin. After looking at some pieces of frosted glass that had been washed up on a beach, Clare wanted to imitate the effect with resin castings. Usually resin is admired for its shiny finish. She cast some bangles into silicone moulds and cut into the resin and rubbed it down with abrasives to remove the shine. STEP 1 Each bangle mould will need about 36g of resin mix. Measure out 24g of clear resin and 12g of hardener and stir. Put some green GG paste (the size of an apple pip) on a laminated sheet and add a little of the resin mix. Blend with a palette knife and add the coloured resin to the resin mix in the cup and stir thoroughly. MATERIALS Silicone bangle moulds Chemset low-viscosity resin Chemset low-viscosity hardener Green GG and blue colour pastes Blue and pink alcohol inks Digital scales Mixing cups and sticks Palette knife Laminated sheet of white paper 10cm x 10cm acrylic block for each mould Barrier cream Safety breathing mask Piercing saw and saw blades Pendant drill or Dremel type tool Small grinding tool RESOURCES Bangle moulds, Chemset resin and hardener, green gg and blue colour pastes, digital scales, mixing cups and sticks, palette knife, acrylic blocks, wet and dry abrasive papers: www.resin8.co.uk Alcohol inks: www.hobbycraſt.co.uk Tools: www.kernowcraſt.com, www.cooksongold.com CONTACT www.resin8.co.uk [email protected] 01242 603624 STEP 6 Hold the bangle in such a way that when you cut into the resin you do not run the risk of cutting yourself if the saw blade breaks or slips. Cut semicircular pieces away from around the bangle in a random pattern. Do this on all sides except inside the bangle. Split pin attachment for drill Various grades grit wet and dry abrasive paper Do not mix resin wearing a paper or cloth mask. You need a proper breathing mask (respirator). Make sure your room is well ventilated. Safety tips MJ90_P64-65_Resin Colour Bangles SHSD.indd 64 MJ90_P64-65_Resin Colour Bangles SHSD.indd 64 07/01/2016 14:28 07/01/2016 14:28
Transcript

w w w . c r a f t s i n s t i t u t e . c o m64

Project Intermediate

RESIN COLOUR BANGLESCreate resin bangles coloured in two diff erent ways and fi nished with a sea-glass surface. By Clare John

Clare loves the immediacy of resin and has been developing diff erent eff ects

and fi nishes since she graduated from Middlesex University. She has also been making silicone moulds for casting resin.

After looking at some pieces of frosted glass that had been washed up on a beach, Clare wanted to imitate the eff ect with resin castings. Usually resin is admired for its shiny fi nish. She cast some bangles into silicone moulds and cut into the resin and rubbed it down with abrasives to remove the shine.

STEP 1Each bangle mould will need about

36g of resin mix. Measure out 24g of

clear resin and 12g of hardener and

stir. Put some green GG paste (the

size of an apple pip) on a laminated

sheet and add a little of the resin mix.

Blend with a palette knife and add

the coloured resin to the resin mix in

the cup and stir thoroughly.

MATERIALS Silicone bangle moulds

Chemset low-viscosity resin

Chemset low-viscosity hardener

Green GG and blue colour pastes

Blue and pink alcohol inks

Digital scales

Mixing cups and sticks

Palette knife

Laminated sheet of white paper

10cm x 10cm acrylic block for

each mould

Barrier cream

Safety breathing mask

Piercing saw and saw blades

Pendant drill or Dremel type tool

Small grinding tool

RESOURCESBangle moulds, Chemset resin

and hardener, green gg and blue

colour pastes, digital scales,

mixing cups and sticks, palette

knife, acrylic blocks, wet and dry

abrasive papers: www.resin8.co.uk

Alcohol inks: www.hobbycraft .co.uk

Tools: www.kernowcraft .com,

www.cooksongold.com

CONTACT www.resin8.co.uk

[email protected]

01242 603624

STEP 6Hold the bangle in such a way that

when you cut into the resin you do

not run the risk of cutting yourself

if the saw blade breaks or slips.

Cut semicircular pieces away from

around the bangle in a random

pattern. Do this on all sides except

inside the bangle.

Split pin attachment for drill

Various grades grit wet and dry

abrasive paper

Do not mix resin wearing

a paper or cloth mask.

You need a proper

breathing mask (respirator).

Make sure your room is

well ventilated.

Safety tips

MJ90_P64-65_Resin Colour Bangles SHSD.indd 64MJ90_P64-65_Resin Colour Bangles SHSD.indd 64 07/01/2016 14:2807/01/2016 14:28

w w w . c r a f t s i n s t i t u t e . c o m

Intermediate ProjectP

HO

TO

GR

AP

HS

: L

AU

RE

L G

UIL

FO

YLE

, C

LA

RE

JOH

N

You could make just one

bangle at a time using one

mould.

Try white colour paste for

a subtler look.

Use wire-wrap castings.

Designer tips

STEP 2Put the bangle mould onto an

acrylic block to keep it level. Pour

the green resin mix into the mould

from one side. Tilt the mould so

that the resin fl ows evenly around.

Put the mould in a warm, dust–free

place to cure overnight. Repeat

Steps 1 and 2 using blue colour

paste to colour a bangle.

STEP 5Prepare to cut into the bangles. You

must wear a proper breathing mask

so that you do not inhale resin dust.

I have used a jeweller’s piercing saw

to cut pieces of the bangle away to

give the impression that the sea has

worn the bangle away. Resin is not

hard to cut and will not shatter.

STEP 4When the resin is set, put the mould

in the fridge for 30 minutes. This is

to help release the resin from the

mould. Then gently ease the mould

away from the resin and remove the

ring from the mould. The mould

can be washed in soapy water to

remove any resin residue.

STEP 3Make another 36g of resin mix. This

time add a few drops of blue alcohol

ink directly into the cup of resin mix.

Stir thoroughly. The colour will be a

translucent colour rather than a solid

opaque colour. Prepare the bangle

mould and pour in the tinted resin

and follow the rest of Step 2. Repeat

this step using pink alcohol ink. You

will now have four bangles.

STEP 8You must wear a proper breathing

mask for this step. I have used a

small grinding tool on a pendant

drill to roughly smooth the cut

edges of the bangle and create

undulating contours. It is possible to

miss out cutting the resin with a saw

and just use a grinding tool, but you

will make a lot of dust that way.

STEP 7Thread the saw blade into the

middle of the bangle and gently use

the blade to cut a slight soft angle

around the inside. The idea is to

make the bangle comfortable to

wear without sharp edges.

Make accessories to match

the bangles by putting

green resin into moulds.

Rub down the castings with

abrasive paper to give a

sea-glass eff ect. Drill the top

of the castings and glue head

pins with epoxy glue. Add

earwires and a chain.

Extra ProjectsMake a pendant

and earrings

65

STEP 9Still wearing a mask, change the

grinding tool for a split pin and wet

and dry abrasive papers. Clean up

the contours with diff erent grades

of papers. Alternatively you could

do this step by hand but use the

abrasive papers wet to keep down

the dust. Give the bangles a fi nal

polish with a cloth – rubbing them on

denim jean material works well.

MJ90_P64-65_Resin Colour Bangles SHSD.indd 65MJ90_P64-65_Resin Colour Bangles SHSD.indd 65 07/01/2016 14:2807/01/2016 14:28


Recommended