19
Scopia (Radvision) Licensing in PLDS Process Overview and Training Update

Scopia (Radvision) Licensing in PLDS
Process Overview and Training Update
License Activation Updates
• Avaya has updated the PLDS website to enable users to enter a Scopia (Radvision) serial number and PLDS will return the License Activation Code (LAC), enabling the user to generate a license key/file more quickly
• There will no longer be the need to reach out to the IT Helpdesk for support with finding or assigning LACs
• Going forward the new manufacturing process will include PLDS relevant LAC information right in the box to make license activation simple and easy. There will be a manufacturing transition period (refer to slide 4)
• Distributor Note: • Distributors will no longer be expected to manage a License Channel
Transfer process for stocked LACs in PLDS

Licensing in 3 Steps: 1. Obtain LAC 2. Assign LAC 3. Activate License

Letter in the box – What Next? • If letter is a Radvision letter go to next slide for how to obtain LAC
• If letter is an AVAYA letter go slide 8 for how to activate LAC

Step 1 - Lookup LAC(s) based on Serial Number(s) on Letter
• 1. In PLDS Select Reports
2. Expand Entitlements Reports
3. Click “Run” next to Retrieve LAC using Serial number for Radvision products
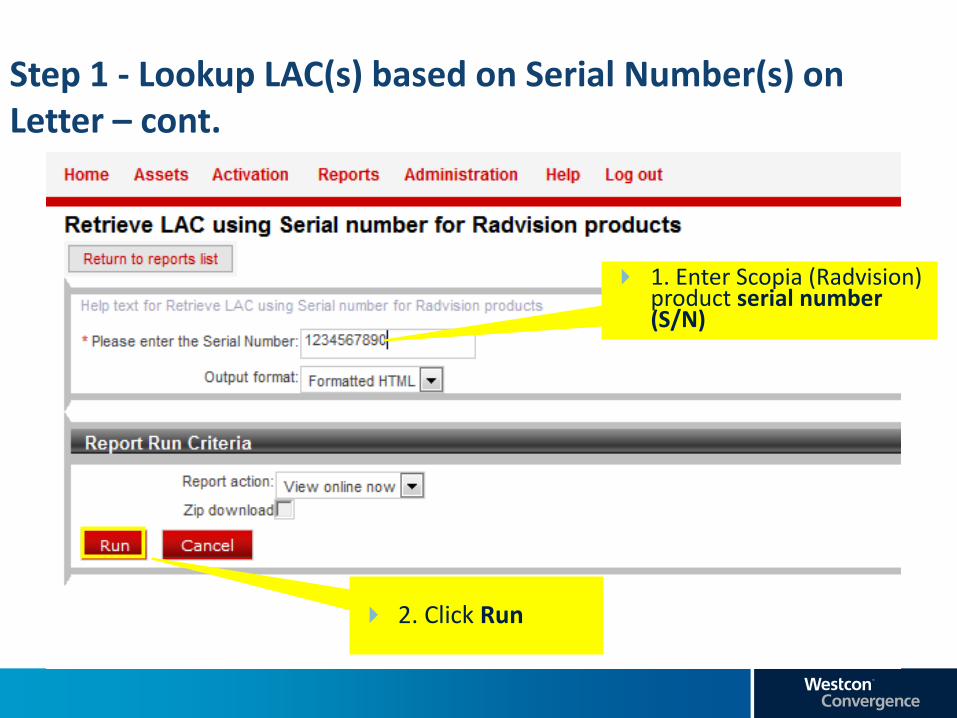
Step 1 - Lookup LAC(s) based on Serial Number(s) on Letter – cont.
1. Enter Scopia (Radvision) product serial number (S/N)
2. Click Run
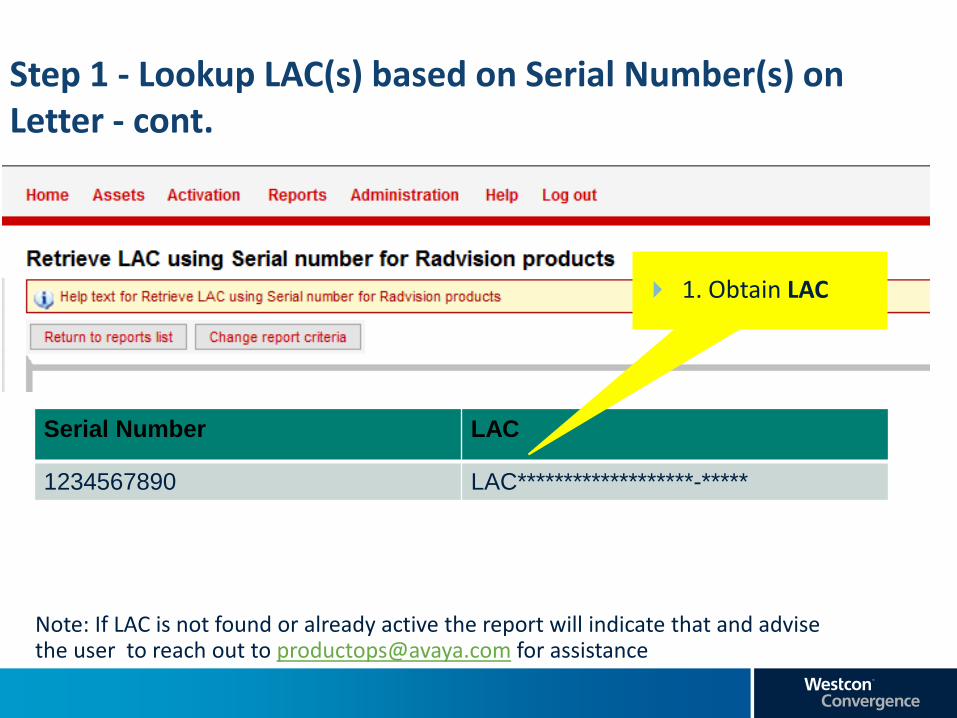
Step 1 - Lookup LAC(s) based on Serial Number(s) on Letter - cont.
Serial Number LAC
1234567890 LAC*******************-*****
1. Obtain LAC
Note: If LAC is not found or already active the report will indicate that and advise the user to reach out to [email protected] for assistance

Step 2 - Assign LAC(s)
1. On Home Screen Enter your LAC
2. Click
1234567890

Step 2 - Assign LAC(s) – Cont.
1. Click

Step 2 - Assign LAC(s) – Cont.
1. Enter the End Customer’s NAME or Company ID
2. Click
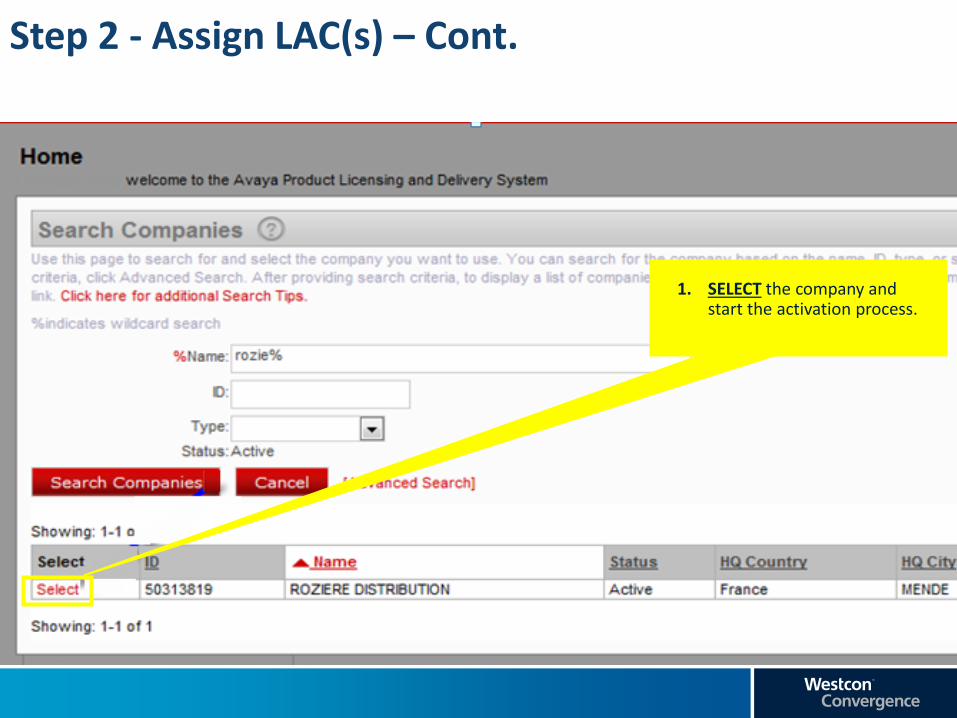
Step 2 - Assign LAC(s) – Cont.
1. SELECT the company and start the activation process.

2. Click Next and continue on through EULA
Step 3 – Activate License Key 1. Enter the Host ID and serial
number
1. SELECT the company and start the activation process.
2. Select Next and continue through to EULA

Step 3 – Activate License Key – Cont.
1. Select Finish

Step 3 – Activate License Key – Cont.
1. Obtain Key and Install

• Complete training on Radvision transition into Avaya standard process and tools for partners can be found at: https://sales.avaya.com/documents/1399573141268
• Access to PLDS can be obtained by Signing into Avaya Support at http://support.avaya.com, Select “Profile,” Select “View/Request Roles,” Select a “Role” for the application(s), Click “Save.” The basic “PLDS User” role will automatically be added to your profile
• Helpdesk tickets can be created at: http://www.avaya.com/partner-itss or can be called in at 1-866-AVAYA IT. For more specific numbers per region go to https://sales.avaya.com/en/general/support
• For further support on critical or time sensitive issues reach out to [email protected]
Additional Information

Backup – Searching for Company IDs
1. Click on REPORTS 2. Click on COMPANY AND
GROUP REPORTS

1. Click RUN
Backup – Searching for Company IDs – Cont.

1. Enter the Customer SOLD TO 2. Click
Backup – Searching for Company IDs – Cont.

1. Obtain the COMPANY ID
Backup – Searching for Company IDs – Cont.


