Skill Level 1 - Easy Basic Skills & Experience Required Proper service and repair procedures are vital to the safe, reliable operation of all motor vehicles as well as the personal safety of those performing the repairs. Standard safety procedures and precautions (including use of safety goggles and proper tools and equipment) should be followed at all times to eliminate the possibility of personal injury or improper service which could damage the vehicle or compromise its safety. Volkswagen MK5/MK6 Bremmen Automatic Headlight Conversion Kit Installation
Transcript
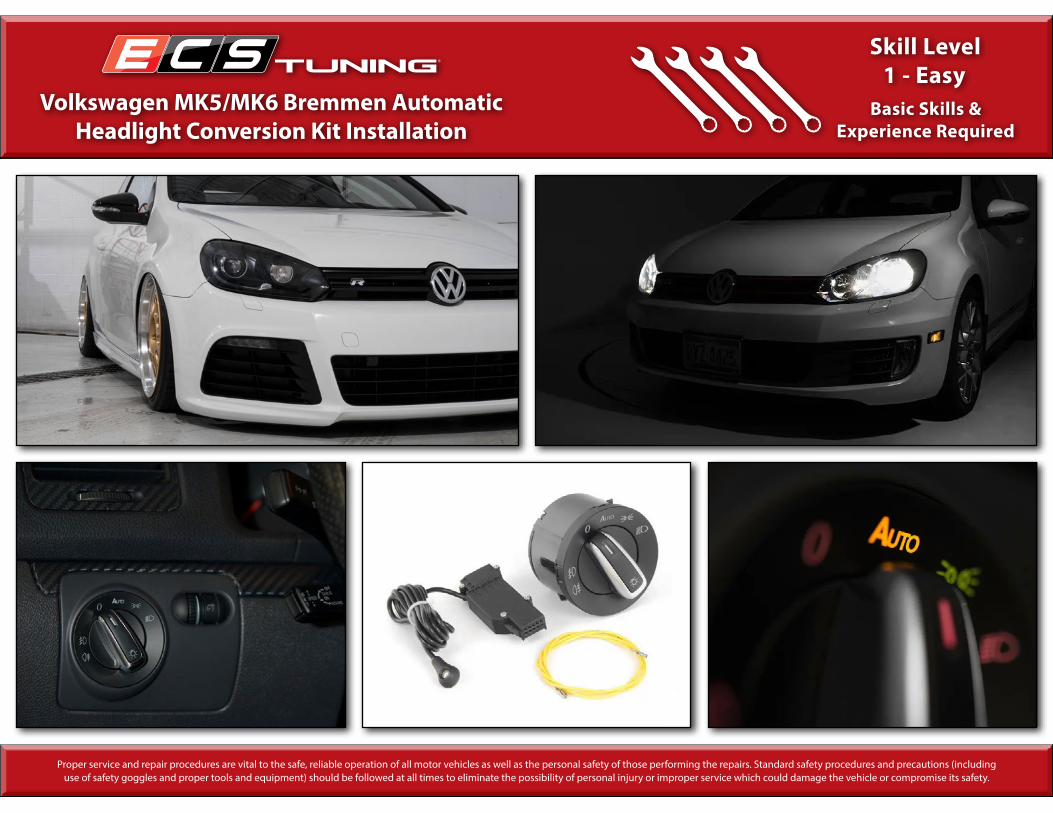
Skill Level1 - Easy
Basic Skills & Experience Required
Proper service and repair procedures are vital to the safe, reliable operation of all motor vehicles as well as the personal safety of those performing the repairs. Standard safety procedures and precautions (including use of safety goggles and proper tools and equipment) should be followed at all times to eliminate the possibility of personal injury or improper service which could damage the vehicle or compromise its safety.
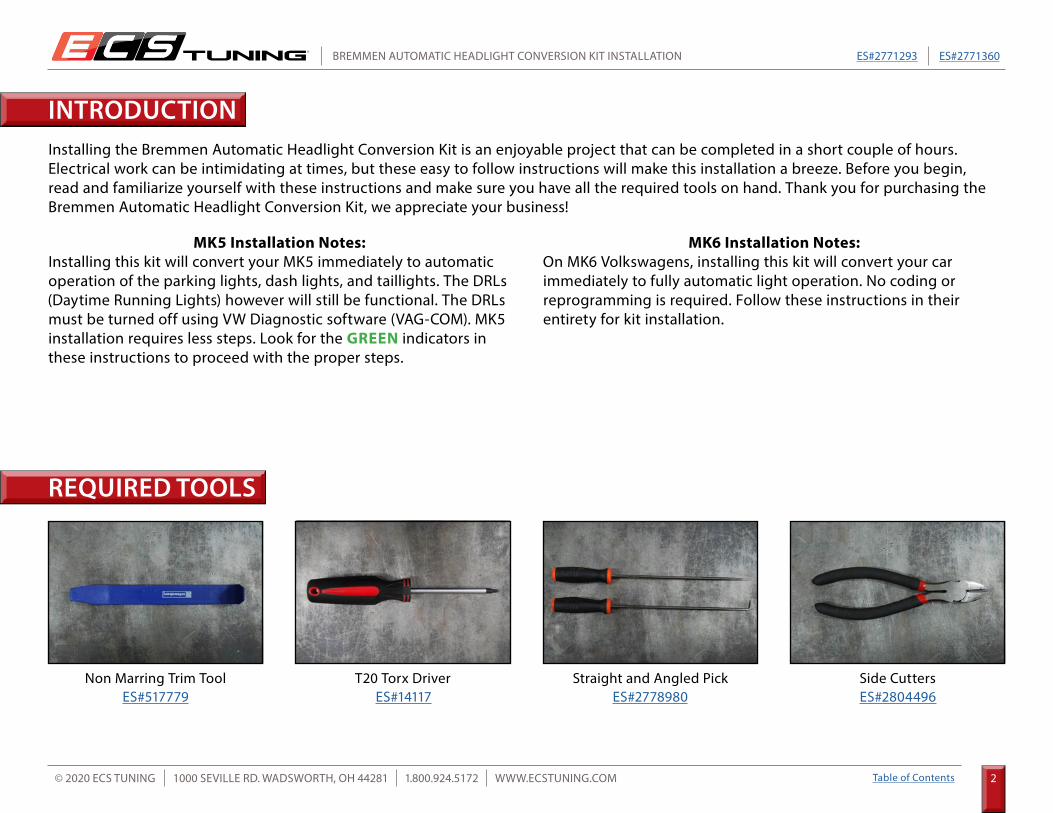
Installing the Bremmen Automatic Headlight Conversion Kit is an enjoyable project that can be completed in a short couple of hours. Electrical work can be intimidating at times, but these easy to follow instructions will make this installation a breeze. Before you begin, read and familiarize yourself with these instructions and make sure you have all the required tools on hand. Thank you for purchasing the Bremmen Automatic Headlight Conversion Kit, we appreciate your business!
INTRODUCTION
MK5 Installation Notes:Installing this kit will convert your MK5 immediately to automatic operation of the parking lights, dash lights, and taillights. The DRLs (Daytime Running Lights) however will still be functional. The DRLs must be turned off using VW Diagnostic software (VAG-COM). MK5 installation requires less steps. Look for the GREEN indicators in these instructions to proceed with the proper steps.
MK6 Installation Notes:On MK6 Volkswagens, installing this kit will convert your car immediately to fully automatic light operation. No coding or reprogramming is required. Follow these instructions in their entirety for kit installation.
NEVER get underneath a vehicle that is supported only by a jack, andALWAYS make sure that the vehicle is securely supported on jack stands.
• RH refers to the passenger side of the vehicle.• LH refers to the driver side of the vehicle.• Always use the proper torque specifications.• If applicable to this installation, torque specifications will be listed throughout the document and at the end as well.• Please read all of these instructions and familiarize yourself with the complete process BEFORE you begin.
• Park your car in a safe, well lit, level area.• Shut the engine off and remove the key from the ignition switch.• Make sure any remote start devices are properly disabled.• ALWAYS wear safety glasses.• Make sure the parking brake is applied until the vehicle is safely lifted and supported.• Whether lifting a vehicle using an automotive lift or a hydraulic jack, be sure and utilize the factory specified lift points.• Lifting a vehicle in an incorrect location can cause damage to the suspension/running gear.• ALWAYS support the vehicle with jack stands.• ALWAYS read and follow all safety information and warnings for the equipment you are using.
ECS Tuning cares about your health and safety, please read the following safety information. This information pertains to automotive service in general, and while it may not pertain to every job you do, please remember and share these important safety tips.
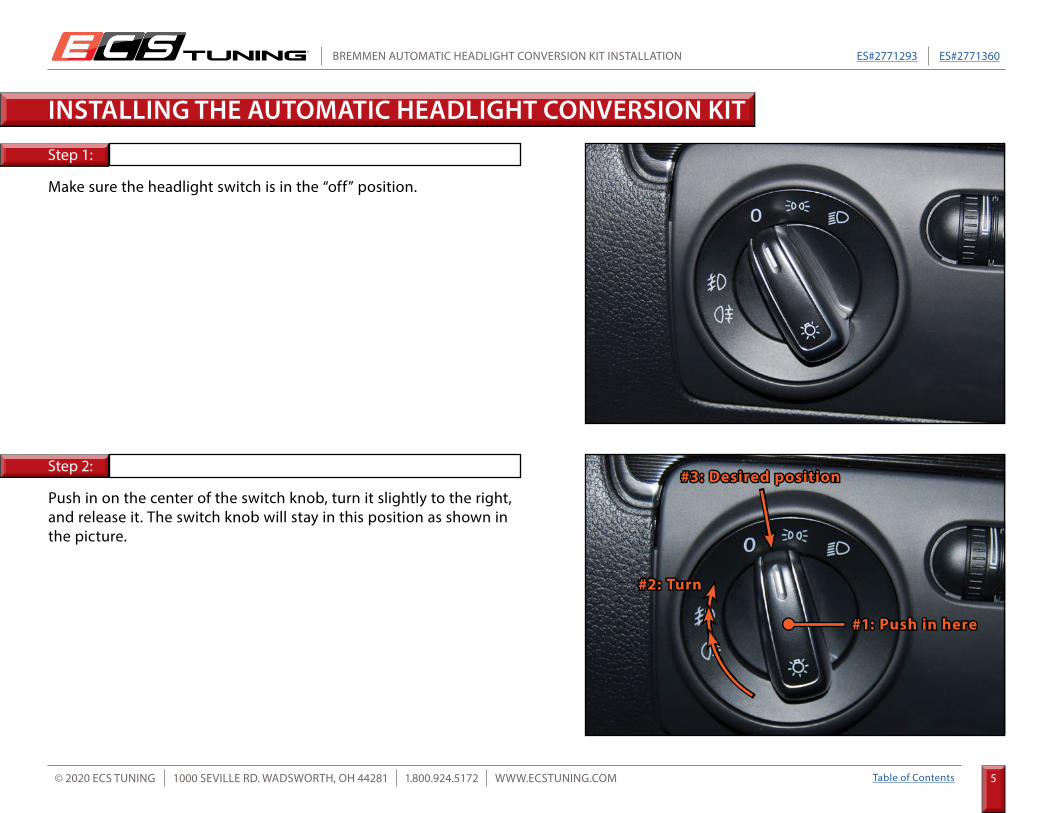
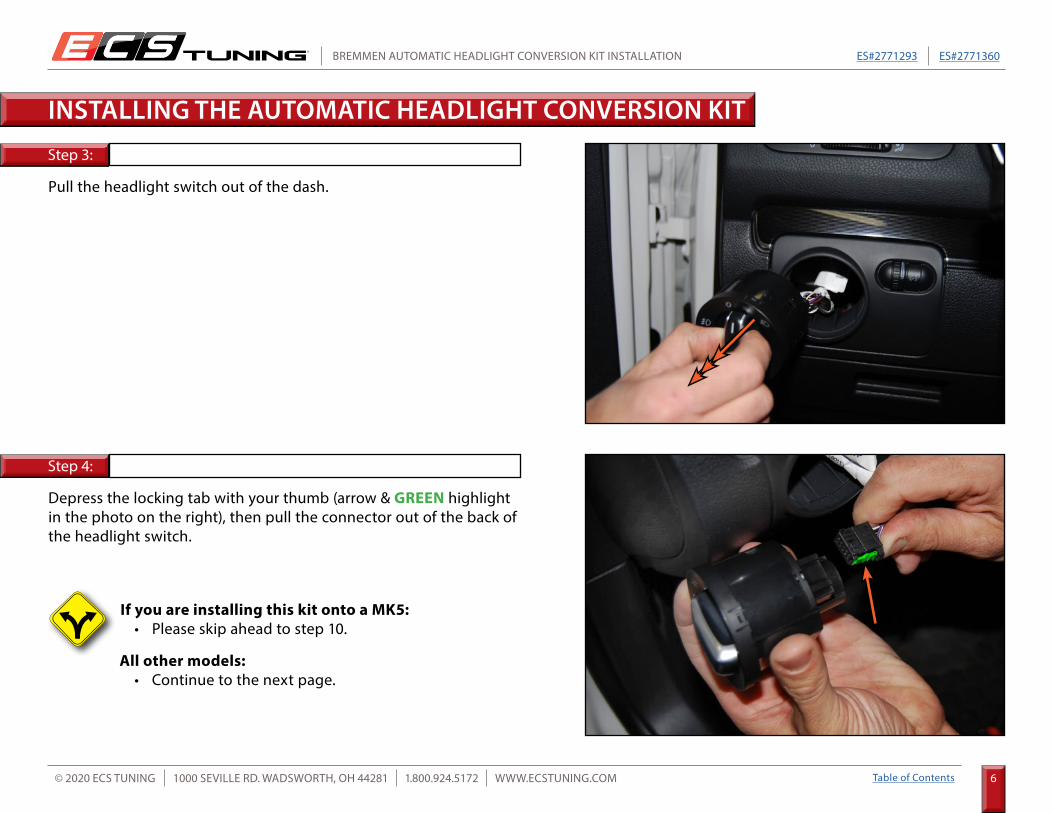
Make sure the headlight switch is in the “off” position.
Push in on the center of the switch knob, turn it slightly to the right, and release it. The switch knob will stay in this position as shown in the picture.
Depress the locking tab with your thumb (arrow & GREEN highlight in the photo on the right), then pull the connector out of the back of the headlight switch.
INSTALLING THE AUTOMATIC HEADLIGHT CONVERSION KIT
If you are installing this kit onto a MK5:• Please skip ahead to step 10.
Locate the empty headlight switch connector pin location number three. It is located between pin two (purple wire) and pin four (black wire with a purple tracer).
Using a pick, carefully release the terminal retaining tab on same side as the empty cavity. The inset photo shows a side view of the connector.
INSTALLING THE AUTOMATIC HEADLIGHT CONVERSION KIT
The headlight switch connector is a ten pin connector.Each of the pin locations is assigned a number one through ten. Look closely at the back of the connector and you will see a reference number at each corner that will allow you to identify the specific pins in between. Wire color may vary depending on vehicle options and year, but the pin location will be the same.
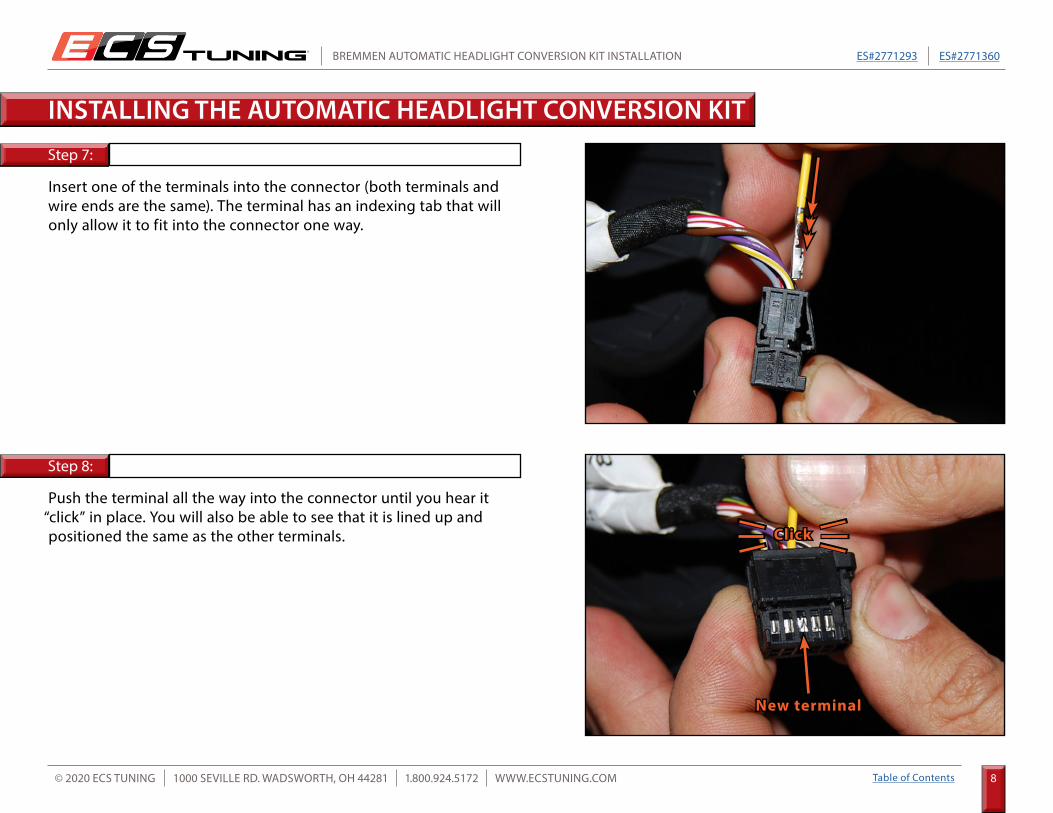
Insert one of the terminals into the connector (both terminals and wire ends are the same). The terminal has an indexing tab that will only allow it to fit into the connector one way.
Push the terminal all the way into the connector until you hear it “click” in place. You will also be able to see that it is lined up and positioned the same as the other terminals.
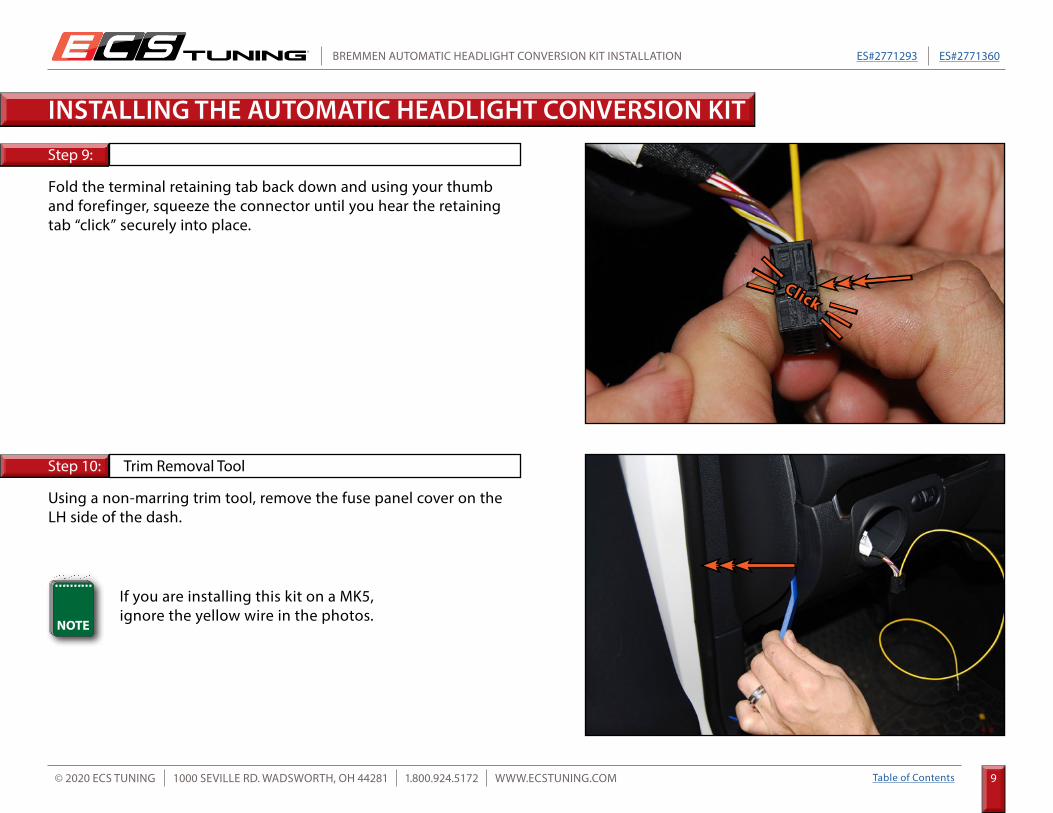
Fold the terminal retaining tab back down and using your thumb and forefinger, squeeze the connector until you hear the retaining tab “click” securely into place.
Using a non-marring trim tool, remove the fuse panel cover on the LH side of the dash.
INSTALLING THE AUTOMATIC HEADLIGHT CONVERSION KIT
If you are installing this kit on a MK5, ignore the yellow wire in the photos.
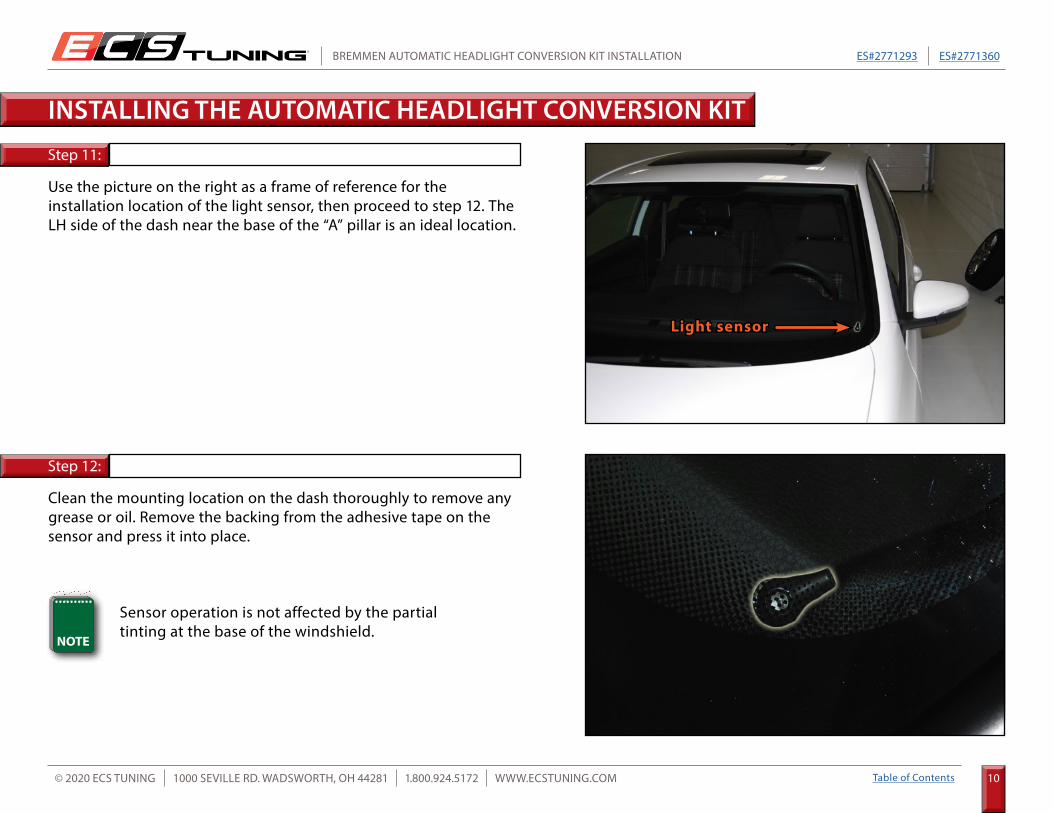
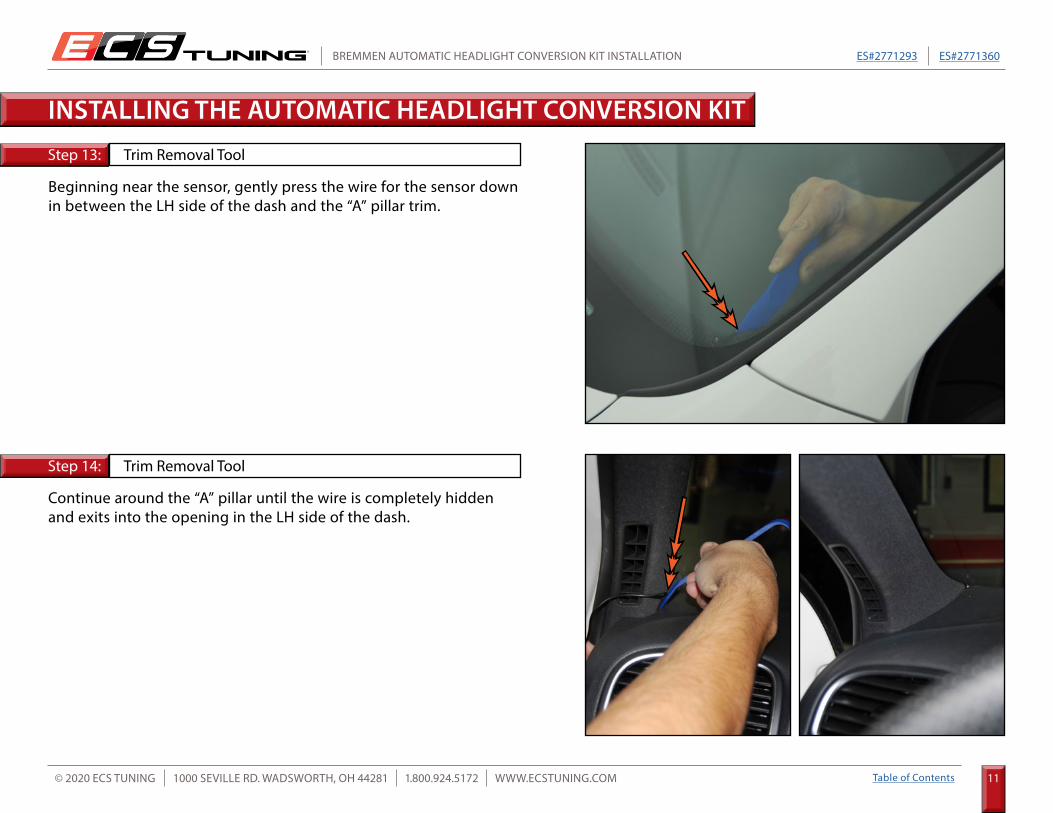
Use the picture on the right as a frame of reference for the installation location of the light sensor, then proceed to step 12. The LH side of the dash near the base of the “A” pillar is an ideal location.
Clean the mounting location on the dash thoroughly to remove any grease or oil. Remove the backing from the adhesive tape on the sensor and press it into place.
INSTALLING THE AUTOMATIC HEADLIGHT CONVERSION KIT
Sensor operation is not affected by the partial tinting at the base of the windshield.
Insert the light sensor module into the left side of the dash and pull it out the opening for the headlight switch.
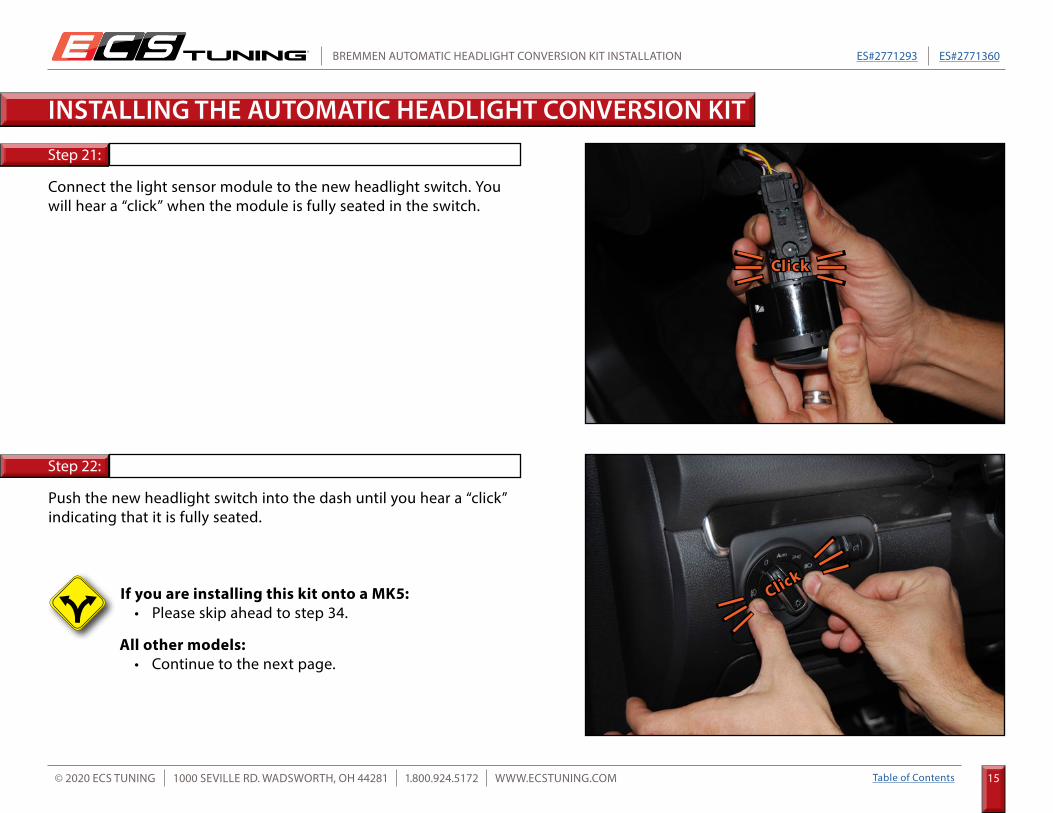
Plug the headlight switch connector with the new terminal installed (MK6 only) into the light sensor module. You should hear a “click” when the connector is fully seated. You will also hear a series of beeps from the car to signify that it has recognized the new sensor.
INSTALLING THE AUTOMATIC HEADLIGHT CONVERSION KIT
If you are installing this kit onto a MK5:• Please skip ahead to step 20.
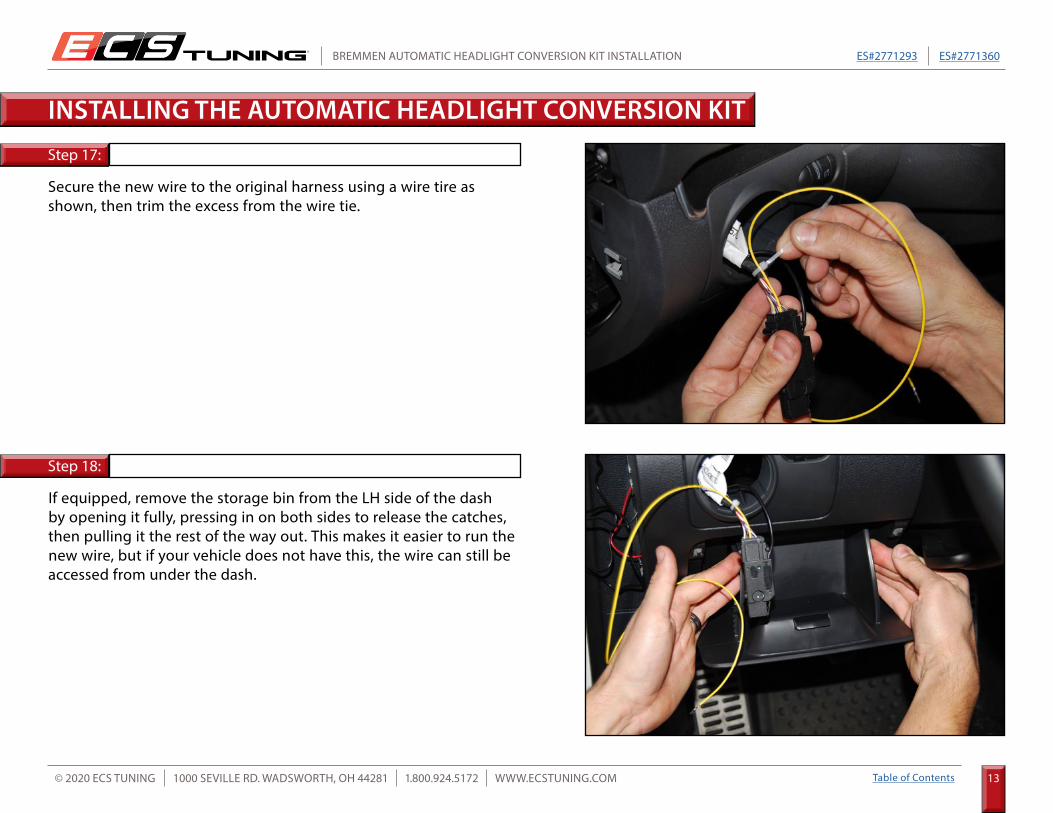
Secure the new wire to the original harness using a wire tire as shown, then trim the excess from the wire tie.
If equipped, remove the storage bin from the LH side of the dash by opening it fully, pressing in on both sides to release the catches, then pulling it the rest of the way out. This makes it easier to run the new wire, but if your vehicle does not have this, the wire can still be accessed from under the dash.
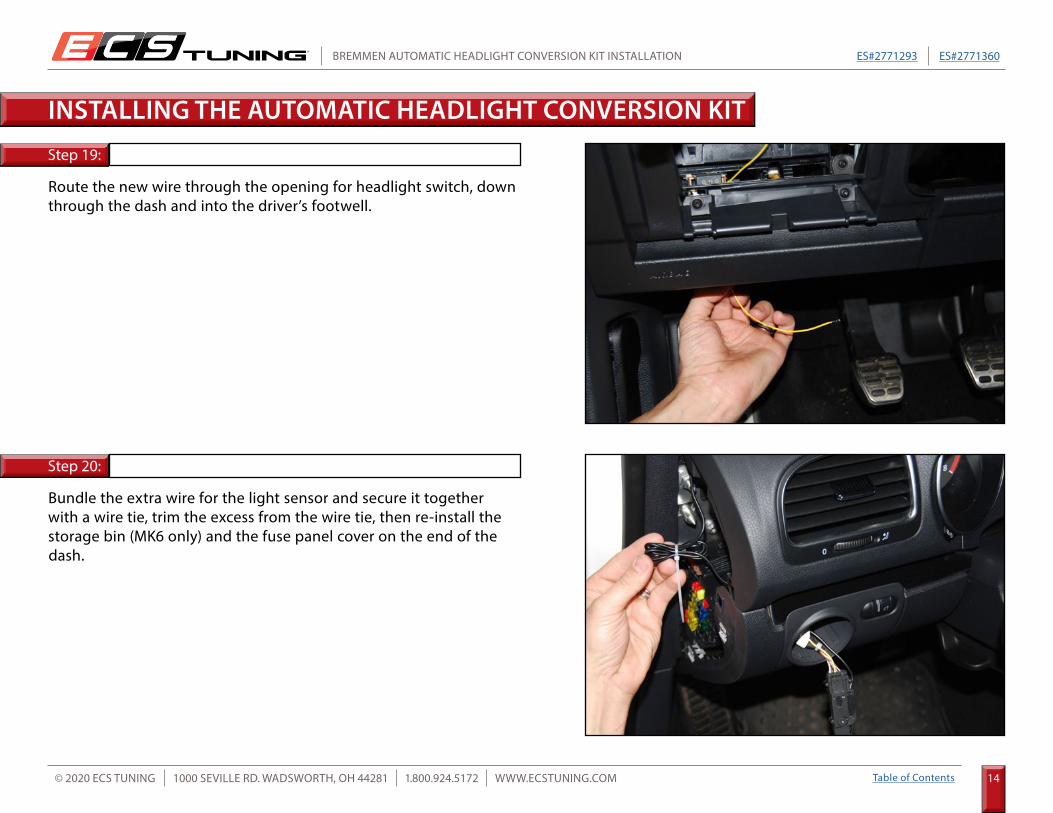
Route the new wire through the opening for headlight switch, down through the dash and into the driver’s footwell.
Bundle the extra wire for the light sensor and secure it together with a wire tie, trim the excess from the wire tie, then re-install the storage bin (MK6 only) and the fuse panel cover on the end of the dash.
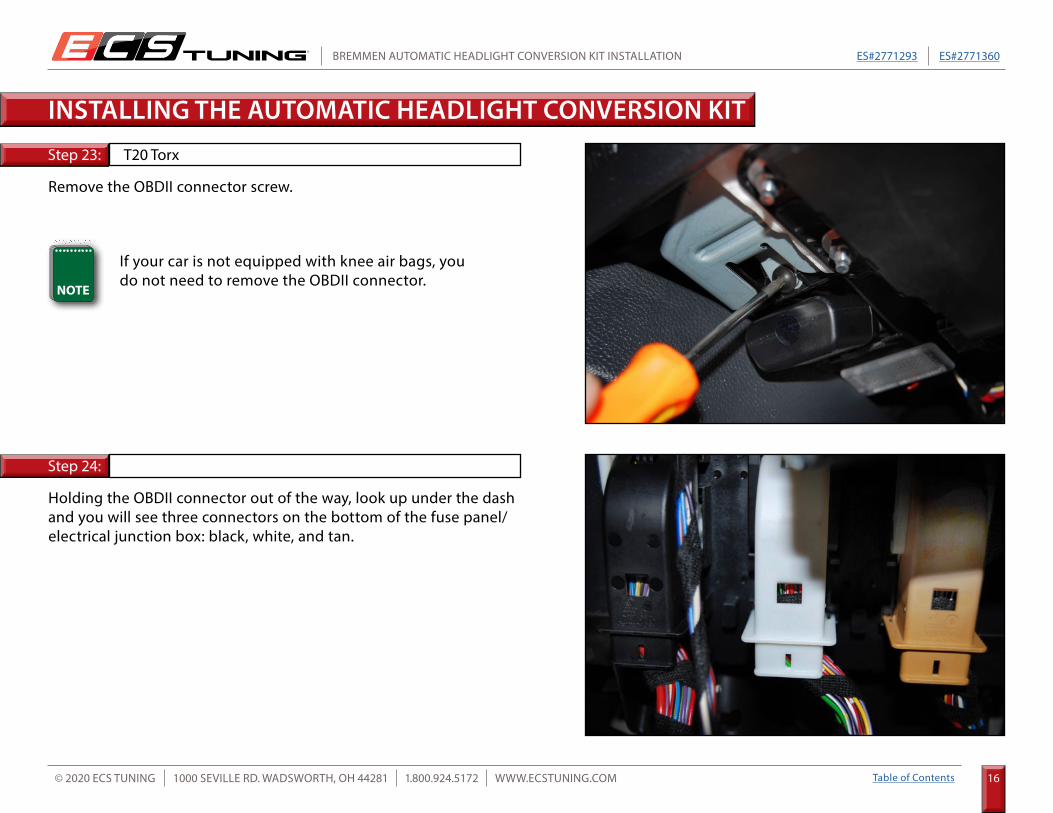
Holding the OBDII connector out of the way, look up under the dash and you will see three connectors on the bottom of the fuse panel/electrical junction box: black, white, and tan.
INSTALLING THE AUTOMATIC HEADLIGHT CONVERSION KIT
If your car is not equipped with knee air bags, you do not need to remove the OBDII connector.
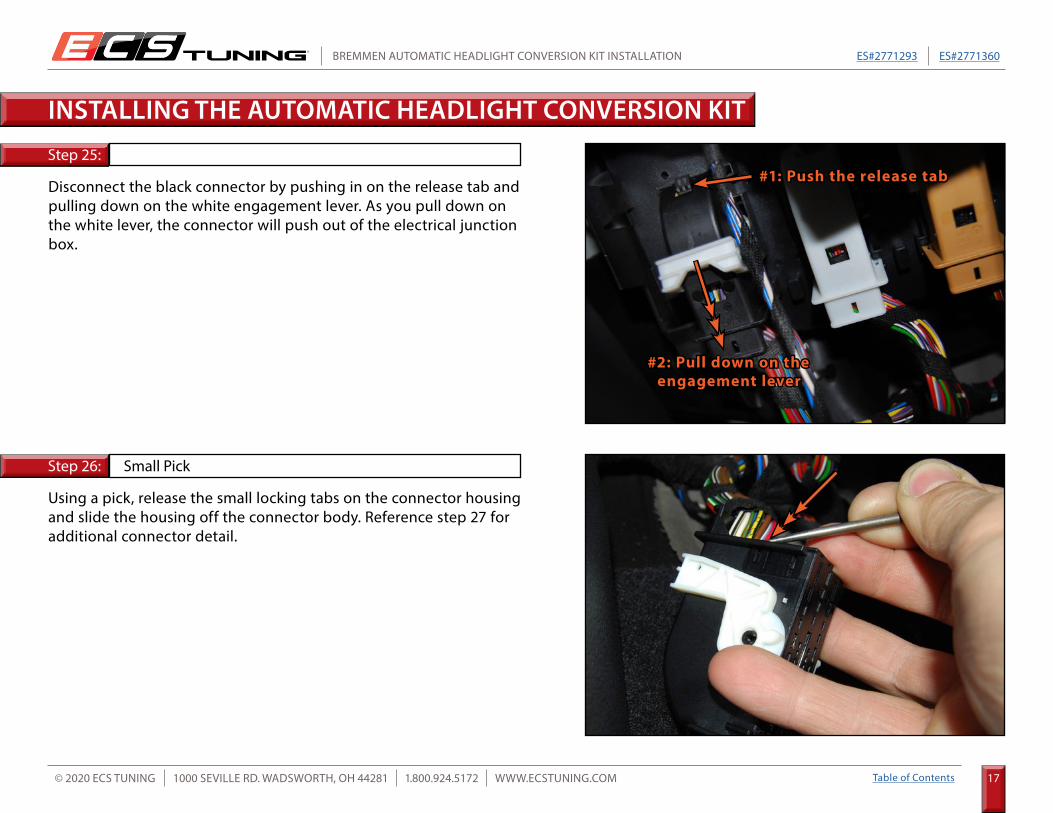
Disconnect the black connector by pushing in on the release tab and pulling down on the white engagement lever. As you pull down on the white lever, the connector will push out of the electrical junction box.
Using a pick, release the small locking tabs on the connector housing and slide the housing off the connector body. Reference step 27 for additional connector detail.
INSTALLING THE AUTOMATIC HEADLIGHT CONVERSION KIT
#1: Push the release tab#1: Push the release tab
#2: Pull down on the #2: Pull down on the engagement leverengagement lever
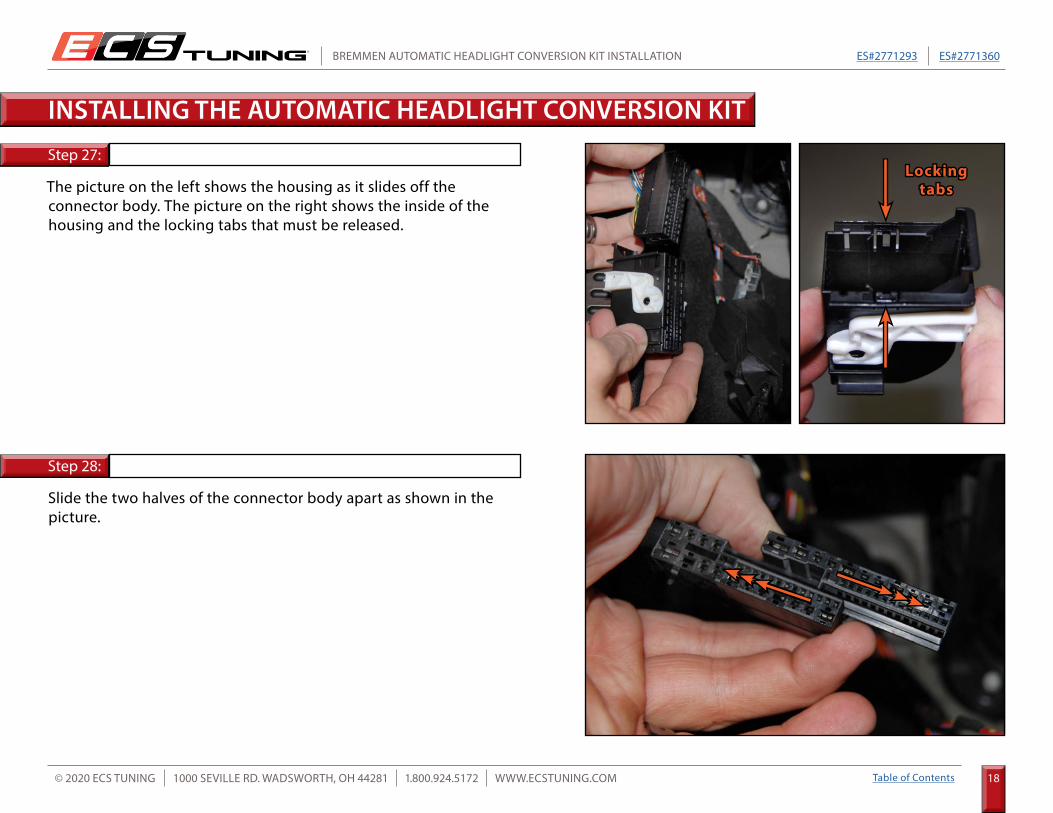
The picture on the left shows the housing as it slides off the connector body. The picture on the right shows the inside of the housing and the locking tabs that must be released.
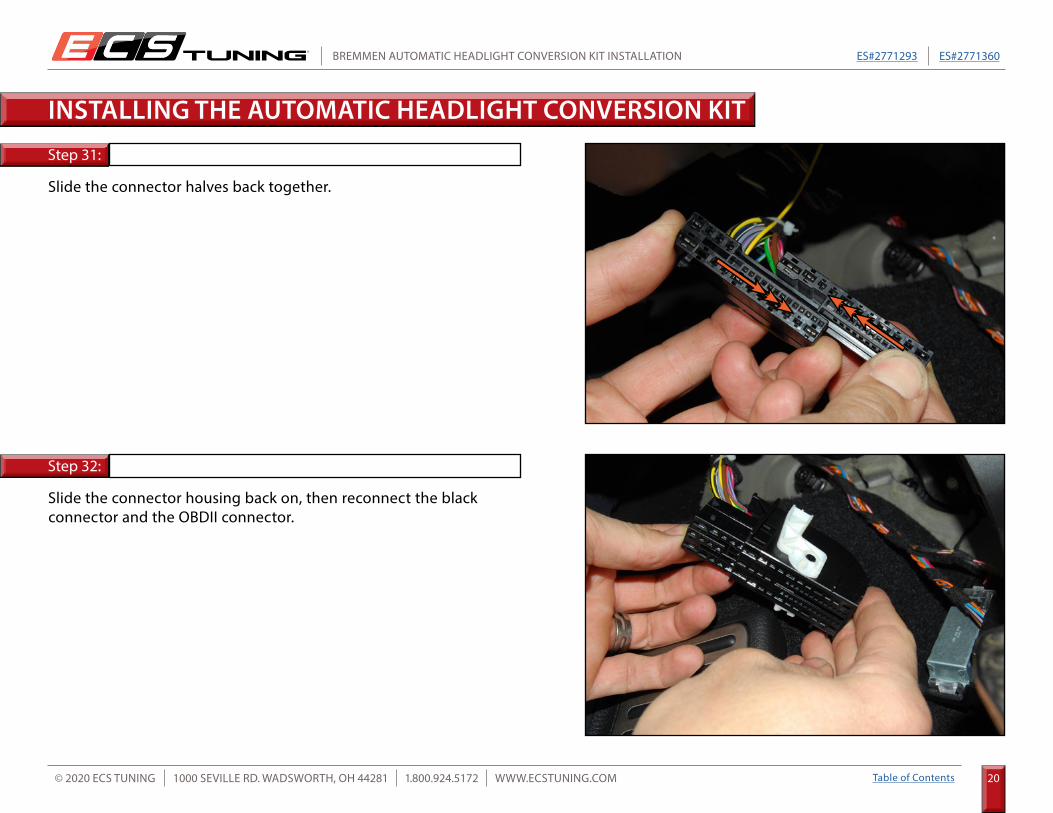
Slide the two halves of the connector body apart as shown in the picture.
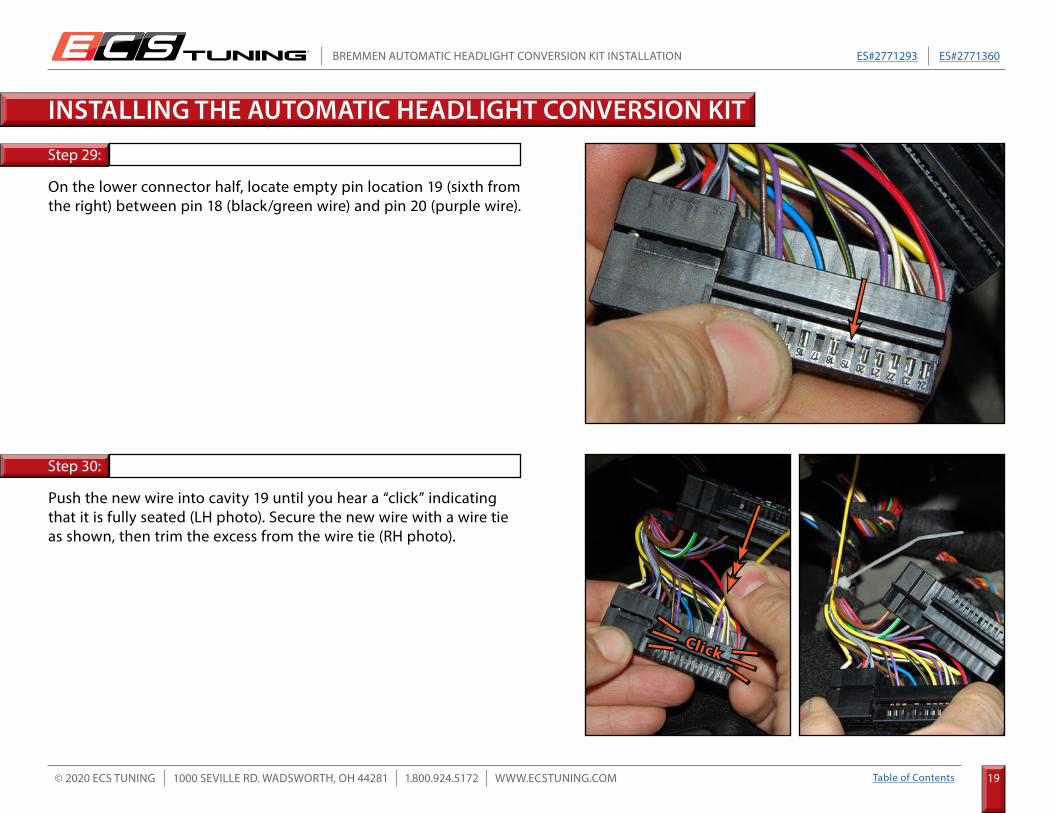
On the lower connector half, locate empty pin location 19 (sixth from the right) between pin 18 (black/green wire) and pin 20 (purple wire).
Push the new wire into cavity 19 until you hear a “click” indicating that it is fully seated (LH photo). Secure the new wire with a wire tie as shown, then trim the excess from the wire tie (RH photo).
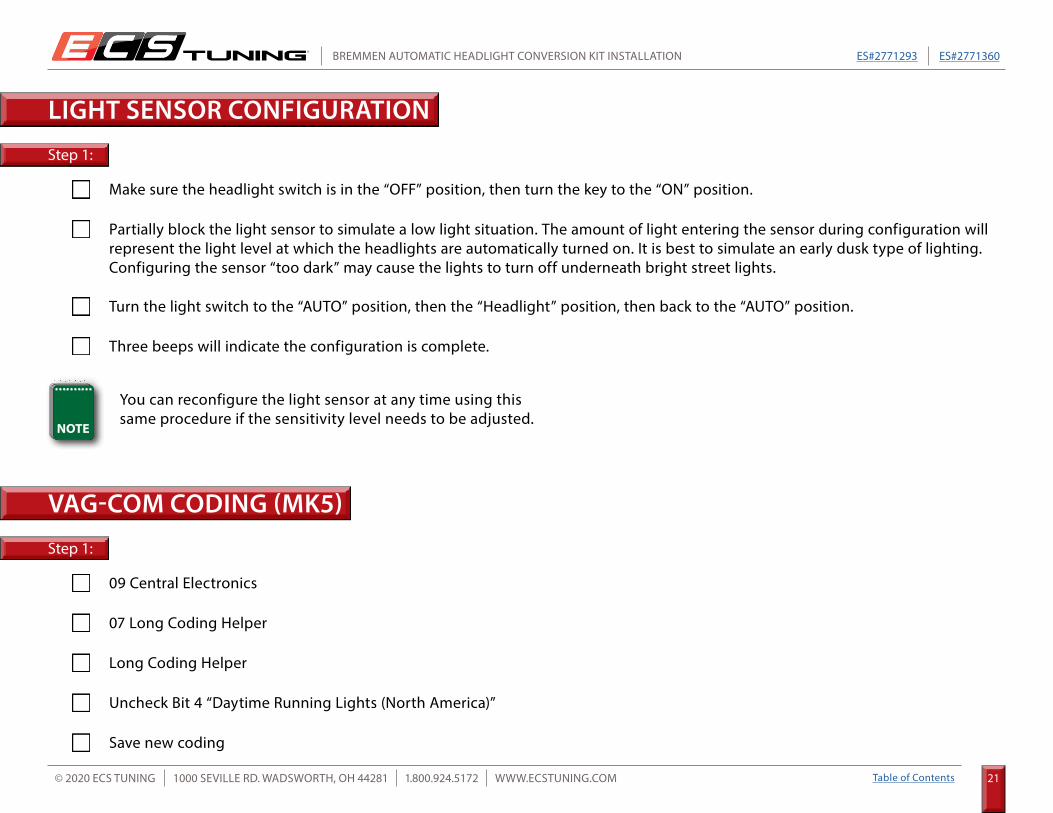
Make sure the headlight switch is in the “OFF” position, then turn the key to the “ON” position.
Partially block the light sensor to simulate a low light situation. The amount of light entering the sensor during configuration will represent the light level at which the headlights are automatically turned on. It is best to simulate an early dusk type of lighting. Configuring the sensor “too dark” may cause the lights to turn off underneath bright street lights.
Three beeps will indicate the configuration is complete.
Turn the light switch to the “AUTO” position, then the “Headlight” position, then back to the “AUTO” position.
09 Central Electronics
Long Coding Helper
Save new coding
07 Long Coding Helper
Uncheck Bit 4 “Daytime Running Lights (North America)”
Step 1:
VAG-COM CODING (MK5)
Step 1:
You can reconfigure the light sensor at any time using this same procedure if the sensitivity level needs to be adjusted.
At ECS Tuning, we carry a line of high quality Schwaben Tools and Equipment to help you build your ultimate tool collection. Never before has affordability and quality been so closely related. Our entire Schwaben line is subjected to strict in house testing for strength and durability. See
what we have to offer and equip your garage without breaking the bank.
These instructions are provided as a courtesy by ECS TuningProper service and repair procedures are vital to the safe, reliable operation of all motor vehicles as well as the personal safety of those performing the repairs. Standard safety procedures and precautions (including use of safety goggles and proper tools and equipment) should be followed at all times to eliminate the possibility of personal injury or improper service which could damage the vehicle or compromise its safety.
Although this material has been prepared with the intent to provide reliable information, no warranty (express or implied) is made as to its accuracy or completeness. Neither is any liability assumed for loss or damage resulting from reliance on this material. SPECIFICALLY, NO WARRANTY OF MERCHANTABILITY,
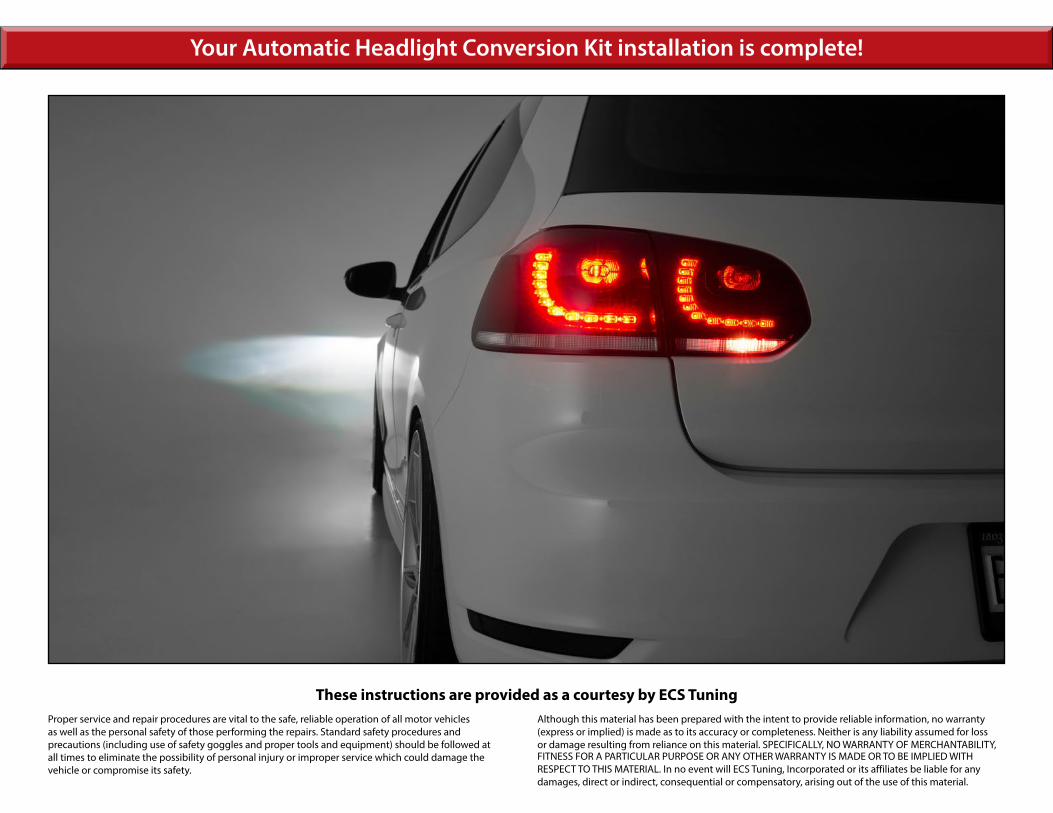
Your Automatic Headlight Conversion Kit installation is complete!
FITNESS FOR A PARTICULAR PURPOSE OR ANY OTHER WARRANTY IS MADE OR TO BE IMPLIED WITH RESPECT TO THIS MATERIAL. In no event will ECS Tuning, Incorporated or its affiliates be liable for any damages, direct or indirect, consequential or compensatory, arising out of the use of this material.