31
Smart Aligner – Introductory Course 6/29/2021 Smart Aligner Introductory Course 1
Smart Aligner – Introductory Course
6/29/2021 Smart Aligner Introductory Course 1
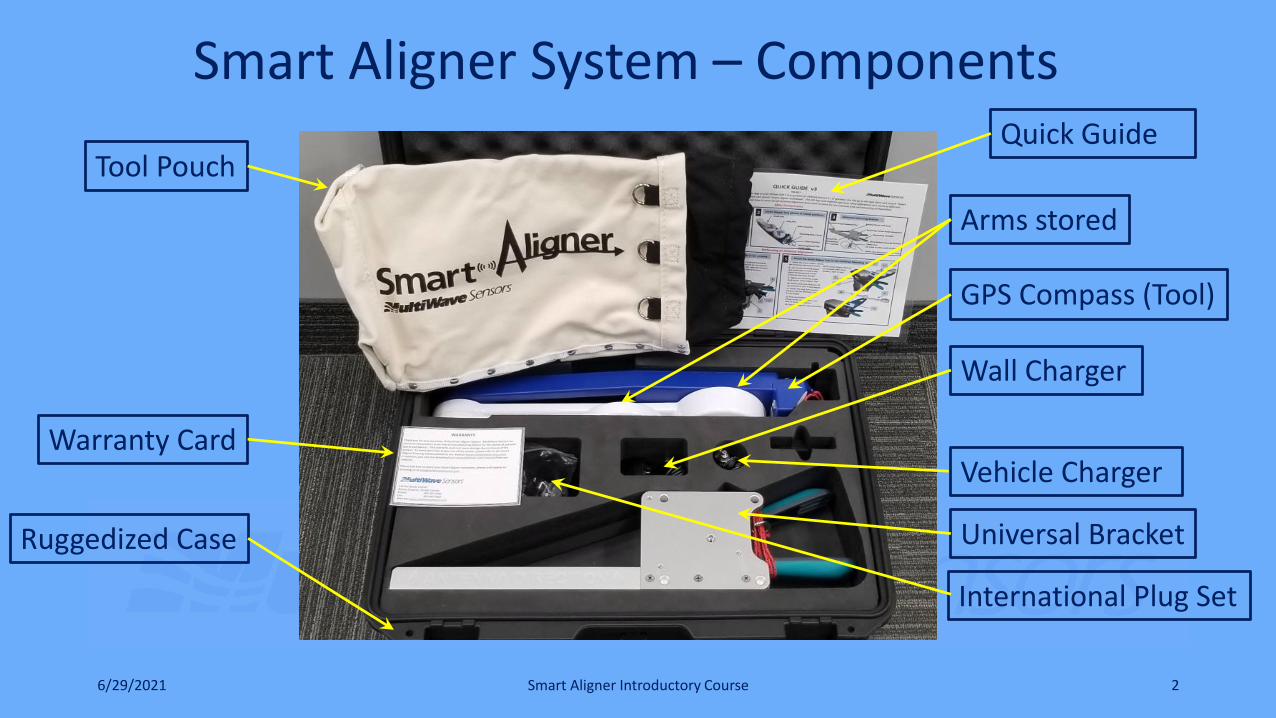
Smart Aligner System – Components
6/29/2021 Smart Aligner Introductory Course 2
GPS Compass (Tool)
Universal Bracket
Quick GuideTool Pouch
Warranty Card
International Plug Set
Wall Charger
Vehicle Charger
Ruggedized Case
Arms stored
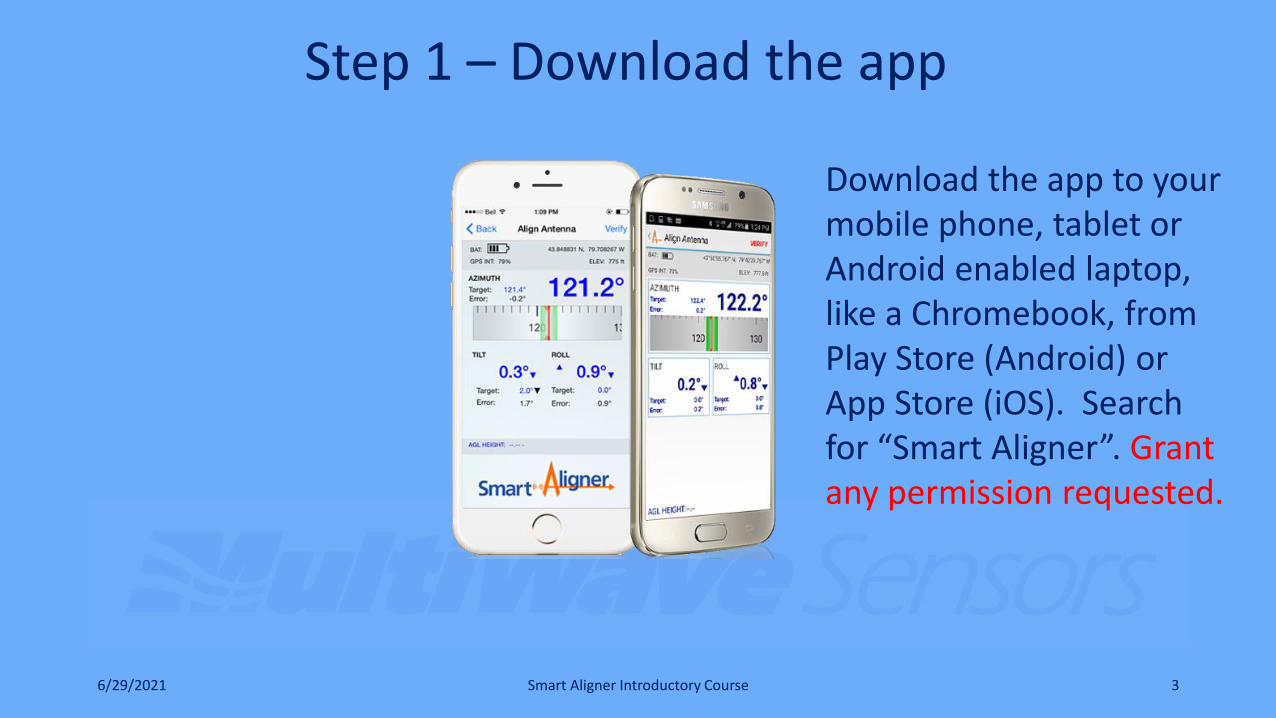
Step 1 – Download the app
6/29/2021 Smart Aligner Introductory Course 3
Download the app to your mobile phone, tablet or Android enabled laptop, like a Chromebook, from Play Store (Android) or App Store (iOS). Search for “Smart Aligner”. Grant any permission requested.
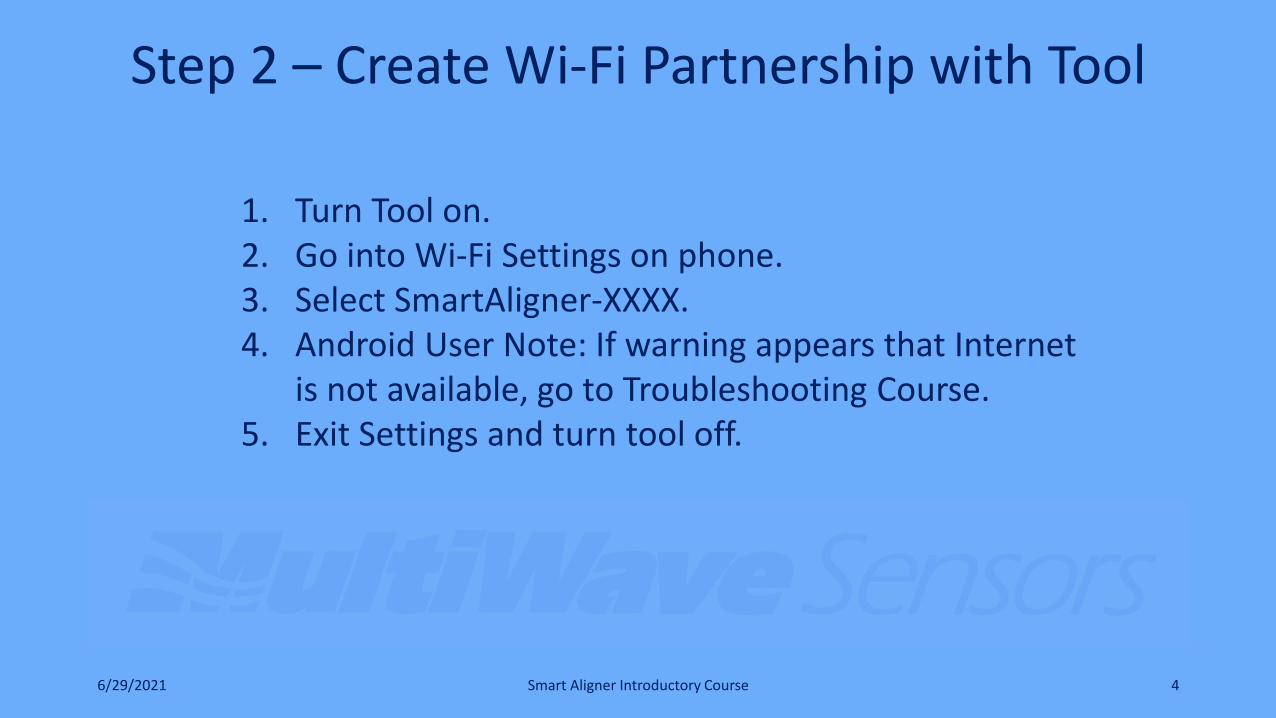
Step 2 – Create Wi-Fi Partnership with Tool
6/29/2021 Smart Aligner Introductory Course 4
1. Turn Tool on.2. Go into Wi-Fi Settings on phone.3. Select SmartAligner-XXXX.4. Android User Note: If warning appears that Internet
is not available, go to Troubleshooting Course.5. Exit Settings and turn tool off.
Step 3 – Preparing for RAD Center
6/29/2021 Smart Aligner Introductory Course 5
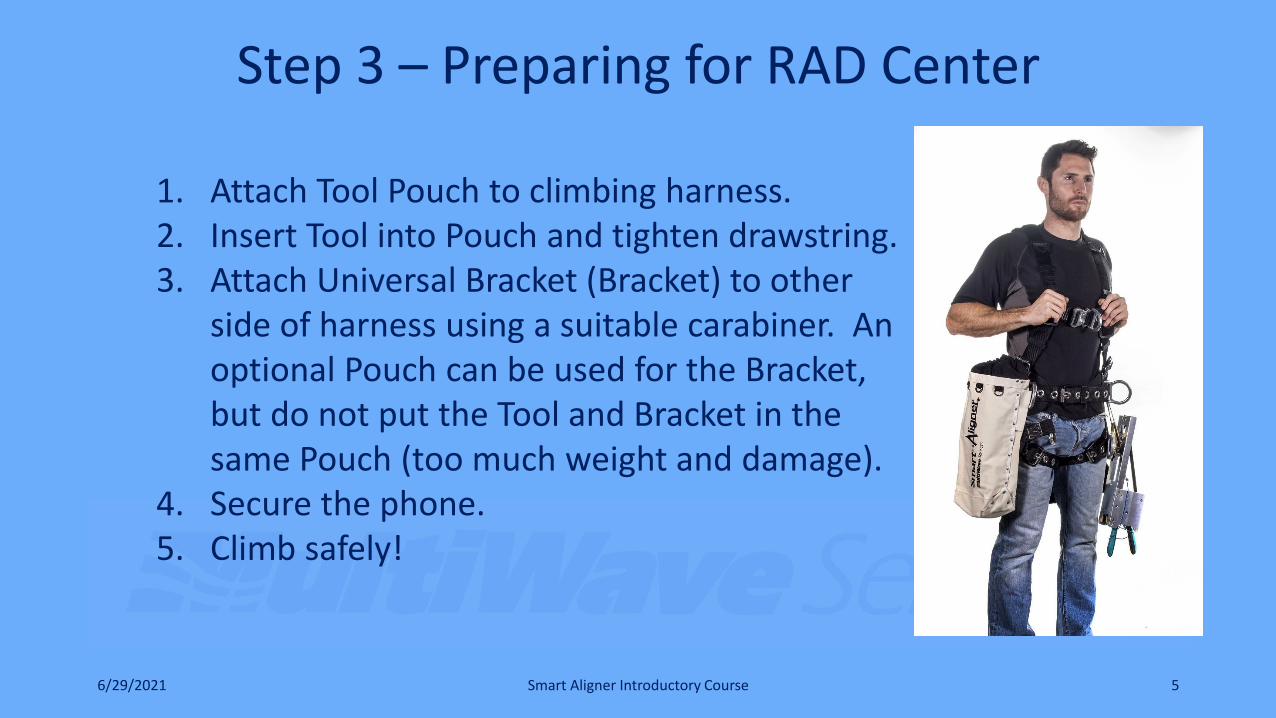
1. Attach Tool Pouch to climbing harness.2. Insert Tool into Pouch and tighten drawstring.3. Attach Universal Bracket (Bracket) to other
side of harness using a suitable carabiner. An optional Pouch can be used for the Bracket, but do not put the Tool and Bracket in the same Pouch (too much weight and damage).
4. Secure the phone.5. Climb safely!
Step 4 – Attaching the Universal Bracket
6/29/2021 Smart Aligner Introductory Course 6
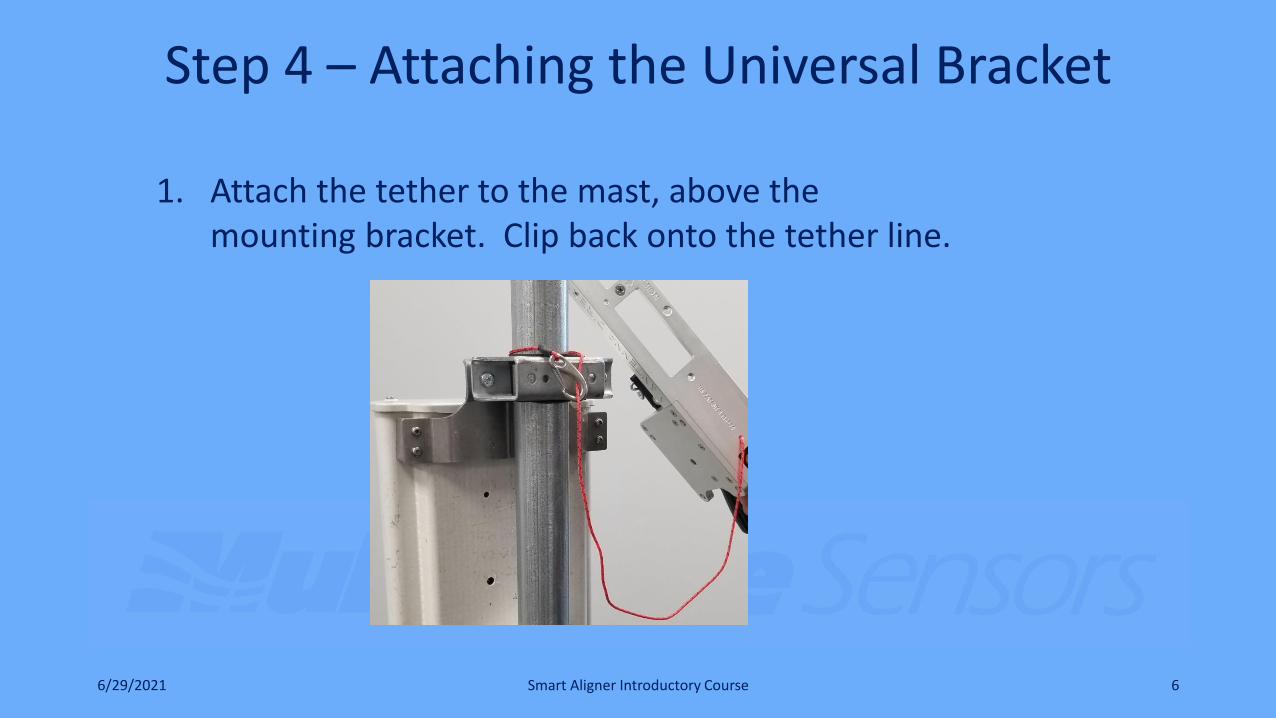
1. Attach the tether to the mast, above the mounting bracket. Clip back onto the tether line.
Step 4 – Attaching the Universal Bracket
6/29/2021 Smart Aligner Introductory Course 7
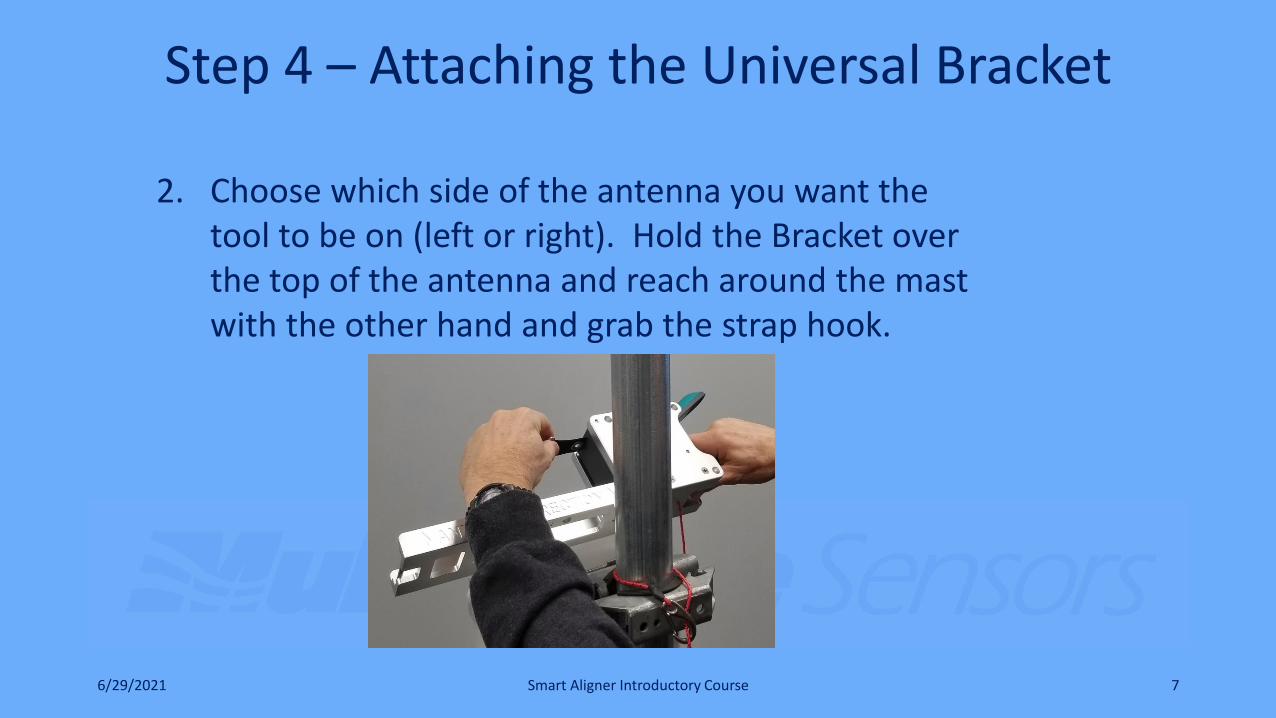
2. Choose which side of the antenna you want the tool to be on (left or right). Hold the Bracket over the top of the antenna and reach around the mast with the other hand and grab the strap hook.
Step 4 – Attaching the Universal Bracket
6/29/2021 Smart Aligner Introductory Course 8
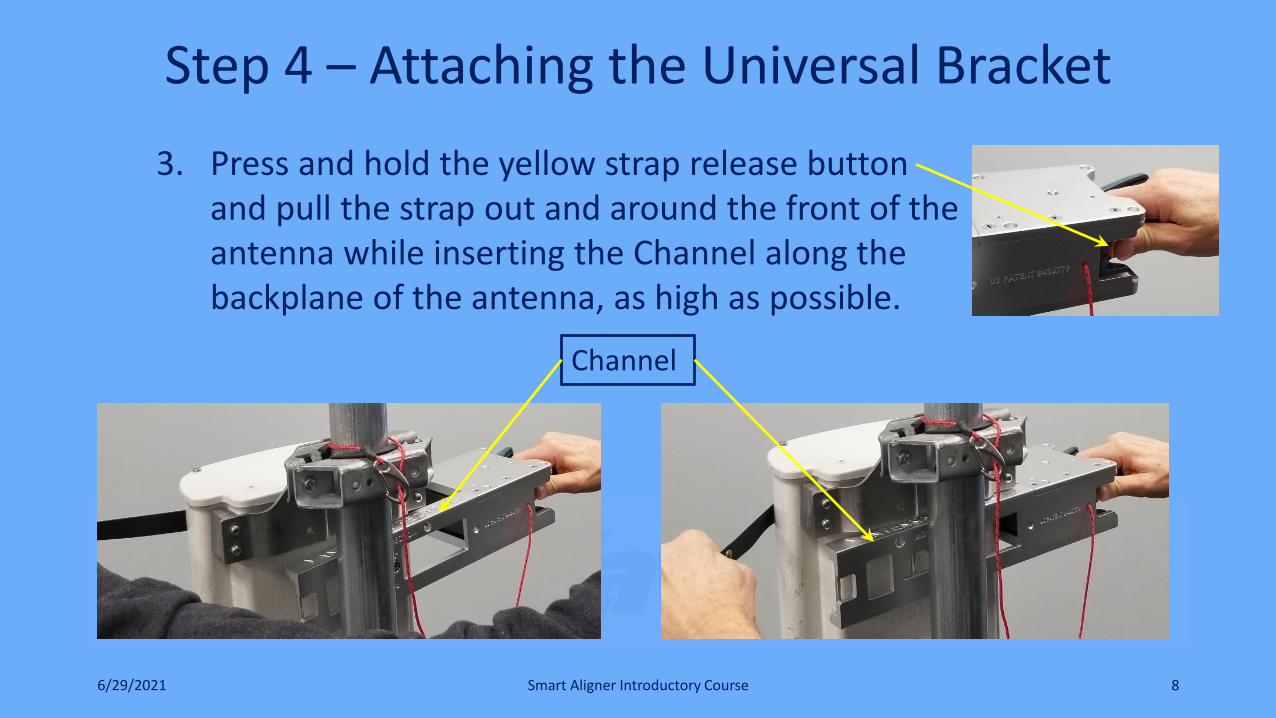
3. Press and hold the yellow strap release button and pull the strap out and around the front of the antenna while inserting the Channel along the backplane of the antenna, as high as possible.
Channel

Step 4 – Attaching the Universal Bracket
6/29/2021 Smart Aligner Introductory Course 9
4. Attach the strap hook to the receiving pin at the end of the channel and release the yellow strap release button (use other pin if the antenna is < 6” wide).
Pin
Step 4 – Attaching the Universal Bracket
6/29/2021 Smart Aligner Introductory Course 10
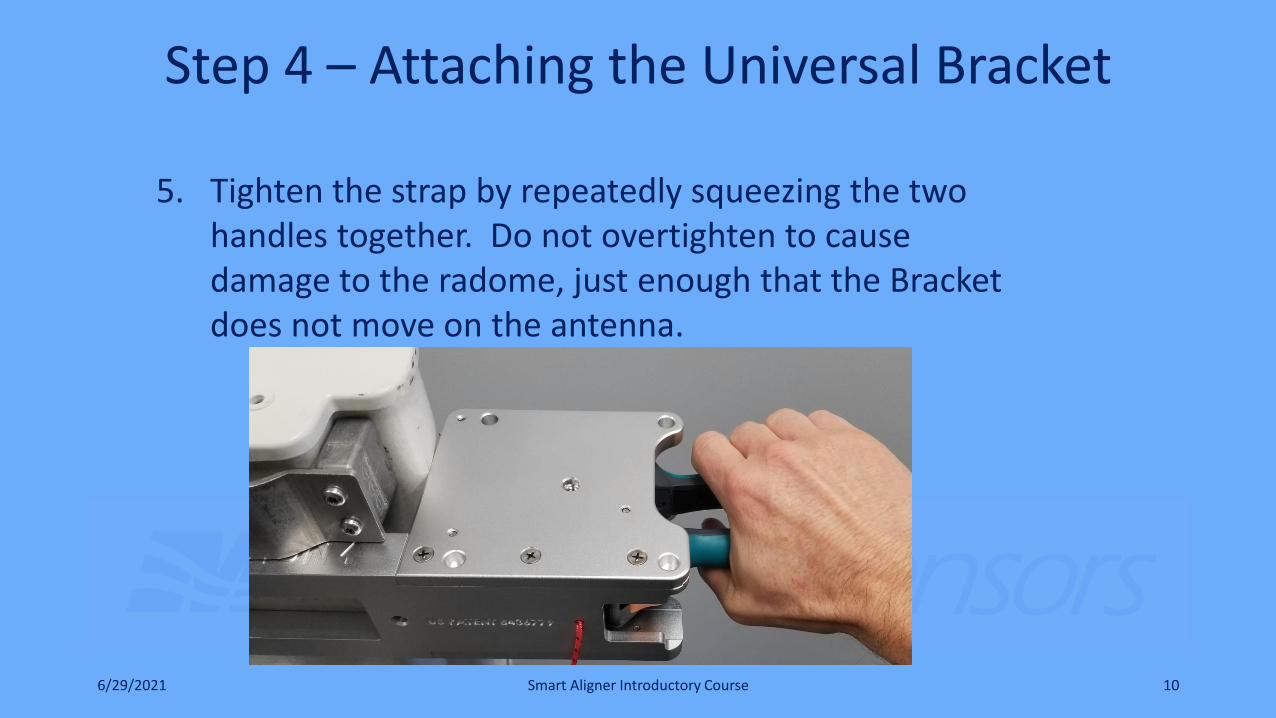
5. Tighten the strap by repeatedly squeezing the two handles together. Do not overtighten to cause damage to the radome, just enough that the Bracket does not move on the antenna.
Step 5 – Attaching the Tool
6/29/2021 Smart Aligner Introductory Course 11
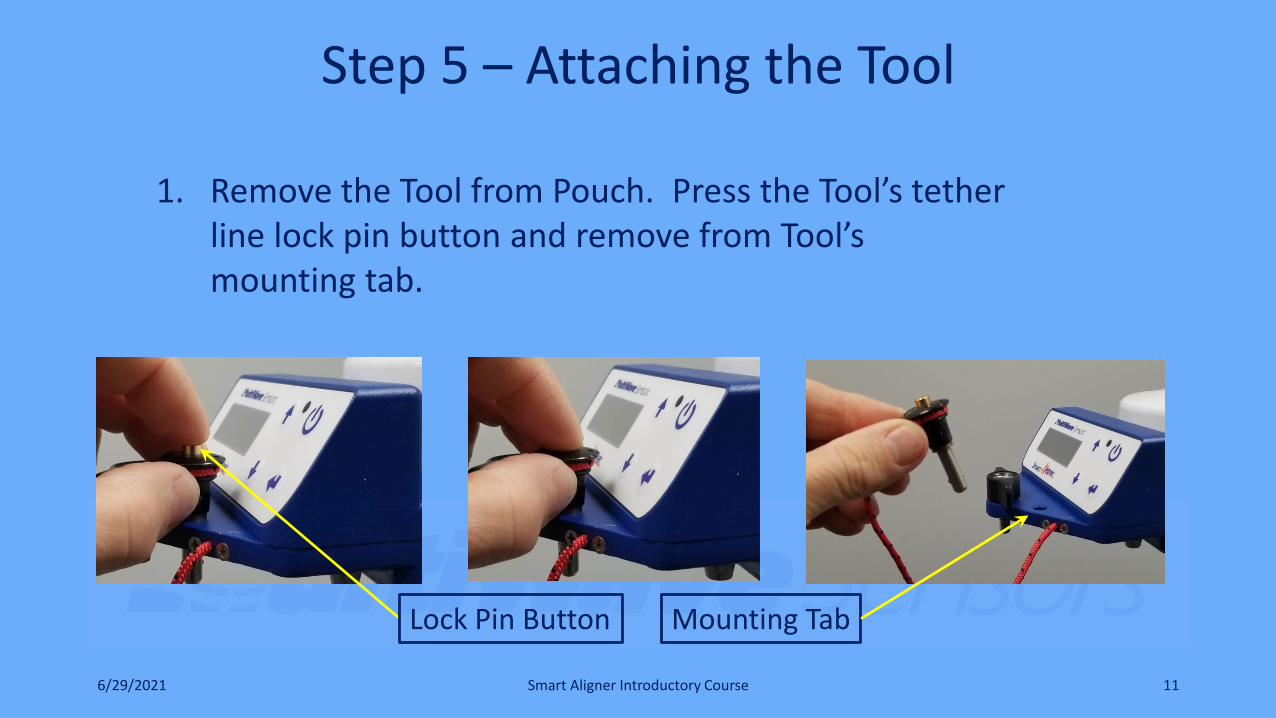
1. Remove the Tool from Pouch. Press the Tool’s tether line lock pin button and remove from Tool’s mounting tab.
Mounting TabLock Pin Button
Step 5 – Attaching the Tool
6/29/2021 Smart Aligner Introductory Course 12
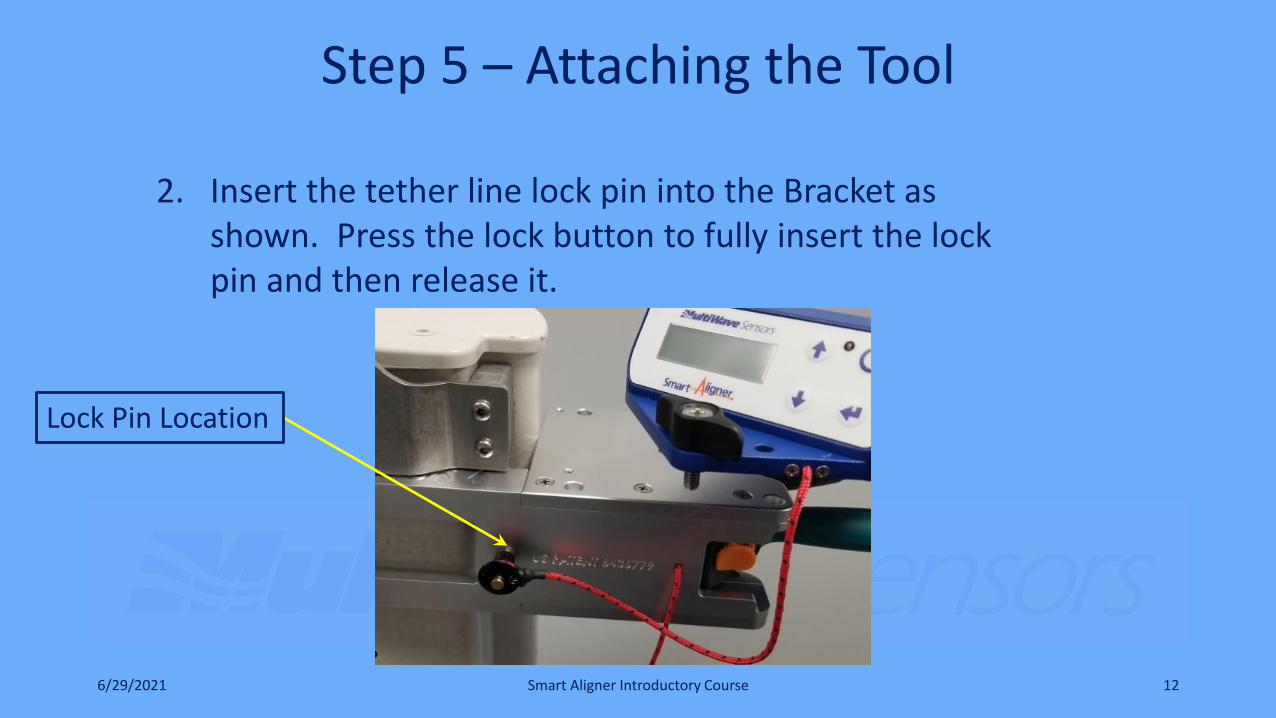
2. Insert the tether line lock pin into the Bracket as shown. Press the lock button to fully insert the lock pin and then release it.
Lock Pin Location
Step 5 – Attaching the Tool
6/29/2021 Smart Aligner Introductory Course 13
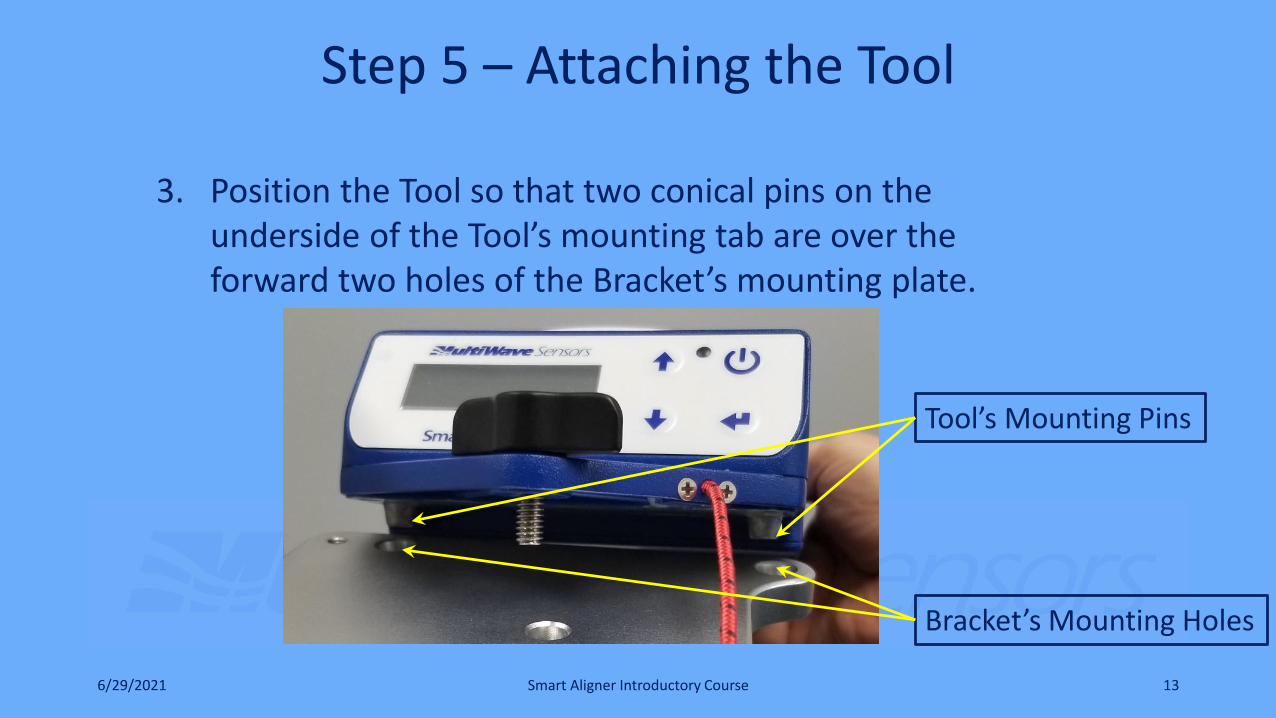
3. Position the Tool so that two conical pins on the underside of the Tool’s mounting tab are over the forward two holes of the Bracket’s mounting plate.
Tool’s Mounting Pins
Bracket’s Mounting Holes
Step 5 – Attaching the Tool
6/29/2021 Smart Aligner Introductory Course 14
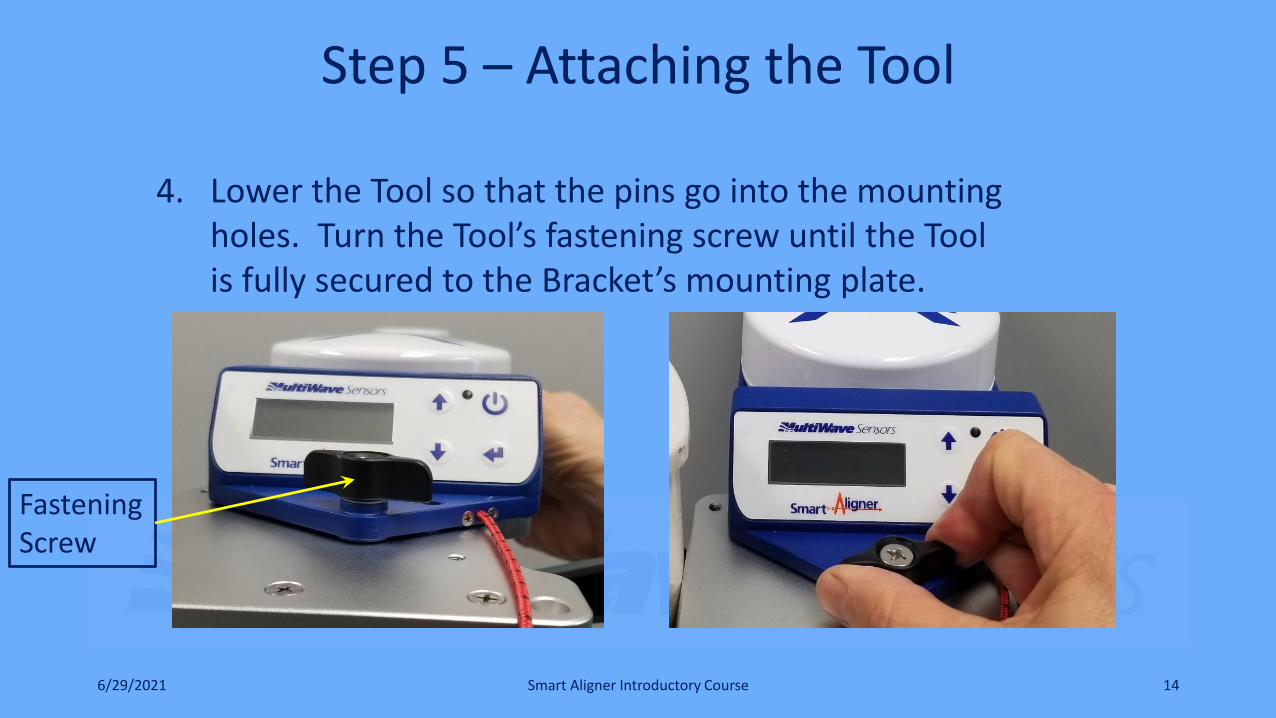
4. Lower the Tool so that the pins go into the mounting holes. Turn the Tool’s fastening screw until the Tool is fully secured to the Bracket’s mounting plate.
FasteningScrew
Equipment Removal Warnings
6/29/2021 Smart Aligner Introductory Course 15
1. Never remove the Bracket from the antenna with the Tool attached.
2. Always return the Tool’s arms to the stored position and turn off the Tool before removing from the Bracket.
3. Remove the Tool first, then remove the Tool’s tether from the Bracket, then store in the Pouch.
4. Remove the Bracket from the Antenna, then remove the Bracket’s tether line. Safely secure the Bracket.
Step 6 – Deploying the Short Arm
6/29/2021 Smart Aligner Introductory Course 16
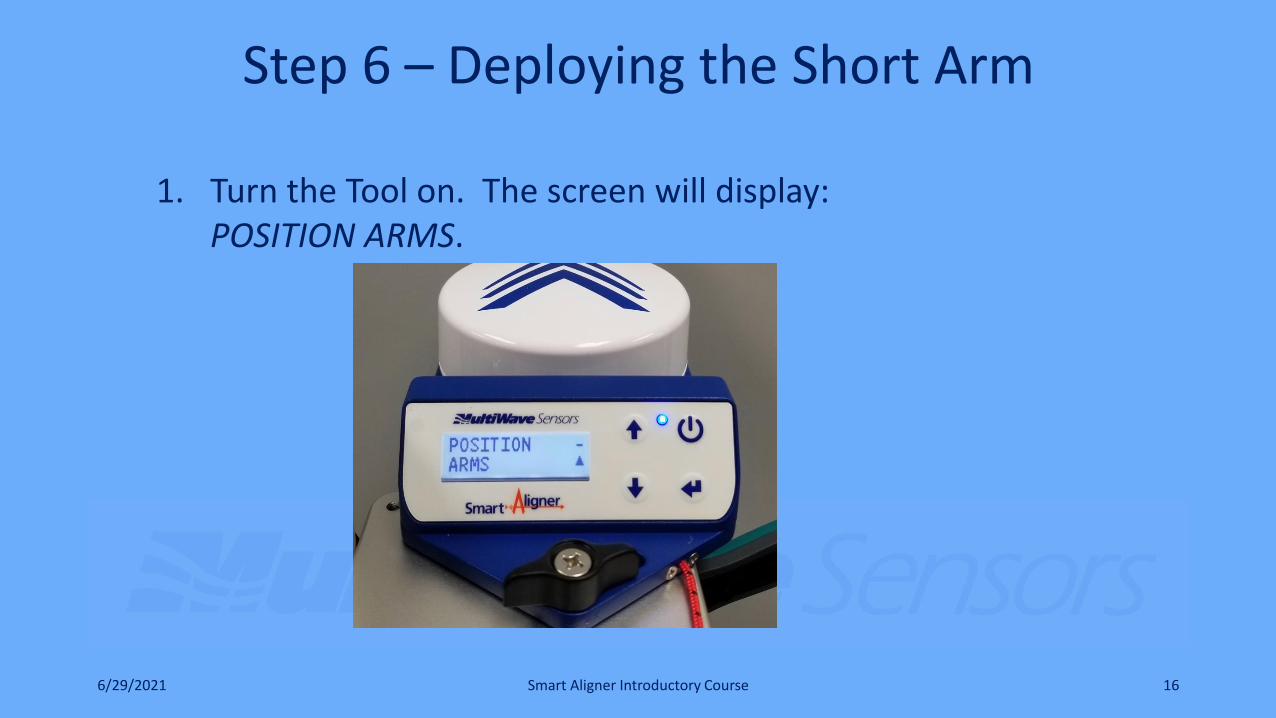
1. Turn the Tool on. The screen will display: POSITION ARMS.
Step 6 – Deploying the Short Arm
6/29/2021 Smart Aligner Introductory Course 17
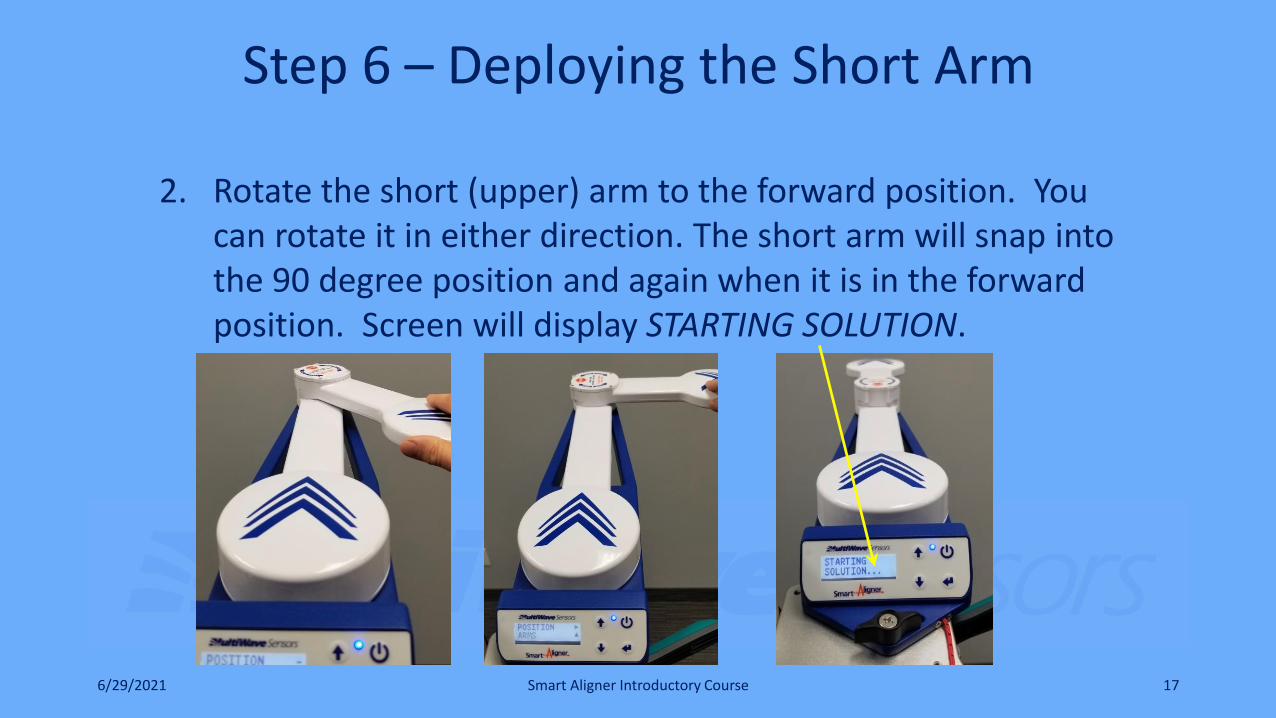
2. Rotate the short (upper) arm to the forward position. You can rotate it in either direction. The short arm will snap into the 90 degree position and again when it is in the forward position. Screen will display STARTING SOLUTION.
Step 6 – Deploying the Short Arm
6/29/2021 Smart Aligner Introductory Course 18
WARNING:
When returning the short arm to the stored position, it must follow the same path it travelled. For example, if it was rotated counter clockwise to the forward position, it won’t be able to keep rotating counter clockwise and must be rotated clockwise back to the stored position. There is a lock mechanism to prevent a full rotation. Do not force the arm past the lock.
Step 7 – Tool’s Main Measurement Screen
6/29/2021 Smart Aligner Introductory Course 19
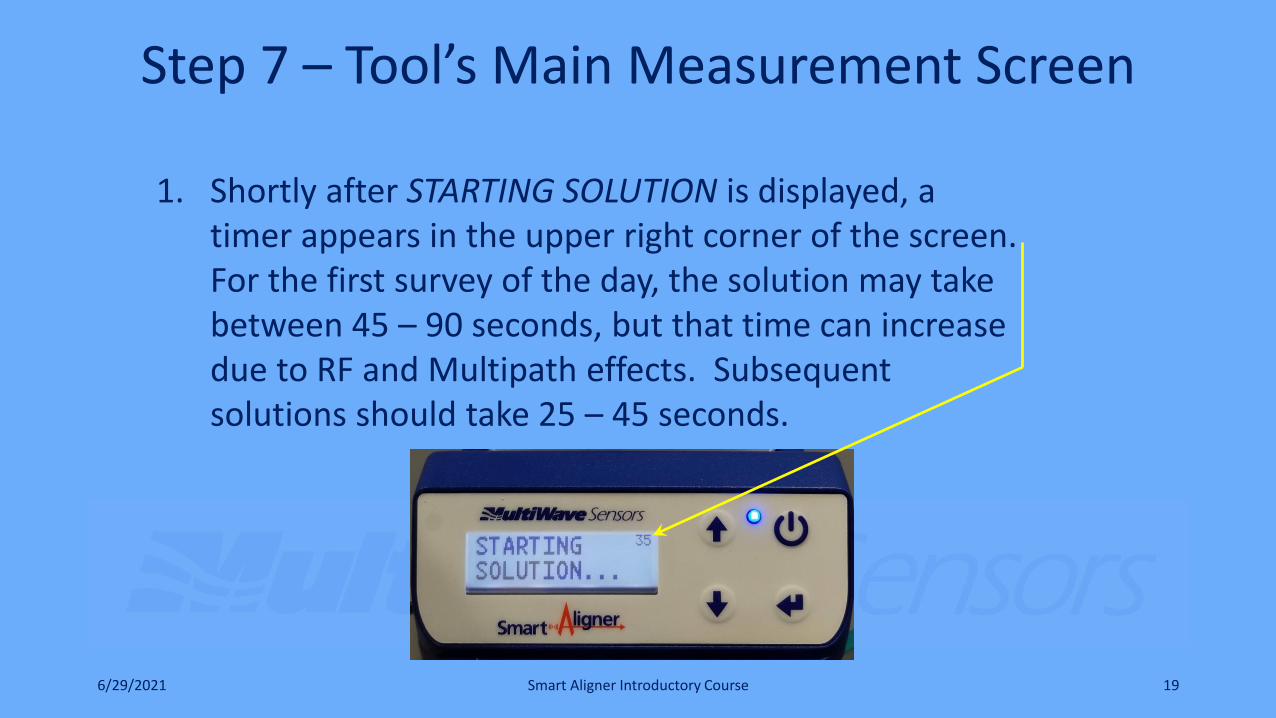
1. Shortly after STARTING SOLUTION is displayed, a timer appears in the upper right corner of the screen. For the first survey of the day, the solution may take between 45 – 90 seconds, but that time can increase due to RF and Multipath effects. Subsequent solutions should take 25 – 45 seconds.
Step 7 – Tool’s Main Measurement Screen
6/29/2021 Smart Aligner Introductory Course 20
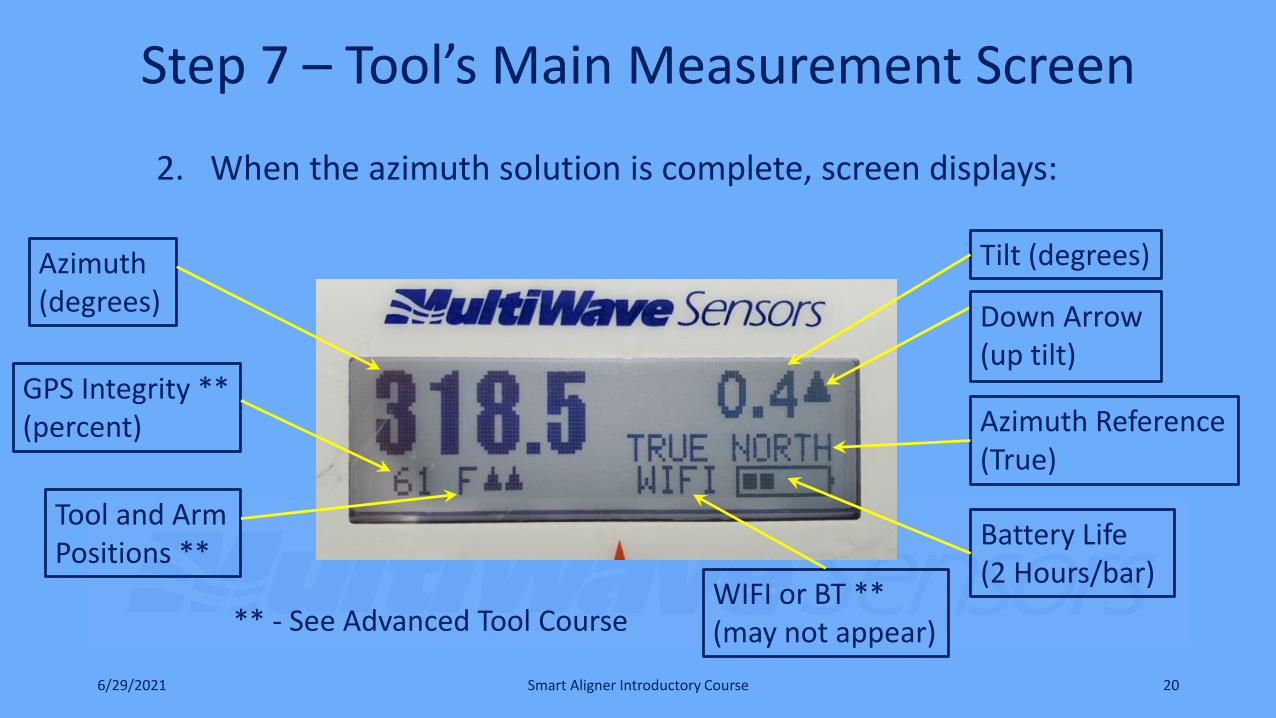
2. When the azimuth solution is complete, screen displays:
Azimuth(degrees)
GPS Integrity **(percent)
Tool and Arm Positions **
Tilt (degrees)
Azimuth Reference (True)
Battery Life(2 Hours/bar)
** - See Advanced Tool Course
Down Arrow (up tilt)
WIFI or BT **(may not appear)
Step 7 – Tool’s Main Measurement Screen
6/29/2021 Smart Aligner Introductory Course 21
3. Prior to using the app interface on the phone, the antenna can be coarsely adjusted to the proper orientation by viewing the Tool’s screen.
Step 8 – Using the app
6/29/2021 Smart Aligner Introductory Course 22
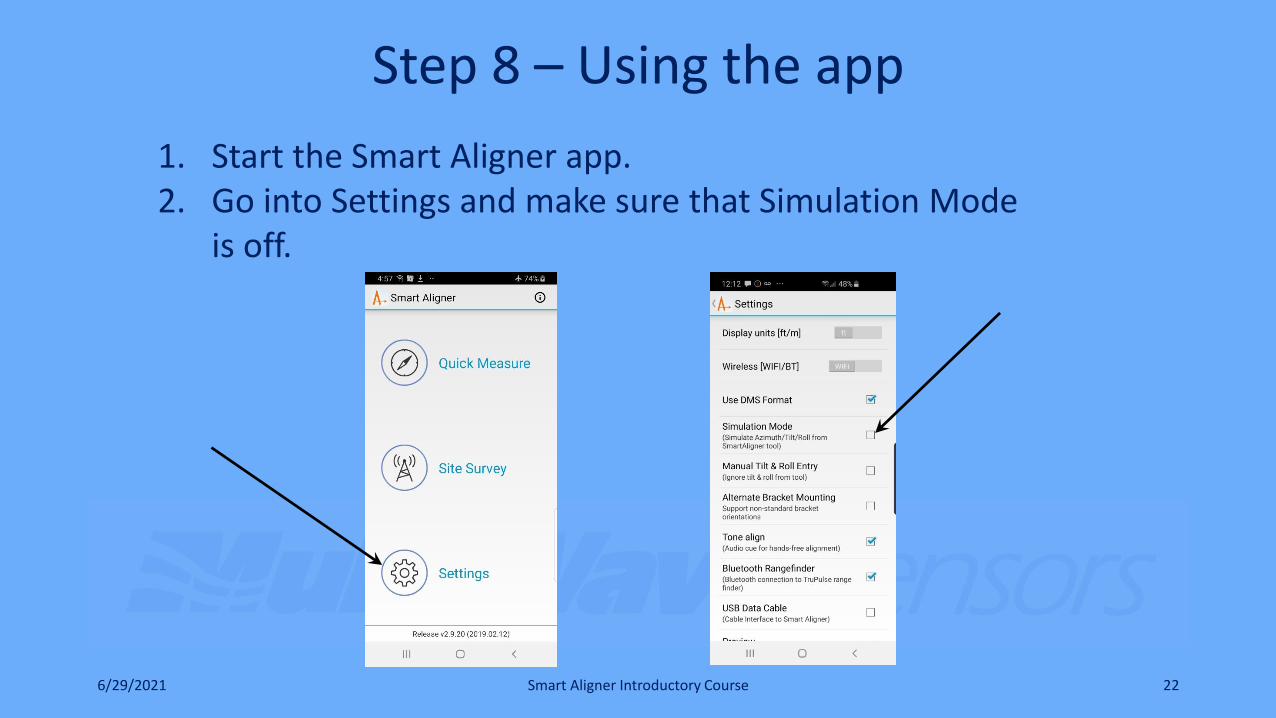
1. Start the Smart Aligner app.2. Go into Settings and make sure that Simulation Mode
is off.
Step 8 – Using the app
6/29/2021 Smart Aligner Introductory Course 23
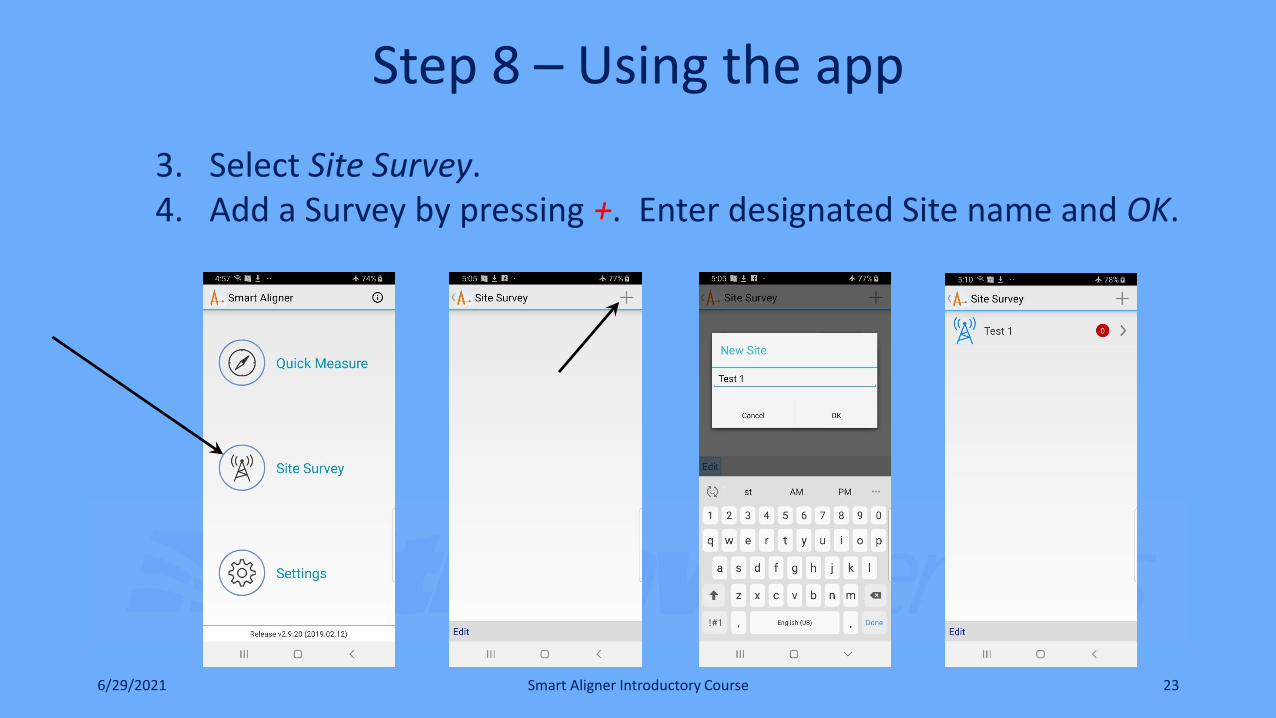
3. Select Site Survey.4. Add a Survey by pressing +. Enter designated Site name and OK.
Step 8 – Using the app
6/29/2021 Smart Aligner Introductory Course 24
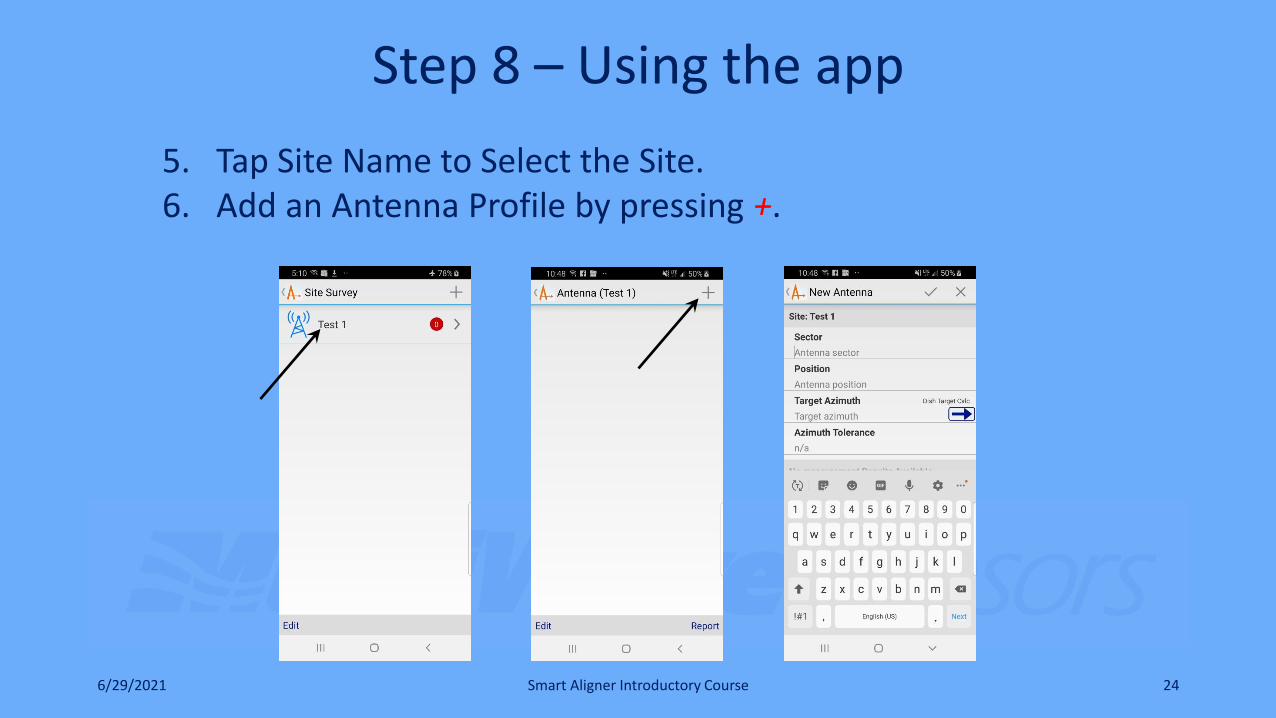
5. Tap Site Name to Select the Site.6. Add an Antenna Profile by pressing +.
Step 8 – Using the app
6/29/2021 Smart Aligner Introductory Course 25
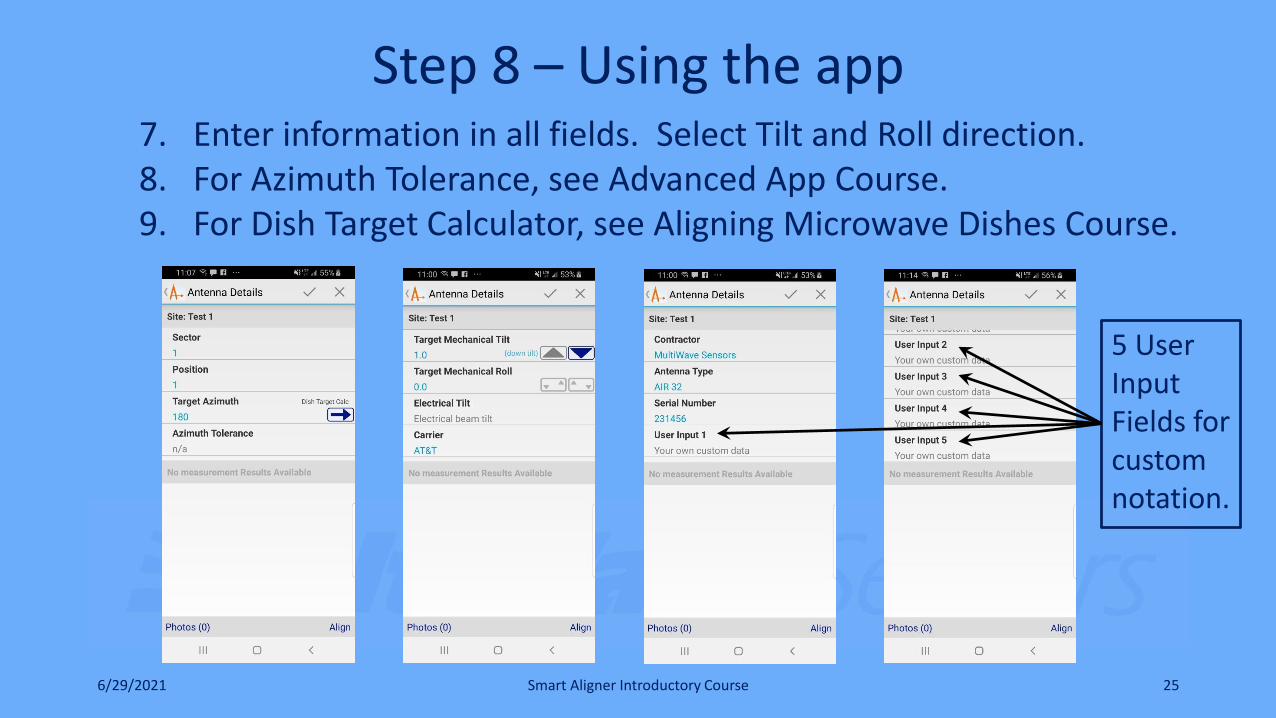
7. Enter information in all fields. Select Tilt and Roll direction.8. For Azimuth Tolerance, see Advanced App Course.9. For Dish Target Calculator, see Aligning Microwave Dishes Course.
5 User Input Fields for custom notation.
Step 8 – Using the app
6/29/2021Smart Aligner Introductory Course
26
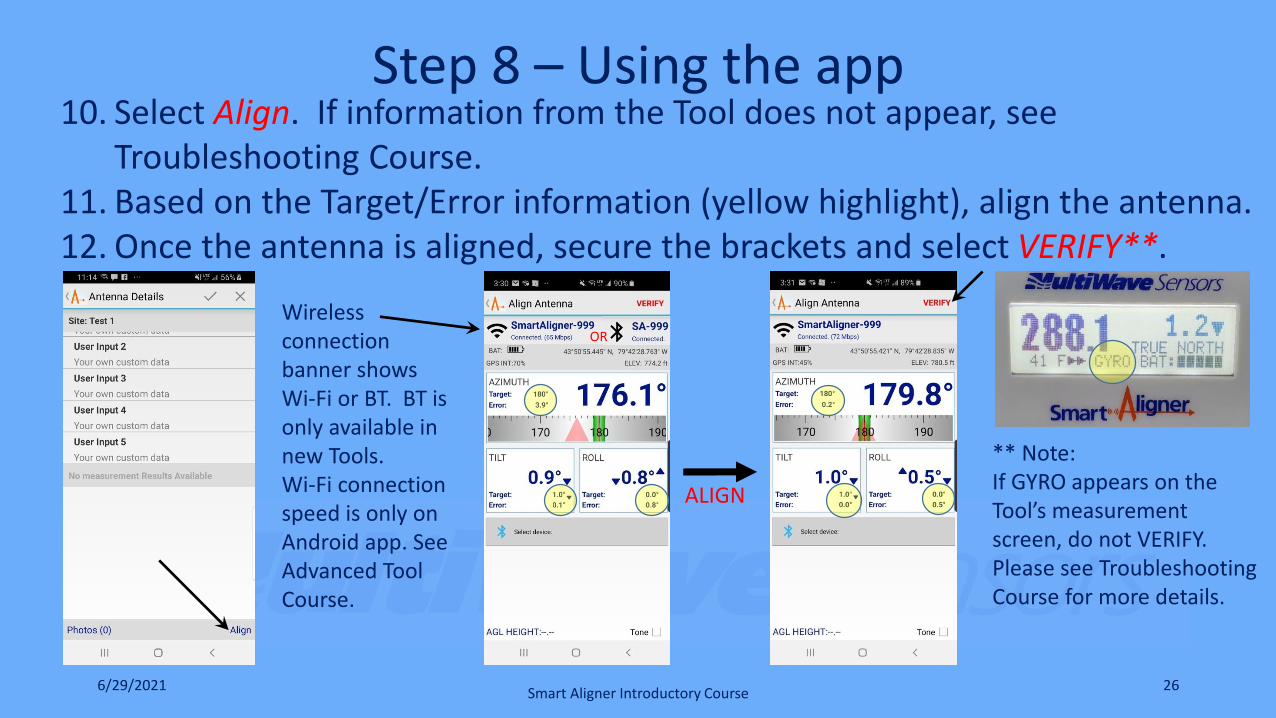
10. Select Align. If information from the Tool does not appear, see Troubleshooting Course.
11. Based on the Target/Error information (yellow highlight), align the antenna.12. Once the antenna is aligned, secure the brackets and select VERIFY**.
ALIGN
Wireless connection banner shows Wi-Fi or BT. BT is only available in new Tools. Wi-Fi connection speed is only on Android app. See Advanced Tool Course.
OR
** Note:If GYRO appears on the Tool’s measurement screen, do not VERIFY. Please see Troubleshooting Course for more details.
Step 8 – Using the app
6/29/2021 Smart Aligner Introductory Course 27
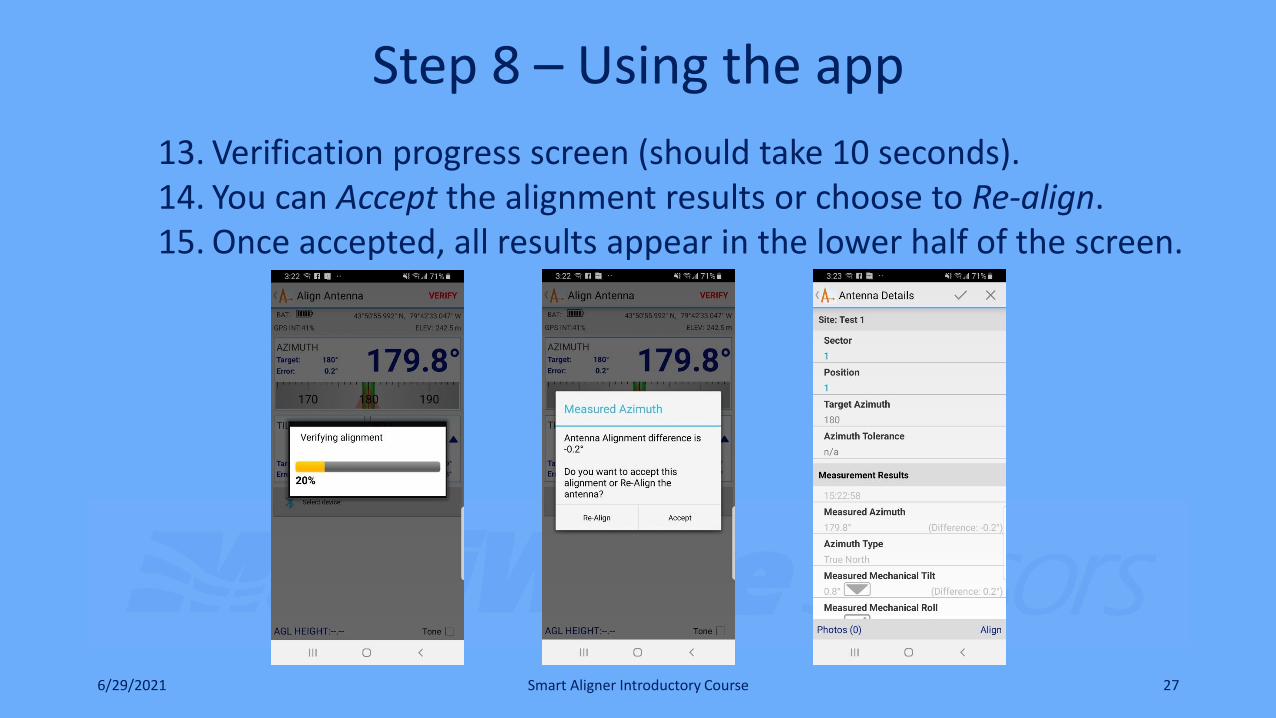
13. Verification progress screen (should take 10 seconds).14. You can Accept the alignment results or choose to Re-align.15. Once accepted, all results appear in the lower half of the screen.
Step 8 – Using the app
6/29/2021 Smart Aligner Introductory Course 28
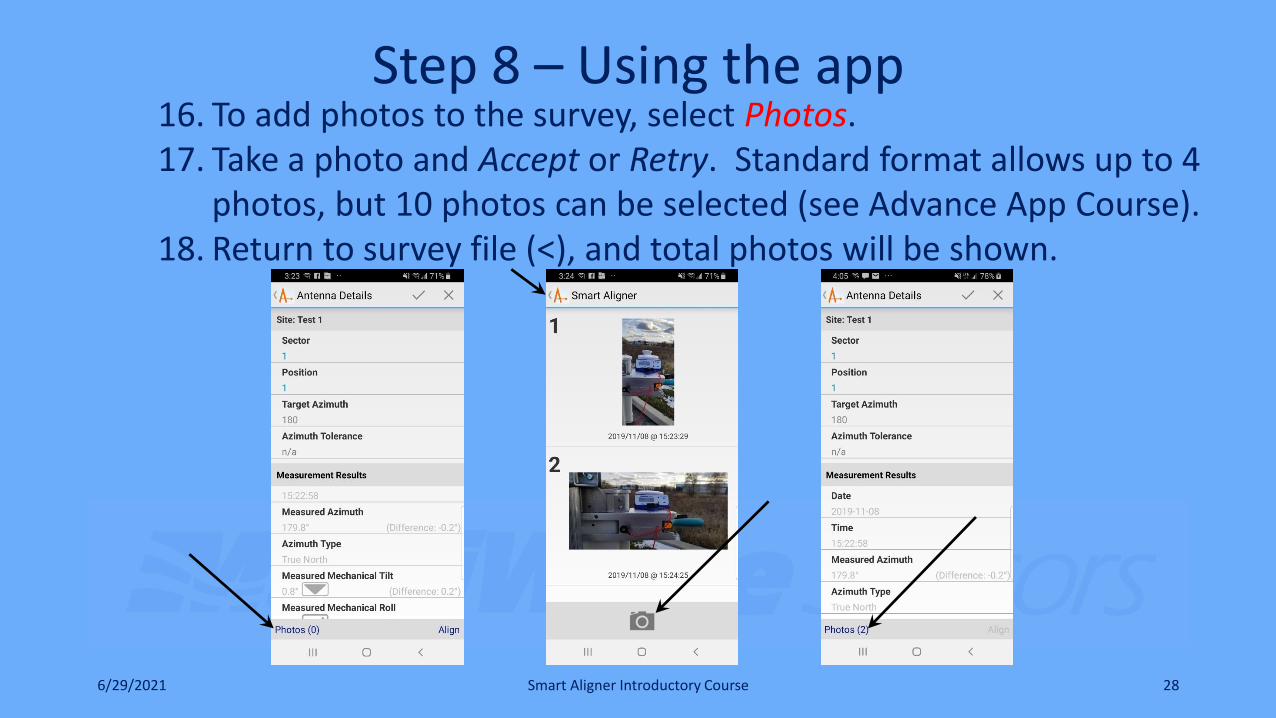
16. To add photos to the survey, select Photos.17. Take a photo and Accept or Retry. Standard format allows up to 4
photos, but 10 photos can be selected (see Advance App Course).18. Return to survey file (<), and total photos will be shown.
Step 8 – Using the app
6/29/2021 Smart Aligner Introductory Course 29
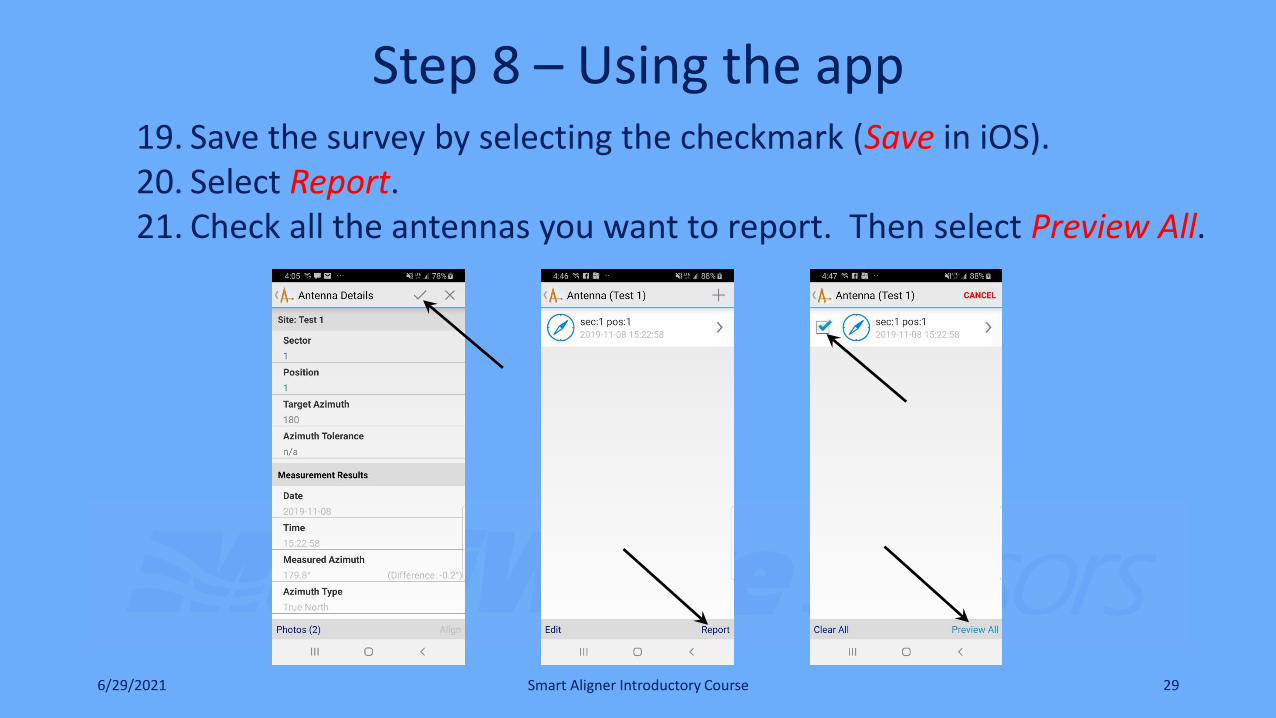
19. Save the survey by selecting the checkmark (Save in iOS).20. Select Report.21. Check all the antennas you want to report. Then select Preview All.

Step 8 – Using the app
6/29/2021 Smart Aligner Introductory Course 30
22. You can preview the PDF report(s) by zooming in.23. Select EMAIL and use your email browser to send the email out.(You should turn the Tool off so your phone will use data for the email)
Course End
6/29/2021 Smart Aligner Introductory Course 31
1. Advanced Tool Course2. Advanced App Course
Recommended Next Courses


