34
1 Soils Teaching Toolbox Information, Activities, and Resources for Utah Classrooms
1
Soils Teaching Toolbox
Information, Activities, and Resources for Utah Classrooms

2
Curriculum Correlation
Utah State Office of Education
Elementary Science Core Kindergarten Standard I, Objective 3b 1st grade Standard III, Objective; 1a, d, e 2nd grade Standard I, Objective 1c 3rd grade Standard II, Objective; 1a, b, c Standard V, Objective 1a 4th Grade Standard III, Objective; 3a, b, c Standard III, Objective; 2a, b, c, d 5th Grade Standard II, Objective 1a 6th Grade Standard V, Objective 1a, 3a, c
Teaching Toolboxes The Utah Museum of Natural History has created Teaching Toolboxes designed to help teachers or group leaders introduce, teach, and reinforce science topics. Each Toolbox is filled with Museum specimens, activities, and content information to help excite students about natural history. Funding for this program was provided by the Institute of Museum and Library Services (IMLS).
This Teacher Toolbox contains specimens that can be handled and touched by teachers and students. You will see this symbol when there is information or an activity that uses the Teacher Toolbox. Curriculum Correlation The adjacent box shows how the material in this packet correlates with the Utah Science Core Curriculum. Although not listed, materials may also be used for other curricula such as art, reading, and math. Other Teaching Toolboxes offered include: Box of Bats, Rocks, Early Tools, Plants, Insects, Bones, Fossils, DNA, Traits, and Genes. For more information on Toolboxes and programs visit www.umnh.utah.edu.
Soils Teaching Toolbox

3
Top Layer: Tools Sieve (includes 5 screens and lid) 2 Soil Thermometers Trowel Middle Layer: Life Mole skull Wetland Soil Plants: Juncus Willow Anthropogenic Soil Plants: Morning Glory Crab Grass Forest Soil Plants: Austrian Pine Oregon Grape Colorado Plateau Soil Plants: Cactus Mormon Tea Great Basin Soil Plants: Sage Rabbitbrush Alpine Soil Plant: Aster Insects in Vials: Pill Bug (Crustacea: Isopodalem) Earwig (Dermaptera) Water Strider (Hempitera: Gerridae) Ants (Hymenoptera) Centipede (Chilopoda) Velvet Ants (Hymenoptera: Mutillidae) Microscope Slides (8) Earthworm intestinal region Rhabditis Moss Protonema Oscillatoria
Soils Specimen Key

4
Bacteria Types Typical Dicot Root Dirt (soil) Termite Bottom Layer: Larger 8 oz. bottles of: Sand Silt Clay Smaller 4 oz bottles of: Topsoil Subsoil (see parent rocks) Mivida (Utah’s State Soil) 2 Parent rocks Sediment Column Books
• A Handful of Dirt o by Raymond Bial
• Dirt by Steve Tomecek • Dig In! Hands-On Soil Investigations
o NSTA press • Backyard Detective Critters up Close
o by Nic Bishop • Life In A Bucket of Soil
o by Silverstein • Soil Science Simplified
o by H. Kohnke • Soil: Digging Into Earth’s Vital Resource
o by Stille • There’s A Hair In My Dirt!
o By Gary Larson • Working Worms at Work
o by Wendy Pfeffer • Globe Soil Color Chart
Other: Soil Sampler (includes boring rod) Magnifying lenses (20) Clear rulers (20)

5
O – surface horizon (organic material) A – Topsoil horizon B – Subsoil horizon C – Parent Material
Loose debris Parent Material
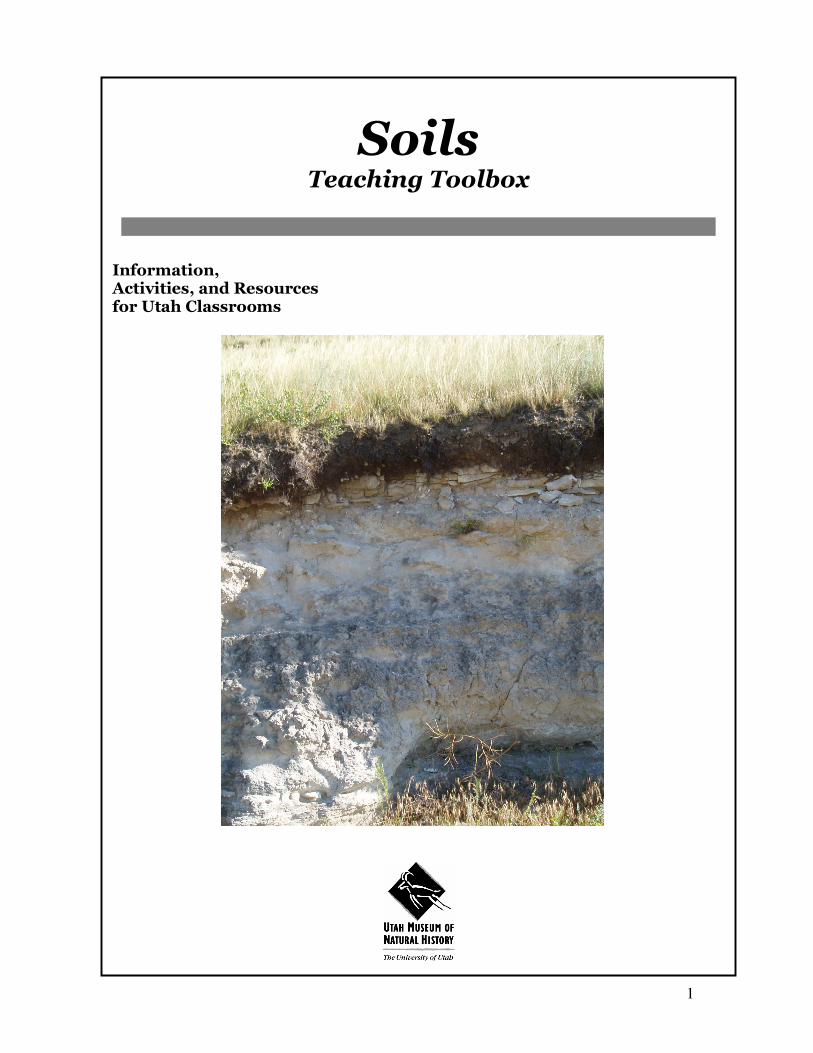
Soil is more than dirt. Soil’s combination of rocks, water, air and organic material provide an essential natural resource to our earth. It is home to many plants and animals, it provides nutrients and support for plants and crops, helps filter and store water, decomposes waste, and provides jobs and natural resources that we depend upon. The study of soil (“pedology”) opens up a complex and fascinating world in the dirt beneath your feet. Soil Formation Soil begins with a parent material. The parent material is the loose, unconsolidated debris that is created when bedrock is broken down. The rock is weathered into bits and pieces naturally by water, ice, wind, and plants. A river can tumble over rock, breaking it into pieces and smaller sediments. A plant’s roots can break through a rock as it grows and expands. This way of breaking the rock without changing the rock’s composition is called mechanical weathering. However, when rocks are broken down by chemical changes, it is called chemical weathering and the composition of the rock changes. Some minerals in rocks react with oxygen, carbonic acid, or even water to go through a chemical change. Soil continues to form as the debris from the parent material settles into different layers parallel to the ground. These layers are called horizons. The top horizon is usually filled with loose organic material and smaller sediments than the lower layers that have not been exposed to as much weathering. That loose material from the top eventually leaches downward to partially mix with the layers below. The horizon layers
continues to form distinguishing characteristics as different materials (plants, water, rocks and minerals) are either added to or transported from the parent material. Organic Components of Soil Weathered material is only one part of the soil. Plants and animals die, drop their leaves, and leave waste on the surface of the ground. The fresh and partially decomposed material at the surface is called the O horizon. The A horizon (topsoil) is just below the O horizon and is filled with a dark, nutrient rich material known as humus. Many decomposers play an important role in the formation of humus. Fungi, mold, and bacteria are microscopic
decomposers that attack and break down dead organisms and their wastes in soil. Nutrients from these organisms are recycled into the soil. Mites and worms also help decompose dead organic material and mix it with soil. Earthworms help with the formation of soil because as they eat their way through, the upper and lower horizons are
The Scoop (General Information on Soil)

6
Gravel= 2 mm or larger Sand = less than 2 mm Silt = less than 1/16 mm Clay = less than 1/256 mm
mixed. The waste from earthworms contains nitrogen (useful for plant growth) and helps aerate the soil. The B horizon (subsoil) usually has less organic material and a lighter color than the A horizon. The lowest horizon is the C horizon which is broken bedrock or parent material. There are very few organic materials or organisms in this layer. Several horizons exposed vertically are called a soil profile. Soil formation takes a long time. It can take from a few hundred to several hundred thousand years for a soil to form. The type of parent material, topography, climate, and exposure to different types of plants and animals all affect the rate that soil can form. Texture Weathered rock comes in a wide range of shapes and sizes. The amount of each particle size determines the texture of the soil. The largest particles in soil are called gravel (anything larger than 2 mm). The other particles in soil are sand (less than 2 mm), silt (less than 1/16 mm), and clay (less than 1/256 mm). When a soil has a fine texture like clay, the particles are extremely small and can hold water very well. Gravel particles leave large pores that water easily flows through. The amount of water in soil in part determines how plants will grow. While water is essential for plant growth, sometimes too much water prohibits the plant from getting enough oxygen. Soil textures with large particles can allow an abundance of air for the plant, but do not hold water very well. The best texture for plant growth is called loam, which has
all three of the different particle sizes (sand, silt and clay). This allows plants to get a sufficient amount of both water and air. In addition to water, soil provides support and acts as an anchor to plants as they grow.

7
UTAH CORE CURRICULUM Grade 3, Standard II, Objective 1; a, b, c Grade 4, Standard III, Objective 3a Grade 6, Standard V, 1a BACKGROUND This lesson can be used as a basic introduction to a soil unit. Observation skills will reveal that soil contains more than meets the eye. The soil from the yard, the mountains, desert, and other regions are all very different when looked at closely. MATERIALS
• Soils Field Crate • Petri dishes or paper plates • Small trowel • Clear rulers • Magnifying lenses • Soil Color Chart • Samples of soil (collected by students) • Toothpicks
PROCEDURE
1. Show the students the Field Crate and explain that Utah has several different types of soil.
2. Have students bring in soil samples from various areas (or even collect soil from around your school).
3. Complete the Soil Observations worksheet on page 6. 4. Talk about what type of soil each sample is most likely to be (use the Field Crate
information as a guide). Additional Activities:
• Have kids weigh the soil sample using a scale soon after it is collected. Allow the soil to dry out and weigh it again. Talk about evaporation and how water is a part of the soil as well.
• Recipe for soil on UEN’s website http://www.uen.org/Lessonplan/preview
What’s in the Soil?

8
NAME ________________________________
SOIL OBSERVATIONS:
1. Use a hand lense and toothpick to carefully observe your soil sample. Write down some of your observations.
a. What does the soil feel like? b. What shapes are the particles in your soil? c. What colors are found in your soil? d. What other things are in your soil? e. Draw a picture of your soil sample in the circle below
2. Separate the different parts of your soil into different groups. a. Separate the living and non-living parts. b. Separate the particles into different colors c. Separate the particles into different sizes or shapes
3. Find the soil that looks most like your sample on the field crate.

9
UTAH CORE CURRICULUM Grade 4, Standard III, Objective 3b BACKGROUND Recall from the background information that soils have distinguishing layers known as horizons. When there are several different horizons exposed vertically, it is known as a profile. MATERIALS
• Golf tees (or markers) • Trowel & shovel • Corer (soil sampler) • Spray bottle • Notebook and pencil for observations
PROCEDURE You can do this activity as an introduction to soil collecting and observation techniques. Remember to always get permission to collect soil or dig pits. Make sure to follow safety guidelines (watch for power/water lines and wash hands after handling soil and wear gloves when collecting). Also please try not to dig too many samples that will scar the land – be courteous of others! When finding a place to collect soil look first for areas where soil horizons are already exposed. You might find road cuts, construction sites, excavation sites, and so forth. Look below for some other methods. Road Cut:
1. Find an area where a deep section of soil is already exposed. A great place to look is at excavation sites, road cuts, or construction areas.
2. Expose a fresh surface of the soil by scraping away the outer surface of soil. 3. Look for different horizons, places where the soil seems to change in
composition, and place golf tees or markers at the boundaries. Label these horizons.
4. Write down and draw observations about each layer: a. Color b. Creatures c. Size of particles d. Moisture e. Others observations
Observing Horizons & Profiles/ Techniques
10
Pit: 1. Dig a pit 1 meter deep that is wide enough to actually see the sides of the pit. 2. Starting at the top, try to identify the different horizons. Label each layer. 3. Make observations about each area.
Core samples: (see Soil Sampler information for more detail and lesson plans)
1. Unscrew entire cap unit (cap plus T-handle) and remove it from body. 2. Insert the smaller rod into the hole of the body sampler. 3. Clear the area to be sampled of any noticeable surface debris. 4. Apply downward pressure on the boring handle, and rotate to penetrate the soils
to the desired depth. 5. Remove sampler body from the soil. 6. Remove the boring handle from the sampler body. Screw the cap back onto the
sampler body. 7. Partially screw the T-handle into the cap. Continue turning the T-handle until the
entire soil plug is pushed out of the sampler body. Carefully remove the plug. 8. Place soil into a collection bag (record location for each plug).
Surface Sample (top horizon):
1. Find a small area of ground that you can dig about 10 cm down. 2. Collect that soil in a dish for observations. 3. Note any observations of the sample.
11
SOIL PROFILE Draw and label your observations (include topsoil, subsoil, and bedrock):
1. Draw horizontal lines to show the different horizons. 2. Sketch observations of each layer. 3. How is each layer different?

12
UTAH CORE CURRICULUM Grade 4, Standard III, Objective; 2 a, b, c, d Grade 5, Standard II, Objective 1 a BACKGROUND The parent rock is the original material that weathers into smaller bits and pieces. The loose debris (called parent material) can either remain in its original spot (residual soil) or be transported by wind, glaciers, or running water (transported soil). The parent material mixes with water, air, and organic components to slowly form different types of soil. For example, sandy soils are formed from sandstone and silt loam soils from shale. A limestone parent rock may weather into soil that is fairly good for plants to grow in. In contrast, granite parent rock is slow to develop and results in poor growing soil MATERIALS
• Parent rocks • Top Soil • Subsoil • Picture of parent material
PROCEDURE 1. Explain what a parent rock is and how it can go through weathering (wind, rain,
water, gravity, etc.). 2. Observe each of the following specimens from the toolbox:
a. Two parent rocks b. Topsoil jar c. Subsoil jar
3. Match each parent rock in the parent rock picture. 4. Match the subsoil in the parent rock picture (the subsoil is a combination of the
parent rocks broken down as well as a little topsoil). 5. Match the topsoil in the parent rock picture (the topsoil is formed from organic
material like plants). 6. Find the topsoil and subsoil in the large parent rock picture. 7. Think about how the different layers of soil are formed. 8. Search around your local area to see if you can find areas where soil has been
formed and transported.
Are You My Mother? (Parent Rocks)

13
Gravel= 2 mm or larger Sand = less than 2 mm Silt = less than 1/16 mm Clay = less than 1/256 mm
UTAH CORE CURRICULUM Grade 4, Standard III, Objective 3a Grade 5, Standard II, Objective 1a BACKGROUND As weathering breaks rocks into smaller, but varying sizes, the texture of the soil is created. The texture refers to the amount of sand, clay, and silt in the soil. Recall from the background information that a particle larger than 2 mm is gravel, sand is less than 2 mm, silt less than 1/16 mm, and clay less that 1/256 mm. It can be hard to tell the differences between the different sized particles by just looking at them, but there are a few simple guidelines you can use. If you’re out in the field, moisten the soil with water and knead it until it feels like putty. Squeeze it between your fingers to see if it forms a ribbon. Soil that forms a ribbon has clay in it. Sand usually feels coarse when rubbed between your finger and silt feels like a powder (about the consistency of flour). Tools can be helpful when determining what type of soil you have. A sieve is a tool that is used to separate the largest particles from a sample. Sieves, however, are not very good for separating the very fine particles like silt and clay. For those, soil scientists usually use the hydrometer method. With a hydrometer particles are separated by their sedimentation rate, or how fast they settle in a column of water. The hydrometer method used by soil scientists is more sophisticated than the activity below, but the principle is the same – larger particles settle faster than smaller particles and smaller particles remain suspended longer than large ones (see soil triangle activity). MATERIALS
• Collect samples of gravel, sand, silt, and clay • Sieve • Sediment column • Clear rulers • Beaker (or clear glass) filled with water
PROCEDURE Part I: Sort by texture
1. Gather samples of gravel, sand, silt, and clay for each student. 2. Observe the grain sizes to determine which sample has the largest particles
and which has the smallest particles. 3. Make additional observations about the texture:
a. Which one feels gritty? b. Which one feels like powder? c. Which is the coarsest?
4. Label each sample as gravel, sand, silt, or clay.
Soil Texture
14
Part II: Understanding texture a little deeper (see sieve directions in the back of this packet for more information):
1. Collect a sample of soil. 2. Run the sample through the sieve to separate the larger particles from the
smaller particles. Particles that sift through the 2 mm sieve are smaller than the openings of 2 mm, so they are sand, silt, or clay (no gravel).
3. Observe the remaining small particles using a magnifying glass and toothpick. See if you can separate the particles even more.
4. Use the sediment column to observe the different rates that sediments fall. 5. Drop a small sample of the soil into a glass of water. Watch the different
rates that the particles fall. Which fall the fastest? Which falls the slowest?

15
6. UTAH CORE CURRICULUM Grade 4, Standard III, Objective 3a Grade 4, Math Standard I, Objective 4 b, Standard III, Objective 1 a BACKGROUND Soils can vary quite a bit. The climate, type of parent rock, amount of time, and type of plants all affect what type of soil you have. In order to have consistency when identifying and working with soil, soil scientists use a tool known as a soil triangle. The triangle is a chart that uses the percentage of silt, sand, and clay to determine the type and texture of the soil. For example, a medium textured soil that consists of approximately equal amounts of clay, sand, and silt is a fertile soil called loam. Soil that is mostly silt but also has sand and clay is called silty loam. Students will need to understand the difference between sand, silt, and clay (see Soil Texture activity). They will find percentages of each of these particles for a sample and then use the soil triangle to identify what type of soil they have. MATERIALS
• Soil texture triangle • Triangles for silt, sand, and clay • Ruler • Sediment column (capped graduated cylindar with soil types)
PROCEDURE There are two parts to this lesson. First find the percentages of sand, silt, and clay. Next, use the soil triangle to determine what type of soil sample you have. Part I: Finding the percentages of sand, silt and clay
1. Shake up the sediment column so particles are all suspended. 2. Let column sit still. The sand should settle in about the first 40 seconds. 3. Leave the column undisturbed until all the particles have settled (you might let it
sit over night). 4. Using a metric ruler, measure the amount of sand (bottom layer) and record it in
the box below. Record how much silt and clay there is as well and record it below.
Soil Triangle
Sand = _______ cm Silt = _______ cm Clay = _______ cm

16
5. Add the amount of sand, silt, and clay.
6. Find the percentages of sand, silt, and clay:
Part II: Using the soil triangle (use percentages from above) 1. Use the percentage of sand from the sediment column and find it on the bottom of
the soil triangle. Draw a dark line that follows the arrows from that sand percentage.
2. Repeat for silt and clay Find where the 3 lines intercept. This is the type of soil you have.
Example: A soil sample with 65 % sand,15% clay, and 20 % silt is a sandy loam.
Soil Percentages: _______ % Sand _______ % Silt _______ % Clay Soil Type:
_____ cm sand + ____ cm Silt + _____clay = __________ cm total.
Step 1: Divide the amount of sand into the total amount.
cm sand = _________ cm total
Step 2: Multiply that number by 100. _____________ * 100 = _______% sand

17

18
Extension Activity: Repeat the process above with your own sample.
1. Find a wide mouth jar with a lid (an old mayonaise jar, canning jar, etc.). 2. Fill the jar about 1/2 full with soil. 3. Mark a line on the jar where the soil reaches. 4. Fill the jar with water (leave just enough room to be able to shake it up) and put
the lid tightly on the jar. 5. Shake the lid vigorously so all the particles are suspended. 6. Wait 40 seconds and then mark where the particles have settled on the jar (this is
the sand). 7. Wait another 6 hours and mark the jar (this is the silt) 8. The remaining area is the clay. 9. From there calculate the percentages of sand, silt, and clay (for example, the
amount of sand compared to the whole amount of soil). 10. Use the soil triangle to determine what type of soil you have collected.
19
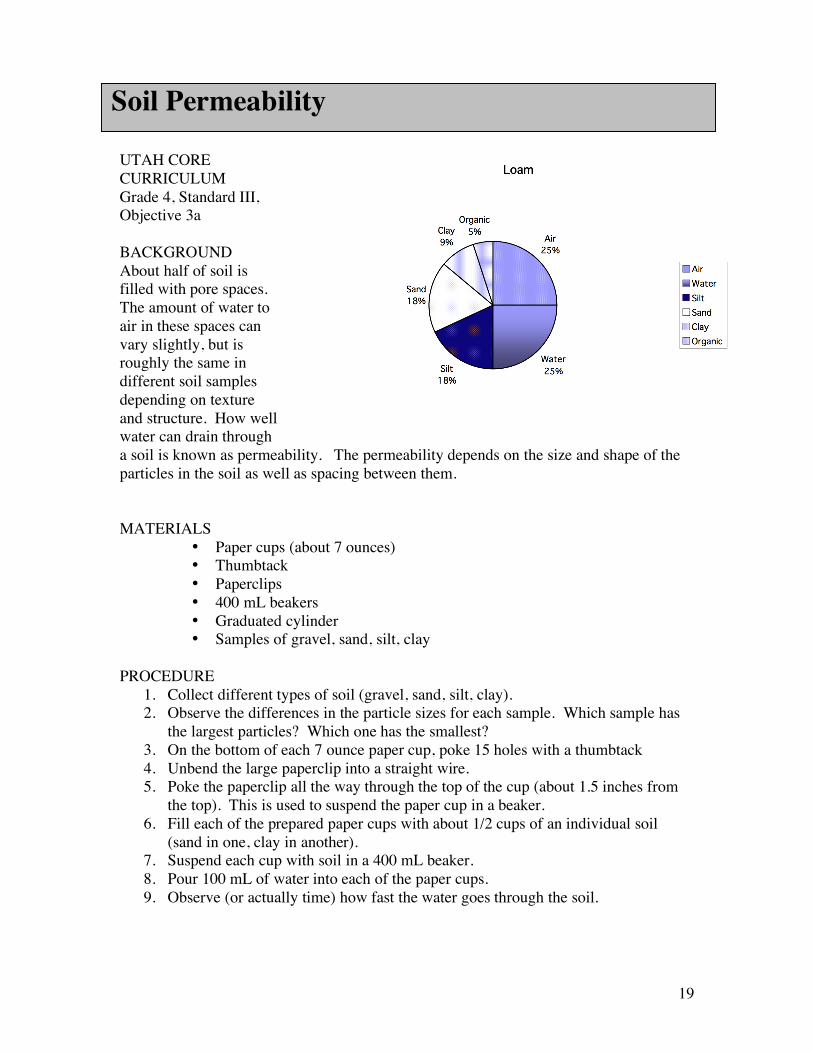
UTAH CORE CURRICULUM Grade 4, Standard III, Objective 3a BACKGROUND About half of soil is filled with pore spaces. The amount of water to air in these spaces can vary slightly, but is roughly the same in different soil samples depending on texture and structure. How well water can drain through a soil is known as permeability. The permeability depends on the size and shape of the particles in the soil as well as spacing between them.
MATERIALS • Paper cups (about 7 ounces) • Thumbtack • Paperclips • 400 mL beakers • Graduated cylinder • Samples of gravel, sand, silt, clay
PROCEDURE 1. Collect different types of soil (gravel, sand, silt, clay). 2. Observe the differences in the particle sizes for each sample. Which sample has
the largest particles? Which one has the smallest? 3. On the bottom of each 7 ounce paper cup, poke 15 holes with a thumbtack 4. Unbend the large paperclip into a straight wire. 5. Poke the paperclip all the way through the top of the cup (about 1.5 inches from
the top). This is used to suspend the paper cup in a beaker. 6. Fill each of the prepared paper cups with about 1/2 cups of an individual soil
(sand in one, clay in another). 7. Suspend each cup with soil in a 400 mL beaker. 8. Pour 100 mL of water into each of the paper cups. 9. Observe (or actually time) how fast the water goes through the soil.
Soil Permeability

20
Example of soil color (brownish yellow) : 10 YR 5/6 Hue = 10 YR Value = 5 Chroma = 6
UTAH CORE CURRICULUM Kindergarten, Standard I, Objective 3b Grade 4, Standard III, Objective 3c BACKGROUND The color of soil is an easy and obvious way to start identifying soils. The color helps you know how well water drains, how much air is in the soil, and the type of minerals and organic material that is in it. This can be useful when trying to decide what type of tree to plant, where to build a building, or how to landscape an area. There are soil color books to help you identify the hue, value, and chroma in the soil color. Using a soil color book allows soil scientists to be more consistent with describing soil. The hue refers the wavelength, the actual color. The value (brilliance) is how dark or light the color is. Chroma is the purity of the color. The color of the soil is caused by several different factors. Dark soil is usually created by organic material that accumulates on the top layers, the O and A-horizon. For example, raw peat is usually brown and humus is dark, almost black. Black soil can also indicate manganese oxides or iron sulfides. Most of the coloring in the sub-soil is the result of oxidation and hydration. Grey soils are usually areas where the water tables has risen and created a reduced iron. When iron rusts (oxidizes) it creates a red colored soil (called iron oxide). Yellow and yellow-brown soils usually have goethite (a type of iron) or possibly even pure sulfur.
Color Minerals Dark/ black manganese oxide,
pyrite, todorokite Red iron, hematite,
lepidocrocite White calcite, dolomite Yellow geothite, jarosite
MATERIALS
• Color Chart • Water spray bottle • Place outdoors to look at soil • Soil samples from the toolbox
Soil Colors
21
PROCEDURE
1. Go outside with the color chart and find an area where you can see different horizons of soil.
2. Take a sample from each soil horizon. If it is dry, slightly moisten it with a water bottle.
3. For each sample, compare the soil with the color chart to find the best match (if there are several colors, pick the most dominant one, but make note of the other colors as well).
4. Older students can interpret what the colors reveal about the soil: a. The subsoil helps you understand how well the soil drains water. Red to
brown soils are usually aerated, they drain water well. Gray soils are usually poorly drained and saturated most of the time.
b. What has caused a soil to be well drained (red) or poorly drained (gray)? Was it the slope of the land, the rainfall in your area, location, or something else?

22
UTAH CORE CURRICULUM Grade 3, Standard V, Objective1a BACKGROUND Temperature can affect soil in many ways. When temperatures are very cold, animals in the soil have a hard time surviving and water freezes up, preventing it from seeping into the soil. If the temperature fluctuates between freezing and thawing, weathering affects the structure of the soil. Warm temperatures also affect soil. The sun gives off solar radiation that is absorbed by the atmosphere, the earth, or reflected back into space. Dark soils absorb much more solar radiation (up to 80%) than light colored soil that absorbs only about 30%. Soils with a lot of water absorb heat much slower than soils that drain water quickly (like sand). This can be helpful when determining when to start planting certain crops. Farmers can plant a little earlier in sandy soils that heat up more quickly than other soils. MATERIALS
• Light soil • Dark Soil • Soil thermometers (2) • Heat lamp or sunny day
PROCEDURES
1. Place one thermometer in dark soil and one in the light soil and record the temperatures.
2. Place the soils in the sun or under the heat lamp and record the initial temperature in a data table.
3. Record the temperatures every minute until the temperatures plateau and record them in the data table.
4. Plot the temperatures of the two soils in a simple line graph. 5. Which soil increased temperature the quickest? 6. Add a little water to one of the samples and try again. How does that
affect the temperature? What about the rate of temperature change?
Soil Temperature

23
UTAH CORE CURRICULUM Grade 4, Standard III, Objective 3a Grade 6, Standard V, Objective 1a, Objective; 3 a, c BACKGROUND Soil ecology is the study of how living creatures interact with their soil environment. A myriad of animal, plant, and microscopic life is housed beneath the surface and support the balanced ecosystem of the soil. Producers are an essential part of the soil ecosystem because they get their energy from the sun and act as food for other organisms. For example, plants are producers that obtain energy from the sun. In turn, they are eaten by other animals both above the surface and below (roots and tubers). Consumers are usually animals that feed on producers or other consumers. Finally, all forms of dead materials are worked on by decomposers in the O and A horizons. Bacteria, fungi, and molds are common decomposers of the soil that are essential in cycling the nutrients. Many decomposers are microscopic and secrete enzymes that digest organic materials. Microorganisms There are several important creatures in the soil that are too small to see with just the naked eye- they are called microorganisms. Bacteria are extremely abundant in the soil and come in many shapes and sizes. The most common bacteria in soil is tiny (1/25,000 of an inch), shaped like a rod, and can reproduce very quickly. Fungi like mold and mushrooms are important decomposers in the soil. They usually grow from spores and have small thread-like parts call mycelium. The mycelium on mushroom fungi grow underground and absorb nutrients and water. Rhizopus is the same type of mold that grows on your bread and in the soil. Animals There are two different types of worms in the soil. The earth worm is a familiar animal that burrows in the shallow parts of the soil. As it moves, it ingests and excretes materials into the earth. They create important channels, pores, and help in mixing up the soil. The second
Soil Ecology

24
type of worm is the nematode. These are the most abundant animal in the soil. They are microscopic and live in the moist areas surrounding the soil feeding on dead or decaying roots, living roots, or other living organisms. Arthropods like springtails, mites, millipedes and centipedes. Springtails are very small and look like small white darts in the soil (some even lack pigment and eyes) and feed on dead organic matter. Mites are also very small and feed on dead materials, sometimes nematodes and small soil animals. As they eat and digest, they aid in mixing the different layers of soil. Millipedes and centipedes both have many legs. Millipedes have more legs and a vegetarian diet unlike the carnivorous centipedes. Ants and termites sometimes build nests below the ground or make a mound. Finally, white grubs are the larvae of May beetles or June bugs. They have black heads and 3 pairs of legs and are usually considered an agricultural pest. Burrowing mammals alter the soil by creating channels with their activity. Prairie dogs, mice, moles, rabbits, badgers, chipmunks, and gophers are all examples of mammals that can be found underground. MATERIALS
• Field crate • Mole skull • Soil samples from different regions (Wetland, Anthropogenic, Forest, Colorado
Plateau, Great Basin) • Plant samples from the different regions • Insect samples from the different regions • Large paper
Procedure
1. Discuss the types of living things found in soil. 2. Go to the Field Crate and observe:
a. Notice what types of living things found for each region. b. How do the different types of plants and animals differ for each region?
Discuss their adaptations. 3. With the toolbox items, decide which items are consumers and which are
producers. 4. Choose one type of soil to diagram on your paper (i.e. anthropogenic) 5. Draw what a profile from that soil would look like (the different horizons and
surroundings above it). 6. Using the toolbox items as a guide, draw the different plants and animals that
would be found in your profile (i.e. the anthropogenic soil would have plants like crab grass and dandelion on the surface with roots below, the subsoil would have centipedes, pill bugs, and ants, then in the lowest layer there would be mostly broken up rocks and the bedrock.

25
UTAH CORE CURRICULUM Grade 2, Standard I, Objective 1c Grade 3, Standard III, Objective 3a Grade 4, Standard III, Objective 3a Grade 5, Standard I, Objective 1a Grade 6, Standard V, 1a BACKGROUND A microscope is a useful tool for scientists. It allows scientists to view soil in a completely new dimension – extremely close up. When using a microscope the details of the soil are magnified and you can better see the shapes, sizes, creatures, and pores of the soil. MATERIALS
• Microscope • Soil Slides (8)
o Earthworm intestinal region o Rhabditis (a type of nematode) o Moss Protonema o Oscillatoria (a type of cyanobacteria) o Dicot root o Dirt (soil)
• Paper and pencil PROCEDURE
1. Set up the microscope: • Pre-focus the slides
• Discuss the procedure for using a microscope. 2. Allow students to view several different slides under the
microscope: • Write down or draw observations. • What were they able to see with the microscope that
they couldn’t see with just the naked eye? 3. Have students decide which slides contain non-living and
living items. Of the living organisms, which are animals, plants, or from another kingdom?
4. Talk about the role each of the microorganisms plays in the soil (see soil ecology for more information).
5. Discuss some of the diseases we can get from the soil and why it is important to wear gloves, wash our hands as well as fruits and vegetables.
a. Listeriosis (http://www.cdc.gov/) b. Hook worm or Ancylostomiasis
(http://www.niaid.nih.gov/factsheets/roundwor.htm)
Soil Under the Microscope

26
http://ag.arizona.edu/pubs/garden/mg/botany/roots.html
UTAH CORE CURRICULUM Grade 1, Standard III, Objective; 1 a, d, e Grade 4, Standard V, Objective; 2 a, b BACKGROUND Roots are an important part of plants. One of their most important functions is to anchor and support the plant; however, roots also absorb water, act as a storehouse of energy, and transport nutrients to the other parts of the plant. Root growth largely depends on the conditions acting on the soil like temperature, amounts of water, oxygen and even carbon dioxide. The two main categories of root include tap roots and fibrous roots. A tap root is developed from the seed and enlarges to become the main, dominant root of the plant. Smaller root hairs extend from it, but there is only one primary root. In fibrous root systems the main root generally is short lived and is replaced by several smaller roots of equal size spreading out near the surface. Monocotyledon plants (like grass) tend to be fibrous. Roots help keep soil together (aggregated) and structured, protecting it from the elements of erosion that would destroy it. Fungi and actinomycete bacteria also aid in the development of soil’s structure. MATERIALS
• Field Crate o Hyacinth (bulb) o Cattail (rhizome) o Dandelion (taproot)
• Toolbox plants • Examples of different types of roots (onion, garlic, carrot, beetroot, sweet
potatoes, or ginger) • Meter sticks
PROCEDURE:
1. Roots as an anchor a. Discuss how roots help anchor and support the plant in the soil. b. Go outside and pull or dig a weed out of the ground (get permission if it is
more than an unwanted weed). Make sure to get the entire plant. Notice that the roots are holding soil. Decide if the roots are taproots or fibrous.
Finding Your Roots

27
c. Place meter sticks in the ground at several different depths. Notice how the deeper the stick, the more anchored it is.
d. In the Field Crate, look at the hyacinth, cattail, and dandelion and discuss what type of roots they have.
2. Roots as energy storage. Roots can store energy that is used as food by both plants and humans. Look at the some of the following roots that store energy.
a. Bulbs (onion, garlic) are underground storage organs with short stems where fleshy bases of leaves store food for the plant.
b. Carrots and beetroots are thickened taproot. The main root comes from the seed (radicle) and the root enlarges to become the dominant root of the plant. Common with dicot plants.
c. Sweet potatoes are fibrous monocot roots. d. Rhizome (ginger) – not a root, but a stem that grows horizontally

28
Bedrock: The solid layer of rock beneath the soil. Erosion: The wearing away and transportation of rock and soil material. Hectare: A unit of measurement equal to 100 acres. Hydration: Adding water to a substance. Humus (hyoo mus): The dark part of soil formed as plants and animals decay. Loam: Soil with approximately the same proportions of sand, silt, and clay. This is the best soil for growing plants Organic: Derived from or characteristic of a living thing. Oxidation: A chemical reaction where oxygen is added to the substance. Pedology: The study of soil. Non-organic: A non-living thing. Parent Materials: Loose, unconsolidated debris produced from the weathering and erosion of bedrock. Parent Rock: Rock from which the parent materials are made. Residual Soil: Soil formed from when the parent rock is not transported to a new area. Soil horizon: A layer of soil with a different composition from the layers above or below it. Soil Profile: The vertical section of soil that exposes all of the horizons. Texture: Relative proportions of sand, silt, and clay in the soil. Transported Soil: Soil formed when the parent material is transported or moved from its original spot (wind, water, glaciers, etc.). Weathering: The breaking down of rocks and minerals by natural processes such as water, wind or glacier.
Words to Know
29
Books Out of the Dust by Karen Hesse (grade 4-11) a novel Soil Science and Archaeology by Susan Limbrey Fundamentals of Soil Science 8th Ed. By Henry D. Foth; Michigan State University; John Wiley & Sons. Soils: An Introduction to Soils and Plant Growth 2nd Ed. By Roy L Donahue; Prentice-Hall Inc. Englewood Cliffs, New Jersey. Fundamentals of Soil Science 8th Ed by Henry D. Foth. Soil Links
• Utah Agriculture in the Classroom’s project “Dirt: Secrets in the Soil” can be downloaded online. http://extension.usu.edu/aitc/teachers/elementary/dirt.html
• United States Department of Agriculture Natural Resources website. • http://www.nrcs.usda.gov/ • http://www.science.org.au/nova/035/035act.htm (Australian Academy of
Science, Sodicity - a dirty word in Australia, activities, references) • http://www.spacegrant.hawaii.edu/class_acts/Soils.html (Hawaii Space Grant
College, Hawaii Institute of Geophysics and Planetology, University of Hawaii, 1996, Exploring Planets in the Classroom – Describing Soils, activities)
• http://soil.gsfc.nasa.gov/index.html (NASA, Soil Science Education Home Page, activities)
• http://cuba.fulton.k12.il.us/CHS/Agric/AdvAgSci/Soils/SoilProf/SoilProf.htm (Discussion of the soil profile, horizons, and how they form, Cuba Elementary School, Cuba, IL)
• http://www.agry.purdue.edu/clubs/agryclub/agryclub.htm (Purdue University Agronomy Club web site, a good place to order weed and crop seeds, soil texture material, clays, etc.)
• http://commtechlab.msu.edu/sites/dlc-me/zoo/ (DLC-ME | The Microbe Zoo) • http://dep.state.ct.us/wst/compost/hcompost.htm (CT Department of
Environmental Protection) • http://www.oldgrowth.org/compost/wormfaq.html (the Compost Resource Page -
Earthworm FAQ) • http://soil.gsfc.nasa.gov/index.html (Soil Science Education Page) • http://ltpwww.gsfc.nasa.gov/globe/protocol/structur.htm (Soil color, profiles
from Florida, Maryland, Michigan, Arizona, Bolivia) • http://www.nrcs.usda.gov/ (Natural Resources Conservation Service, NRCS (the
old Soil Conservation Service)) • http://geography.about.com/library/weekly/aa090699.htm (About.Com, Soil -
Geography - 09/06/99)
Additional Resources

30
• http://www.nrm.se/ev/research/nema.html.en (Nematoder – about nematode worms)
• http://www.soilcrust.org/ (Soil Crust Home) • http://www.projectsoil.org/ (Project Soil, a professional soil kit farmers, costs
$150) Thank you:
• Bill Case of Utah Geological Society • Debra Speilmaker of USU extension office

31
Not Just Dirt … The material that covers the surface of the earth, allowing plants, fungi and bacteria to grow is called soil. Soil forms as organic material (such as plants and animals) decay and the solid rock of the earth's crust (parent rock) break down. It can take from 200 to 1,000 years to form just an inch of topsoil. Soil is teeming with life, most of which cannot be seen with the human eye. These microorganisms include bacteria, nematodes, fungi and algae, which decay the organic matter and help in the formation of more soil. Just 1/2 teaspoon of soil can contain 100 million to 3 billion bacteria and around one million fungi. Sand, silt, and clay Soil Texture is the feel of a soil. Soils are a mixture of clay, silt, and sand, with some organic material tossed in. Clay, silt and sand refer to the different grain sizes present in the soil, which all feel different to the touch. Organic matter Characteristics: Clay feels sticky when wet smaller than 0.002mm Sand feels gritty 2 -0.05mm Silt feels like flour 0.05 - 0.002mm Loam is a soil made up of equals parts of sand and silt, with a smaller amount of clay. Loam is the best soil for growing plants. What is a soil profile? Soil is arranged in layers called horizons. A soil profile is a vertical section of the soil. There are five major soil horizons. They are: O horizon: This is the organic horizon.
Field Crate Information/ Text

32
A horizon: A mix of decomposed organic matter and mineral matter. B horizon: A darker layer with lots of clay minerals, reddish iron materials and some, but few organic materials. C horizon: Weathered material. Rocks can be found in this layer. R horizon: Bedrock or Parent Material
ALPINE An alpine region is the upper elevation limits of forest and tree growth; it is above the tree line. In Utah, alpine is usually from 9,500 to 10,000 feet. The climate is cool and vegetation is usually dwarfed. Most plants are perennial; they grow back each year. Alpine plants are slow growing and many species are eight to twelve years old before they flower. Lichen Lichens are a combination of fungi and green algae, sharing one body. They are great at weathering rocks and feed on the minerals the rocks contain. ANTHROPOGENIC Dandelions have a thick taproot that can be 10 inches long. They were imported from Europe as honeybee food. A dandelion flower is actually many tiny flowers, each of which produces a seed. Hyacinths are true Bulbs. Bulbs are living plants, not seeds. The flower bulb stores food and will produce flowers each year. Bulbs need soil. They will rot in standing water. Box elder bugs They are most abundant during hot, dry summers. Their main food is the sap of the female (seed-bearing) box elder tree. Alien Invaders Many plants and animals, such as the dandelion, originally came from different parts of the world. Though not all non-native species cause problems, any plant, animal or microbe that is not native to a region and threatens to cause harm in any way is an Invasive Species. Anthropogenic soil has been disturbed by human activities. It is the soil found in cities, towns, roadways, farms and lawns. Although there can be color variation and layers in anthropogenic soil, often times everything is so mixed up that the soil is considered Parent Material.

33
THE COLORADO PLATEAU The high, semi-arid Colorado Plateau encompasses 130,000 square miles of the Four Corners states, including Utah's southeastern corner. Mivida Soil Mivida is the unofficial state soil. Mivida soils are found in warm, semi-arid climates receiving between 8 to 13 inches of rain a year. Biological Soil Crusts Living soil crusts cover large parts of the Colorado Plateau. They are formed by a web of cyanobacteria, mosses and lichens. They create a shell that holds the soil particles together. The living crusts are usually darker than the surrounding areas. In the high desert of the Colorado plateau, these black crusts may encompass 70 to 80 percent of the living ground cover. Biological soil crusts are very fragile. They are especially damaged by tire tracks. Under the best circumstances, a thin veneer of cryptobiotic soil may take five to seven years. Cyanobaceria When cyanobacteria becomes wet, it moves through the soil. It leaves behind a trail of thin fibers that bind the soil together. FOREST SOIL Forest Soil provides nutrition for plants to grow. Healthy soils are made up of organic and inorganic material, water, air and billions of living creatures, from microscopic fungi to moles. Humus Humus [hyOO´mus] is the dark brown or black layer of decaying organic (plant and animal) material that occurs on the top of soil. Humus is formed when soil microorganisms, such as fungi or bacteria, break down animal and plant material. Plants are then able to use this material for nutrition. Fungi Fungi are not plants. They are placed in their own Kingdom. They absorb their food from the living or dead matter that they grow on. GREAT BASIN SOIL Mormon Crickets Mormon Crickets cannot fly. Their wings are too short. Instead they hop or crawl. They move during the daytime and can cover a mile a day.
34
The Great Basin The Great Basin is a cold desert with high elevations. Winter snowfall provides most of the Great Basin’s moisture. Because of the desert climate and a series of mountain ranges, surface streams are prevented from reaching the sea – that’s why it’s called a basin, it holds the water. Three distinct natural environments are encountered when crossing the Great Basin: Playas (salt basins that can become lakes; saltbush is what mostly grow here), Mountains, and Valleys. Sagebrush Sagebrush dominates the Great Basin landscape. Sagebrush stays green all year. It grows where there is little rain and where extremes in temperature are typical. Its narrow leaves are covered with tiny hairs to protect the plant from drying out. Its roots can cover large areas and the taproot pulls water from deep in the ground. WETLAND Cattails A cattail is a rhizome, not a bulb. A rhizome is the thickened stem of the plant. It grows sideways underground and does not store food, like a bulb does. Cattails are a sure sign of water and can grow nine feet tall. They have been around since the time of the dinosaurs. Wetlands Wetlands are areas where water covers the soil during the growing season. Wetland soils are hydric (flooded with water long enough for no oxygen to be present in the upper horizon). The plants that grow in wetlands have adapted to this soil type. These soils often are high in organic material. Shallow water and lots of nutrients lead to a very food-rich ecosystem. Wetlands are nature’s supermarkets. Utah Wetlands Although Wetlands cover only 1% of Utah’s land, 80% of Utah’s Wildlife use them at some stage of their life!


