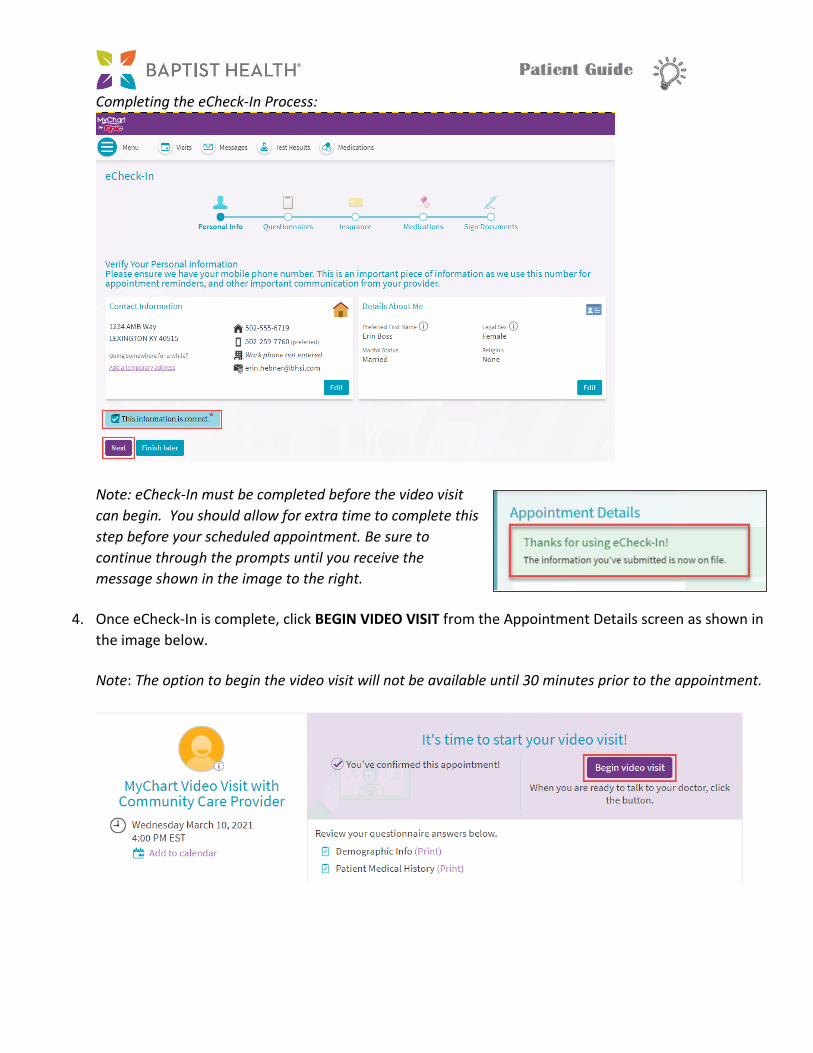
Step-by-Step Guide for MyChart Video Visits Using a Computer This guide will provide step-by-step instructions for using your computer to connect to a MyChart video visit with your healthcare provider. To receive the maximum benefit of your video visit without delays, please review and follow these instructions to ensure you are prepared for your appointment. Part I: Day before Your Appointment 1. You will need access to both MyChart and Zoom via the web. MyChart uses the Zoom Video Client to connect you with your healthcare provider by video. If you already have Zoom downloaded on your computer, skip to step 1b (Zoom Prep/Testing). To reset your MyChart password, call 502-253-4820 or 844-764-7820. a. Downloading Zoom Zoom: Open your web browser and go to zoom.us. Click on the Resources dropdown, and select Download Zoom Client. Click to download the first option in the list, Zoom Client for Meetings. Follow the on-screen prompts provided by your web browser to successfully complete the download. Note: You do NOT need to set up a Zoom account or sign in.
Transcript
Step-by-Step Guide for MyChart Video Visits Using a Computer This guide will provide step-by-step instructions for using your computer to connect to a MyChart video visit with your healthcare provider. To receive the maximum benefit of your video visit without delays, please review and follow these instructions to ensure you are prepared for your appointment.
Part I: Day before Your Appointment 1. You will need access to both MyChart and Zoom via the web. MyChart uses the Zoom Video Client to
connect you with your healthcare provider by video. If you already have Zoom downloaded on your computer, skip to step 1b (Zoom Prep/Testing). To reset your MyChart password, call 502-253-4820 or 844-764-7820.
a. Downloading Zoom
Zoom: Open your web browser and go to zoom.us. Click on the Resources dropdown, and select Download Zoom Client.
Click to download the first option in the list, Zoom Client for Meetings. Follow the on-screen prompts provided by your web browser to successfully complete the download. Note: You do NOT need to set up a Zoom account or sign in.