7
Woven Wood Shades STEP BY STEP INSTALLATION INSTRUCTIONS Loop Control
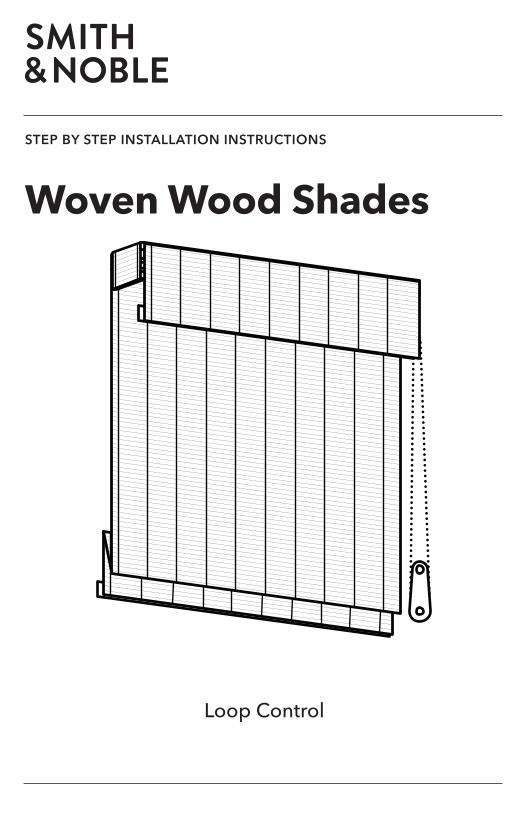
Woven Wood ShadesSTEP BY STEP INSTALLATION INSTRUCTIONS
Loop Control
1 2smithandnoble.com 800.248.8888
Table of Contents
Step 1 - Getting Started . . . . . . . . . . . . . . . . . . . . . . . . . . . . . 3
Overview - Loop Control & Bracket Quantity . . . . . . . . . . . . . . 4
Step 2 - Mounting the Brackets . . . . . . . . . . . . . . . . . . . . 5 - 6
Step 2 - Attaching Shade to Bracket . . . . . . . . . . . . . . . . . . 6
Step 3 - Attaching the Loop Control Tensioner . . . . . . . . . 7
Step 4 - Installing the Cord Tensioner . . . . . . . . . . . . . . . . . 8
Step 4 - Operating the Shade . . . . . . . . . . . . . . . . . . . . . . . . 8
(Optional) Hold Down Brackets . . . . . . . . . . . . . . . . . . . . . . . . . . 9
Troubleshooting . . . . . . . . . . . . . . . . . . . . . . . . . . . . . . . . . . . . . 10
Care & Cleaning . . . . . . . . . . . . . . . . . . . . . . . . . . . . . . . . . . . . . 10
Safety . . . . . . . . . . . . . . . . . . . . . . . . . . . . . . . . . . . . . . . . . . 10
Warranty . . . . . . . . . . . . . . . . . . . . . . . . . . . . . . . . . . Back Cover
A Smooth Set-UpWe want you to love your new window coverings and
that includes having a smooth installation experience . We
recommend saving this guide. If you encounter any difficulties
or questions, please reach out to us for help . It’s why we’re here .
Call us at 800 .248 .8888 for more info on installation .
We recommend you hold on to all packaging until your
window coverings are fully installed . Should something go
wrong (we strongly doubt it), we want any potential returns to
be a painless as possible .
Customer Service Hours Monday — Friday: 6am — 6pm PT Saturday — Sunday: 7am — 4pm PT
smithandnoble .com
EverythingYou Need
3 4smithandnoble.com 800.248.8888
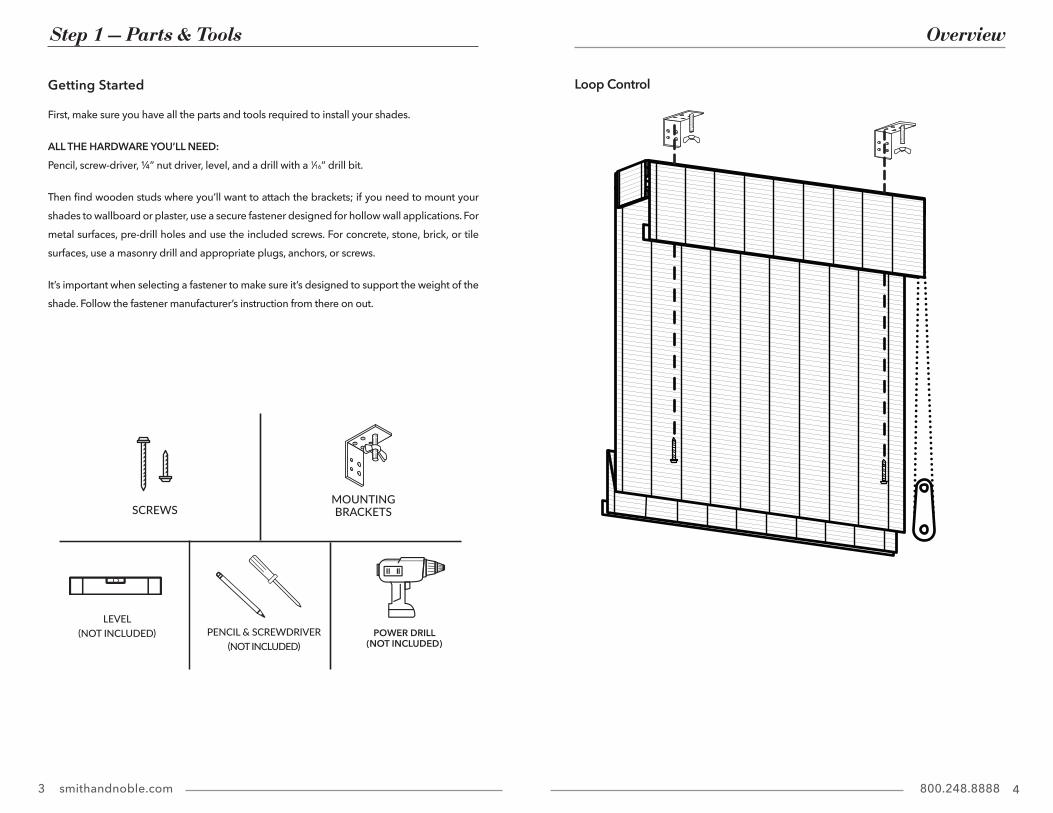
First, make sure you have all the parts and tools required to install your shades .
ALL THE HARDWARE YOU’LL NEED: Pencil, screw-driver, ¼” nut driver, level, and a drill with a 1⁄16” drill bit .
Then find wooden studs where you’ll want to attach the brackets; if you need to mount your shades to wallboard or plaster, use a secure fastener designed for hollow wall applications . For metal surfaces, pre-drill holes and use the included screws . For concrete, stone, brick, or tile surfaces, use a masonry drill and appropriate plugs, anchors, or screws .
It’s important when selecting a fastener to make sure it’s designed to support the weight of the shade . Follow the fastener manufacturer’s instruction from there on out .
Getting Started Loop Control
POWER DRILL(NOT INCLUDED)
OverviewStep 1 — Parts & Tools
SCREWSMOUNTING BRACKETS
PENCIL & SCREWDRIVER(NOT INCLUDED)
LEVEL(NOT INCLUDED)
5 6smithandnoble .com 800 .248 .8888
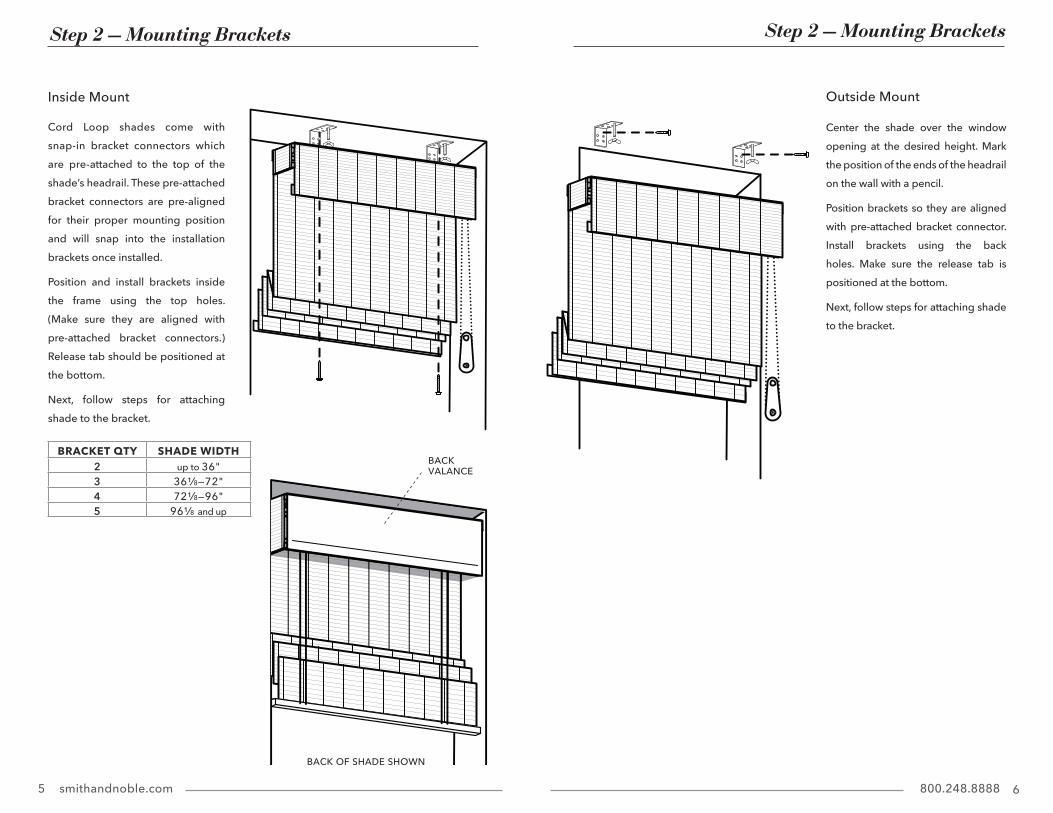
Inside Mount Outside Mount
Center the shade over the window opening at the desired height . Mark the position of the ends of the headrail on the wall with a pencil .
Position brackets so they are aligned with pre-attached bracket connector . Install brackets using the back holes . Make sure the release tab is positioned at the bottom .
Next, follow steps for attaching shade to the bracket .
Cord Loop shades come with snap-in bracket connectors which are pre-attached to the top of the shade’s headrail . These pre-attached bracket connectors are pre-aligned for their proper mounting position and will snap into the installation brackets once installed .
Position and install brackets inside the frame using the top holes . (Make sure they are aligned with pre-attached bracket connectors .) Release tab should be positioned at the bottom .
Next, follow steps for attaching shade to the bracket .
Step 2 — Mounting BracketsStep 2 — Mounting Brackets
BRACKET QTY SHADE WIDTH2 up to 36"3 36¹⁄8—72"4 72¹⁄8—96"5 96¹⁄8 and up
BACK VALANCE
BACK OF SHADE SHOWN
7 8smithandnoble.com 800.248.8888
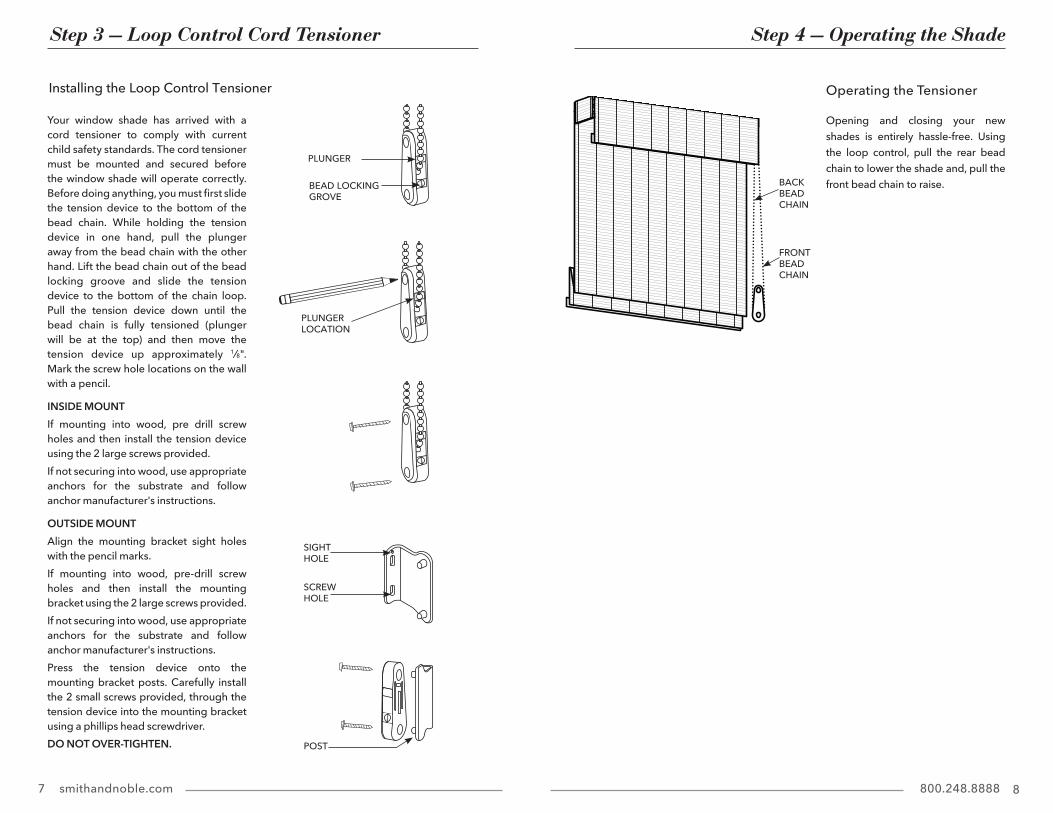
Installing the Loop Control Tensioner
Your window shade has arrived with a cord tensioner to comply with current child safety standards . The cord tensioner must be mounted and secured before the window shade will operate correctly . Before doing anything, you must first slide the tension device to the bottom of the bead chain . While holding the tension device in one hand, pull the plunger away from the bead chain with the other hand . Lift the bead chain out of the bead locking groove and slide the tension device to the bottom of the chain loop . Pull the tension device down until the bead chain is fully tensioned (plunger will be at the top) and then move the tension device up approximately 1 ⁄8" . Mark the screw hole locations on the wall with a pencil .
INSIDE MOUNTIf mounting into wood, pre drill screw holes and then install the tension device using the 2 large screws provided .If not securing into wood, use appropriate anchors for the substrate and follow anchor manufacturer's instructions .
OUTSIDE MOUNTAlign the mounting bracket sight holes with the pencil marks .If mounting into wood, pre-drill screw holes and then install the mounting bracket using the 2 large screws provided .If not securing into wood, use appropriate anchors for the substrate and follow anchor manufacturer's instructions .Press the tension device onto the mounting bracket posts . Carefully install the 2 small screws provided, through the tension device into the mounting bracket using a phillips head screwdriver . DO NOT OVER-TIGHTEN.
Step 4 — Operating the ShadeStep 3 — Loop Control Cord Tensioner
Operating the Tensioner
Opening and closing your new shades is entirely hassle-free . Using the loop control, pull the rear bead chain to lower the shade and, pull the front bead chain to raise .
PLUNGER
BEAD LOCKINGGROVE
PLUNGERLOCATION
SIGHTHOLE
SCREWHOLE
POST
FRONT BEADCHAIN
BACK BEADCHAIN
9 10smithandnoble.com 800.248.8888
Hold Down Bracket Troubleshooting
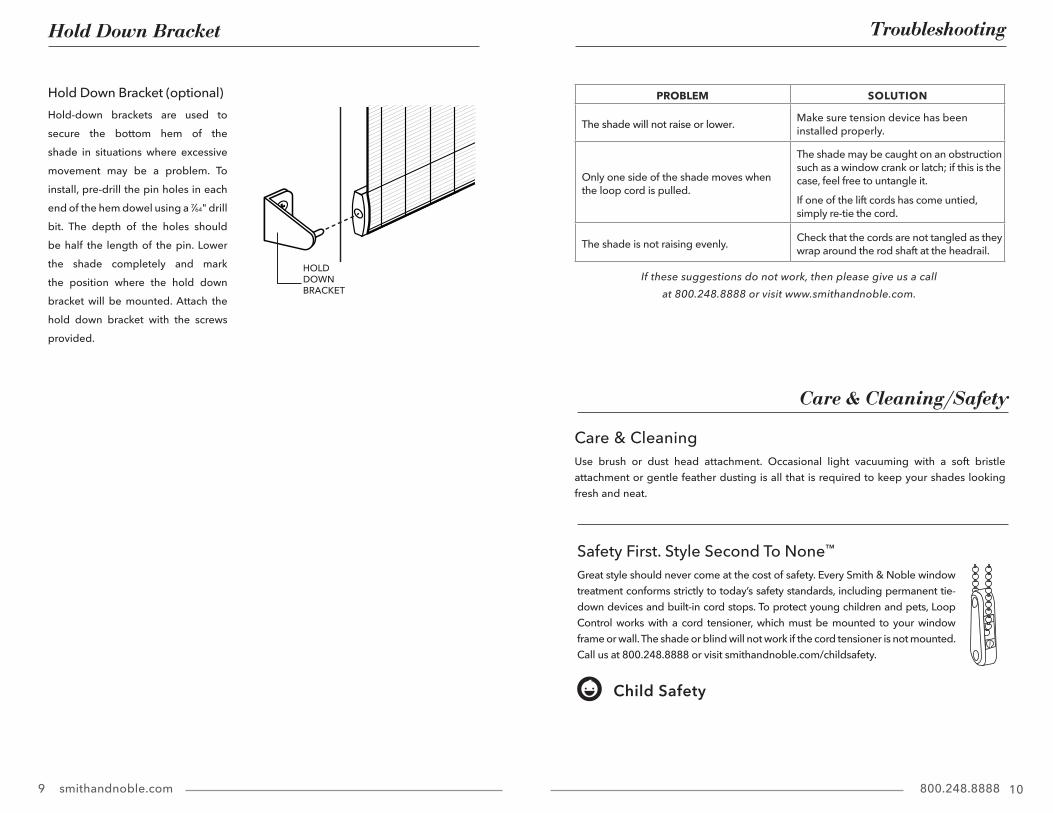
Hold Down Bracket (optional)Hold-down brackets are used to secure the bottom hem of the shade in situations where excessive movement may be a problem . To install, pre-drill the pin holes in each end of the hem dowel using a 7⁄64" drill bit . The depth of the holes should be half the length of the pin . Lower the shade completely and mark the position where the hold down bracket will be mounted . Attach the hold down bracket with the screws provided .
If these suggestions do not work, then please give us a call at 800.248.8888 or visit www.smithandnoble.com.
PROBLEM SOLUTION
The shade will not raise or lower . Make sure tension device has been installed properly .
Only one side of the shade moves when the loop cord is pulled .
The shade may be caught on an obstruction such as a window crank or latch; if this is the case, feel free to untangle it .
If one of the lift cords has come untied, simply re-tie the cord .
The shade is not raising evenly . Check that the cords are not tangled as they wrap around the rod shaft at the headrail .
Care & Cleaning /Safety
Care & CleaningUse brush or dust head attachment . Occasional light vacuuming with a soft bristle attachment or gentle feather dusting is all that is required to keep your shades looking fresh and neat .
Safety First . Style Second To None™
Great style should never come at the cost of safety . Every Smith & Noble window treatment conforms strictly to today’s safety standards, including permanent tie-down devices and built-in cord stops . To protect young children and pets, Loop Control works with a cord tensioner, which must be mounted to your window frame or wall . The shade or blind will not work if the cord tensioner is not mounted . Call us at 800 .248 .8888 or visit smithandnoble .com/childsafety .
Child Safety
HOLDDOWNBRACKET

© 2020 Smith & Noble Home, Inc . All Rights Reserved SN112020
Warranty Service
The enjoyment of your window coverings should be everlasting, which is why our products come with a limited lifetime warranty . The warranty applies to the original owner, requires a proof of purchase and covers defects in material or craftsmanship . Shades or blinds must have been properly installed . We reserve the right to determine if your window covering warrants a repair or a replacement . In need of warranty service? Call us at 800 .248 .8888 and we’ll arrange for a repair or replacement ASAP .


