Whitney A. Curtis Fall 2010 This guide is to assist you in building a Table of Authorities using Word 2010. Step One Once you have completed your brief, make another copy of the document, highlighting all of the authority contained within the document. Print that document containing the highlighted authority and use it as you create your Table of Authorities. It is also a good opportunity to check to make sure that your citations are correct. Step Two Next, you want to return to your original document and block out your first reference and then click on the References Tab, as seen below. STETSON UNIVERSITY COLLEGE OF LAW LIBRARY Building a Table of Authorities
Transcript
Whitney A. Curtis Fall 2010
This guide is to assist you in building a Table of Authorities using Word 2010.
Step One
Once you have completed your brief, make another copy of the document, highlighting all of the
authority contained within the document. Print that document containing the highlighted authority and
use it as you create your Table of Authorities. It is also a good opportunity to check to make sure that
your citations are correct.
Step Two
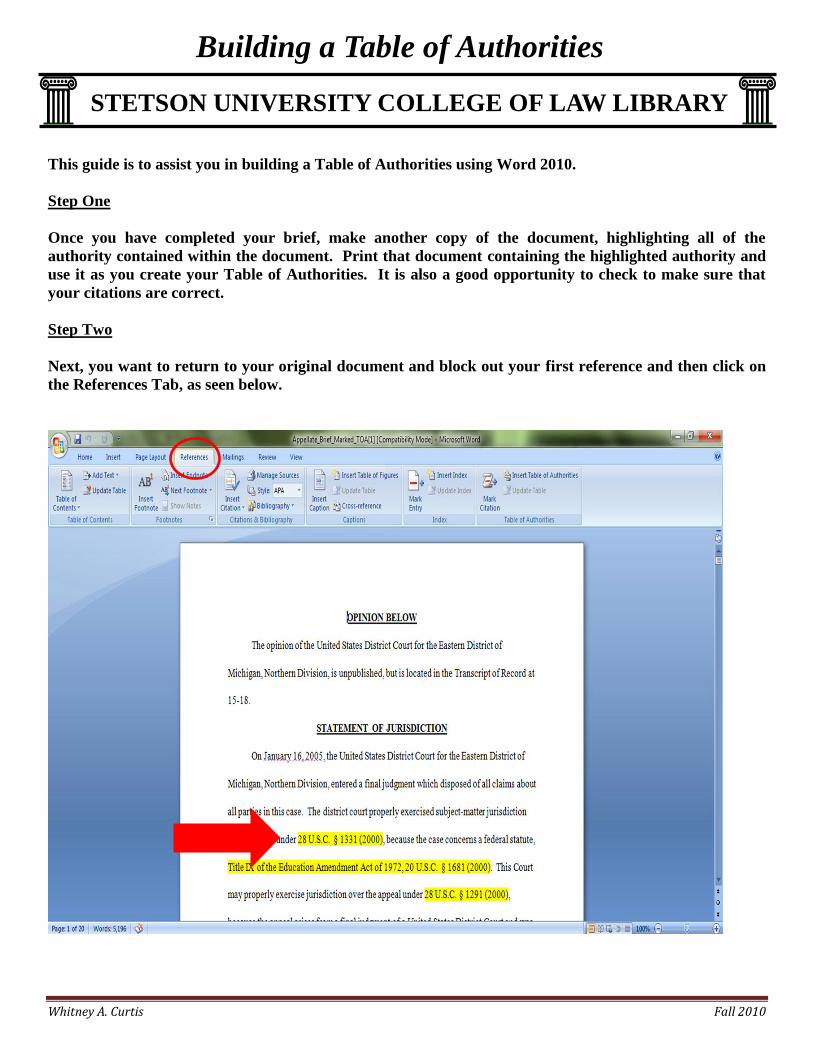
Next, you want to return to your original document and block out your first reference and then click on
the References Tab, as seen below.
STETSON UNIVERSITY COLLEGE OF LAW LIBRARY
Building a Table of Authorities
Whitney A. Curtis Fall 2010
Step Three
You will notice that under the References tab, at the far right side, is a box called Table of Authorities,
with three choices to choose from. You want to choose Mark Citation as seen below. The pop up screen
which appears after choosing Mark Citation, lists the citation you previously highlighted in the selected
text box, as well as in the short citation box.
Whitney A. Curtis Fall 2010
Step Four
However, you notice that the category listed in the Mark Citation box is actually Cases. Since, the item
selected is actually a statute you want to use the drop down menu and select the appropriate category –
statutes.
Whitney A. Curtis Fall 2010
Step Five
Once you have selected the appropriate category, in this instance, statutes, you then want to select Mark
All and close the Mark Citation box. Then you are going to go the very next citation contained in your
document and highlight it. In this instance, it is Title IX of the Education Amendment Act of 1972, 20
U.S.C. § 1681 (2000). Click on Mark Citation and the statute appears in the Mark Citation box. In this
instance, you will want to edit the short citation to just Title IX since you know that it has been referred
to in many instances in your document as Title IX. Once that is done, you want to select Mark All and
then close the Mark Citation box.
Now that you have seen how to select and mark statutes, let’s try and select and mark some cases.
Whitney A. Curtis Fall 2010
Step Six
First, you would scroll down in your document until you get to a case. As with statutes, you highlight the
case and then select Mark Citation so that the Mark Citation dialog box opens. You will notice that when
you do that, the category selected in the dialog box is the category of the last citation you highlighted
which is a statute. Since we are now selecting cases, you need to make sure that the category you select is
Cases.
NOTE: Pinpoint citations do not belong in Table of Authorities, so make sure you remove the pinpoint
citation before you mark the citation. Also, you will need to correct your short citation to reflect the first
name of the case, as seen below. Once you have removed the pinpoint citation and corrected the short
citation, as with statutes, you would select Mark All and then close the dialog box.
Whitney A. Curtis Fall 2010
Step Seven
You would follow these same steps selecting all of the remaining cases in your document, removing the
pinpoint citations and creating the short citation with the case name. Once all of the cases have been
selected in your document, you are ready to generate your Table of Authorities.
Step Eight
To generate the Table of Authorities, you want to return to the beginning of your document. Scroll down
a few spaces and enter the title “Table of Authorities.” Then you return to the References Tab and click
on the Insert Table of Authorities symbol shown below.
Whitney A. Curtis Fall 2010
Step Nine
The Insert Table of Authorities dialog box opens as shown below. Make sure you keep the Use passim
and keep original formatting radial buttons selected. Make sure you have All selected under Category
and then click OK and the Table of Authorities is generated.
Whitney A. Curtis Fall 2010
Step Ten
You know have your Table of Authorities. If you change the Table of Authorities, you may use the
Update Table of Authorities feature to make the necessary changes, as seen below.