29
| Date post: | 03-Jun-2018 |
| Category: |
Documents |
| Upload: | ravinderjs |
| View: | 219 times |
| Download: | 0 times |

8/12/2019 Telephone Guide - 9611G IP (May 2012)
http://slidepdf.com/reader/full/telephone-guide-9611g-ip-may-2012 1/29

8/12/2019 Telephone Guide - 9611G IP (May 2012)
http://slidepdf.com/reader/full/telephone-guide-9611g-ip-may-2012 2/29
2
About Your Telephone .................................................................................................................................. 3
Conventions .................................................................................................................................................. 7
Feature Finder ............................................................................................................................................... 8
Answer a Call ........................................................................................................................................... 10
Make a Call .............................................................................................................................................. 11
Redial ...................................................................................................................................................... 12
Hold ......................................................................................................................................................... 12
Mute ........................................................................................................................................................ 12
Bridged Calls ............................................................................................................................................ 13
Transfer ................................................................................................................................................... 14
Conference .............................................................................................................................................. 14
Call Log .................................................................................................................................................... 16
Contacts .................................................................................................................................................. 18
Call Forwarding All Calls .......................................................................................................................... 20
Send All Calls ........................................................................................................................................... 20
Message .................................................................................................................................................. 20
Directory ................................................................................................................................................. 21
Telephone Settings ................................................................................................................................. 21
Dialing Numbers while on Campus ............................................................................................................. 25
Tones and Their Meanings .......................................................................................................................... 27
Ringing Tones .......................................................................................................................................... 27
Handset Tones ........................................................................................................................................ 27
Troubleshooting .......................................................................................................................................... 28
Glossary ....................................................................................................................................................... 28
Last Updated 03-2012

8/12/2019 Telephone Guide - 9611G IP (May 2012)
http://slidepdf.com/reader/full/telephone-guide-9611g-ip-may-2012 3/29
8/12/2019 Telephone Guide - 9611G IP (May 2012)
http://slidepdf.com/reader/full/telephone-guide-9611g-ip-may-2012 4/29
4
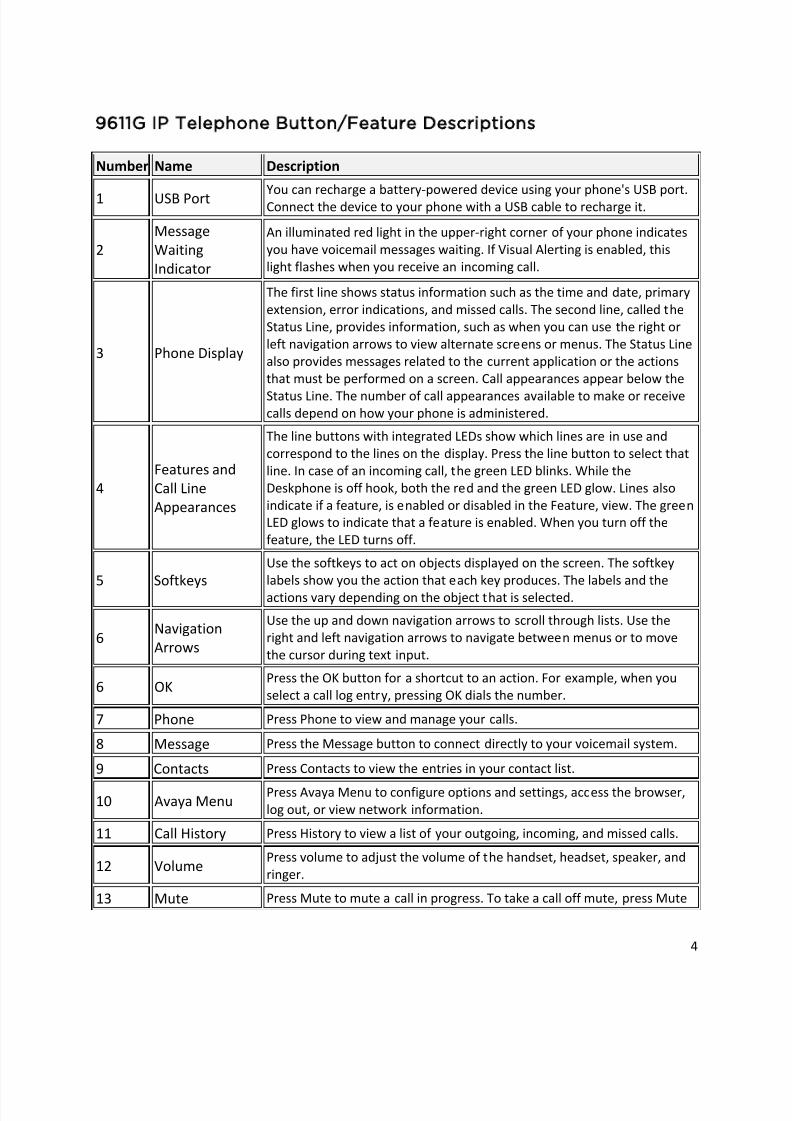
9611G IP Telephone Button/Feature Descriptions
Number Name Description
1 USB Port You can recharge a battery-powered device using your phone's USB port.Connect the device to your phone with a USB cable to recharge it.
2
Message
Waiting
Indicator
An illuminated red light in the upper-right corner of your phone indicates
you have voicemail messages waiting. If Visual Alerting is enabled, this
light flashes when you receive an incoming call.
3 Phone Display
The first line shows status information such as the time and date, primary
extension, error indications, and missed calls. The second line, called the
Status Line, provides information, such as when you can use the right or
left navigation arrows to view alternate screens or menus. The Status Line
also provides messages related to the current application or the actions
that must be performed on a screen. Call appearances appear below the
Status Line. The number of call appearances available to make or receivecalls depend on how your phone is administered.
4
Features and
Call Line
Appearances
The line buttons with integrated LEDs show which lines are in use and
correspond to the lines on the display. Press the line button to select that
line. In case of an incoming call, the green LED blinks. While the
Deskphone is off hook, both the red and the green LED glow. Lines also
indicate if a feature, is enabled or disabled in the Feature, view. The green
LED glows to indicate that a feature is enabled. When you turn off the
feature, the LED turns off.
5 Softkeys
Use the softkeys to act on objects displayed on the screen. The softkey
labels show you the action that each key produces. The labels and the
actions vary depending on the object that is selected.
6Navigation
Arrows
Use the up and down navigation arrows to scroll through lists. Use the
right and left navigation arrows to navigate between menus or to move
the cursor during text input.
6 OKPress the OK button for a shortcut to an action. For example, when you
select a call log entry, pressing OK dials the number.
7 Phone Press Phone to view and manage your calls.
8 Message Press the Message button to connect directly to your voicemail system.
9 Contacts Press Contacts to view the entries in your contact list.
10 Avaya MenuPress Avaya Menu to configure options and settings, access the browser,
log out, or view network information.
11 Call History Press History to view a list of your outgoing, incoming, and missed calls.
12 VolumePress volume to adjust the volume of the handset, headset, speaker, and
ringer.
13 Mute Press Mute to mute a call in progress. To take a call off mute, press Mute

8/12/2019 Telephone Guide - 9611G IP (May 2012)
http://slidepdf.com/reader/full/telephone-guide-9611g-ip-may-2012 5/29
5
again.
14 SpeakerPress Speaker to use the speakerphone. To take a call off speakerphone,
lift the handset and press Speaker.
15 HeadsetPress Headset to use the headset if it is connected. Only HIS headset cords
are compatible with your phone.
Your Telephone Number
Your telephone number is displayed on the right-side of the screen as a 5-digit number within the yellow
“Line Button” lines. If the first digit of the number is a 2, your phone number is 517-432-xxxx. If the first
digit of the number is a 3, your phone number is 517-353-xxxx. If the first digit of the number is a 4,
your phone number is 517-884-xxxx. If the first digit of the number is a 5, your phone number is 517-
355-xxxx. You may have an additional local number assigned to your phone if you reside in Grand
Rapids, Detroit or Macomb Community College.
For example, if your phone displays the number “31855”, your phone number is 517-353-1855.
Scrolling and Navigation
When navigating through the options and features on your telephone display, use the
navigation arrows to scroll and buttons to select lines or options.
Use the up and down navigation arrows to scroll up or down through lists. Use the right and left
navigation arrows to go to other screens when indicated by the Prompt Line or to move the
cursor right or left when entering text.
When you scroll to a line on the display, that line is selected. The selected line is highlighted
with a yellow highlight and a yellow carrot on the right side of the screen. The softkey labels will
change according to the options available for the highlighted line. The OK button is a shortcut
for the default action. For example, when you select an entry in your Contacts list, pressing OK
places a call to that person.
Telephone Stand
Your telephone can be placed in two positions, a lower position and an upright position. To
switch the phone from the lower position to the upright position (or visa versa), slide the stand
to the left until it becomes loose and rotate the stand 180°. Line up the tabs on the back for the
position you wish to keep and lock in place by sliding it right. If your phone is in the upright
position, reverse the tab located below the switchhook in the top ear piece pocket (on the front
of the phone). This will keep the handset seated in the correct position. You will need a small
screwdriver to lift this tab out.
8/12/2019 Telephone Guide - 9611G IP (May 2012)
http://slidepdf.com/reader/full/telephone-guide-9611g-ip-may-2012 6/29
6
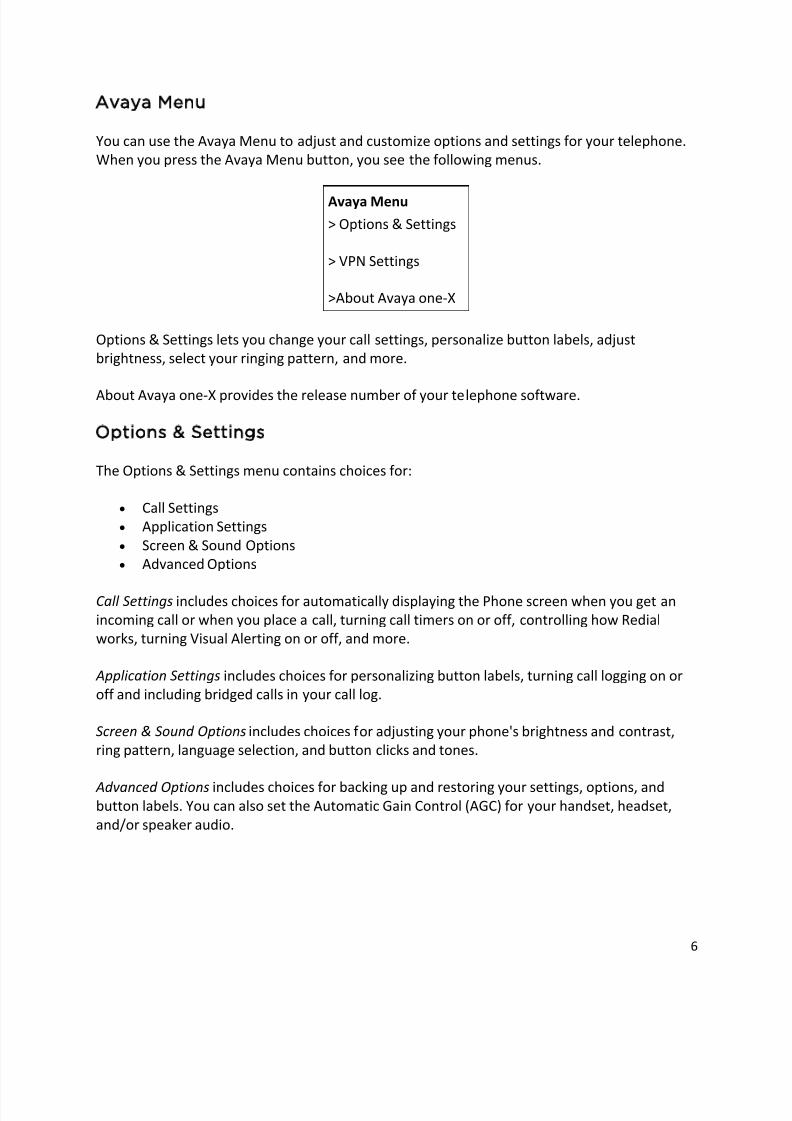
Avaya Menu
You can use the Avaya Menu to adjust and customize options and settings for your telephone.
When you press the Avaya Menu button, you see the following menus.
Avaya Menu
> Options & Settings
> VPN Settings
>About Avaya one-X
Options & Settings lets you change your call settings, personalize button labels, adjust
brightness, select your ringing pattern, and more.
About Avaya one-X provides the release number of your telephone software.
Options Settings
The Options & Settings menu contains choices for:
• Call Settings
• Application Settings
• Screen & Sound Options
• Advanced Options
Call Settings includes choices for automatically displaying the Phone screen when you get an
incoming call or when you place a call, turning call timers on or off, controlling how Redial
works, turning Visual Alerting on or off, and more.
Application Settings includes choices for personalizing button labels, turning call logging on or
off and including bridged calls in your call log.
Screen & Sound Options includes choices for adjusting your phone's brightness and contrast,
ring pattern, language selection, and button clicks and tones.
Advanced Options includes choices for backing up and restoring your settings, options, andbutton labels. You can also set the Automatic Gain Control (AGC) for your handset, headset,
and/or speaker audio.

8/12/2019 Telephone Guide - 9611G IP (May 2012)
http://slidepdf.com/reader/full/telephone-guide-9611g-ip-may-2012 7/29
8/12/2019 Telephone Guide - 9611G IP (May 2012)
http://slidepdf.com/reader/full/telephone-guide-9611g-ip-may-2012 8/29

8/12/2019 Telephone Guide - 9611G IP (May 2012)
http://slidepdf.com/reader/full/telephone-guide-9611g-ip-may-2012 9/29
9
Transfer
Transfers a call from your telephone to another extension or outside number. Use when your
caller needs to speak further with someone else.
Conference
Lets you speak with up to five people in different locations on the same call. Additional
conferencing options may be available through Expanded Meet-Me Conferencing. Contact your
system administrator for more information about this feature.
Call Log
When you have one or more missed calls, the Call Log button lights and the Missed Calls icon
and the number of missed calls display on the top line.
Contacts
Permits you to use your contact list as an address book. You can save up to 250 names and
telephone numbers.
Call Forwarding All Calls
Allows you to set a number to which your calls will be forwarded, or turn off call forwarding if it
is already on. You must enter the telephone number where the calls will be forwarded each
time you use this feature. If call forwarding is turned on, a Forwarding icon appears on the
top line of your display screen. The forwarding features available on your phone depend on theoptions your system administrator has set. For more information about the options available to
you, contact your system administrator.
Send All Calls
Sends your incoming calls directly to voicemail. Incoming calls ring once at your extension and
then go directly to a number which is set by MSU Telecom Systems. If the SAC feature is
administered on your phone, a SendAll softkey appears on the Phone screen. Pressing SendAll
turns Send All Calls on. If it is already on, pressing SendAll turns it off. You can also turn Send All
Calls on or off by using the telephone Features list. The forwarding features available on your
phone depend on the options your system administrator has set. For more information aboutthe options available to you, contact your system administrator.

8/12/2019 Telephone Guide - 9611G IP (May 2012)
http://slidepdf.com/reader/full/telephone-guide-9611g-ip-may-2012 10/29
10
Message
The lighted Message button and a red light on the upper right-hand corner of your telephone
indicate when you have messages waiting. Your messages are an administered function.
Contact your system administrator with any questions.
Directory
Searches for the extension of another user in your location by allowing you to key in the user's
name with the dial pad. Use as a handy quick reference source for extension number
information.
Telephone Settings
Allows you to configure various settings to utilize advanced features of your telephone.
Answer a Call
To answer an incoming call:
1. If you are not on another call, lift the handset, or press the line button next to the
incoming call or press Speaker to answer using the speakerphone, or press Headset to
answer using the headset.
If you are on another call, from the Phone screen, scroll to the line with the incoming
call and press Answer or OK.
o You are connected to the incoming call.
Note: To automatically display the Phone screen whenever you receive an incoming call, set the
Go to Phone Screen on Ringing option to Yes.
To send an incoming call directly to voicemail:
1.
Press To Vmail.o The incoming call goes directly to voicemail.
To ignore an incoming call:
1. Press Ignore.
8/12/2019 Telephone Guide - 9611G IP (May 2012)
http://slidepdf.com/reader/full/telephone-guide-9611g-ip-may-2012 11/29
11
o The ringer is turned off for the currently incoming call.
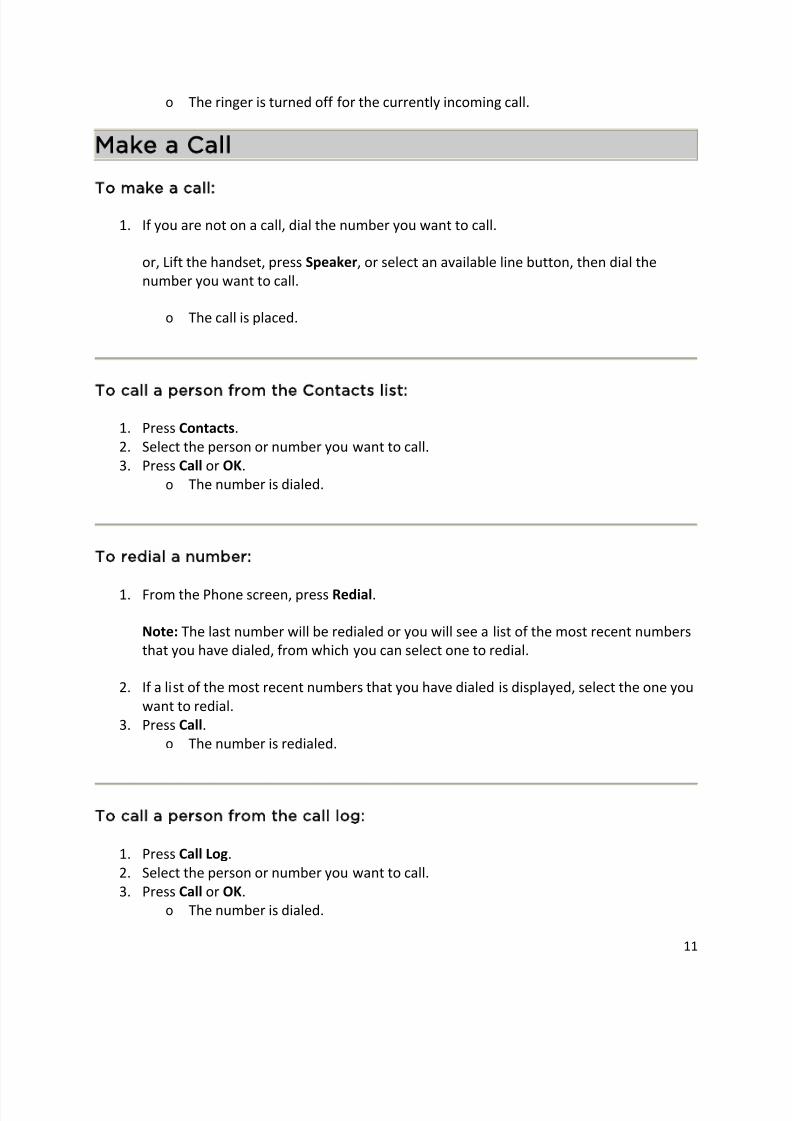
Make a Call
To make a call:
1. If you are not on a call, dial the number you want to call.
or, Lift the handset, press Speaker, or select an available line button, then dial the
number you want to call.
o The call is placed.
To call a person from the Contacts list:
1. Press Contacts.
2. Select the person or number you want to call.
3. Press Call or OK.
o The number is dialed.
To redial a number:
1. From the Phone screen, press Redial.
Note: The last number will be redialed or you will see a list of the most recent numbers
that you have dialed, from which you can select one to redial.
2. If a list of the most recent numbers that you have dialed is displayed, select the one you
want to redial.
3. Press Call.
o The number is redialed.
To call a person from the call log:
1. Press Call Log.
2. Select the person or number you want to call.
3. Press Call or OK.
o The number is dialed.

8/12/2019 Telephone Guide - 9611G IP (May 2012)
http://slidepdf.com/reader/full/telephone-guide-9611g-ip-may-2012 12/29
12
Redial
To redial a number:
1. From the Phone screen, press Redial.
Note: The last number will be redialed or you will see a list of the most recent numbers
that you have dialed, from which you can select one to redial.
2. If a list of the most recent numbers that you have dialed is displayed, select the one you
want to redial.
3. Press Call.
o The number is redialed.
Hold
To put a call on hold:
1. From the main Phone screen, select the line you want to put on hold.
2. Press Hold.
o The call is placed on hold.
To retrieve a call from hold:
1. Press Resume.
o The held call is retrieved.
Mute
To mute a call:
1. Press the Mute button.
o The Mute button light turns on.
o The other person cannot hear you.
To unmute a call:
1. Switch between the handset, headset, or speakerphone.
8/12/2019 Telephone Guide - 9611G IP (May 2012)
http://slidepdf.com/reader/full/telephone-guide-9611g-ip-may-2012 13/29
13
or, Press the Mute button again.
o The Mute button light turns off.
o The call is unmuted and the other person can hear you again.
Bridged Calls
To answer a call on a bridged line:
Answering a call on a bridged line is basically the same as a call on a primary line. If the ringing
line is selected, you can answer by picking up the handset or by pressing Speaker or Headset or
Answer.
1. Select the bridged call that you want to answer.
Note: The ringing line will be selected automatically if there are no other active calls. Ifyou are on another call when a call comes in to a bridged line, you have to select the
ringing line (just like for an incoming call to a primary line).
2. Press Answer.
o You are connected to the incoming call.
To make an outgoing call on a bridged line:
Note: When you make a call on a bridged line, you are using another person’s line. The caller ID
will show the call as coming from you or coming from the person whose line you are using. If
you have any questions about how the name or extension displays to the person you are
calling, contact MSU Telecom Systems.
1. Select the bridged line you want to use.
2. Press OK.
{dial tone}
3. Dial the telephone number, or call the person from the Contacts list, or call the personfrom the Call Log list.
o The outgoing call is placed.

8/12/2019 Telephone Guide - 9611G IP (May 2012)
http://slidepdf.com/reader/full/telephone-guide-9611g-ip-may-2012 14/29
14
To join a call on a bridged line:
1. Select the line associated with bridged call in progress that you want to join.
2. Press Bridge.o You are connected to the call.
Transfer
To transfer a call:
1. From the Phone screen, select the line you want to transfer.
2. Press Transfer.
3. Dial the telephone number, or call the person from the Contacts list, or call the person
from the Call Log list.4. Press Complete.
o The call is transferred.
Conference
To add a person on hold to a conference call:
1. From the Phone screen, select your active call.
2. Press Conf .
3. Select the call on hold that you want to add to the conference.4. Press Resume to take the call off hold.
5. Press Join to add the person to the conference call.
o The new person is added to the active call.
To set up a conference call:
1. From the Phone screen, select your active call.
2. Press Conf .
3. Dial the telephone number, or call the person from the Contacts list, or call the person
from the Call Log list.
4. Press Join to add the person to the existing call.
o The new person is added to the active call.
8/12/2019 Telephone Guide - 9611G IP (May 2012)
http://slidepdf.com/reader/full/telephone-guide-9611g-ip-may-2012 15/29
15
To drop the last person added to conference call:
1. From the Phone screen, select your active call.
2. Press Drop.
o The last person added to the conference call is dropped.
To drop a person from a conference call:
1. From the Phone screen, select your active call.
2. Press More then Details.
3. Select the person you want to drop.
4. Press Drop.
o The selected person is dropped from the conference call.
To put a conference call on hold:
1. While you are on the conference call, press Hold.
o The conference call is put on hold.
o The other parties can still talk to each other.
2. Press Resume or OK to resume the conference call.
To retrieve a conference call from hold:
1. Press Resume or OK.
o The conference call is retrieved from hold.
To mute a person on a conference call:
Note: The individual muting feature is not available on all phones. If you do not see Silence
when you choose a person, you cannot mute that person.
1. During a conference call, from the Phone screen, press More > Details.
2. Select the person you want to mute.
3. Press Silence.
o The person is muted.

8/12/2019 Telephone Guide - 9611G IP (May 2012)
http://slidepdf.com/reader/full/telephone-guide-9611g-ip-may-2012 16/29
16
To unmute a person on a conference call:
1. Press Silence.
o The person is unmuted.
Call Log
To view the call log:
1. Press History.
Note: You can go to the top of the list by pressing History again.
2. Scroll to the right or left to view separate lists of your answered, outgoing, or missedcalls lists.
To view call log details:
1. Press History.
2. Select the number you want to view.
3. Press Details.
4. To return to the list view, press Back.
To call a person from the call log:
1. Press History.
2. Select the person or number you want to call.
3. Press Call or OK.
o The number is dialed.
To add an entry from the call log to your Contacts list:
1. Press History.
2. Select the number you want to add to your Contacts list.
3. Press +Contact.
4. Edit the name and telephone number, if necessary.
8/12/2019 Telephone Guide - 9611G IP (May 2012)
http://slidepdf.com/reader/full/telephone-guide-9611g-ip-may-2012 17/29
17
5. Press Save.
o The new entry is added to the Contacts list.
To clear all entries from the call log:
Clearing all entries from a call log might or might not delete all of the entries in every log. For
example, if you are viewing the Outgoing Calls list, only outgoing calls are deleted from the call
log. However, if you are viewing the All Calls list, pressing Clear All deletes all calls from the call
log.
1. Press History.
2. Select the list you want to delete.
3. Press More.
4. Press Clear All.
o The display requests confirmation.
5. Press Clear All again or OK to confirm.
o All of the entries from the list you were viewing are deleted.
To remove an entry from the call log:
1. Press History.
2. Select the number you want to delete.
3. Press More > Delete.o The display requests confirmation.
Note: If you want to cancel and exit this procedure press Cancel.
4. Press Delete.
o The selected call log entry is deleted.
To toggle call logging on or off:
1. Press Avaya Menu.
2. Select Options & Settings or Phone Settings.
3. Press Select or OK.
4. Select Application Settings.
5. Press Select or OK.
6. Select the type of call logging you want to turn on or off.
8/12/2019 Telephone Guide - 9611G IP (May 2012)
http://slidepdf.com/reader/full/telephone-guide-9611g-ip-may-2012 18/29
18
Note: To turn logging of bridged lines on or off, select Log Bridged Calls and press
Change or OK.
7. Press Change or OK to turn call logging on or off.
8. Press Save.
Contacts
To add a new contact:
1. Press Contacts.
2. Press New.
3. Enter the name using the dialpad.
Note: Press the number key that corresponds to the letter or number you want to enter
until the letter or number is displayed. Pause before entering the next character if thecharacters are on the same key. Enter remaining letters or numbers. If you want to
delete the last character, press Bksp. If you want to remove a letter, number, space, or
symbol that is in the middle of the text you entered, use the left and right navigation
arrows to place your cursor after the character you want to remove. Once your cursor is
in the correct position, press Bksp to remove the character to the left of the cursor. To
change between upper and lower case letters, or to enter numbers, press More > Abc.
To cycle through the options (Abc/123/abc/ABC), press ABC again to until the type you
want to use is displayed. To enter characters that are not on your dialpad, press More >
Symbols and select the symbol you want to use then press OK to select the symbol. To
delete all text and start over, press Clear.
4. Select the next field.
5. Enter the (primary) telephone number.
6. Select the next field.
7. Select the type of number entered (general, work, mobile, home).
8. If you have another number for this contact, repeat Steps 5 through 7. You can add up
to three numbers for this contact.
9. Press Save or OK.
o The new contact is saved.
To add an entry from the call log to your Contacts list:
1. Press History.
2. Select the number you want to add to your Contacts list.
3. Press +Contact.
8/12/2019 Telephone Guide - 9611G IP (May 2012)
http://slidepdf.com/reader/full/telephone-guide-9611g-ip-may-2012 19/29
19
4. Edit the name and telephone number, if necessary.
5. Press Save.
o The new entry is added to the Contacts list.
To edit an existing contact:
1. Press Contacts.
2. Select the contact you want to edit.
3. Press More > Edit.
4. Choose the field you want to edit.
5. Use the dialpad and softkeys to make changes to the contact information.
6. Press Save or OK.
o Your changes are saved.
To delete a contact:
1. Press Contacts.
2. Select the contact you want to delete.
3. Press More > Delete.
o The display prompts for confirmation.
Note: If you want to exit this procedure and cancel the deletion, press Cancel.
4. Press Delete.
o The selected contact is deleted.
To call a person from the Contacts list:
1. Press Contacts.
2. Select the person or number you want to call.
3. Press Call or OK.
o The number is dialed.
To view Contacts details:
1. Press Contacts.

8/12/2019 Telephone Guide - 9611G IP (May 2012)
http://slidepdf.com/reader/full/telephone-guide-9611g-ip-may-2012 20/29
20
2. Select the contact you want to view.
3. Press Details.
o The information available for that contact is displayed.
Call Forwarding All Calls
To turn call forwarding on:
1. Press the Right navigation button to access the Features menu.
2. Select CFrwd from the list.
3. Enter the number to which you want to forward your calls.
{confirmation tone}
o All of your calls will be forwarded to the number you entered.
To turn call forwarding off:
1. Press the Right navigation button to access the Features menu.
2. Select CFrwd.
3. Press Select or OK.
{confirmation tone}
Send All Calls
To toggle Send All Calls on or off:
1. Press the Right navigation button to access the Features menu.
2. Select SendAllCalls.
3. Press Select or OK to turn Send All Calls on or off.
Message
To retrieve your messages:
1. Press the Message button or dial 2-2100. Alternatively, you can dial 517-432-2100 from
any outside phone to get to your voicemail. There is a separate Voicemail Users Guide
that covers the specific options for voicemail.
o You are connected directly to your voicemail system.

8/12/2019 Telephone Guide - 9611G IP (May 2012)
http://slidepdf.com/reader/full/telephone-guide-9611g-ip-may-2012 21/29
21
Directory
To call a person from the directory:
1. From the Phone screen, scroll right to access the Features menu.
2. Select Directory.
3. Press Select or OK.
4. Use the dialpad keys to start spelling the last name of the person you want to call.
Note: Press each dialpad key one time for each corresponding letter. For example, for
"Hill," press 4, 4, 5, 5.
5. If you want to scroll to the next displayed name, alphabetically, select Next.
6. Press OK, or enter the next letter.
7. When the name you want is indicated, select Make Call.
8. Press OK.o The call is placed.
Telephone Settings
To set redial options:
1. Press Avaya Menu.
2. Select Options & Settings or Phone Settings.
3. Press Select or OK.
4. Select Call Settings.5. Press Select or OK.
6. Select Redial.
7. Press Change or OK or the Right/Left Arrows to select either One Number and List.
Note: If you select One Number, then Redial will automatically dial the last number you
dialed. If you select List, then Redial will automatically display a list of the lat numbers
you dialed and permit you to make a selection.
8. Press Save.
o The redial option you selected is saved.
To change the ring pattern:
1. Press Avaya Menu.
2. Select Options & Settings or Phone Settings.
8/12/2019 Telephone Guide - 9611G IP (May 2012)
http://slidepdf.com/reader/full/telephone-guide-9611g-ip-may-2012 22/29
22
3. Press Select or OK.
4. Select Screen & Sound Options.
5. Press Select or OK.
6. Select Personalized Ringing.
7. Press Change or OK to see a list of the available ring patterns.
o Additional ring patterns are available by pressing the “Classic” or “Rich” softkey.8. Select a ring pattern to listen to it. If you want to hear it again, press Play or OK.
9. To enable the current ring pattern on your phone, press Save.
o The new ring pattern is saved.
To toggle button click sounds on and off:
1. Press Avaya Menu.
2. Select Options & Settings or Phone Settings.
3. Press Select or OK.
4. Select Screen & Sound Options.
5. Press Select or OK.
6. Select Button Clicks.
7. Press Change or OK to turn sounds on or off.
8. Press Save.
To turn error tones on or off:
1. Press Avaya Menu.
2. Select Options & Settings or Phone Settings.
3. Press Select or OK.
4. Select Screen & Sound Options.
5. Press Select or OK.
6. Select Error Tones.
7. Press Change or OK to toggle error tones on or off.
Note: If you turn error tones on, then your telephone will beep when you make a
mistake or take an action that is not allowed.
8. Press Save.
8/12/2019 Telephone Guide - 9611G IP (May 2012)
http://slidepdf.com/reader/full/telephone-guide-9611g-ip-may-2012 23/29
23
To configure visual alerts:
1. Press Avaya Menu.
2. Select Options & Settings or Phone Settings.3. Press Select or OK.
4. Select Call Settings.
5. Press Select or OK.
6. Select Visual Alerting.
7. Press Change or OK to turn Visual Alerting on or off.
Note: When the Visual Alerting option is turned on, incoming calls cause the LED in the
top right corner of the phone to flash.
8. Press Save.
To set Go To Phone Screen on Calling:
1. Press Avaya Menu.
2. Select Options & Settings or Phone Settings.
3. Press Select or OK.
4. Select Call Settings.
5. Press Select or OK.
6. Select Go to Phone Screen on Calling.7. Press Change or OK to set the option to Yes or No.
Note: If you select Yes, then the Phone screen will automatically be displayed each time
you place a call.
8. Press Save.
To set Go To Phone Screen on Ringing:
1. Press Avaya Menu.
2. Select Options & Settings or Phone Settings.
3. Press Select or OK.
4. Select Call Settings.
5. Press Select or OK.
6. Select Go to Phone Screen on Ringing.
8/12/2019 Telephone Guide - 9611G IP (May 2012)
http://slidepdf.com/reader/full/telephone-guide-9611g-ip-may-2012 24/29
24
7. Press Change or OK to set the option to Yes or No.
Note: If you select Yes, then the Phone screen will automatically be displayed each time
you get an incoming call.
8. Press Save.
To adjust the brightness of the display:
1. Press Avaya Menu.
2. Select Options & Settings or Phone Settings.
3. Press Select or OK.
4. Select Screen & Sound Options.
5. Press Select or OK.
6. Select Brightness.
7. Press Change or OK.
8. Select Phone or an SBM24 Module.
9. Scroll to the right or left to adjust the brightness.
10. Press Save or OK.
o The brightness setting is saved.
To configure the call timers:
You can set your call settings to display the duration of calls. You can turn the call timer display
on or off.
1. Press Avaya Menu.
2. Select Options & Settings or Phone Settings.
3. Press Select or OK.
4. Select Call Settings.
5. Press Select or OK.
6. Select Display Call Timers.
7. Press Change or OK to toggle the call timer display on or off.
8. Press Save.
8/12/2019 Telephone Guide - 9611G IP (May 2012)
http://slidepdf.com/reader/full/telephone-guide-9611g-ip-may-2012 25/29
25
To edit the button labels:
Note: You can change the labels that are displayed for your extensions, features, and
abbreviated dial or speed dial buttons. For example, you can change the label for your
extension to "My Line."
1. Press Avaya Menu.
2. Select Options & Settings or Phone Settings.
3. Press Select or OK.
4. Select Application Settings.
5. Press Select or OK.
6. Select Personalize Labels.
7. Press Change or OK.
8. If the label you want to edit is on the Features menu, scroll right to access the Features
menu.
9. Select the label you want to edit.
10. Press Edit.
11. Edit the label.
Note: You can press Clear to clear all text fields and start over.
12. Press Save or OK.
To restore the button labels to their default labels:
1. Press Avaya Menu.
2. Select Options & Settings.
3. Press Select or OK.
4. Select Application Settings.
5. Press Select or OK.
6. Select Restore Default Button Label.
7. Press Change or OK.
Dialing Numbers while on Campus
When using your Avaya telephone please use the dialing rules described below. If, at any time, you hear
an additional dial tone after you have finished dialing you may not have permission to dial the number
from your phone. You may need to talk to your department administrator or MSU Telecom Systems in
order to get the permissions to dial long-distance or international numbers.
8/12/2019 Telephone Guide - 9611G IP (May 2012)
http://slidepdf.com/reader/full/telephone-guide-9611g-ip-may-2012 26/29
26
Dialing Emergency numbers
• If you have an emergency, simply dial 911.
• Non-Emergency calls for the Campus Police should dial 5-2222, or if you are not on the East
Lansing campus, press the “Emerg.” Button.
Dialing On-campus numbers
• Simply dial the last 5-digits of the person’s phone number. For example, if their phone number
is 517-355-1855, dial 5-1855. These calls are toll-free.
• You will not be able to dial numbers that start with 432, 353, 884 and 355 by dialing their 7-digit
local numbers. For example, if you attempt to dial 8-355-1855, the call will NOT be completed.
Please dial the last 5-digits of the number
Dialing Local numbers
• Dial 8, and then the number as if you were to dial it from a home phone, leaving off the area
code. For example, if the number you are dialing is 517-333-1800, dial 8-333-1800. These calls
are charged as a local call.
Dialing Long Distance numbers
• Dial 8, 1, the area code, and then the phone number. For example, if the number you are dialing
is 815-544-2424, dial 8-1-815-544-2424. These calls are charged by the minute as long-distance
calls.
Dialing International numbers
• Dial 8, 011, the country code, the city code and then the number. For example, if the number
you are dialing is in Germany (Country Code 49), in Frankfurt (City Code 69), with a number of
75350, dial 8-011-49-69-75350. These calls are charged by the minute, at the current
international rate for that country. Please call MSU Telecom Systems at 3-5515 to find out the
current rate for a country.
Campus Operator and Information Services
• You can dial zero (0) from your phone to be connected to the campus operator. They can help
you look up phone numbers of individuals or departments on campus, 24 hours a day, 7 days a
week.

8/12/2019 Telephone Guide - 9611G IP (May 2012)
http://slidepdf.com/reader/full/telephone-guide-9611g-ip-may-2012 27/29

8/12/2019 Telephone Guide - 9611G IP (May 2012)
http://slidepdf.com/reader/full/telephone-guide-9611g-ip-may-2012 28/29
28
Troubleshooting
Problem Solution
A feature does not work as
noted in the book.
1. Reread the procedure and try again.
2. For many features you must lift the handset
before you can use the feature.
3. Check with MSU Telecom Systems at 3-5515
for more information about this feature.
The telephone does not ring. 1. Set the ringer volume to a higher level.
2. Place a test call from another extension to
your extension.
3. If there is still a problem, contact MSU
Telecom Systems at 3-5515 to open a
service call to have the problem corrected.
Glossary
activate
To begin or turn on the operation of a feature.
call appearance button
A button used exclusively to place, receive, or hold calls. It has an assigned extension number
and is equipped with a red in-use light and a green status light.
dial pad
The 12 pushbuttons that you use to dial a number and access features.
extension
A dialing number 5 digits assigned to each phone connected to the MSU Telephone System
feature
8/12/2019 Telephone Guide - 9611G IP (May 2012)
http://slidepdf.com/reader/full/telephone-guide-9611g-ip-may-2012 29/29
A special function or service, such as Conference, Hold, Send All Calls, etc.
feature code
A dial code of 1, 2, or 3 digits that you use to activate or cancel the operation of a feature.
handset
The handheld part of the telephone that you pick up, talk into, and listen from. This is
sometimes called the "receiver".
off-hook
When the handset is removed from the cradle (for example, when you lift the handset to place
or answer a call), or speaker is on.
on-hook
When the handset is left on the cradle, and speaker is off.
party
A person who places or answers a call.
pickup group
A group of telephone users who can answer calls for each other through the Call Pickup feature.Group members are determined by the system manager and are usually located in the same
work area or perform similar job functions.
ringer
The device that produces the electronic ringing sound in your telephone.
Switch / PBX
The device that makes connections for all voice and data calls for a network, and also contains
software for features. Also known as a system, switching system, or Centrex.


