40
Working With Coroplast PLUS 2007 Marty Slack
| Date post: | 30-Dec-2016 |
| Category: |
Documents |
| Upload: | vuongtuong |
| View: | 218 times |
| Download: | 0 times |
Working With Coroplast
PLUS 2007Marty Slack
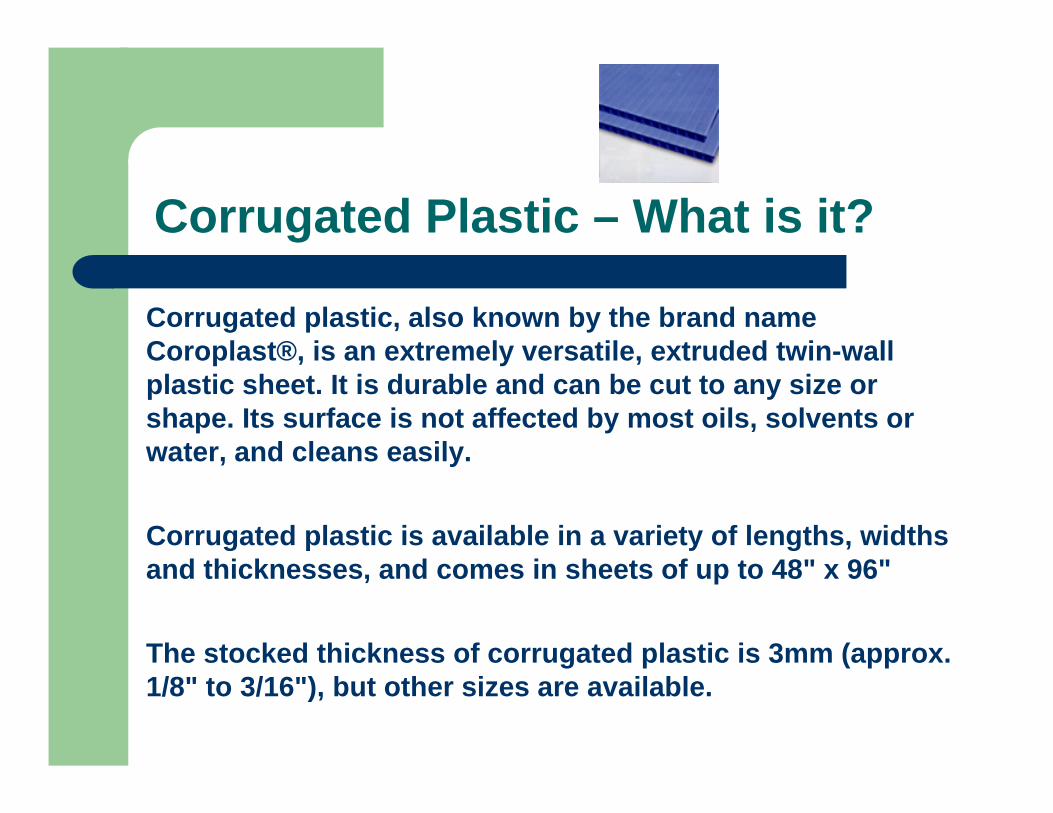
Corrugated Plastic – What is it?
Corrugated plastic, also known by the brand nameCoroplast®, is an extremely versatile, extruded twin-wall plastic sheet. It is durable and can be cut to any size or shape. Its surface is not affected by most oils, solvents or water, and cleans easily.
Corrugated plastic is available in a variety of lengths, widths and thicknesses, and comes in sheets of up to 48" x 96"
The stocked thickness of corrugated plastic is 3mm (approx. 1/8" to 3/16"), but other sizes are available.

What Can You Do With Coro?
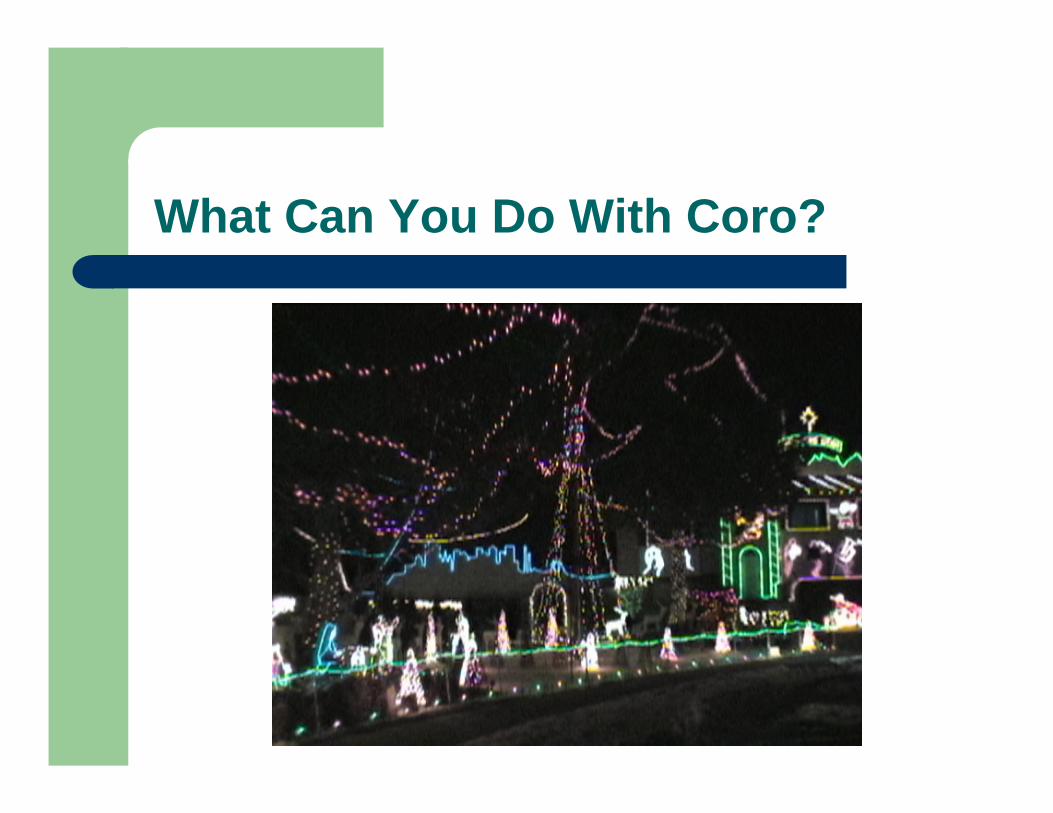
What Can You Do With Coro?

Where to Purchase Coro
Plastics SuppliersSign Shops
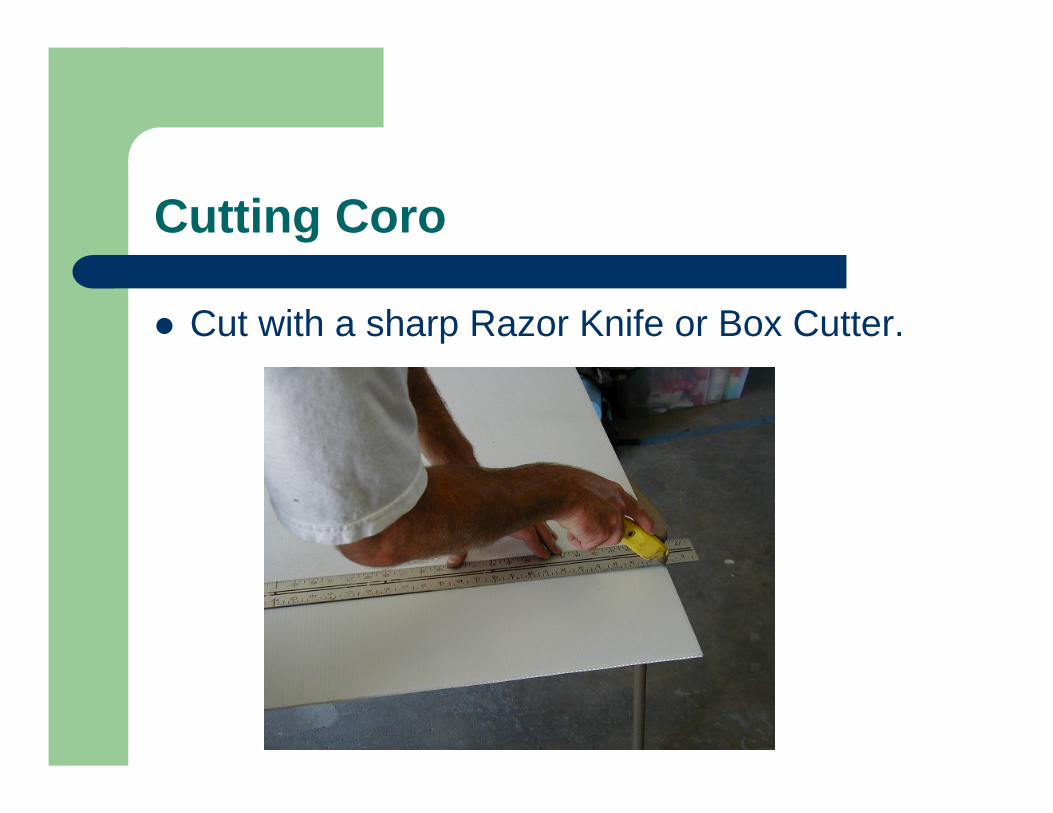
Cutting Coro
Cut with a sharp Razor Knife or Box Cutter.
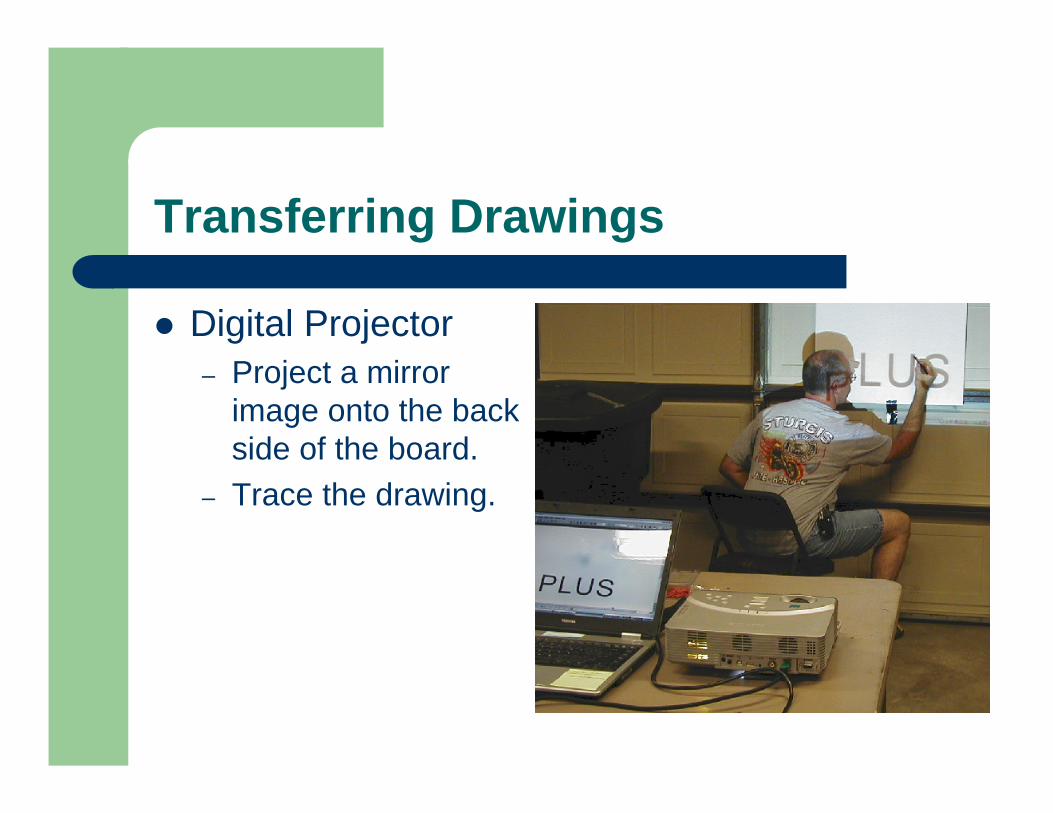
Transferring Drawings
Digital Projector– Project a mirror
image onto the back side of the board.
– Trace the drawing.
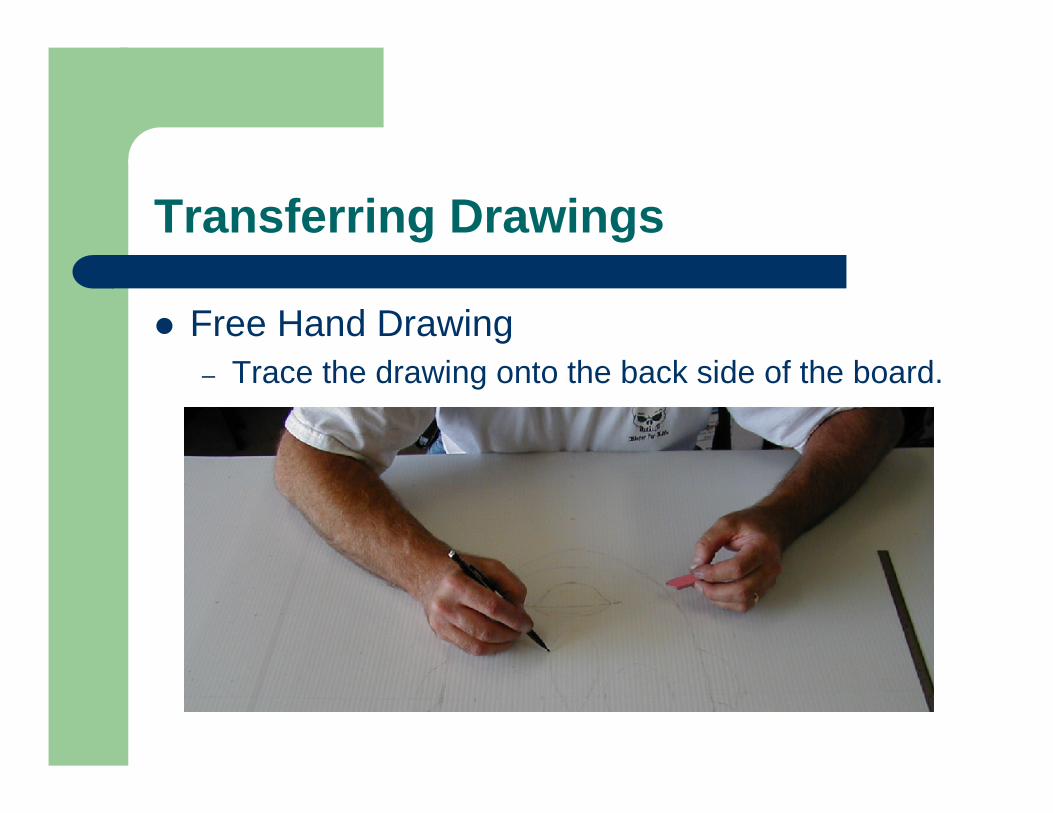
Transferring Drawings
Free Hand Drawing– Trace the drawing onto the back side of the board.
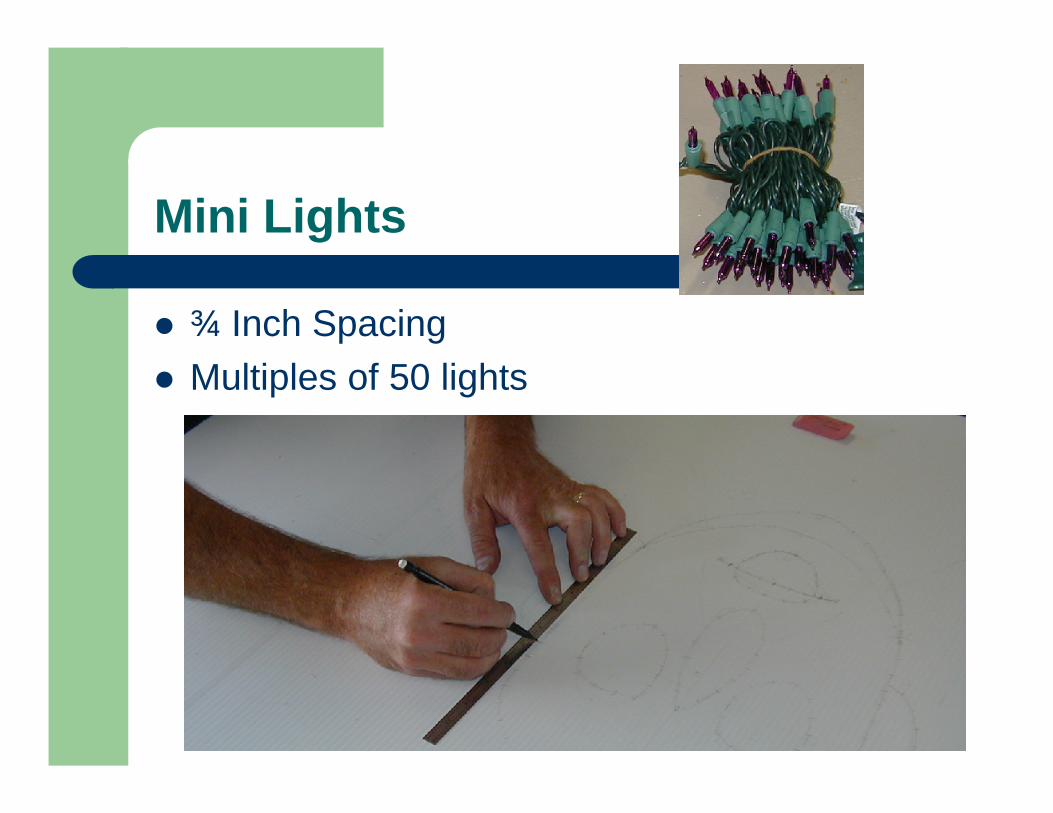
Mini Lights
¾ Inch SpacingMultiples of 50 lights
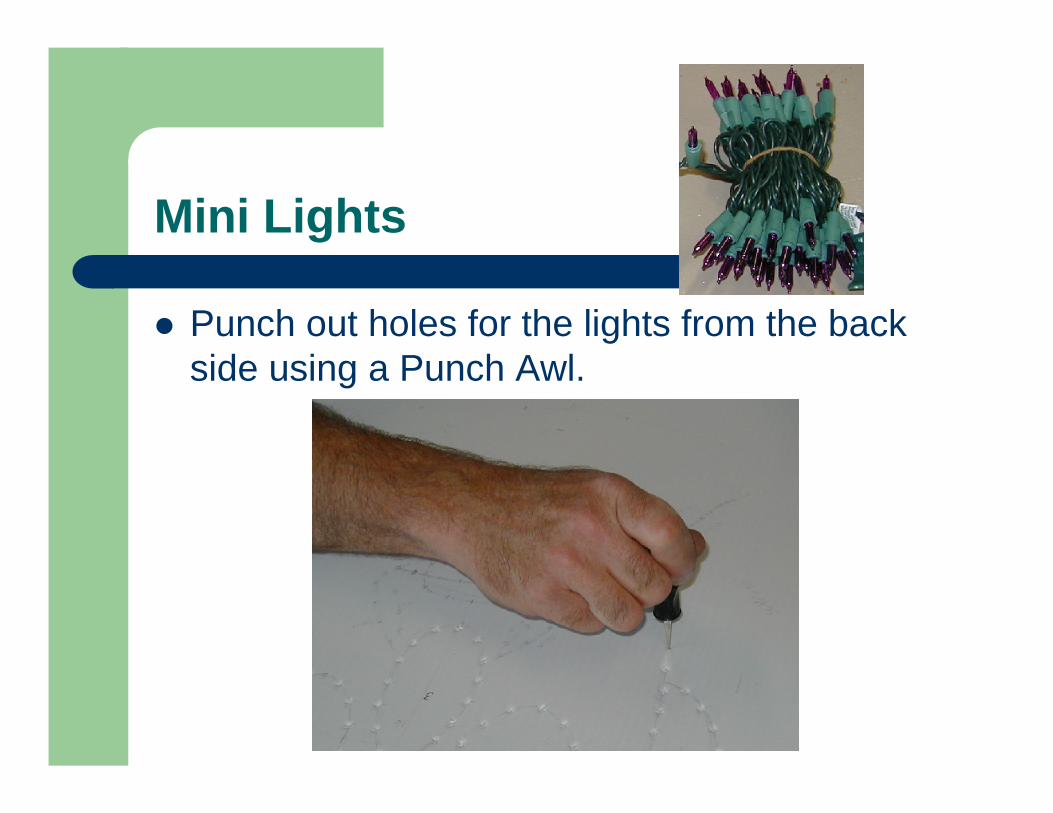
Mini Lights
Punch out holes for the lights from the back side using a Punch Awl.
Mini Lights
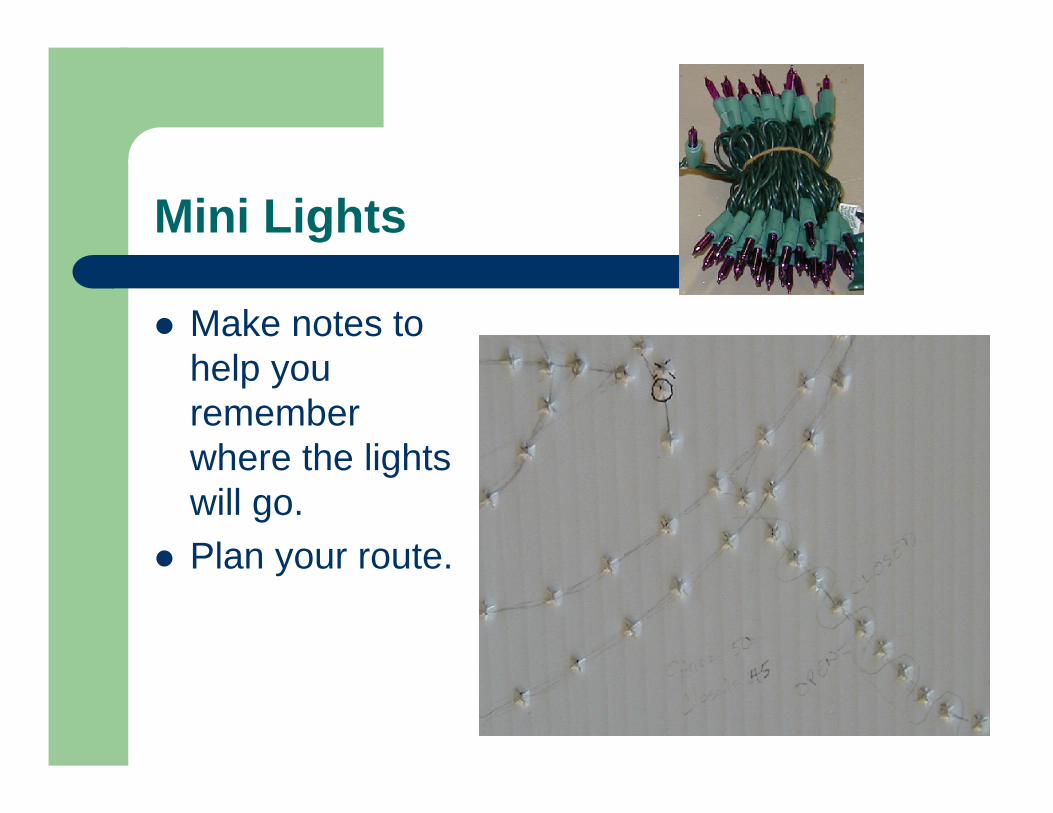
Make notes to help you remember where the lights will go.Plan your route.
Mini Lights
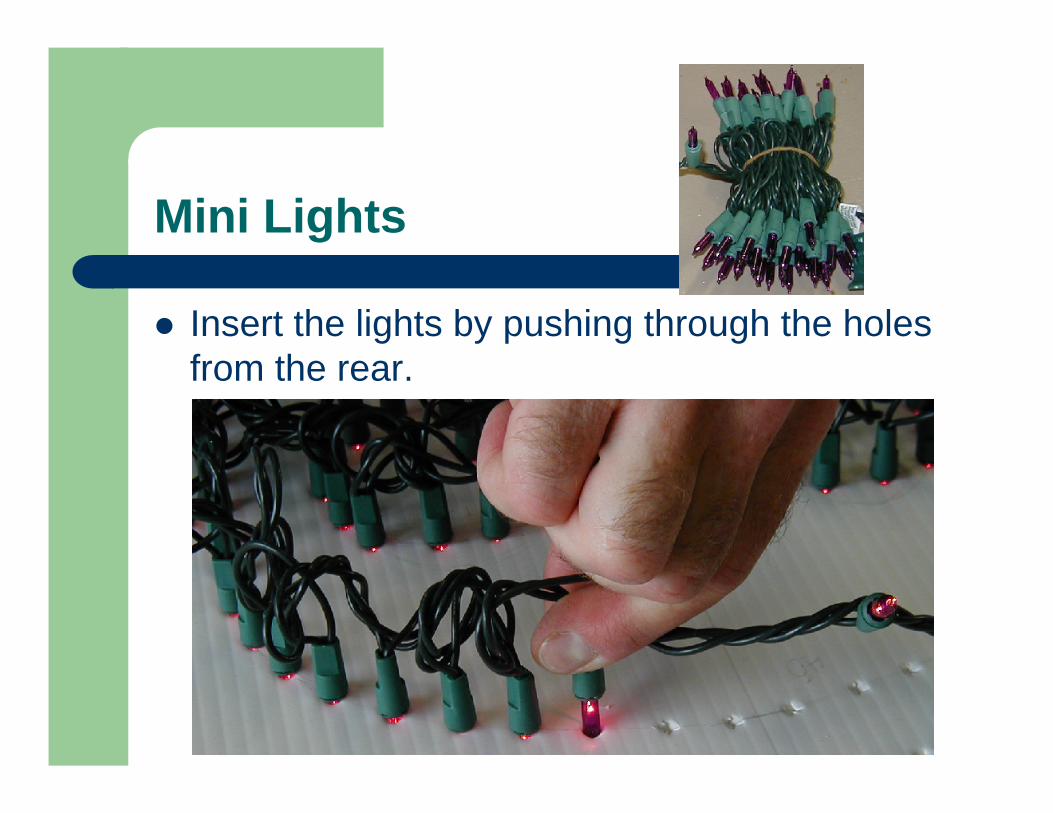
Insert the lights by pushing through the holes from the rear.

Mini Lights
Cover unused lights with electrical tape or blackout caps.
Mini Lights
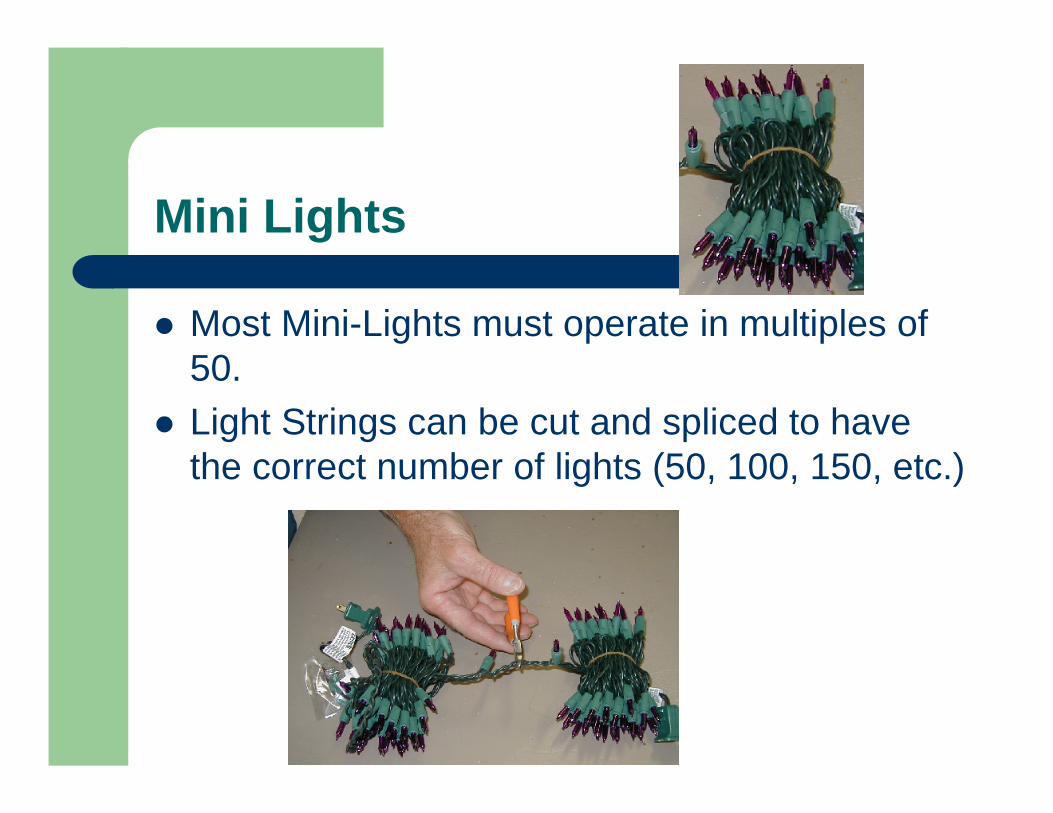
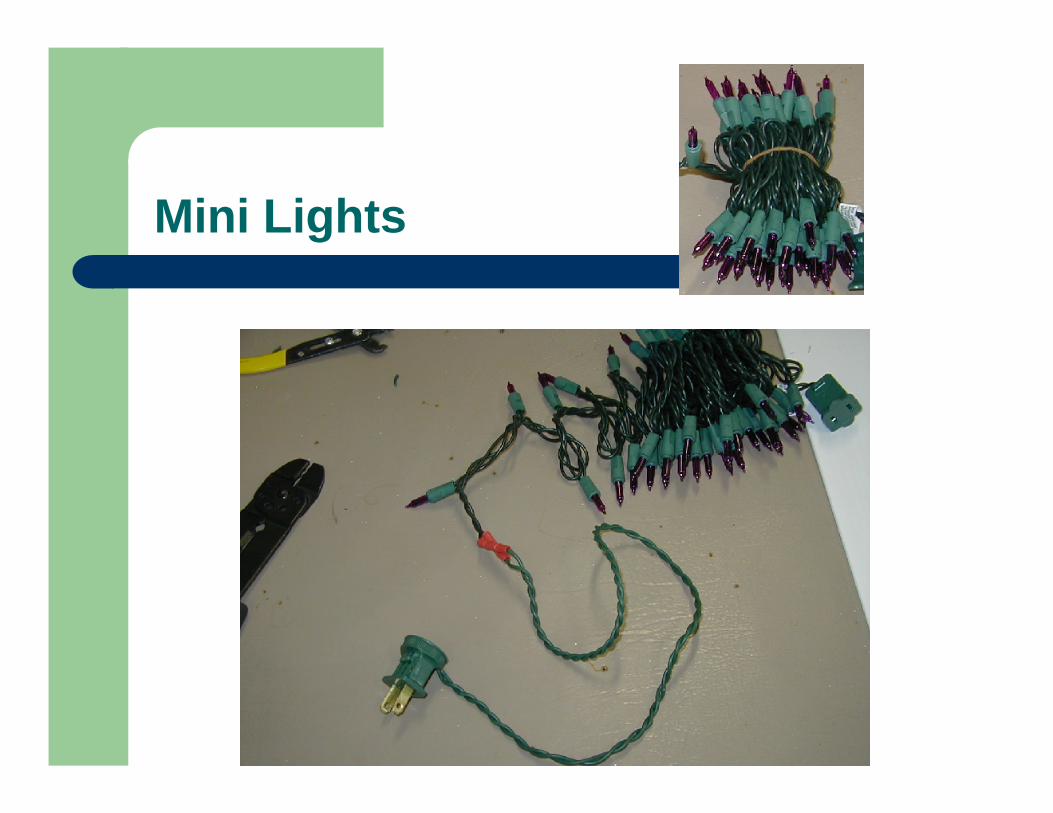
Most Mini-Lights must operate in multiples of 50.Light Strings can be cut and spliced to have the correct number of lights (50, 100, 150, etc.)

Mini Lights
Light Strings can be spliced with a few simple tools and parts:
Mini Lights
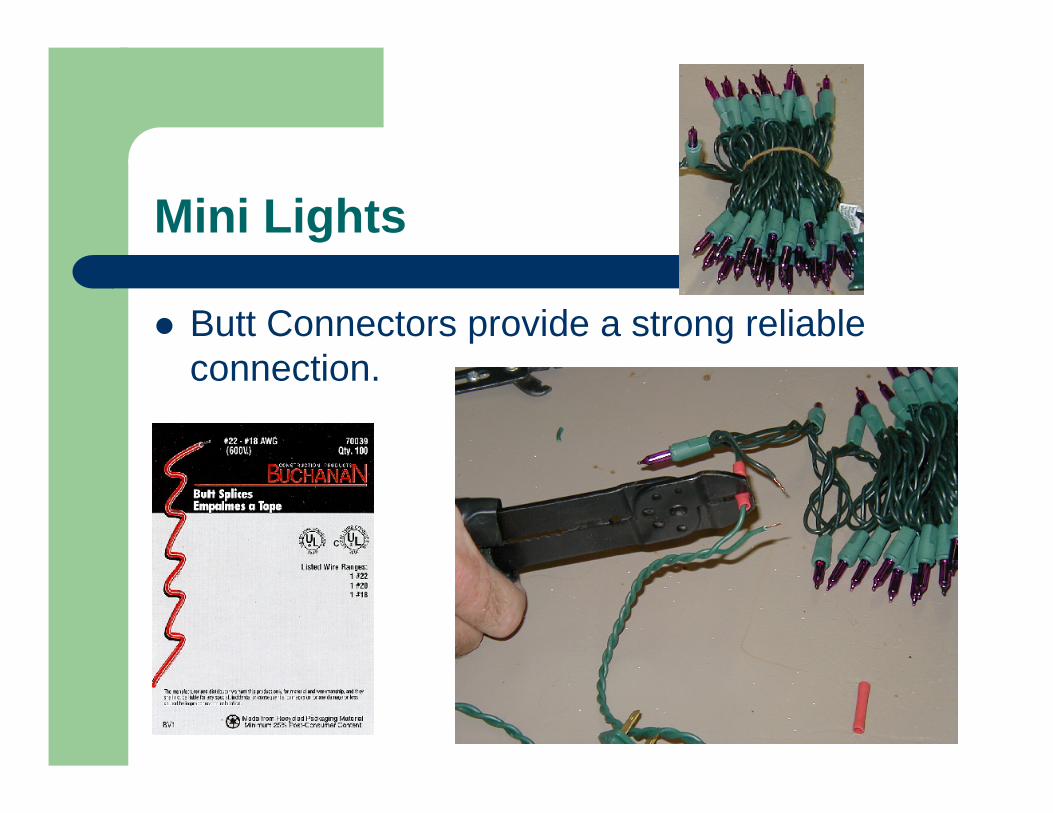
Butt Connectors provide a strong reliable connection.
Mini Lights
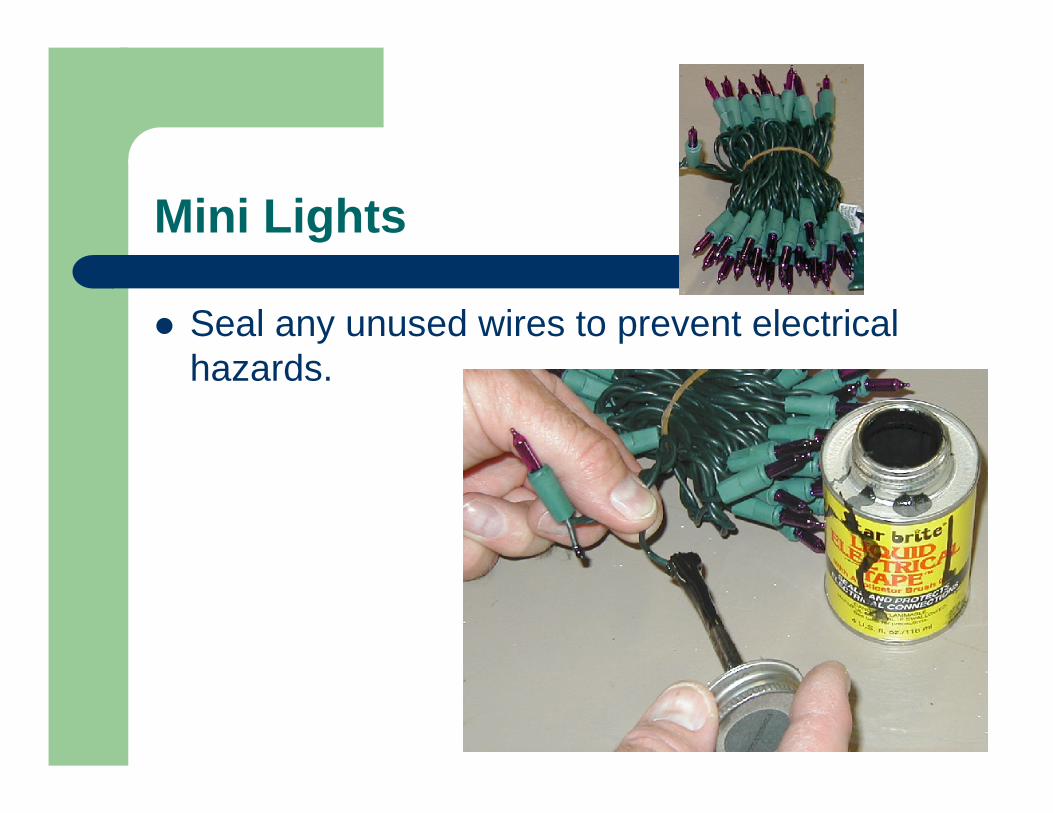
Seal any unused wires to prevent electrical hazards.
Mini Lights

Mini Lights
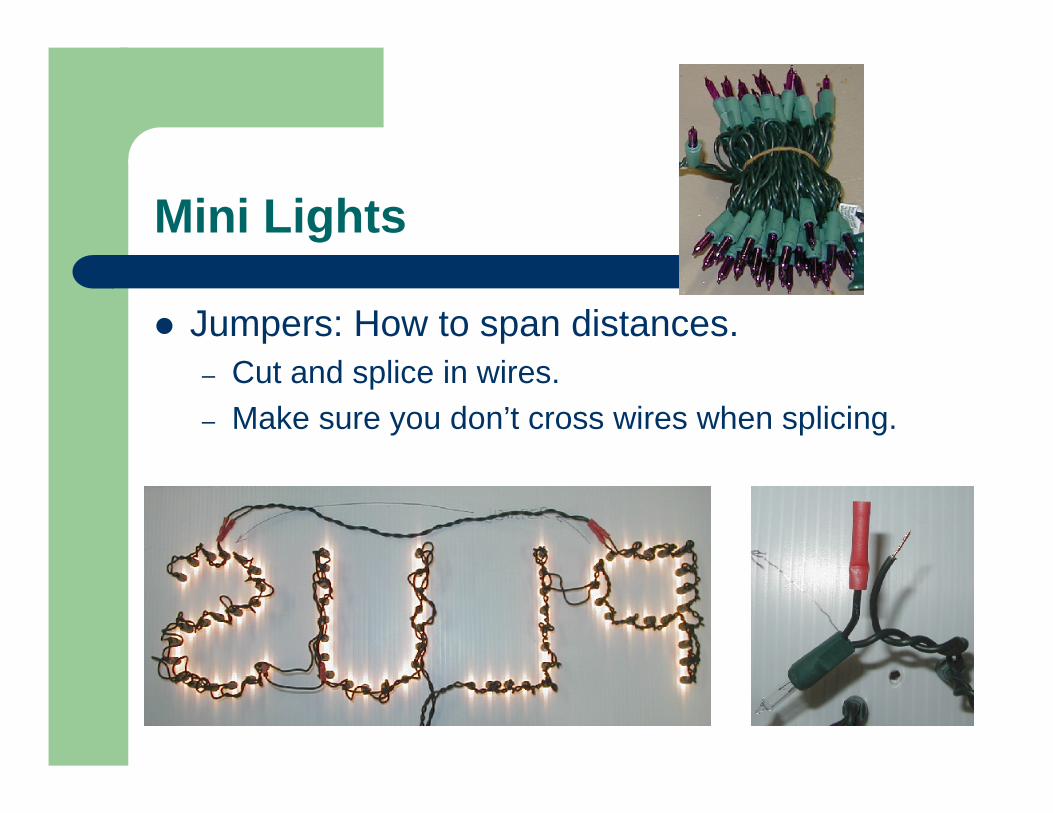
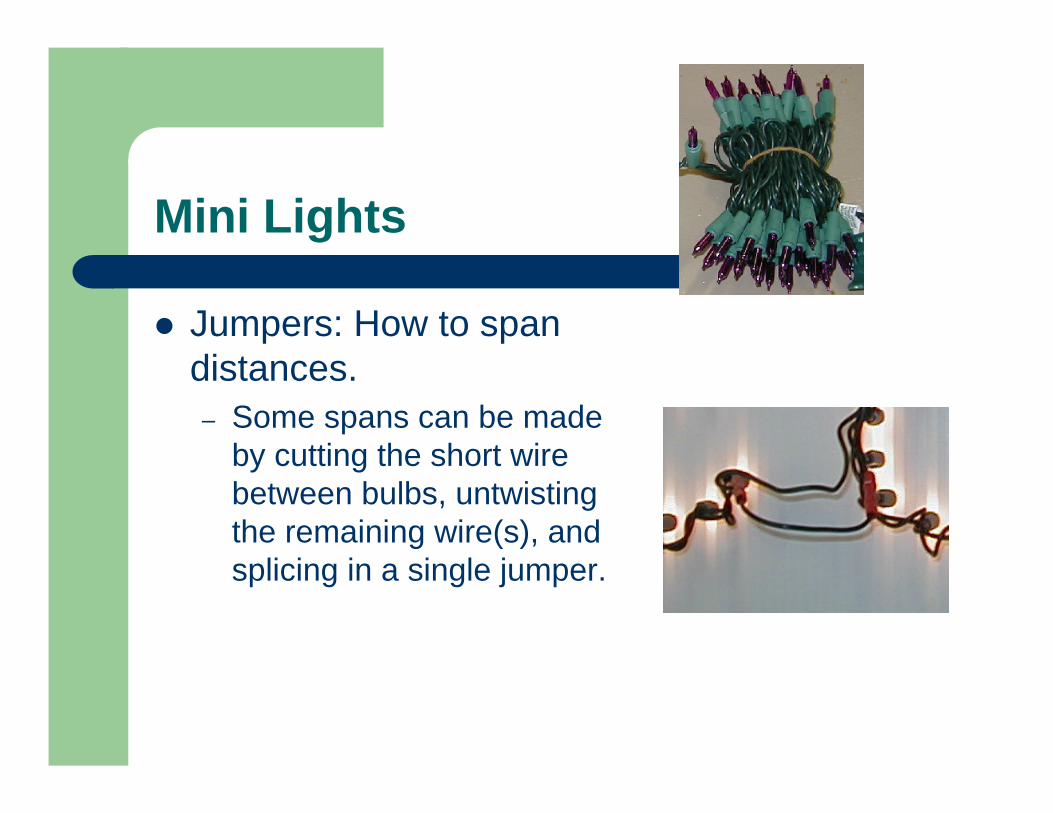
Jumpers: How to span distances.
Mini Lights
Jumpers: How to span distances.– Cut and splice in wires.– Make sure you don’t cross wires when splicing.
Mini Lights
Jumpers: How to span distances.– Some spans can be made
by cutting the short wire between bulbs, untwisting the remaining wire(s), and splicing in a single jumper.
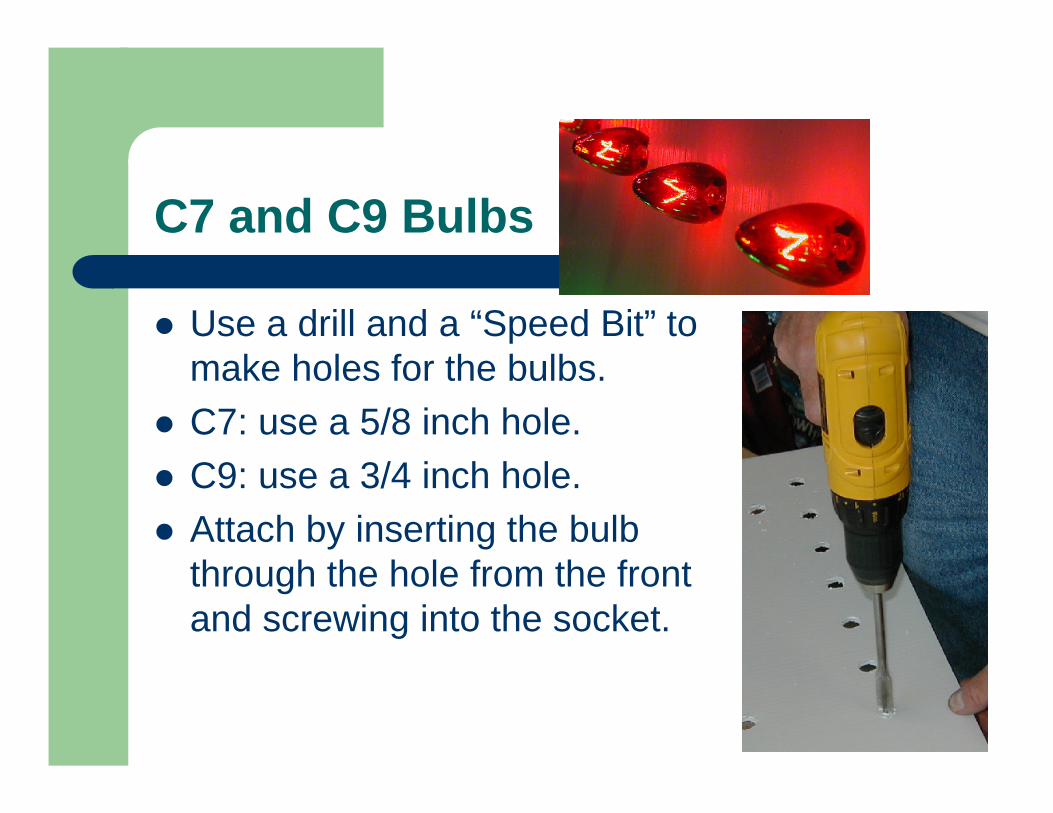
C7 and C9 Bulbs
Use a drill and a “Speed Bit” to make holes for the bulbs.C7: use a 5/8 inch hole.C9: use a 3/4 inch hole.Attach by inserting the bulb through the hole from the front and screwing into the socket.
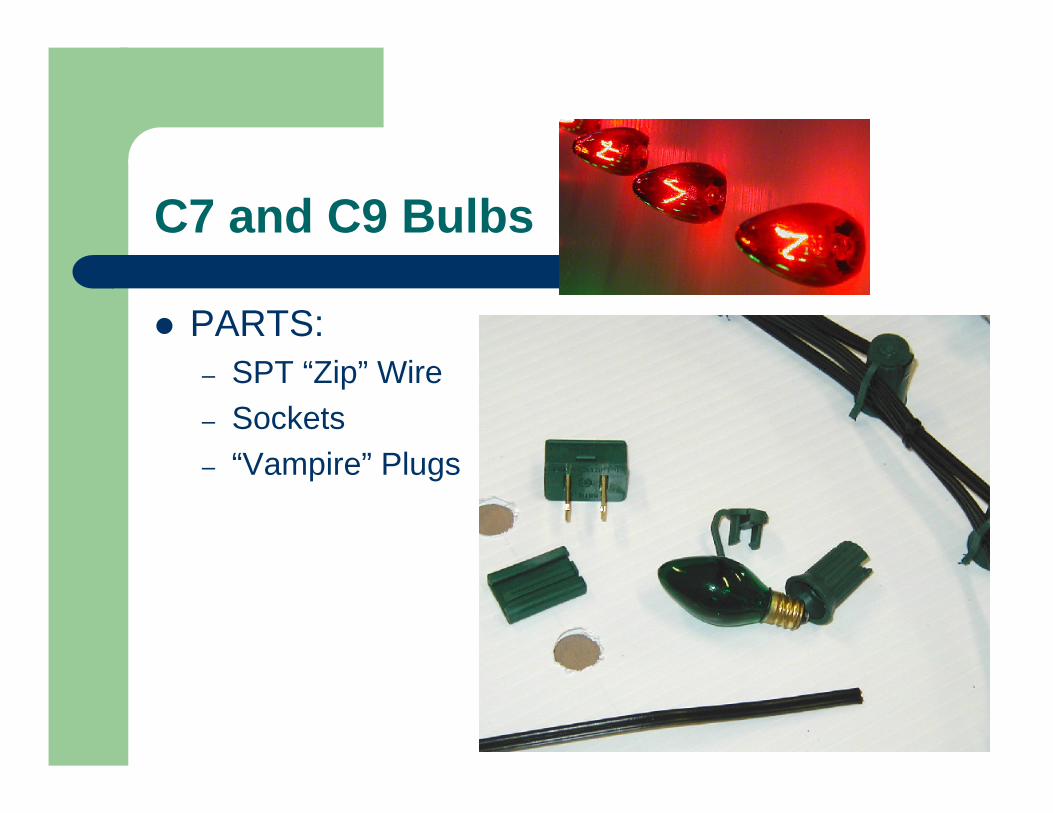
C7 and C9 Bulbs
PARTS:– SPT “Zip” Wire– Sockets– “Vampire” Plugs
C7 and C9 Bulbs
Ropelight
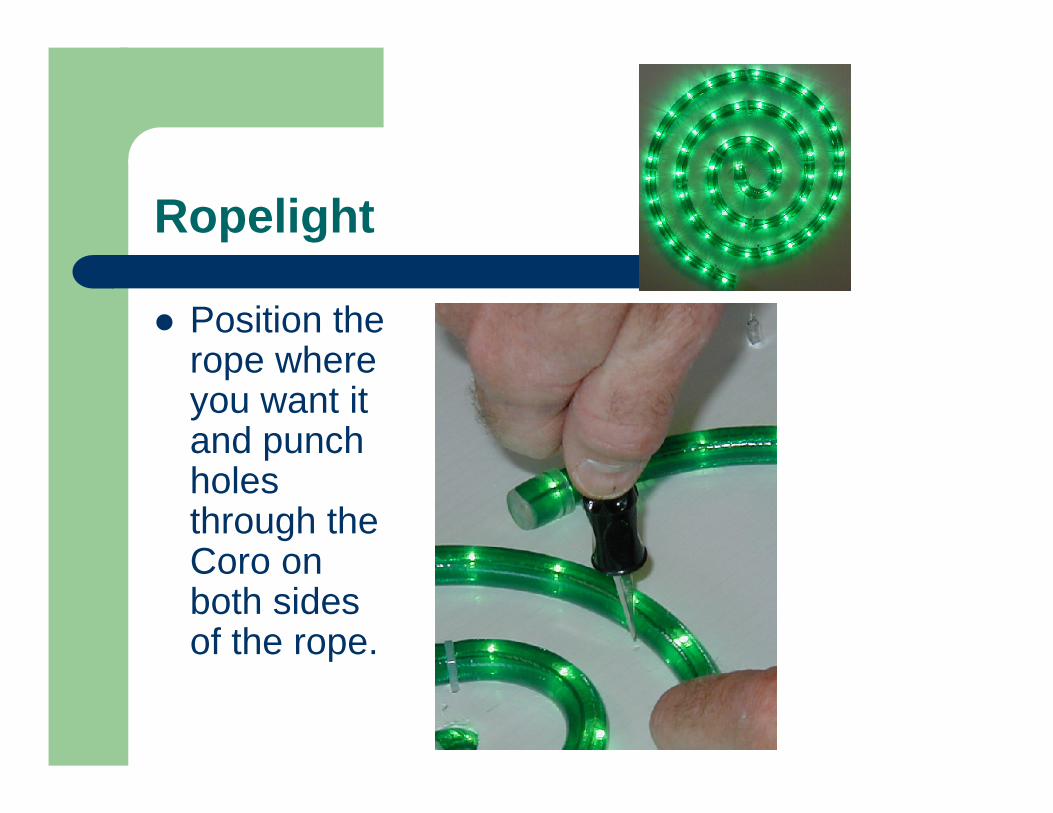
Position the rope where you want it and punch holes through the Coro on both sides of the rope.
Ropelight
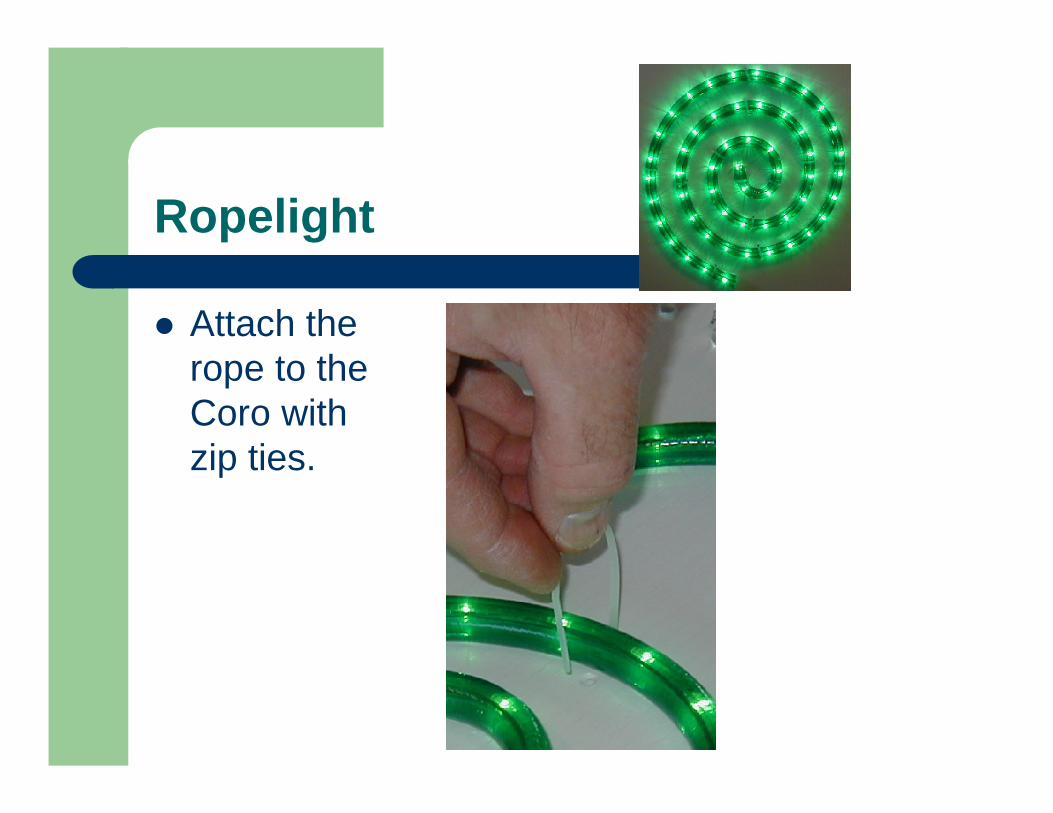
Attach the rope to the Coro with zip ties.
Ropelight
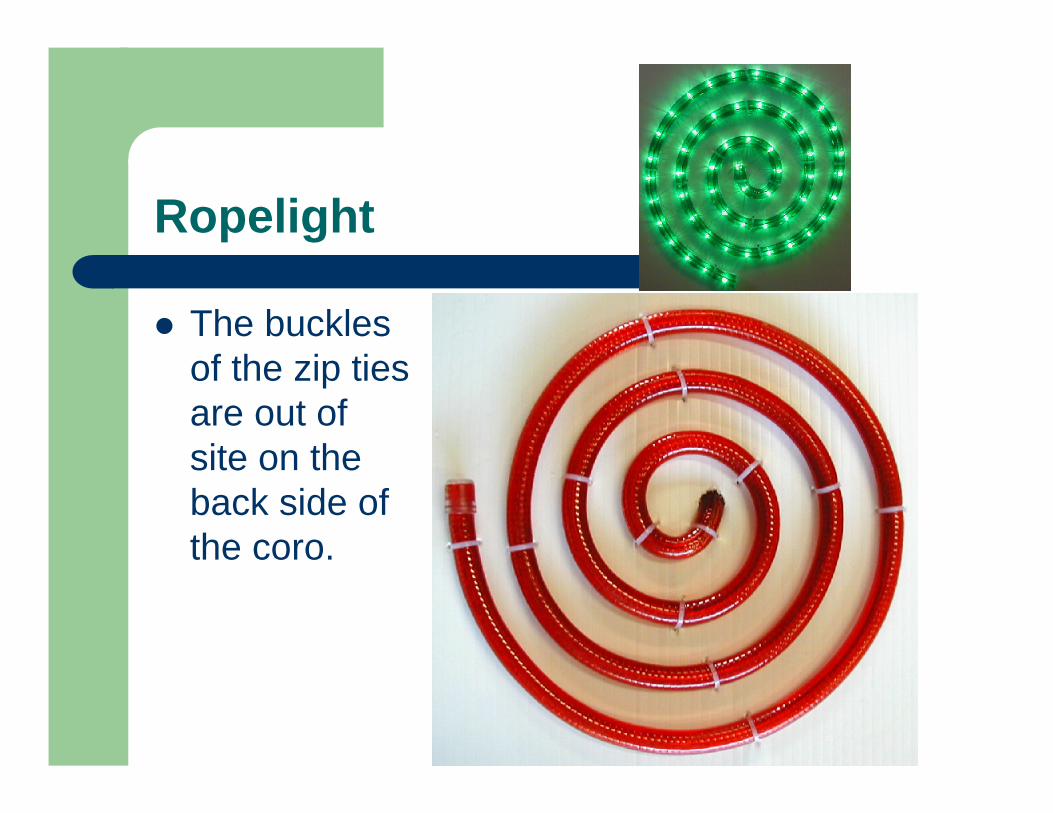
The buckles of the zip ties are out of site on the back side of the coro.
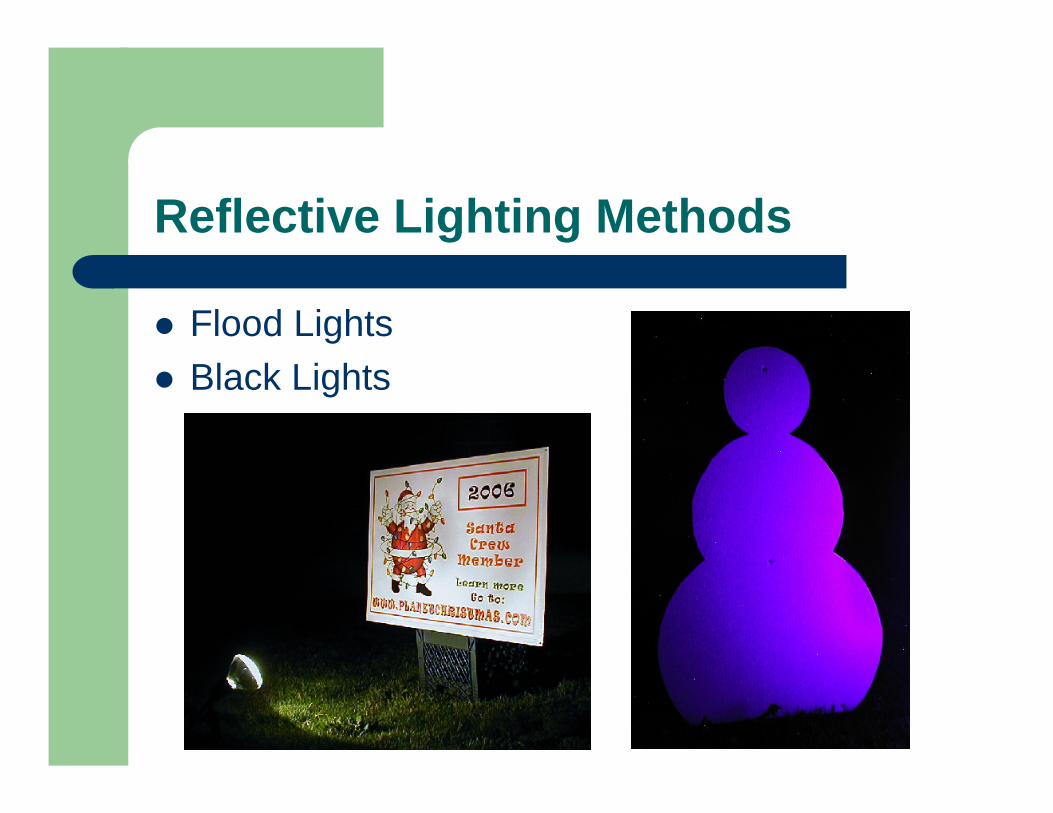
Reflective Lighting Methods
Flood LightsBlack Lights
Frames and Supports
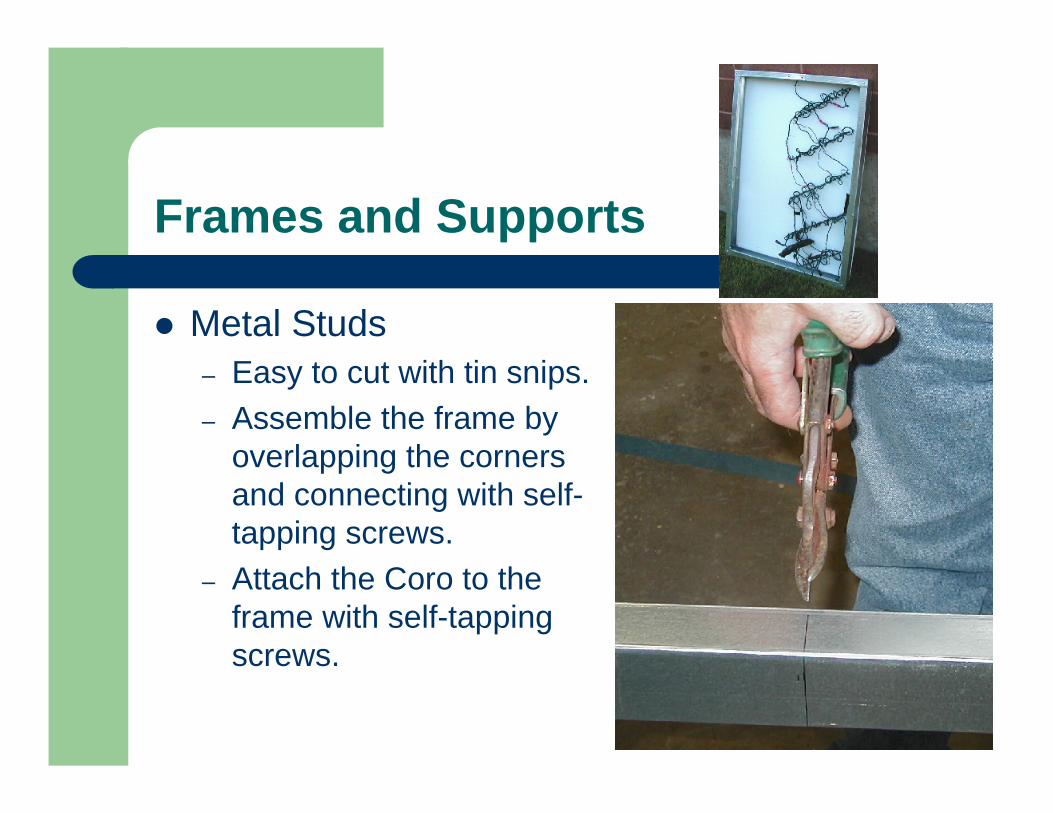
Metal Studs– Easy to cut with tin snips.– Assemble the frame by
overlapping the corners and connecting with self-tapping screws.
– Attach the Coro to the frame with self-tapping screws.
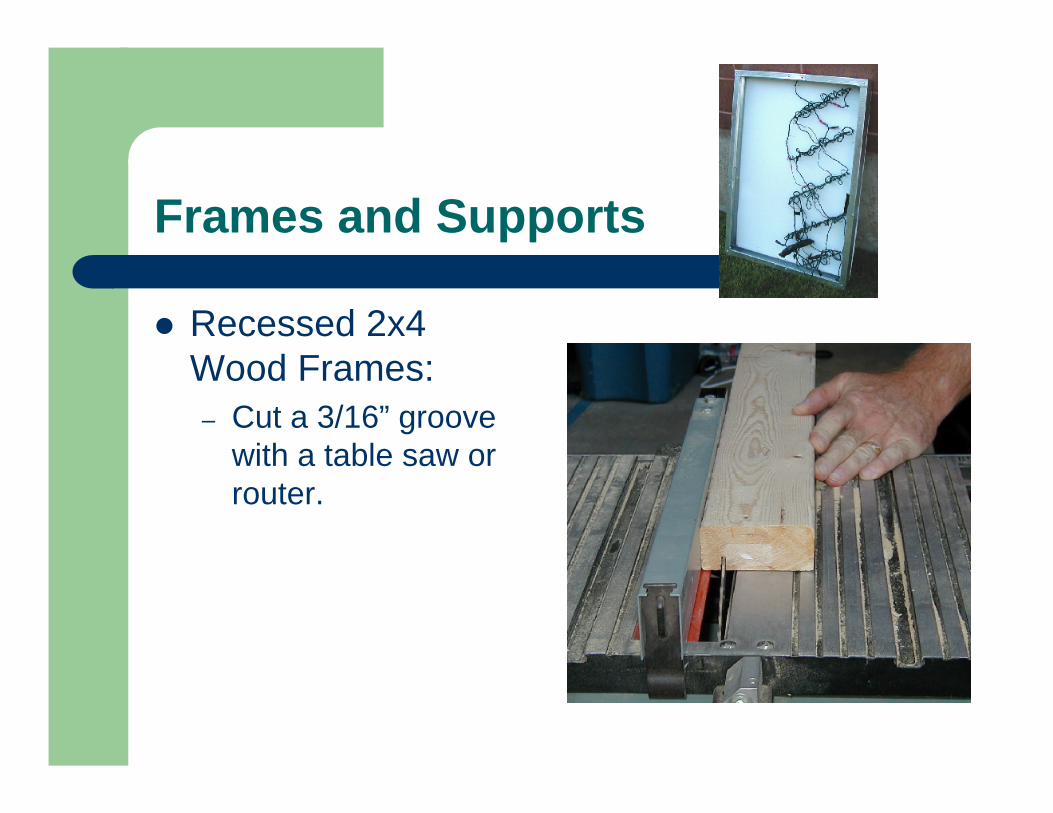
Frames and Supports
Recessed 2x4 Wood Frames:– Cut a 3/16” groove
with a table saw or router.
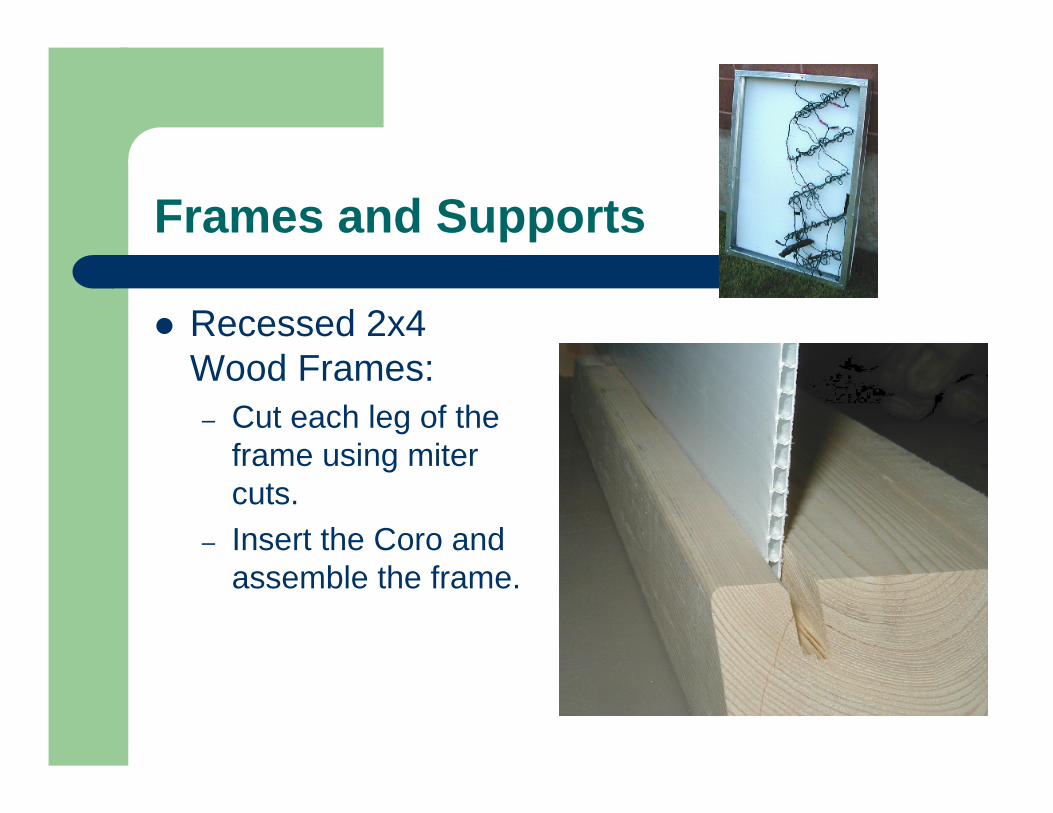
Frames and Supports
Recessed 2x4 Wood Frames:– Cut each leg of the
frame using miter cuts.
– Insert the Coro and assemble the frame.
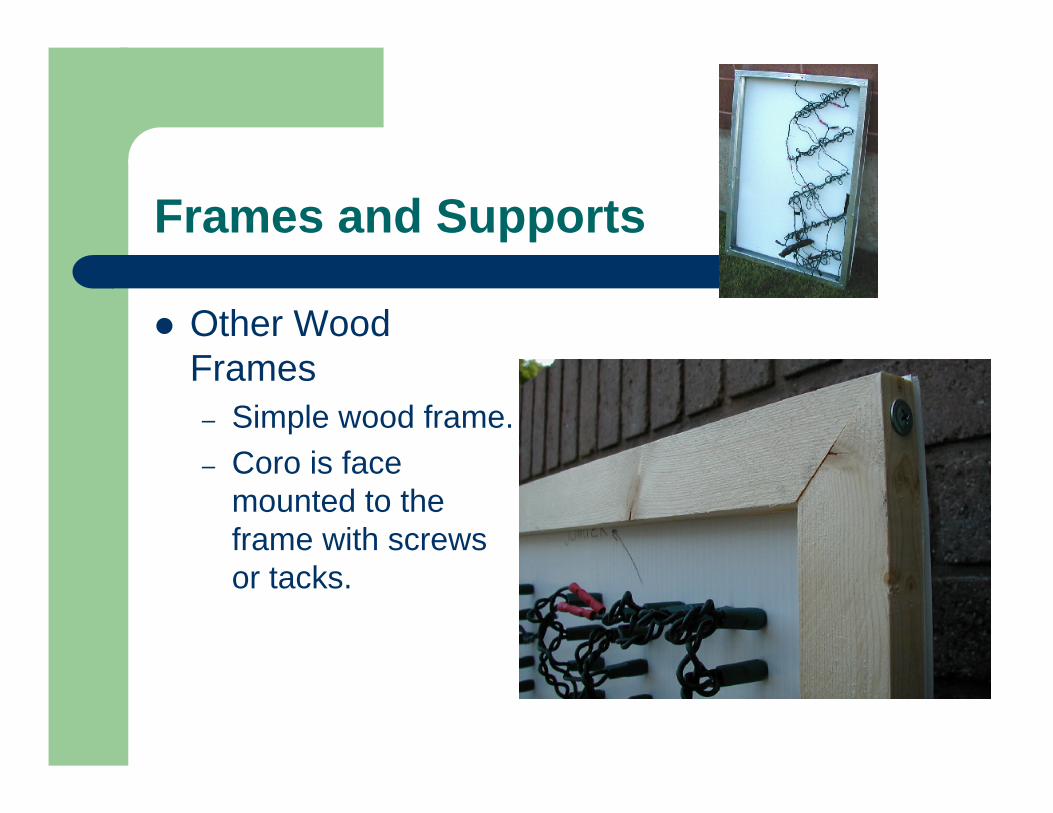
Frames and Supports
Other Wood Frames– Simple wood frame.– Coro is face
mounted to the frame with screws or tacks.
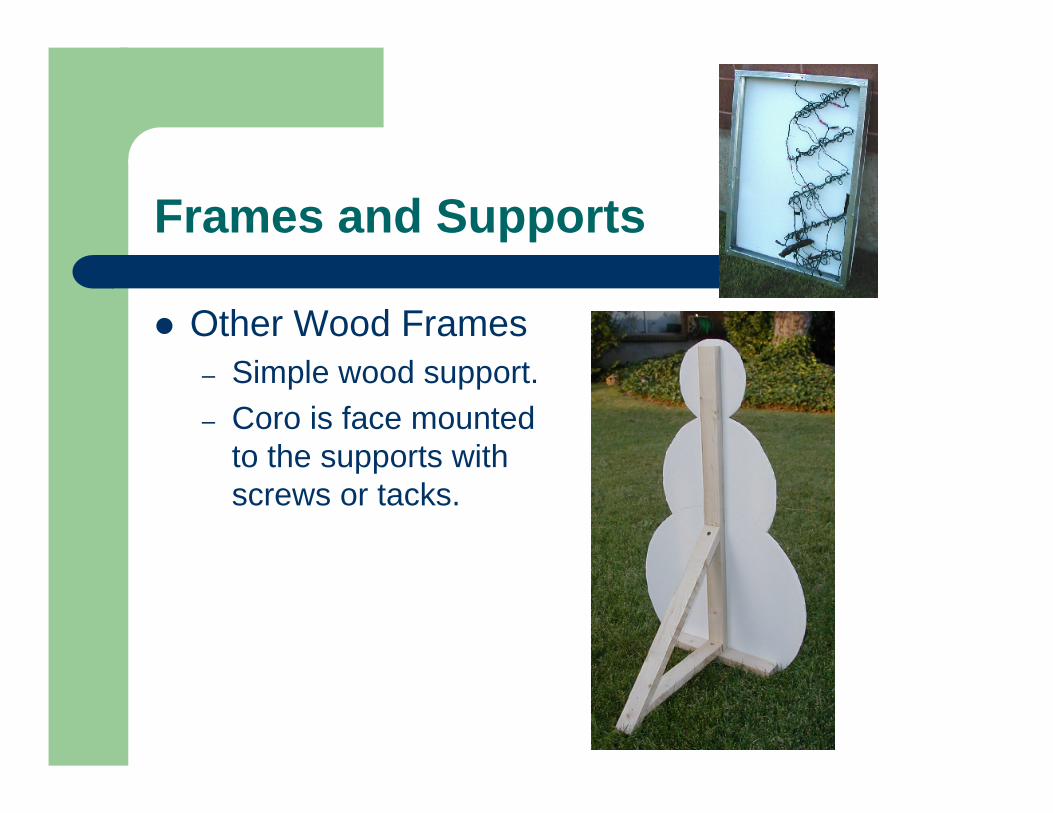
Frames and Supports
Other Wood Frames– Simple wood support.– Coro is face mounted
to the supports with screws or tacks.
Frames and Supports
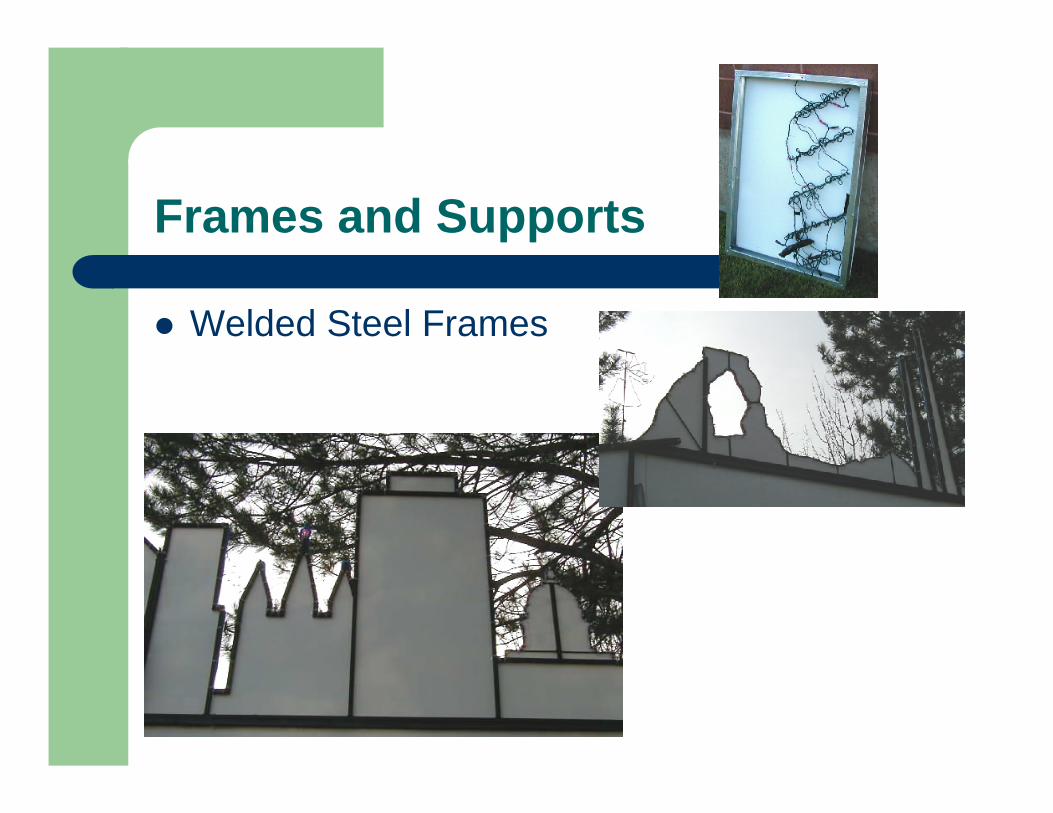
Welded Steel Frames
Frames and Supports
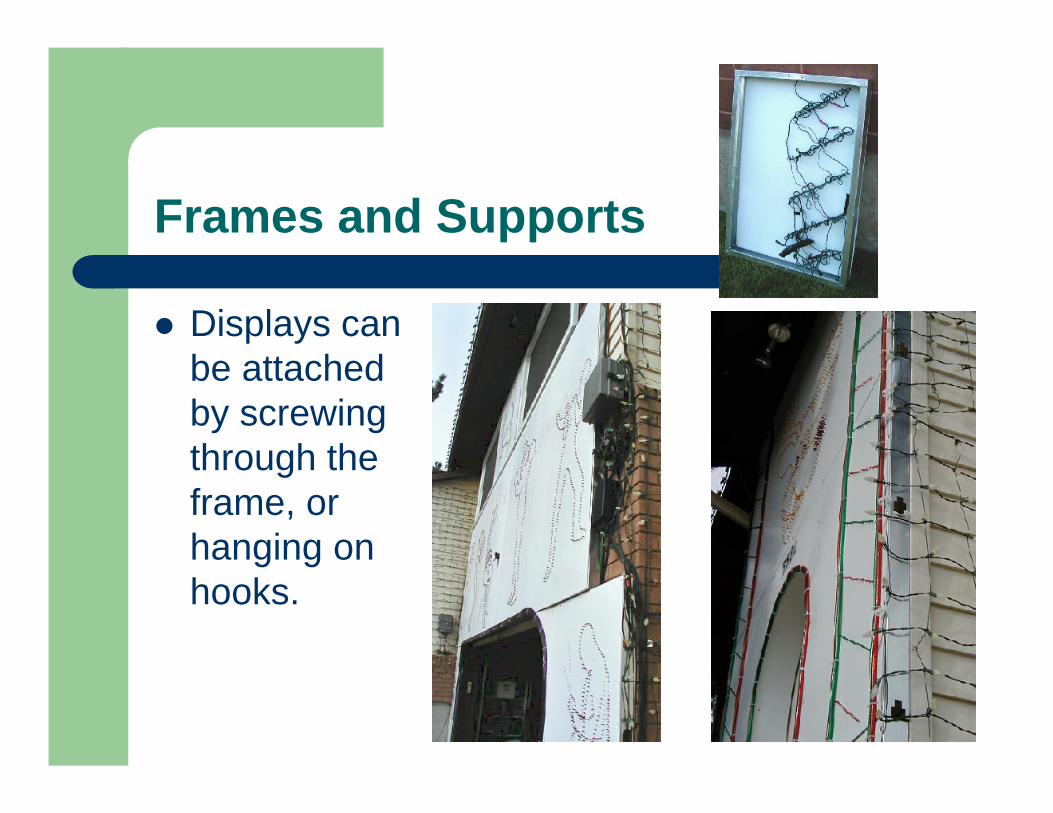
Displays can be attached by screwing through the frame, or hanging on hooks.
Frames and Supports
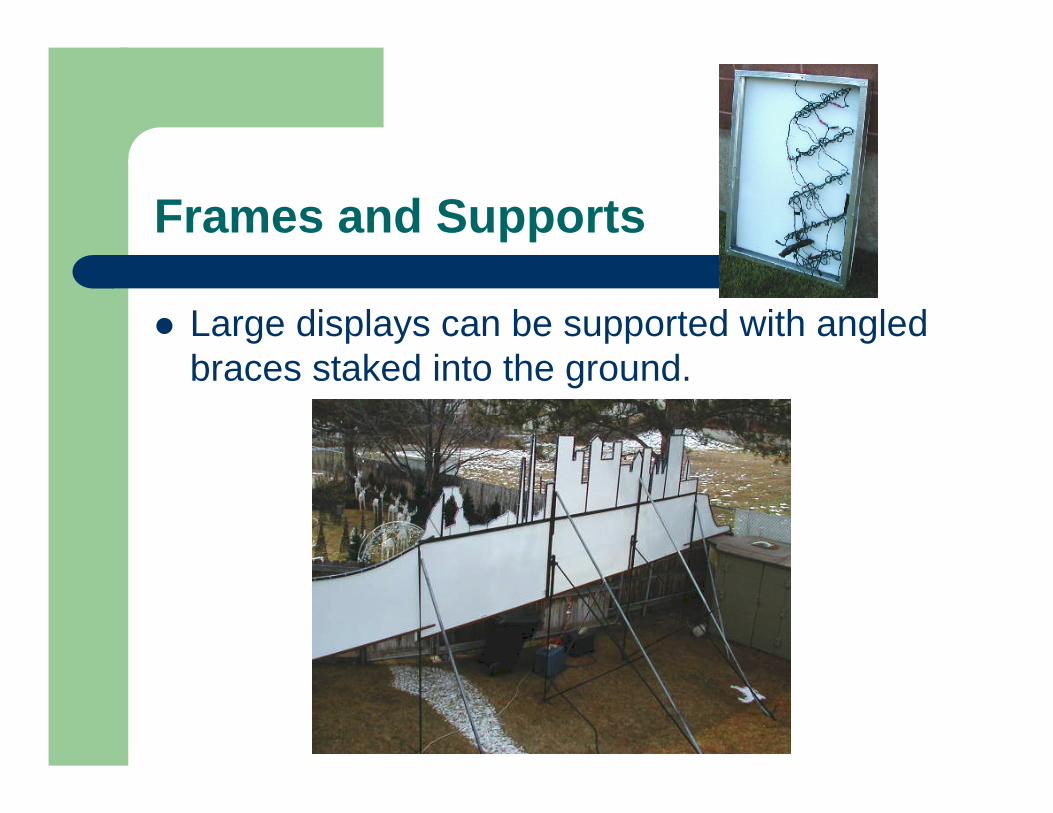
Large displays can be supported with angled braces staked into the ground.
Frames and Supports
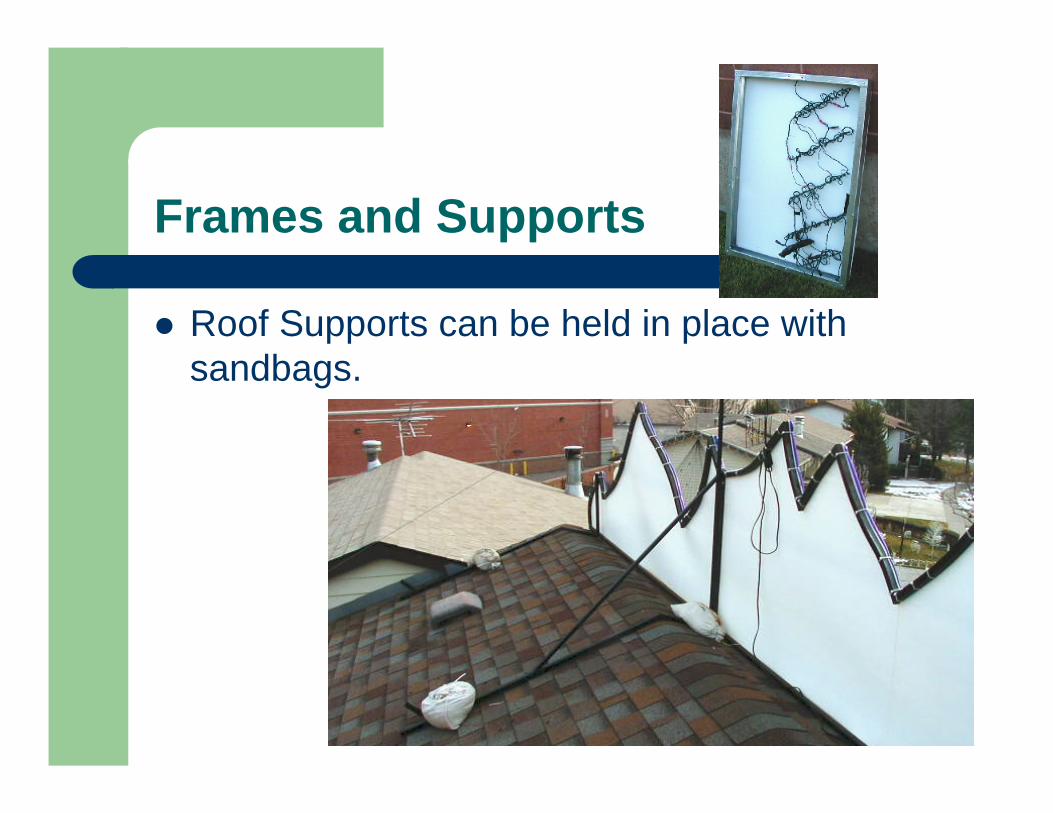
Roof Supports can be held in place with sandbags.
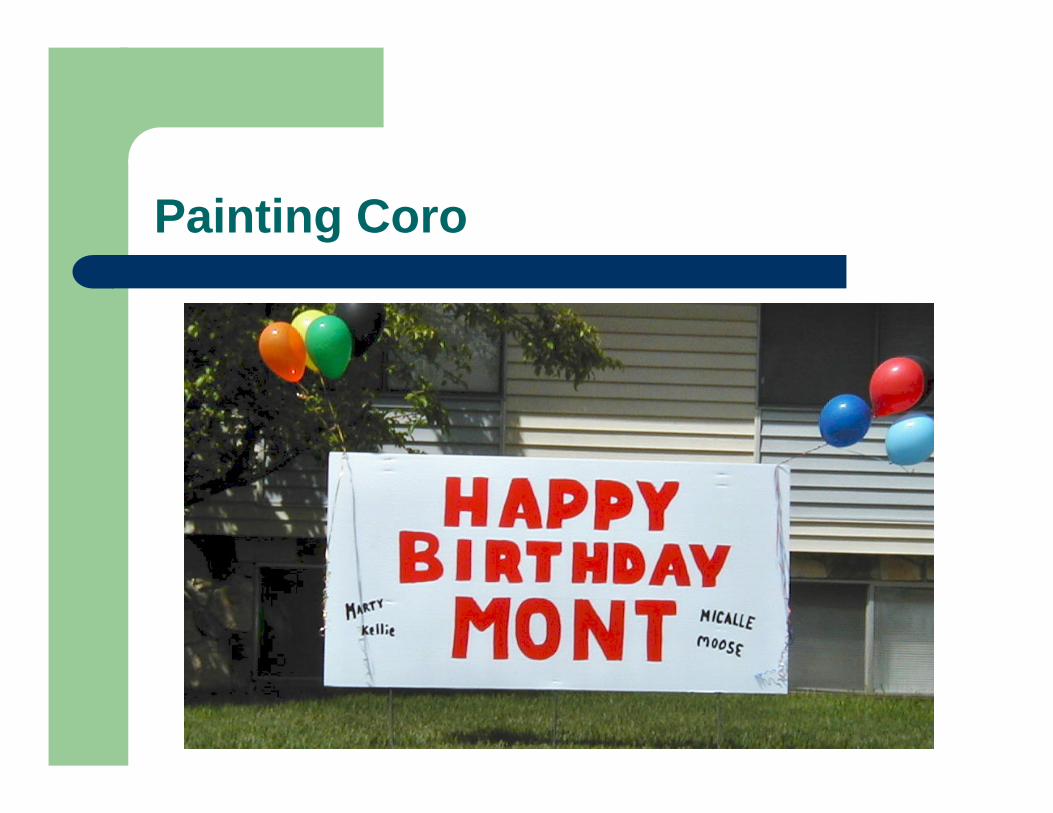
Painting Coro
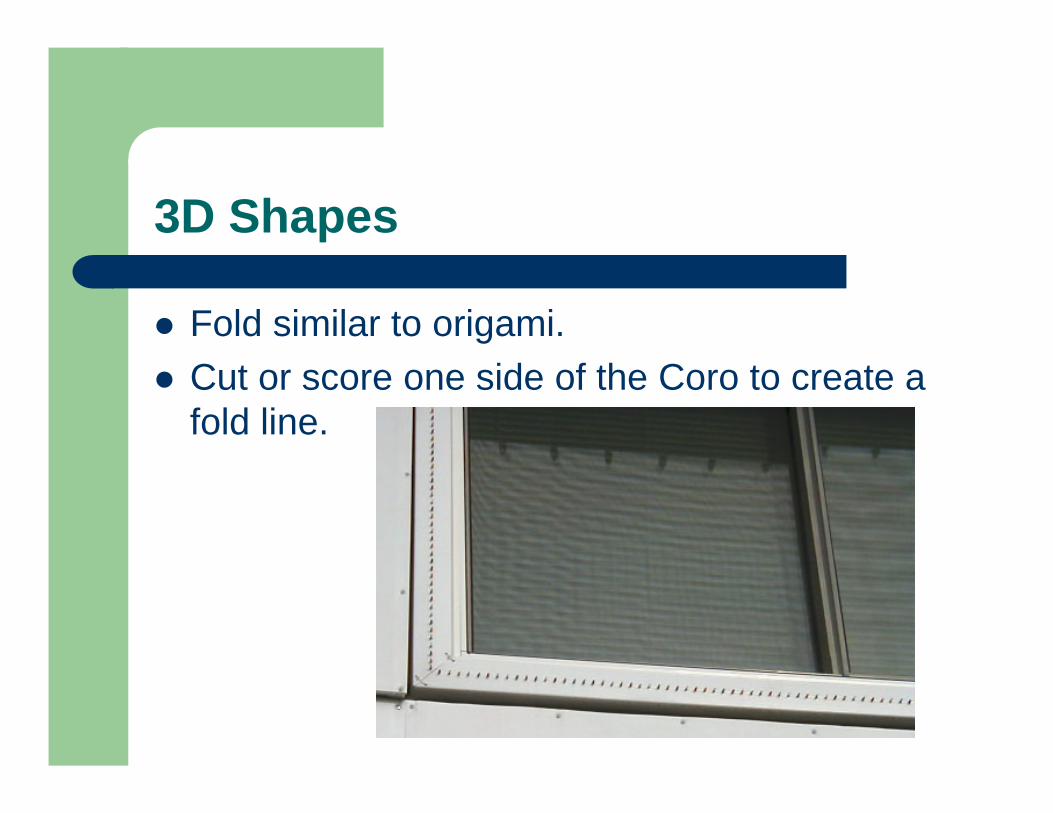
3D Shapes
Fold similar to origami.Cut or score one side of the Coro to create a fold line.

Working With Coroplast


