TRAINING OF TRAINERS 1 Introduction 2 Theories and factors involved in adult learning 3 Planning of training 3.1. Needs Assessment 3.2. Analysis of constraints 4 Contents level 4.1. Defining learning objectives 4.2. Course content 4.3. Overviews 4.4. Summaries 4.5. Instructor’s Guide 5 Methods level 5.1. How to start things off – icebreakers and openers 5.2. Participative methods 5.3. Inventory of methods and techniques used in adult training 6 Trainer-trainee interaction level 7 Evaluation of the learning process
Transcript
TRAINING OF TRAINERS
1 Introduction 2 Theories and factors involved in adult learning 3 Planning of training
3.1. Needs Assessment 3.2. Analysis of constraints
5 Methods level 5.1. How to start things off – icebreakers and
openers 5.2. Participative methods 5.3. Inventory of methods and techniques used in
adult training 6 Trainer-trainee interaction level 7 Evaluation of the learning process
1 Introduction This guide has been developed by an international partnership in the frame of the Socrates-Grundtvig 2 project REMA – “Results management in designing and delivering training for adults”. The organizations contributing to this guide are: the Institute of Agriculture and Food Information (UZPI, from Czech Republic), the Social and Economic Training Institute (IFES, from Romania) and COOPETAP (from Portugal). Project REMA is based on three-level conception of training (ISTL-Integrated System of Training Levels, which include all key elements of training and management of them) and concerning field of results management on each from those substantial levels. The levels of training which have been distinguished are:
Level 1: Delivery of knowledge content and its quality; Level 2: Methods of teaching; Level 3: Interaction between Trainer and Learners.
Attending to Grundvig 2 objectives, this Training of Trainers guide is designed to help trainers of adults create and deliver effective and dynamic courses. Effective design includes effective planning of the intended outcomes from training, assessment of existing skill and knowledge levels versus desired skill and knowledge levels, and creating training that closes the gap between actual and desired skill and knowledge levels. The Main Objectives of this guide Upon the reading of this manual, participants will be able to: Explain the course design and development process. Conduct training needs assessment. Design activities for training that will create learning that meets learning objectives. Write learning objectives that are measurable. Explain the importance of varied learning methods and create training activities using
those varied learning methods. Write course content that supports learning objectives. Write effective overviews and summaries of content. Write effective Instructor Guide Understand trainer-trainee interaction Perform evaluation of training
The goal of this guide is to provide tools and reference materials that can be used later to produce high-quality and consistent training materials. Throughout this guide, you will find numerous exercises (or activities) and examples of how to use the proper methods and techniques. Training for future trainers manual gets results in the form of measurable learning achievements among the individuals and groups with whom they work - greater retention, better on-the-job application, and increased learner interest.
RR EE MM AA –– RR EE SS UU LL TT SS MM AA NN AA GG EE MM EE NN TT II NN DD EE SS II GG NN II NN GG AA NN DD DD EE LL II VV EE RR II NN GG TT RR AA II NN II NN GG FF OO RR AA DD UU LL TT SS AA NN DD TT HH EE UU NN EE MM PP LL OO YY EE DD
TT RR AA IINN II NN GG OO FF TT RR AA IINN EE RR SS GG UU IIDD EE
2 Theories and factors involved in adult learning
Why consider learning theories? This short chapter will summarise a range of learning theories that can be applied in the educational context. Teaching and learning activities can be designed and implemented to take principles of learning into account. Also, it is interesting to think about individual differences among learners and to work towards including activities that have variety and interest for all the learners in educational programs. Differences in learning styles The idea that people learn in different ways has been explored over the last few decades by educational researchers. Kolb, one of the the most influential of these, found that individuals begin with their preferred style in the learning process. Honey and Mumford building on Kolb’s work, identified four learning styles:
1. Activist (enjoys the experience itself) 2. Reflector (spends a great deal of time and effort reflecting) 3. Theorist (good at making connections and abstracting ideas from experience) 4. Pragmatist (enjoys the planning stage)
There are strengths and weaknesses in each of these styles. Honey and Mumford argue that learning is enhanced when we think about our learning style so that we can build on strengths and work towards minimising weaknesses to improve the quality of learning. Theories and factors involved in adult learning process There are many different theories of how people learn. What follows is a variety of them, and it is useful to consider their application to how your future adult students learn and also how you teach in your future projects or programs. It is interesting to think about your own particular way of learning and to recognise that everyone does not learn the way you do. Burns (1995, p 99) sees learning as a relatively permanent change in behaviour, including both observable activity and internal processes such as: thinking, attitudes and emotions. Furthermore Burns considers that learning might not manifest itself in observable behaviour until some time after the educational program has taken place.
Sensory stimulation theory Traditional sensory stimulation theory has as its basic premise that effective learning occurs when the senses are stimulated (Laird, 1985). Laird quotes research that found that the vast majority of knowledge held by adults (75%) is learned through seeing. Hearing is the next most effective (about 13%) and the other senses — touch, smell and taste — account for 12% of what we know. How you use this theory? By stimulating the senses, especially the visual sense, learning process is enhanced. However, this theory says that if multi-senses are stimulated, greater learning takes place. Stimulation through the senses is achieved through a greater variety of colours, volume levels, strong statements; facts presented visually, use of a variety of techniques and media.
3
RR EE MM AA –– RR EE SS UU LL TT SS MM AA NN AA GG EE MM EE NN TT II NN DD EE SS II GG NN II NN GG AA NN DD DD EE LL II VV EE RR II NN GG TT RR AA II NN II NN GG FF OO RR AA DD UU LL TT SS AA NN DD TT HH EE UU NN EE MM PP LL OO YY EE DD
TT RR AA IINN II NN GG OO FF TT RR AA IINN EE RR SS GG UU IIDD EE
Reinforcement theory The behaviourist school of psychology developed this theory, notably by B.F. Skinner (Laird 1985, Burns 1995). Skinner believed that behaviour is a function of its consequences. The learner will repeat the desired behaviour if positive reinforcement (a pleasant consequence) follows the behaviour. How you use this theory? Making use of different types of reinforcements. Positive reinforcement, or ‘rewards’ can include verbal reinforcement such as ‘That’s great’ or ‘You’re certainly on the right track’ or through to more tangible rewards such as a certificate at the end of the course or promotion to a higher level in an organisation. Negative reinforcement also strengthens a behaviour and refers to a situation when a negative condition is stopped or avoided as a consequence of the behaviour. Punishment, on the other hand, weakens a behaviour because a negative condition is introduced or experienced as a consequence of the behaviour and teaches the individual not to repeat the behaviour, which was negatively reinforced. Punishment creates a set of conditions, which are designed to eliminate behaviour.
Cognitive-Gestalt approaches The emphasis here is on the importance of experience, meaning, problem solving and the development of insights. How you use this theory? It is noted that this theory has developed the concept that individuals have different needs and concerns at different times, and that they have subjective interpretations in different contexts. Facilitation theory (the humanist approach) Carl Rogers and others have developed the theory of facilitative learning. The basic premise of this theory is that learning will occur by the educator acting as a facilitator, that is by establishing an atmosphere in which learners feel comfortable to consider new ideas and are not threatened by external factors. Other characteristics of this theory include: 22
2
222
2
22
a belief that human beings have a natural eagerness to learn there is some resistance to, and unpleasant consequences of, giving up what is currently held to be true the most significant learning involves changing one’s concept of oneself
How you use this theory? Facilitative way of sharing new concepts is:
less protective of their constructs and beliefs than other teachers more able to listen to learners, especially to their feelings inclined to pay as much attention to their relationship with learners as to the content of the course apt to accept feedback, both positive and negative and to use it as constructive insight into themselves and their behaviour
Learners: are encouraged to take responsibility for their own learning provide much of the input for the learning which occurs through their insights and experiences
4
RR EE MM AA –– RR EE SS UU LL TT SS MM AA NN AA GG EE MM EE NN TT II NN DD EE SS II GG NN II NN GG AA NN DD DD EE LL II VV EE RR II NN GG TT RR AA II NN II NN GG FF OO RR AA DD UU LL TT SS AA NN DD TT HH EE UU NN EE MM PP LL OO YY EE DD
TT RR AA IINN II NN GG OO FF TT RR AA IINN EE RR SS GG UU IIDD EE
2
2
2
2
222
are encouraged to consider that the most valuable evaluation is self-evaluation and that learning needs to focus on factors that contribute to solving significant problems or achieving significant results
Experiential learning
Kolb proposed a four-stage learning process with a model that is often referred to in describing experiential learning. The process can begin at any of the stages and is continuous; there is no limit to the number of cycles you can make in a learning situation. This theory asserts that without reflection we would simply continue to repeat our mistakes. How you use this theory? Kollb’s research found that people learn in four ways with the likelihood of developing one mode of learning more than another: 1) through concrete experience, 2) observation and reflection, 3) abstract conceptualisation and 4) through active experimentation Adult learning (andragogy) Malcolm Knowles (1978, 1990) is the theorist who brought the concept of adult learning to the fore. He has argued that adulthood has arrived when people behave in adult ways and believe themselves to be adults. Then they should be treated as adults. He taught that adult learning was special in a number of ways. How you use this theory?
Adult learners bring a great deal of experience to the learning environment. Educators can use this as a resource adults expect to have a high degree of influence on what they are to be educated for, and how they are to be educated the active participation of learners should be encouraged in designing and implementing educational programs adults need to be able to see applications for new learning adult learners expect to have a high degree of influence on how learning will be evaluated adults expect their responses to be acted upon when asked for feedback on the progress of the program
Adulthood as a social construction Pogson and Tennant (1995) provide a perspective of adulthood as a social construction. They say that the concept of a life’s course varies for different individuals and different cultures; therefore trainers and adult educators should be wary of definitive views of adults and their behaviour. The question could be asked – when is maturity complete? Is there no further development after a certain stage in life? Some authors think that while children at approximately the same age are at approximately the same stage of development, the same cannot be said of adults. Adults would vary in levels of knowledge and also in their life experiences. There could be said to be great variation in adult experience. How you use this theory? An adult’s emotional response can affect learning: Some adults can approach formal educational settings with anxiety and feelings of high or low self-efficacy. Their approach to new learning contexts can be influenced by how they appraise or evaluate the new experience. For example: given two adults in a classroom where an exercise is about to begin, one individual may interpret the exercise in such a way that leads to a
5
RR EE MM AA –– RR EE SS UU LL TT SS MM AA NN AA GG EE MM EE NN TT II NN DD EE SS II GG NN II NN GG AA NN DD DD EE LL II VV EE RR II NN GG TT RR AA II NN II NN GG FF OO RR AA DD UU LL TT SS AA NN DD TT HH EE UU NN EE MM PP LL OO YY EE DD
TT RR AA IINN II NN GG OO FF TT RR AA IINN EE RR SS GG UU IIDD EE
feeling of ‘excitement’, while the other person interprets the exercise in such a way that leads to the feeling of ‘embarrassment’. It is self evident that the way the individual interprets the situation and the subsequent emotion that arises will affect the kind of action the individual is to take. Such appraisals coupled with labels such as ‘fear’ or ‘anxiety’ can lead some learners to emotionally disengage from the source of discomfort that is the learning experience. However, when coupled with labels such as ‘excitement’ or ‘challenge’ the learner is led to take actions that focus on the task.
6
RR EE MM AA –– RR EE SS UU LL TT SS MM AA NN AA GG EE MM EE NN TT II NN DD EE SS II GG NN II NN GG AA NN DD DD EE LL II VV EE RR II NN GG TT RR AA II NN II NN GG FF OO RR AA DD UU LL TT SS AA NN DD TT HH EE UU NN EE MM PP LL OO YY EE DD
TT RR AA IINN II NN GG OO FF TT RR AA IINN EE RR SS GG UU IIDD EE
3 Planning of training
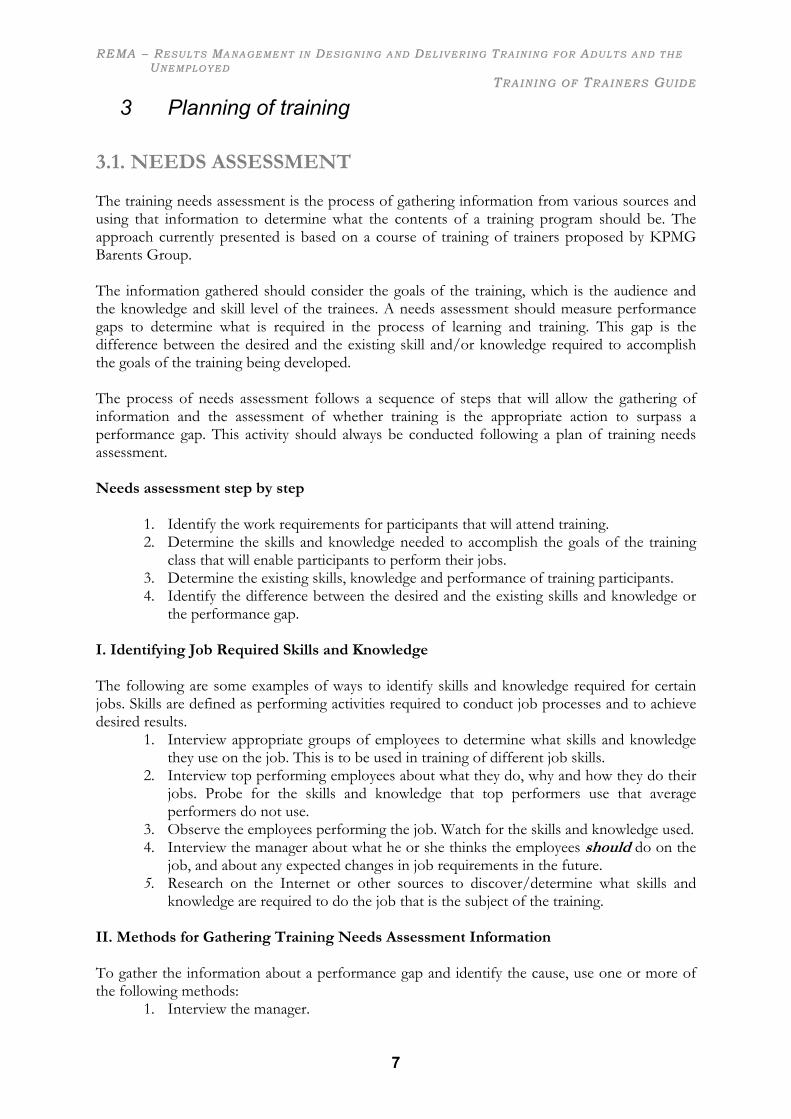
3.1. NEEDS ASSESSMENT The training needs assessment is the process of gathering information from various sources and using that information to determine what the contents of a training program should be. The approach currently presented is based on a course of training of trainers proposed by KPMG Barents Group. The information gathered should consider the goals of the training, which is the audience and the knowledge and skill level of the trainees. A needs assessment should measure performance gaps to determine what is required in the process of learning and training. This gap is the difference between the desired and the existing skill and/or knowledge required to accomplish the goals of the training being developed. The process of needs assessment follows a sequence of steps that will allow the gathering of information and the assessment of whether training is the appropriate action to surpass a performance gap. This activity should always be conducted following a plan of training needs assessment. Needs assessment step by step
1. Identify the work requirements for participants that will attend training. 2. Determine the skills and knowledge needed to accomplish the goals of the training
class that will enable participants to perform their jobs. 3. Determine the existing skills, knowledge and performance of training participants. 4. Identify the difference between the desired and the existing skills and knowledge or
the performance gap. I. Identifying Job Required Skills and Knowledge The following are some examples of ways to identify skills and knowledge required for certain jobs. Skills are defined as performing activities required to conduct job processes and to achieve desired results.
1. Interview appropriate groups of employees to determine what skills and knowledge they use on the job. This is to be used in training of different job skills.
2. Interview top performing employees about what they do, why and how they do their jobs. Probe for the skills and knowledge that top performers use that average performers do not use.
3. Observe the employees performing the job. Watch for the skills and knowledge used. 4. Interview the manager about what he or she thinks the employees should do on the
job, and about any expected changes in job requirements in the future. 5. Research on the Internet or other sources to discover/determine what skills and
knowledge are required to do the job that is the subject of the training. II. Methods for Gathering Training Needs Assessment Information To gather the information about a performance gap and identify the cause, use one or more of the following methods:
1. Interview the manager.
7
RR EE MM AA –– RR EE SS UU LL TT SS MM AA NN AA GG EE MM EE NN TT II NN DD EE SS II GG NN II NN GG AA NN DD DD EE LL II VV EE RR II NN GG TT RR AA II NN II NN GG FF OO RR AA DD UU LL TT SS AA NN DD TT HH EE UU NN EE MM PP LL OO YY EE DD
TT RR AA IINN II NN GG OO FF TT RR AA IINN EE RR SS GG UU IIDD EE 2. Interview the employees performing the job. For ten or fewer employees, you may
want to interview all of them individually or have one meeting with the group. For a group of 11 to 30 employees, you can select a sampling of six or seven employees to interview. Prepare the interview questions before you start.
3. Distribute questionnaires to the manager and employees to find out the cause of the problem. A questionnaire accomplishes the same objective as interviews. It is used in addition to, or instead of, interviews if you need the training analysis information from a large group or a group working in several locations.
4. Interview the experts persons who have done the job successfully or managers who have solved the problem before.
5. Observe the employees doing the work to see if you can spot the cause of the performance problem.
6. Research the "best practices" from other countries. Perhaps another country has already solved the problem and can share the solution with you.
Sample Questions for the Needs Assessment Interview or Questionnaire
1. Describe your work and how you perform it. (Including special forms, equipment and supplies.)
2. Tell me what you do first, second, third through the entire work process. How long have you done this work? How frequently do you do it?
3. What is the easiest part about the work? 4. What is the hardest part about the work? 5. What obstacles prevent you from doing a better job? 6. Why is the work important?
III. Determining the Performance Gap Follow these additional steps to determine the performance gaps in the individual or workgroup.
1. Analyse the difference between the skills and knowledge used by top performers and those used by average performers.
2. Analyse the difference between the skills and knowledge used on the job and those needed on the job.
3. Describe the difference between the skills and knowledge used on the job now and those that will be needed when the job changes (new responsibilities, procedures or equipment).
IV. Performance Analysis Model Once you identify a performance gap, you then determine the best solution to improve performance. The first step is to determine whether the gap is important or significant. If it is important enough to address, then determine whether the gap is caused by a skill or knowledge deficiency. If a skill or knowledge deficiency is evident, then training is probably a good solution. If the gap is caused by other issues or circumstances, training may not be the best solution. Before you start designing a course to surpass the performance gap you should answer to the following questions:
1. How Important is the performance gap? If not important, ignore the performance gap. If the gap is important, then ask the next question.
2. Is the gap caused by a knowledge or skill deficiency? If the gap is caused by a knowledge or skill deficiency, then move to a training solution.
3. What are the Training Solutions? • If the person or group has never performed a certain job task before, then train.
8
RR EE MM AA –– RR EE SS UU LL TT SS MM AA NN AA GG EE MM EE NN TT II NN DD EE SS II GG NN II NN GG AA NN DD DD EE LL II VV EE RR II NN GG TT RR AA II NN II NN GG FF OO RR AA DD UU LL TT SS AA NN DD TT HH EE UU NN EE MM PP LL OO YY EE DD
TT RR AA IINN II NN GG OO FF TT RR AA IINN EE RR SS GG UU IIDD EE
• If the person or group has never performed the certain job task before but not often or lately, arrange practice.
• If the gap is not caused by a knowledge or skill deficiency or if training cannot improve the performance, then move to recommending management solutions. Management solutions are the actions that only the manager can influence to improve the performance and narrow the performance gap. The manager should consider taking some of the actions described below.
EXERCISE: Instructions: Review the situation described below and answer the questions that follow. Scenario The Commerce Bank is located downtown. The bank is very busy, especially at lunch time. Customers come in monthly to get money to pay their utility bills. Many of these customers like to be waited on by Kate. She has been with the bank for a long time and works very fast. In the last six weeks Kate’s cash drawer has been out of balance at the end of the day almost twice as much as usual, and customers are starting to complain that she takes too long to process transactions. The customers have threatened to move to another bank. Kate’s supervisor is concerned that Kate is making too many mistakes. Other Information for the Scenario: In the past two weeks, the bank has added some new forms that need to be completed with each transaction. Kate attended training to learn how to complete the forms. Kate’s supervisor has checked the forms that she has completed, and has found errors in them. Kate’s supervisor started work about seven months ago. No matter how hard Kate tries, her supervisor seems to find something she does wrong. Kate wants to make sure she completes the forms correctly, but doesn’t understand how important they are.
1. Describe the Performance Gap(s). 2. Is the Performance Gap(s) important? Why? Why not? 3. Is the Performance Gap caused by a knowledge or skill deficiency? 4. List possible training actions. 5. List possible management solutions:
3.2. Analysis of constraints The development of realistic training targets needs a relatively clear inventory of resources and constraints. It is obvious that a complete and definitive study cannot be performed, but it should be possible to ensure planning of work and could cause changes in the order of priorities to be satisfied. In the case of constraints, it is important to know which can be overcome and which cannot. The distinction is sometimes easy to make. The natural tendency is to consider too quickly that a constraint is impossible to overcome. Concerning resources, it is important to distinguish between direct and indirect resources. Direct resources are those resources that institutions have in their grasp, and as such, are easily accessed (personnel of institutions, buildings, equipments…). Indirect resources are those over which institutions don’t have direct control, but which could be disposed of, if proper steps are taken (experts from other institutions, borrowing of an equipment, library etc.). The following tables, proposed by DeKetele (1989) should provide a useful frame in constraint analysis:
9
RR EE MM AA –– RR EE SS UU LL TT SS MM AA NN AA GG EE MM EE NN TT II NN DD EE SS II GG NN II NN GG AA NN DD DD EE LL II VV EE RR II NN GG TT RR AA II NN II NN GG FF OO RR AA DD UU LL TT SS AA NN DD TT HH EE UU NN EE MM PP LL OO YY EE DD
TT RR AA IINN II NN GG OO FF TT RR AA IINN EE RR SS GG UU IIDD EE
Type of constraints Constraints that can be overcome
Constraints that cannot be overcome
Institutional Training policy
Rules Hierarchical relations
Human Training coordinators
Lecturers Facilitators Animators Participants
Space Place Room
Time Duration
Date
Material Budget Rent
Travelling Didactic instruments
Other
Type of resources Direct ressources Indirect ressources
Institutional In the organizing institution
Outside the organizing institution
Human Possible training
coordinators Possible lecturers
Possible facilitators Possible animators
Space Possible locations
Assessment of locations (number of places, environment…)
Time Available periods of time
More favourable periods of time
Material Sources of financing
Logistic infrastructure Didactical resources
Other
10
RR EE MM AA –– RR EE SS UU LL TT SS MM AA NN AA GG EE MM EE NN TT II NN DD EE SS II GG NN II NN GG AA NN DD DD EE LL II VV EE RR II NN GG TT RR AA II NN II NN GG FF OO RR AA DD UU LL TT SS AA NN DD TT HH EE UU NN EE MM PP LL OO YY EE DD
TT RR AA IINN II NN GG OO FF TT RR AA IINN EE RR SS GG UU IIDD EE
4 Contents level
4.1 Defining learning objectives The approach currently presented is based on a course of curriculum development proposed by KPMG Barents Group. Learning Objectives Learning objectives are statements that describe what learners should be able to do upon the completion of a course or module. Objectives are a guide to content and activities that should be included in training. Types of Learning Objectives A. One typology of learning objectives describes course objectives and module objectives:
1. Course Objectives: Provide the learner with a clear understanding of what he/she will understand or be able to perform as a result of the training. The course objectives are a cornerstone in determining how the course will be designed.
2. Module Objectives: Provide a detailed look at what will be presented in each module. These objectives should relate directly to the course objectives; however, they should be presented as smaller pieces of information that are easier for the learner to grasp.
B. One very largely used classification of learning objectives is proposed by Bloom & co. It distinguishes between cognitive, affective and psychomotor objectives. Part of the popularity of this classification is due to its empirical nature.
1. Cognitive Objectives: concern mainly or only matters of knowledge, intellectual abilities and capabilities. These objectives concern task of memorising, comprehending, putting into practice, problem solving (analysis, synthesis, evaluation).
2. Affective Objectives: according to Bloom, these are “the objectives that describe modifications in interests, attitudes, values as well as progress in judgement and in the capacity to adapt”. Most of the time such objectives are ignored in the field of training. This does not mean that training doesn’t have consequences at an affective level, but rather that we do not master these consequences well enough. The main affective objectives refer to the sensitising of trainees to a certain phenomenon, the discovery of that phenomenon, the interiorization of values, the organization of the system of values held by trainees.
3. Psychomotor Objectives: as described by AJ Harrow, psychomotor objectives include reflex movements, natural (fundamental) movements, perceptive abilities, physical abilities, motor abilities, non-verbal communication.
Elements of a Good Learning Objective Learning objectives should be provided to learners at the beginning of each course and before each module. The objectives provide the learner with a clear understanding of what he/she will understand or be able to perform as a result of the training. When writing learning objectives, keep the following criteria in mind.
• Keep statements short and simple.
11
RR EE MM AA –– RR EE SS UU LL TT SS MM AA NN AA GG EE MM EE NN TT II NN DD EE SS II GG NN II NN GG AA NN DD DD EE LL II VV EE RR II NN GG TT RR AA II NN II NN GG FF OO RR AA DD UU LL TT SS AA NN DD TT HH EE UU NN EE MM PP LL OO YY EE DD
TT RR AA IINN II NN GG OO FF TT RR AA IINN EE RR SS GG UU IIDD EE
• Avoid excessive detail. • Do not use the objectives to talk about instructors, trainers, the training
process, or the learner population. • Distinguish between activities and objectives (for example, “Read pages 10-25
of the “Teller Operations Manual” is a training activity; “Complete an error transaction” is the objective or end result of the learning).
• Distinguish between descriptions and objectives. Descriptions explain course content; objectives tell what should be accomplished.
• Make sure the objective defines the outcome of the training without describing the means to those outcomes.
• For each objective, specify the action that must be taken, the conditions under which the action should be performed, and the criteria or standards that the performer must meet to accomplish the objective successfully.
• Ensure that the objective states to learners precisely what is expected of them. • Be specific, but not excessively detailed. The scope of an objective depends on
the purpose or subject of the particular objective. Writing an Objective Perform the following steps to write a good learning objective.
1. Start by asking yourself, “What should the learner be able to do by the end of the training period?”
2. Begin the objective with a verb and an object, e.g., type a letter, write a report. The subject “you” is understood.
3. Use action verbs to describe what must be learned by the participants (i.e., operate, collect, list, define, etc.).
4. Follow the verb with a description of what is being treated (operate a computer, complete a report, etc.). The combination of the action verb and the description essentially state what the learner must accomplish.
5. Add conditions by answering questions such as: a. “Will the equipment be available?” b. “What are the time limits?” c. “What resources will be used?”
6. If the course has proficiency requirements, build the competency standard into the objective (for example, process 100 items per hour).
7. When describing a concept that a learner must understand, begin with “explain,” since explaining is an indicator of understanding.
Writing Learning Objective - Example The following are examples of good learning objectives:
a. “By the end of the first month of training, the trainees should be able to understand the functioning of the Diesel engine.”
b. “By the end of the second day of training, the trainees should be able to understand the importance of the sustainable development concept.”
c. “By the end of the first week of training, the trainees should be able to run a complete a security check of the main offices within ten minutes.”
12
RR EE MM AA –– RR EE SS UU LL TT SS MM AA NN AA GG EE MM EE NN TT II NN DD EE SS II GG NN II NN GG AA NN DD DD EE LL II VV EE RR II NN GG TT RR AA II NN II NN GG FF OO RR AA DD UU LL TT SS AA NN DD TT HH EE UU NN EE MM PP LL OO YY EE DD
TT RR AA IINN II NN GG OO FF TT RR AA IINN EE RR SS GG UU IIDD EE
4.2 Course Content Writing and editing content so information is clear, concise, and relevant to the learner ensures course success. Information should be presented in an interesting way that motivates the learner to participate and understand. Rules For Writing/Editing Content To ensure that content is clear, logical and easy to understand, keep the following points in mind:
A. Course Design Elements - Make sure that each course includes the required learning elements for consistency in appearance and learning including:
i. Cover page. ii. Table of contents.
iii. Course overview and objectives. iv. Modules (course content). v. Summary of the course.
vi. Glossary, forms, and exhibits (as required and time permits). B. Module Design Elements - Make sure that each module includes the following learning
elements: i. Sound and detailed learning objectives.
ii. An overview of the module. iii. Content. iv. Activities, exercises, case studies, etc. v. Summary.
vi. Resources. C. Text - Keep text clear and concise so the content is easy to understand. When content is
concise and easy to understand, courses can be used as reference material after the class. D. Samples and Examples - Provide samples and examples where appropriate to reinforce
concepts and add realism to the course content. E. Logical Flow of Information - Keep the flow of your materials logical. Concepts that are
not presented in a logical flow can confuse the learner and inhibit learning. F. Case Studies, Exercises and Activities - Use case studies, exercises and activities
whenever appropriate to emphasize points and encourage learners to participate in the learning process.
G. Relevance - Make sure that all information presented in the course is relevant and applicable to the learner. Presentation of extra information can be confusing and prevent learners from focusing on the important concepts.
H. Varied Presentation - Try to vary the way in which information is presented to keep learners interested and focused.
I. Handouts, Articles, Supporting Materials - Be prepared with applicable handouts, articles and supporting materials to reinforce your ideas. These materials can strengthen the concepts presented and add variety to the course presentation.
Module Plan Checklist The Module Plan Checklist can help designers check for missing elements, relevance, and clarity in lessons. After completing your course design on a new lesson or editing an existing one, use the checklist to ensure that you have included all the proper elements in the lesson.
• The module clearly states one or more learning objectives. • The module objectives are based on the course objectives. • The objectives state conditions and criteria that help measure whether objectives have
been achieved.
13
RR EE MM AA –– RR EE SS UU LL TT SS MM AA NN AA GG EE MM EE NN TT II NN DD EE SS II GG NN II NN GG AA NN DD DD EE LL II VV EE RR II NN GG TT RR AA II NN II NN GG FF OO RR AA DD UU LL TT SS AA NN DD TT HH EE UU NN EE MM PP LL OO YY EE DD
TT RR AA IINN II NN GG OO FF TT RR AA IINN EE RR SS GG UU IIDD EE
• The introduction contains information that motivates participants and orients them to the module objectives.
• The number of teaching points is appropriate to meet the module objectives in the allotted time.
• The course content is clear, concise, relevant, and presented in a logical manner. • Graphics are appropriate and are used to support the stated objectives. • Activities and techniques used in the class support the learning objectives. • Samples and examples are used in an appropriate manner and support the stated learning
objectives. • The lesson includes a variety of activities. • Learners are given ample opportunity to participate and apply what they have learned. • The transparencies are relevant, appropriate and clear. • The summary reinforces key concepts presented. • The time frames are noted and appropriate in order to complete activities.
The information above ensures that you create training materials that are easy and logical to follow so that the content will be more understandable. Overviews An overview is an introduction that motivates participants by generating interest in the topic about to be presented. An overview should provide a framework for learners. This framework helps learners retain and use new information that is presented to them. What Makes a Good Overview? A good overview should have the following characteristics:
• Be short, simple, and straightforward. • Has no more than a few paragraphs in length for a course or a few sentences for a new
module or idea. • Get the learner’s attention without providing too much detail. • Present a synopsis of the basic content of the course, module, or topic about to be
presented (graphics can be excellent communicators in an overview). • Provide an understanding of how the content can be useful to the learner or answer the
learner’s question, “What’s in it for me?” When Should an Overview Be Used? In most cases, an overview should be provided at the following points in a course: At the beginning of the course - to provide participants a “big picture,” preface the direction and purpose of the course and provide a context for new information being presented. At the beginning of each module - to give participants a solid understanding of where the information they are about to learn fits into the “big picture”. Before explaining difficult concepts or ideas - present a basic, easier-to understand concept and then build upon the concept with more difficult information. Summaries A summary is a synopsis of a course or module. Summaries reinforce the thoughts, ideas, and concepts presented during training to form a single, cohesive picture for the learner.
14
RR EE MM AA –– RR EE SS UU LL TT SS MM AA NN AA GG EE MM EE NN TT II NN DD EE SS II GG NN II NN GG AA NN DD DD EE LL II VV EE RR II NN GG TT RR AA II NN II NN GG FF OO RR AA DD UU LL TT SS AA NN DD TT HH EE UU NN EE MM PP LL OO YY EE DD
TT RR AA IINN II NN GG OO FF TT RR AA IINN EE RR SS GG UU IIDD EE
What Makes a Good Summary? A good summary should have the following characteristics:
• Be short, simple and straightforward. • Be no more than a few paragraphs in length for a course or a few sentences for a new
module idea. • Summarize the major points presented without providing too much detail. • Review the basic content of the course, module or topic presented. • Reinforce how the content can be useful to the learner. • Parallel the overview of the course or module.
When Should a Summary Be Used? In most cases, a summary should be considered at the following points: At the end of the course -- to bring all the components of the course together to reinforce the “big picture” presented in the overview. At the end of each module -- to strengthen the learner’s understanding of how the information they have learned correlates to the entire course and can be useful to them. After explaining difficult concepts or ideas -- to ensure that the learner understands all aspects of the concept or idea presented before moving on to other information. Instructor’s Guide An Instructor Guide is an important tool that instructors use when conducting a training course. Typically, the guide provides instruction about presenting content, conducting discussion groups or sessions, and facilitating exercises. An instructor guide can be lengthy and detailed or short and concise. Instructor Guide should be no more than 10-12 pages in length (depending on the length of the course) and should provide specific details required to conduct the course. Instructor Guide provides added insight to the instructor to ensure that he/she delivers content or leads an activity in the most effective way possible. Elements of the Instructor Guide Document A good set of Instructor Guide should include:
• A brief description of each module in the course (one to three sentences). • The estimated length of time to teach each module. • Important notes that the instructor should be aware of when teaching the course. • A description and list of instructions for each exercise; answers to exercises, if needed. • A description of all case studies, important points that should be brought out for each
case, and possible outcomes. • A list of resources required to complete each module (books, job aids, video tapes,
Instructor Guide Document - Example Instructors Guide Document
15
RR EE MM AA –– RR EE SS UU LL TT SS MM AA NN AA GG EE MM EE NN TT II NN DD EE SS II GG NN II NN GG AA NN DD DD EE LL II VV EE RR II NN GG TT RR AA II NN II NN GG FF OO RR AA DD UU LL TT SS AA NN DD TT HH EE UU NN EE MM PP LL OO YY EE DD
TT RR AA IINN II NN GG OO FF TT RR AA IINN EE RR SS GG UU IIDD EE
(Sample Page) Module # - Module Name Overview Insert one to three brief sentences describing the purpose of this module. Estimated Teaching Time This module should take _____ minutes to complete. Note: You may break down the time required to complete individual pieces of the module if appropriate. Important Notes About This Module Insert the following (as required) in enough detail for another instructor to teach the course if they are familiar with the course content: ♦ Method/Content ♦ Explanations ♦ Notes ♦ Key points Exercise: Insert Name Insert a brief description of the exercise and its purpose. Instructions: Insert instructions that the instructor must know to explain the exercise and any special notes required to facilitate the exercise. Results: Insert the appropriate answers/responses to the exercise. You may attach a copy of the exercise to the instructor guide with answers provided and make references to the copy. Case Study: Insert Name Insert a brief description of the case study and its purpose. Instructions: Insert instructions that the instructor must know to explain the case study to the students and any special notes required to facilitate the case study. Results: Insert the appropriate answers/responses to the case study. You may attach a copy of the case study to the instructor guide with answers provided and make references to the copy. Critique Instructor Guide Critique Questions 1. Does the overview give a clear and concise description of what will be included in the module? 2. Is a purpose for the exercise stated? 3. Are the exercise instructions clear? Why or why not? 4. Are the case study instructions clear? Why or why not? 5. From the description of the case study, can you tell what the goal of the case study is? 6. What information do you think needs to be added to this Instructor Guide? 7. What information in the Instructor Guide do you think is extraneous?
5 Methods level - Methods and techniques used in training
5.1. How to Start Things off – Icebreakers and Openers
16
RR EE MM AA –– RR EE SS UU LL TT SS MM AA NN AA GG EE MM EE NN TT II NN DD EE SS II GG NN II NN GG AA NN DD DD EE LL II VV EE RR II NN GG TT RR AA II NN II NN GG FF OO RR AA DD UU LL TT SS AA NN DD TT HH EE UU NN EE MM PP LL OO YY EE DD
TT RR AA IINN II NN GG OO FF TT RR AA IINN EE RR SS GG UU IIDD EE
Both icebreakers and openers are start-up activities that help participants ease into the program. Icebreakers are relatively subject-matter free, whereas openers relate directly to the content (subject matter) of the session or course. Thus, if everyone knows one another, icebreakers may not be necessary. But regardless of the participants’ prior acquaintances with one another, an opener would seem to be quite desirable in any program.
Basically you can start a training program in only one of two ways: (a) by introducing the participants group to the content at the outset or (b) by easing the group into things before directly involving them in the subject matter. Regardless of which start-up procedure you use, you should recognize that your approach to the opening of the program communicates the following loud and clear:
• Your philosophy of learning • Your style of training • Your attitudes toward the participants as learners • Your anxiety level. In other words, your first communication effort, whether you have reflected on it or aren’t conscious of it, is immediately creating attitude toward you and your program. Because a basic principle of communication is that all behaviour with others is perceived. Behaviour does not take place in a vacuum. Rather, it is observed, sifted, weighed, interpreted, and given meaning by those who experience it. The meaning may not be the one we intend, but it registers its impact, nevertheless.
A well-thought-out, professional training effort should give full attention to icebreaking and/or opening activities because they:
• Warm up (energize) the participants and thus put them at ease; learning proceeds best when the learners are ready to learn;
• Set the tone for the course and indicate whether the course will be participative, sit-and-listen, or some mixture of these approaches to learning;
• Indicate who has responsibility for learning; • Communicate immediately the kind of trainer you are – relaxed or compulsive, friendly
or distant, super-sober or fun to be with, subject matter or participant oriented; • May provide later linkage with a particular topic or session; for example, an icebreaker
that deals with values can serve as a bridge to such topics as motivation, career planning, management philosophy, and leadership style.
Planning the Use of Icebreakers and Openers If you are convinced that icebreakers and openers have real merit, you will want to plan them properly. This means you should select ones on such factors as: composition of the group, expectations of the group, nature of the course, length of the course, style and personality of the trainer(s), program content.
A useful checklist to test the appropriateness of your proposed icebreaker is listed bellow:
Is there a possibility the activity could build barriers rather than create rapport? Is there a possibility that the participants might experience failure in involving themselves
in the task? Could it provoke embarrassment, especially for those who are introverted to varying
degrees? Would be desirable to build more trust before asking for this type of participation? Could the end result be accomplished with less threatening procedures?
17
RR EE MM AA –– RR EE SS UU LL TT SS MM AA NN AA GG EE MM EE NN TT II NN DD EE SS II GG NN II NN GG AA NN DD DD EE LL II VV EE RR II NN GG TT RR AA II NN II NN GG FF OO RR AA DD UU LL TT SS AA NN DD TT HH EE UU NN EE MM PP LL OO YY EE DD
TT RR AA IINN II NN GG OO FF TT RR AA IINN EE RR SS GG UU IIDD EE
Is this icebreaker one that I like to do, but one that is not appropriate for other learning styles or personality types?
Would it make sense to query a more conservative associate to assess the activity, so as to check his/her reaction?
Working with Icebreakers Although a training group composed of participants who know one another quite well may not require icebreaking activities, groups of strangers can certainly profit from them. It is essential to use more dynamic, experiential icebreakers for warm-up purposes. The group will benefit for several reasons:
Icebreakers allow participants to become acquainted wit one another in a more meaningful way;
A start can be made on overcoming possible feelings of loneliness, and icebreakers certainly help to involve shy people;
They help to relax the group and make people more spontaneous; They set a climate, tone, and pace for the course, particularly if it is to be a participative
one; They help to build momentum for the next phase of the course; They achieve the instant involvement of everyone; They help to build group identity and group cohesiveness; They assist in developing trust among participants and with the trainer as well; They help participants learn about the resources of the group; They help energize the group; They help to develop the credibility of the trainer as a facilitator, not a leader or a
lecturer; They give the trainer a feel for the group; They can help to reduce the anxieties of the trainer, who is a human being, too!
There are many icebreakers, simple to understand and easy to administer, such as: “Interviews for creative introductions”, “My personal shield”, “Trust walk”, “Values billboard”, “Card swap”, “Know your sign”, “Art Mart”, “Puzzle fun”, “Nicknames”, “Hobby hunt”, “Shoe In”, “Me: yesterday, today and tomorrow”, etc.
The icebreakers can be divided into two categories: (a) the personality report - directly asks participants to provide information about themselves: needs, hopes, fears, goals, details about one’s background; and (b) the personality clue – provides indicators about one’s personality.
Working with Openers
Openers are tools to help participants ease into the subject matter of the course. They are intended to set the stage, to avoid abrupt starts, and generally to make participants comfortable with the formal program that they are about to experience. Unlike icebreakers, they are essentially subject-matter-related, work-oriented.
Openers may also provide the participants with the opportunity to express their reasons for coming and their goals and expectations about learning from the course. If some of those objectives are quite different from yours and you proceed, unaware of that circumstance, you may encounter considerable difficulty-boredom, limited cooperation, argumentation, and possibly post-session complaints from the participant’s bosses.
18
RR EE MM AA –– RR EE SS UU LL TT SS MM AA NN AA GG EE MM EE NN TT II NN DD EE SS II GG NN II NN GG AA NN DD DD EE LL II VV EE RR II NN GG TT RR AA II NN II NN GG FF OO RR AA DD UU LL TT SS AA NN DD TT HH EE UU NN EE MM PP LL OO YY EE DD
TT RR AA IINN II NN GG OO FF TT RR AA IINN EE RR SS GG UU IIDD EE
Conversely, if you learn of this variance in goals/expectations early on, you can do one of several things: • State candidly that a particular goal is outside the purview of this course; • Advise the participant that his/her special interest is covered in another course; • Adjust the program to the extent possible; • If someone is really in the wrong ballpark, ask if he/she wishes to leave.
Examples of openers: Goal Analysis
Participants from small groups and tell the trainer their goals for the course. These goals are posted on a flipchart, and the trainer categorizes them as “R” (Realistic) or “U” (Unrealistic or Unattainable). After adding the trainer’s own goals, all the posted goals are discussed. This is a means of involving both participants and trainers in planning the course and opening the communication process. Individual Goals
In small groups, the participants declare their goals for the course and enter them on a flipchart. The individual goals are discussed in the small group for five to ten minutes; then the flipchart is posted on the wall. The trainer comments supportively on all goals as to relevancy, practically. The flipcharts can and should be referred to at various stages in the program.
A variation of this procedure is to have pairs discuss their goals for two minutes; the pairs merge with another pair to form quartets and buzz for four minutes; the quartets merge with another quartet and buzz for eight minutes. The octets record their goals on flipcharts, the flipcharts are posted on the wall, and a recorder from each octet explains its goals. The trainer points out the similarities and divergences of the stated goals.
Another variation of the goal-setting opener is to have each goal identified with its owner, for example, in a power negotiation session we may get a T-column on a flipchart. Commitment Continuum
If you sense that several participants in your program are there reluctantly or have negative attitudes for any reasons, a good way to deal directly and constructively with this circumstance is to use a ten-point continuum. Draw a horizontal line on the flipchart and number a scale on it from one to ten. Label one end “dull, terrible, threatening” and label the other end “great, exciting”. Then ask the group such questions as: Why are you here? Are you here voluntarily? Where you send by your boss? You can gather data for the continuum in one of two ways: (1) with your back to the participants have them call out a number on the scale, which you then mark with a check; or (2) have participants enter their numbers on slips of paper, which another participant can collect and post on the scale. Common Concerns Checklist
To provide your participants with the opportunity to express their feelings about the forthcoming course, you can use a checklist along the following lines: You are about to begin a course on.......Some thoughts may have occurred to you, such as those listed below. Please check those about which you been thinking. You may wish to add other concerns not on the list below. We will hold a general discussion concerning participant responses to the checklist. - Lectures will be boring - Discussions will ramble and drag on - Some people will monopolize the available airtime
19
RR EE MM AA –– RR EE SS UU LL TT SS MM AA NN AA GG EE MM EE NN TT II NN DD EE SS II GG NN II NN GG AA NN DD DD EE LL II VV EE RR II NN GG TT RR AA II NN II NN GG FF OO RR AA DD UU LL TT SS AA NN DD TT HH EE UU NN EE MM PP LL OO YY EE DD
TT RR AA IINN II NN GG OO FF TT RR AA IINN EE RR SS GG UU IIDD EE
- Some material won’t be covered - Breaks will be too short - Breaks will be too far apart - Too many overhead projector slides will be used - I don’t expect anything new - I doubt if I’ll fit into the group - We could cover this topic in less time. The openers can be divided into these two categories: (a) The attitude report – asks participants in a direct way to verbalize their attitudes toward the topic or subject that they will be entering; (b) the attitude clue – provides indirect data or indicators about a person’s feelings toward the subject at hand. Group discussion Rules for Discussion Leaders A group discussion is a planned conversation between three or more people on a selected topic, with a trained discussion leader. The purpose is to express opinions, gain information on the topic, and team from the other group members. USE GROUP DISCUSSION: To share ideas and broaden viewpoints To stimulate interest in problems To help participants express their ideas To identify and explore a problem To create an informal atmosphere To get opinions from persons who hesitate to speak With ten or fewer people
GROUND RULES FOR A DISCUSSION: Be an active part of the group. Work to solve common problems. Discuss completely, but do not argue. Contribute ideas related to the subject. Ask questions to clarify ideas. Be clear and brief -- no speeches. Listen and team. Write down good ideas
PREPARE FOR THE DISCUSSION: Preferable seating arrangement is a circle, semicircle, U, or Hollow Square so that each person in the group can see every other person. Make the room as comfortable as possible. Check the ventilation and lighting. Have paper and pencil ready to record main points. Start the discussion on time. Close on time. Encourage informality and good humour. Permit friendly disagreement, but on the point under discussion, not between personalities. LEADING THE DISCUSSION: Help the group feel at ease. See that everyone knows everybody else. Give everyone a chance to talk. Let the person talking remain seated. More people will
participate and those talking will feel more at ease.
20
RR EE MM AA –– RR EE SS UU LL TT SS MM AA NN AA GG EE MM EE NN TT II NN DD EE SS II GG NN II NN GG AA NN DD DD EE LL II VV EE RR II NN GG TT RR AA II NN II NN GG FF OO RR AA DD UU LL TT SS AA NN DD TT HH EE UU NN EE MM PP LL OO YY EE DD
TT RR AA IINN II NN GG OO FF TT RR AA IINN EE RR SS GG UU IIDD EE
Set the tone for the discussion: emphasize that there are no dumb questions or comments; stress that there are many ways of handling any situation; point out that everyone's ideas are of value during a teaming experience.
Foster discussion by asking questions such as: "How does that apply to your job?", "How would you handle that situation?", "What are your thoughts?"
Be careful of the person who tries to monopolize the discussion. Interrupt the "speechmaker" tactfully and lead the discussion to another person.
Call on individuals who seem ready to talk, rather than going around the circle. Direct rather than dominate the discussion by easing yourself info the background
when the group gets into the swing of it. Keep the discussion general so that it is of interest to all present. Keep the discussion on the track. If it gets sidetracked, bring it back to the main subject
by suggesting there are some other important points, which need to be covered in the limited time.
Observe and respond to participants' body language (nodding head, leaning forward or backward, hand position, eye contact, etc.)
If you feel that some important point is being neglected, mention it. Summarize periodically. Stop occasionally to review the points that have been made. Stick to the time limit. If there doesn't seem to be sufficient time to cover the subject,
mention this in your training session evaluation, and take action to correct this before the next session.
Keep spirits high. Encourage ease and informality. Let everyone have a good time. Don't let the discussion drag or get boring.
Quickly summarize the conclusions in such a way that everyone will realize the important facts brought out in that discussion
HANDLING DIFFICULT SITUATIONS: Anticipate participants' responses to the material presented. Identify potential problem situations before hand and plan contingency approaches. Consult other trainers for approaches and insights they have found helpful. Turn difficult situations and comments back to the group. Allow group members to
work through the situations or comments themselves. Limit your opinions on controversial subjects and avoid expressing personal opinions. Never argue with a participant.
POINTS TO REMEMBER: Prepare for the discussion. Get the group to feel at ease. Give everyone a chance to talk. Keep the group on the track. Summarise periodically.
How to Introduce a Speaker Proper introduction at a training course is important. Participants attending the course expect to hear and see qualified trainers in action and good introductions can help greatly to establish prestige for the staff. Here are some suggestions: Give the full name carefully. Avoid the use of nicknames. Tell about the trainer's experience, namely your experience: what jobs you held, how
long you have served, special recognition or awards.
21
RR EE MM AA –– RR EE SS UU LL TT SS MM AA NN AA GG EE MM EE NN TT II NN DD EE SS II GG NN II NN GG AA NN DD DD EE LL II VV EE RR II NN GG TT RR AA II NN II NN GG FF OO RR AA DD UU LL TT SS AA NN DD TT HH EE UU NN EE MM PP LL OO YY EE DD
TT RR AA IINN II NN GG OO FF TT RR AA IINN EE RR SS GG UU IIDD EE
Tell what the trainer's function is in the training course and why you were selected for this particular assignment.
Avoid horseplay or stupid jokes in making introductions. Sometimes there will be guest speakers at training courses. They need a slightly
different type of introduction: Be brief. You are the one who introduces not the speaker. Don't take up his or her time. Avoid clichés and stale or stilted phrases such as "This speaker needs no introduction"
or "We are gathered here tonight." Briefly answer the following questions: Why is the subject of interest in general? Why is it of interest to this particular audience? Why is this speaker the one to present it? Give the speaker and his or her ability to handle the subject, a sincere build-up but
don't put him or her on the spot by overselling. Save the speaker's name until last. The speaker's name is usually recognised as the
signal for him or her to rise and come forward. Don't embarrass him or her by giving it before you are ready for him or her.
Make his or her name the climax of your introduction by pausing before it, saying it clearly, and raising your voice a bit. "I am pleased to present (short pause) Mr. Donald Smith or Ms. Mary Jones."
Remain facing the audience until you have finished saying the name, and then quickly turn to the speaker for their acknowledgement.
You will want to be sure to thank the speaker after he or she has finished, and if appropriate, offer congratulations on the presentation.
5.2 Participative training methods The reasons trainers1 should be concerned with participative training methods are compelling:
1.
2.
3.
4.
Our understanding of the adult as a learner. Scientific authorities have been telling us for years that the adult learner wants to be involved, wants to participate, and wants to be treated with respect and dignity. Trends in society at large. There is significant and unwavering trend in society of people making demand. So, today’s higher educational levels and a stronger sense of independence among employees are triggering these demands. Underpinning these requirements for participation, too, is an evolving humanistic philosophy, worldwide, which sees human beings as uniquely capable of personal and collective growth, self/determination, and transformation. Trends in organizations. Organizations of all sorts have been moving gradually toward various forms of participative management. These activities reflect a recognition that employees have needs and values that relate to self-control, self-determination, self-development and meaningful work Brain research. Recent research about the right and left brain has revealed that people are not only logical and rational (left brain thinking) but also have the capacity to be spontaneous and creative (right brain thinking). Certainly, participation provides one with the opportunity to use the right hemisphere of the brain to a significant degree.
55..22..11 BBRRAAIINNSSTTOORRMMIINNGG
1 This term is used to cover instructors, facilitators, tutors, teachers or conference leaders in all kinds of training settings (class or discussion room) where participative methods are employed.
22
RR EE MM AA –– RR EE SS UU LL TT SS MM AA NN AA GG EE MM EE NN TT II NN DD EE SS II GG NN II NN GG AA NN DD DD EE LL II VV EE RR II NN GG TT RR AA II NN II NN GG FF OO RR AA DD UU LL TT SS AA NN DD TT HH EE UU NN EE MM PP LL OO YY EE DD
TT RR AA IINN II NN GG OO FF TT RR AA IINN EE RR SS GG UU IIDD EE
Know why you want to run a brainstorming session One of the first things you need to determine is whether you need to use a brainstorming session at all. A brainstorming session should be used for generating lots of new ideas and solutions. It should not be used for analysis or for decision making. Of course you will need to analyze and judge upon the ideas but this is done afterwards and the analysis process does not involve brainstorming techniques. A brainstorming session must be targeted to a specific topic. You must define the problem area or the opportunity area you want to create ideas for. You must draw up a specific problem or opportunity statement, which describes what you are trying to achieve. This statement must not even suggest what a typical solution might be because this will hinder the idea generation. It is perfectly acceptable to propose a brainstorming session to investigate a whole area of interest, which you wish to explore. You will have no fixed perceptions about the area and can often discover new ideas and markets precisely because you didn't follow the normal training path. Creative thinkers often suggest that before you do research in a specific area, you should generate your own ideas because if you follow what everyone else has done, you will follow the normal line of thinking and come up with the same or similar answers. The time and costs spent brainstorming can sometimes be saved by just implementing a currently known solution and spending your valuable time on more crucial problems. Some problems are best solved by computer simulation or mathematical calculations because they do not need a change in perception. You should not be planning a brainstorming session if you already have several solutions and all you want to do is to decide which one to use (this is done by analysis).
Decide how you will run the session and who will take part Assume you now have a problem or situation statement describing what you are trying to achieve or investigate. You have also decided that brainstorming is the most valid approach to your investigation. Now you need to decide how you will run the session and who will take part. It is important to adjust the style and management of the session depending on the topic and the participants involved. First you should decide who will lead the session - the facilitator. This person needs to introduce the session, to keep an eye on the time and to make sure the rules are obeyed. This person will facilitate the session to make it run smoothly and ensure that the participants feel comfortable and join in the process. They will also be responsible for restarting the creative process if it slows down. This central facilitator will normally be you. Next you should decide the manner of how it will take part. Group sizes are often number between 4 and 30 people. More people mean more opportunity for diversity but can lead to nervousness or to frustration if each person is not given enough individual time to suggest ideas.
Prepare the room and materials
23
RR EE MM AA –– RR EE SS UU LL TT SS MM AA NN AA GG EE MM EE NN TT II NN DD EE SS II GG NN II NN GG AA NN DD DD EE LL II VV EE RR II NN GG TT RR AA II NN II NN GG FF OO RR AA DD UU LL TT SS AA NN DD TT HH EE UU NN EE MM PP LL OO YY EE DD
TT RR AA IINN II NN GG OO FF TT RR AA IINN EE RR SS GG UU IIDD EE
The choice of room will obviously depend on what is available and we will leave this to your creativity if the ideal room is not available. What we suggest for a group of approximately 12 people:
Brainstorming technique - Example Example: Arrange people to be seated in a circle with no "head of the table". Ideally, a round-shaped table is best, though a set of tables in a circle is the usual solution. Otherwise a broad U shape layout is fine. This makes everybody feel equal and when people's ideas start to flow you will find that the person initiating the session becomes part of the group and can play an equal role without pushing any authority. You could have flipcharts just behind the members (approximately one per two people) and with lots of coloured pens. Each person should also have a notepad and pen so that they can write down their personal ideas at the same time as ideas shouted out by other people are being written down elsewhere. Make sure no ideas are lost at any stage. The cost of extra pads is small compared to the loss of a potential winning solution. You may well need an overhead projector if you intend to display the situation’s description and any background information or pictures. A room which has space around the table in which to move about, but not one which makes the group feel small in comparison, is ideal. Comfortable chairs and tables coupled with refreshments on a nearby table are useful. Providing an object in the middle of the circle gives people something to fix on while thinking and removes the need to look into the face of someone else while suggesting an idea.
Alterations for smaller groups Smaller groups are easier to control but there are less people to keep the process moving smoothly onward. A very small group is more like a quick-fire conversation and could be seated round a small table with a large pad of paper covering the whole table surface. Everyone can add their ideas at the same time. Try to move the group close together so they don't feel remote from each other.
Alterations for larger groups With large groups it's impossible to arrange people in a circle without them being too far away to feel part of the group. In this situation you will need to have a theatre-style seating pattern with the facilitator at the front. If you need a microphone and speakers then it's likely that the group is too big for brainstorming because ideas will be lost while people wait for their turn to speak.
Running the session itself Stick the brainstorming rules up in a prominent place. At the point when everyone has arrived, gather everyone together and settle them down in their seats. Welcome them to the brainstorming session and outline the purpose of the session: to get as many ideas as possible on the subject of your choice. Allow people clarification of your intentions but be careful not to suggest specific solutions and try not to place any barriers to solutions at this stage. For now, they should pretend that anything is possible.
24
RR EE MM AA –– RR EE SS UU LL TT SS MM AA NN AA GG EE MM EE NN TT II NN DD EE SS II GG NN II NN GG AA NN DD DD EE LL II VV EE RR II NN GG TT RR AA II NN II NN GG FF OO RR AA DD UU LL TT SS AA NN DD TT HH EE UU NN EE MM PP LL OO YY EE DD
TT RR AA IINN II NN GG OO FF TT RR AA IINN EE RR SS GG UU IIDD EE
Run through the brainstorming rules: Postpone and withhold your judgment of ideas. Encourage wild and exaggerated ideas. Quantity counts at this stage, not quality. Build on the ideas put forward by others. Every person and every idea has equal worth
Highlight the importance of the rules. Also explain that the ideas they shout out are both to serve as possible solutions AND to stimulate ideas in other people. You are expecting strange and impossible ideas, which will spark off workable solutions. Let them know how much you value weird and bizarre ideas.
Ending the session When you decide to end the session, catch everyone's attention and ask participants to finish off their writing. Thank them very much for taking part, tell them how good the process was and how enjoyable you found it.
Post-session work and idea analysis You should now have a large number of ideas scattered about on lots of bits of paper (unless you used a computer program to store your ideas). It is recommended that you put all of the ideas into one list. If you intend to do any amount of analysis on the ideas, you should share the complete set with the others. When you start to analyze the ideas you are not brainstorming. However, brainstorming without analysis is pointless. Brainstorming summary Brainstorming can be an effective way to generate lots of ideas and then determine which idea(s) best solves the problem. Brainstorming is most effective with larger groups of people and should be performed in a relaxed environment. If participants feel free to be silly, they'll stretch their minds more and therefore produce more creative ideas. Brainstorming works best when you have a larger group of varied people. Step by Step 1. Define your problem (please note that the word "problem" is not necessarily negative - your problem could be a situation). Write out your problem concisely and make sure that everyone understands the problem. 2. Give yourselves a time limit - we recommend around 25 minutes, but experience will show how much time is required. Larger groups may need more time to get everyone's ideas out. 3. Everyone must shout out solutions to the problem while one person writes them out. There must be ABSOLUTELY NO CRITICISING OF IDEAS. No matter how daft, how impossible or how silly an idea is, it must be written down. 4. Once your time is up, select the five ideas, which you like best. Make sure everyone involved in the brainstorming session is in agreement. 5. Write down about five criteria for judging which ideas best solves your problem.
25
RR EE MM AA –– RR EE SS UU LL TT SS MM AA NN AA GG EE MM EE NN TT II NN DD EE SS II GG NN II NN GG AA NN DD DD EE LL II VV EE RR II NN GG TT RR AA II NN II NN GG FF OO RR AA DD UU LL TT SS AA NN DD TT HH EE UU NN EE MM PP LL OO YY EE DD
TT RR AA IINN II NN GG OO FF TT RR AA IINN EE RR SS GG UU IIDD EE
6. Give each idea a score of 0 to 5 points depending on how well it meets each criterion. Once all of the ideas have been scored for each criterion, add up the scores. 1. The idea with the highest score will best solve your problem. 55..22..22.. RRoollee PPllaayyiinngg
AA TTrraaiinniinngg TTeecchhnniiqquuee Introduction: We learn by reading, listening to someone talking, watching something being done, and doing something ourselves. Of course, different individuals have different ways of learning, and variable strengths according to how they obtain the information to be learned. The following list is a rough generalization of information taken out form psychological research: If you look at the various ways we have of learning, then reading appears to be at the
bottom of the list. The information is difficult to absorb and understand, and retention tends to be short
lived. Listening to a lecture appears to be far down on the list, almost as low as reading. Watching something being done, live, or video or on a film, is a little more effective. At the top of the list, are games and simulations, when the trainee participates in the
activity to be learned, absorption is faster, more complete and more concentrated, and retention is much greater.
That is one of the many reasons why training should not be all lumped together, role playing or simulation games have been found to be very effective. The Essence of a Role-Playing Game: A role playing game is a training session where the facilitator, perhaps with an assistant or two, sets up a scenario where the participants are assigned different roles, where those roles identify with those in the situation where participants will find themselves when they undertake their work in the field. The play gives the training participants opportunities to act out various roles chosen to represent actual roles that would be in the field situation. One important result is that training participants get an opportunity to see the field situation from perspectives other than those they might be taking in reality. That opportunity results in a greater sensitivity to the experiences of other persons in the field situation. The follow-up session following the play gives the training participants an opportunity to analyse some of the social dynamics that occur. This objectivity is available both to those who take roles for a play session, and to those who might be observing the role-play session. There are three stages to a standard role-play session: (1) the set up, (2) the play and (3) the discussion.
(1) Setting Up the Play: In the set up stage, the facilitator sets the stage. This means describing the scenario and assigning roles to participants. If a participant plays a particular role in reality, in the field situation, it would be more effective to give a different role to that participant during the role-play session. An optional part of the set up stage is to give some time for the key role players to get together to map out the general plot of their play. You as facilitator must decide this on the basis of what you want to emphasize, and this should be decided when you design the workshop in which the role-play will be carried out.
26
RR EE MM AA –– RR EE SS UU LL TT SS MM AA NN AA GG EE MM EE NN TT II NN DD EE SS II GG NN II NN GG AA NN DD DD EE LL II VV EE RR II NN GG TT RR AA II NN II NN GG FF OO RR AA DD UU LL TT SS AA NN DD TT HH EE UU NN EE MM PP LL OO YY EE DD
TT RR AA IINN II NN GG OO FF TT RR AA IINN EE RR SS GG UU IIDD EE
Another option is to put together a single page description of the scenario to be worked out by the players. Another option is to write one-paragraph descriptions of the key role players. A description can include the main objectives and concerns of the person in that role, perhaps can include some key dialogues or a statement to be read by the person playing the role.
The possible variations are numerous; use them. Alternatively, it may be useful for the persons playing all the roles to be spontaneous and think up their separate acts in the heat of the moment. In this case there will be no time for the actors to plan their plot, and no written descriptions or guidelines.
(2) The Play Stage:
The second, or play stage of the session is when the trainee or participants act out their roles and the play is carried out. If the play becomes too long, then the facilitator can give the actors a time warning of one or two minutes, and then end the play after that. Alternatively, the play may be too short, and the facilitator must encourage the actors to embellish their acting and to add speeches, and actions that make their play less skimpy.
(3) The Follow Up: The third stage is the follow-up. This is important and can not be omitted. It is important for all the trainee participants to discuss what happened. They may question individual role-players to ask why they took a particular position, made a certain statement, or undertook an action. The explanation and the resulting discussion are important for the participants to obtain a greater understanding of the social dynamics related to a particular field situation. In some role play sessions, a certain amount of heat (anger, dismay, disagreement) may be generated, especially if some role-players take the play too seriously, and take hard line positions. The follow-up discussions offer the facilitator an opening to cool off the group a little, and explain that the heat was generated by the structure of the situation, not by the stubbornness of the individuals playing the roles. That heat is not a bad thing to be avoided; it is an opportunity to reveal the nature of some field situations, and to encourage participants to be sensitive to the different assumptions, values, goals and positions that may be taken by different persons actually in the field. The Value of Humour: In both the set up and the discussion stages, the facilitator should encourage a light touch. Remember that a "play" by definition is not reality, and should not be taken seriously. Humour is encouraged. Humour can defuse an anxious situation, and it allows participants to take a more arms-length approach to analysing the potential field situations they might experience later. Participants should be encouraged to "ham it up," (play with their roles; over act), and to enjoy playing. When to Use Role Playing: Role-playing should not be limited to initial training or awareness raising sessions. They are very useful during annual and semi-annual reviews of various programmes; they are useful in follow-up and ongoing training of community workers after they have been in the field for some time. They are useful for heads of programmes, managers, programmes, planners and head office staff and officers, especially if they can be included in sessions along side of field workers in the programmes they administer. In a single training session or workshop, you may wish to set up more than one role playing game. If so, make it different, using a different
27
RR EE MM AA –– RR EE SS UU LL TT SS MM AA NN AA GG EE MM EE NN TT II NN DD EE SS II GG NN II NN GG AA NN DD DD EE LL II VV EE RR II NN GG TT RR AA II NN II NN GG FF OO RR AA DD UU LL TT SS AA NN DD TT HH EE UU NN EE MM PP LL OO YY EE DD
TT RR AA IINN II NN GG OO FF TT RR AA IINN EE RR SS GG UU IIDD EE
scenario, and with different structure (e.g. whether or not you hand out written instructions; whether or not you give time for the players to prepare their plot; whether or not you use all or some of the participants).
TEAM ROLE-PLAYING Team Role Play Team role playing is an excellent exercise for: analysing problems from various perspectives implementing brainstorming methodology in simulations of real cases trying various solutions in a case scenario developing team-work, co-operation and creative problem solving in groups exercising creative techniques in a risk-free environment
How team role-playing works Role-playing is when a group of people act out roles for a particular scenario. For instance, you might train sales people by having two people act out a sale-scenario. One acts as the sales person. The other acts as the customer. This allows trainee sales people to practice their sales techniques. A trainer and/or other trainees may watch the role play and critique it afterwards. Team role-playing is similar, except that two or more teams actively participate. For instance, a group of 10 people and one trainer are divided into two teams of five each. One person in each group acts out the relevant role in the scenario. The other four act as coaches providing advice to their actor. The trainer does not take part in either group. Rather she/he oversees the exercise. To make team role playing more effective, a secret conflict is introduced from the beginning. Only the trainer is aware of the conflict. Upon completion of the role playing, the trainer leads a discussion on the role-play.
Team role-playing - Example Example: a software company learns that customers are unhappy with customer support and this is causing a loss of customers. In order to improve customer support, the company decides to use team role-playing. A trainer brings together a group of 12 software developers and customer support representatives. The trainer introduces the problem and encourages an open discussion in order to put all the relevant issues on the table and get participants thinking about the problem in depth prior to the team role-playing. While discussion is still relatively lively, the trainer interrupts, divides the participants into two groups. Participants should be randomly assigned to groups, such as by having each person pulling a paper, indicating group membership, out of a hat. It is important that the participants do not divide themselves into groups. Getting people who do not normally work together to do so creates new synergies which should promote greater creative thinking. Group A (playing the role of a customer support person) receives a card which, states:
28
RR EE MM AA –– RR EE SS UU LL TT SS MM AA NN AA GG EE MM EE NN TT II NN DD EE SS II GG NN II NN GG AA NN DD DD EE LL II VV EE RR II NN GG TT RR AA II NN II NN GG FF OO RR AA DD UU LL TT SS AA NN DD TT HH EE UU NN EE MM PP LL OO YY EE DD
TT RR AA IINN II NN GG OO FF TT RR AA IINN EE RR SS GG UU IIDD EE
"This customer is very influential. To lose them would be highly damaging to the company. You must do anything within reason to retain them" Group B (playing the role of the customer) receives a card stating: "You have seriously overspent your software budget and while you are not unhappy with the product, you must convince the customer support person to take back the product and refund your money. Since you cannot admit the actual situation (as it would clearly not be legitimate for a refund), you must find problems with the software sufficient to legitimise the return and refund." The groups meet separately for five to ten minutes to discuss strategy and who will be the actor. Then the two actors go to the centre of the room to perform the role-play. At any time during the role-play, the actors can look to their teams for advice. Likewise teams can offer unsolicited advice. Normally the teams are physically separated from their actors. However, each team can call one "time out" to have a private discussion of strategy. In a lively role-play, a team member may very well offer advice to the actor of the other team. There is nothing wrong with this and the trainer should not prohibit it, although the teams themselves may do so. Eventually, a solution of some sort will be found. If the conflict is not apparent to both sides and there is still sufficient enthusiasm in the teams, the trainer may ask the teams to find another solution. Once it is clear no more solutions are to be found, the groups are brought together and discuss the role play, their strategies, their solution, relevance to real world situations, and alternative solutions. Optionally, each team can draft a short "lessons learned" paper about the role-play. The papers can be combined and copies distributed to all role-play participants and any other staff who might learn from the role-play. In a situation similar to the example, there would probably be several team role-playing sessions with different people and different conflicts. In addition, some conflicts would be specific to the company's product or procedures. 5.3.3. Games and Simulations
Games and simulations, known as structured experiences, provide with significant opportunities to experience learning. By “experience” we mean to learn from one’s personal involvement with the structured event or incident.
Simulation games are more elaborate than simple role-playing. Perhaps one of the earliest simulation games, developed for a class in political science, is "The Power of Suns." One of the most elaborate simulation games was one funded by CIDA, held on Camp Shylo, a military wilderness area in southern Manitoba. At this location approximately a hundred secondary students from across Canada were set up in five "nations," with various characteristics, with facilitators and chaperones, equipped with radio handsets, in a game that lasted several weeks. Relative to the output, the raised awareness of participants, perhaps the elaborate setting up of simulation games does not warrant them being used in all types of training. Working with Games
Game: A learning activity governed by rules, entailing a competitive situation, having winners and losers. Although games do not reflect reality, there is and must be learning. The
29
RR EE MM AA –– RR EE SS UU LL TT SS MM AA NN AA GG EE MM EE NN TT II NN DD EE SS II GG NN II NN GG AA NN DD DD EE LL II VV EE RR II NN GG TT RR AA II NN II NN GG FF OO RR AA DD UU LL TT SS AA NN DD TT HH EE UU NN EE MM PP LL OO YY EE DD
TT RR AA IINN II NN GG OO FF TT RR AA IINN EE RR SS GG UU IIDD EE
learning typically comes from experiencing the game, including the interaction of the participants, but not from the subject matter or content of the game per se.
How to Lead Games Have a positive attitude. Be enthusiastic. Overlook mistakes and be lenient. Include everyone in the game. Don't wear a game out. Quit while they are still having fun.
What Should a Game Leader Know? Know the game thoroughly. Have all the equipment readily available. Make sure the available space will allow everyone to play. Explain the rules clearly and briefly. Teach the games by steps or demonstrations.
Why Use Games? A game has many purposes and advantages; some of them are listed below:
• It is an experiential form of learning • It helps participants drop their possible resistance to new learning by fully immersing the
in an active task • It heightens participant’s awareness, interest and curiosity, thus making them more
receptive to learning • It has high motivational value • It provides participation for everyone • Learning is rapid • It allows for risk-taking in a safe atmosphere • It can aid skill development • It emphasizes peer and collaborative learning, etc.
When to Use Games? From the standpoint of course design, games are indeed versatile learning tools that can be used in several ways: games may be used to open an activity, in on-going course or to conclude (possibly summarize) a session or course
Administering the Game
Good “management” requires concern with issues and procedures such as the following:
• Is the game being played at the most appropriate time in the session or course? • Have I familiarized myself with the game so I can properly introduce it, conduct it, and
process it? • Have I allowed enough time for the game, particularly for processing it? • Have I planned for all pre-game preliminaries such as game materials, instructions sheets,
instruction’s manual, seating arrangements, flipcharts and pens? • How will I introduce the game? • How do I form groups? • Will I need a co-trainer? • What is my role during the game?
30
RR EE MM AA –– RR EE SS UU LL TT SS MM AA NN AA GG EE MM EE NN TT II NN DD EE SS II GG NN II NN GG AA NN DD DD EE LL II VV EE RR II NN GG TT RR AA II NN II NN GG FF OO RR AA DD UU LL TT SS AA NN DD TT HH EE UU NN EE MM PP LL OO YY EE DD
TT RR AA IINN II NN GG OO FF TT RR AA IINN EE RR SS GG UU IIDD EE
Designing Your Own Games Although a great number and variety of games are available from publishers, at times it may be desirable to design your own game. This may be to meet the needs of the course or program better, for economy or to ensure that participants have a fun as well as a learning experience. Keep in mind the following suggestions when designing a game: develop a good feel for games in general, work with one or more colleagues on the project and use a guide to meaningful game design
Checklist For Design of a game 1. Terminal objectives (attitudes, skills, behaviour) are fully thought out and reduced to writing.
No Yes Not
sure
2. There is a high probability that the game will actually provide the desired learning outcomes.
3. There is a logical relationship between the length of the game session and participant learning (cost effectiveness).
4. The game is the best training method to achieve the terminal objectives.
5. The game has been constructed so that winners and losers will learn equally.
6. Observers have been included to facilitate the post- game analysis. 7. Provisions have been made, either orally or in writing, to instruct the observers properly in their roles.
8. Judges have been included since the end-result requires an “objective” appraisal.
9. A price will be awarded to stimulate interest. 10. If a prize is awarded, money will be collected from all participants.
11. If a prize is awarded, it will be awarded, by the trainer or an impartial judge or referee.
12. Total time for the game has been carefully measured. 13. Time for processing of the game is planned for. 14. The game has been subject to a “dry run” before it so used in class.
Working with Simulations Simulation: Any training activity designed to reflect reality. This may include role-play, an in-basket exercise, or any other learning experience that has real-life aspects integrated into it. The learning comes from the participant’s own experience in the activity.
Simulation – game: A reality-based game wherein the participants experience what people do in the real world. The learning comes from the real-life content of the game. The game is played competitively and, of course, has outcomes (scores, winners, losers).
Advantages of Using Simulations
Simulation is beneficial for many of the following reasons:
• Participants are involved in a real-life rather than a theoretical situation;
31
RR EE MM AA –– RR EE SS UU LL TT SS MM AA NN AA GG EE MM EE NN TT II NN DD EE SS II GG NN II NN GG AA NN DD DD EE LL II VV EE RR II NN GG TT RR AA II NN II NN GG FF OO RR AA DD UU LL TT SS AA NN DD TT HH EE UU NN EE MM PP LL OO YY EE DD
TT RR AA IINN II NN GG OO FF TT RR AA IINN EE RR SS GG UU IIDD EE
• Learning is active rather than passive; • The learning process relies on the best approach to adult learning; • Mistakes can be made in a risk-free atmosphere • Participants can function in a low-stress environment and learn how to deal with a high
stress situation; • Time spans can be compressed; • The learning situation provides the opportunity for immediate feedback concerning
proper and improper actions or decisions; • The trainer’s role can shift from a didactic one that of learning facilitator.
Possible drawbacks of the simulation include the following:
• A simulation, while very real, may still not be able to replicate all situations or complexities that may arise;
• Participants may tend to generalize from what is only a slice of life, but not life itself; • A simulation must be carefully constructed to ensure that the desired learning outcomes
are certain to be reached; • Simulations facilitators need to be ready and able to handle unpredictable, ambiguous,
even emotional outcomes; • This is a time-consuming training method, more so than most other methods.
Should You Use a Simulation? Some factors should be considered before embarking on a simulation: (a) cost factors; (b) size of trainee group; (c) effectiveness; (d) fidelity.
Trainer Skills Required
• Matching participant needs and skill levels in the initial design of the simulation; • Setting the stage properly before the simulation starts; • Delivering straight feedback in a sensitive, caring way; • Assisting participants to focus on a broad range of inter-group and/or organizational
issues; • Debriefing participants after what is typically an intense, action-packed experience.
Implementing the Simulation Attention to these skill pointers will help participants maximise their learning from the simulation:
1. Introduce the simulation to the participants so that objectives, roles, rules, procedures and the time frames are clear;
2. Monitor the simulation in a facilitating way; 3. Assess performance in the simulation; 4. Allow for enough processing time so that loose ends, in the form of principles and key
skill points, are firmly buttoned down; 5. Provide for other kinds of training activities that may be needed in support of the
simulation.
Designing a Simulation
32
RR EE MM AA –– RR EE SS UU LL TT SS MM AA NN AA GG EE MM EE NN TT II NN DD EE SS II GG NN II NN GG AA NN DD DD EE LL II VV EE RR II NN GG TT RR AA II NN II NN GG FF OO RR AA DD UU LL TT SS AA NN DD TT HH EE UU NN EE MM PP LL OO YY EE DD
TT RR AA IINN II NN GG OO FF TT RR AA IINN EE RR SS GG UU IIDD EE
The best way for the trainer to design a simulation is to work with a group of experts. First, explain the nature of simulation and provide them with several examples. Then have them draw on their practical experience to develop situations and problems they want the participants to experience.
Some of the guidelines to construct a meaningful simulation are listed bellow:
1. Determine its purpose, listing each ability you wish to develop; 2. Design activities that develop the stated abilities 3. Outline the scenario, deciding on the purpose and name of the organization involved,
nature and number of roles, and so on; 4. Use a plotline and props, that are logical, believable, and consistent; 5. Assign participants appropriate roles; 6. As the simulation develops, ask participants to generate alternatives and choose a solution
or course of action there from; 7. Make certain all activities have been assigned enough time for their completion; 8. Provide opportunities for giving participants oral feedback, with particular emphasis on
the giving of praise for good performance; 9. Conduct a dry run to “debug” the simulation; 10. Arrange for participants to critique the simulation.
The Right Ways to Create a Successful Simulation 1. Watch the “replication” trap. Replication is not to be confused with simulation. The logic involved is that the closer the simulation relates to reality, the more valid and unforgettable the experience is likely to be.
2. Not all subjects can “survive” a simulation. Some subjects are more appropriate for a simulation than are others. Following characteristics will serve as clues to possible suitability:
• Does the simulation have the necessary impact to help participants really see the world as others do?
• Will the simulation create an environment in which people learn to perform multiple skills under pressure? In real world, people often need to perform a number of skills simultaneously.
• Will the simulation help participants to grasp systems thinking? The simulation should therefore put participants on the inside of the system so they can fully comprehend how altering one componet inevitably influences everything else.
• Will the simulation help participants recognize the contradictions entailed in cognitive sissonance?Many of us often hold values, attitudes, and beliefs which are contradictory with our behavior, but we are not likely to be aware of that inconsistency.
3. Prepare a comprehensive design plan. Two planning decisions must be made:
a) will your design be totally your own, or will you employ a design team? You need people to fill these key role: a principal expert simulation designer, a subject matter expert, an overall administrator for the project, and a client or representative who provides a “reality check” as the project proceeds.
b) will you use a structured creative process, or will the process be on an ad hoc or informal basis? For the most creative simulation, use this guidelines: don’t settle on the first idea that appears; look at a proble from multiple perspectives
33
RR EE MM AA –– RR EE SS UU LL TT SS MM AA NN AA GG EE MM EE NN TT II NN DD EE SS II GG NN II NN GG AA NN DD DD EE LL II VV EE RR II NN GG TT RR AA II NN II NN GG FF OO RR AA DD UU LL TT SS AA NN DD TT HH EE UU NN EE MM PP LL OO YY EE DD
TT RR AA IINN II NN GG OO FF TT RR AA IINN EE RR SS GG UU IIDD EE
Conclusion: During training workshops and routine reviews, role playing games are an effective method of increasing awareness, enhancing participant analysis of field situations, and familiarising participants with the roles, aims, perspectives and positions of people whom they will meet in the field. While not directly participatory in the sense that they are real situations, they are participatory in their implementation, and provide considerable and valuable benefits in a training programme. 55..22..33.. CCAASSEE SSTTUUDDYY CCOONNSSTTRRUUCCTTIIOONN What is a Study Case? An Study Case describes a series of events which reflects different kinds of activity as it actually happened, warts and all. The case writer suppresses his own opinions and conclusions so the reader can deal with the information and learn from the experience of drawing his own conclusions. Because cases differ from other writing, an aspiring case writer should read a variety of cases to see the many forms they may take. The major objective of a Study Case is to provide a medium through which learning (e.g., analyzing, applying knowledge, reasoning, drawing conclusions) takes place. Imparting additional specific information is relatively minor and coincidental. A good case:
1. Is taken from real life (a necessity). 2. Consists of one or more parts, each part usually ending with problems and/or
points for discussion. 3. Includes sufficient data for the reader to treat problems and issues.
To make a case believable to the reader, a good case usually includes:
1. They may simply be a history of an activity. 2. They may be illustrations of some form of activity which trainees critically
evaluate against what they have learned in more formal courses. 3. They may be used for practice in analysis, i.e., trainees may be required to carry
out analysis indicated by the situation or they may be required to complete an analysis started in the case.
4. They may be springboard cases, i.e., they propose problems to be solved, or are starting points for design projects.
How Study Cases are Used. Some of the more common uses of Study Cases are:
1. Reading assignments to acquaint students with various aspects of engineering. 2. Background to specific problems; problems which may be in the case or may be
posed by the instructor. 3. Practice in formulating problems. Trainees may be required to read the case, to
identify and formulate problems to be solved. 4. Subjects for class discussion, e.g., trainees can evaluate problems, people, and
situations in the case.
34
RR EE MM AA –– RR EE SS UU LL TT SS MM AA NN AA GG EE MM EE NN TT II NN DD EE SS II GG NN II NN GG AA NN DD DD EE LL II VV EE RR II NN GG TT RR AA II NN II NN GG FF OO RR AA DD UU LL TT SS AA NN DD TT HH EE UU NN EE MM PP LL OO YY EE DD
TT RR AA IINN II NN GG OO FF TT RR AA IINN EE RR SS GG UU IIDD EE
5. Medium for relating activity history. Motivation for laboratory work. 6. Background and source for design projects.
What's in a Good Case? Study cases do not represent "good" or "bad" ways of developing an activity. Since cases are real-life situations, cases reflect all sorts of activities, failures and successes, old and new techniques, theoretical and empirical results. Facts should not be changed to tell "how it should have been done." Cases must have a ring of truth to them. Only by "telling it like it is", can truth be preserved. Cases are not examples; they are not a photographic slice of life; they are not guessing contests for trainees. Simply recording what happened does not produce a good case. People are involved in all sorts of activities; the case writer must present the facts in such a way that trainees will become involved. Most activities have two or more events occurring simultaneously. Problems rarely come neatly packaged as textbook problems do. Cases must reflect this. This is why case writers find it difficult to locate and write cases that illustrate specific points. As a case writer you must present facts so the student using the case can identify with the specific actor in the case. To accomplish this, a case is usually written from the point of view of one individual in the case. What did he see as the problem? What facts were available? What events led up to the situation? What resources were available? What were the constraints on his actions? A case should be like an adventure or mystery story in which the future trainee becomes engrossed because he wants to know what will develop. A case should introduce personalities by name. Activities are performed by people; this should be reflected in the case. The background of the more important people should be given. A careful balance is necessary on including personalities; too few and the case seems lifeless - too many and trainees focus on personalities and turn the case into a human relations problem, especially if technical problems become difficult. First hand data necessary to treat the problems should be included. The more nearly the case presents the data as they became available to the actor in the case, the more useful the case. Background data should be used also, i.e., only in sufficient quantity to permit a student to proceed. A Study Case is an instrument for learning. The objective is not to tell all the facts and results but to give just enough facts for trainees to become involved in the case. What is left out is often as important as what is included. Although a case is a tool for learning, it can not do the teaching. Quality of a case is not measured in terms of its technical content but in terms of its usefulness as instructional material. Quotations should be considered, they can be used quite effectively for:
1. Expressing opinions 2. Stating important issues 3. Expressing personal philosophy 4. Establishing character 5. Expressing differences of opinion 6. Increasing believability
35
RR EE MM AA –– RR EE SS UU LL TT SS MM AA NN AA GG EE MM EE NN TT II NN DD EE SS II GG NN II NN GG AA NN DD DD EE LL II VV EE RR II NN GG TT RR AA II NN II NN GG FF OO RR AA DD UU LL TT SS AA NN DD TT HH EE UU NN EE MM PP LL OO YY EE DD
TT RR AA IINN II NN GG OO FF TT RR AA IINN EE RR SS GG UU IIDD EE
One unique aspect of cases is that they seldom have a clear cut-off point. Real life problems do not end cleanly and concisely; things happen, actions are taken, projects run into one another. Cases are the same way. Cases usually end when the writer runs out of data; or they end with a problem. In using cases, the greater part of learning takes place in wrestling with the problems in the case, not in knowing how it turned out. Questions posed for the reader by the writer are controversial. We believe the less a writer intrudes into the case the better. Questions throughout the body of a case, posed by the writer rather than by a participant, reduce effectiveness of a case. Questions at the end of sections where there is a break are acceptable, although these can restrict use of a case. Which Study Case to Write? Look for an interesting project that illustrates any theory, rather than for situations that illustrate specific pieces of interesting theory or application. Most trainers start writing cases using their own experiences. This is an easy way to start; all the information is at hand. The case can also be written in the first person. Beyond personal experiences, case writers must depend on other sources. If an acquaintance tells you about, or if you read about, an interesting project, a potentially good case is available. An excellent case can be written entirely from news items, magazine articles, etc. The real starting point of a good case is that somebody has found a specific activity interesting. Collecting Case Content. Once you have identified a case you must collect the story. This usually means interviewing one or more people (and/or others) involved in the project. Even if the case relies heavily on written material, an interview with at least one participant can provide a story line and insights unobtainable any other way. In soliciting information from any source it must be made clear that the case will not be published without prior consent of the individual or agency supplying the material. People will speak freely about their difficulties in a specific activity only when they are confident they will have full opportunity to correct any erroneous or damaging impressions. Typical questions that you can address are: 1. Were any solutions other than the final one considered? Why were they rejected? What
were the compromises? 2. Who made the decisions? 3. Were there any difficulties in completing the project or was it a "breeze"? A well-written case has several structures. There is a time structure; events occur in a time sequence which influences outcome. There is an expository structure; specific facts and details are given so the student can deal with issues and problems. There is a narrative structure, which ties events together. There is a plot structure that adds interest, drama, and suspense. In a good case, one structure may dominate, but it cannot stand alone. 5.3. INVENTORY OF METHODS AND TECHNIQUES USED IN ADULT TRAINING
36
RR EE MM AA –– RR EE SS UU LL TT SS MM AA NN AA GG EE MM EE NN TT II NN DD EE SS II GG NN II NN GG AA NN DD DD EE LL II VV EE RR II NN GG TT RR AA II NN II NN GG FF OO RR AA DD UU LL TT SS AA NN DD TT HH EE UU NN EE MM PP LL OO YY EE DD
TT RR AA IINN II NN GG OO FF TT RR AA IINN EE RR SS GG UU IIDD EE
This issue will take into account a short summary of the existent methods that can be used when preparing a training session. In the second part you will find the most important methods in a detailed manner and other reading recommendations for further reading. Lecture What is it? One person conveys information to a group of learners by talking to them, with or without visual aids. There is no participation by the learners and little feedback to the lecturer. When to use it? 22
22
22
2
2
22
In large groups where discussion is not practical. When an expert is relaying new information to learners who have no relevant personal experience.
Informal Talk What is it? It is similar to a lecture, except involving feedback and participation by the learners. It is less formal. When to use it?
In-groups where there is ample time for questions and feedback. In such context where material being presented is not entirely outside the experiences of the learners.
Demonstration What is it? A person or team of people, shows learners how they would carry out a task by actually performing the task while explaining it. Most commonly is followed by actually performing the task. When to use it?
It is especially helpful when is intended to teach a skill. Need a small instructor to learner ratio.
Discussion What is it? It is a planned conversation (exchange of ideas or viewpoints) on a selected topic, guided by a trained discussion leader. When to use it?
Where the ideas and experiences of the group will help them discover the point they are learning. With an experienced leader to keep things on track.
Case Study What is it? A realistic situation or a series of actual events which is presented to the learners, either orally or by a handout, for their analysis. When to use it?
When real-life situations get the point across most effectively. Where multiple points of view will help learners reach a better understanding of the concepts.
37
RR EE MM AA –– RR EE SS UU LL TT SS MM AA NN AA GG EE MM EE NN TT II NN DD EE SS II GG NN II NN GG AA NN DD DD EE LL II VV EE RR II NN GG TT RR AA II NN II NN GG FF OO RR AA DD UU LL TT SS AA NN DD TT HH EE UU NN EE MM PP LL OO YY EE DD
TT RR AA IINN II NN GG OO FF TT RR AA IINN EE RR SS GG UU IIDD EE
Role Playing What is it? Leaders or learners act out roles presented in a particular situation. Participants must supply their own dialog within the context of the role and the situation. When to use it? 22
2
2
22
22
22
When high learner participation is desired. When the subject involves person to person communication.
Simulations What is it? Are a group of techniques that are a more complex form of role-playing and case study. It is used for recreating the environment in which participants would normally carry out a job and the situations that might arise. When to use it?
In these following situations: disaster, rescue, first aid, or other crisis management situation training. Any time an elaborate role-play can best teach the subject matter.
Brainstorming What is it? Group members suggest possible solutions to a problem in rapid-fire order, either orally or on cards that will be posted later. All ideas are considered; criticism and editorialising are not allowed. When to use it?
When the situation involves pulling together the ideas of the whole group. For program planning.
Buzz Groups What is it? A way to promote quick exchange of ideas on a single topic in a short period of time. Ideas are presented back to the larger group for discussion. When to use it?
When the group is too large for general discussion or brainstorming. When the experiences of the learners can lead them to discover solutions for themselves.
Question and Answer Session What is it? An opportunity for an expert to share specific knowledge about a topic in direct response to the desires of the group of learners. When to use it?
Near the end of a training session. When an expert is available or one’s whose knowledge is either superior or whose authority makes his/her answers correct.
38
RR EE MM AA –– RR EE SS UU LL TT SS MM AA NN AA GG EE MM EE NN TT II NN DD EE SS II GG NN II NN GG AA NN DD DD EE LL II VV EE RR II NN GG TT RR AA II NN II NN GG FF OO RR AA DD UU LL TT SS AA NN DD TT HH EE UU NN EE MM PP LL OO YY EE DD
TT RR AA IINN II NN GG OO FF TT RR AA IINN EE RR SS GG UU IIDD EE
Learning Centers What is it? A series of stations/tables/corners, each accommodating a small group, all teaching related parts of the same general topic. When to use it? 2
2
When the trainer is confronted with a lot of information that has to be shared in a short period of time. When a group is too large to teach effectively through other methods above.
39
RR EE MM AA –– RR EE SS UU LL TT SS MM AA NN AA GG EE MM EE NN TT II NN DD EE SS II GG NN II NN GG AA NN DD DD EE LL II VV EE RR II NN GG TT RR AA II NN II NN GG FF OO RR AA DD UU LL TT SS AA NN DD TT HH EE UU NN EE MM PP LL OO YY EE DD
TT RR AA IINN II NN GG OO FF TT RR AA IINN EE RR SS GG UU IIDD EE
6 Trainer-trainee interaction level 7 Evaluation of learning process
EVALUATION METHODS This section discusses three techniques that you can use to develop your evaluation.
Comparative Study Learning outcomes are sometimes evaluated by systematic studies designed to show the effect the use of educational technology has had on the learning of a group of trainees. Such studies generally compare the performance of two groups of trainees being taught the same material, one that has access to educational technology materials or teaching techniques, and one that does not. The effects are usually measured by means of test scores and the like. Comparative studies of this sort are valuable, but you should be aware that the direct, systematic study of learning outcomes is a difficult thing to do in an educational setting. To begin with, you'll need a test group and a control group of sufficient size. But because trainees attend training courses to get an education rather than to be subjects in an experiment, setting up control groups is not easy.
Quantitative vs. Qualitative One branch of educational evaluation research focuses on producing numbers, usually attempting to quantify changes in learning outcomes. This quantitative approach is sometimes appropriate, even necessary: numbers can provide a quick snapshot of the efficacy of the use of educational or training effects However, a quantitative evaluation may not always be appropriate. Many of the phenomena we deal with in an educational process are, after all, not to easy to quantificate. And you might not have the time or feel qualified to produce a study that meets formal social-scientific criteria of rigor and quantitative analysis. You can obtain very useful information through qualitative methods, such as studying trainees interaction on a class bulletin board. You can assess learning outcomes directly without doing a quantitative study.
Formative vs. Summative Evaluations can have different purposes. A formative evaluation is directed at the revision and improvement of your use of educational impact on your trainees. You might give out a
40
RR EE MM AA –– RR EE SS UU LL TT SS MM AA NN AA GG EE MM EE NN TT II NN DD EE SS II GG NN II NN GG AA NN DD DD EE LL II VV EE RR II NN GG TT RR AA II NN II NN GG FF OO RR AA DD UU LL TT SS AA NN DD TT HH EE UU NN EE MM PP LL OO YY EE DD
TT RR AA IINN II NN GG OO FF TT RR AA IINN EE RR SS GG UU IIDD EE
questionnaire or hold focus groups with a view toward revising the course in light of what your students tell you. A summative evaluation, on the other hand, is directed at judging whether to expand, reduce or eliminate your use of educational tools that you have used. A given evaluation can have both purposes, of course. There are good reasons to do formative evaluations early, or at least midway through your course. If you're using any form of educational materials, it's hard to anticipate what problems trainees may encounter, and early evaluations enable you to make changes in the course or your teaching before it's too late. End-of-course evaluations provide an overall measure of your performance and the effectiveness of the course, but they occur too late to benefit the trainees who fill them out. If you use early formative evaluation, be sure to report back to trainees on the results of the evaluation. If you poll trainees about what they'd like to change during the course, tell them what the outcomes were, what you ąre going to change and what you ąre not, and why. This demonstrates that you are interested in improving the course and your teaching, and opens the way for them to offer comments and suggestions in the future. The effect of the exercise is to initiate a healthy dialogue between you and your students about the teaching process. EVALUATION TOOLS Evaluation Matrix Although by all appearances, the "Evaluation Matrix" is a very simple tool, it has a powerful purpose. It helps you to consider a wider range of data collection methods than you might otherwise consider in relation to each of the questions addressed by your evaluation. Evaluators sometimes get into the habit of using one or other data collection method, e.g., an end-of-training questionnaire, without considering the advantages of alternative methods. This tool prompts you to consider each evaluation question and to decide which of the many data collection options have the greatest potential for providing the desired information. Instructions: 1. The “Evaluation Matrix” tool will help you consider the most appropriate and feasible data collection method for each of the questions identified in your evaluation plan. (Remember that evaluation is different from assessment in that evaluation is focused on the effectiveness and worth of programs or products whereas assessment is focused on estimating student learning.) 2. List your questions on the vertical side of the matrix. 3. List the feasible data collection methods on the horizontal side of the matrix. 4. Consider each question carefully and choose the most appropriate data collection method. 5. A sample matrix is displayed below. 6. To make your own matrix, copy the matrix below and paste it into a new file using the “Drawing” option in the “New Document” dialog box.
41
RR EE MM AA –– RR EE SS UU LL TT SS MM AA NN AA GG EE MM EE NN TT II NN DD EE SS II GG NN II NN GG AA NN DD DD EE LL II VV EE RR II NN GG TT RR AA II NN II NN GG FF OO RR AA DD UU LL TT SS AA NN DD TT HH EE UU NN EE MM PP LL OO YY EE DD
TT RR AA IINN II NN GG OO FF TT RR AA IINN EE RR SS GG UU IIDD EE
7. In the “Drawing” option, the elements of the matrix can be edited.
EVALUATION MATRIX
a. What knowledge was learned by trainees.
b. What skills were developed by trainees?
c. What attitudes were formed by trainees?
d. What were trainee reactions to the IMM?
e. What were instructor reactions to the IMM?
Evaluation Questions
42
RR EE MM AA –– RR EE SS UU LL TT SS MM AA NN AA GG EE MM EE NN TT II NN DD EE SS II GG NN II NN GG AA NN DD DD EE LL II VV EE RR II NN GG TT RR AA II NN II NN GG FF OO RR AA DD UU LL TT SS AA NN DD TT HH EE UU NN EE MM PP LL OO YY EE DD
TT RR AA IINN II NN GG OO FF TT RR AA IINN EE RR SS GG UU IIDD EE
Anecdotal Record Form Evaluation data does not have to be reported as "cold hard statistics." Often you will want to tell the "human story" involved in your development or implementation project. One way of capturing those important stories and critical incidents that provide the human story is the "Anecdotal Record Form." Participants in an interactive multimedia design project can use this instrument to describe a noteworthy event and to offer their own interpretation of its relevance. It is very important to try to complete an Anecdotal Record Form as soon as possible after a critical event has occurred so as not to forget critical information. It is equally important to separate your description of the incident from your interpretation of it! Instructions: 1. As a participant in an interactive multimedia design project, you will observe incidents or listen to reports of incidents which relate to the development and impact of the program. It is important that this kind of anecdotal information be systematically recorded so that the story of the development and outcomes of this project can be understood. Therefore, you should complete an Anecdotal Record Form whenever you witness or hear of a significant incident relating to the progress and accomplishments of project. An anecdotal record is a verbal account which exhibits these characteristics: a. Each anecdote should be limited to a single incident. b. It should contain a factual, non-inferential description of the observed or reported incident. (For example, "The trainees said 'I've never enjoyed using a computer before.' " instead of "The trainee expressed satisfaction with the training system.") c. It should include a description of the situation in which the incident occurs so that the meaning of the behavior can be understood. d. It should be written as soon as possible after witnessing or hearing about the incident so that all important details can be included. e. It should include a separate section describing your interpretation of or feelings about the anecdote. Your personal evaluation is important because your judgments about the project are valued highly. 2. A copy of a blank Anecdotal Record Form as well as a sample completed form appears below.
43
RR EE MM AA –– RR EE SS UU LL TT SS MM AA NN AA GG EE MM EE NN TT II NN DD EE SS II GG NN II NN GG AA NN DD DD EE LL II VV EE RR II NN GG TT RR AA II NN II NN GG FF OO RR AA DD UU LL TT SS AA NN DD TT HH EE UU NN EE MM PP LL OO YY EE DD
TT RR AA IINN II NN GG OO FF TT RR AA IINN EE RR SS GG UU IIDD EE
BLANK ANECDOTAL RECORD FORM DATE: __________ PLACE: _______ NAME OF OBSERVER: ___________ Description of the incident: Interpretation:
44
RR EE MM AA –– RR EE SS UU LL TT SS MM AA NN AA GG EE MM EE NN TT II NN DD EE SS II GG NN II NN GG AA NN DD DD EE LL II VV EE RR II NN GG TT RR AA II NN II NN GG FF OO RR AA DD UU LL TT SS AA NN DD TT HH EE UU NN EE MM PP LL OO YY EE DD
TT RR AA IINN II NN GG OO FF TT RR AA IINN EE RR SS GG UU IIDD EE
SAMPLE ANECDOTAL RECORD FORM DATE: July 23, 1992 PLACE: Beta Site 2 NAME OF OBSERVER: Lucy Schweitzer Description of the incident: About two hours into the course, one of the trainees suddenly got up and left the class. I followed him out into the hall and asked if anything was wrong. He replied: "I can't waste my time sitting in the class because I don't intend to use the new system." I asked him why and he answered: "Computers don't work for me. As soon as I touch one, the program blows up. You'll be glad I won't use your system because it would just fall apart if I did. It's nothing against you or your course, I just know it won't work." I tried to talk to him more, but he indicated that he had to make some phone calls and left. Interpretation: The "(Insert name here.)" course training is innovative and user-friendly in our eyes, but in the eyes of a person with high anxiety about technology, it is just another threatening computer program. I suspect that this person strongly fears computers and that he has an unusually strong degree of "learned helplessness" with respect to them. It may be worthwhile to conduct some sort of a pre-assessment with respect to "techno-phobia" and makes special efforts to help those who express high anxiety. Also, this person indicated before the beginning of the course that he was only there because his boss insisted that he attend. We may need to clarify the enrollment procedures for this and other clients. Expert Review Checklist •Expert review is one of the primary evaluation strategies used in both formative (How can this multimedia program be improved?) and summative (What is the effectiveness and worth of this multimedia program?) evaluation. It is often a good idea to provide experts with some sort of instrument or guide to insure that they critique all of the important aspects of the IMM program that you want reviewed. This "Expert Review Checklist" has been designed for use by an instructional design expert. You would employ different sorts of Expert Review Checklists with different types of experts such as a content expert or a human computer interface expert. Focus Group Protocol •Focus groups are a powerful means of collecting data about learner or instructor reactions to a new interactive multimedia program. However, focus groups need to be carefully planned so that you get the kind and quality of information you are seeking. This "Focus Group Protocol" is a brief example of a list of questions that might be addressed during a focus group regarding an interactive multimedia program.
45
RR EE MM AA –– RR EE SS UU LL TT SS MM AA NN AA GG EE MM EE NN TT II NN DD EE SS II GG NN II NN GG AA NN DD DD EE LL II VV EE RR II NN GG TT RR AA II NN II NN GG FF OO RR AA DD UU LL TT SS AA NN DD TT HH EE UU NN EE MM PP LL OO YY EE DD
TT RR AA IINN II NN GG OO FF TT RR AA IINN EE RR SS GG UU IIDD EE
Formative Review Log •The "Formative Review Log" is a simple instrument that can be used by anyone you have asked to review your program in its formative stages. The instrument has three columns, the first for recording the screen or format sheet number that the person is reviewing, the second for writing down observations (e.g., errors, confusing points, or ideas), and the third for recording what actions have been taken in reaction to the feedback provided by members of the project team. Using an instrument like this with many different types of users will probably have the greatest pay-off for formative evaluation throughout the life of the project. Implementation Log •It is one thing to plan and develop a good interactive multimedia program. It is entirely another thing to implement it as planned. Many training innovations have failed because implementation factors (such as instructor motivation) were not considered. It is essential to make every effort to collect information regarding the actual use of an interactive multimedia program as compared to the planned use. The "Implementation Log" tool has been designed to make that comparison a little more systematic. Interview Protocol •Interviews are a powerful means of collecting data about learner or instructor reactions to a new interactive multimedia program. However, interviews need to be carefully planned so that you get the kind and quality of information you are seeking. This "Interview Protocol" is a brief example of a list of questions that might be addressed during an interview regarding an interactive multimedia program. Questionnaire •Questionnaires are undoubtedly the single most frequently used type of evaluation instrument. Poorly designed questionnaires are often administered at the close of a course or training session as a "smilometer" or "happiness indicator." They are also often distributed to users of interactive multimedia programs. If the only thing you find out about your interactive multimedia program with a questionnaire is whether the trainees liked it, you are not making good use of this strategy. As shown in the "Questionnaire," a wealth of information can be provided by a well-designed instrument.
46
RR EE MM AA –– RR EE SS UU LL TT SS MM AA NN AA GG EE MM EE NN TT II NN DD EE SS II GG NN II NN GG AA NN DD DD EE LL II VV EE RR II NN GG TT RR AA II NN II NN GG FF OO RR AA DD UU LL TT SS AA NN DD TT HH EE UU NN EE MM PP LL OO YY EE DD
TT RR AA IINN II NN GG OO FF TT RR AA IINN EE RR SS GG UU IIDD EE
User Interface Rating Form •The "User Interface" of an interactive instructional product, e.g, a multimedia program, is a critical element of the product that must be carefully evaluated. If the user interface is not well-designed, learners will have little opportunity to learn from the program. This rating form includes ten major criteria for assessing the user interface for an interactive program, such as "ease of use" and "screen design." Not all of the criteria may be relevant to the particular program you are evaluating, but most of them will. You may need to add additional criteria to the list. Novice users of interactive instructional products are generally not good candidates for using this form. The people rating the user interface should be experienced users of the type of program you are asking them to rate. Even better, they could be experienced designers of interactive programs. Evaluation Report Sample •The "Evaluation Report Sample" presents one way of structuring an evaluation report. Evaluation reports are notorious for being weighty volumes that few people read. Not surprisingly, lengthy reports have little effect on decision-makers. This tool illustrates a strategy for dividing an evaluation report into two-page sections that each include four parts: 1) an attention-getting headline, 2) a description of the major issues related to the headline, 3) a presentation of data related to the issues, and 4) a bottom-line recommendation or summary of the findings. People who receive a report in this format can take two or three sections at a time and make them agenda items for their team meetings. In this way, the evaluation findings are much more likely to have an impact on practical decisions.
47
RR EE MM AA –– RR EE SS UU LL TT SS MM AA NN AA GG EE MM EE NN TT II NN DD EE SS II GG NN II NN GG AA NN DD DD EE LL II VV EE RR II NN GG TT RR AA II NN II NN GG FF OO RR AA DD UU LL TT SS AA NN DD TT HH EE UU NN EE MM PP LL OO YY EE DD
TT RR AA IINN II NN GG OO FF TT RR AA IINN EE RR SS GG UU IIDD EE
Bibliography Bloom, B. S. & Co. (1956), Taxonomy of Educational Objective. Handbook 1:
Cognitive domain, New York, Mac Kay. Harrow, A. J. (1972), A Taxonomy of the Psychomotor Domain. A Guide for
Developing Behavioral Objectives, New York, Mac Kay. DeKetele, J-M, Chastrette, M., Cros, D., Mettelin, P., Thomas, J. (1992) Guide du