68
Using Avaya one-X® Communicator Release 6.1 October 2011

Using Avaya one-X®
Communicator Release 6.1
October 2011


iii
Table Of Contents
Introduction ............................................................................................................................ 1
Logging in to the server ............................................................................................................ 3
Logging out of the server .......................................................................................................... 3
Using your feature buttons ........................................................................................................ 5
Using Avaya one-X® Communicator Icons ................................................................................... 6
Using Avaya one-X® Communicator with other applications .......................................................... 9
Using Avaya one-X® Communicator in the Citrix Environment ..................................................... 9
Using Avaya one-X® Communicator with Microsoft Outlook ......................................................... 9
Configuring Avaya one-X® Communicator .................................................................................10
Using a headset with Avaya one-X® Communicator ..................................................................10
Enabling or disabling the Click-to-Dial feature ..........................................................................10
Configuring your dialing rules ................................................................................................11
Enabling/disabling the dialing confirmation window ..................................................................12
Viewing the line display information for a call ..........................................................................13
Turning off ringing for all incoming calls ..................................................................................13
Handling Calls ........................................................................................................................15
Answering a call ...................................................................................................................15
Ignoring an incoming call ......................................................................................................15
Placing a call on hold ............................................................................................................15
Resuming a call on hold ........................................................................................................16
Using Dialpad to enter digits during a call ................................................................................16
Transferring a call ................................................................................................................16
Hanging up a call .................................................................................................................17
Muting the microphone .........................................................................................................17
Unmuting the microphone .....................................................................................................18
Making Calls ...........................................................................................................................19
Making a call from the main window .......................................................................................19
Making a call using a bridged extension ..................................................................................19
Making a call from the Dialpad ...............................................................................................19

Using Avaya one-X® Communicator Release 6.1
iv
Making a call from a contact ..................................................................................................20
Dialing a number from Microsoft Internet Explorer ...................................................................20
Dialing a number from Mozilla Firefox .....................................................................................21
Redialing the last number dialed ............................................................................................21
Using Dialpad to enter digits during a call ................................................................................21
Muting the microphone .........................................................................................................22
Unmuting the microphone .....................................................................................................22
Making Conference Calls ..........................................................................................................23
Starting a conference ...........................................................................................................23
Adding a participant to a conference .......................................................................................23
Placing a conference on hold ..................................................................................................23
Resuming a conference on hold ..............................................................................................24
Hanging up a conference .......................................................................................................24
Dropping the last call from a conference .................................................................................24
Using Bridge Conferencing .......................................................................................................25
Calling into a bridge conference .............................................................................................25
Host Tasks ..........................................................................................................................25
Locking or unlocking a bridge conference .............................................................................25
Muting a bridge conference (Lecture mode) ..........................................................................25
Unmuting a bridge conference.............................................................................................26
Muting a participant ...........................................................................................................26
Unmuting a participant .......................................................................................................26
Placing a bridge conference on hold .....................................................................................26
Resuming a bridge conference on hold .................................................................................26
Placing a participant on hold ...............................................................................................26
Retrieving a participant from hold ........................................................................................27
Renaming a bridge conference ............................................................................................27
Sorting participants in a bridge conference ...........................................................................27
Adding a participant to a bridge conference ..........................................................................27
Dropping a participant from a bridge conference ...................................................................28
Ending a bridge conference .................................................................................................28

Table Of Contents
v
Participant Tasks ..................................................................................................................28
Muting your bridge conference line ......................................................................................28
Unmuting your bridge conference line ..................................................................................28
Leaving a bridge conference ...............................................................................................29
Using Contacts .......................................................................................................................31
Searching for a contact (SIP mode) ........................................................................................31
Searching for a contact (H.323 mode) ....................................................................................31
Using advanced search .........................................................................................................32
Adding a contact ..................................................................................................................33
Modifying a contact ..............................................................................................................33
Deleting a contact ................................................................................................................34
Viewing the information for a contact ......................................................................................34
Sorting contacts ...................................................................................................................34
Making a call from a contact ..................................................................................................35
Sending an e-mail to a contact ..............................................................................................35
Searching for a contact (SIP mode) ........................................................................................35
Using Favorites ....................................................................................................................36
Adding a contact to Favorites (SIP mode) .............................................................................36
Removing a contact from Favorites ......................................................................................36
Using the Call Log ...................................................................................................................37
Viewing Call Log entries ........................................................................................................37
Sorting Call Log entries .........................................................................................................37
Making a call from a Call Log entry .........................................................................................38
Deleting a Call Log entry .......................................................................................................38
Adding a caller to Contacts from a Call Log entry .....................................................................38
Using Instant Messaging and Presence.......................................................................................41
Sending and receiving instant messages .................................................................................41
Inserting emoticons in an instant message ..............................................................................41
Changing the fonts of an instant message ...............................................................................42
Changing your Presence status ..............................................................................................42
Making a call from the Instant Messaging window ....................................................................43

Using Avaya one-X® Communicator Release 6.1
vi
Sending instant messages while on an active call .....................................................................43
Sending and receiving instant messages from Call Log ..............................................................43
Using Directories .....................................................................................................................45
Setting up access to a public directory ....................................................................................45
Setting up access to Microsoft Outlook ....................................................................................46
Setting up access to IBM Lotus Notes Address Book .................................................................46
Using Voice Messaging .............................................................................................................47
Configuring Avaya one-X® Communicator to access a messaging system ....................................47
Accessing the voice messaging system ...................................................................................48
Using Visual Voice Mail ............................................................................................................49
Accessing your visual voice mail messages (H.323 mode) .........................................................49
Adding a number to Contacts from visual voice mail messages ..................................................49
Making a call from a visual voice mail message ........................................................................50
Marking a message as Unread ...............................................................................................50
Deleting a message ..............................................................................................................50
Sending an e-mail to a contact from a visual voice mail message ...............................................51
Sending an Instant Message to a contact from a visual voice mail message (H.323 mode only) .....51
Using Video with Avaya one-X® Communicator ..........................................................................52
Using video with Avaya one-X® Communicator.........................................................................52
Opening the video window .....................................................................................................52
Displaying the video window in its optimal size ........................................................................53
Setting the video window to appear automatically on login ........................................................53
Changing your video settings .................................................................................................53
Viewing Video in Picture in Picture (PIP) mode .........................................................................54
Muting the video ..................................................................................................................54
Stopping the video ...............................................................................................................55
Viewing statistics for the current video call ..............................................................................55
Viewing Full Screen video window ..........................................................................................55
Keeping video window always on top ......................................................................................56
Troubleshooting ......................................................................................................................57
Product Interactions .............................................................................................................57

Table Of Contents
vii
Index ....................................................................................................................................59


1
Introduction
Avaya one-X® Communicator 6.1 is Avaya’s next generation softphone that supports both H.323 and
SIP audio, video, instant messaging, and presence services. It provides enterprise users with simple
access to all the communication tools in a single interface. Avaya one-X® Communicator enables you
to log into your company's server remotely and make and receive telephone calls from your telephone
extension.
Depending on the Avaya one-X® Communicator features installed on your computer, you can:
Use Avaya one-X® Communicator with Client Enablement Services.
Make calls.
Make conference calls.
Use bridge conferencing.
Use contacts.
Use Call Log.
Use Instant Messaging.
Use Directories.
Use Voice Messaging.
Use Visual Voice Mail.
Enable/disable the Click-to-Dial feature.
Use Video.


3
Logging in to the server
To log in to the server:
1. Start Avaya one-X® Communicator to display the Avaya one-X® Communicator
Login dialog box.
2. Perform one of the following:
If Avaya one-X® Communicator is integrated with Avaya one-X® Client Enablement Services,
in the User Name box, enter your user name on the server.
If Avaya one-X® Communicator is not integrated with Client Enablement Services, in the
Extension box, enter your extension.
3. In the Password box, enter your password.
4. Click Log On.
You can set up your Avaya one-X® Communicator account to use it with other applications.
Logging out of the server
To log out of the server and close Avaya one-X® Communicator, perform one of the following steps:
Click and select Exit.
Right-click the Avaya one-X® Communicator icon in the System Tray, and select Exit.
To log out of the server without closing Avaya one-X® Communicator:
Click , and select Log Off.
To close the Avaya one-X® Communicator window and remain logged into the server:
Click X at the top of the window. The Avaya one-X® Communicator window closes, but Avaya one-X®
Communicator continues to run and is still logged in to the server. The Avaya one-X® Communicator
icon ( ) appears in the System Tray. The Avaya one-X® Communicator window opens when you:
Receive a call.
Double-click the Avaya one-X® Communicator icon in the System Tray.


5
Using your feature buttons
Feature buttons
Depending on how your extension on the Avaya Aura® Communication Manager system is
administered, you can see the Feature buttons on your Avaya one-X® Communicator.
To see the Feature buttons available for your use, click . If you do not see some of these feature
buttons in your Dialpad window, contact your system administrator.
The following advanced telephony feature buttons are available for both H.323 and SIP:
Automatic Call Back
Call Forwarding All Calls
Call Forwarding Busy/Don't Answer
Call Park and Call Retrieve
Calling Party Number Blocking
Calling Party Number Unblocking
Call Pickup (Group, Directed, and Extended Group)
Malicious Call Trace
One-Step Recording
Priority Calling
Send All Calls
Transfer to Voicemail
Whisper Page
EC500
Team button
Enhanced Call Pickup with Alerting
Enhanced Call Forwarding
To access your feature buttons:

Using Avaya one-X® Communicator Release 6.1
6
1. Click .
The Dialpad window displays the advanced SIP telephony (AST) features that are programmed
for your extension.
2. Click the appropriate feature button.
Using Avaya one-X® Communicator Icons
The table below lists out icons used in Avaya one-X® Communicator user interface and the purpose of
each icon:
Icon Icon name Icon description
Call button Dials a number.
Call answer button Answers an incoming call.
Call drop and call
reject button
Ends an ongoing call and rejects an incoming call.
Transfer call button Forwards an ongoing call to another telephone
number.
Call hold Places the current call on hold
Ongoing call button Places the current call on hold and dials another
number.
Mute button Mutes the audio.
Unmute button Unmutes the audio.
Speaker phone button Changes speakerphone mode to headset mode.
Headset button Changes headset mode to speakerphone mode.
Call log button
(Toggle)
Opens or closes the call log pane.
Contacts button
(Toggle)
Opens or closes the contacts pane.

Using Avaya one-X Communicator Icons
7
Redial button Redials the last dialled number.
Call resume button Resumes the on-hold call.
Call from log button Dials the selected number from the call log pane.
Voice mail button
(Toggle)
Notifies and gives access to new voicemails.
Dial pad button
(Toggle)
Opens or closes the dial pad.


9
Using Avaya one-X® Communicator with other applications
You must have a Avaya one-X® Client Enablement Services account if you want to integrate Avaya
one-X® Communicator with Client Enablement Services. Contact your system administrator for more
information.
When you integrate Avaya one-X® Communicator with Avaya one-X® Client Enablement Services, you
can:
Access your contacts in Client Enablement Services.
Access Client Enablement Services-based call history.
Use bridge conferencing.
Access your visual voice mail messages.
Change your personal message.
Manage ring phones
Select block calls or allow VIP calls option.
USING AVAYA ONE-X® COMMUNICATOR IN THE CITRIX ENVIRONMENT
If you are using Avaya one-X® Communicator in the Citrix environment the Avaya one-X®
Communicator files reside on the Citrix server. You can set your dialing rules using Avaya one-X®
Communicator.
The following features are not supported in the Citrix environment:
Video
This Computer mode (Road Warrior configuration)
Click-to-Dial feature
Note: If you are using Avaya one-X® Communicator as a published application in the Citrix
environment, you must use a resolution of 1024 x 768 or higher.
USING AVAYA ONE-X® COMMUNICATOR WITH MICROSOFT OUTLOOK
You can easily make and log calls from Microsoft Outlook using Avaya one-X® Communicator. You can
make calls from any Microsoft Outlook contact and also from the journal entry which exists for
Microsoft Outlook contact. You can even set Avaya one-X® Communicator to try and match the caller
ID for an incoming call with the telephone numbers in your Microsoft Outlook contacts, giving you the

Using Avaya one-X® Communicator Release 6.1
10
opportunity to know who is calling before you answer the call. If a match is found, the information for
that contact is popped to the screen.
For information on how to use Avaya one-X® Communicator with Microsoft Outlook, select Help from
the Avaya menu in Microsoft Outlook.
Note: Avaya one-X® Communicator supports Microsoft Outlook 2007 and Microsoft Outlook 2010.
Configuring Avaya one-X® Communicator
USING A HEADSET WITH AVAYA ONE-X® COMMUNICATOR
Before you can use a headset, you need to tune your headset with Avaya one-X® Communicator.
When using a headset with Avaya one-X® Communicator, place the microphone of the headset directly
in front of your mouth. This helps ensure that the other party on a call will hear you when you speak.
For a list of supported headsets, see "End user requirements” in Chapter 6, "Deployment Planning,” in
the Overview and Planning for Avaya one-X® Communicator guide.
ENABLING OR DISABLING THE CLICK-TO-DIAL FEATURE
Use this procedure to enable dialing from Microsoft Internet Explorer or Mozilla Firefox. When the
Click-to-Dial feature is enabled, all dialable numbers displayed in the selected Web browser are
highlighted automatically. You can dial these numbers with a click of the mouse. Avaya one-X®
Communicator automatically enables the Click-to-Dial feature from Microsoft Internet Explorer and
Mozilla Firefox during installation.
To disable the Click-to-Dial feature:
1. Click and select Settings > General Settings.
The General Settings dialog box appears.
2. Under Devices and Services, click Preferences.
The Preferences settings appear.
3. In the Click-to-Dial area, clear the check box for Microsoft Internet Explorer or
Mozilla Firefox.
4. Click OK.
NOTE:
Configuring Avaya one-X Communicator
11
You must restart the respective browser to view the change.
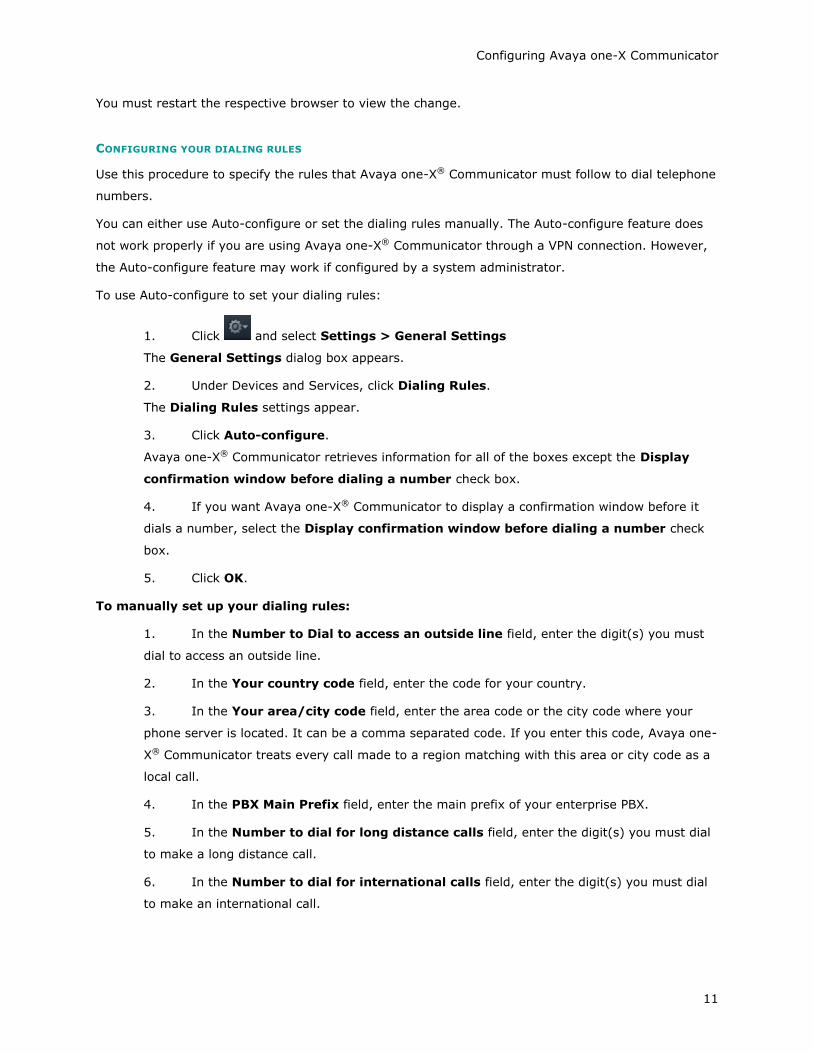
CONFIGURING YOUR DIALING RULES
Use this procedure to specify the rules that Avaya one-X® Communicator must follow to dial telephone
numbers.
You can either use Auto-configure or set the dialing rules manually. The Auto-configure feature does
not work properly if you are using Avaya one-X® Communicator through a VPN connection. However,
the Auto-configure feature may work if configured by a system administrator.
To use Auto-configure to set your dialing rules:
1. Click and select Settings > General Settings
The General Settings dialog box appears.
2. Under Devices and Services, click Dialing Rules.
The Dialing Rules settings appear.
3. Click Auto-configure.
Avaya one-X® Communicator retrieves information for all of the boxes except the Display
confirmation window before dialing a number check box.
4. If you want Avaya one-X® Communicator to display a confirmation window before it
dials a number, select the Display confirmation window before dialing a number check
box.
5. Click OK.
To manually set up your dialing rules:
1. In the Number to Dial to access an outside line field, enter the digit(s) you must
dial to access an outside line.
2. In the Your country code field, enter the code for your country.
3. In the Your area/city code field, enter the area code or the city code where your
phone server is located. It can be a comma separated code. If you enter this code, Avaya one-
X® Communicator treats every call made to a region matching with this area or city code as a
local call.
4. In the PBX Main Prefix field, enter the main prefix of your enterprise PBX.
5. In the Number to dial for long distance calls field, enter the digit(s) you must dial
to make a long distance call.
6. In the Number to dial for international calls field, enter the digit(s) you must dial
to make an international call.

Using Avaya one-X® Communicator Release 6.1
12
7. In the Extension length for internal extensions calls field, enter the number of
digits that comprise an internal extension. For example, if your internal extensions consist of
five digits, you would enter 5. In this example, any number that consists of five digits or less
would be treated as an internal extension.
If your company supports internal extensions of varying lengths (for example, three-digit,
five-digit, and seven-digit extensions), you can specify the different supported extension
lengths. For example, if your company supports three-digit, five-digit, and seven-digit
extensions, you would enter 3, 5, 7. You must use a comma to separate the values.
NOTE:
If you specify multiple extension lengths, Avaya one-X® Communicator performs exact
matches. For example, if you specify 3, 5, 7, Avaya one-X Communicator treats three-digit
numbers, five-digit numbers, and seven-digit numbers as internal extensions. In this example,
if you dial a one-digit, two-digit, or four-digit number, Avaya one-X® Communicator does not
recognize the numbers as internal extensions.
8. In the Length of national phone numbers field,
o Enter the number of digits you must dial (including area/city code) for a call
within your country.
o For countries with multiple phone number length, enter all supported phone
number length separated by a comma.
9. If you entered an area or city code in Step 3, select the Include area/city code
when making a local call check box if you intend to enter that area or city code while
making a call. This ensures that Avaya one-X® Communicator treats the calls as local calls.
For example, if you entered the code as 234 and if you select the check box, you need to
prefix the number to be called with 234.
10. If you want Avaya one-X® Communicator to display a confirmation window before it
dials a number, select the Display confirmation window before dialing a number check
box.
11. Click OK.
ENABLING/DISABLING THE DIALING CONFIRMATION WINDOW
Use this procedure to specify whether Avaya one-X® Communicator displays a confirmation window
before it dials a number.
To enable the dialing confirmation window:
1. Click and select Settings > General Settings.
The General Settings dialog box appears.

Configuring Avaya one-X Communicator
13
2. Click Dialing Rules.
The Dialing Rules settings appear.
3. Select the Display confirmation window before dialing a number check box.
Avaya one-X® Communicator displays the dialing confirmation window before it dials a
telephone number.
4. Click OK.
VIEWING THE LINE DISPLAY INFORMATION FOR A CALL
Line display information feature is supported in Avaya one-X® Communicator only with H.323 protocol.
Use this procedure to set Avaya one-X® Communicator to display call information for the active call.
The line display information appears below the call appearance area in the Avaya one-X®
Communicator window.
To view the line display information for the active call:
Click and select View > Show Line Display.
NOTE:
A check mark indicates that this setting is enabled.
TURNING OFF RINGING FOR ALL INCOMING CALLS
To turn off ringing for all incoming calls:
1. Click and select Settings > General Settings.
The General Settings dialog box appears.
2. Click Audio.
The Audio page appears.
3. Clear the Ring on incoming calls check box.
4. Click OK.


15
Handling Calls
ANSWERING A CALL
An incoming call appears in the call appearance area of the Avaya one-X® Communicator window.
When you answer a call, the active call timer starts. The active call timer keeps track of the duration
of the call.
To answer a call:
Click for the incoming call.
If you are in Other Phone mode, answer the call from the other phone.
IGNORING AN INCOMING CALL
Use this procedure to disable ringing for an incoming call. You can also turn off ringing for all incoming
calls (works only in This Computer mode).
NOTE:
You cannot disable ringing for an incoming call if you are using Avaya one-X® Communicator in
Telecommuter mode.
To disable ringing for the call:
Click for the call.
PLACING A CALL ON HOLD
When you place a call on hold, the hold timer starts. The hold timer keeps track of how long the call is
on hold. The hold timer restarts every time the call is placed on hold.
To place a call on hold:
Click for the active call.
The call is placed on hold.
If the call is video enabled, Avaya one-X® Communicator stops sending video to the other party. When
you resume the call, Avaya one-X® Communicator resumes sending video to the other party.

Using Avaya one-X® Communicator Release 6.1
16
RESUMING A CALL ON HOLD
When you resume a call that is on hold, the active timer resumes.
To resume a call that is on hold:
Click for the held call.
If the call is video enabled, Avaya one-X® Communicator resumes sending video to the other party
USING DIALPAD TO ENTER DIGITS DURING A CALL
Use the Dialpad to enter digits during an active call.
To enter digits from the Dialpad during an active call:
1. Click to access the Dialpad.
2. Click the appropriate buttons on the Dialpad.
To close the Dialpad:
Click X in the Dialpad.
TRANSFERRING A CALL
Use the following procedure when you are active on a call and want to transfer the call to another
number.
To transfer a call to another number:
1. While you are active on a call, click .
The Transfer dialog box appears.
2. In the To field, enter the number to which you want to transfer the call.
3. Click OK.
The call disappears from the Avaya one-X® Communicator window, indicating that the transfer
was successful.
NOTE:
You can also transfer a call to another number by dragging and dropping the call appearance to either
an entry in the call log or to a contact, and then clicking the Transfer button that appears on the
respective Call Log entry or the Contact entry.
Use the following procedure when you are active on one call and another call is on hold, and you want
to transfer one of the calls to another call or to another number.

Handling Calls
17
To transfer a call to another active call:
1. While you are active on a call, click .
The Transfer dialog box appears. By default, the To field displays the number of the other
call, which is on hold.
2. Perform one of the following:
If you want to transfer the call to the other call, which is on hold, click
Transfer.
The call disappears from the Avaya one-X® Communicator window, indicating that the
transfer was successful.
If you want to transfer the call to another number, click Other Number.
3. In the To field, enter the number to which you want to transfer the call.
4. Click OK.
The call disappears from the Avaya one-X® Communicator window, indicating that the transfer
was successful.
NOTE:
You can also transfer a call to another number by dragging and dropping the call appearance to either
the held call appearance, or to an entry in the call log, or to a contact, and then clicking the Transfer
button that appears in the held call appearance, or the respective Call Log entry, or the Contact entry.
HANGING UP A CALL
To hang up a call:
Click for the call.
MUTING THE MICROPHONE
You can mute or unmute the microphone only in This Computer mode. When you mute the
microphone, your microphone is muted for all calls. To use your microphone, you must unmute the
microphone.
To mute the microphone:
Click .

Using Avaya one-X® Communicator Release 6.1
18
UNMUTING THE MICROPHONE
When you mute the microphone, your microphone is muted for all calls. To use your microphone for
another call, you must unmute the microphone.
To unmute the microphone:
Click .

19
Making Calls
MAKING A CALL FROM THE MAIN WINDOW
To make a call from the main window:
1. In the Enter name or number field, enter the telephone number you want to dial.
NOTE:
To make an international call, prefix your number with "+" sign and then the country code. For
example, you want to make a call to 1234567890 in India. The country code for India is 91.
Therefore, you need to enter +911234567890.
2. Click .
If you are in Other Phone mode, answer the call from the other phone.
A call appearance is displayed for the call.
MAKING A CALL USING A BRIDGED EXTENSION
Your system administrator sets up bridged extensions. With the bridged extension feature, you can
use another extension to make a call from your phone. At the receiving end, the call appears to have
originated from the other extension.
Avaya one-X® Communicator displays bridged extensions in the drop-down list box adjacent to the
Enter name or number field.
To make a call from the main window:
1. In the drop-down list box adjacent to the Enter name or number field, click the
bridged extension that you want to use for making the call.
2. Click .
If you are in Other Phone mode, answer the call from the other phone.
A call appearance is displayed for the call.
MAKING A CALL FROM THE DIALPAD
To make a call from the Dialpad:
1. Click to access the Dialpad.
2. Perform one of the following steps:
Click each digit you want to dial.

Using Avaya one-X® Communicator Release 6.1
20
Press each digit on your keyboard.
NOTE:
To make an international call, prefix your number with "+" sign and then the country
code. For example, you want to make a call to 1234567890 in India. The country code
for India is 91. Therefore, you need to press the digits +911234567890.
A call appearance is displayed.
To close the Dialpad:
Click X in the Dialpad.
MAKING A CALL FROM A CONTACT
To make a call from a contact:
1. Click to display your contacts.
2. From the Show drop-down list, select the appropriate contact list.
3. For the contact you want to call, click .
If you are in Other Phone mode, answer the call from the other phone.
A call appearance is displayed for the call.
DIALING A NUMBER FROM MICROSOFT INTERNET EXPLORER
When you dial a telephone number from a Web page, the telephone number is processed according to
how you configured Windows dialing.
Before you can dial a telephone number from Internet Explorer, you must enable the Click-to-Dial
feature. When the Click-to-Dial feature is enabled, all dialable numbers displayed in Internet Explorer
windows are highlighted automatically.
To dial a number that is highlighted automatically:
1. In the browser window, place the mouse over the telephone number you want to dial.
A telephone icon appears.
NOTE:
If you are on a secure site, a different icon appears.
2. Click the number.
A call appearance is displayed for the call.
To dial a number that is not highlighted automatically:
1. In the browser window, select the number you want to dial.

Making Calls
21
2. Right-click and select Click to Dial.
A call appearance is displayed for the call.
DIALING A NUMBER FROM MOZILLA FIREFOX
When you dial a telephone number from a Web page, the telephone number is processed according to
how you configured Windows dialing.
To dial a number that is highlighted automatically in Mozilla Firefox:
1. In the Mozilla Firefox window, place the mouse over the telephone number you want
to dial.
A telephone icon appears.
NOTE:
If you are on a secure site, a different icon appears.
2. Click the number.
A call appearance is displayed for the call.
To dial a number that is not highlighted automatically in Mozilla Firefox:
1. In the Mozilla Firefox window, select the number you want to dial.
2. Right-click and select Click to Dial.
A call appearance is displayed for the call.
REDIALING THE LAST NUMBER DIALED
The Redial button dials the last telephone number that you dialed from Avaya one-X® Communicator
during the current session.
To redial the last number dialed:
Click .
If you are in Other Phone mode, answer the call from the phone.
A call appearance is displayed for the call.
USING DIALPAD TO ENTER DIGITS DURING A CALL
Use the Dialpad to enter digits during an active call.
To enter digits from the Dialpad during an active call:
1. Click to access the Dialpad.

Using Avaya one-X® Communicator Release 6.1
22
2. Click the appropriate buttons on the Dialpad.
To close the Dialpad:
Click X in the Dialpad.
MUTING THE MICROPHONE
You can mute or unmute the microphone only in This Computer mode. When you mute the
microphone, your microphone is muted for all calls. To use your microphone, you must unmute the
microphone.
To mute the microphone:
Click .
UNMUTING THE MICROPHONE
When you mute the microphone, your microphone is muted for all calls. To use your microphone for
another call, you must unmute the microphone.
To unmute the microphone:
Click .

23
Making Conference Calls
STARTING A CONFERENCE
Depending on your telephone system, you may have up to six participants (including yourself) in a
conference. To start a conference, you must have at least one call in the Avaya one-X® Communicator
window.
To start a conference:
1. Make sure there are at least one call in the Avaya one-X® Communicator window.
2. Click Conference.
The Conference dialog box appears.
3. In the With field, enter the number with which you want to have the conference call.
4. Click OK.
One call is displayed for the conference.
5. The dialed number gets connected to the conference call.
ADDING A PARTICIPANT TO A CONFERENCE
Depending on your telephone system, you may have up to six participants (including yourself) in a
conference.
To add a participant to a conference:
1. Perform one of the following steps:
Call the party you want to add to the conference.
Answer the call from the party you want to add to the conference.
2. Click Conference.
The Conference dialog box appears.
3. Click Conference for the party you want to add to the conference or by drag and drop
the party in the Conference dialog box and then click Conference.
PLACING A CONFERENCE ON HOLD
To place a conference on hold:
Click .

Using Avaya one-X® Communicator Release 6.1
24
The conference call is placed on hold.
RESUMING A CONFERENCE ON HOLD
To resume a conference that is on hold:
Click .
HANGING UP A CONFERENCE
To hang up a conference:
Click for the active conference call.
DROPPING THE LAST CALL FROM A CONFERENCE
Use this procedure to drop the last call that was added to the conference.
The conference must be active when you want to drop the last call.
To drop the last call from a conference:
Click Drop for the active conference call.
Avaya one-X® Communicator disconnects the last call that you made.

25
Using Bridge Conferencing
CALLING INTO A BRIDGE CONFERENCE
The Bridge Conference icon is available only when Avaya one-X® Communicator is integrated with
Client Enablement Services.
To call into a bridge conference:
1. Click .
The Bridge Conference window appears.
2. Enter your conference bridge number in the box, and click .
3. Log into the bridge. You can use the Avaya one-X® Communicator Dialpad to enter
your access code.
The Bridge Conference window displays the conference participants. The default name that
Avaya Meeting Exchange assigns to each conference appears at the top of the window. Your
information is displayed in bold type at the top of the participants list.
HOST TASKS
Locking or unlocking a bridge conference
If you are logged in as a host, you can lock the bridge conference to new participants so that no new
participants can join until you unlock the conference.
To lock the bridge conference:
In the Bridge Conference window, click . The conference security icon appears at the top of
the window.
To unlock the bridge conference:
In the Bridge Conference window, click .
Muting a bridge conference (Lecture mode)
If you are logged in as a host, you can mute all other lines in the bridge conference. In this mode, the
participants can only listen.
To put the bridge conference on the lecture mode:
In the Bridge Conference window, click .

Using Avaya one-X® Communicator Release 6.1
26
Unmuting a bridge conference
To bring the bridge conference out of the lecture mode:
In the Bridge Conference window, click .
Muting a participant
If you are logged in as a host, you can mute a participant.
To mute a participant:
In the Bridge Conference window, click for the participant you want to mute.
An icon appears for the selected participant indicating that the participant is muted.
Unmuting a participant
To unmute a participant:
In the Bridge Conference window, click for the participant you want to unmute.
Placing a bridge conference on hold
If you are logged in as a host, you can place the bridge conference on music hold.
To place a bridge conference on hold:
In the Bridge Conference window, click .
Resuming a bridge conference on hold
To resume a bridge conference that is on hold:
In the Bridge Conference window, click .
Placing a participant on hold
If you are logged in as a host, you can place a participant on hold.
To place a participant on hold:
In the Bridge Conference window, click and select Hold for the participant you want to place on
hold.
An icon appears for the selected participant indicating that the participant is on hold.

Using Bridge Conferencing
27
Retrieving a participant from hold
If you are logged in as a host, you can retrieve a participant who is on hold.
To retrieve a participant who is on hold:
In the Bridge Conference window, click and select Unhold for the participant who is on hold.
Renaming a bridge conference
Avaya one-X® Communicator uses the default name that Avaya Meeting Exchange assigns to each
conference. If you logged in as a host, you can change the name that is displayed to the participants
for the bridge conference.
To rename a bridge conference:
1. In the Bridge Conference window, click on the conference name at the top of the
window.
2. Make your changes.
Sorting participants in a bridge conference
Regardless of how you sort the participants in a conference, your name is always listed on top in bold
type. The timer is also displayed next to your name.
To sort participants in a bridge conference by name or the order in which they joined the
conference:
1. In the Bridge Conference window, click and select Sort Participants by.
2. Perform one of the following steps:
o If you want sort by name, click Name.
o If you want to sort by the order in which the participants joined the
conference, click Join Order.
To sort participants in ascending order or descending order:
1. In the Bridge Conference window, click and select Sort Participants by.
2. Perform one of the following steps:
o If you want to sort by ascending order, click Ascending.
o If you want to sort by descending order, click Descending.
Adding a participant to a bridge conference
Only the host can add a participant to a bridge conference.

Using Avaya one-X® Communicator Release 6.1
28
To add a participant:
1. In the text box at the top of the Bridge Conference window, enter the telephone
number of the party you want to add.
2. Click .
Dropping a participant from a bridge conference
If you are logged in as a host, you can drop participants from the bridge conference.
To drop a participant from the bridge conference:
1. In the Bridge Conference window, click for the participant you want to drop.
2. Select Remove from Conference.
The participant is dropped from the bridge conference.
Ending a bridge conference
If you logged into the bridge conference as a host, depending on your bridge configuration, you can
drop the bridge conference after making changes even if other hosts remain in the conference. When
the bridge conference ends, all conference participants are dropped.
To end a bridge conference:
In the Bridge Conference window, click .
PARTICIPANT TASKS
Muting your bridge conference line
If you logged into a bridge conference as a participant, use this task to mute your line in the bridge
conference.
To put your bridge conference line on mute:
In the Bridge Conference window, click for your entry in the bridge conference.
An icon appears for your entry indicating that you are muted.
Unmuting your bridge conference line
If you logged into a bridge conference as a participant, use this task to unmute your line in the bridge
conference.
To unmute your bridge conference line:
In the Bridge Conference window, click for your entry in the bridge conference.
Using Bridge Conferencing
29
Leaving a bridge conference
Use this procedure to leave a bridge conference that you logged into as a participant.
To leave a bridge conference:
1. In the Bridge Conference window, click for your entry.
2. Select Exit Conference.


31
Using Contacts
SEARCHING FOR A CONTACT (SIP MODE)
When you search for a contact, Avaya one-X® Communicator searches the contacts in all Personal
Contacts, Favorites, enterprise contacts, and Search Results.
To search for a contact:
1. Click to display your contacts.
2. In the Enter name or number box, enter the name you want to find.
3. Click .
The contacts that match your search criteria are displayed. (The Show drop-down list displays
Search Results.)
NOTE:
When you enter the first few characters of a enterprise contact’s first name or last
name, all matching names are displayed in the search results. As you type in more characters,
the search results filter to match the new characters. These search results are populated from
your Microsoft Outlook, IBM Lotus Notes, and Public Directory only if you have selected either
or all of these in the Preferences - General Settings dialog box.
If you have configured Novell directory as a Public Directory, you can search a Novell
directory enterprise contact only if you are an authenticated user.
If you have integrated Avaya one-X® Communicator with Lotus Notes, Lotus Notes
prompts you for a password when you search for a enterprise contact. Enter your Lotus Notes
password to continue the search.
SEARCHING FOR A CONTACT (H.323 MODE)
When you search for a contact, Avaya one-X® Communicator searches the contacts in all My Contacts,
Favorites (only when Avaya one-X® Communicator is integrated with Avaya one-X® Client Enablement
Services), enterprise contacts, and Search Results.
To search for a contact:
1. Click to display your contacts.
2. In the Enter name or number box, enter the name or telephone number you want to
find.

Using Avaya one-X® Communicator Release 6.1
32
3. Click .
The contacts that match your search criteria are displayed. (The Show drop-down list displays
Search Results.)
NOTE:
When you enter the first few characters of a enterprise contact’s first name or last
name, all matching names are displayed in the search results. As you type in more characters,
the search results filter to match the new characters. These search results are populated from
your Microsoft Outlook, IBM Lotus Notes, and Public Directory only if you have selected either
or all of these in the Preferences - General Settings dialog box.
If you have configured Novell directory as a Public Directory, you can search a Novell
directory enterprise contact only if you are an authenticated user.
If you have integrated Avaya one-X® Communicator with Lotus Notes, Lotus Notes
prompts you for a password when you search for a enterprise contact. Enter your Lotus Notes
password to continue the search.
USING ADVANCED SEARCH
Use this feature to search for contacts in a specific directory and organise the search results.
To search for a contact:
1. Click to display your contacts.
2. Click Advanced Search.
3. From the Search drop-down, select the directory type.
4. From the Field drop-down, select the name of a field by which you are making the
search.
5. Enter a search criteria in the box adjacent to the Field drop-down.
6. Click Search.
The contacts that match your search criteria are displayed. (The Show drop-down list displays
Search Results.)
NOTE:
If you have configured Novell directory as a Public Directory, you can search a Novell
directory enterprise contact only if you are an authenticated user.
If you have integrated Avaya one-X® Communicator with Lotus Notes, Lotus Notes
prompts you for a password when you search for a enterprise contact. Enter your Lotus Notes
password to continue the search.

Using Contacts
33
To organize the search results:
1. Click Field Organizer.
The Field Organizer dialog box for the selected directory type appears.
2. Select a field from the Available fields.
3. Click to move the selected field under Show in this order.
To move the field back to Available fields, click .
4. To change the order of the fields, select the field listed under Show in this order and
click or to move the field up or down respectively.
5. Click Save.
The selected fields are displayed in the order of preference in the Advanced Search dialog
box.
ADDING A CONTACT
Use this procedure to add a contact to your Contacts list.
To add a contact:
1. Click to display your contacts.
2. Click , and select Contacts > Add Contact.
The Add Contact dialog box appears.
3. Enter appropriate information for this contact.
4. When finished, click OK.
NOTE:
For SIP protocol:
Contacts that are added when Avaya one-X® Communicator is integrated with Avaya
one-X® Client Enablement Services can also be used in the standalone mode of Avaya one-
X® Communicator.
However, contacts added in the standalone mode of Avaya one-X® Communicator
cannot be viewed or used when you integrate Avaya one-X® Communicator with Client
Enablement Services.
MODIFYING A CONTACT
You cannot modify details of a Favorite contact.

Using Avaya one-X® Communicator Release 6.1
34
To modify the details of a contact:
1. Click to display your contacts.
2. Right-click the contact you want to modify, and select Show Details.
OR
Double-click the contact you want to modify.
The Contact Details dialog box displays the information for the selected contact.
3. Make changes to the contact details as required.
4. When finished, click OK.
DELETING A CONTACT
Use this procedure to delete a contact.
To delete a contact:
1. Click to display your contacts.
2. For the contact you want to delete, right-click the contact and select Delete from
Contacts.
A dialog box appears prompting you to confirm your action.
3. Click Yes.
The selected contact is deleted.
VIEWING THE INFORMATION FOR A CONTACT
To view the information for a contact:
1. Click to display your contacts.
2. Find the contact in which you are interested.
3. For the contact, click , and select Show Details.
OR
Double-click the contact you want to modify.
The information for the selected contact appears.
4. Click OK.
SORTING CONTACTS

Using Contacts
35
You can sort contacts by first name or last name and type.
From the Sort drop-down list, select First Name or Last Name. Click the Name box to display the
names in ascending or descending order.
MAKING A CALL FROM A CONTACT
To make a call from a contact:
1. Click to display your contacts.
2. From the Show drop-down list, select the appropriate contact list.
3. For the contact you want to call, click .
If you are in Other Phone mode, answer the call from the other phone.
A call appearance is displayed for the call.
SENDING AN E-MAIL TO A CONTACT
To send an e-mail to a contact:
1. Click to display your contacts.
2. From the Show drop-down list, select the appropriate contact list.
3. For the appropriate contact, click .
Your default e-mail application opens.
4. Compose and send your e-mail message.
SEARCHING FOR A CONTACT (SIP MODE)
When you search for a contact, Avaya one-X® Communicator searches the contacts in all Personal
Contacts, Favorites, enterprise contacts, and Search Results.
To search for a contact:
1. Click to display your contacts.
2. In the Enter name or number box, enter the name you want to find.
3. Click .
The contacts that match your search criteria are displayed. (The Show drop-down list displays
Search Results.)
NOTE:

Using Avaya one-X® Communicator Release 6.1
36
When you enter the first few characters of a enterprise contact’s first name or last
name, all matching names are displayed in the search results. As you type in more characters,
the search results filter to match the new characters. These search results are populated from
your Microsoft Outlook, IBM Lotus Notes, and Public Directory only if you have selected either
or all of these in the Preferences - General Settings dialog box.
If you have configured Novell directory as a Public Directory, you can search a Novell
directory enterprise contact only if you are an authenticated user.
If you have integrated Avaya one-X® Communicator with Lotus Notes, Lotus Notes
prompts you for a password when you search for a enterprise contact. Enter your Lotus Notes
password to continue the search.
USING FAVORITES
Adding a contact to Favorites (SIP mode)
After searching for a contact, you can add it to the Favorites contact list.
To add a contact to Favorites:
1. Click to display your contacts or search for the contact.
2. Find the contact you want to add to your Favorites.
3. Right-click the contact and perform any one of the following:
Select Add to Favorite.
Select Show Details, select the Favorite check box in the Contact Details dialog box, and
click OK.
Removing a contact from Favorites
When you remove a contact from Favorites, that contact is not deleted from any other directory.
To remove a contact from Favorites:
1. Click to display your contacts.
2. From the View drop-down list, select Favorites to display your Favorites contact list.
3. Right-click the contact you want to remove from the Favorites list, and select Show
Details.
4. In the Contact Details dialog box, clear the Favorite check box.
5. Click OK.

37
Using the Call Log
VIEWING CALL LOG ENTRIES
To view Call Log entries:
Click .
Your list of Call Log entries appear.
To view the details of a Call Log entry:
Right-click the contact, and select Show Details.
To view the name and number in the Call Log entries:
Click , and select Call Log > Show Name and Number.
The name and number appear for all the entries in the Call Log.
SORTING CALL LOG ENTRIES
You can sort Call Log entries by type of call (that is, All, Incoming, Outgoing, or Missed),
name/number, date/time, and length of call
To sort your Call Log entries by type:
1. Click .
Your list of Call Log entries appear.
2. From the Show drop-down list, select the type of call log entries you want to view.
Your choices are All, Incoming, Outgoing, or Missed.
To sort your Call Log entries by name/number, date/time, or length of call:
1. Click .
Your list of Call Log entries appear.
2. Click on the appropriate column (that is, Name/Number, Time, or Length).
The Call Log entries are displayed in ascending order depending on the selected attribute.
Click on the column again to display the Call Log entries in descending order.

Using Avaya one-X® Communicator Release 6.1
38
MAKING A CALL FROM A CALL LOG ENTRY
To make a call from a Call Log entry:
1. Click to access the Call Log.
2. Right-click the contact, and click Contact>Call.
Alternatively, Click for the contact you want to call.
DELETING A CALL LOG ENTRY
To delete a Call Log entry:
1. Click to access the Call Log.
2. Right-click the contact you want to delete, and select Delete.
Alternatively, select the contact from the Call Log, and click >Call Log > Delete
Selected.
A dialog box appears prompting you to confirm your action.
3. Click Yes.
To delete multiple Call Log entries:
1. Click to access the Call Log.
2. Select all the entries that you want to delete.
3. Click , and select Call Log > Delete Selected.
A dialog box appears prompting you to confirm your action.
4. Click Yes.
To delete all entries in the Call Log:
1. Click to access the Call Log.
2. Click , and select Call Log > Delete All.
A dialog box appears prompting you to confirm your action.
3. Click Yes.
ADDING A CALLER TO CONTACTS FROM A CALL LOG ENTRY
Using the Call Log
39
If the Call Log entry is from an unknown number, you can add that entry to your Contacts. However,
in SIP mode, you can only add a Personal Contact from a Call Log entry.
To add a caller to your contacts list from the call log entry:
1. Click to display your call log.
2. Select a contact you want to add to your Contacts.
3. Right-click the Contact and select Add to Contacts.
4. In the Contact Details dialog box, enter contact information as required.
5. Click OK.
The contact is added to your Contacts list.
NOTE:
If a contact already exists with the same phone number, the system displays the contact details for
that contact.


41
Using Instant Messaging and Presence
SENDING AND RECEIVING INSTANT MESSAGES
You can use instant messaging in SIP mode as well as H.323 mode. This feature is available only when
Avaya one-X® Communicator is integrated with Avaya Aura® Presence Services Release 6.1.
Avaya one-X® Communicator supports Unicode enabling to send and receive instant messages in any
language.
You can also send and receive instant messages from Avaya one-X® Agent users if they are registered
on the same presence server or a federated XMPP server.
To send and receive instant messages:
1. Click to display your contacts.
2. From the Show drop-down list, select Favorites to display your Favorites contact list.
3. Click for the contact to which you want to send instant messages.
The Instant Messaging window appears.
4. Enter your message. You can enter a maximum of 500 characters in an instant
message.
5. Click Send to send your message to the contact.
NOTE:
If the contact is offline, a message <DisplayName> is currently offline. Messages sent to offline
users will be delivered when they come online. appears in the Instant Messaging window.
INSERTING EMOTICONS IN AN INSTANT MESSAGE
While entering an instant message in the Instant Messaging window, you can also add emoticons.
To insert an emoticon in an instant message:
1. Click to display your contacts.
2. From the Show drop-down list, select Favorites to display your Favorites list.
3. Click for the contact to which you want to send instant messages.
The Instant Messaging window appears.
4. Enter your message.
5. Click to open the emoticons list.
Using Avaya one-X® Communicator Release 6.1
42
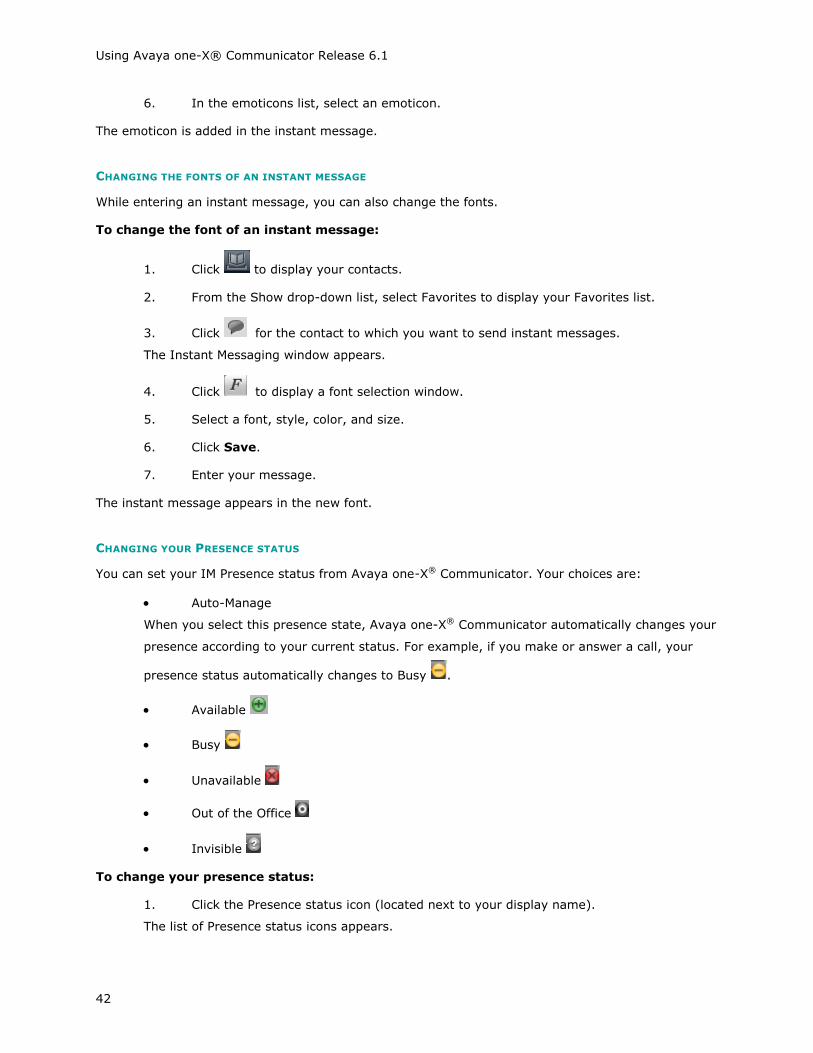
6. In the emoticons list, select an emoticon.
The emoticon is added in the instant message.
CHANGING THE FONTS OF AN INSTANT MESSAGE
While entering an instant message, you can also change the fonts.
To change the font of an instant message:
1. Click to display your contacts.
2. From the Show drop-down list, select Favorites to display your Favorites list.
3. Click for the contact to which you want to send instant messages.
The Instant Messaging window appears.
4. Click to display a font selection window.
5. Select a font, style, color, and size.
6. Click Save.
7. Enter your message.
The instant message appears in the new font.
CHANGING YOUR PRESENCE STATUS
You can set your IM Presence status from Avaya one-X® Communicator. Your choices are:
Auto-Manage
When you select this presence state, Avaya one-X® Communicator automatically changes your
presence according to your current status. For example, if you make or answer a call, your
presence status automatically changes to Busy .
Available
Busy
Unavailable
Out of the Office
Invisible
To change your presence status:
1. Click the Presence status icon (located next to your display name).
The list of Presence status icons appears.

Using Instant Messaging and Presence
43
2. Select the appropriate Presence status.
MAKING A CALL FROM THE INSTANT MESSAGING WINDOW
While sending instant messages to a contact, you can also call the contact from the Instant Messaging
window.
To call the contact from the Instant Messaging window:
1. Click to display your contacts.
2. From the Show drop-down list, select Favorites to display your Favorites list.
3. Click to display the Instant Messaging window.
4. Click on the top of the Instant Messaging window.
SENDING INSTANT MESSAGES WHILE ON AN ACTIVE CALL
While on a call with a contact, you can also send instant messages to that contact.
To send instant messages while on an active call:
1. Click to display your contacts.
2. From the View drop-down list, select Favorites to display your Favorites list.
3. Click to initiate a call.
A call appearance is displayed.
4. Click to display the Instant Messaging window.
5. Enter your message.
SENDING AND RECEIVING INSTANT MESSAGES FROM CALL LOG
To send and receive instant messages from Call Log:
1. Click to access the Call Log.
2. Double-click an entry for which you want to send instant messages.
The Call Details window appears.
3. In the Call Details window, click to open the messaging window.


45
Using Directories
SETTING UP ACCESS TO A PUBLIC DIRECTORY
If you are logged in to Avaya one-X® Communicator, you can set up access to a public directory only
manually.
To configure the public directory settings:
You must know the following information for that directory:
Server address for the directory
Search root for the directory
Login, if required
Password, if required
1. In the Directory Type field, select a type of directory. Your options are:
Active Directory (LDAP)
Domino
Novell
Sun ONE Directory
2. In the Directory Name field, enter the name for the directory.
3. In the Server Address field, enter the IP address of the server for this directory.
4. In the User name field, enter the user name, if required.
5. In the Password field, enter the password, if required.
6. In the Search Root field, enter the search root. An example is ou=people,
o=<your_company_name>.com.
7. In the Server Port field, enter the port. The default is 389.
8. In the Timeout field, enter the timeout interval. The default is 100 seconds.
9. In the Max Entries field, enter the maximum number of matching entries that you
want Avaya one-X® Communicator to display. The default is 50.
10. Select the Use Active Directory GSS Bind check box if you want Avaya one-X®
Communicator to use the current user's login and password to bind with the Active Directory
LDAP server.
11. Click Preferences.
The Preferences page appears.

Using Avaya one-X® Communicator Release 6.1
46
12. Select the Public Directory check box if you want Avaya one-X® Communicator to
search contacts in the public directory when you use the Name Look Up feature.
13. Click OK.
SETTING UP ACCESS TO MICROSOFT OUTLOOK
Use this procedure to set Avaya one-X® Communicator to search contacts in Microsoft Outlook when
you use the Name Look Up feature. Microsoft Outlook must be installed and running on your
computer.
To set up access to Microsoft Outlook:
1. Click and select Settings > General Settings.
The General Settings dialog box appears.
2. Click Preferences.
The Preferences page appears.
3. Select the Microsoft Outlook Contacts check box.
4. Click OK.
SETTING UP ACCESS TO IBM LOTUS NOTES ADDRESS BOOK
Use this procedure to set Avaya one-X® Communicator to search contacts in Lotus Notes Address
Book when you use the Name Look Up feature. Lotus Notes Address Book must be installed and
running on your computer.
To set up access to Lotus Notes Address Book:
1. Click and select Settings > General Settings.
The General Settings dialog box appears.
2. Click Preferences.
The Preferences settings page appears.
3. Select the IBM Lotus Notes® Contacts check box.
4. Click OK.

47
Using Voice Messaging
CONFIGURING AVAYA ONE-X® COMMUNICATOR TO ACCESS A MESSAGING SYSTEM
If you are using Avaya one-X® Client Enablement Services integration, and visual voice mail is
administered for your Client Enablement Services account, you do not have to configure Avaya one-X®
Communicator to access the messaging system. In this case, Avaya one-X® Communicator is already
configured to access your visual voice mail messages.
When you receive a voice mail message, the Message Waiting Indicator (MWI) icon, located in the
top-left corner of the Avaya one-X® Communicator main window, is turned "on," indicating that you
have one or more voice mail message. You can access your messaging system from Avaya one-X®
Communicator by clicking on the Message Waiting Indicator icon. However, you must first configure
Avaya one-X® Communicator to access your messaging system. If you click on the Message Waiting
Indicator icon before configuring Avaya one-X® Communicator to access your messaging system, no
action occurs (that is, Avaya one-X® Communicator does not access your messaging system).
You can set Avaya one-X® Communicator to access your messaging system in one of the following
ways:
Dial the access number of the messaging system.
Open an application that accesses the messaging system.
Open a Web browser and go to the Web page for the voice messaging system.
To configure Avaya one-X® Communicator to access your messaging system:
1. Click and select Settings > General Settings.
The General Settings dialog box appears.
2. Click Messaging.
The Messaging page appears.
3. Select the Enable Message Access check box.
4. Perform one of the following steps:
If you want Avaya one-X® Communicator to dial a telephone number:
1. Select the Dial this number option.
NOTE:
You can also use Auto-configure to configure this number.
2. In the text box, enter the telephone number you want to dial to access
the messaging system.
3. Go to Step 5.

Using Avaya one-X® Communicator Release 6.1
48
If you want Avaya one-X® Communicator to open another application to
access the messaging system:
1. Select the Start This Application option.
2. Using the Browse button, select the application you want to run.
3. Go to Step 5.
If you want Avaya one-X® Communicator to open a Web browser to access the
Web page for the messaging system:
1. Select the Open Webpage option.
2. In the text box, enter the Web page for the messaging system.
3. Go to Step 5.
5. Click OK to close the General Settings dialog box.
ACCESSING THE VOICE MESSAGING SYSTEM
If you are using Avaya one-X® Client Enablement Services integration, and visual voice mail is
administered for your Client Enablement Services account, go to Access your visual voice mail
messages.
When you receive a voice mail message, the Message Waiting Indicator on your telephone is turned
"on". When this occurs, the Voice Messages Status button turns on in the Avaya one-X®
Communicator window. You can access your voice messaging system from Avaya one-X®
Communicator by clicking on the Voice Message Status button. However, you must first configure
Avaya one-X® Communicator to access your voice messaging system. If you click on the Voice
Messages Status button before configuring Avaya one-X® Communicator to access your voice
messaging system, no action occurs (that is, Avaya one-X® Communicator does not access your voice
messaging system).
To access your voice messaging system:
Click the Voice Messages Status button located at the top-left corner of the Avaya one-X®
Communicator window. Avaya one-X® Communicator attempts to contact your voice messaging
system.
49
Using Visual Voice Mail
ACCESSING YOUR VISUAL VOICE MAIL MESSAGES (H.323 MODE)
If you are using Avaya one-X® Client Enablement Services integration, you can access your Visual
Voice Mail messages.
To access your Visual Voice Mail messages:
1. Click .
Your list of messages appears.
2. Do either of the following:
Click for the message you want to view, and then select Listen.
The details of the message appear, and the voice mail message starts downloading.
Click on the message you want to view.
The details of the message appear, and the voice mail message starts downloading.
3. In the Voice area, use the controls to play the message.
4. Click and select Save to save the message at a location of your choice.
5. Click and select Open to play the message in another media player.
NOTE:
If you double-click a message, it starts playing as soon as the download completes. You do not need
to click to play it.
ADDING A NUMBER TO CONTACTS FROM VISUAL VOICE MAIL MESSAGES
Besides adding a personal contact, you can add a Favorite contact if Avaya one-X® Communicator is
able to resolve the contact name.
To add a number to the Contacts from the visual voice mail message:
1. Click to display your voice mail messages.
2. Select a number you want to add to your Contacts.
3. Click and select Contact > Add Contact.
The contact is added to Contacts list.
Using Avaya one-X® Communicator Release 6.1
50
NOTE:
If a contact already exists with the same phone number, the system displays the contact details for
that contact.
MAKING A CALL FROM A VISUAL VOICE MAIL MESSAGE
To make a call from a visual voice mail message:
1. Click to display your voice mail messages.
2. Select a number you want to call.
3. Perform one of the following:
Click and select Contact > Call.
Click for the entry you want to call.
NOTE:
A phone icon ( ) appears only when the voice mail includes a telephone number.
MARKING A MESSAGE AS UNREAD
To mark a visual voice mail message as "unread":
1. Click .
Your list of messages appears.
2. Click for the message you want to mark as "unread," and then select Mark as
Unread.
DELETING A MESSAGE
To delete a visual voice mail message:
1. Click .
Your list of messages appears.
2. Click for the message you want to delete, and then select Delete.
The selected message is deleted.
To delete multiple visual voice mail messages:

Using Video with Avaya one-X Communicator
51
1. Click .
Your list of messages appears.
2. Click the message you want to delete.
3. Press and hold down the CTRL key on your keyboard, and then click on each message
you want to delete.
4. After you have selected the messages you want to delete, click the menu icon in
the Avaya one-X® Communicator launch pad window and then select Messages > Delete
Selected.
A confirmation dialog box appears.
5. Click Yes.
The selected messages are deleted.
SENDING AN E-MAIL TO A CONTACT FROM A VISUAL VOICE MAIL MESSAGE
This feature is available only when Avaya one-X® Communicator is integrated with Avaya one-X®
Client Enablement Services. Also, you can send an e-mail to a contact only when the contact is added
on the Client Enablement Services server.
To send an e-mail to a contact from a Visual Voice Mail message:
1. Click to display your voice mail messages.
2. Perform one of the following:
Click adjacent to a contact you want to send an e-mail.
Click and select Contact > Send Email > e-mail address of the contact.
This displays your default mail client (Microsoft Outlook or IBM Lotus Notes) to compose a new e-mail.
SENDING AN INSTANT MESSAGE TO A CONTACT FROM A VISUAL VOICE MAIL MESSAGE (H.323 MODE ONLY)
This feature is available only in H.323 mode and when Avaya one-X® Communicator is integrated with
Avaya one-X® Client Enablement Services. In addition, you can send an instant message only if the
contact is added on the Client Enablement Services server.
To send an instant message to a contact from a visual voice mail message:
1. Click to display your voice mail messages.
2. Perform one of the following:
Click adjacent to a contact you want to send an instant message.

Using Avaya one-X® Communicator Release 6.1
52
Click and select Contact > Launch IM.
This displays your default Instant Message client (Microsoft Office Communicator).
Using Video with Avaya one-X® Communicator
USING VIDEO WITH AVAYA ONE-X® COMMUNICATOR
For video calls, ensure that the Enable Video Calls check box in the General Settings window is
selected after installation.
If Avaya one-X® Communicator cannot establish a video call with a particular contact, a red cross
icon appears on the video status of that contact in Contacts and Call Log windows.
Video integration enables you to send and receive video during calls you handle with Avaya one-X®
Communicator if the media server of your enterprise provides support and is configured for video.
Avaya one-X® Communicator attempts to "register" with the video feature on the media server.
Note: The video icon ( ) is displayed for users that avail IM and Presence services and
are added as Favorites.
When video is available during a call, you can:
Send video to the other party.
Receive video from the other party.
Mute video (temporarily stop sending video to the other party).
Stop the video.
View statistics for the call.
View full screen video.
Keep video window always on top.
By default, Avaya one-X® Communicator sends your video image automatically when you answer or
join a video call. To change this setting, see Changing your video settings.
OPENING THE VIDEO WINDOW
Use this procedure to open the video window if it is closed.
To open the video window:
1. Perform one of the following steps:

Using Video with Avaya one-X Communicator
53
Click and select a Preferred Camera.
Click and select Settings > General Settings > Video.
2. Click Open Video Window.
DISPLAYING THE VIDEO WINDOW IN ITS OPTIMAL SIZE
To display the video window in its optimal size:
Click General Settings>Video>Open Video Window> >Optimize Video Window Size in the
video window.
SETTING THE VIDEO WINDOW TO APPEAR AUTOMATICALLY ON LOGIN
Use this procedure to set the video window to appear automatically when you log into the server.
To set the video window to appear automatically on login:
1. Click and select Settings > General Settings
The General settings page appears.
2. Click Video.
3. Click Advanced.
4. Make sure the Show the video window automatically on login with video
capabilities check box is selected.
5. Click OK.
CHANGING YOUR VIDEO SETTINGS
You can change the following video settings:
Whether to start sending your video images automatically when you answer or join a
call
Whether to display the near-end video and the far-end video in the same window
(Picture-in-Picture)
Whether to make the video picture to stretch to fit the screen in full-screen mode
Whether to enable the screen saver and monitor power saving mode during a call
To change your video settings:
1. Click and select Settings > General Settings
The General settings page appears.

Using Avaya one-X® Communicator Release 6.1
54
2. Click Video.
3. If you want Avaya one-X® Communicator to start sending your video image
automatically, make sure the Send your video image automatically when you answer or
join a video call check box is selected.
NOTE:
If you disable this setting, Avaya one-X® Communicator does not send the video automatically
when you answer or join a video call. The Video Umute button is displayed. To start
sending video to the other party on the call, you must click .
4. To set Avaya one-X® Communicator to display the near-end and far-end video in the
same window, perform the following steps:
a. Select the Display a picture-in-picture window check box.
b. Select the appropriate option for the size of the picture-in-picture window (that
is, small, medium, or large).
c. If you want the picture-in-picture window to remain in a fixed location in the
video window, select the Fixed picture-in-picture location check box.
5. If you want Avaya one-X® Communicator to stretch the video window to fit the screen
on a full screen video mode, select the Stretch video to fit screen check box.
6. If you want Avaya one-X® Communicator to display a warning before displaying the
video window on a full screen mode, select the Display warning before entering Full
Screen mode check box.
7. If you want to disable the screen saver and do not want the monitor to switch to the
power saving mode during an active video call, select the Automatically disable screen
saver and monitor power saving mode during a call check box.
8. Click OK.
VIEWING VIDEO IN PICTURE IN PICTURE (PIP) MODE
Use this procedure to view your video picture and the video picture of the called party in PIP mode in
your video window:
1. Select the Display a picture-in-picture window check box, see Changing your
video settings.
2. Ensure that the video window is open on your end and the other party's window.
3. Click .
Two pictures appear in your video window.
MUTING THE VIDEO

Using Video with Avaya one-X Communicator
55
Use this procedure to temporarily stop sending video to the other party during a call.
To temporarily stop sending video to the other party:
Disconnect the Web camera or click .
Avaya one-X® Communicator stops sending the video. However, you continue to receive video from
the other party. The other party sees the following message in their video window: "Far End Muted."
To resume sending video to the other party:
Reconnect the Web camera or click .
STOPPING THE VIDEO
Use this procedure to stop sending video to the other party during a call. Stopping the video during a
call does not disconnect the call.
NOTE:
When you stop the video during a call, you cannot restart the video during that call.
To stop sending video to the other party:
Click .
VIEWING STATISTICS FOR THE CURRENT VIDEO CALL
To view the statistics for the current video call:
1. Perform one of the following steps:
Click and select Settings > Statistics > Video.
In the Video window, click > Video Statistics
The Video Statistics dialog box appears.
2. When finished, click Close.
VIEWING FULL SCREEN VIDEO WINDOW
Use this procedure to view full screen video.
1. Click the icon on the video window to view the full screen video.
You get a warning that you can press the Escape key anytime to return to normal mode. Press
the Escape key to return to the normal mode from the full screen mode.
2. Select the Do not display this warning in future check box, if you do not want to
see this warning next time.

Using Avaya one-X® Communicator Release 6.1
56
3. Click OK.
KEEPING VIDEO WINDOW ALWAYS ON TOP
Use this procedure to keep the video window always on top of other applications:
Click General Settings>Video>Open Video Window> >Always on Top in the video window

57
Troubleshooting
PRODUCT INTERACTIONS
Avaya one-X® Communicator interacts with the following products:
Citrix
If you are using Avaya one-X® Communicator in the Citrix environment, you must use a
resolution of 1024 x 768 or higher.
Microsoft Alt-Tab Task Switcher Powertoy for Windows XP
Avaya one-X® Communicator does not work with Microsoft Alt-Tab Task Switcher Powertoy for
Windows XP.


59
Index
A
answer ......................................... 15, 16, 24
Avaya one-X Client Enablement Services 9, 25,
26, 27, 28
B
bridge conference ............... 25, 26, 27, 28, 29
bridged .................................................... 19
C
Call Log ............................................. 37, 38
calls 11, 12, 15, 16, 17, 19, 20, 21, 23, 24, 25,
29, 35, 38, 52
Citrix ........................................................ 9
Click-to-Dial feature ....................... 10, 20, 21
client enablement services .......................... 9
conference .............. 23, 24, 25, 26, 27, 28, 29
Contacts ............................................ 33, 34
D
dialpad ......................................... 16, 19, 21
digits ................................................. 16, 21
directories ................................................ 45
disconnect.......................................... 17, 24
drop ........................................................ 24
E
email ....................................................... 35
emoticons ................................................ 41
F
Favorites .................................................. 36
feature buttons .......................................... 5
Firefox ..................................................... 21
font .........................................................42
full screen ................................................55
H
hang up ............................................. 17, 24
headsets ..................................................10
hold ........................................ 15, 16, 23, 26
I
IBM Lotus Notes Address Book ....................46
ignore ......................................................15
instant messaging ......................... 41, 42, 43
Internet Explorer .......................................20
L
last number dialed ....................................21
line display information ..............................13
lock .........................................................25
log in ........................................................ 3
log out ...................................................... 3
Lotus Notes Address Book ..........................46
M
message ..................................................50
microphone ........................................ 17, 22
Microsoft Internet Explorer .........................20
Microsoft Outlook .................................. 9, 46
Mozilla Firefox ...........................................21
mute ................................ 17, 22, 25, 26, 28
O
Outlook ................................................ 9, 46

Using Avaya one-X® Communicator Release 6.1
60
P
participant ............................................... 26
picture in picture ....................................... 54
PIP .......................................................... 54
presence status ........................................ 42
public directory ......................................... 45
R
redial....................................................... 21
ringing ..................................................... 13
S
search ............................................... 31, 35
security ................................................... 25
status ...................................................... 42
T
touch tones ........................................ 16, 21
transfer ....................................................16
U
unhold .....................................................27
unlock .....................................................25
unmute ........................................ 17, 22, 26
V
video ................................ 52, 53, 54, 55, 56
Visual Voice Mail ................................. 49, 50
voice mail ............................... 47, 48, 49, 50
voice messaging system ............................48


