Page 1
1
3/2018 Version 10.0.0.3218ProModel Extended Features Webinar
For Software Version: 10.0.0.3218Copyright © 2018 ProModel Corporation
556 E Technology WayOrem, UT 84097
801-223-4600
This publication may not be reproduced in whole or in part in any form or by any means, electronic or mechanical, including photocopying, recording, or otherwise, without prior written permission of ProModel Corporation. ProModel and MedModel are registered trademarks of ProModel Corporation.
Instructor Info:
Rebecca Santos
Technical Support Engineer
Office: 801.223.4671
[email protected]
Using Extended Features in ProModel
Page 2
2
During this Webinar on ProModel Extended Features you will learn
how to:
Create models in collaboration with coworkers
Watch more than one view during the simulation
Analyze and Manipulate RDB files in Excel
Use Excel to create and edit models
Optimize simulation models
Page 3
3
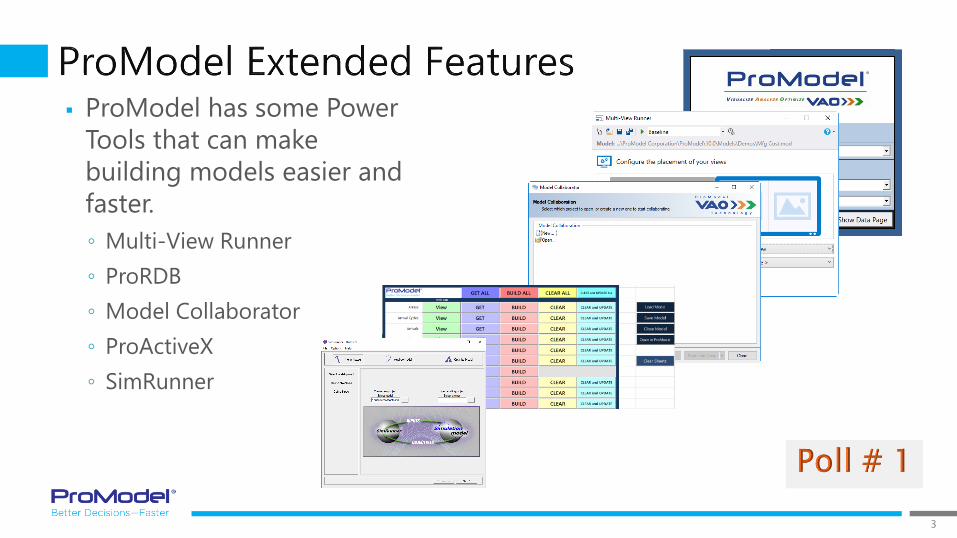
ProModel has some Power
Tools that can make
building models easier and
faster.
◦ Multi-View Runner
◦ ProRDB
◦ Model Collaborator
◦ ProActiveX
◦ SimRunner
Page 5
5
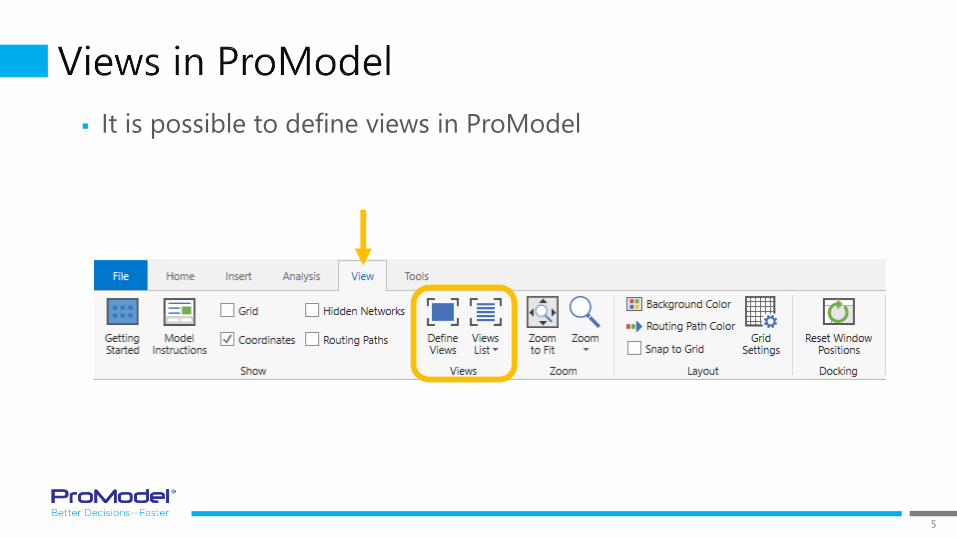
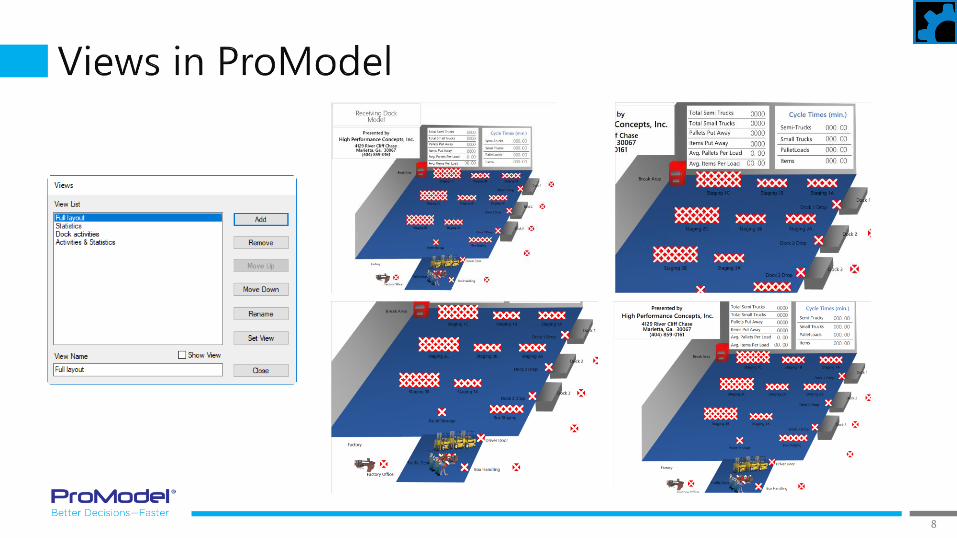
It is possible to define views in ProModel
Page 7
7
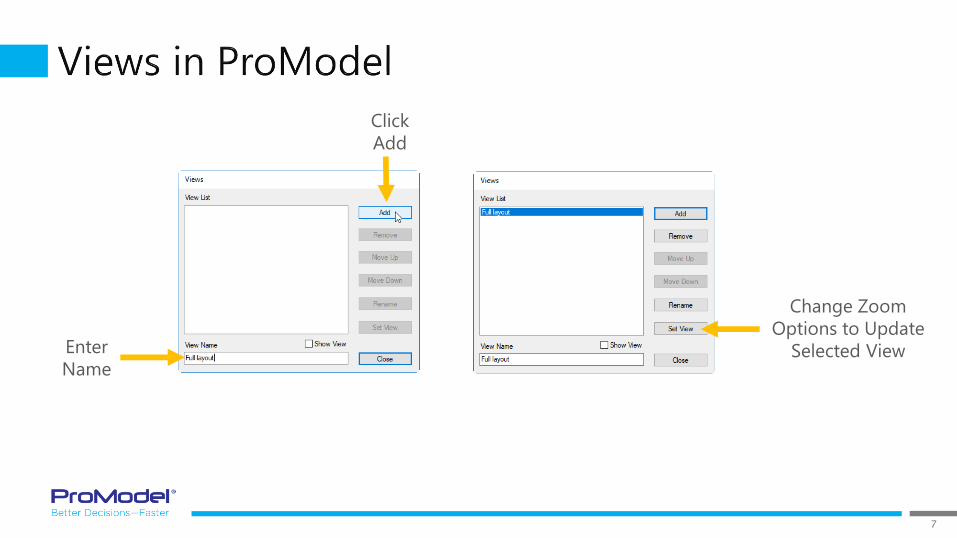
Enter
Name
Click
Add
Change Zoom
Options to Update
Selected View
Page 9
9
The Views window
shows up during the
simulation letting
the user select
which view he/she
chooses to watch.
However, it’s only
possible to watch
one view at a time.
Page 10
10
Multi-View Runner allows you to watch more than one view at a time
Creates a .pmvr file
Page 11
11
A monitor selection portion of
the Multi-View Runner dialog
box allows you to select what
views you want to be displayed
on the monitor.
Page 12
12
None Full Screen
Side by Side Four
Page 13
13
The drop-down list allows
the user to select the
views they want to display
on each screen
Page 14
14
Creation of a
new
configuration
Opening an
existing
configuration
Saving the configuration
without changing its
folder or name
Saving the
configuration in a
different folder or with
a different file name
Running the
simulation
List for selection of
the scenario you
want to simulate
View
synchronization
interval
Page 15
15
While the simulation is running the
Views window and a pop-up simulation
control bar box is displayed.
Page 17
17
When a simulation is run
RDB files are created
These files contain the
basic statistics created
during the simulation
Each scenario will have its
own RDB file
Page 18
18
The information
stored in the RDB
files is the data
displayed on
Output Viewer.
They are located under:
C:\Users\<username>\Documents\ProModel\Output
Page 19
19
C:\Program Files (x86)\ProModel Corporation\ProModel\10.0\Power Tools
Extract all or part of the
standard ProModel
output statistics
Page 20
20
Allows using Excel to retrieve
model output data
Granted, of minimal benefit,
given the power of the
standard ProModel output
viewer
Nevertheless, allows non-
ProModel users to extract key
metrics from output data
Page 21
21
Open ProRDB
Specify the RDB file
Specify the Replication
and Period of interest
Get Data
Page 23
23
Collaboration on model creation can speed up the process
ProModel offers 3 tools that can help in this process:
◦ Model Collaborator
◦ Merge
Submodel
Model
Page 25
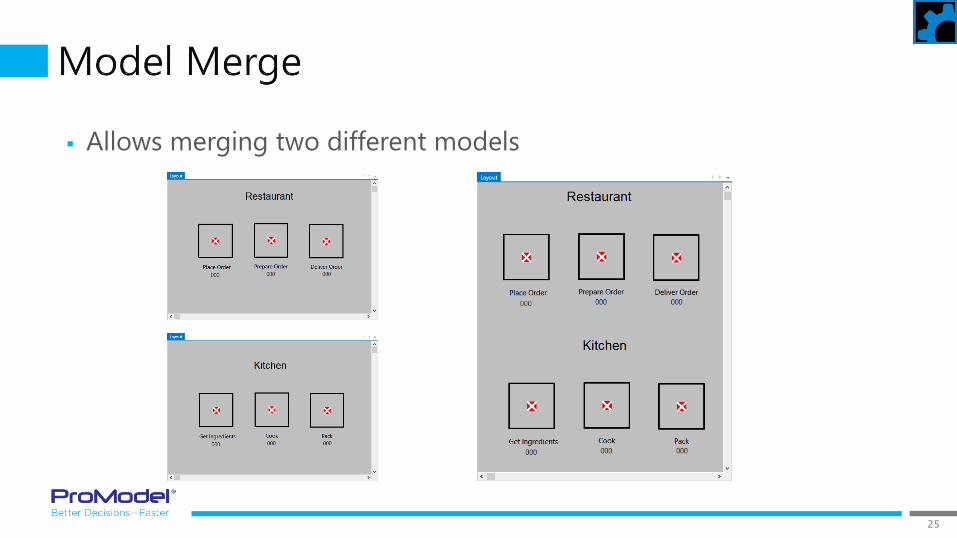
25
Allows merging two different models
Page 26
26
Allows you to merge two different models even if they have
duplicated locations, entities, attributes or variables.
◦ If there are locations, entities, attributes or variables with the same name it will add a suffix or a
prefix to the duplicate locations, entities, attributes or variables of the model that is being
merged to the main model.
Page 27
27
Guides you through the merging Process in w wizard-like interface
Page 29
29
Extract & Build text and graphics items in a model
Use Excel techniques to construct items
◦ COPY / PASTE sections of items
◦ FILL DOWN (iterating numbers & names)
◦ CONCATENATE items to build other items
Automate model Open & Save & Run
Page 30
30
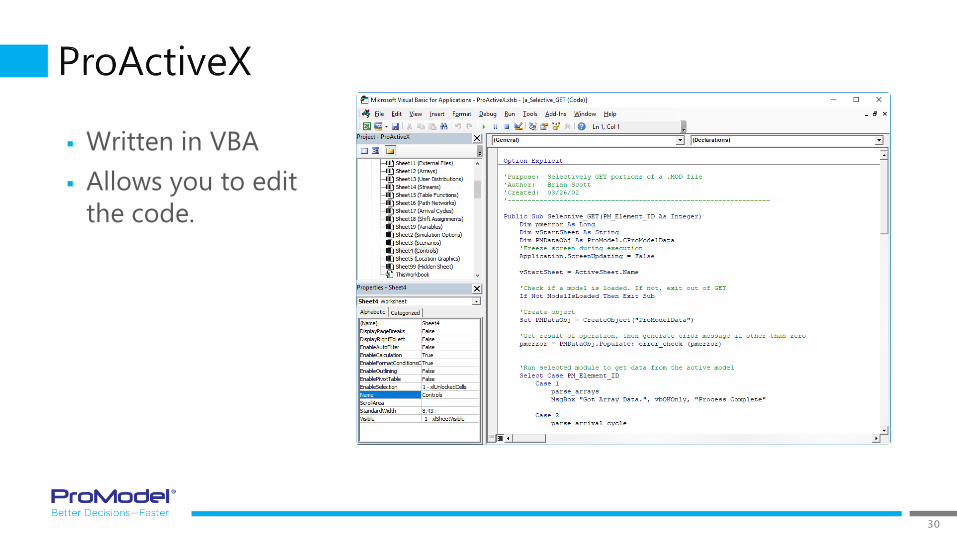
Written in VBA
Allows you to edit
the code.
Page 31
31
Can be found at "C:\Program Files (x86)\ProModel
Corporation\ProModel\10.0\Power Tools\ProActiveX.xlsb“
The released version ProModel 2018 has a ProActiveX file that brings up
the old User Interface. This was fixed and the new version of ProActiveX
can be found in the Solutions Café
(https://www.promodel.com/solutionscafe/).
Page 32
32
1
Load the model so you
can start working on it.
Page 33
33
2
Click on GET ALL to import
the model information to
ProActiveX
Page 34
34
3
Click on View start editing
Page 35
35
4
Click on Build ALL when
you finish editing
Page 36
36
5 Save your model and click
Open in ProModel6
Page 37
37
Special notes
◦ Always Save a backup copy of your model before making any changes
◦ Always carefully check to see if ProActiveX did what you expected
Page 39
39
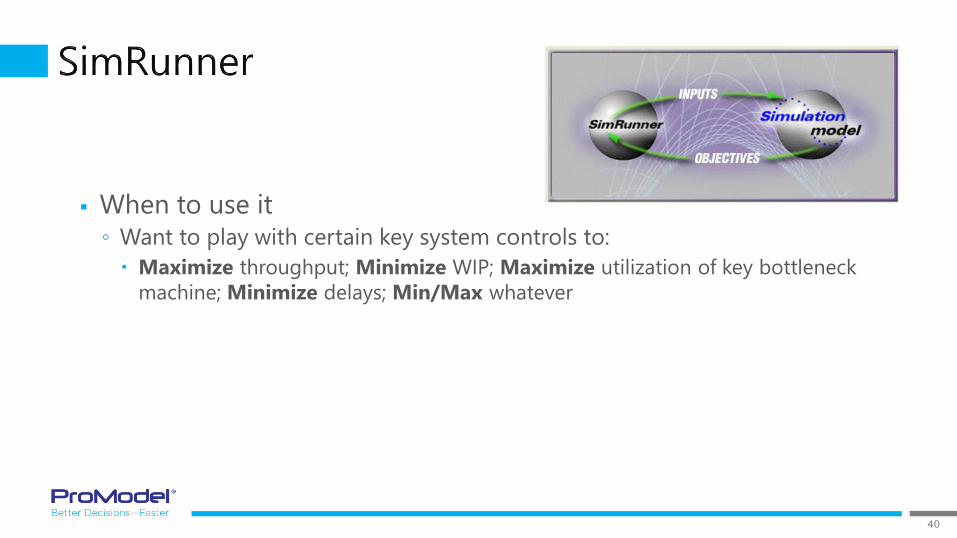
Optimization tool
Finding the best solution
for a System (model)
given some constraints (inputs)
driving toward a Goal (objective function)
Page 40
40
When to use it◦ Want to play with certain key system controls to:
Maximize throughput; Minimize WIP; Maximize utilization of key bottleneck
machine; Minimize delays; Min/Max whatever
Page 41
41
Goal: Maximize profit
Can change:◦ Quantity of Operators
◦ Batch Size
◦ Use Robot or Not
Profit = Value of product * Quantity Produced - Cost of raw material - Cost of Labor - Cost of Robot
Page 43
43
How many Scenarios are possible? ◦ Parameters choices * Parameters choices = BIG!!!
For example: Between 1 & 5 operators
Batch size between 1 & 50
Use a robot or not ( 2 choices )
◦ Therefore: ( 5 ) * ( 50 ) * ( 2 ) = 500 Scenarios!!!
Do you want to create 500 scenarios to find the right solution?
Page 44
44
Create simulation model◦ Scenario Parameter macros
◦ Output metrics
Open SimRunner
Define Objective Function
Define Input Factors
Define Optimization control parameters
Run Optimization
Examine results … We have a winner!!!
Page 45
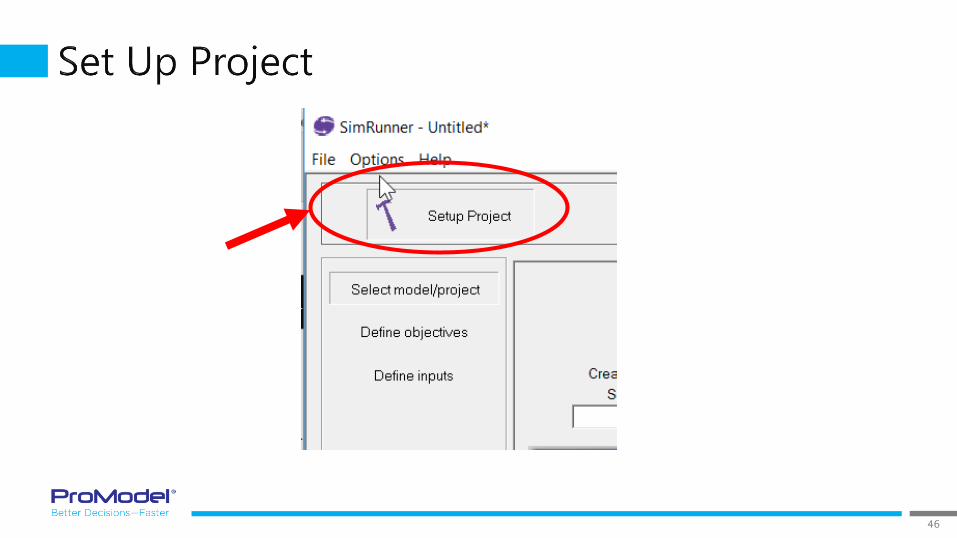
45
Setup … Analyze … Optimize
Steps for
current
activity
Page 47
47
Select Model Name (if starting new Project)
or Project Name (if previously created)
Page 48
48
GOAL!!
Desired Minimize or Maximize of item(s)
Equation that calculates desired metric◦ Example: v_Profit = v_Revenue – v_Cost
◦ Example: v_WIP = (CONTENTS(x)+CONTENTS(y)+…)
◦ …
Page 49
49
Pick anything in this list to Minimize or Maximize
Target Range … For identifying Infeasible Solutions
Weight Factor
Page 50
50
Choose Item◦ For this model: v_Profit – Current Value
(current value = At the End of the Run)
Choose:◦ Maximize or Minimize
◦ Target Range, if any
◦ Weight
If you change something,
don’t forget to press the
Update button
Page 51
51
The Changeable Parameter to use for creating Scenarios must be
numeric Scenario Macros
Page 52
52
Scenario Parameter Macros
Specify Lower/Upper Limits
Choose Integer or Real Don’t forget the Update Button
Page 53
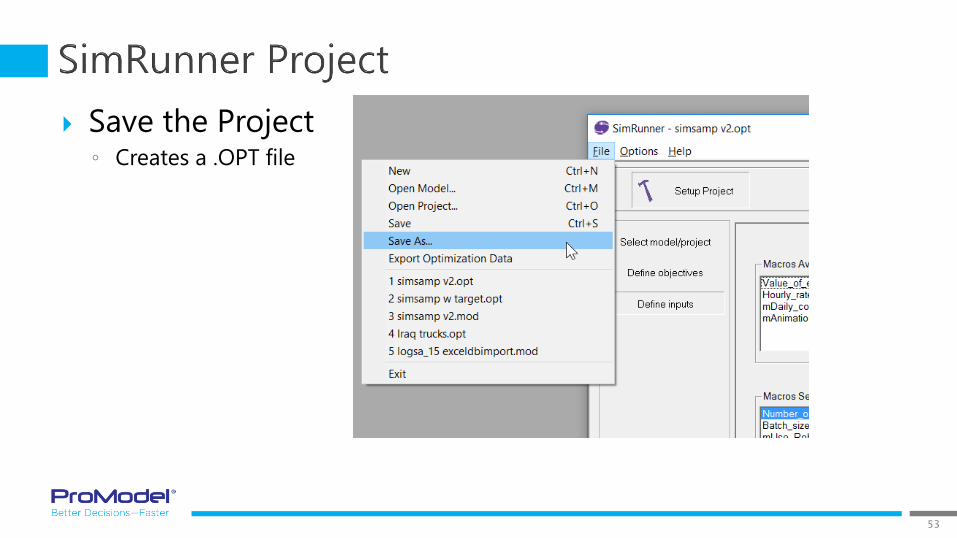
53
Save the Project◦ Creates a .OPT file
Page 54
54
Helps determine:◦ Number of replications
◦ Warmup period
However…◦ ~30 Reps usually OK
◦ You’ll know if
Warm-up is appropriate
Run Analyze… Reports suggestions
Page 55
55
Profile◦ Cautious, (more runs)
Moderate,
Aggressive (less runs)
◦ Convergence %
No Animation
# of Replications
Warmup/Run Time
Confidence Level
Page 56
56
Run…◦ Results for each run…
“Performance Plot”
Green – Each run
Red – Best so far
◦ Table of Results
When finished…
“Optimization Converged”
Page 57
57
Best solution is at the top◦ For our example:
$18,300 profit for the day
5 Operators
Batch size: 4 or 7
Yes, Use the Robot
Page 58
58
But more can be gleaned…◦ What if someone doesn’t show up for work
(4 Operators instead of 5):
Profit of only $17,260
Page 59
59
Regarding the Batch Size…◦ How sensitive is the Profit?
Not very ($250/day), for sizes 3,4,5,6,7,8,9,10
◦ What if there are “standard” containers?
Then don’t fill every hole
Page 60
60
Regarding the Robot…◦ What’s it’s worth?
$13,600 - $18,300 = -$4,700 day loss without
Page 61
61
How about if we don’t use Profit?◦ Max Throughput, Min WIP, Min Labor – w/ Weights
Best Solution: 4 Operators , Batch Size = 16 , Use RobotDifferent Analysis… Different Results
Page 62
62
Thanks for attending this ProModel Extended Features
Webinar! We hope it was helpful.
Remember, help is only an email or phone call away.
Good luck and happy modeling!
Technical Support
888-776-6633
[email protected]
6 am - 6 pm M-F, Mountain Time