77
Water-wise Landscape Rebate Manual

Water-wise Landscape Rebate Manual
Purpose & Goals
• Introducing the community to water-wise landscapes• Create attractive, lower-maintenance yards that will
save water and withstand drought• Incentivize the conversion of turf to a water-wise
landscape• Help customers make informed decisions regarding
water use• Help customers achieve their conservation goals

Program Options
• Commercial– Z-zone program max: $15,000– Regular program max: $10,000
• Residential– Z-zone program max: $4,500– Regular program max: $3,000
Program Specifics
• The rebate will cover ALL material costs up to the maximum limit depending on which program you chose to participate in.
• Option 1 – Z-zone– Use only z-zone plants – plants that require no
supplemental water after establishment (see list) – A water budget will be provided as a guide

Program Specifics
• Option 1 – Z-zone (cont.)– Payment schedule
• 50% of material costs paid upon completion of the project• Year 1 - 10% at the end of the following year*• Year 2 - 10% at the end of the following year*• Year 3 - 10% at the end of the following year*• Year 4 - 20% after the first year of no watering in the project area*
– If a decrease in consumption is not achieved for a particular year, the rebate for that year will be forfeited
– This does not affect the rebate for subsequent years
* Upon proof of decrease in consumption

Program Specifics
• Option 2 – Water-wise rebate– Any water-wise plant material may be used– Maximum 20% moderate water-use plant material– A water budget will be provided as a guide– Payment schedule
• 65% of material costs paid upon completion of the project• 35% paid at the end of the following year upon demonstrating a
reduction in water use
Program Specifics
• How are the rebates calculated?– Rebates will be calculated based on submission of receipts
for material costs related to the project– Only material costs will be considered– Receipts need to be itemized

Overview of Steps
1. Apply online Eligibility determined by Aurora Water staff
2. Submit paperwork Wait for project approval
3. Obtain necessary approvals and permits4. Begin installation5. First inspection6. Finish installation7. Final inspection

Getting Started• Apply online
– Go to www.aurorawater.org Conservation Rebates Xeriscape Rebate Program
• You’ll receive an email confirming successful submission and a link to your application.
• Do not delete this email • Do not reply to this email •
Wait for notification of property eligibility beforesubmitting any paperwork or starting the project.
From: [email protected]: Aurora Water – Xeriscape Rebate Application Submitted

Eligibility
• Eligible areas– Lawn in residential front and side yards and streetscape– Lawn in areas of commercial or large properties that are
visible to the public*• Lawn needs to be healthy with few to no weeds• Water bill needs to show sufficient usage during
summer months – this typically guarantees healthy plant material
* Potential areas will be addressed on a case-by-case basis

How Eligibility is Determined
• Sufficient outdoor usage is determined by comparing actual use to expected use
• First, indoor usage needs to be determined– This is accomplished using Winter Quarter Average
(WQA). WQA is determined by averaging water usage during the months of December, January and February when there should be zero outdoor usage
• WQA is subtracted from each month’s usage to determine actual outdoor use
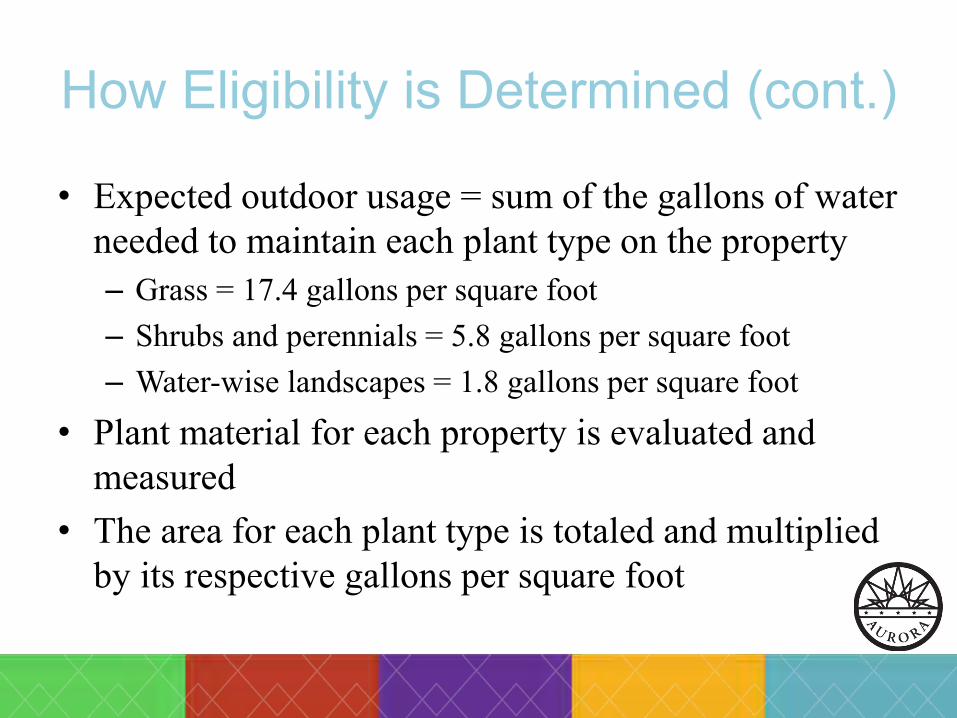
How Eligibility is Determined (cont.)
• Expected outdoor usage = sum of the gallons of water needed to maintain each plant type on the property– Grass = 17.4 gallons per square foot– Shrubs and perennials = 5.8 gallons per square foot– Water-wise landscapes = 1.8 gallons per square foot
• Plant material for each property is evaluated and measured
• The area for each plant type is totaled and multiplied by its respective gallons per square foot
How Eligibility is Determined (cont.)
• Gallons for all areas are added together and compared to actual usage
• The property is eligible if actual usage is 80% or more of expected usage for a majority of the years queried

Getting Started
• If property is eligible– Submit documentation using the link provided to you in the
confirmation email you received upon filling out the application
• Valid form of I.D.• I.R.S. form W-9• Landscape design and plant list• Email current photos to Meghan, [email protected]

Getting Started
• The link will open an internet browser window that looks like this, however the fields will be populated with your information

Getting Started
• Select files using the ‘Browse…” button• Click “Add Another File” for each file to be added• Click “Upload These Files!” and wait a few moments for the
files to upload
Getting Started
• If necessary, documentation may be brought into the Water Conservation Office, or you may email them to Meghan McCarroll at [email protected]
Getting Started
• Landscape Design Options– Residential
• Free Aurora Water design• Hire Contractor/Landscape Designer• Provide your own design
– Commercial and Large Properties• Hire Contractor/Landscape Designer• Design to be stamped by a Colorado
Licensed Landscape Architect• Free Aurora Water design (limited availability)

Getting Started
• Landscape Design– ‘Work-of-art’ not necessary– Needs to be drawn to-scale– Draw plants to near mature size– Label the following:
• Plants• Hardscape and landscape features• Mulch types• Remaining turf and bed areas
Getting Started
• Landscape Design (cont.)– Legend must contain
• Name• Property address• North arrow• Graphical scale• Numeric scale

Design Examples
Plant Symbols
Numeric scaleGraphical scale
Acceptable Design
North arrow

Design Examples
Acceptable Design

What’s Wrong With This Design?

Acceptable Design

Getting Started
• Plant List– Plant list calculator
• Use during the design process• Submit as the official plant list
– A separate plant list calculator is to be used for front/side yard or tree lawns
– This list is not compatible with iOS software or alternatives to MS Excel
– Contact Meghan if challenges are encountered• 720-859-4361, [email protected]

• Plant list example

Getting Started
• Photos– Email to Meghan
– A few of property– Several of proposed project area
• We need to see the entire area, not just close-ups
– Size/Resolution• Nothing less than 150KB

Getting Started
Special Instructions for Commercial and Large Properties
– Project may need to go through the City’s Design Review process
– Consult with the Planning Department regarding the scope of the project
• Planning Department City Hall, 2nd floor303-739-7000

Getting Started
• You will receive an email when changes are made to your application

Landscape Requirements
Hardscape features• Provide season-long visual interest• Required for areas visible to the public
– Residential front and side yards– Commercial and large property projects adjacent to public
roads

Plan Implementation
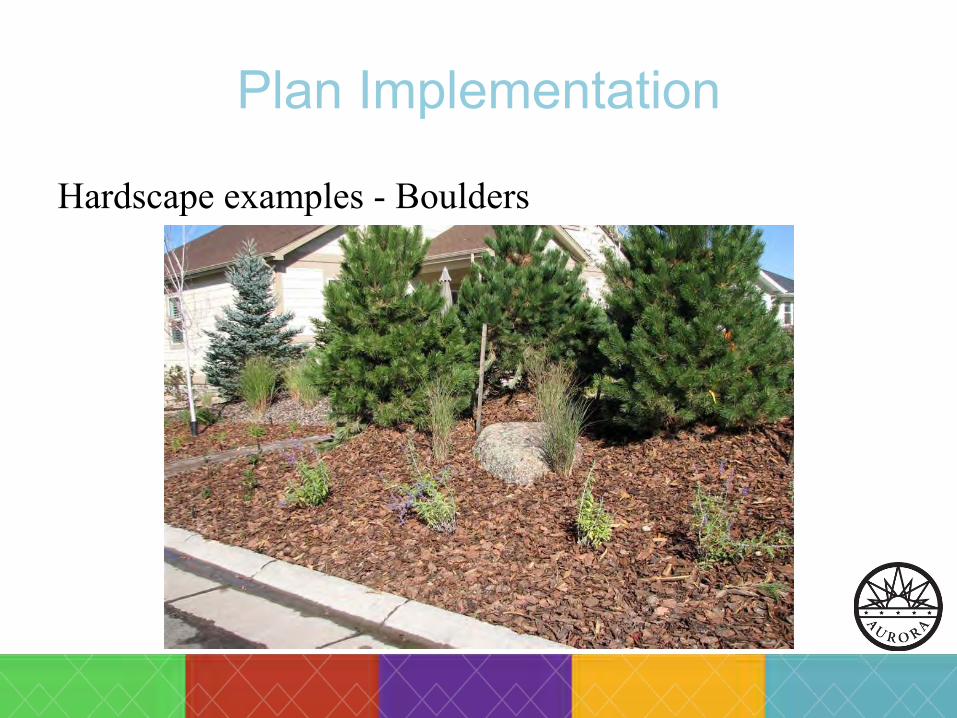
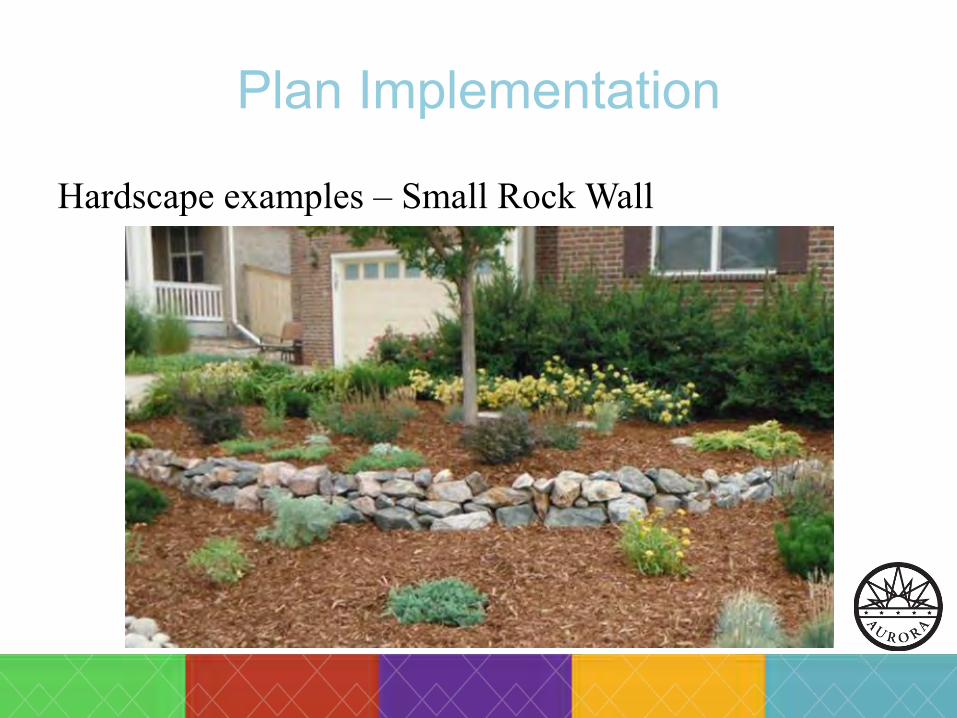
Hardscape options:– Berm: <2.5’ tall, grade<1:4– Boulders: 3 min, 2’x3’x18”– Small wall: 1-2.5” tall
Plan Implementation
Hardscape examples - Boulders

Plan Implementation
Hardscape examples - Boulders

Plan Implementation
Hardscape examples - Boulders
Plan Implementation
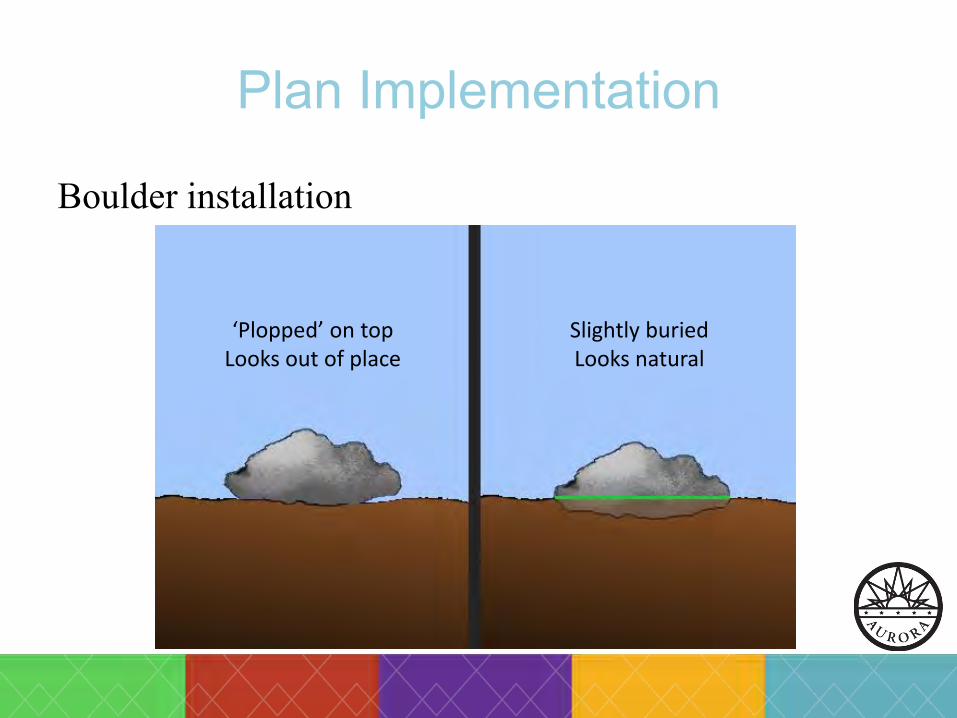
Boulder installation
Slightly buriedLooks natural
‘Plopped’ on topLooks out of place
Plan Implementation
Hardscape examples – Small Rock Wall

Plan Implementation
Hardscape examples – Small Rock Wall

Plan Implementation
Hardscape examples – Retaining Wall

Plan Implementation
Irrigation• Several options
– Drip (new or retrofit existing system)– Existing spray system– Hand water (pending approval of Landscape Rebate
administrator)• Order of potential efficiency
1. Drip2. Hand water3. Existing spray system

Plan Implementation
Irrigation (cont.)
Irrigation method Efficiency CostEase of
self-install
Hand wateredModerate to very high
Very low N/A
Existing spray system Low N/A N/A
Drip – retrofit Very high ModerateModerately
difficult
Drip – new system Very highModerate to
expensiveDifficult
Plan Implementation
Irrigation (cont.)• An irrigation permit must be obtained for major
changes to existing layout of turf areas• Water supply must be protected by a backflow
prevention device.– Permit must be obtained through the
Permit Center (303-739-7420) for installationand inspection if one is not present

Plan Implementation
Irrigation (cont.)• Automatic irrigation systems require
installation of a rain gauge• Drip lines are to be secured to soil prior to application
of mulch– We recommend using 5” landscape pins– Pin often
• Consider use of low-flow valves for drip zones

Plan Implementation
Planting Procedure
Step #1• Properly place plant material.
Step #2 – shrubs, perennials and ornamental grasses:• Dig a bowl shaped hole twice as wide as the plant container and about the
depth of the root ball, setting soil aside.• Do not use excavated soil to build berms elsewhere
in the yard.
Plan Implementation
Planting Procedure
Step #2 – trees:• Follow Forestry’s planting instructions on the City of Aurora website• If ‘smother’ method was used to kill the grass, rake mulch
away from area, and place excavated soil on a small tarpso that mulch remains clean.
Plan Implementation
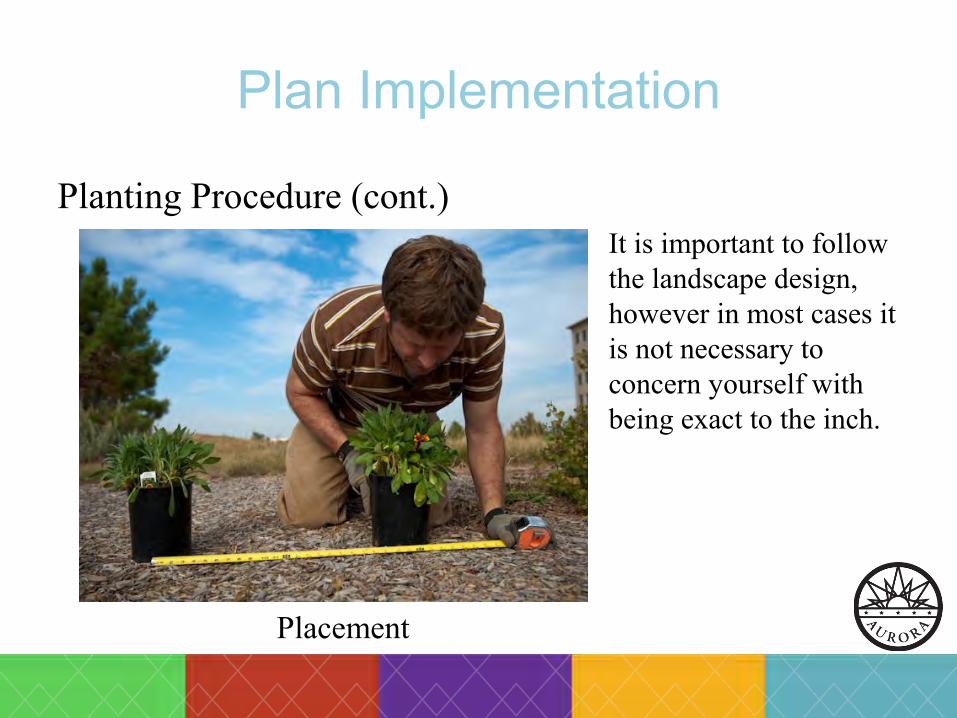
Planting Procedure (cont.)
Placement
It is important to follow the landscape design, however in most cases it is not necessary to concern yourself with being exact to the inch.
Plan Implementation
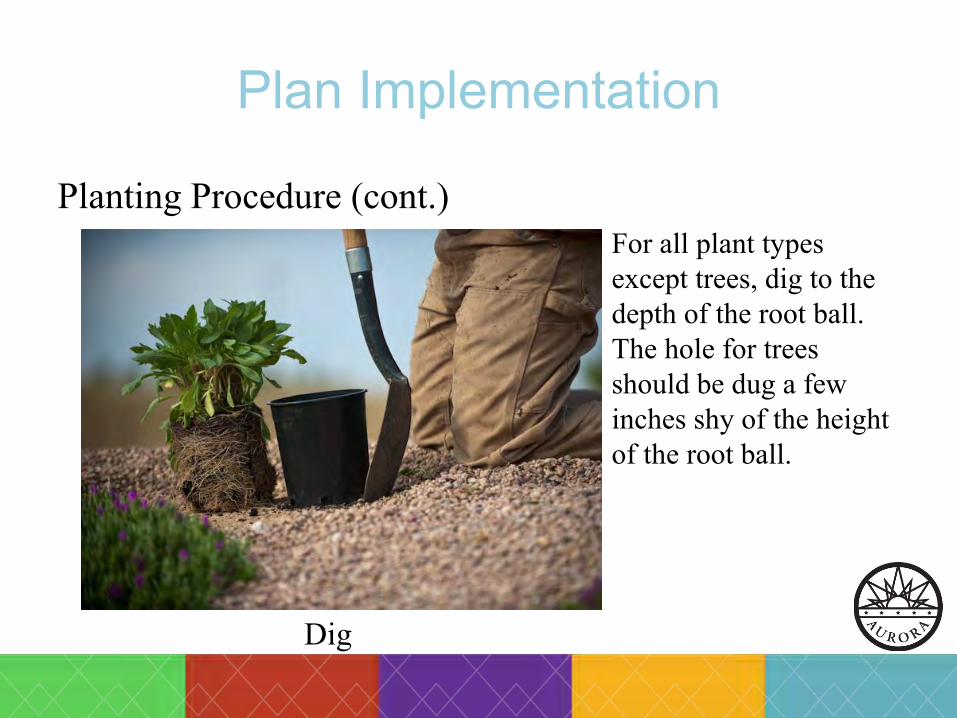
Planting Procedure (cont.)
Dig
For all plant types except trees, dig to the depth of the root ball. The hole for trees should be dug a few inches shy of the height of the root ball.

Plan Implementation
Planting Procedure (cont.)
Plan Implementation
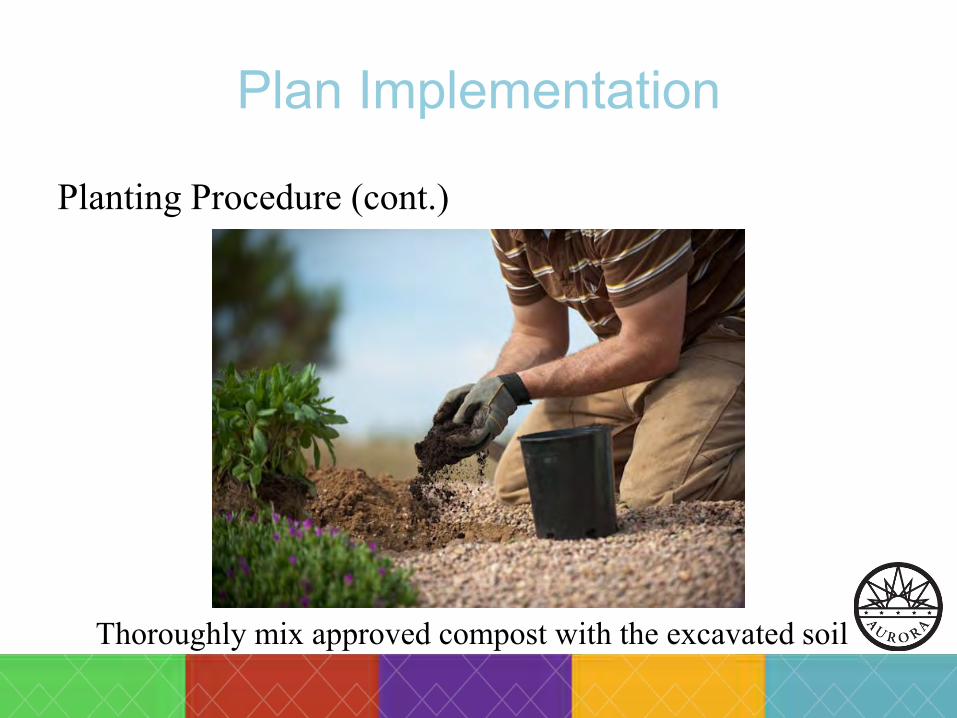
Planting Procedure (cont.)
Step #3• Mix the recommended quantity of approved compost into the
excavated soil. Composts approved for use are Class I and II. Anything else must receive prior approval.
• Use only the native soil when planting trees.
Plan Implementation
Planting Procedure (cont.)
Thoroughly mix approved compost with the excavated soil
Plan Implementation
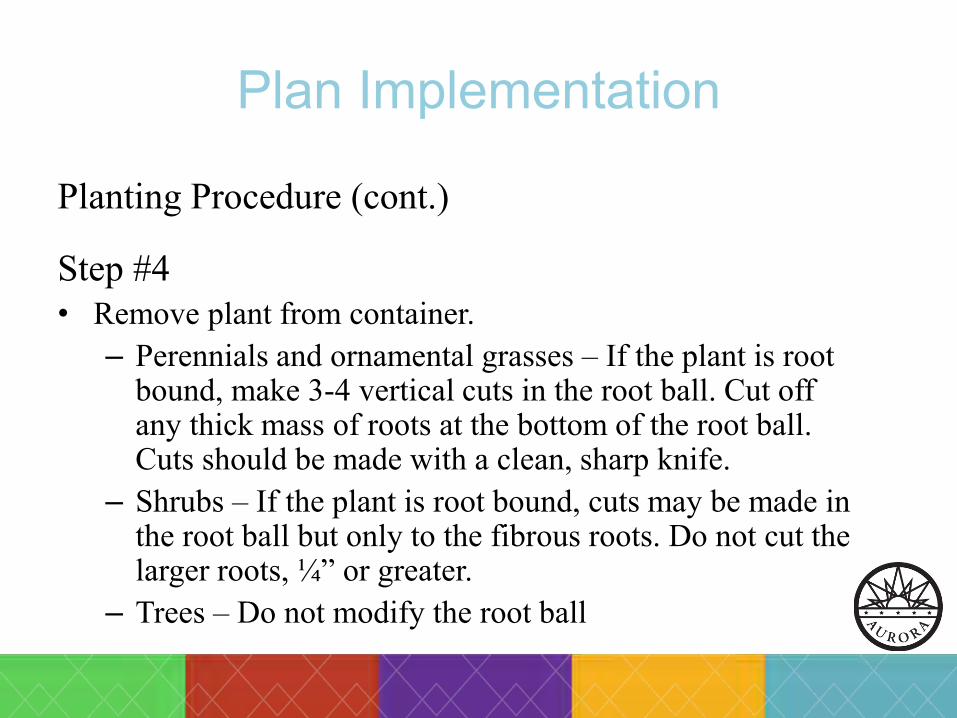
Planting Procedure (cont.)
Step #4• Remove plant from container.
– Perennials and ornamental grasses – If the plant is root bound, make 3-4 vertical cuts in the root ball. Cut off any thick mass of roots at the bottom of the root ball. Cuts should be made with a clean, sharp knife.
– Shrubs – If the plant is root bound, cuts may be made in the root ball but only to the fibrous roots. Do not cut the larger roots, ¼” or greater.
– Trees – Do not modify the root ball

Plan Implementation
Planting Procedure (cont.)
Make vertical cuts into a root bound ball.

Plan Implementation
Planting Procedure (cont.)
Step #5• Place plant in center of hole making sure that it is not too
deeply planted. Backfill in layers using the soil-compost mix, firming soil around plant with fingers after each layer. There should only be a small quantity of left over soil. Consider building a small ring around the planting area with any remaining soil.
• NOTE: Plant trees so that root ball is 4 inches above grade.

Plan Implementation
Planting Procedure (cont.)
Plant
Plan Implementation
Planting Procedure (cont.)
Step #6• Water deeply and thoroughly, making sure to saturate the soil
surrounding the plant. • For complete details on proper planting technique, take the
Water Conservation class, “Water-wise Landscape Start to Finish”

Plan Implementation
Planting Procedure (cont.)
Water

Plan Implementation
Edging• Must be used to separate planting beds from turf.• Will effectively keep grass out of beds if:
– It is at least 4” in height – Installed leaving no more than ½” out of the soil
• May be used to separate mulch types• May not be placed on top of the soil• Should not be easily visible
First Inspection
• The first inspection provides an opportunity for questions to be asked and resolution to take place prior to finishing the project.
• Call or email Meghan to schedule a first inspection– 720-859-4361 – [email protected]

First Inspection
The following will be reviewed:• Plant type and size according to plant list• Plant holes dug double wide• Use of class I or class II compost or other approved
amendment.• Planting technique• Irrigation system, including backflow and rain sensor (if
applicable)• Presence of weeds and other hazards• Use of erosion control bmp’s (i.e. silt fence, fiber rolls)
for construction materials• Demonstration of keeping public right-of-ways clean
Plan Implementation
Mulching• You may apply mulch once the first inspection has
been completed and you have been given the go ahead to continue
• Mulch must be at least 3” deep• Choices of mulch are organic (bark, wood) and
inorganic (cobble, rock)• At least two mulch types are required

Plan Implementation
Mulching (cont.)• Fabric is optional, though we do not recommend its use
around plant material because of the unnatural barrier that is created between the mulch and the soil.

Plan Implementation
Mulching – A few options
Golden Small Chip Shredded Bark
Dark Medium Chip 3” River Rock

Plan Implementation
Mulching (cont.)• In front and side yards: there is no limit to the use of
organic mulches, however rock mulch may only cover 50% of the area; the remaining 50% would need to be covered by an organic mulch. This is per City code.
• Pea gravel may be used, but not next to pedestrian access points (sidewalks, streets, etc.)

Plan Implementation
Mulching (cont.)• Be creative with colors and textures, but sensitive to
neighborhood aesthetics• Red mulch, lava rock and recycled mulch products
such as ground rubber or crushed concrete may not be used
• Edging of any sort may not be used to keep mulch off concrete, instead excavate soil as shown on the following slide to provide a place for the mulch to rest

Plan Implementation
Mulching (cont.)• Edging of any sort may not be used to keep mulch off
concrete, instead excavate soil as shown on the following slide to provide a place for the mulch to rest.
Plan Implementation
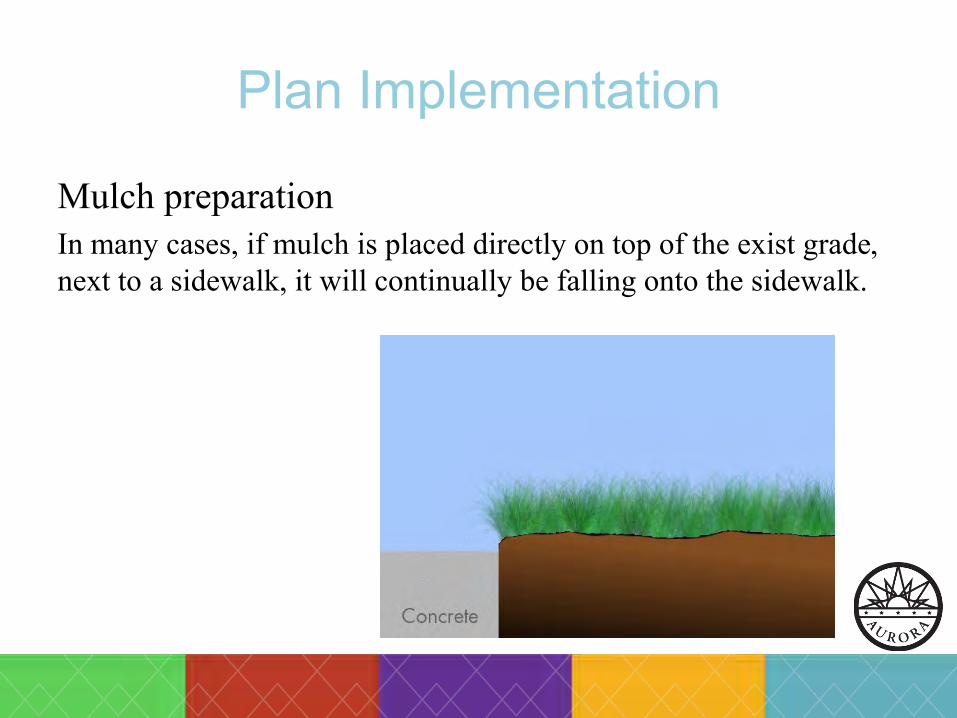
Mulch preparationIn many cases, if mulch is placed directly on top of the exist grade, next to a sidewalk, it will continually be falling onto the sidewalk.
Plan Implementation
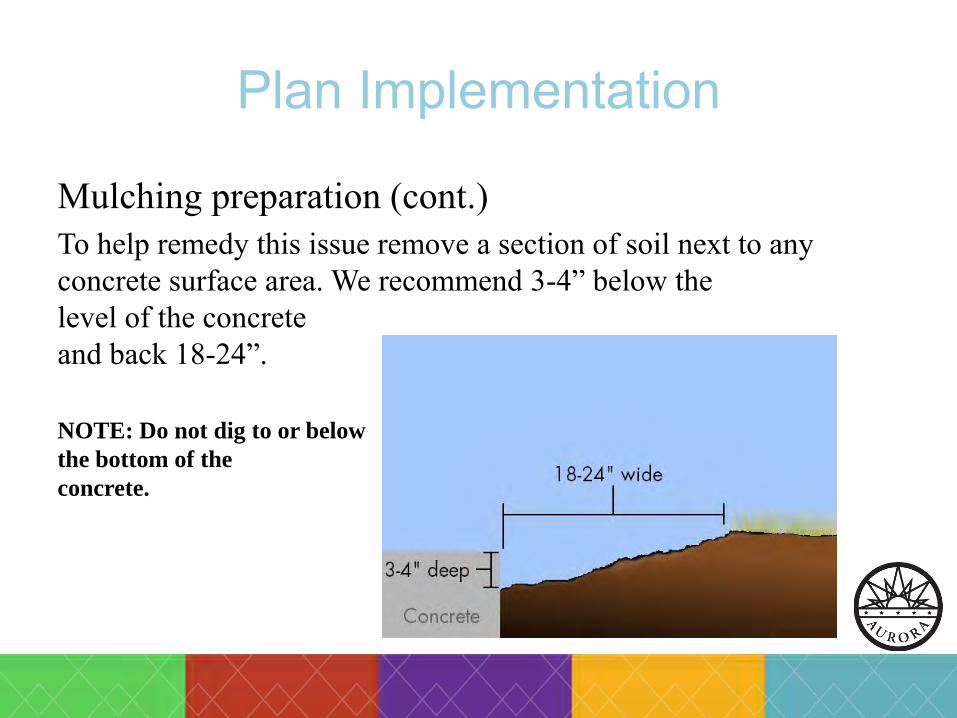
Mulching preparation (cont.)To help remedy this issue remove a section of soil next to any concrete surface area. We recommend 3-4” below thelevel of the concreteand back 18-24”.
NOTE: Do not dig to or below
the bottom of the
concrete.

Plan Implementation
Mulching preparation (cont.)This is not adequate. Not only is there increased likelihood that mulch will fall onto the sidewalk, but the degree of slope isvisually noticeable.

Plan Implementation
Mulching preparationThis shows how the site will look when mulch is put down. The first inspection needs to take place prior to the installation of mulch.This works well forinorganic mulch, but notfor organic mulch.It is likely that water willcollect during a majorrain event, causingorganic mulch to float.
Plan Implementation
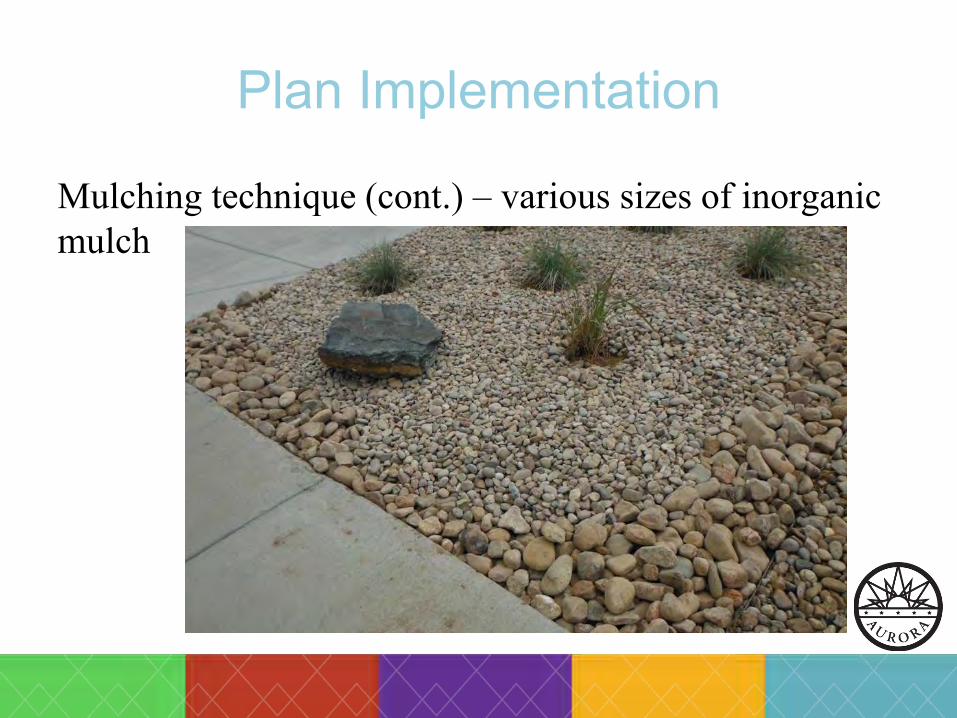
Mulching technique (cont.) – various sizes of inorganic mulch

Plan Implementation
Mulching technique (cont.) – inorganic and organic mulch

Final Inspection
• Submit remaining receipts prior to final inspection• Call Meghan when the project is complete
• The inspector will look for the following:– 3 inches of mulch– Fabric (if used) securely pinned, tucked and covered with mulch– Irrigation lines pinned and covered with mulch– Minimal edging showing– Site free of weeds– A ‘completed project’
An appointment is not required for the final inspection

Challenges
Most common challenges encountered by participants:
#4 - Digging is hard work!– Plan!– Take your time– Listen to your body
#3 - Don’t know who to contact.– You have one contact: Meghan McCarroll– Please do not call other conservation staff with questions
regarding your project– Messages returned within 24 hours.– Schedule: Mon – Fri, 8am - 5pm
Challenges
#2 - Can’t find a plant. – Don’t worry, substitutions are allowed! Find one that has a
similar mature size and water use characteristics. Inform Meghan of change. Substitution of a plant with different characteristics will require approval. Thorny plants are not allowed next to sidewalks.
#1 - Procrastination! – Plan ahead by anticipating potential delays– Pre-order plant material– Don’t wait until the last few weeks to start your
project

Other Programs
Irrigation Rebate– This rebate is in addition to the landscape rebate and will
be automatically processed for qualifying landscape rebate projects. Receipts for all applicable irrigation materials must be submitted upon completion of the project.
– Per zone rebate values are for material costs.

Other Programs
Irrigation Rebate (cont.)
ItemUnit
Rebate Value
Notes
Rain Sensors, wiredwireless
$15$50
Must not currentlyhave a rain sensor
Soil Moisture Sensors (ea) $100 Limit of 2 per residence
Controllers, smart or weather based $300 50% of material cost up to $300
Low-flow Nozzles (ea) $6 Must change body at same time. Limit of 50 nozzles.
Pop-up Sprinkler Body (ea) $9 Must have pressure regulating stems, check valves and a minimum 4” pop-up height. Limit of 50 bodies.
Other Programs
• Toilet Rebate– Up to $50.00 for replacing a 1.6 gallons per flush toilet
with an ultra-high-efficiency toilet (uHET)– Up to $150.00 for replacing a 3.5 gallons per flush toilet
with an ultra-high-efficiency toilet (uHET)– Ultra-high-efficiency toilets average 1.1 gallons per flush
or less and are WaterSense certified
• Indoor Water Assessments

Contacts
• General Information:– www.aurorawater.org
– Meghan McCarroll• 720-859-4361 (office)• [email protected]


