98
Who are we teaching to… http://bit.ly/audiencebvsd2013/

Who are we teaching to…
http://bit.ly/audiencebvsd2013/


http://bit.ly/bvsdsparkfun2013
http://bit.ly/bvsdsparkfun2013pdf
http://bit.ly/1d9igxs

Introduction to Arduino With Protosnap Pro Mini
BRIAN HUANG
Education Engineer
JIM LIMBLOM
Design Engineer
BEN LEDUC-MILLS
Education Outreach
Coordinator

This work is licensed under a Creative Commons Attribution-ShareAlike 3.0 United States License.
Ignite Format
Speakers are given 20 slides, each shown for
15 seconds, giving each speaker 5 minutes of
fame.
Why do it??
• Keeps the slides moving.
• Gives students a well defined format to
rehearse and practice.
• It’s fast, fun, and crazy…

This work is licensed under a Creative Commons Attribution-ShareAlike 3.0 United States License.
In 5 minutes…
• About SparkFun
• Learning Outcomes
• Motivation behind all of this
• What is Arduino
• Examples of projects and things people
have done…

This work is licensed under a Creative Commons Attribution-ShareAlike 3.0 United States License.
About Us
SparkFun Electronics is an Open Source Hardware
Company. We are all about creation, innovation and
sharing information. We want to get you excited
about cutting edge electronics technology.

This work is licensed under a Creative Commons Attribution-ShareAlike 3.0 United States License.
Learning Outcomes
You will understand basic electrical and
computational principles used in making,
building, and inventing with Arduino.
You will be able to design and write
programs to interface sensors and control
LEDs, buzzers, and other devices.

This work is licensed under a Creative Commons Attribution-ShareAlike 3.0 United States License.
Motivation

This work is licensed under a Creative Commons Attribution-ShareAlike 3.0 United States License.

This work is licensed under a Creative Commons Attribution-ShareAlike 3.0 United States License.
Invent To Learn

This work is licensed under a Creative Commons Attribution-ShareAlike 3.0 United States License.
Tinkering -- A Mindset For
Learning
“When we allow children to experiment,
take risks, and play with their own
ideas, we give them permission to trust
themselves. They begin to see
themselves as learners who have good
ideas and can transform their own ideas
into reality.”
Martinez, Sylvia Libow., and Gary Stager. Invent to Learn: Making, Tinkering, and Engineering in
the Classroom. Torrance, CA: Constructing Modern Knowledge, 2013. N. p.31-32.
This work is licensed under a Creative Commons Attribution-ShareAlike 3.0 United States License.
From Tinkering to
Engineering…
“Engineering is the application of scientific
principles to design, build, and invent.”
It is “…any engagement in a systematic
practice of design to achieve solutions to
particular human problems.”
Martinez, Sylvia Libow., and Gary Stager. Invent to Learn: Making, Tinkering, and Engineering in
the Classroom. Torrance, CA: Constructing Modern Knowledge, 2013. N. p.31-32.
This work is licensed under a Creative Commons Attribution-ShareAlike 3.0 United States License.
Engineering as Solving
Problems…
“We teach science and math so that they
can make the world a better place, not so
that they can pass tests.”
Martinez, Sylvia Libow., and Gary Stager. Invent to Learn: Making, Tinkering, and Engineering in
the Classroom. Torrance, CA: Constructing Modern Knowledge, 2013. N. p.31-32.
I want ________ to ________.

What is it all about?
Stop Following
Directions
&
Start
Engineering

The Learning Cycle
Time to play, reflect, question and redesign

Computer Science Education Act
(CSEA)

This work is licensed under a Creative Commons Attribution-ShareAlike 3.0 United States License.
Program or be programmed
If nothing else – we must help to
developing a computationally
literate society…
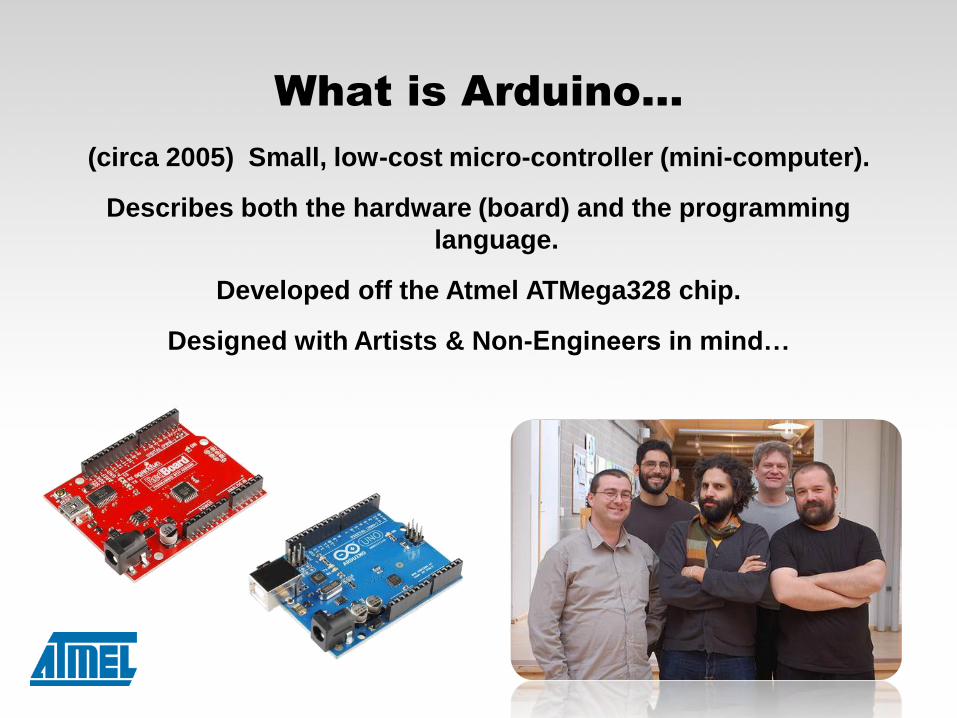
What is Arduino…
(circa 2005) Small, low-cost micro-controller (mini-computer).
Describes both the hardware (board) and the programming
language.
Developed off the Atmel ATMega328 chip.
Designed with Artists & Non-Engineers in mind…

But… what is it???
Think of this as a mini-brain…
This work is licensed under a Creative Commons Attribution-ShareAlike 3.0 United States License.
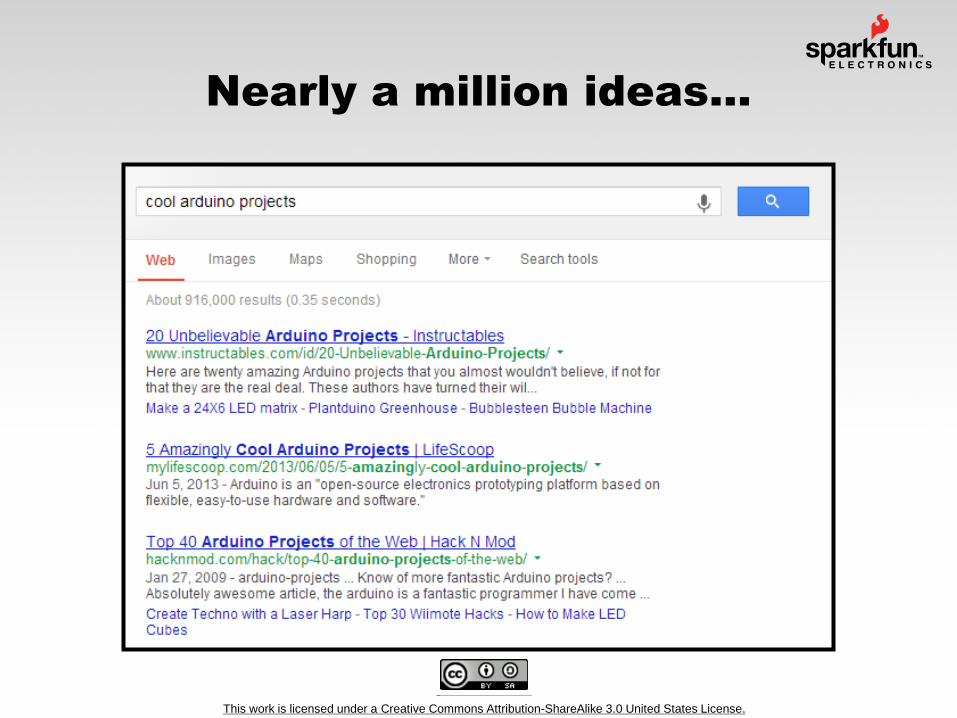
Nearly a million ideas…
This work is licensed under a Creative Commons Attribution-ShareAlike 3.0 United States License.
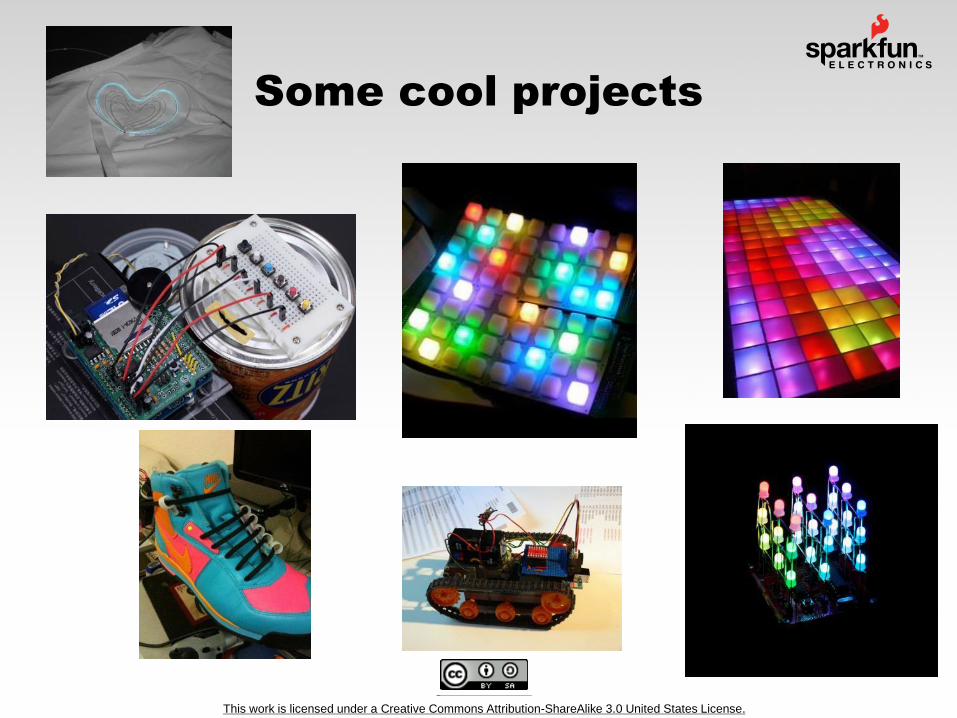
Some cool projects
This work is licensed under a Creative Commons Attribution-ShareAlike 3.0 United States License.
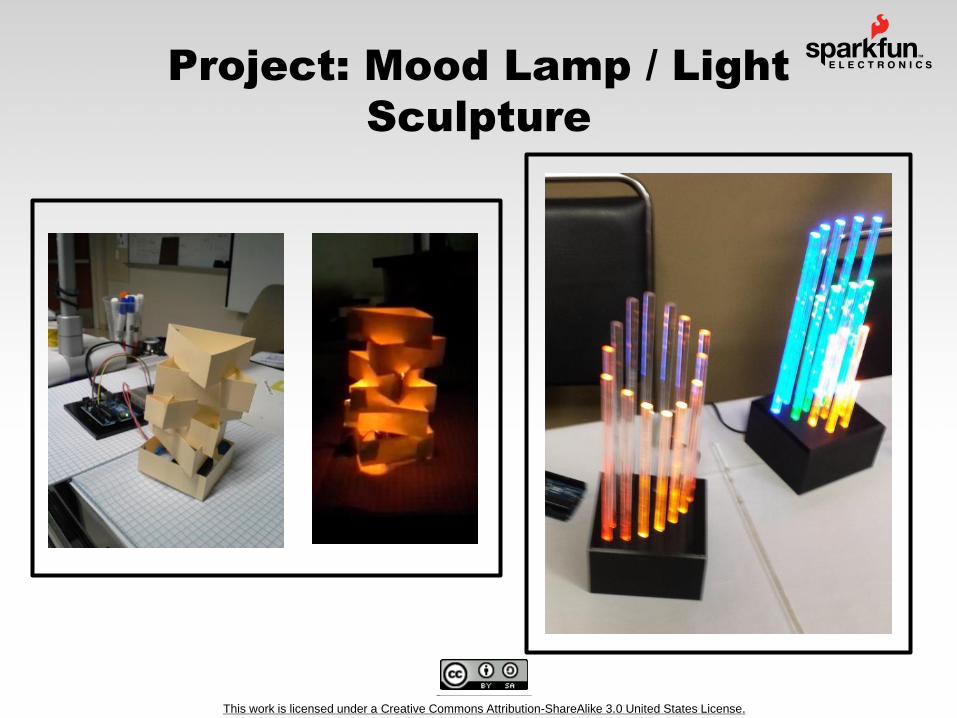
Project: Mood Lamp / Light
Sculpture

This work is licensed under a Creative Commons Attribution-ShareAlike 3.0 United States License.

This work is licensed under a Creative Commons Attribution-ShareAlike 3.0 United States License.
Massimo Banzi TED Talk
2012 Edinborough

This work is licensed under a Creative Commons Attribution-ShareAlike 3.0 United States License.
Further Motivation

This work is licensed under a Creative Commons Attribution-ShareAlike 3.0 United States License.
From the NGSS
The practices describe behaviors that
scientists engage in as they investigate
and build models and theories about the
natural world and the key set of
engineering practices that engineers use
as they design and build models and
systems.
This work is licensed under a Creative Commons Attribution-ShareAlike 3.0 United States License.
Agenda
- Ignite Introduction
- Protosnap ProMini vs. Arduino
- ArduBlock – Graphical Programming for
Beginners…
- Adult - Open Swim
- Arduino IDE Programming Environment
- Data Collection Demo
- Resources

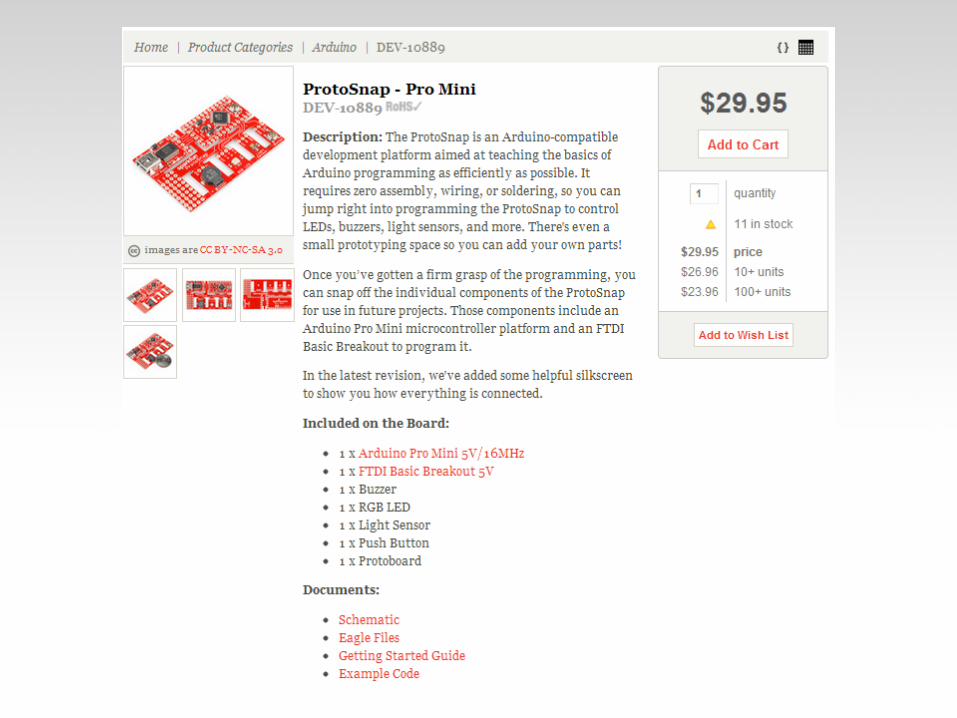
Protosnap ProMini vs. Arduino

This work is licensed under a Creative Commons Attribution-ShareAlike 3.0 United States License.

This work is licensed under a Creative Commons Attribution-ShareAlike 3.0 United States License.

This work is licensed under a Creative Commons Attribution-ShareAlike 3.0 United States License.
Installing ArduBlock
Create a folder structure:
tools\ArduBlockTool\tool\
tool ArduBlockTool tool
under the \My Documents\Arduino folder
Save \ Move the ArduBlock.jar file here.
Note: the folder names
are case-sensitive!!!

This work is licensed under a Creative Commons Attribution-ShareAlike 3.0 United States License.
General Rules
Raise your hand if you have a question.
Be respectful.
When I raise my hand…
Share your findings with the people near
you.
Poke around, experiment, and have fun…
Imagine, create, and play!!!
This work is licensed under a Creative Commons Attribution-ShareAlike 3.0 United States License.
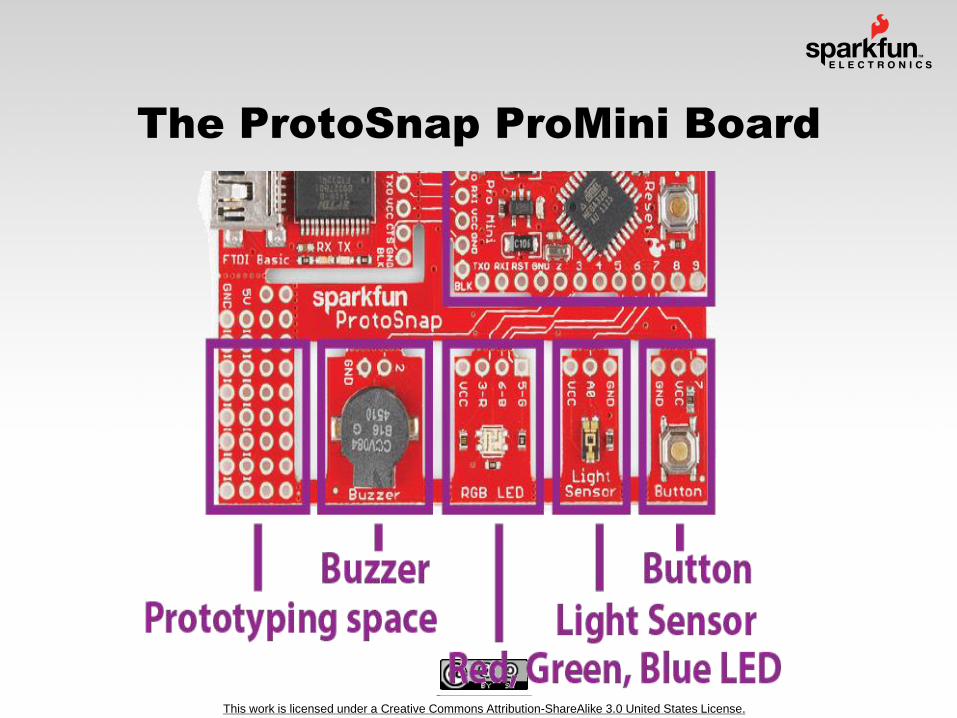
The ProtoSnap ProMini Board
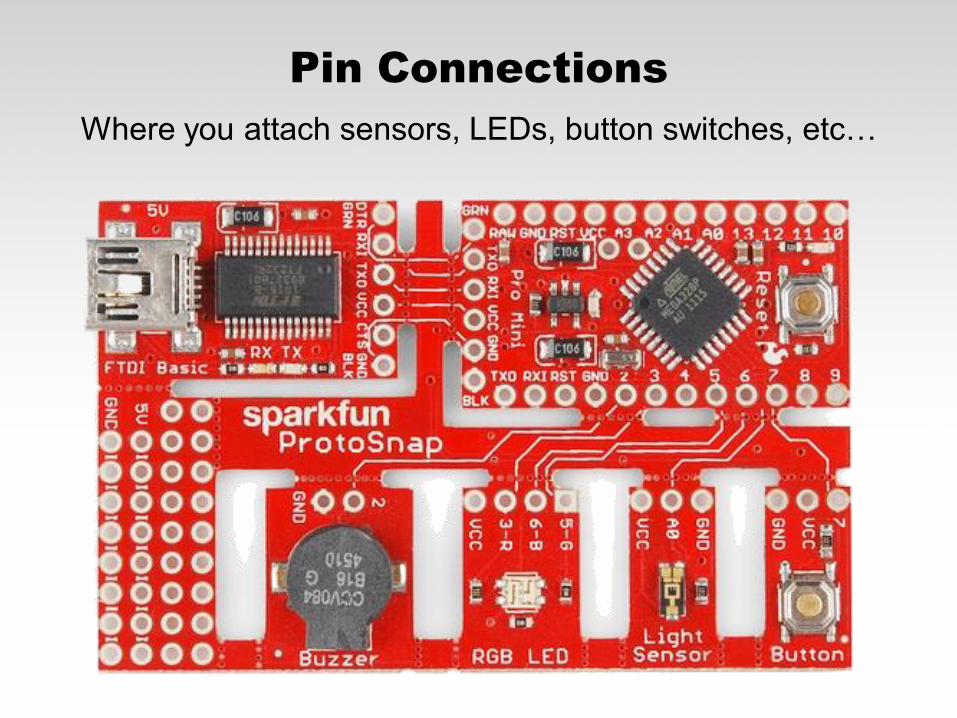
Pin Connections
Where you attach sensors, LEDs, button switches, etc…

Actual Pin-outs

This work is licensed under a Creative Commons Attribution-ShareAlike 3.0 United States License.
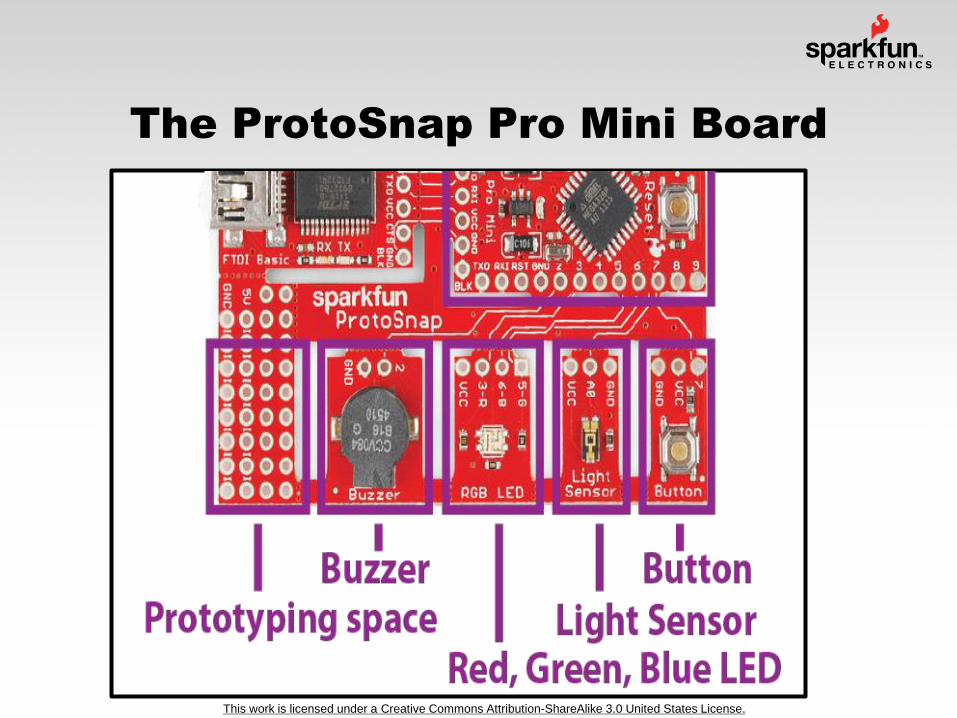
Flip the Board Over
Do you see the wires that are running to the sensors, LEDs,
and buttons?
The microcontroller is pre-wired to the inputs and outputs on
this board.
This work is licensed under a Creative Commons Attribution-ShareAlike 3.0 United States License.
The ProtoSnap Pro Mini Board

This work is licensed under a Creative Commons Attribution-ShareAlike 3.0 United States License.
Notes on Vocabulary
Vcc = Common Collector Voltage (+5 V or
the positive terminal of the power source)
GND = Ground (also referred to as the
negative terminal of the power)
Circuit = Circle
Plated Through Hole
This work is licensed under a Creative Commons Attribution-ShareAlike 3.0 United States License.
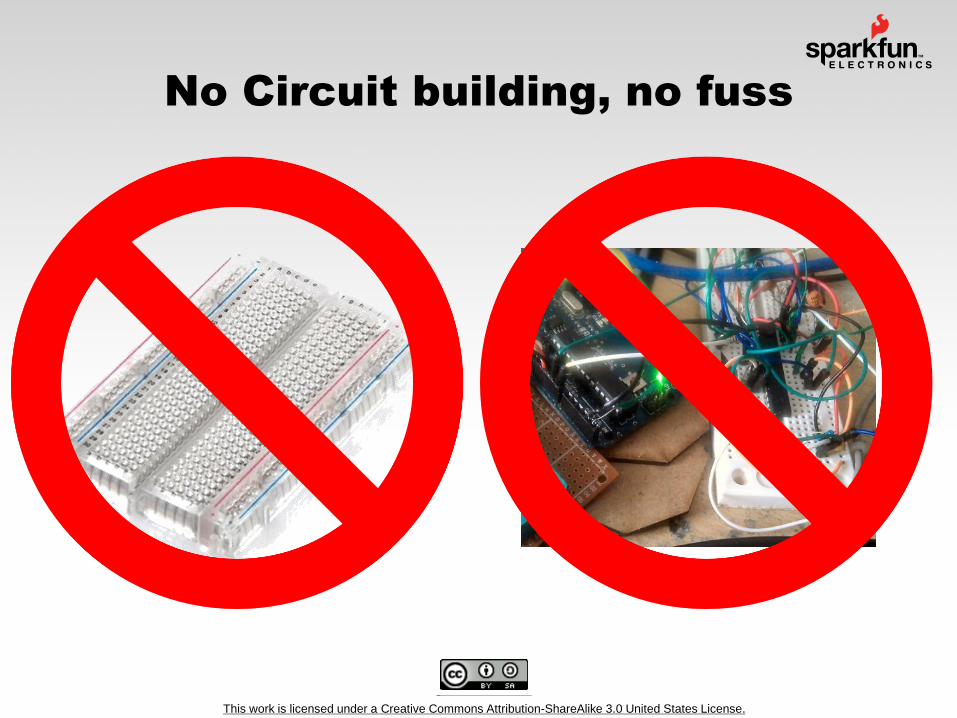
No Circuit building, no fuss

Startup Arduino IDE
Double-click on either
the Arduino Icon or
wherever you
installed (saved) the
Arduino program.

This work is licensed under a Creative Commons Attribution-ShareAlike 3.0 United States License.
Plug it in

This work is licensed under a Creative Commons Attribution-ShareAlike 3.0 United States License.
Lesson #0 – Configuring Arduino
1. Setup Board
(LilyPad Arduino w/ ATmega328)
2. Setup COM Port
PC – Highest COM #
Mac – /dev/tty.usbserial-A####xXx

This work is licensed under a Creative Commons Attribution-ShareAlike 3.0 United States License.
Settings: Tools Board

This work is licensed under a Creative Commons Attribution-ShareAlike 3.0 United States License.
Settings: Tools Serial Port

This work is licensed under a Creative Commons Attribution-ShareAlike 3.0 United States License.
Other Board Types

This work is licensed under a Creative Commons Attribution-ShareAlike 3.0 United States License.
Start ArduBlock
Tools ArduBlock

This work is licensed under a Creative Commons Attribution-ShareAlike 3.0 United States License.
ArduBlock
Introduction to Programming
Scratch-like interface
Clear transition to text-based coding

Lesson #0 – Test Upload

Check for Status Messages

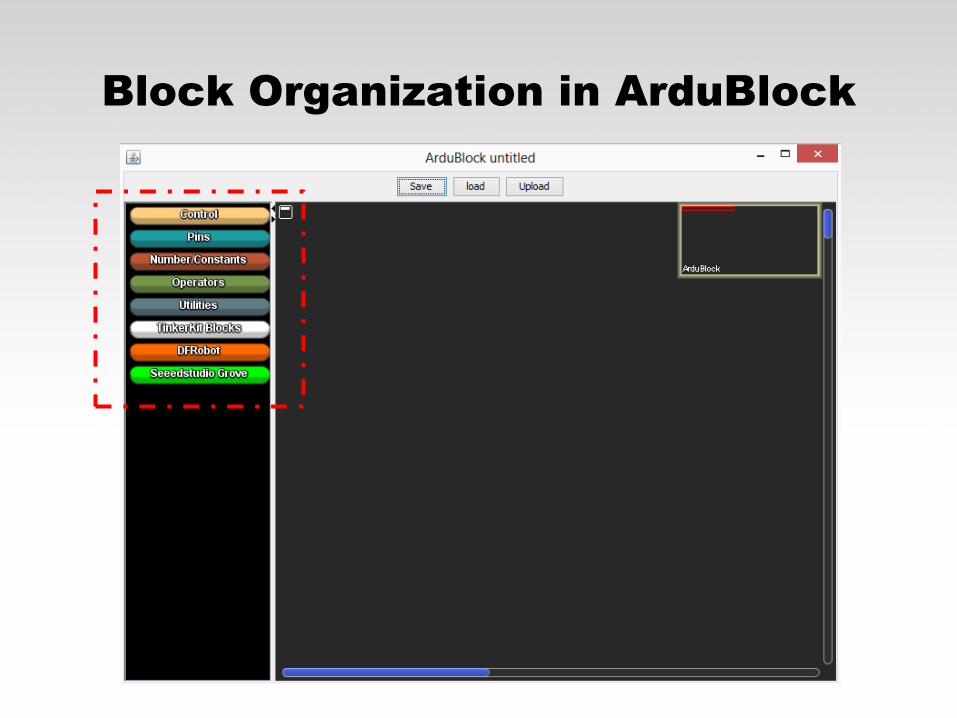
Block Organization in ArduBlock
This work is licensed under a Creative Commons Attribution-ShareAlike 3.0 United States License.
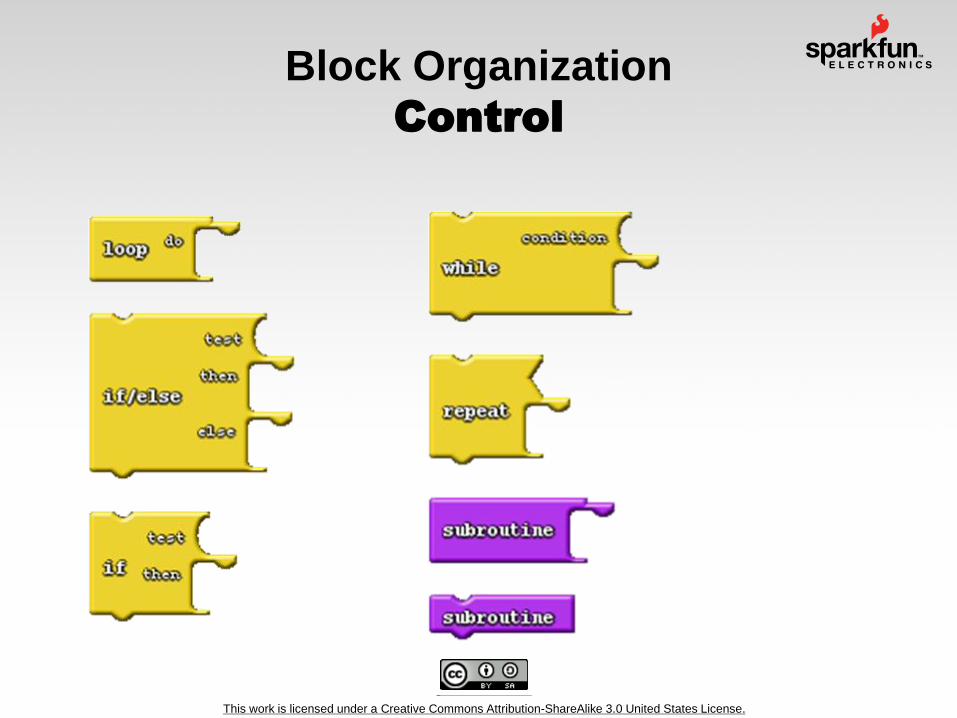
Block Organization
Control
This work is licensed under a Creative Commons Attribution-ShareAlike 3.0 United States License.
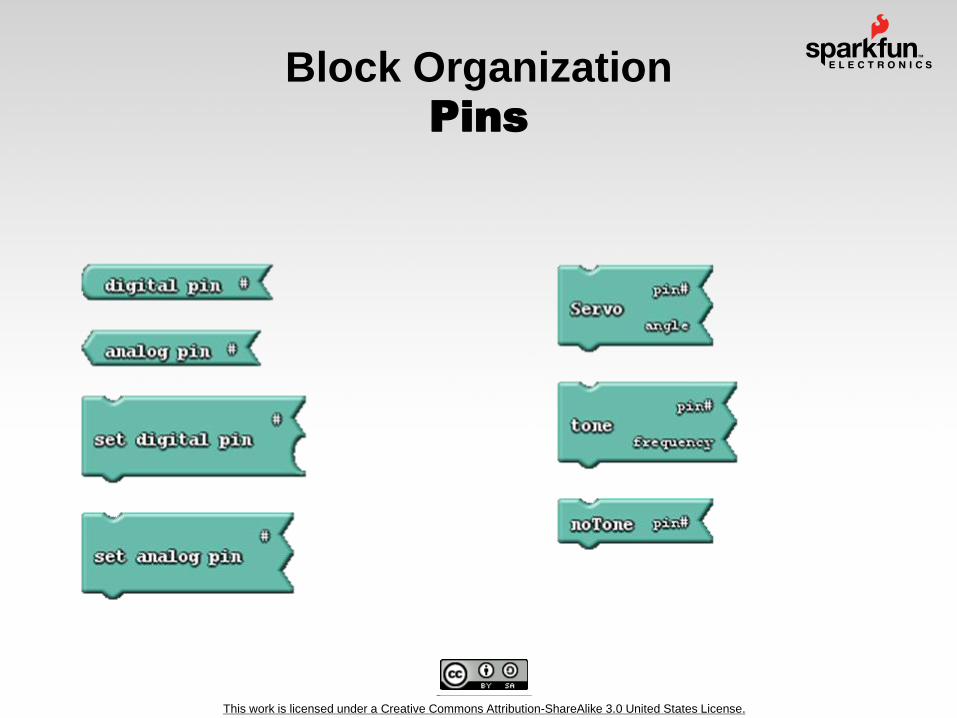
Block Organization Pins

This work is licensed under a Creative Commons Attribution-ShareAlike 3.0 United States License.
Block Organization
Numbers/Constants
This work is licensed under a Creative Commons Attribution-ShareAlike 3.0 United States License.
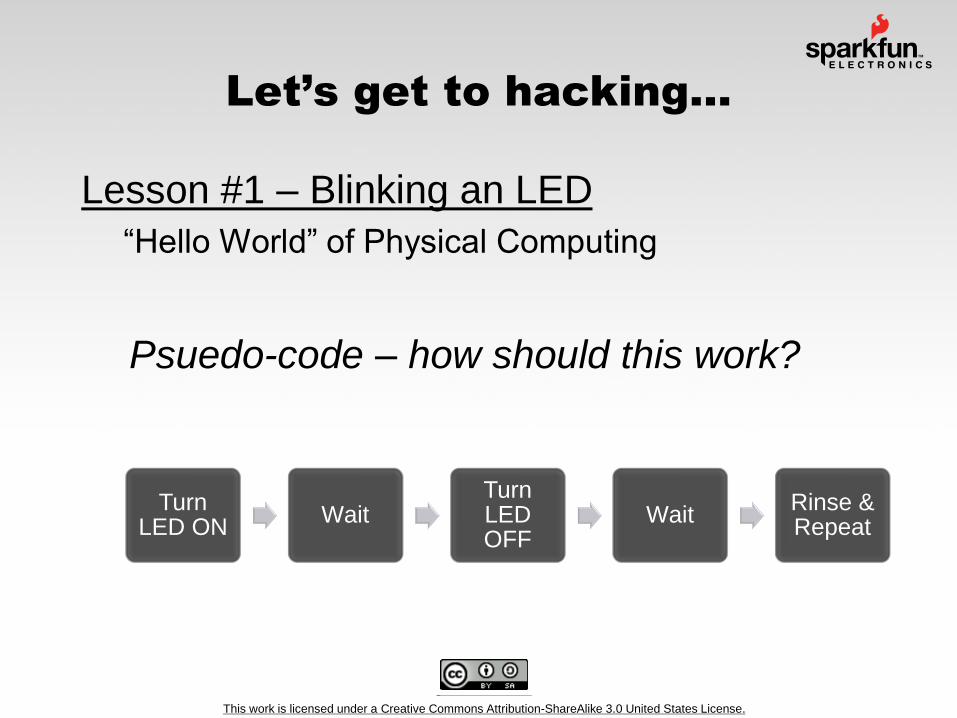
Let’s get to hacking…
Lesson #1 – Blinking an LED
“Hello World” of Physical Computing
Psuedo-code – how should this work?
Turn LED ON
Wait Turn LED OFF
Wait Rinse & Repeat

This work is licensed under a Creative Commons Attribution-ShareAlike 3.0 United States License.
Let’s get to hacking…
Lesson #1 – Blinking an LED
“Hello World” of Physical Computing

This work is licensed under a Creative Commons Attribution-ShareAlike 3.0 United States License.
Alright? Let’s blink!
Challenge 1a – Sweet Heart. Blink to
mimic a heartbeat…
Challenge 1b – Too Fast! Experiment with
the blink rate. What’s the fastest blink rate
you can see? 1 ms? 2 ms??
Challenge 1c – Three in One! Use the
RGB LED to create different combinations and patterns of light. Anything peculiar?

Save your Project
• Save early, Save
often!
• Enumerate your
iterations – (e.g.
blink_10.adp,
blink_11.adp,
blink_12.adp…)
This work is licensed under a Creative Commons Attribution-ShareAlike 3.0 United States License.
New Challenge…
Create a blink that starts off with a 10 ms
delay and gets progressively slower
and slower…
What would the pseudo-code look like for
this:
This work is licensed under a Creative Commons Attribution-ShareAlike 3.0 United States License.
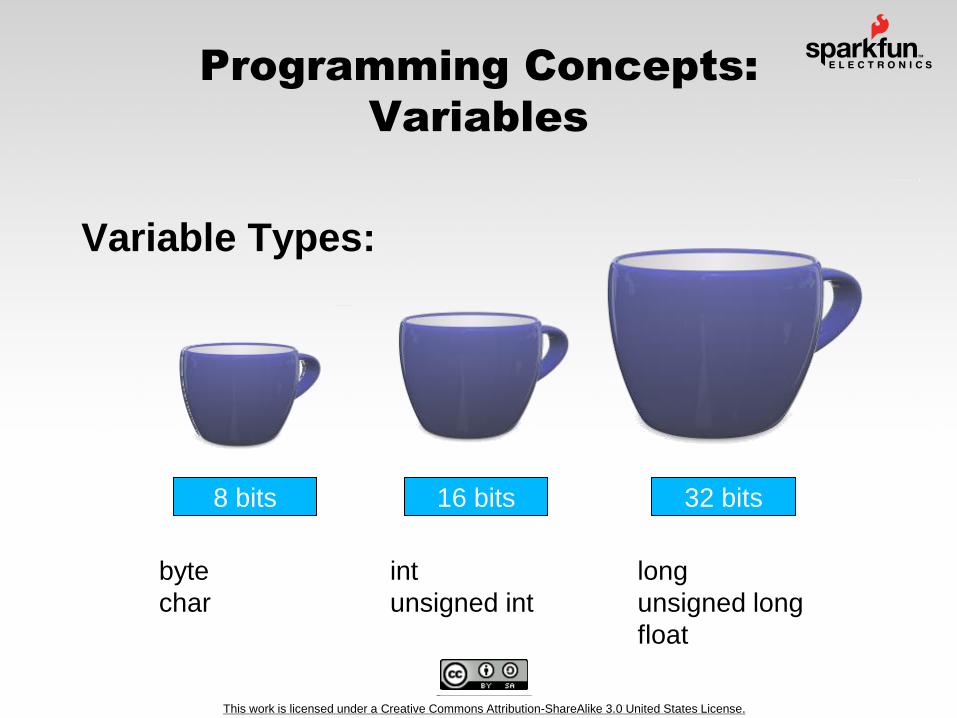
Programming Concepts:
Variables
Variable Types:
8 bits 16 bits 32 bits
byte
char
int
unsigned int
long
unsigned long
float

Using Variables
Numbers/Constants
Variable is just a
placeholder for a
value.
Notice the different
shapes?

Example: Did you come up with
something like this?
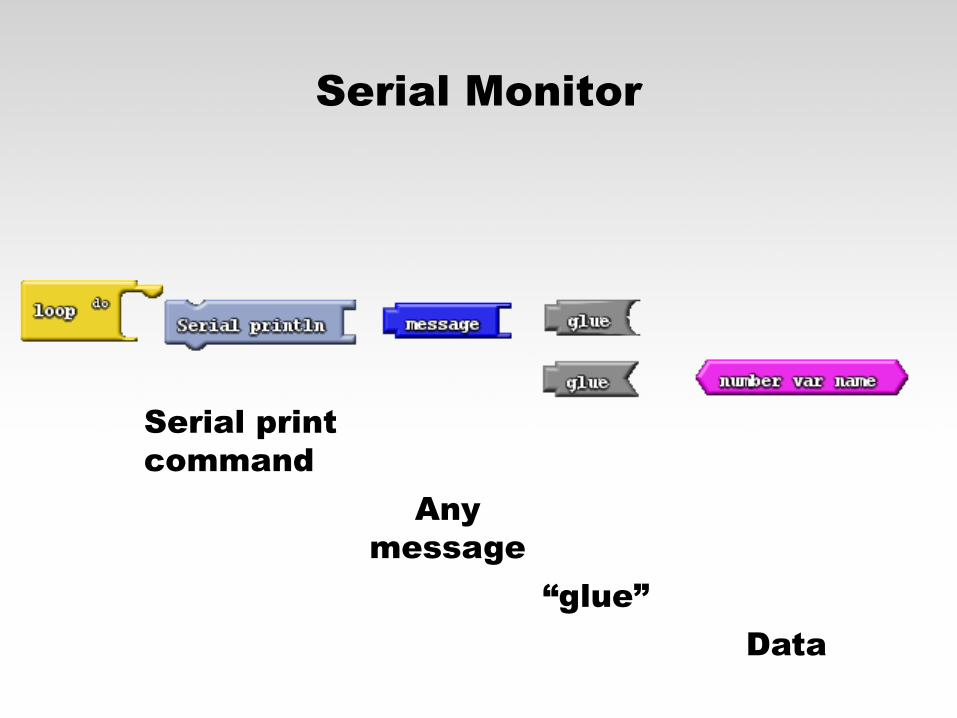
Serial Monitor
Serial print
command
Any
message
“glue”
Data

Add this block… so that we can
watch the variable value

Upload & Click back to Arduino
Open the Serial Monitor

Conditional Statements
If()… else…
test conditions – aka
Boolean
Greater Than
Less Than
Equal To
Greater or Equal
Less or Equal
Not Equal to

This work is licensed under a Creative Commons Attribution-ShareAlike 3.0 United States License.
Aside from just blinking
(on and off), what else
might we want to do??
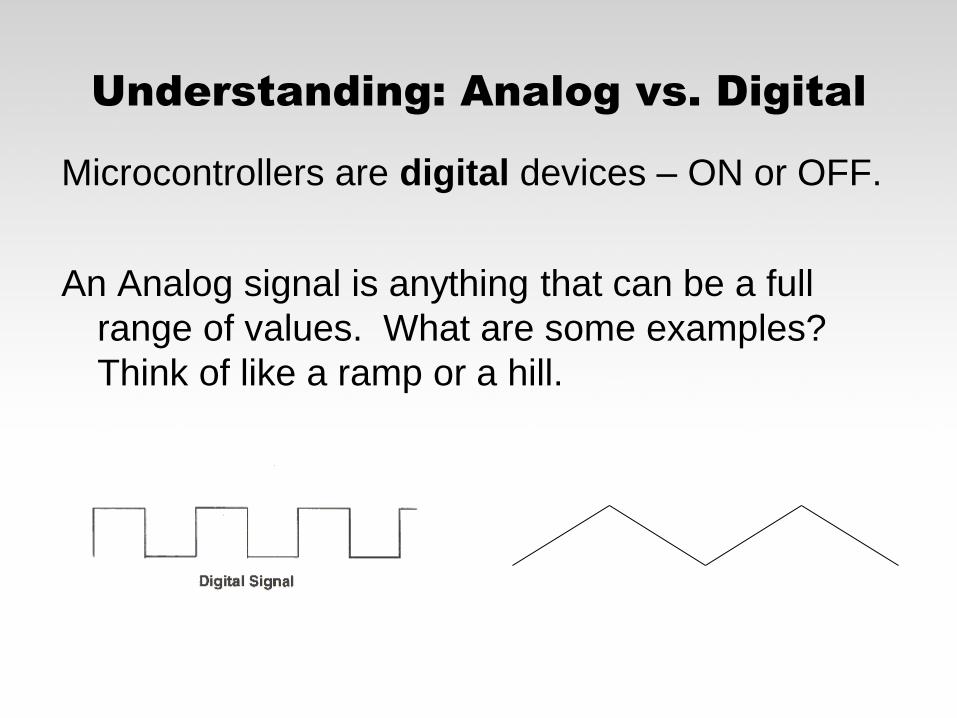
Understanding: Analog vs. Digital
Microcontrollers are digital devices – ON or OFF.
An Analog signal is anything that can be a full
range of values. What are some examples?
Think of like a ramp or a hill.

Understanding: Analog vs. Digital
To create an analog signal, the
microcontroller uses a technique called
PWM.
Pulse Width Modulation (PWM)
Pins 3, 5, 6, 9, 10, 11 are capable of producing an
Analog Output

In ArduBlock
Digital OUTPUT
HIGH or LOW
PIN# -- 0 to 13
SHAPE
Analog OUTPUT
0 to 255
PIN# -- 3, 5, 6, 9, 10, 11
SHAPE

This work is licensed under a Creative Commons Attribution-ShareAlike 3.0 United States License.
Color Mixing with 3
LEDs
analogWrite()
Challenge 2a:
1) How do you turn on the RED LED?
2) Experiment with different values – what do you observe
happens? Anything peculiar??
3) How do you turn on the GREEN or the BLUE LED?

This work is licensed under a Creative Commons Attribution-ShareAlike 3.0 United States License.
Blinking in 3 colors
Tri-color LED
Only to throw you for a loop…
RGB LED is a Common-Anode
(means the positive side of the
LED is all tied to Vcc)
Pin
3
Pin
5
Pin
6
We’ve controlled stuff… what’s
next?
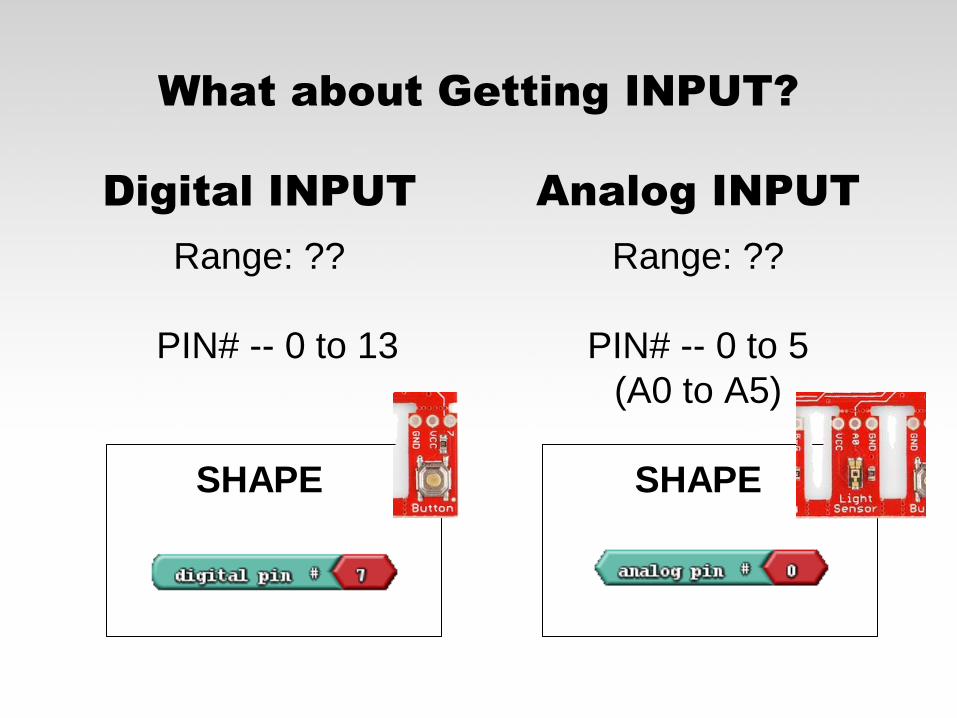
What about Getting INPUT?
Digital INPUT
Range: ??
PIN# -- 0 to 13
SHAPE
Analog INPUT
Range: ??
PIN# -- 0 to 5
(A0 to A5)
SHAPE

Digital Input &
Feedback – Serial Monitor
Serial print
command
Any
message
“glue”
Data

This work is licensed under a Creative Commons Attribution-ShareAlike 3.0 United States License.
Example
or

Digital Input &
Conditional Logic

This work is licensed under a Creative Commons Attribution-ShareAlike 3.0 United States License.
Challenge --
When the button is pressed, blink the LED
10 times.

In ArduBlock
Digital OUTPUT
HIGH or LOW
PIN# -- 0 to 13
SHAPE
Analog OUTPUT
0 to 255
PIN# -- 3, 5, 6, 9, 10, 11
SHAPE

This work is licensed under a Creative Commons Attribution-ShareAlike 3.0 United States License.
Last bit… the buzzer
Final command to know:
tone(pin, freq, duration);
pin – the OUTPUT pin the buzzer is
connected to.
freq – unsigned int (0 … 65,535)
duration – unsigned long (0 … 2^32 - 1)
This work is licensed under a Creative Commons Attribution-ShareAlike 3.0 United States License.
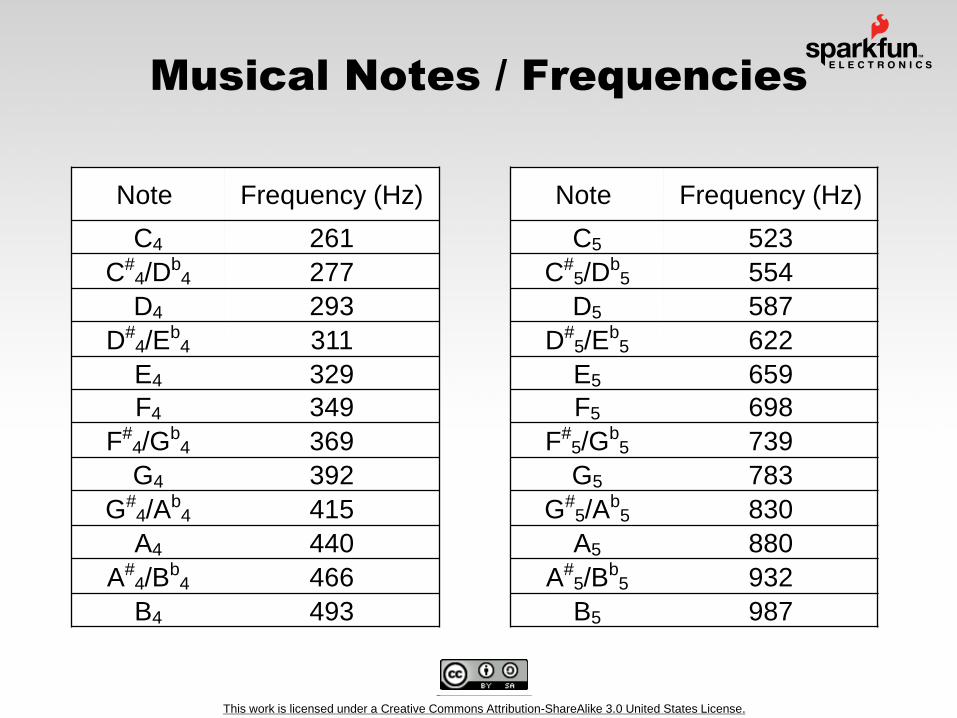
Musical Notes / Frequencies
Note Frequency (Hz)
C4 261
C#4/D
b4 277
D4 293
D#4/E
b4 311
E4 329
F4 349
F#4/G
b4 369
G4 392
G#4/A
b4 415
A4 440
A#4/B
b4 466
B4 493
Note Frequency (Hz)
C5 523
C#5/D
b5 554
D5 587
D#5/E
b5 622
E5 659
F5 698
F#5/G
b5 739
G5 783
G#5/A
b5 830
A5 880
A#5/B
b5 932
B5 987
This work is licensed under a Creative Commons Attribution-ShareAlike 3.0 United States License.
World’s cheapest dubstep
instrument
Tie both the buzzer and the LED to light
sensor… and, create the world’s
cheapest dub step instrument.
Play with the frequency – scale it by
applying multiplier factors or offsets.

This work is licensed under a Creative Commons Attribution-ShareAlike 3.0 United States License.
OK? What’s going on
under the hood?

This work is licensed under a Creative Commons Attribution-ShareAlike 3.0 United States License.
Arduino Code, Examples,
References, etc…

This work is licensed under a Creative Commons Attribution-ShareAlike 3.0 United States License.
Find in Reference

This work is licensed under a Creative Commons Attribution-ShareAlike 3.0 United States License.
A partnership…

This work is licensed under a Creative Commons Attribution-ShareAlike 3.0 United States License.
Resources
Programming Cheat Sheet
http://bit.ly/ArduinoCheatSheet
Download Arduino / Reference
http://arduino.cc/en/

This work is licensed under a Creative Commons Attribution-ShareAlike 3.0 United States License.
Additional Resources
http://www.sparkfun.com
http://learn.sparkfun.com
http://www.arduino.cc
http://www.bildr.org

This work is licensed under a Creative Commons Attribution-ShareAlike 3.0 United States License.
SparkFun Tutorials and Projects
- GardenBot:
www.sparkfun.com/news/598
- High Altitude Balloon:
www.sparkfun.com/tutorials/180
- GPS Clock:
www.sparkfun.com/tutorials/47
- Earthquake Data Logger:
www.sparkfun.com/tutorials/235

This work is licensed under a Creative Commons Attribution-ShareAlike 3.0 United States License.
Thousands of Amazing ideas…
The Cat Defender…
http://www.plasma2002.com/blenderdefende
r/
List of projects at Sparkfun:
http://goo.gl/2M3AM

Questions?

This work is licensed under a Creative Commons Attribution-ShareAlike 3.0 United States License.
Your to keep…
The little red box, the protosnap Pro Mini,
and the cable are yours to keep today.
Please e-mail us with ideas and things that
you end up doing at your school.
Thanks!
email: [email protected]

This work is licensed under a Creative Commons Attribution-ShareAlike 3.0 United States License.
Before leaving, please fill out a quick survey.
Thanks!
http://www.sparkfun.com/WorkshopFeedback
Feedback?

This work is licensed under a Creative Commons Attribution-ShareAlike 3.0 United States License.
www.sparkfun.com
6175 Longbow Drive, Suite 200
Boulder, Colorado 80301


