Sphere cutting jig The concept of cutting a sphere is to cut a circular arc in the horizontal plane along the lathe center axis. To do this, the jig has to pivot directly under the center of where you want to make the sphere. The tool is advanced in increments as the sphere is cut from a cylinder. The jig shown above was made to use on an Jet mini lathe with a 10” swing. The key element is to have the jig swivel freely, but have no slack to wobble. The cutting tool height is set to the centerline of the lathe. There are several commercial jigs available, but they all work the same. The only problem I have found is that the tool is cutting as a scraper, and does not cut cleanly. This can be taken care of when removing the two ends and doing the final turnings between cups. Instructions by Al Hockenbery for turning sphere without a jig can be found at : http://www.woodturnersofpolkcounty.com/Toolmaking%20Resources.htm 1
Transcript
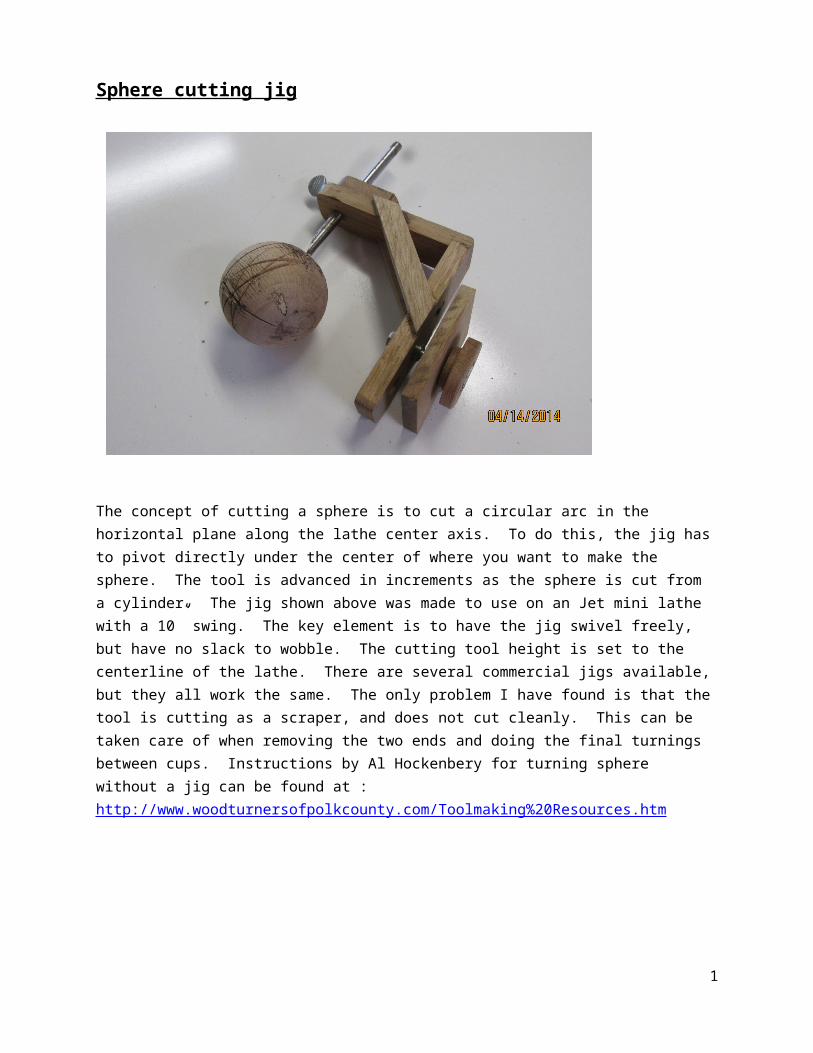
Sphere cutting jig
The concept of cutting a sphere is to cut a circular arc in the horizontal plane along the lathe center axis. To do this, the jig has to pivot directly under the center of where you want to make the sphere. The tool is advanced in increments as the sphere is cut from a cylinder. The jig shown above was made to use on an Jet mini lathe with a 10” swing. The key element is to have the jig swivel freely, but have no slack to wobble. The cutting tool height is set to the centerline of the lathe. There are several commercial jigs available, but they all work the same. The only problem I have found is that the tool is cutting as a scraper, and does not cut cleanly. This can be taken care of when removing the two ends and doing the final turnings between cups. Instructions by Al Hockenbery for turning sphere without a jig can be found at : http://www.woodturnersofpolkcounty.com/Toolmaking%20Resources.htm
This is a quick, easy and inexpensive way to make ornament hangers. Get brass or chrome safety pins, cut the sharp side of with the coil, cut off the point and bend double (gives the glue something to hold on to.) drill hole in ornament and glue in.
Grinder setting sticks & Bowl Gouge sharping jig
With grinder set up to grind your tool, take a stick and make a point at one end, set that in the tool rest pocket with the stick resting on the grinding wheel guard, mark where to cut the stick to length (band saw). To use, set the stick in the tool rest, and slide in until the stick hits the wheel – this will be the same distance each time. Mark each stick for each tool setting.
2
The 5/8” bowl gouge holder was made by drilling a ¾” hole in a block of oak, setting a ¼” x 6” rod in at 45 deg, and drilling and taping for a set screw. Complete plans for a home made grinder jig are found at: http://www.woodturnersofpolkcounty.com/Toolmaking%20Resources.htm
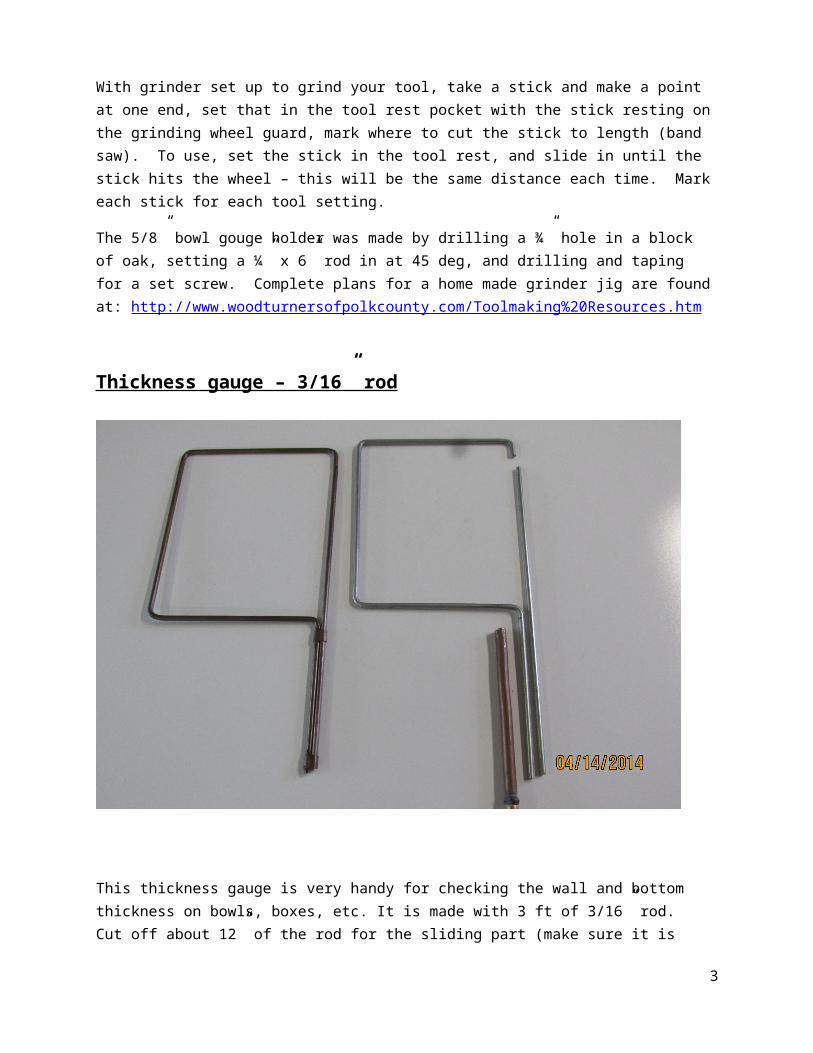
Thickness gauge – 3/16” rod
This thickness gauge is very handy for checking the wall and bottom thickness on bowls, boxes, etc. It is made with 3 ft of 3/16” rod. Cut off about 12” of the rod for the sliding part (make sure it is very straight- no curvature). Bend the “C” shape to suit so that the upper tip aligns with the lower handle. I have used a 6” offset with a 7” reach in the above example. Cut two ~1/2” long 3/8” copper tube guides, flatten over the two rods as guides, and epoxy to the “C” frame handle ONLY. Use a chain saw file (~3/16”) to clean up guide inside so that the straight rod slides freely. Bend as necessary to get sliding part to align with the top. Note, mark, cut off one part of the handle, so that when the gap is closed, you have a reference point at the end of the handle. I also recommend that you make the top hook of the “C” a little shorter than your chuck jaw, so you can measure the bottom thickness of bowls between the chuck jaws next to the tenon. I bend the “C” frame in a vice, and use a hammer to get the shape bend.
If you turn platters, you could make one with a 10” offset and only a 3” reach.
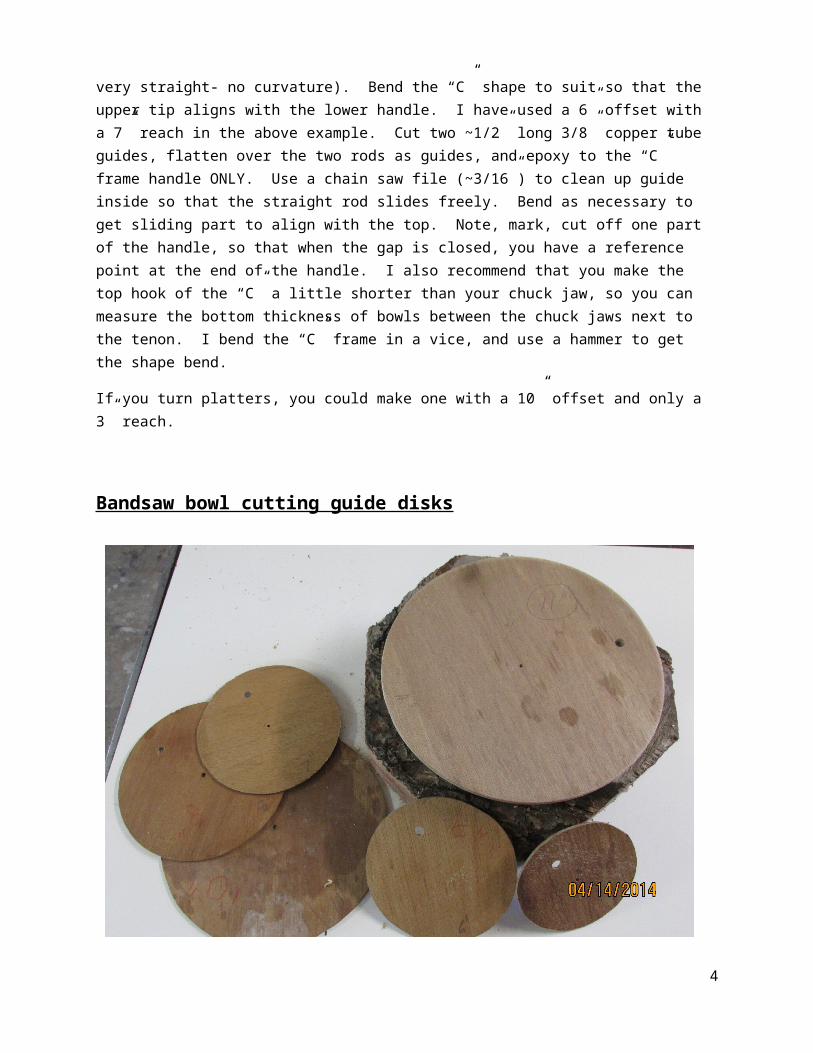
Cut circle from thin plywood, cardboard, etc. with a small hole in the center. Use to mark a circle on a log for cutting a bowl / plate blank. You can attach to the log with a drywall screw, and use as a guide to cut on the bandsaw – cutting ~1/4” outside of the disk. I have one for each size from 6” up to 12”. I drilled a larger hole near the edge to hang them on a nail for storage.
4
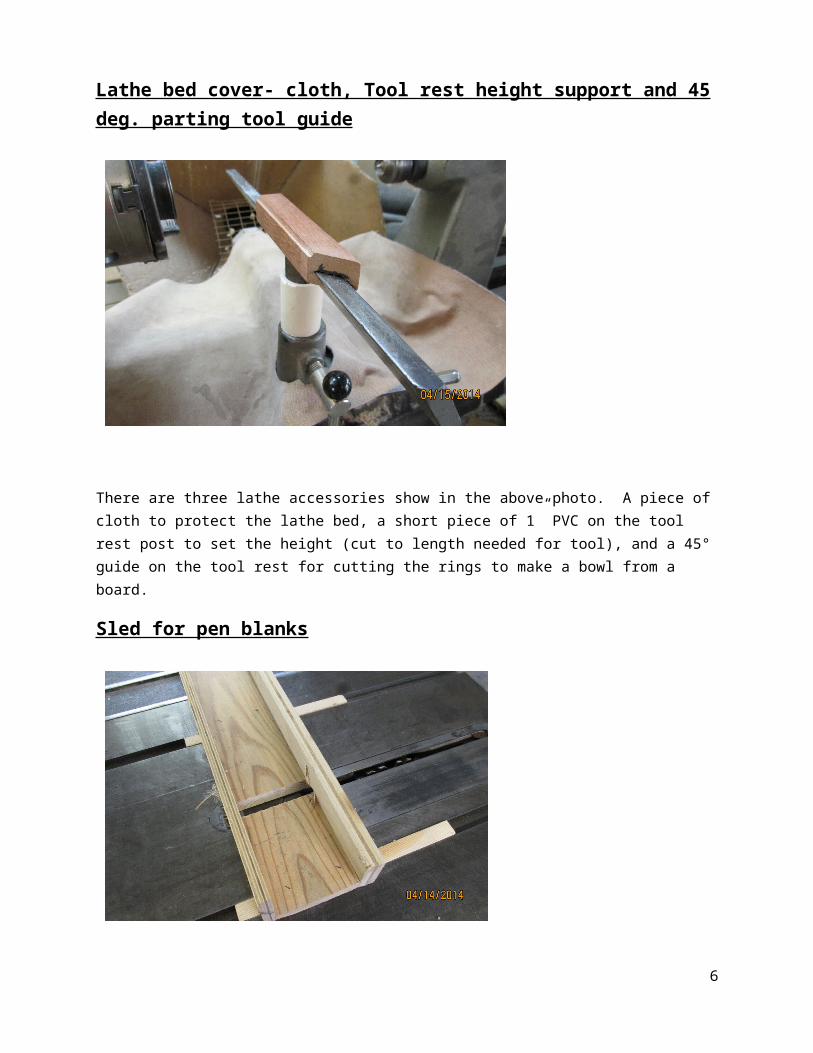
Lathe bed cover- cloth, Tool rest height support and 45 deg. parting tool guide
There are three lathe accessories show in the above photo. A piece of cloth to protect the lathe bed, a short piece of 1” PVC on the tool rest post to set the height (cut to length needed for tool), and a 45° guide on the tool rest for cutting the rings to make a bowl from a board.
Sled for pen blanks
A quick and easy table saw sled to trim pen blanks. I have a pencil mark to show where to place each blank (@ 2”).
5
Tool rack
A simple, safe tool rack (I just have too many tools!) Put the shelf high enough so the tools don’t hit the bottom (or cover the bottom with carpet). Drill the holes for the various tools, and a few extras. Arrange the tools by type, and you will quickly learn where each tool is at – just put them back in the same place each time. Different handles also help to quickly locate each tool.