INTERMEDIATE ACCESS 2000 Table of Contents Page LESSON 1: IMPORTING AND COPYING DATA.........................1 Importing Information from Another Database 1 Copying a Table within the Existing Database 2 Converting Tables from Excel 5 Copying Data into an Existing Table 9 LESSON 2: FORM DESIGN VIEW..................................11 Creating Forms 11 Design View14 Changing the AutoFormat 15 Changing Fonts 16 Adding Color 16 Arranging Form Controls 18 Changing the Order of Data Entry 19 LESSON 3: DATABASE RELATIONSHIPS............................22 Relationship Types 23 Building Relationships Using the Table Wizard 24 Joining Tables in a Query 29 The Relationships Window 32 LESSON 4: SUBFORMS.......................................... 37 Creating Subforms Using the Wizard 37 LESSON 5: CUSTOM REPORTS....................................42
Transcript
INTERMEDIATE ACCESS 2000
Table of ContentsPage
LESSON 1: IMPORTING AND COPYING DATA...........................................................1
Importing Information from Another Database1
Copying a Table within the Existing Database 2 Converting Tables from Excel 5 Copying Data into an Existing Table 9
LESSON 2: FORM DESIGN VIEW...............................................................................11
Creating Forms 11 Design View 14 Changing the AutoFormat 15 Changing Fonts 16 Adding Color 16 Arranging Form Controls 18 Changing the Order of Data Entry 19
This workbook may be reproduced in whole or in part by an employee of the Department of Human Services or Department of Mental Health, Mental Retardation and Substance Abuse Services. All other reproduction is prohibited unless written permission is obtained from the Training Institute.
Last Updated: April 17, 2001
NOTES
NOTES
LESSON 1: IMPORTING AND COPYING DATA
OBJECTIVE: Use information from other sources in your database.
Importing Information from Another Database
OVERVIEW
If a database object containing the structure and/or data you require already exists, you may import it from another Access Database, or convert it from a different database file format - such as dBase, Paradox, etc.
STEPS
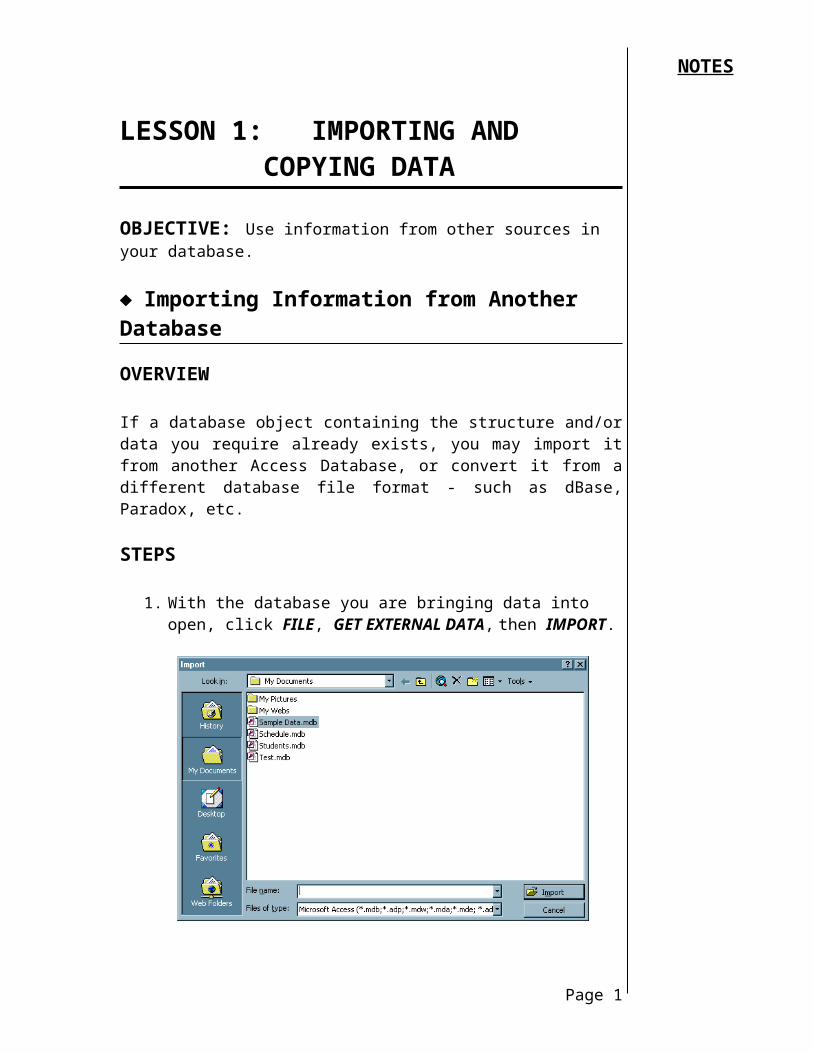
1. With the database you are bringing data into open, click FILE, GET EXTERNAL DATA, then IMPORT.
2. If needed, change the file format in the FILES OF TYPE area.
Page 1
NOTES
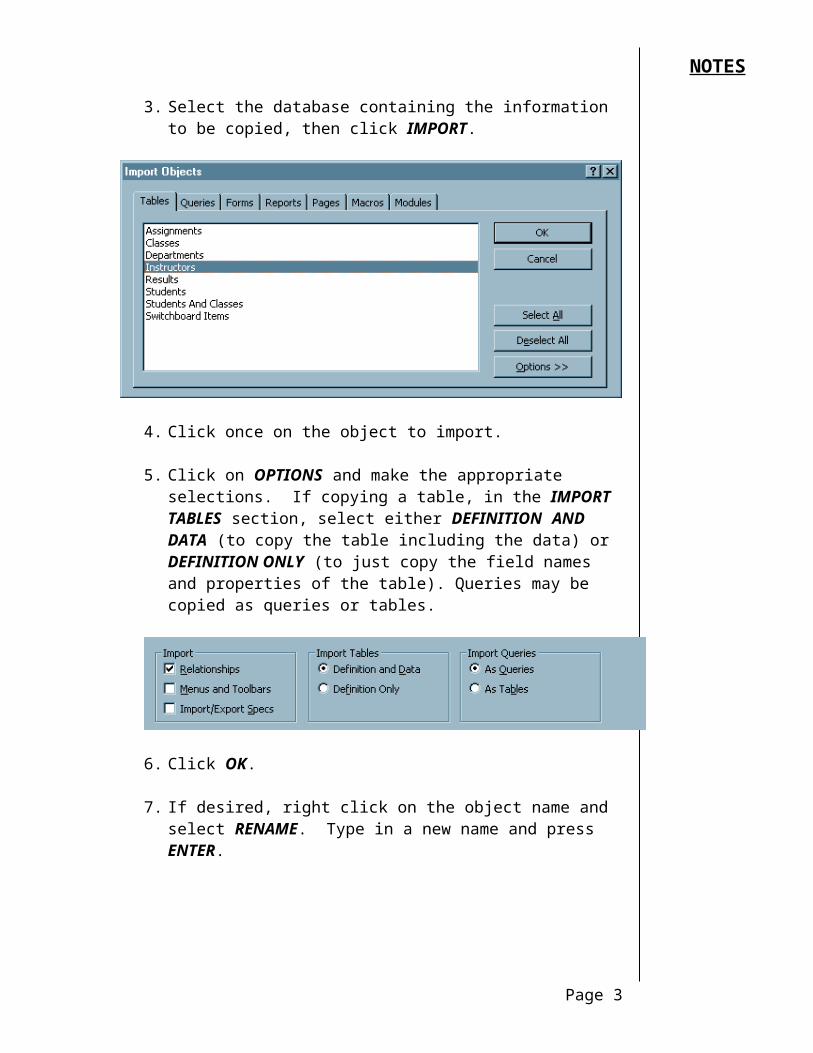
3. Select the database containing the information to be copied, then click IMPORT.
4. Click once on the object to import.
5. Click on OPTIONS and make the appropriate selections. If copying a table, in the IMPORT TABLES section, select either DEFINITION AND DATA (to copy the table including the data) or DEFINITION ONLY (to just copy the field names and properties of the table). Queries may be copied as queries or tables.
6. Click OK.
7. If desired, right click on the object name and select RENAME. Type in a new name and press ENTER.
Copying a Table within the Existing Database
OVERVIEW
You may wish to duplicate a table for another use within the same database. For example, you may have several regions whose information you would like to track identically, but in separate tables.
Page 2
NOTES
STEPS
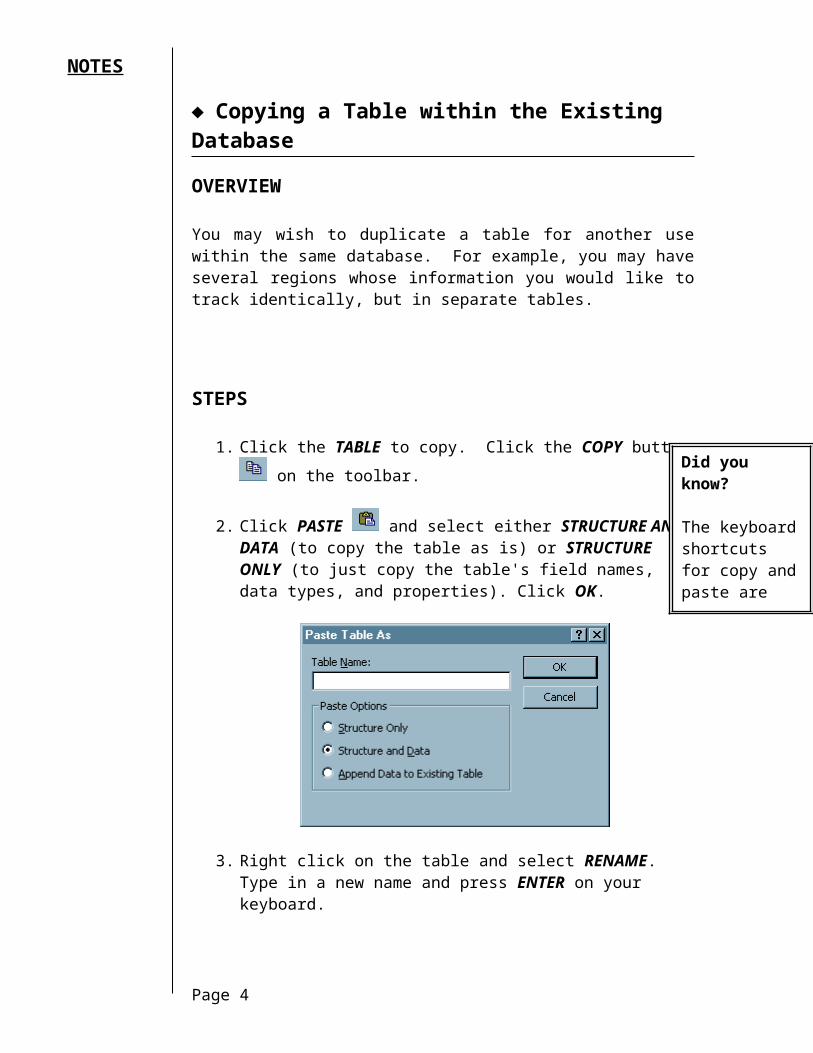
1. Click the TABLE to copy. Click the COPY button on the toolbar.
2. Click PASTE and select either STRUCTURE AND DATA (to copy the table as is) or STRUCTURE ONLY (to just copy the table's field names, data types, and properties). Click OK.
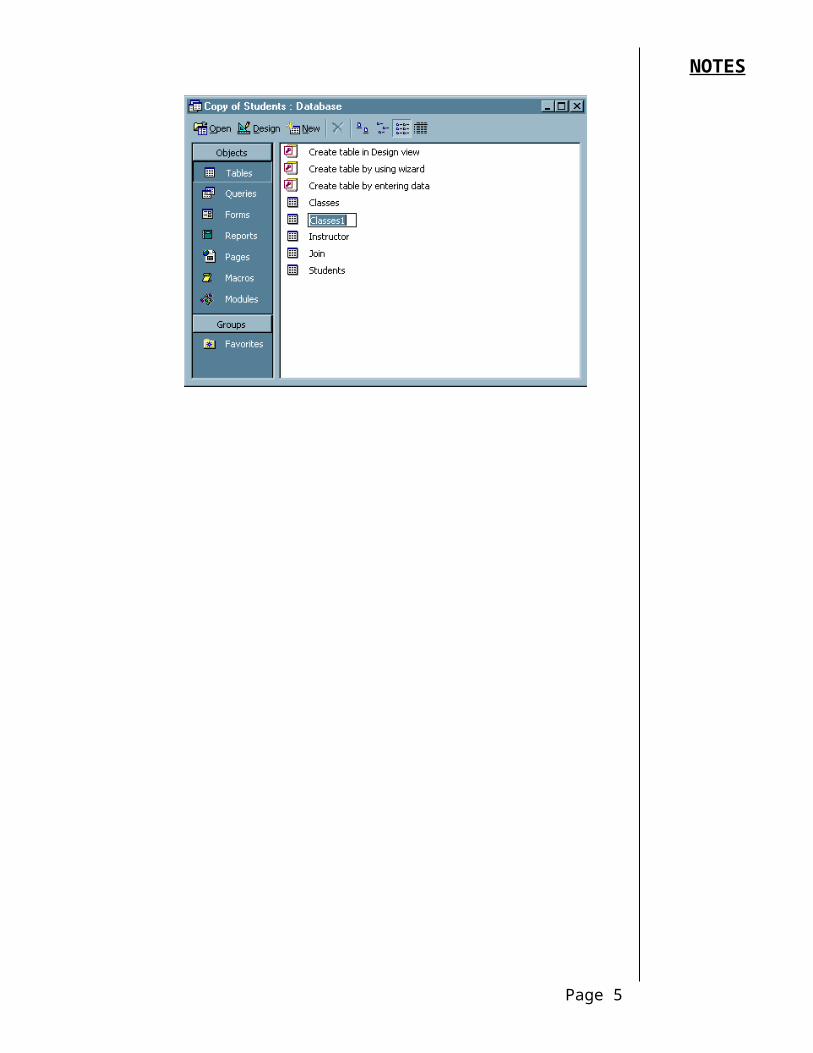
3. Right click on the table and select RENAME. Type in a new name and press ENTER on your keyboard.
Page 3
Did you know?
The keyboard shortcuts for copy and paste are CTRL + C to copy and CTRL + V to paste.
NOTES
Lesson Example
You have a database named Test that includes a table you would like to use in a new database. Your instructor will give you the location of this file and any other files you will need throughout the class.
STEPS
1. Open Microsoft Access, and create a new database named Course Schedule in the C:\MY DOCUMENTS folder.
2. With your Course Schedule database open, click FILE, GET EXTERNAL DATA, then IMPORT.
3. Select the Test database, then click IMPORT.
4. Click once on the Classes table.
5. Click the OPTIONS button and select DEFINITION AND DATA.
6. Click OK.
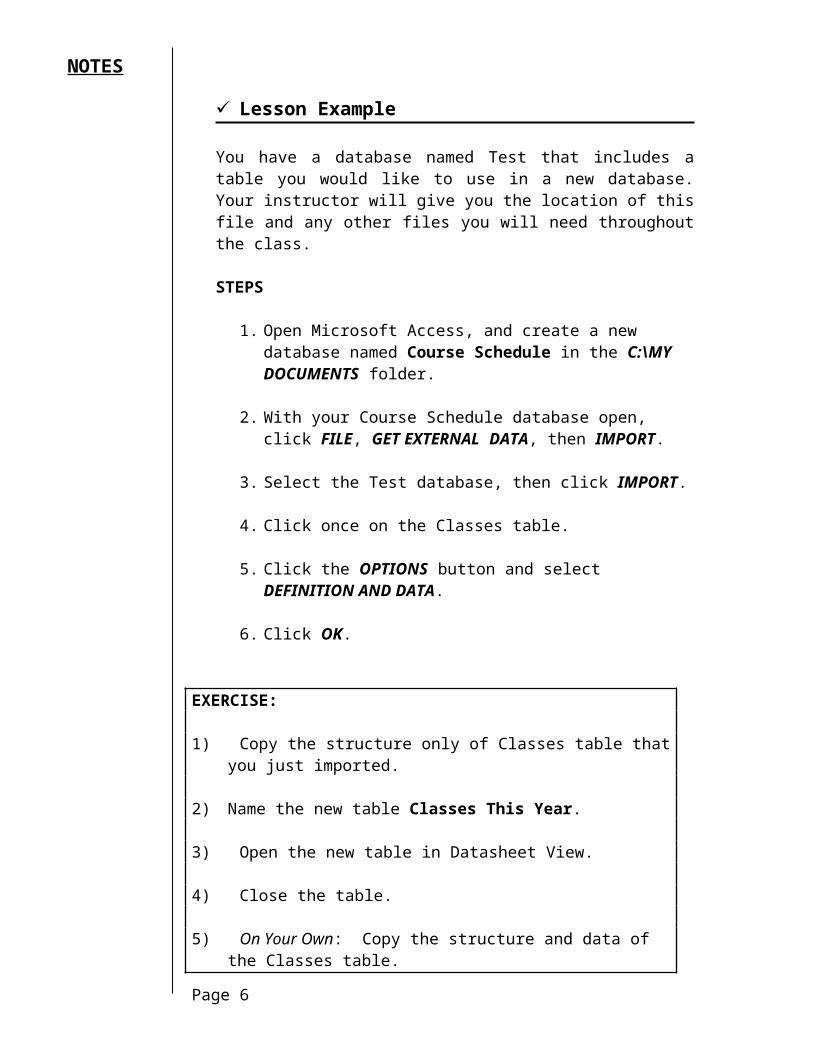
EXERCISE:
1) Copy the structure only of Classes table that you just imported.
2) Name the new table Classes This Year.
3) Open the new table in Datasheet View.
4) Close the table.
5) On Your Own: Copy the structure and data of the Classes table.
6) Name the table Classes Next Year.
7) Open this new table in Datasheet View.
Page 4
NOTES
8) How is this table different from the original Classes table? From the imported Classes This Year table?
9) Close the table.
Converting Tables from Excel
OVERVIEW
Microsoft Excel can perform many of the functions that Access can with a table of data. However, you may find that Excel's limitations restrict you from doing some of the things you would like to do with your data. In this case, you can convert an Excel spreadsheet into an Access table.
STEPS
1. With a database open, click FILE, GET EXTERNAL DATA, then IMPORT.
2. If needed, change the file format in the FILES OF TYPE area to Microsoft Excel (.xls).
Page 5
Helpful Hint:
If you think your information may become more complex over time, it is best to develop data tables in Access initially.
Did you know?
Word tables must be converted into Excel spreadsheets before you can convert them to Access tables.
NOTES
3. Select the file containing the information to be converted, then click IMPORT.
Page 6
NOTES
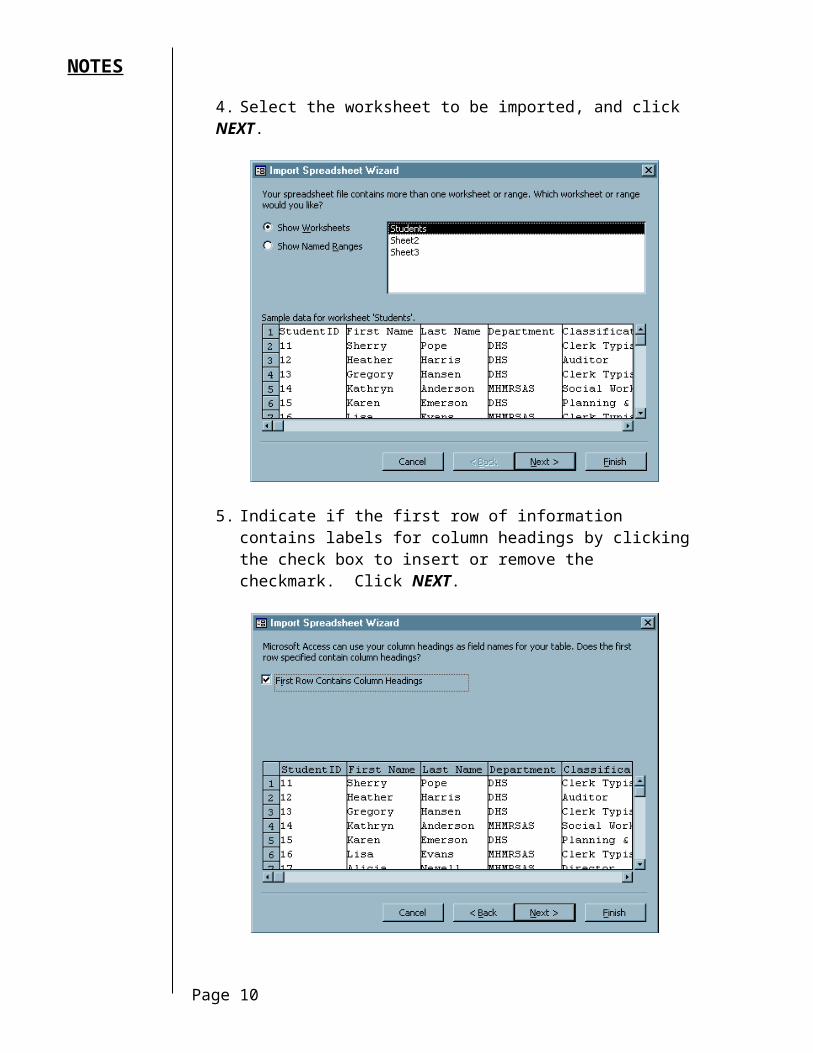
4. Select the worksheet to be imported, and click NEXT.
5. Indicate if the first row of information contains labels for column headings by clicking the check box to insert or remove the checkmark. Click NEXT.
Page 7
NOTES
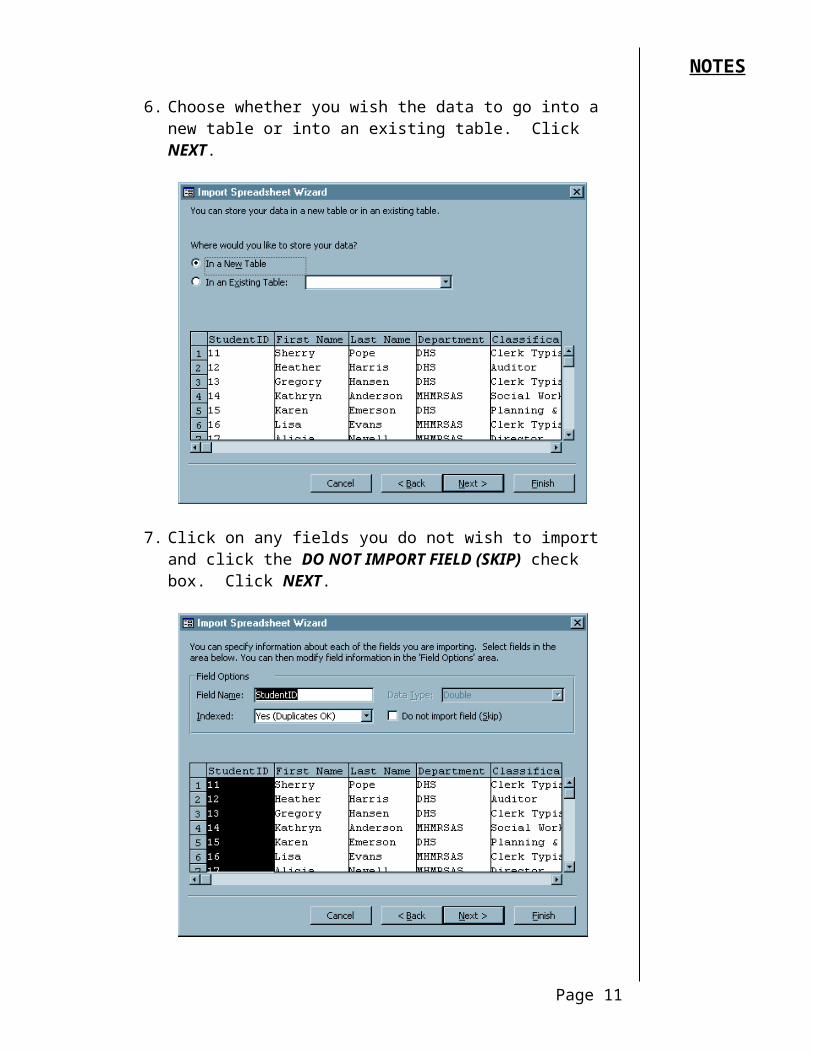
6. Choose whether you wish the data to go into a new table or into an existing table. Click NEXT.
7. Click on any fields you do not wish to import and click the DO NOT IMPORT FIELD (SKIP) check box. Click NEXT.
Page 8
NOTES
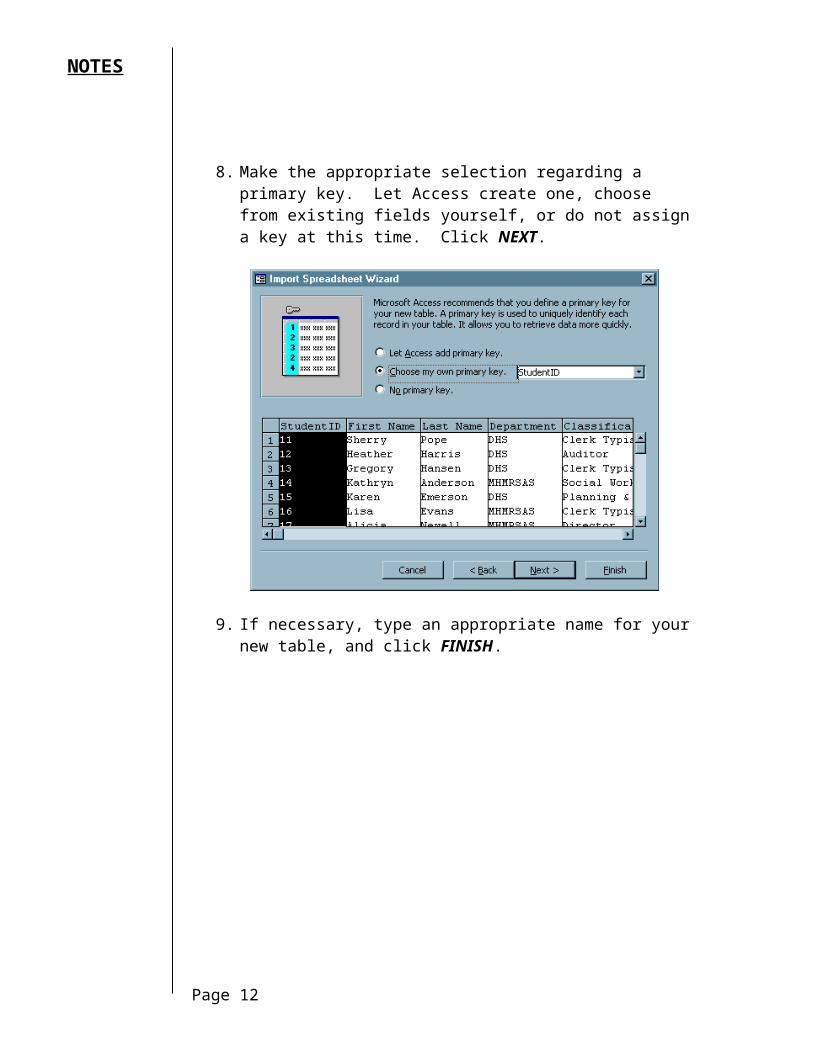
8. Make the appropriate selection regarding a primary key. Let Access create one, choose from existing fields yourself, or do not assign a key at this time. Click NEXT.
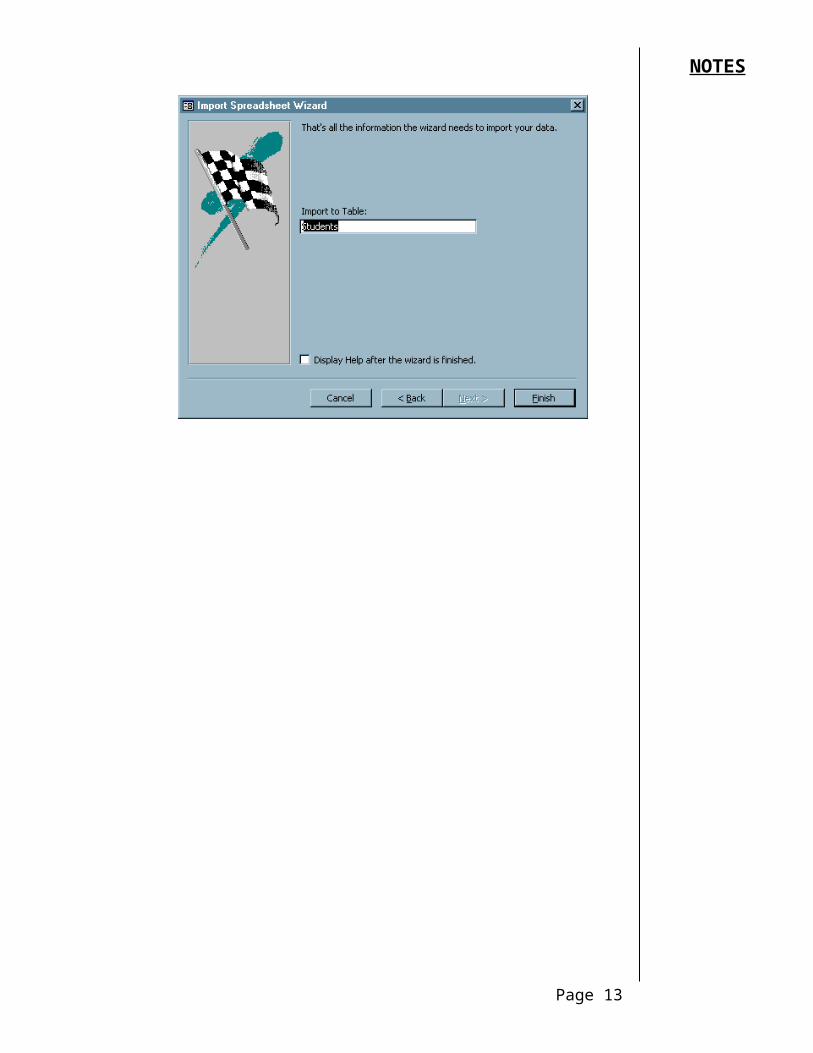
9. If necessary, type an appropriate name for your new table, and click FINISH.
Page 9
NOTES
10. Access will display a dialog box indicating that it has completed the import process. Click OK.
Copying Data into an Existing Table
OVERVIEW
If you have two separate tables that have the same fields, and you would like to combine the data, you may bring the records from one table into the other.
STEPS
1. Open the table containing the data to be imported.
2. Click and drag your mouse pointer over the record selectors (gray boxes to the left of a record) of the records you wish to copy. Please note: The records must be next to one another - you may need to sort specifically for this purpose.
3. Click the COPY button on the toolbar, and close the table.
4. Open the table into which you would like to put the records.
5. Select the entire empty record at the bottom of the table by clicking its row selector.
6. Click the PASTE button in the toolbar.
Page 10
NOTES
Lesson Example
You have created an Excel spreadsheet to store student information. You realize now that this data should be stored in an Access table.
STEPS
1. With your Course Schedule database open, click FILE, GET EXTERNAL DATA, then IMPORT.
2. Change the file format in the FILES OF TYPE area to Microsoft Excel (.xls).
3. Select the Student file, then click IMPORT.
4. Be sure the Students worksheet is selected, and click NEXT.
5. Indicate that the first row of information contains labels for column headings (be sure the check box is checked). Click NEXT.
6. Choose to have the data go into a new table. Click NEXT twice.
7. Choose the StudentID field as the primary key. Click NEXT.
8. Name your new table Students, and click FINISH.
9. Open the Students table and note how many records were imported.
10. Close the Students table.
EXERCISE:
1) Copy the records from the Classes Next Year table into the Classes This Year table.
2) Import the data from the Students worksheet of the People.xls file into the Students table.
3) On Your Own: Copy the student data from the Attendees table of the Test database into the Students table of your Course Schedule database.
4) How many records are now in the Students table?
Page 11
NOTES
Page 12
NOTES
LESSON 2: FORM DESIGN VIEW
OBJECTIVES: Modify form design.Correct tab order.
Creating Forms
OVERVIEW
The Form Wizard allows you to quickly create a data entry form for a table.
STEPS
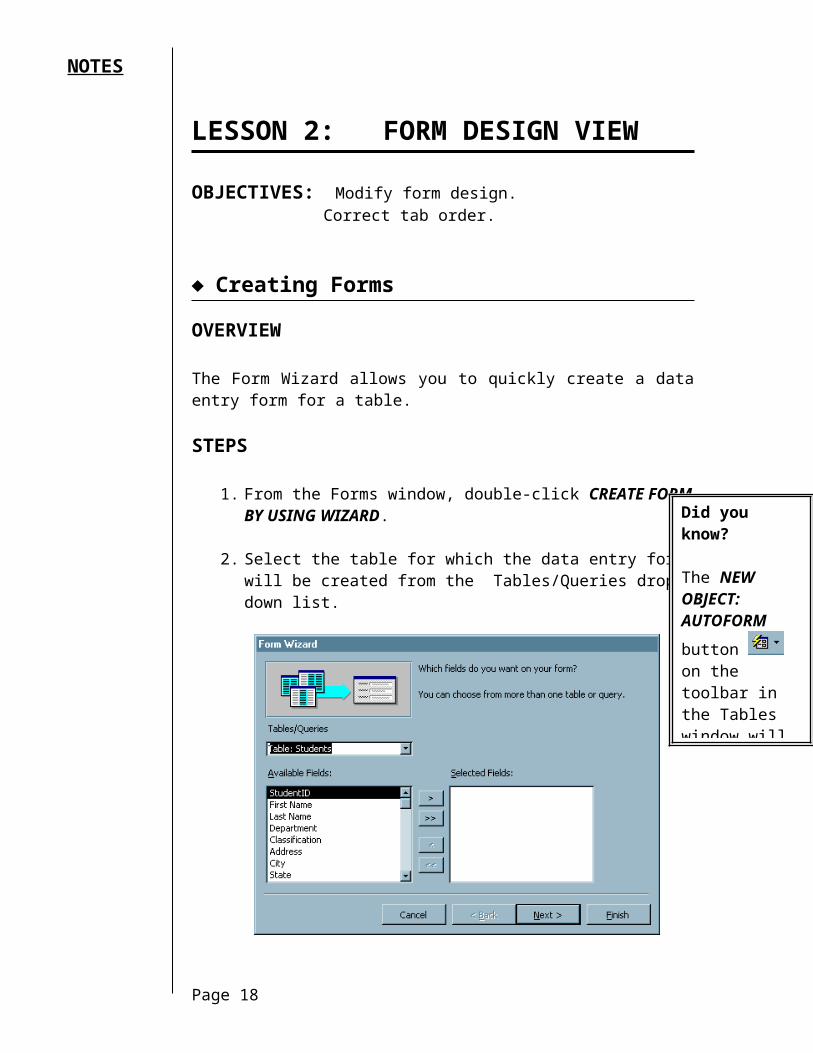
1. From the Forms window, double-click CREATE FORM BY USING WIZARD.
2. Select the table for which the data entry form will be created from the Tables/Queries drop-down list.
3. Send the fields you wish to appear in the form to the Selected Fields box by clicking the name of the field in the Available Fields box, then clicking the button. Or, double-click each field name to be sent. If you wish to select all fields, click the button. Click NEXT.
Page 13
Did you know?
The NEW OBJECT: AUTOFORM
button on the toolbar in the Tables window will create a form based on the selected table instantly.
NOTES
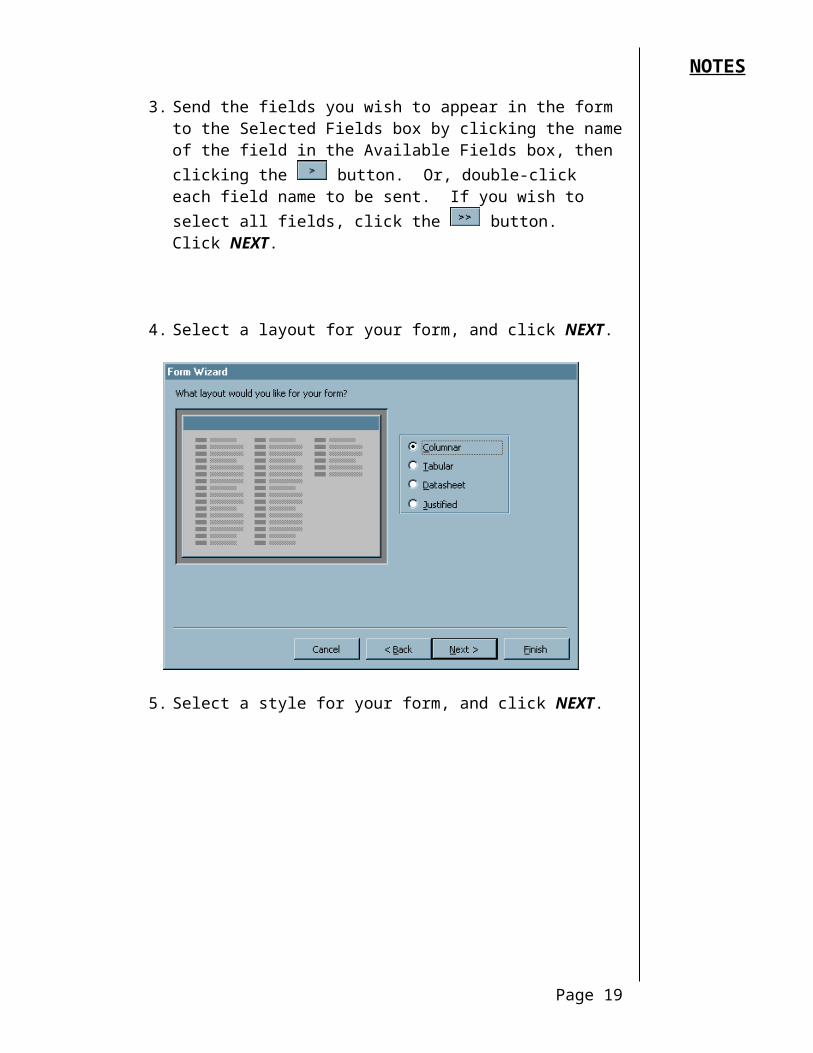
4. Select a layout for your form, and click NEXT.
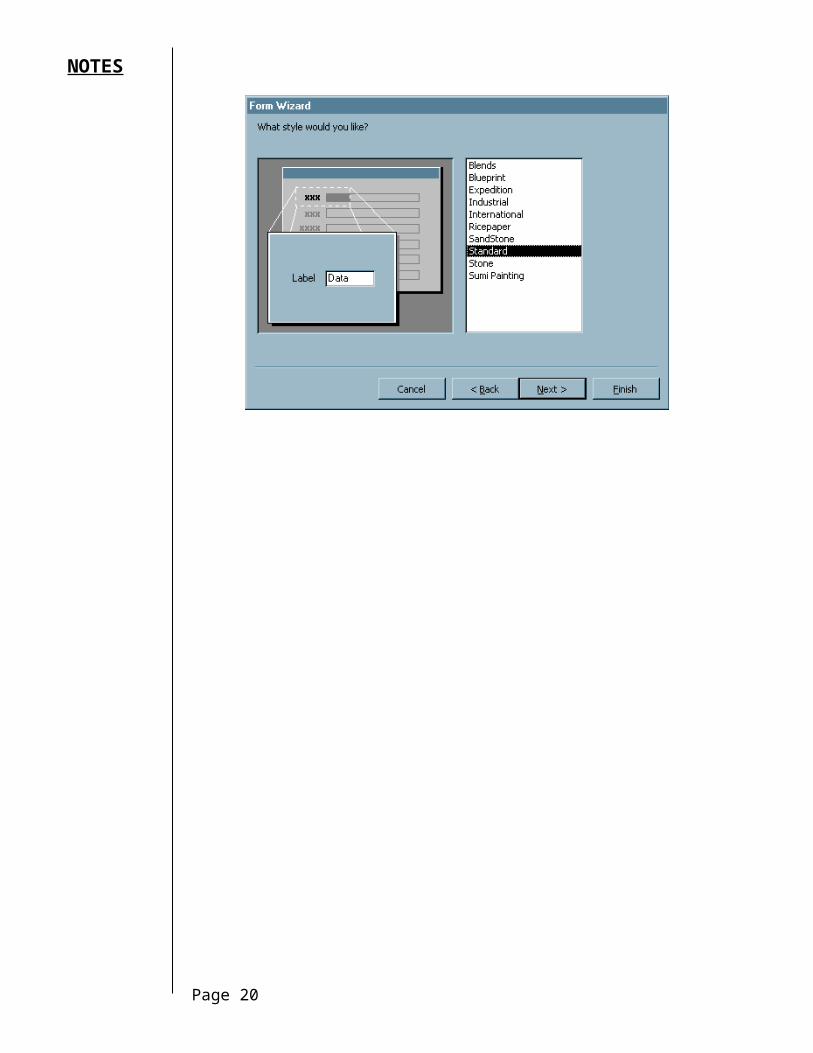
5. Select a style for your form, and click NEXT.
Page 14
NOTES
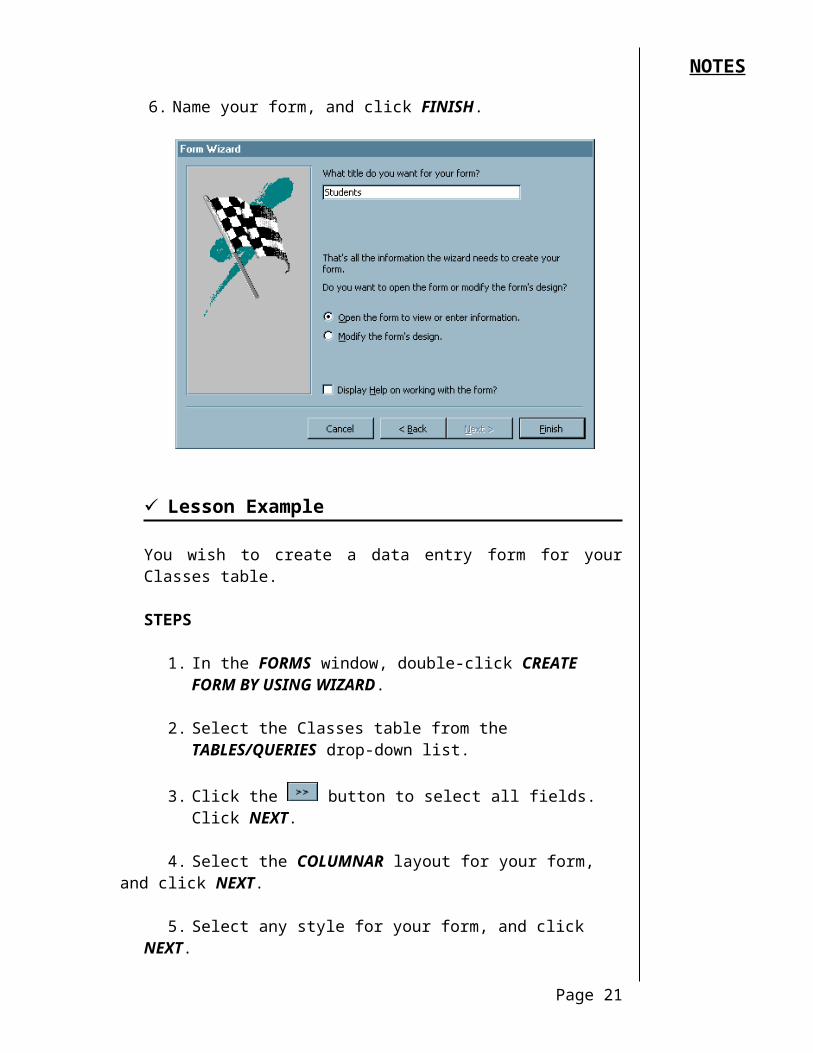
6. Name your form, and click FINISH.
Lesson Example
You wish to create a data entry form for your Classes table.
STEPS
1. In the FORMS window, double-click CREATE FORM BY USING WIZARD.
2. Select the Classes table from the TABLES/QUERIES drop-down list.
3. Click the button to select all fields. Click NEXT.
4. Select the COLUMNAR layout for your form, and click NEXT.
5. Select any style for your form, and click NEXT.
6. Name your form Classes, and click FINISH.
7. Close the form.
Page 15
NOTES
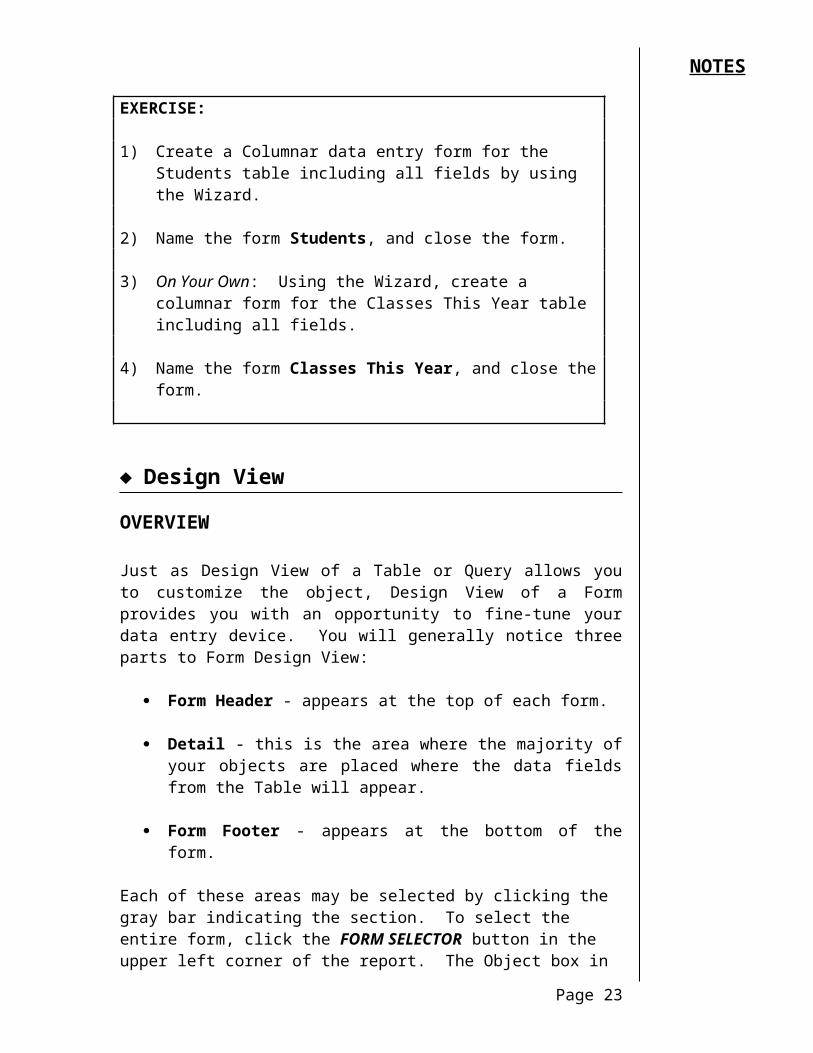
EXERCISE:
1) Create a Columnar data entry form for the Students table including all fields by using the Wizard.
2) Name the form Students, and close the form.
3) On Your Own: Using the Wizard, create a columnar form for the Classes This Year table including all fields.
4) Name the form Classes This Year, and close the form.
Design View
OVERVIEW
Just as Design View of a Table or Query allows you to customize the object, Design View of a Form provides you with an opportunity to fine-tune your data entry device. You will generally notice three parts to Form Design View:
Form Header - appears at the top of each form.
Detail - this is the area where the majority of your objects are placed where the data fields from the Table will appear.
Form Footer - appears at the bottom of the form.
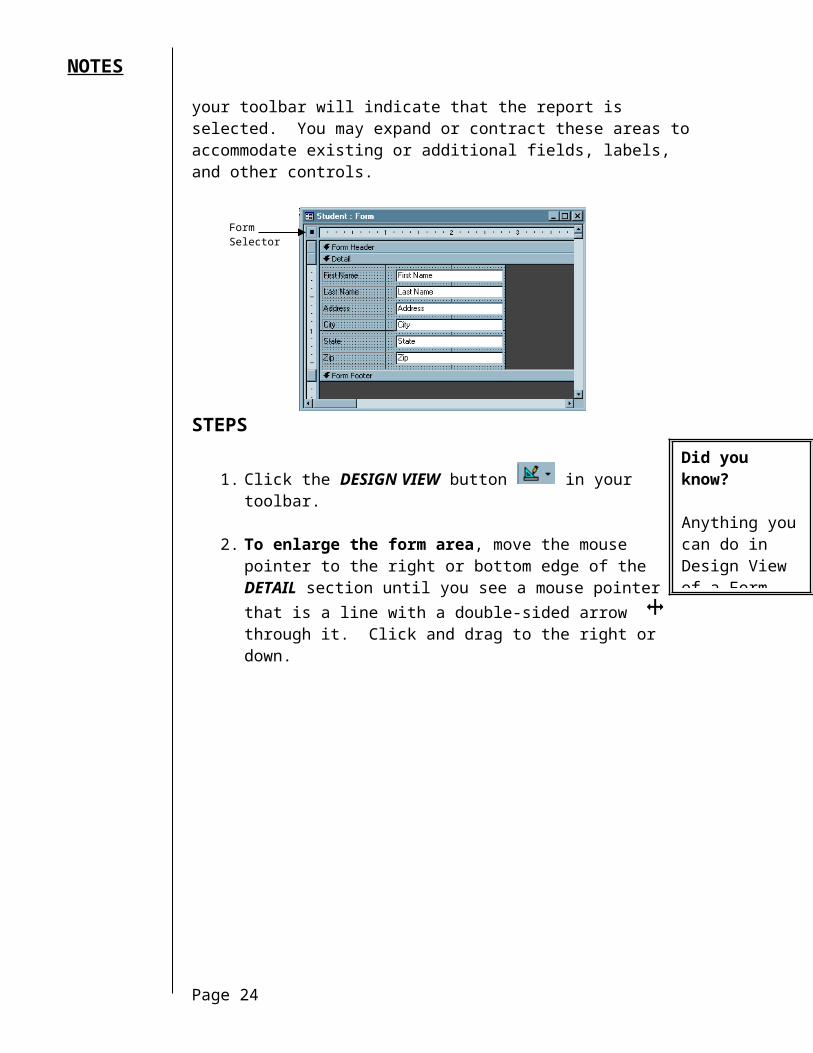
Each of these areas may be selected by clicking the gray bar indicating the section. To select the entire form, click the FORM SELECTOR button in the upper left corner of the report. The Object box in your toolbar will indicate that the report is selected. You may expand or contract these areas to accommodate existing or additional fields, labels, and other controls.
Page 16
NOTES
STEPS
1. Click the DESIGN VIEW button in your toolbar.
2. To enlarge the form area, move the mouse pointer to the right or bottom edge of the DETAIL section until you see a mouse pointer that is a line with a double-sided arrow through it. Click and drag to the right or down.
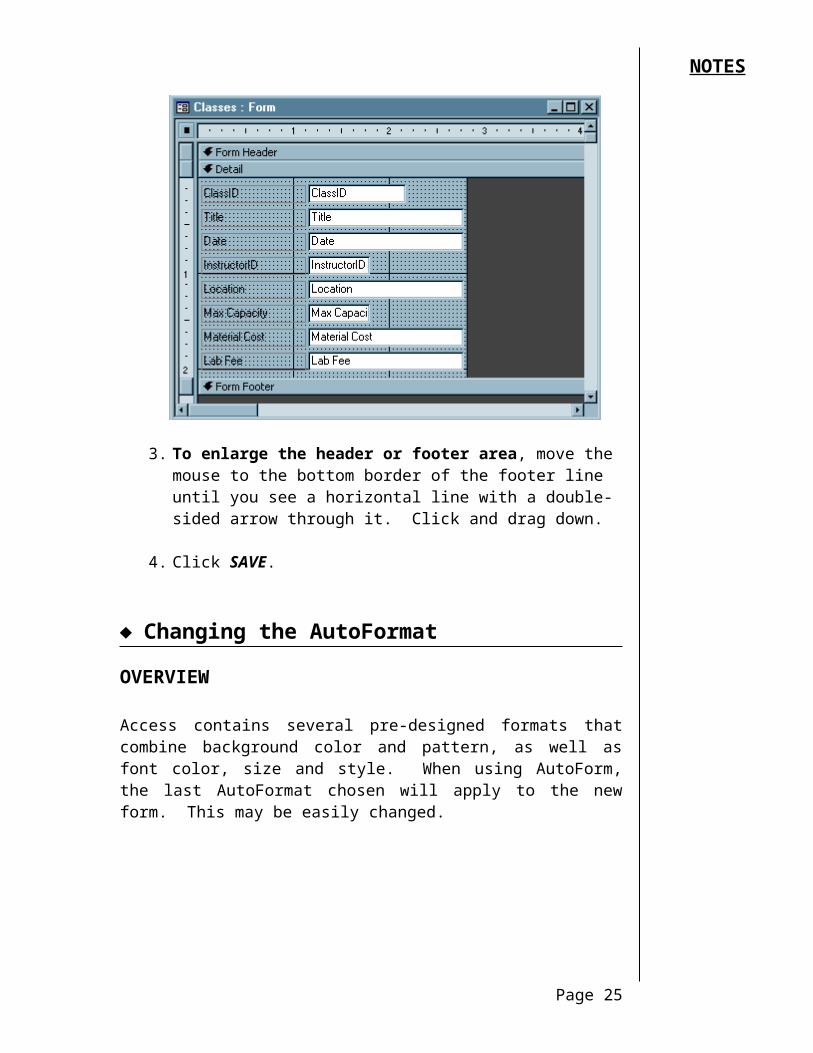
3. To enlarge the header or footer area, move the mouse to the bottom border of the footer line until you see a horizontal line with a double-sided arrow through it. Click and drag down.
4. Click SAVE.
Page 17
Form Selector
Did you know?
Anything you can do in Design View of a Form can be done in Design View of a Report.
NOTES
Changing the AutoFormat
OVERVIEW
Access contains several pre-designed formats that combine background color and pattern, as well as font color, size and style. When using AutoForm, the last AutoFormat chosen will apply to the new form. This may be easily changed.
Page 18
NOTES
STEPS
1. In Design View of the form, be certain the entire form is selected by clicking the FORM SELECTOR in the upper left corner.
2. Click FORMAT on the Menu bar, then AUTOFORMAT. Or, click
the AUTOFORMAT button on the Toolbar.
3. Select the new background that you want. Click OK.
Changing Fonts
OVERVIEW
AutoFormat determines font sizes, colors and styles. However, these may be changed for individual controls as needed.
STEPS
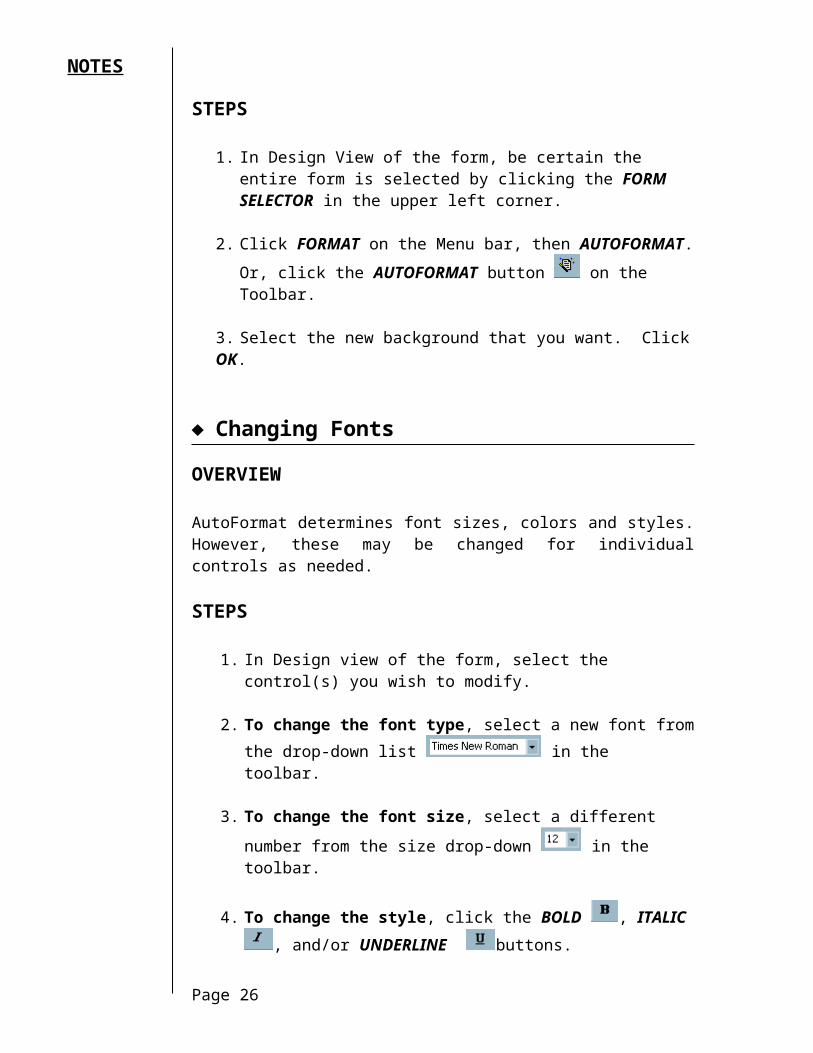
1. In Design view of the form, select the control(s) you wish to modify.
2. To change the font type, select a new font from the drop-down list in the toolbar.
3. To change the font size, select a different number from the size
drop-down in the toolbar.
4. To change the style, click the BOLD , ITALIC , and/or UNDERLINE buttons.
5. To change text alignment, click the appropriate alignment button
in the toolbar.
Adding Color
STEPS
1. From Design view of the form, click the control(s) you want to change.
Page 19
NOTES
2. To color the background fill of an object, click the FILL button on the toolbar, or use the drop-down arrow to choose another
color.
3. To change text color, click the TEXT button on the toolbar, or use the drop-down arrow to choose another color.
4. To change a line color, click the LINE button on the toolbar, or use the drop-down arrow to choose another color.
5. Save your changes.
6. Click the FORM VIEW button on the toolbar to see the form.
Lesson Example
You would like to make some formatting changes to your Instructor form.
STEPS
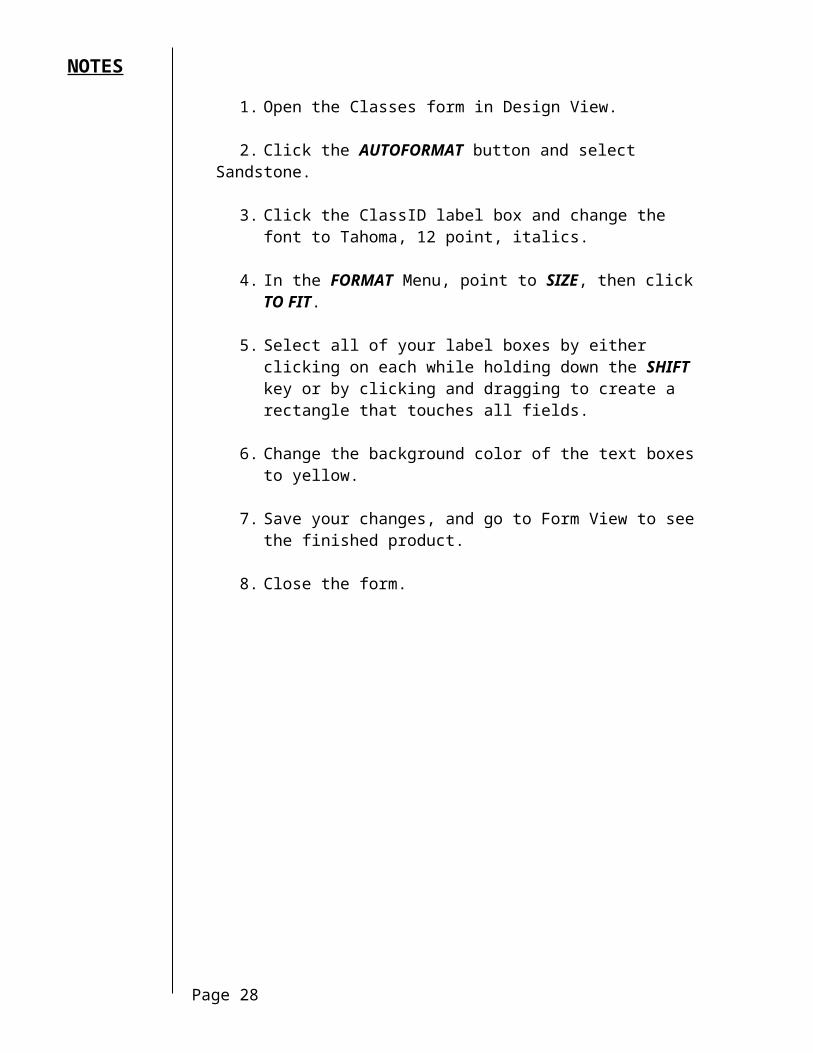
1. Open the Classes form in Design View.
2. Click the AUTOFORMAT button and select Sandstone.
3. Click the ClassID label box and change the font to Tahoma, 12 point, italics.
4. In the FORMAT Menu, point to SIZE, then click TO FIT.
5. Select all of your label boxes by either clicking on each while holding down the SHIFT key or by clicking and dragging to create a rectangle that touches all fields.
6. Change the background color of the text boxes to yellow.
7. Save your changes, and go to Form View to see the finished product.
8. Close the form.
Page 20
NOTES
EXERCISE:
1) Open the Students form in Design View.
2) Change the AutoFormat to Standard.
3) Change the font, color and background color of all of your fields' text boxes as you wish.
4) On Your Own: Change the AutoFormat to one of your choosing. What happens to your previous formatting choices?
5) Save the form, and look at it in Form View.
6) Close the form.
Arranging Form Controls
OVERVIEW
You may customize a form so that it is easier to enter information, or change the order in which Access presents the information.
STEPS
1. To move a text box and its label, click and drag the control using the open hand mouse pointer .
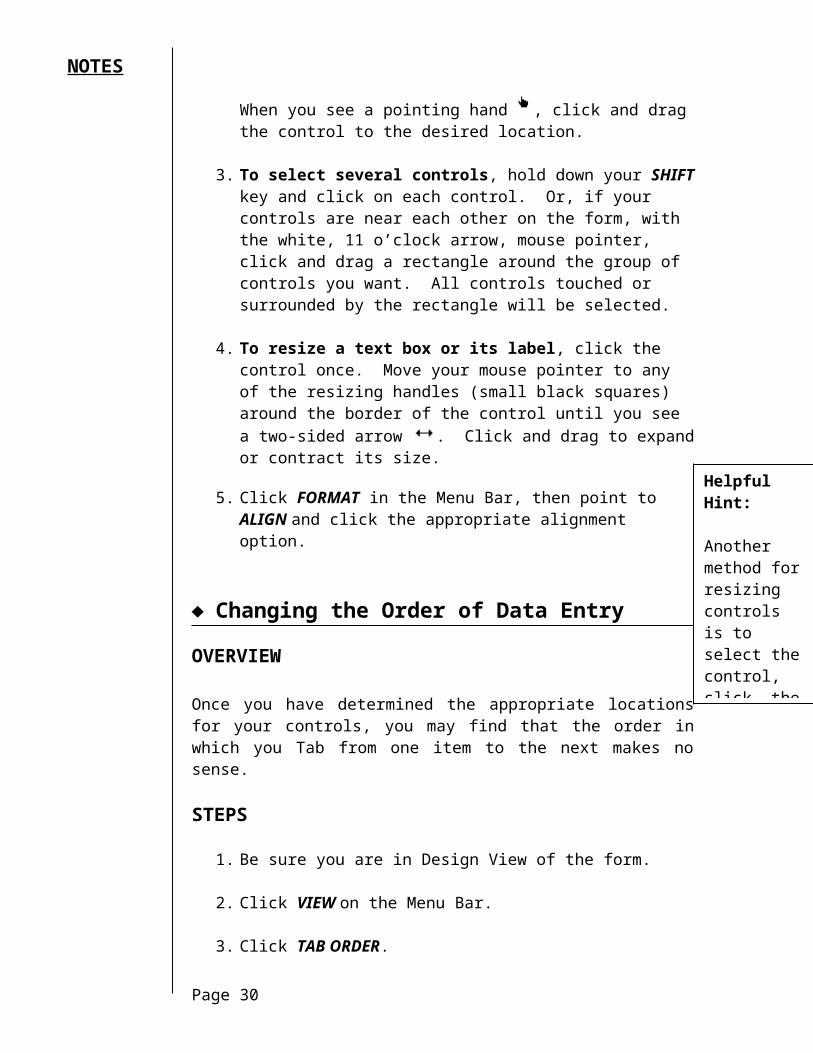
2. To move a text box or its label, click the control once. Move your mouse pointer to the upper left corner of the item you wish to move. When you see a pointing hand , click and drag the control to the desired location.
3. To select several controls, hold down your SHIFT key and click on each control. Or, if your controls are near each other on the form, with the white, 11 o’clock arrow, mouse pointer, click and drag a rectangle around the group of controls you want. All controls touched or surrounded by the rectangle will be selected.
Page 21
Did you know?
CTRL + the arrow keys move selected controls in very tiny increments.
NOTES
4. To resize a text box or its label, click the control once. Move your mouse pointer to any of the resizing handles (small black squares) around the border of the control until you see a two-sided arrow . Click and drag to expand or contract its size.
5. Click FORMAT in the Menu Bar, then point to ALIGN and click the appropriate alignment option.
Changing the Order of Data Entry
OVERVIEW
Once you have determined the appropriate locations for your controls, you may find that the order in which you Tab from one item to the next makes no sense.
STEPS
1. Be sure you are in Design View of the form.
2. Click VIEW on the Menu Bar.
3. Click TAB ORDER.
4. Be sure the DETAIL radio button is selected.
5. To change the tab order, click the gray box in front of the field to move, then click and drag it to a new place in the list. Click OK.
Page 22
Helpful Hint:
Another method for resizing controls is to select the control, click the FORMAT menu, point to SIZE, then click TO FIT.
NOTES
6. To quickly set a "logical" field order, i.e. from left to right/top to bottom of the form, click AUTO ORDER.
Lesson Example
You wish to rearrange the controls on your Instructors form.
STEPS
1. Open the Classes form in Design View.
2. Move the Date field before the Title field.
3. Save your changes and go to Form View.
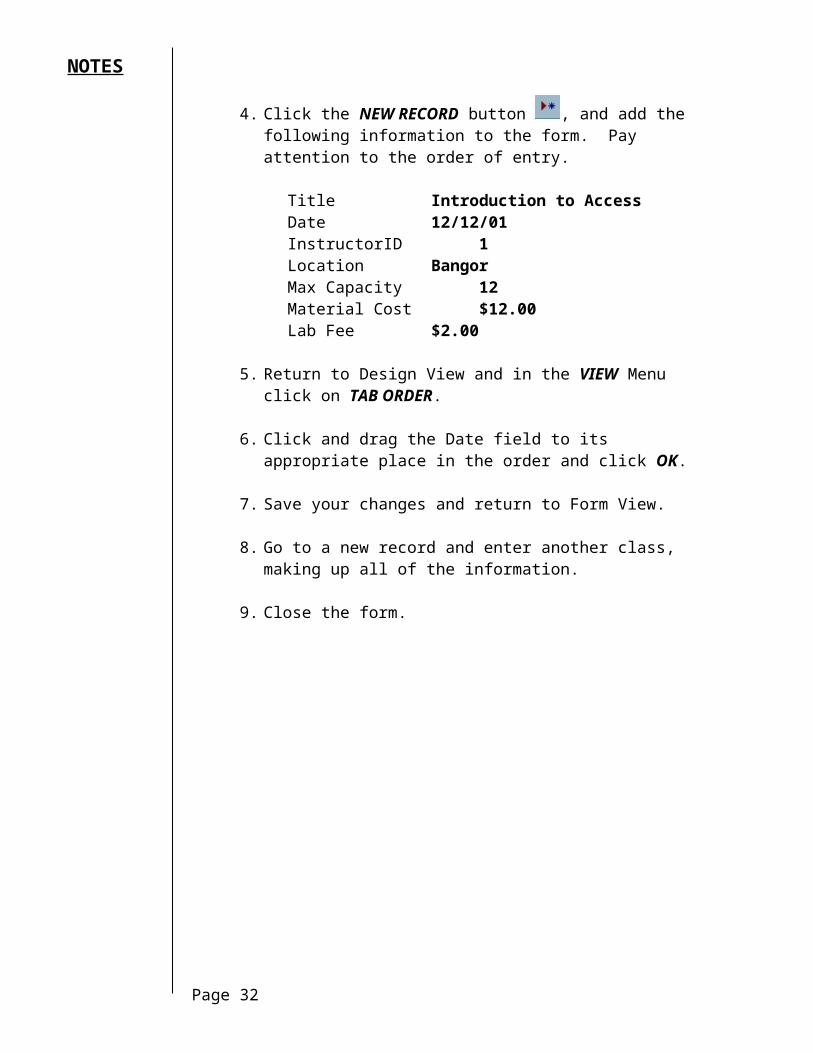
4. Click the NEW RECORD button , and add the following information to the form. Pay attention to the order of entry.
Title Introduction to AccessDate 12/12/01InstructorID 1Location BangorMax Capacity 12Material Cost $12.00Lab Fee $2.00
5. Return to Design View and in the VIEW Menu click on TAB ORDER.
6. Click and drag the Date field to its appropriate place in the order and click OK.
7. Save your changes and return to Form View.
8. Go to a new record and enter another class, making up all of the information.
9. Close the form.
Page 23
NOTES
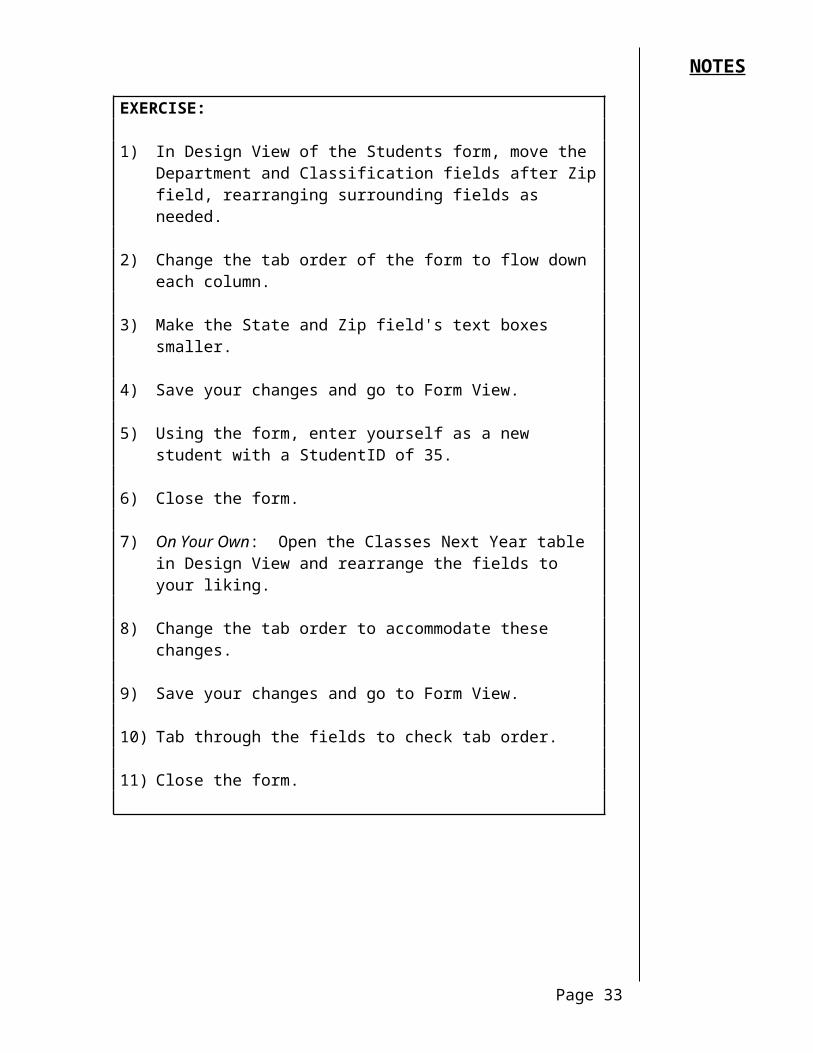
EXERCISE:
1) In Design View of the Students form, move the Department and Classification fields after Zip field, rearranging surrounding fields as needed.
2) Change the tab order of the form to flow down each column.
3) Make the State and Zip field's text boxes smaller.
4) Save your changes and go to Form View.
5) Using the form, enter yourself as a new student with a StudentID of 35.
6) Close the form.
7) On Your Own: Open the Classes Next Year table in Design View and rearrange the fields to your liking.
8) Change the tab order to accommodate these changes.
9) Save your changes and go to Form View.
10) Tab through the fields to check tab order.
11) Close the form.
Page 24
NOTES
LESSON 3: DATABASE RELATIONSHIPS
OBJECTIVES: Understand the different types of relationships.Create relationships.
OVERVIEW
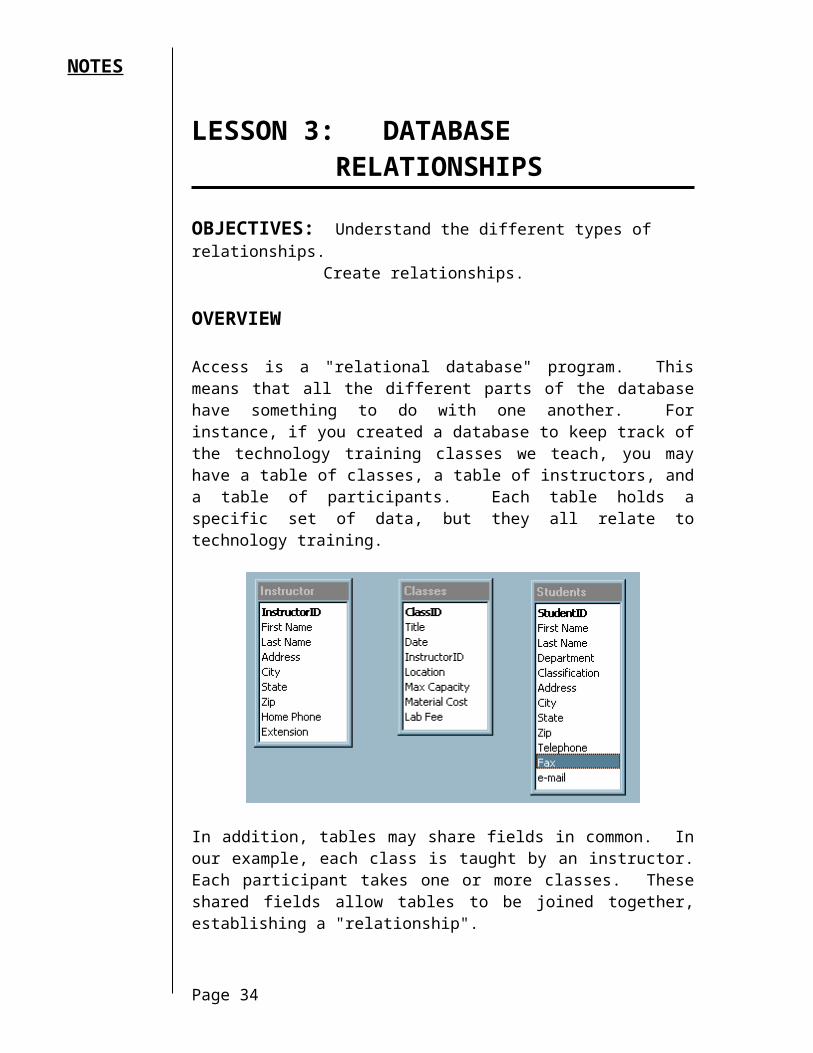
Access is a "relational database" program. This means that all the different parts of the database have something to do with one another. For instance, if you created a database to keep track of the technology training classes we teach, you may have a table of classes, a table of instructors, and a table of participants. Each table holds a specific set of data, but they all relate to technology training.
In addition, tables may share fields in common. In our example, each class is taught by an instructor. Each participant takes one or more classes. These shared fields allow tables to be joined together, establishing a "relationship".
Page 25
NOTES
Determining how tables relate is usually very simple. If a field in one table has the same name and purpose as that in another table, it is a natural place for the tables to join. In most cases, the primary key of one table, which provides a unique identifier for each record, matches a field in the second table, called the "foreign key".
Related items in a database must be joined together so Access can recognize the relationship. The following will describe the different types of relationships that can be established and how to create those relationships.
Relationship Types
OVERVIEW
There are three basic types of relationships: one to one, one to many, and many to many.
A one-to-one relationship means that only one record in the first table can match only one record in the second. This type of relationship is rare, because these records should actually appear together in one table. It usually exists when the table's information must be split into separate tables for data entry or security reasons.
Page 26
NOTES
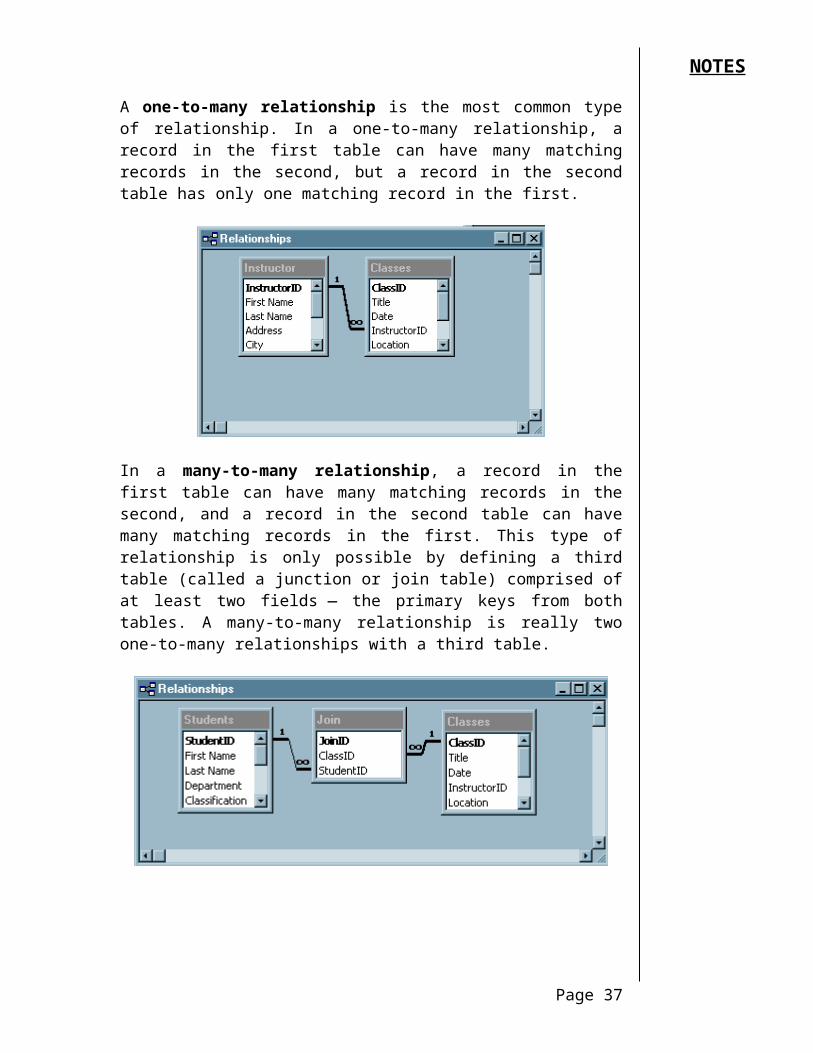
A one-to-many relationship is the most common type of relationship. In a one-to-many relationship, a record in the first table can have many matching records in the second, but a record in the second table has only one matching record in the first.
In a many-to-many relationship, a record in the first table can have many matching records in the second, and a record in the second table can have many matching records in the first. This type of relationship is only possible by defining a third table (called a junction or join table) comprised of at least two fields — the primary keys from both tables. A many-to-many relationship is really two one-to-many relationships with a third table.
Building Relationships Using the Table Wizard
OVERVIEW
When creating a table using the Wizard, if any other tables exist in the database, the Wizard will include a section for joining the new table with others.
Page 27
NOTES
STEPS
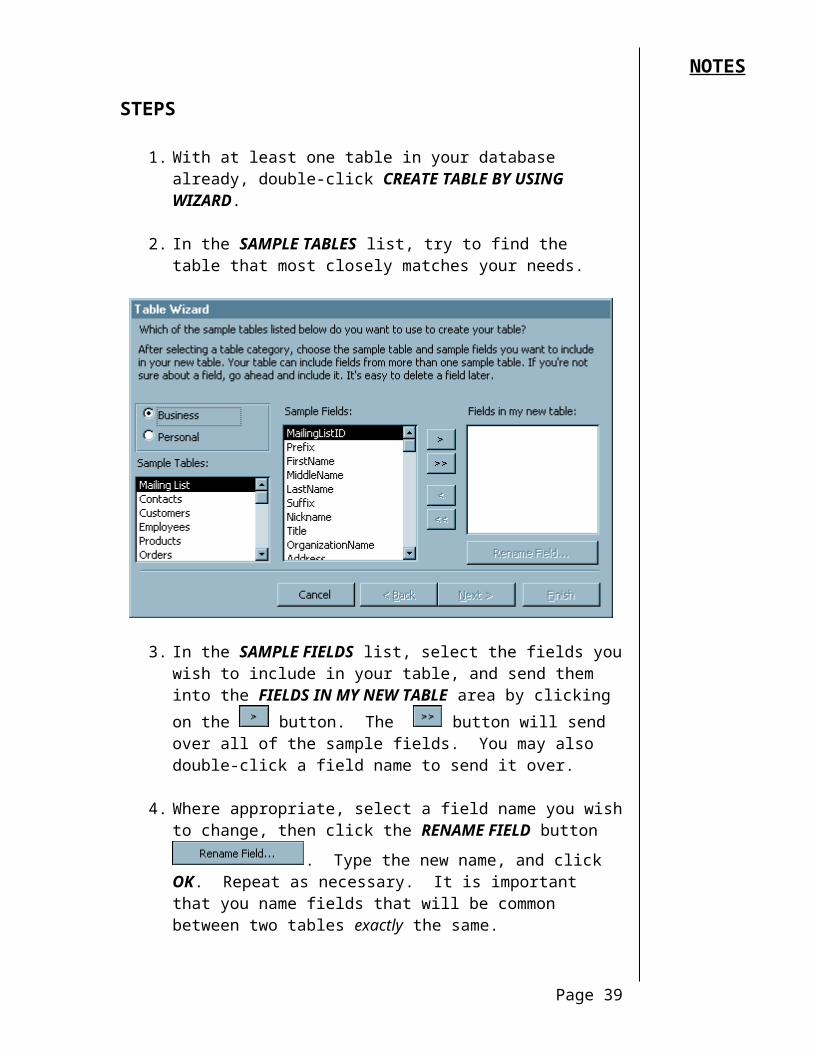
1. With at least one table in your database already, double-click CREATE TABLE BY USING WIZARD.
2. In the SAMPLE TABLES list, try to find the table that most closely matches your needs.
3. In the SAMPLE FIELDS list, select the fields you wish to include in your table, and send them into the FIELDS IN MY NEW TABLE area by clicking on the button. The button will send over all of the sample fields. You may also double-click a field name to send it over.
4. Where appropriate, select a field name you wish to change, then click
the RENAME FIELD button . Type the new name, and click OK. Repeat as necessary. It is important that you name fields that will be common between two tables exactly the same.
5. Click NEXT.
Page 28
NOTES
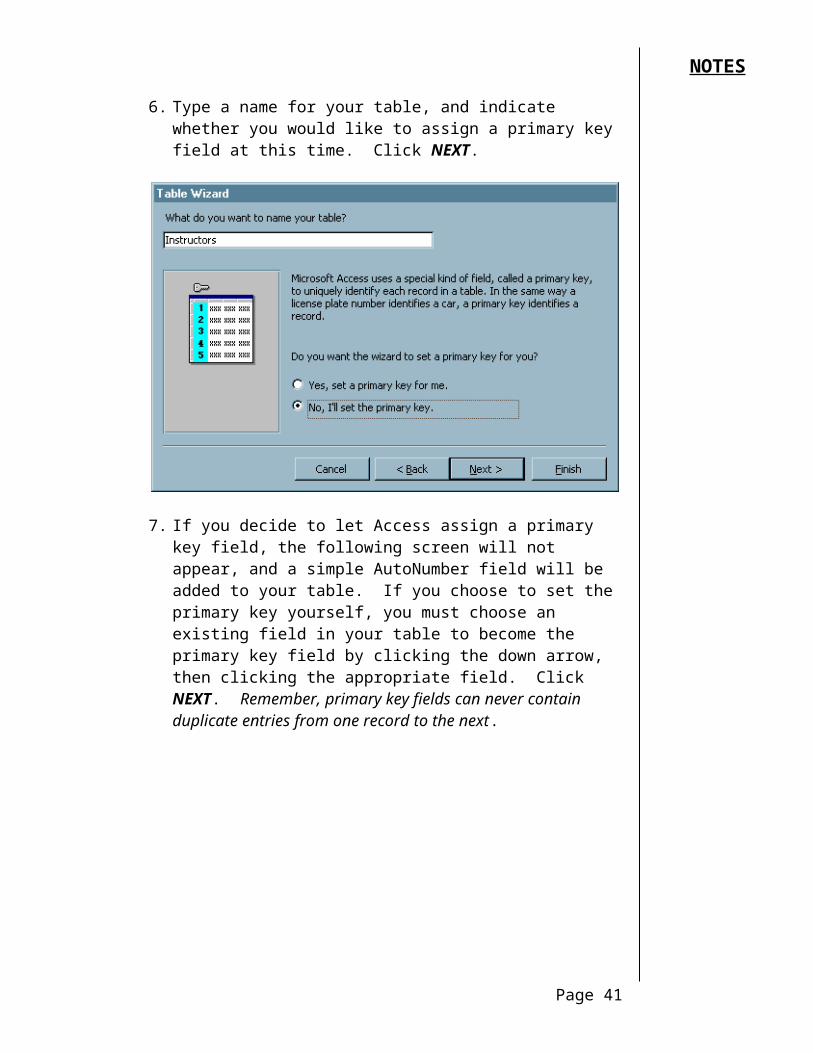
6. Type a name for your table, and indicate whether you would like to assign a primary key field at this time. Click NEXT.
7. If you decide to let Access assign a primary key field, the following screen will not appear, and a simple AutoNumber field will be added to your table. If you choose to set the primary key yourself, you must choose an existing field in your table to become the primary key field by clicking the down arrow, then clicking the appropriate field. Click NEXT. Remember, primary key fields can never contain duplicate entries from one record to the next.
Page 29
NOTES
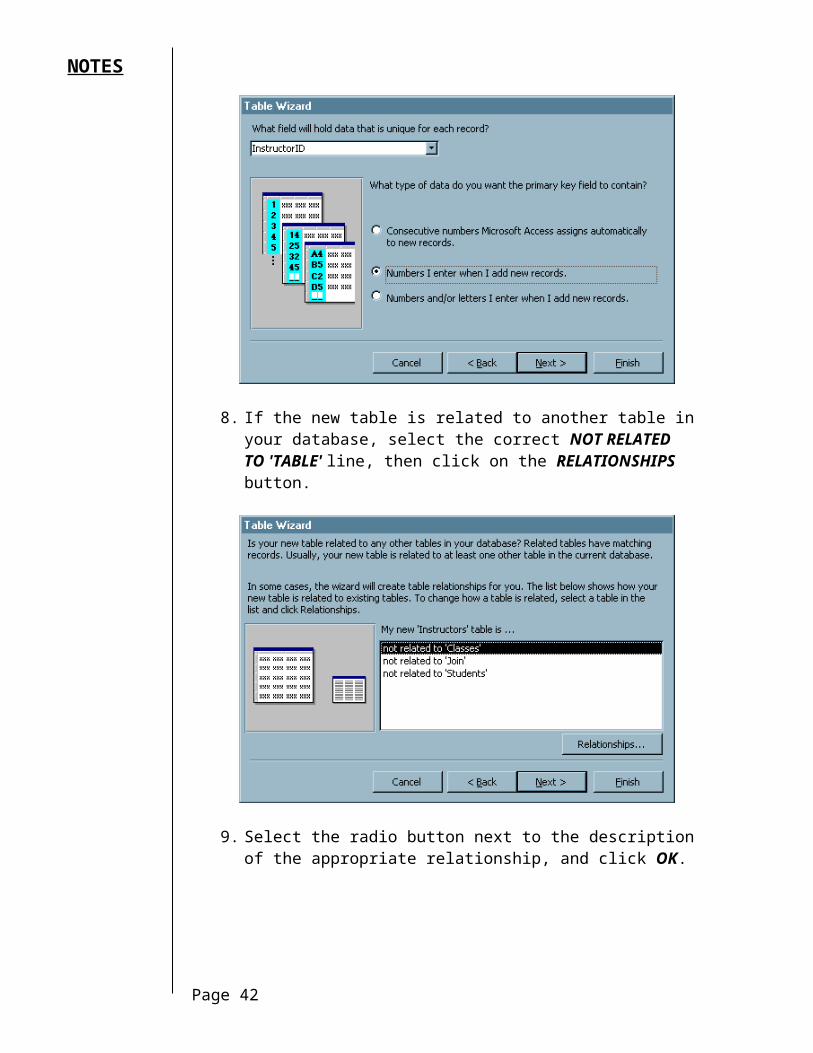
8. If the new table is related to another table in your database, select the correct NOT RELATED TO 'TABLE' line, then click on the RELATIONSHIPS button.
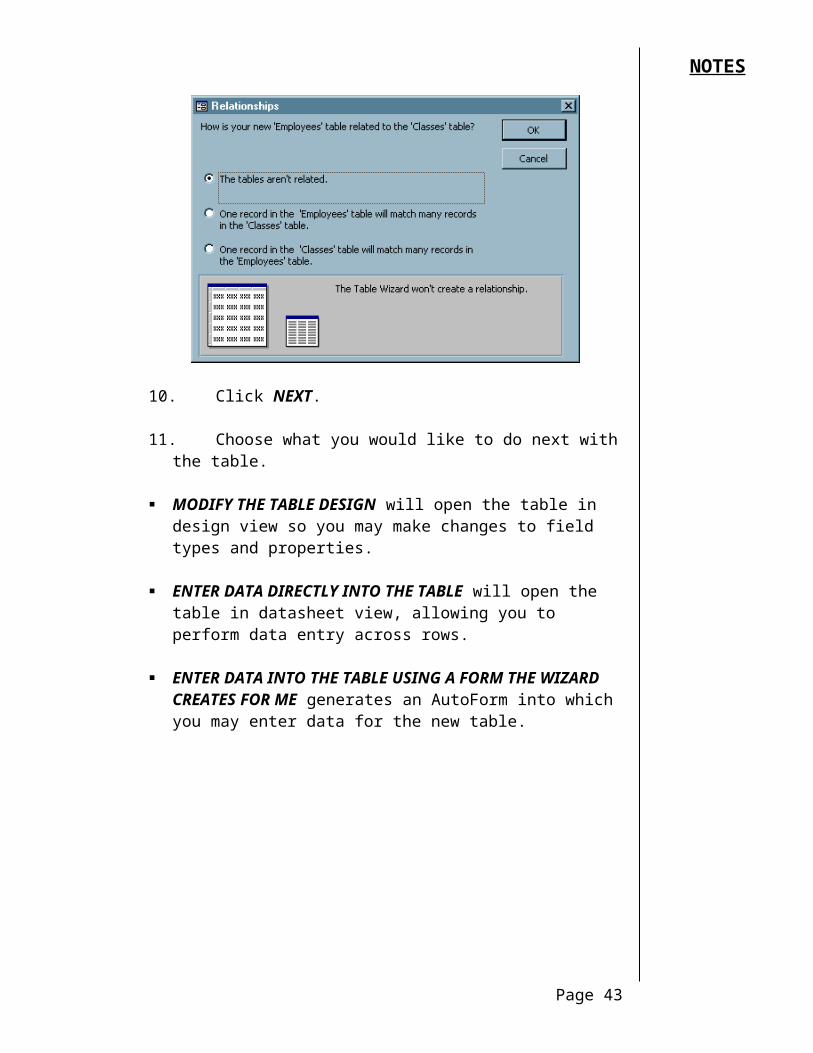
9. Select the radio button next to the description of the appropriate relationship, and click OK.
10. Click NEXT.
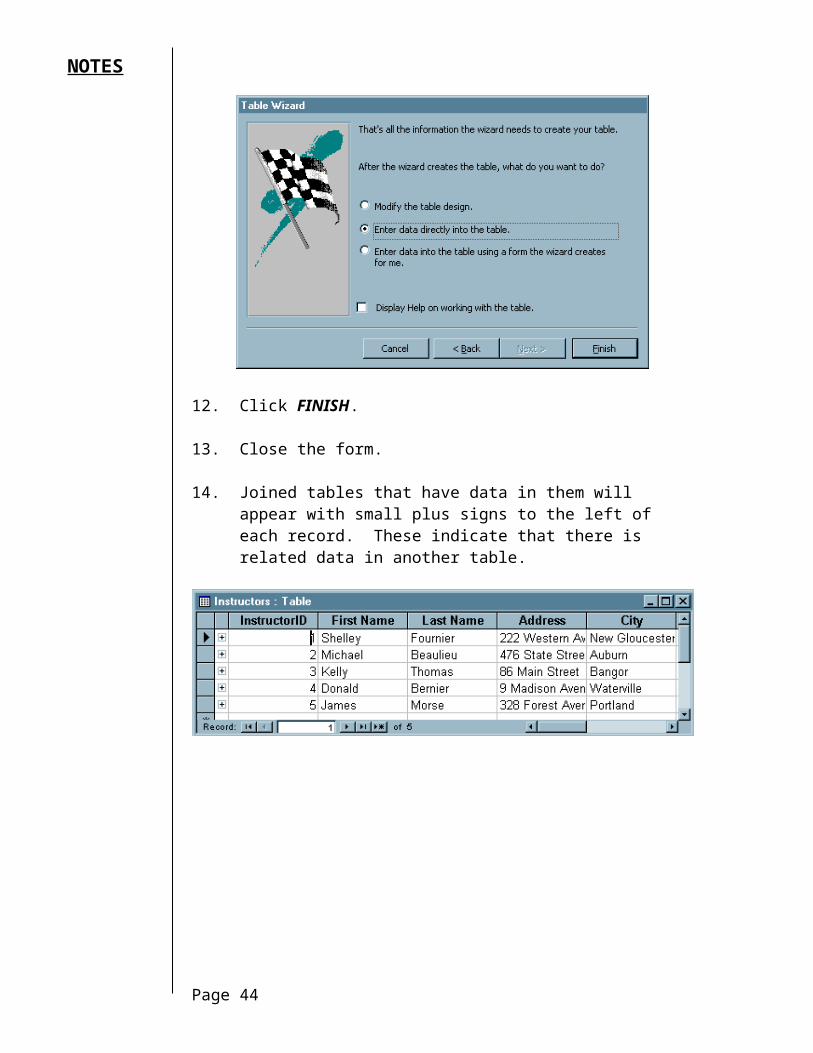
11. Choose what you would like to do next with the table.
MODIFY THE TABLE DESIGN will open the table in design view so you may make changes to field types and properties.
Page 30
NOTES
ENTER DATA DIRECTLY INTO THE TABLE will open the table in datasheet view, allowing you to perform data entry across rows.
ENTER DATA INTO THE TABLE USING A FORM THE WIZARD CREATES FOR ME generates an AutoForm into which you may enter data for the new table.
12. Click FINISH.
13. Close the form.
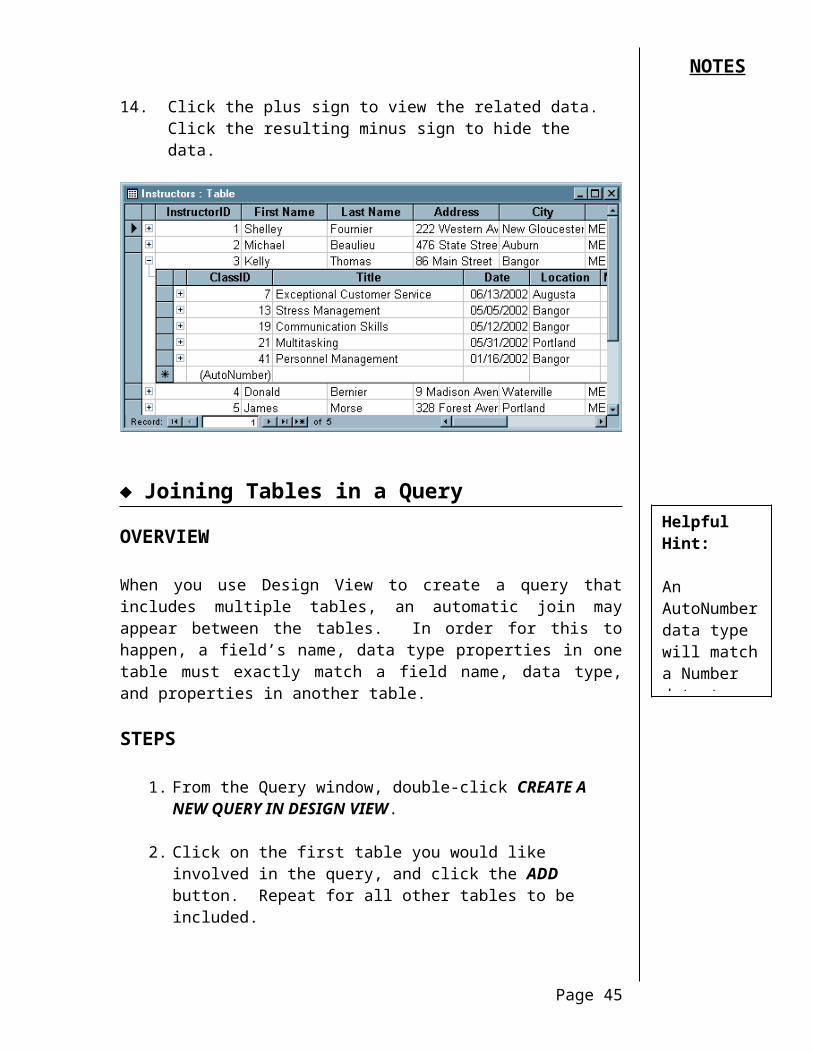
14. Joined tables that have data in them will appear with small plus signs to the left of each record. These indicate that there is related data in another table.
Page 31
NOTES
14. Click the plus sign to view the related data. Click the resulting minus sign to hide the data.
Joining Tables in a Query
OVERVIEW
When you use Design View to create a query that includes multiple tables, an automatic join may appear between the tables. In order for this to happen, a field’s name, data type properties in one table must exactly match a field name, data type, and properties in another table.
STEPS
1. From the Query window, double-click CREATE A NEW QUERY IN DESIGN VIEW.
2. Click on the first table you would like involved in the query, and click the ADD button. Repeat for all other tables to be included.
Page 32
Helpful Hint:
An AutoNumber data type will match a Number data type in another table.
NOTES
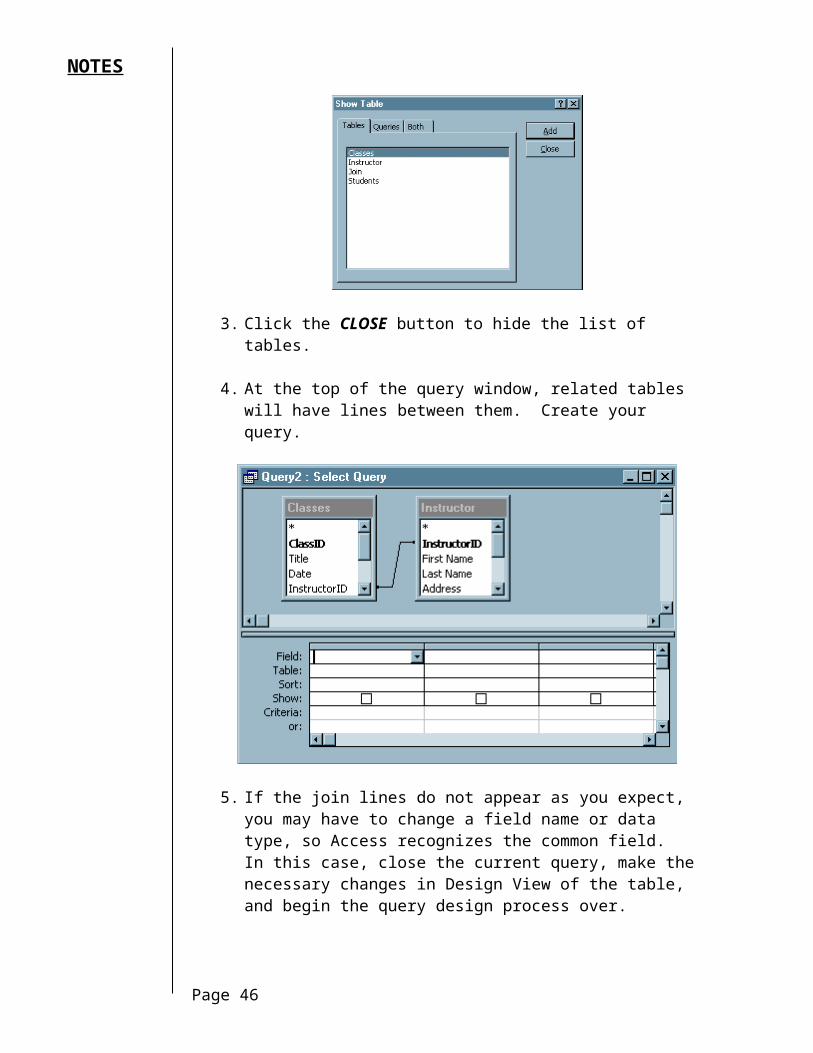
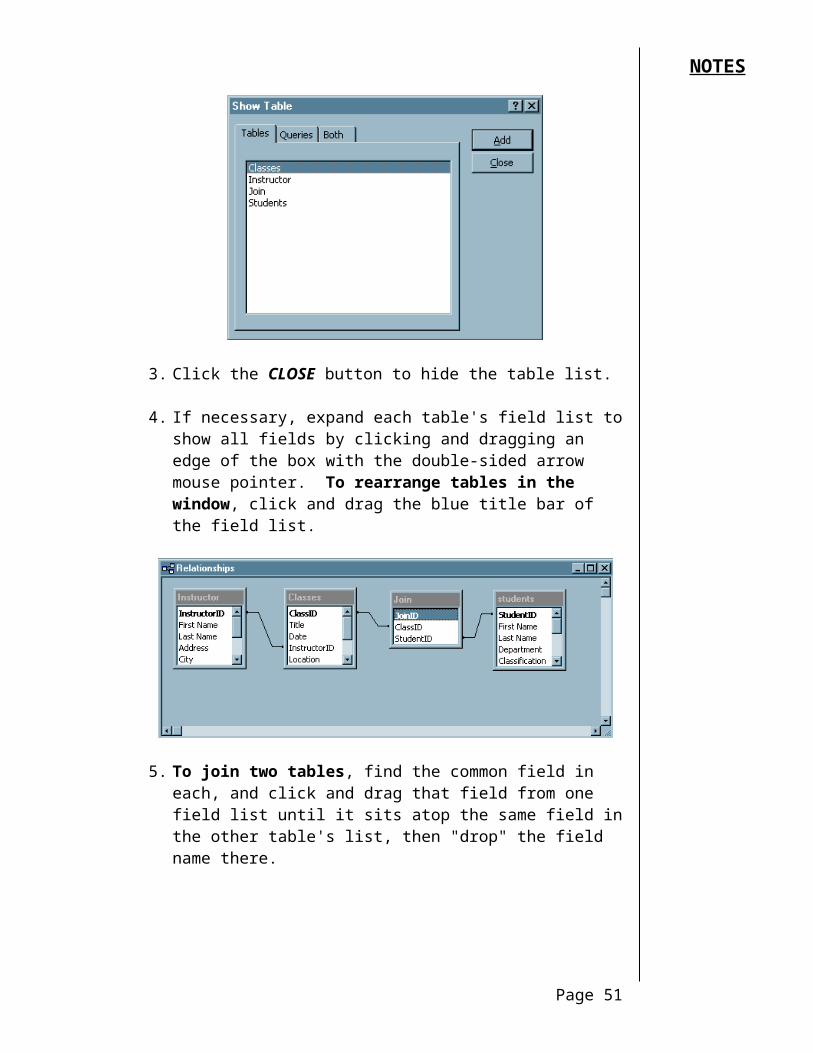
3. Click the CLOSE button to hide the list of tables.
4. At the top of the query window, related tables will have lines between them. Create your query.
5. If the join lines do not appear as you expect, you may have to change a field name or data type, so Access recognizes the common field. In this case, close the current query, make the necessary changes in Design View of the table, and begin the query design process over.
Lesson Example
You need to create a new table in which you will record Instructor information. This table will be related to the Classes table, because each class is taught by an instructor. The Classes table already includes a field to capture the InstructorID.
STEPS
1. Double-click CREATE TABLE BY USING WIZARD.
2. Choose the Employees sample table as the basis for your table.
3. Double-click EmployeeID to send it to the list of fields to include in your table.
4. Click the RENAME FIELD button, type InstructorID as the new name for the field, and click OK.
Page 33
Helpful Hint:
Before creating a new table, check Design View of any tables that may be related to check the common fields’ details.
NOTES
5. Choose the following additional fields for your table, renaming as indicated:
Field New NameFirstNameLastNameAddressCityStateorProvince StatePostalCode ZipHomePhoneExtension WorkExtensio
n
6. Click NEXT.
7. Name the table Instructors, and choose the option to set the primary key field. Click NEXT.
8. Choose InstructorID as the primary key field, and select the data option NUMBERS I ENTER WHEN I ADD NEW RECORDS. Click NEXT.
9. Click the line that states that this table is NOT RELATED TO CLASSES, then click the RELATIONSHIPS button.
10. Choose the option to have one record in the Instructors table match many in the Classes table. Click OK.
11. Click NEXT, and be sure the option to enter data directly into the table is chosen.
12. Click FINISH.
13. Copy the data from the Teachers table in the Test database into your Instructors table
14. Close the Instructors table.
EXERCISE:
1) Create a new query in Design View using the following fields from the Classes Next Year and Instructors tables:
Classes Next Year - Title, Date, LocationInstructors - First Name, Last Name
Page 34
NOTES
2) Which fields in these tables are related?
3) Sort the query by Date, and run the query.
4) Save the query as Class List, and close the query.
5) On Your Own: Create a new query in Design View using the following fields from the Classes and Instructors tables:
Classes - Title, DateInstructors - First Name, Last Name
6) Are the two tables related?
7) Sort the query by Title, and run the query.
8) Save the query as Alpha Class List, and close the query.
The Relationships Window
OVERVIEW
The best method for creating relationships is to use the Relationships window. This is an area of Access where you may view all relationships and define their properties.
STEPS
1. From the Database window, click the RELATIONSHIPS button . Any existing relationships will appear.
Page 35
Did you know?
Relationships created in a Query do not appear in the Relationships Window, and only apply within the query.
Helpful Hint:
Queries and Tables may not have the same name.
NOTES
2. To include additional tables, click the SHOW TABLE button in the toolbar, then click on a table, and click the ADD button. Repeat for all tables.
3. Click the CLOSE button to hide the table list.
4. If necessary, expand each table's field list to show all fields by clicking and dragging an edge of the box with the double-sided arrow mouse pointer. To rearrange tables in the window, click and drag the blue title bar of the field list.
Page 36
NOTES
5. To join two tables, find the common field in each, and click and drag that field from one field list until it sits atop the same field in the other table's list, then "drop" the field name there.
Page 37
NOTES
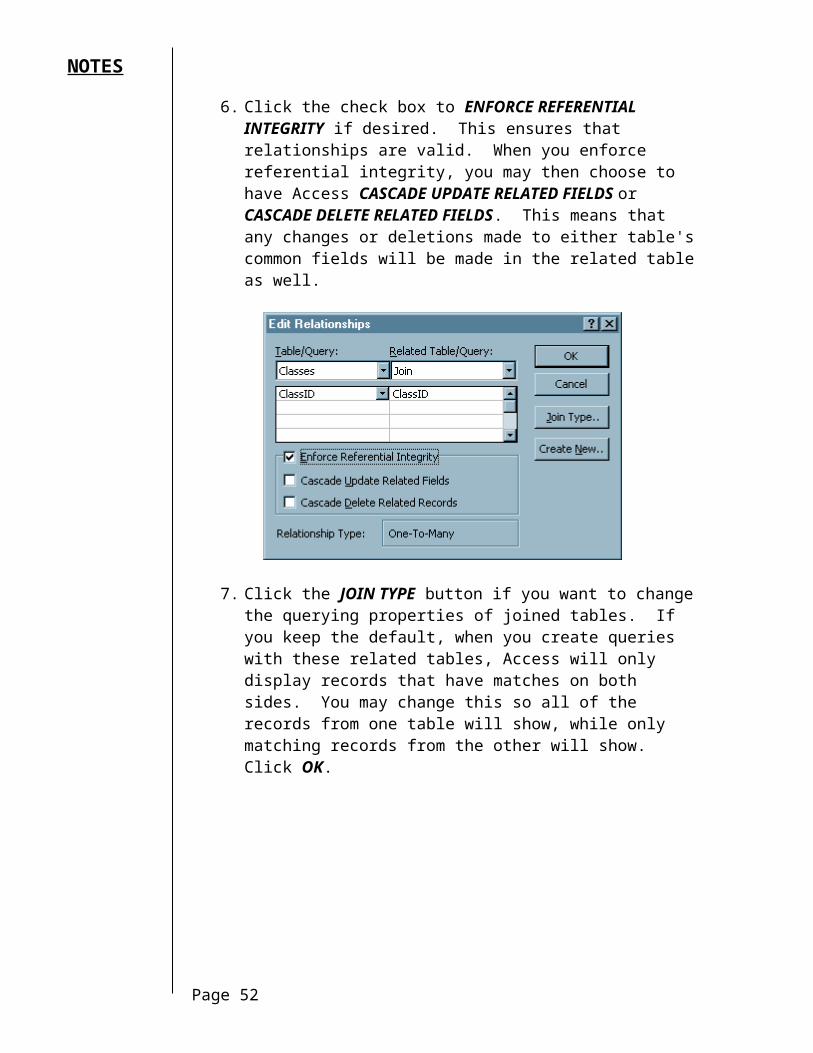
6. Click the check box to ENFORCE REFERENTIAL INTEGRITY if desired. This ensures that relationships are valid. When you enforce referential integrity, you may then choose to have Access CASCADE UPDATE RELATED FIELDS or CASCADE DELETE RELATED FIELDS. This means that any changes or deletions made to either table's common fields will be made in the related table as well.
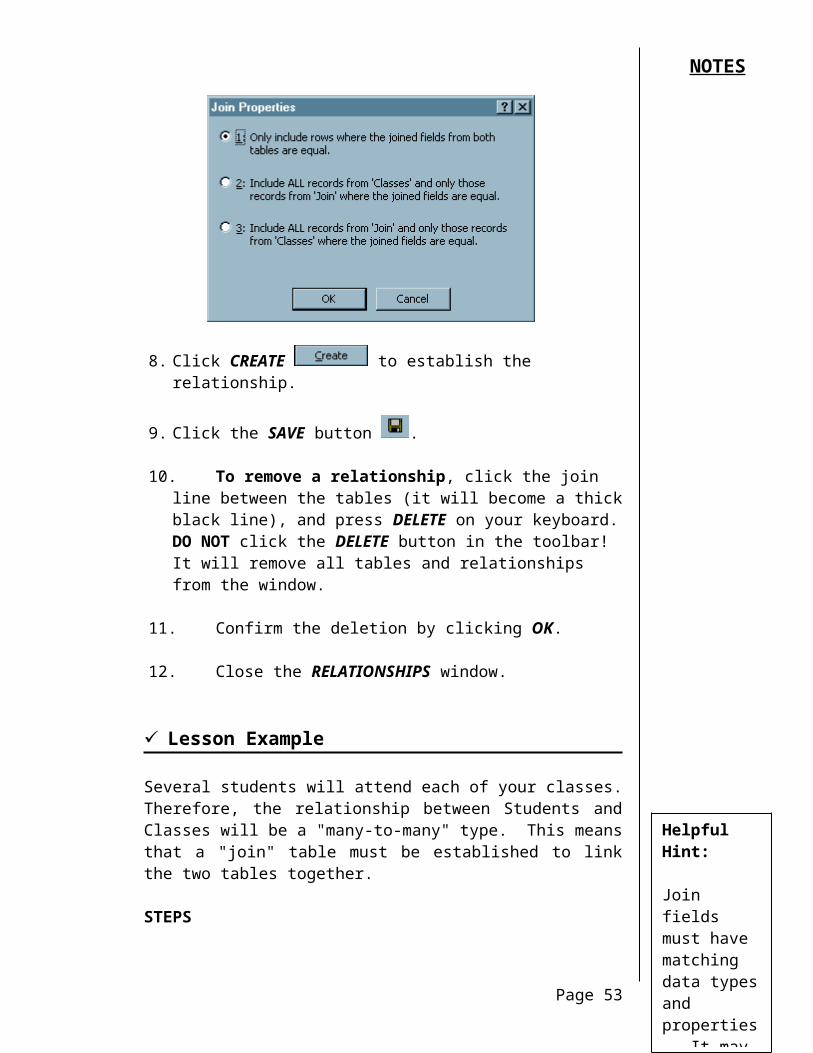
7. Click the JOIN TYPE button if you want to change the querying properties of joined tables. If you keep the default, when you create queries with these related tables, Access will only display records that have matches on both sides. You may change this so all of the records from one table will show, while only matching records from the other will show. Click OK.
8. Click CREATE to establish the relationship.
9. Click the SAVE button .
Page 38
NOTES
10. To remove a relationship, click the join line between the tables (it will become a thick black line), and press DELETE on your keyboard. DO NOT click the DELETE button in the toolbar! It will remove all tables and relationships from the window.
11. Confirm the deletion by clicking OK.
12. Close the RELATIONSHIPS window.
Lesson Example
Several students will attend each of your classes. Therefore, the relationship between Students and Classes will be a "many-to-many" type. This means that a "join" table must be established to link the two tables together.
STEPS
1. Create a new table in Design View that includes:
Field Name Data TypeJoinID AutoNumberClassID NumberStudentID Number (field size Double)
2. Choose JoinID as your primary key field, and save the table using Join as the table name.
3. Close the table.
4. Open the RELATIONSHIPS window.
5. Where do relationships already exist?
6. Click the SHOW TABLE button , and ADD the Join and Students tables.
7. Close the SHOW TABLE dialog box.
Page 39
Helpful Hint:
Join fields must have matching data types and properties. It may be necessary to check these before creating a join table.
NOTES
EXERCISE:
1) Create a relationship between ClassID from the Classes table and ClassID in the Join table.
2) Enforce Referential Integrity, cascading updates and deletes.
3) On Your Own: Did the relationship between Classes Next Year and Instructors originally appear in the Relationships window? (see #6 in the Lesson Example).
4) Why or why not?
5) Create a relationship between StudentID from Students and StudentID from Join.
6) Save the changes to the Relationships window.
7) Close the window.
Page 40
NOTES
LESSON 4: SUBFORMS
OBJECTIVE: Create subforms.
Creating Subforms Using the Wizard
OVERVIEW
A subform is a form within a form. A subform appears when fields from more than one table are used to develop the form. The two tables must be related in some way. The Form Wizard automatically generates forms with subforms where applicable.
STEPS
1. Click the FORMS object in the Database Window.
2. Double-click CREATE FORM BY USING WIZARD.
3. Choose the first table from which you need fields.
4. Send the desired fields into the SELECTED FIELDS box using the or buttons.
5. Select the next table needed.
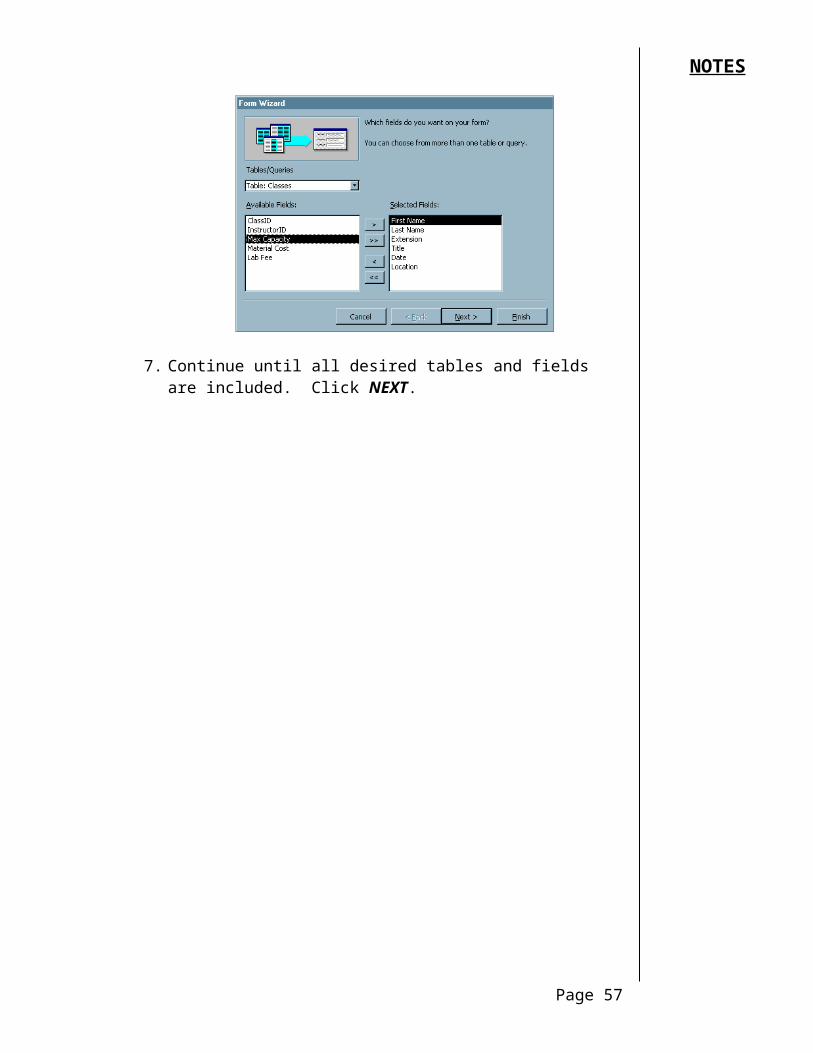
6. Select the fields you want from this table.
7. Continue until all desired tables and fields are included. Click NEXT.
Page 41
NOTES
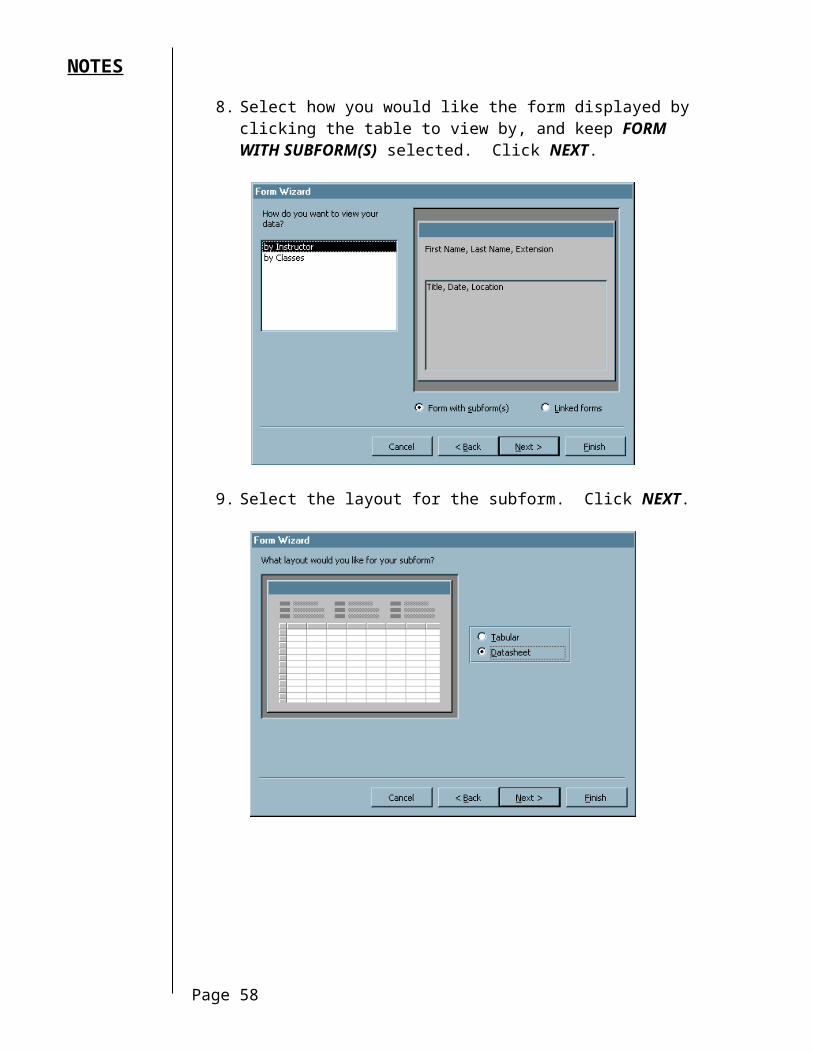
8. Select how you would like the form displayed by clicking the table to view by, and keep FORM WITH SUBFORM(S) selected. Click NEXT.
9. Select the layout for the subform. Click NEXT.
Page 42
NOTES
10. Choose a style for the form. Click NEXT.
11. Type names for both the form and subform. They are saved as two separate objects in the Forms window. Click FINISH.
Page 43
NOTES
Lesson Example
You would like to be able to register students for particular classes using a form. You would also like to be able to look at a class and see its student roster.
STEPS
1. From the FORMS window, double-click CREATE FORM BY USING WIZARD.
2. Select the Classes table from the TABLES/QUERIES drop-down list, and select all fields.
3. Select the Join table from the drop-down list and add StudentID.
4. Select the Students table from the drop-down list and select First Name, Last Name, Telephone, and e-mail. Click NEXT.
5. Be sure you are viewing your data by Classes and that you are creating a form with a subform, and click NEXT.
6. Use the Datasheet layout, and click NEXT.
7. Choose any design you like, and click NEXT.
8. Use Registration for the form name and type Students subform as the subform name. Click FINISH.
9. Find the Multitasking class in Portland, and register StudentIDs 10, 14 and 33.
10. Register any two students in the class of your choice.
11. Close the form.
EXERCISE:
1) Create a Student Transcript using the Form Wizard. Include all Students table fields, the ClassID field from the Join table, and Title, Date, and Location from the Classes table.
2) Keeping all other defaults, name the form Student Transcript and the subform Classes subform.
Page 44
NOTES
3) Scroll through the form's records to see what different students are taking.
4) Close the form.
5) On Your Own: Create an Instructor schedule that shows all Instructor table fields, then the Title, Date and Location fields from the Classes table.
6) Keep all defaults, and name the form Instructor Schedule, and the subform Class subform.
7) Close the form.
Page 45
NOTES
LESSON 5: CUSTOM REPORTS
OBJECTIVE: Modify reports.Create label reports.Edit reports in Microsoft Word.Use Access data in Word Mail Merges.
The Report Wizard
OVERVIEW
Reports in Access are the printable objects created from the data in tables or queries. These reports are easy to create, and update themselves automatically when the data changes. If you utilize more than one table to generate a report, it will work in much the same way as a form with a subform. The primary table information will appear first followed by the corresponding information from the related table.
Once the report is created, you are able to modify the report in exactly the same manner as you modify a form - in Design View.
STEPS
1. Click the REPORTS button in the Objects bar.
2. Double-click CREATE A REPORT BY USING THE WIZARD.
Page 46
NOTES
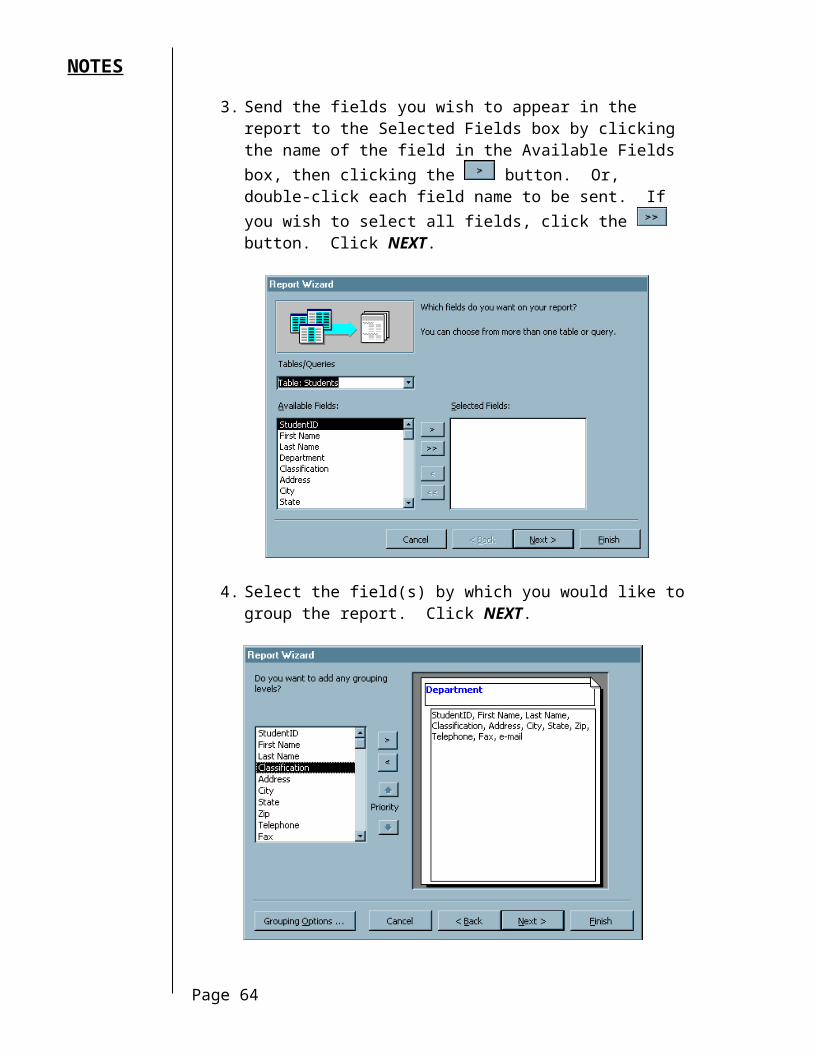
3. Send the fields you wish to appear in the report to the Selected Fields box by clicking the name of the field in the Available Fields box, then clicking the button. Or, double-click each field name to be sent. If you wish to select all fields, click the button. Click NEXT.
4. Select the field(s) by which you would like to group the report. Click NEXT.
Page 47
NOTES
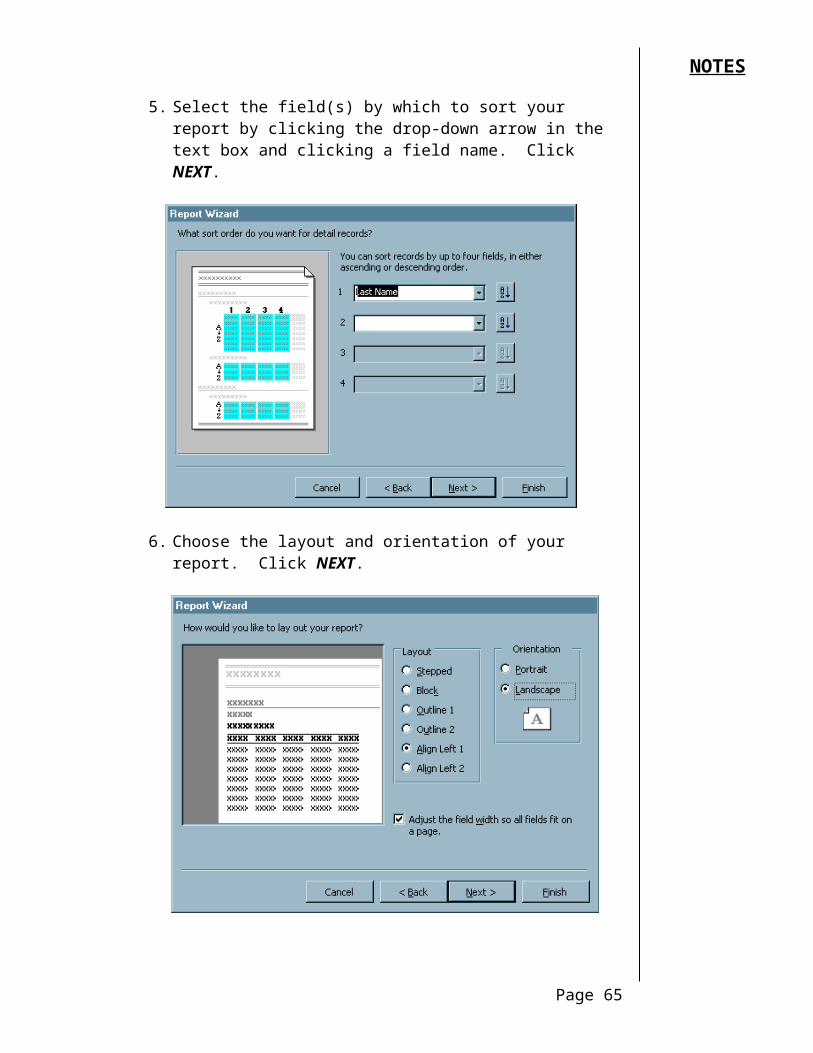
5. Select the field(s) by which to sort your report by clicking the drop-down arrow in the text box and clicking a field name. Click NEXT.
6. Choose the layout and orientation of your report. Click NEXT.
Page 48
NOTES
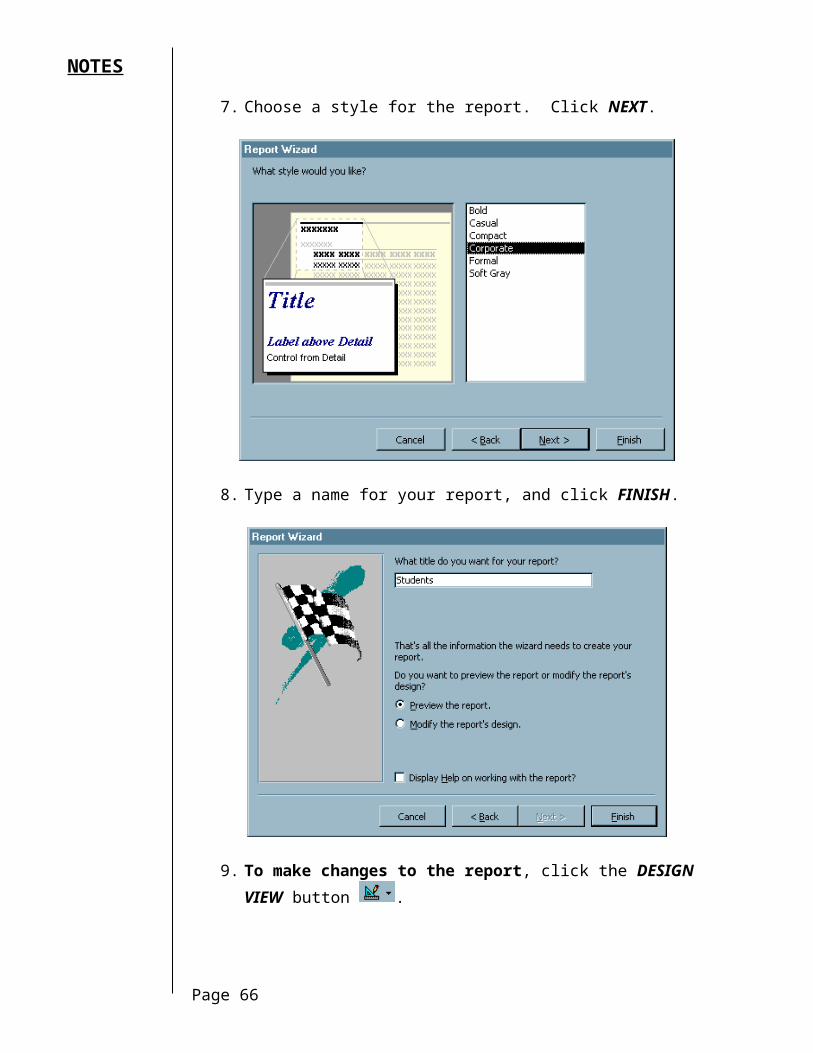
7. Choose a style for the report. Click NEXT.
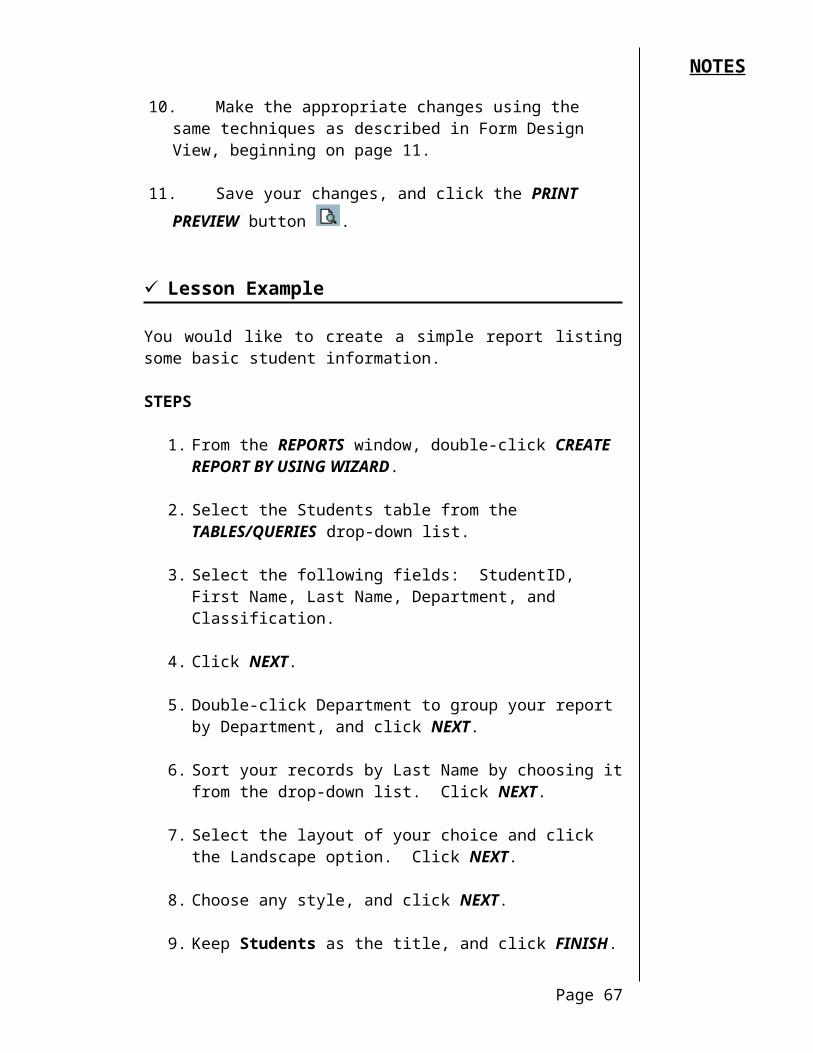
8. Type a name for your report, and click FINISH.
9. To make changes to the report, click the DESIGN VIEW button .
10. Make the appropriate changes using the same techniques as described in Form Design View, beginning on page 11.
Page 49
NOTES
11. Save your changes, and click the PRINT PREVIEW button .
Lesson Example
You would like to create a simple report listing some basic student information.
STEPS
1. From the REPORTS window, double-click CREATE REPORT BY USING WIZARD.
2. Select the Students table from the TABLES/QUERIES drop-down list.
3. Select the following fields: StudentID, First Name, Last Name, Department, and Classification.
4. Click NEXT.
5. Double-click Department to group your report by Department, and click NEXT.
6. Sort your records by Last Name by choosing it from the drop-down list. Click NEXT.
7. Select the layout of your choice and click the Landscape option. Click NEXT.
8. Choose any style, and click NEXT.
9. Keep Students as the title, and click FINISH.
10. Go to Design View and rearrange the fields as desired.
11. Modify the Students title font as you wish.
12. Save your changes, and return to PRINT PREVIEW.
13. Close the report.
Page 50
NOTES
EXERCISE:
1) Create a new report using the wizard using the following:
Instructors table First NameLast Name
Classes table TitleDateLocation
2) View your data by Instructor, do not group further, sort by date, select the Align Left1 layout with portrait orientation, choose any style, and name the report Instructor Schedules.
3) On Your Own: In Design View of the report, place the First and Last Name fields side by side.
4) Change the font of the title as you wish.
5) Save your changes and return to Print Preview.
Label Reports
OVERVIEW
Since a database is set up to track information about people, places, and things, Access enables you to quickly create mailing labels for any correspondence you may send to a large group.
STEPS
1. From the REPORTS window, click the NEW button .
Page 51
Did you know?
You may insert page breaks in your report so each group begins on a new page by clicking VIEW, SORTING AND GROUPING, then selecting WHOLE GROUP in the KEEP TOGETHER property.
NOTES
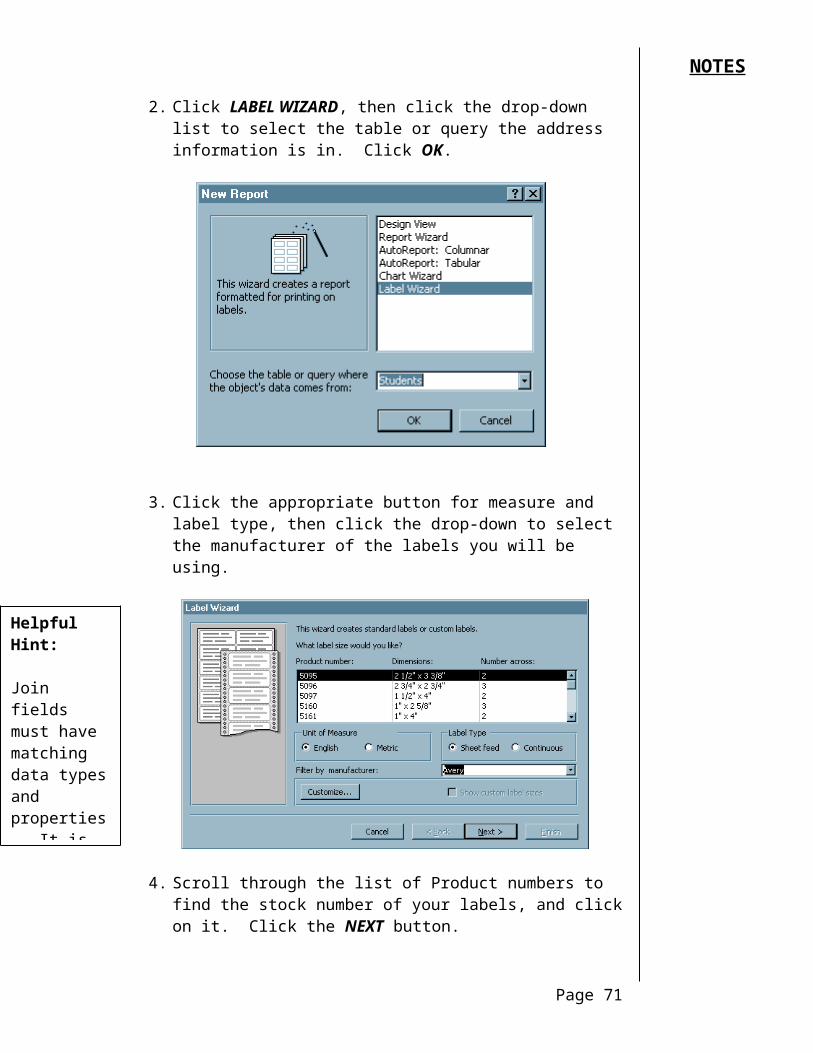
2. Click LABEL WIZARD, then click the drop-down list to select the table or query the address information is in. Click OK.
3. Click the appropriate button for measure and label type, then click the drop-down to select the manufacturer of the labels you will be using.
4. Scroll through the list of Product numbers to find the stock number of your labels, and click on it. Click the NEXT button.
Page 52
Helpful Hint:
Join fields must have matching data types and properties. It is suggested that you check these before creating a join table.
NOTES
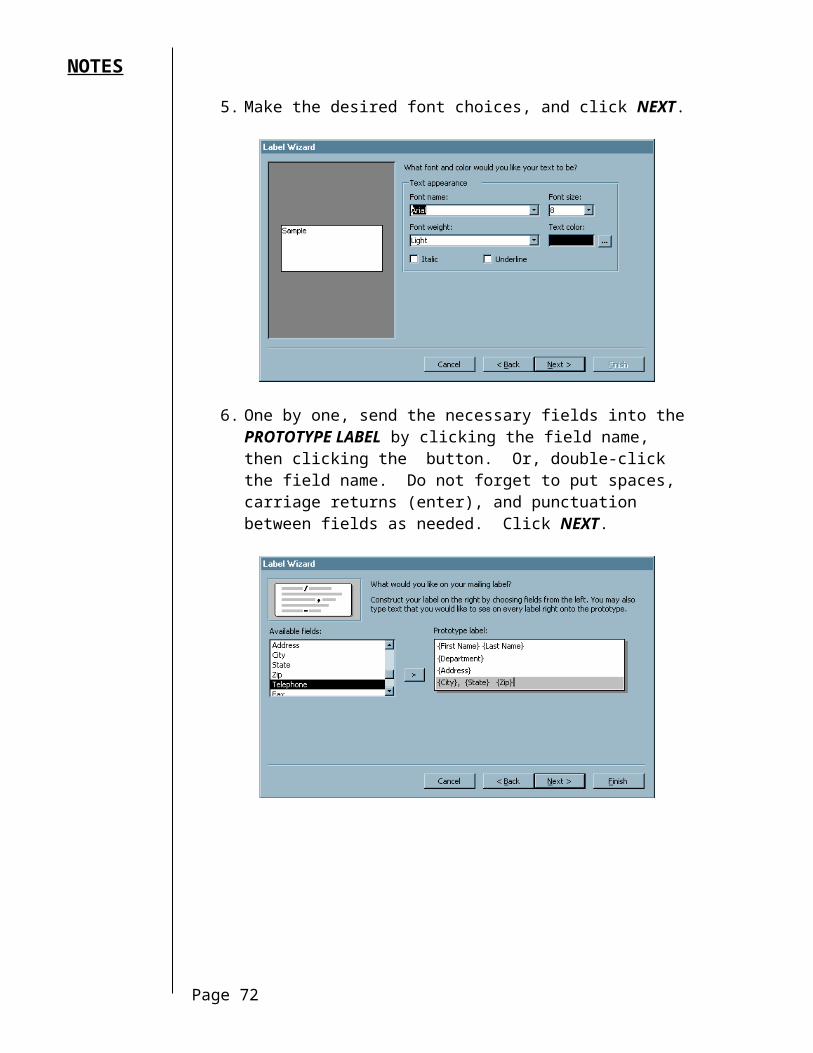
5. Make the desired font choices, and click NEXT.
6. One by one, send the necessary fields into the PROTOTYPE LABEL by clicking the field name, then clicking the button. Or, double-click the field name. Do not forget to put spaces, carriage returns (enter), and punctuation between fields as needed. Click NEXT.
Page 53
NOTES
7. Double-click on the field by which you wish to sort the labels. You may choose more than one sorting field. The post office would prefer that you sort by zip code. Click NEXT.
8. Type a name for the label report, and click FINISH.
9. Insert labels into your printer, and click PRINT .
Lesson Example
You want to send class confirmation letters to your students. Rather than address your envelopes by hand, or recreate the student address list in Word, you decide to generate the labels in a label report.
Page 54
NOTES
STEPS
1. From the REPORTS window, click the NEW button.
2. Click LABEL WIZARD, then click the drop-down list to select the Students table. Click OK.
3. Click English for measure and Sheet Feed for label type, then click the drop-down to choose Avery.
4. Click on Product Number 5160, and click the NEXT button.
5. Make any font choices you like, and click NEXT.
6. Double-click the First Name field and press the spacebar. Click the button to select Last Name and press Enter. Click for Department and press Enter. Double-click City, type a comma and space, click for State and press the spacebar twice, then click for Zip. Click NEXT.
7. Double-click on the Zip field then the Last Name field to sort the labels. Click NEXT.
8. Keep the default name for the report, and click FINISH.
9. Look through your labels, and close the report.
EXERCISE:
1) Make file folder labels for all of your classes. Use Avery 5266 labels, and use the Date and Title fields.
2) Save the labels as Folder Labels.
3) On Your Own: Create Avery 5160 labels for Instructor addresses, and save them using the default report name.
Page 55
NOTES
Publishing Access Reports in Word
OVERVIEW
If you are more comfortable using a word processor to customize reports, Microsoft Access allows you to "send" reports into Word. One of the benefits of this method is that you are able to edit the report just as you would any Word document. In an Access Report, it may not be as simple to modify the finished product.
STEPS
1. Create the report you desire using the REPORT WIZARD or AUTOREPORT.
2. Save and close the report.
3. Select the report in the database window.
4. Click the OFFICE LINKS button .
5. The report will be saved in Rich Text Format (.rtf) and will open in Microsoft Word. If it opens in another program, simply close the program, then open the file from within Microsoft Word.
6. Edit and print the report as needed, being sure to save any changes.
Merging Access Data in Word
OVERVIEW
You may use data stored in Access to complete form letters or other merge documents in Microsoft Word.
STEPS
1. In the TABLES window, click once on the name of the table that contains the data you want to merge.
2. Click the OFFICE LINKS button in the toolbar.
Page 56
NOTES
3. To merge to a brand new document, click the radio button in front of CREATE A NEW DOCUMENT AND THEN LINK THE DATA TO IT.
4. Microsoft Word will open a blank document. You will need to wait until a Merge toolbar opens. You may also need to click on the Word rectangle in the Taskbar to make the document active.
5. Type the document, clicking INSERT MERGE FIELD and choosing the appropriate field each time you want to place a piece of data into the document. Don't forget spacing and punctuation along the way.
Page 57
NOTES
6. Save the document if you plan to use it again.
7. Click the MERGE TO NEW DOCUMENT button in the MERGE toolbar.
8. Print the results, and close the new document without saving. You would use the document with the field name placeholders and merge again in case new data exists in the database the next time.
Lesson Example
You would rather modify the Students report in Microsoft Word.
STEPS
1. Open the Students report.
2. Click the OFFICE LINKS button in the toolbar.
3. If the document opens in a program other than Microsoft Word, close the program, and open Word. Open the document (.rtf extension) from the C:\MY DOCUMENTS folder.
4. Change the title of the report to Student Information, and make the text red.
5. Place colons (:) after each of the Department labels.
6. Save your changes, and close Word
7. In Access, close the Students report.
Page 58
NOTES
EXERCISE:
1) Merge the Students table with MS Word to create the following form letter. Items in bold italics are Access fields.
Date
First Name Last NameDepartmentAddressCity, State Zip
Dear First Name:
Thank you for taking a class with us. We hope what you learned is helpful in your job. Please let us know what other classes you would like us to offer in the future.
Sincerely,
Your Name
2) Once you have merged to a new document, print the first page, and close Word without saving anything.
3) On Your Own: Send the Instructor Schedules report to Word, and make the following modifications:
Edit the title of the report as desiredRemove the First Name and Last Name labels from each instructorEnlarge the font of the dataChange the tab stops to spread out the information (don't forget to select text first)
4) Save your changes, and close Word.
5) Close the Instructor Schedules report.
Page 59
NOTES
LESSON 6: COMPACTING AND REPAIRING YOUR DATABASE
OBJECTIVES: Reduce the size of your database.Correct errors in your database.
OVERVIEW
Compact and Repair is a feature that makes your database as small as possible, ensures that it runs as efficiently as possible, and fixes any potential problems at the same time. You should compact your Access databases on a regular basis to ensure the best results.
Compact an Open Database
OVERVIEW
You may prefer to use these steps if you are performing mostly data entry, or rarely modify the design of your database objects. If you are compacting a shared (multi-user) database that is located on a server or shared folder, make sure that no one else has it open.
STEPS
1. On the TOOLS menu, point to DATABASE UTILITIES, and then click COMPACT AND REPAIR DATABASE. Access will perform the feature without further input.
Compact Automatically
OVERVIEW
Access can automatically compact a database every time you close it. You may prefer to use these steps if you are manipulating database objects frequently.
Page 60
Helpful Hint:
You can stop the compacting process by pressing ESC or CTRL+ BREAK during the process.
NOTES
STEPS
1. Open the database that you want to compact automatically.
2. On the TOOLS menu, click OPTIONS.
3. Click the GENERAL tab.
4. Select the COMPACT ON CLOSE check box. Click OK.
Lesson Example
You would like to run the Compact and Repair utility, and see if it has any impact on the size of your database.
STEPS
1. Close all open database objects.
2. In the FILE Menu, click DATABASE PROPERTIES.
3. Click the GENERAL tab and make note of the size of the file below:
4. Click OK.
5. Click TOOLS, DATABASE UTILITIES, COMPACT AND REPAIR DATABASE.
6. Return to FILE, DATABASE PROPERTIES to check the file size.
7. What is the size of your database now?
8. Click OK.
Page 61
Did you know?
Compacting does not occur if you close a shared database and another user has it open.
NOTES
EXERCISE:
1) Set the database to Compact on Close, and close the database.
2) On Your Own: Open the database, and remove the Compact on Close setting.
Page 62
NOTES
LESSON 7: GIVE IT A TRY!
OBJECTIVE: Practice the lessons learned in class.
EXERCISE:
Refer to Lesson 1 for assistance
1) Make a copy of the Classes table - structure only - named More Classes.
2) Copy the first ten records from the Classes table into More Classes.
Refer to Lesson 2 for assistance
3) Use the wizard to create a form for More Classes. Include all fields, and choose the columnar format. All other choices are yours to make.
4) Choose a different AutoFormat for the form.
5) In Design View of the form, move the Date field above the Title field.
6) Change the tab order to reflect the change in field placement.
7) Save your changes and go to Form View.
8) Check the tab order by "tabbing" through the form.
9) Close the form.
Refer to Lesson 3 for assistance
10) Open the Relationships window and add the More Classes table.
11) Establish relationships between More Classes and Instructors, and between More Classes and the Join table.
12) Save your changes, and close the Relationships window.
Page 63
NOTES
Refer to Lesson 4 for assistance
13) Using the Report Wizard, create a report including the following fields from the More Classes and Students tables:
More Classes TitleDateLocation
Students First NameLast NameTelephone
Make any choices you like throughout the wizard.
14) In Design View of the report, change the font of the title.
15) Save your changes and go to Print Preview.
16) Publish the report to Word.
17) Make further changes in the Word version of the report.
18) Close Word.
19) Close the report.
Refer to Lesson 5 for assistance
20) Compact your database.
Page 64
NOTES
LESSON 8: DELETING OBJECTS
OBJECTIVE: Maintain organized database files.
Deleting Objects
OVERVIEW
You may delete a Database Object (Table, Query, Form, Report, Macro or Module) through Access.
STEPS
1. Close all open database objects.
2. Click the name of the object you want to delete.
3. Press DELETE on your keyboard.
4. Click YES to confirm the deletion.
Deleting Databases
OVERVIEW
You may delete files through Windows Explorer or you may delete from within Access.
STEPS
1. Close any open files. Click FILE on the Menu Bar, then OPEN. Or, click on the OPEN icon .
2. Click on the database to delete, press the DELETE KEY on the keyboard, and then click YES.
Page 65
Did you know?
Deleting a database will delete all objects (tables, reports, etc.) in that database.
NOTES
Lesson Example
You decide you no longer need your Classes query or the Folder Labels report you previously created.
STEPS
1. Be sure all database objects are closed.
2. In the QUERIES window, click once on the Classes query, and press DELETE on your keyboard.
3. Click YES to confirm the deletion.
4. Repeat for the Alpha Class List query.
5. Click REPORTS in the OBJECTS bar.
6. Click the Folder Labels report once, and press the DELETE key.
7. Click YES.
EXERCISE:
1) Delete the Classes This Year and Classes Next Year tables.
2) On Your Own: Delete the the Classes and Instructors forms.
3) Delete the Course Schedule database entirely.
Page 66
NOTES
Page 67
NICE TO KNOW
Mouse Pointers
Text Selector - appears while among text; click to place insertion point or click and drag to select a section of text
Field Selector - appears on the left side of a field in Datasheet View; click to select the contents of the field
Column Selector - appears when pointing at field names in Datasheet View; click to select an entire row
Row Selector - appears in the gray box to left of a record in Datasheet View; click to select the entire record
Column Resize - appears between field names in Datasheet view or on a vertical border in Design View of a Form or Report; click and drag to increase or decrease width
Row Resize - appears on a horizontal border in Design View of a Form or Report; click and drag to increase or decrease height
Normal Select - allows you to click to choose an object; also allows you to click and drag a rectangle to select a group of objects
Move - in Design View of a Form or Report, this pointer appears when you point at the middle a selected control; click and drag to move the control
Move Separately - appears when pointing at the upper left corner of a selected control; allows you to click and drag a label separately from a text box and vice versa
Horizontal Resize - appears when you point at a resizing handle (small black square) on the edge of a control; click and drag away from the object to enlarge, toward the object to make smaller
Diagonal Resize - see above
Vertical Resize - see above
Add Label - appears when the Label tool is selected in the Toolbox; click to insert a standard label, or click and drag to draw a specific size
Add Text Box - when the Text tool is selected in the Toolbox, this mouse pointer will appear; click to insert a standard text box and label, or click and drag to draw the size you desire
Toolbar Buttons
The View buttons change the perspective of the active object. This button allows you to go to Design View of any object.
This View button sends you to Datasheet View of a Table or Report.
This View button sends you to Form View.
This View button sends you to Print Preview of a Report.
Save will save your most recent changes.
Print prints the active object. Be careful if your object contains many records!
Print Preview shows you what your active object will look like on paper.
Spellcheck will check for spelling errors.
Cut removes text or an object and places it on the Clipboard, so it may be placed elsewhere.Copy places a copy of the selected text or object on the Clipboard, so it may be copied to another location.Paste takes the item from the Clipboard and places it at the location of your insertion point or selection.Format Painter allows you to copy the formatting of selected text to other text in your database.
Undo will undo the last action taken.
Properties allows you to look at the specific attributes of an object in your database.Relationships opens the Relationships Window, in which you are able to view the formal relationships that have been drawn between tables.AutoForm allows you to create an instant form from a selected table. The drop down arrow to the right lets you choose a different “AutoObject” to create.
The Office Assistant provides you with interactive help regarding Access.
Delete will remove the selected object from your database.
Sort Ascending puts your records in alphabetical, chronological, or numeric order based on the active field.
Sort Descending sorts records backwards.
AutoFilter removes any record not including the selected entry.
Filter by Form allows you to filter records by more than one entry.
The Filter button becomes activated when AutoFilter is used. Pushing this button will remove the current filter. When Filter by Form is used, this button will turn on the filter once criteria are established, then turn it off when you wish to see all records.
Find lets you search for an entry.
New Record sends you to a blank record for data entry. Some databases require a different button to be used.
Delete Record will remove the active record.
Database Window will place the Database Window in front of any other open windows. You may also use the F11 key.
Zoom will bring an object in print preview closer or move it farther away.
The Primary Key button will establish the active field as the unique identifier of the records in a table.
Keyboard Shortcuts
Keystroke Combination Effect
F1 Opens Access HelpF6 Moves from Design Grid of Table to Properties sectionF9 Updates the active objectF11 Brings the Database Window to the frontTab Moves you ahead one fieldShift + Tab Moves you backward one fieldEnter Moves you ahead one fieldSpacebar Toggles a checkmark on and off in a Yes/No fieldCtrl + Alt + down arrow Opens a drop-down list
Ctrl + Tab Moves you out of a subform to the next form fieldCtrl + Home Sends you to the beginning of the first recordCtrl + End Sends you to the end of the last recordCtrl + ‘ Copies the previous record's entry into the current fieldHome Sends you to the beginning of the active recordEnd Sends you to the end of the active recordArrow (Cursor) Keys Send you one field in the arrow's direction
The Toolbox
OVERVIEW
The Toolbox is a toolbar that contains all of the controls you may place on a form. It may be hidden if you do not wish to see it, and reopened when needed. The controls available in the Toolbox include:
STEPS
1. To hide the Toolbox, click the CLOSE button in its title bar.
2. To open the Toolbox, click the TOOLBOX button in the toolbar.
3. To move the Toolbox out of the way, click and drag its Title Bar to move it to another location.
4. To use a Toolbox control, click once on the control you wish to add.
5. Click in the area of the form or report where you would like the control to appear.