44
BUDDY RHODES CATALOG of CONCRETE PRODUCTS & TECHNIQUES
| Date post: | 18-Mar-2023 |
| Category: |
Documents |
| Upload: | khangminh22 |
| View: | 0 times |
| Download: | 0 times |

BU D DY R H O D E S CATA L O G o f C O NC R E T E P R O D U C T S & T E C H N I Q U E S
P| 2
TH
E B
UD
DY
RH
OD
ES
ST
OR
Y
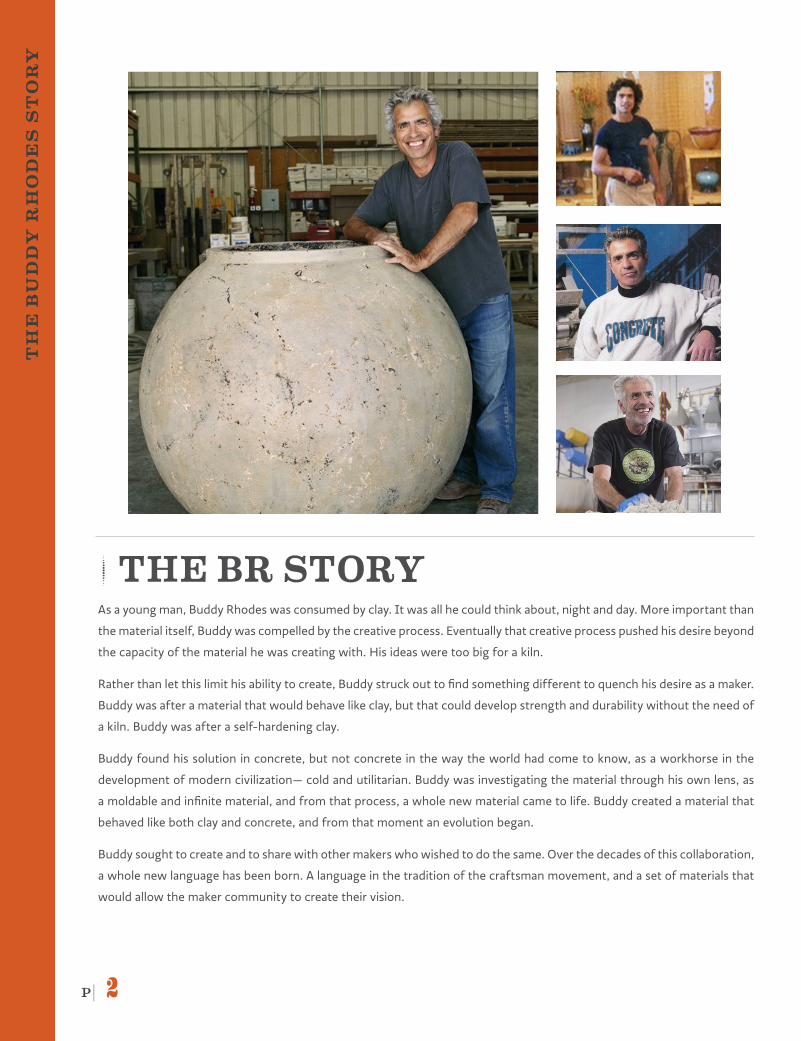
| THE BR STORYAs a young man, Buddy Rhodes was consumed by clay. It was all he could think about, night and day. More important than
the material itself, Buddy was compelled by the creative process. Eventually that creative process pushed his desire beyond
the capacity of the material he was creating with. His ideas were too big for a kiln.
Rather than let this limit his ability to create, Buddy struck out to find something different to quench his desire as a maker.
Buddy was after a material that would behave like clay, but that could develop strength and durability without the need of
a kiln. Buddy was after a self-hardening clay.
Buddy found his solution in concrete, but not concrete in the way the world had come to know, as a workhorse in the
development of modern civilization— cold and utilitarian. Buddy was investigating the material through his own lens, as
a moldable and infinite material, and from that process, a whole new material came to life. Buddy created a material that
behaved like both clay and concrete, and from that moment an evolution began.
Buddy sought to create and to share with other makers who wished to do the same. Over the decades of this collaboration,
a whole new language has been born. A language in the tradition of the craftsman movement, and a set of materials that
would allow the maker community to create their vision.
P| 3BUDDY RHODES CONCRETE PRODUCTS | Call us: 877-706-5303 | Email us at: [email protected]
TA
BL
E o
f C
ON
TE
NT
S
TABLE of CONTENTS
Choosing a Finish ........................................................ 4
Guide to Recipes ......................................................... 8
Craftsman Mix Recipes ............................................... 10
GFRC Mix Recipes ....................................................... 12
ECC Mix Recipes .......................................................... 16
Vertical Mix Recipes .................................................... 18
Curing ........................................................................... 20
Processing .................................................................... 21
Polishing ....................................................................... 22
Etching ......................................................................... 23
Glazing ......................................................................... 24
Sealing ......................................................................... 25
Color in Concrete ........................................................ 28
Signature Collection Pigments ................................... 29
Pure Collection Pigments ........................................... 30
Specialty Collection Pigments .................................... 32
Fiber ............................................................................. 38
Water Reducer ............................................................ 39
Tools ............................................................................. 40
Abrasives ..................................................................... 41
Support ........................................................................ 42
PA G E
P| 4
FIN
ISH
ES
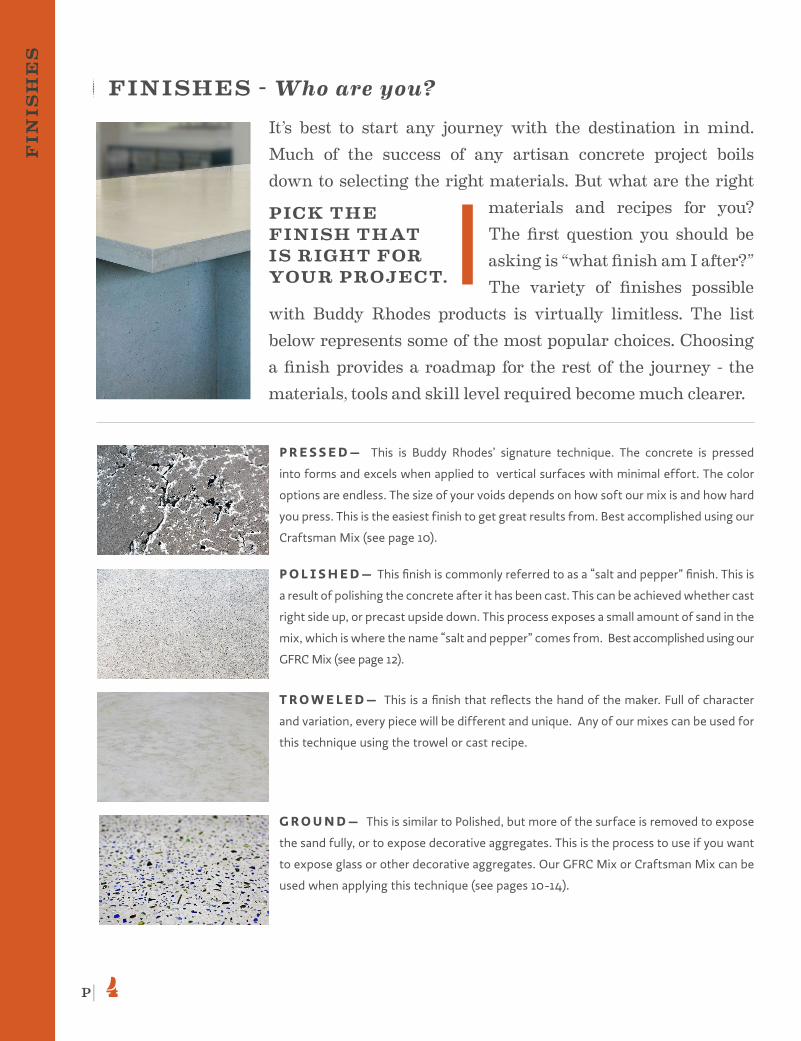
P R E S S E D — This is Buddy Rhodes’ signature technique. The concrete is pressed
into forms and excels when applied to vertical surfaces with minimal effort. The color
options are endless. The size of your voids depends on how soft our mix is and how hard
you press. This is the easiest finish to get great results from. Best accomplished using our
Craftsman Mix (see page 10).
P O L I S H E D — This finish is commonly referred to as a “salt and pepper” finish. This is
a result of polishing the concrete after it has been cast. This can be achieved whether cast
right side up, or precast upside down. This process exposes a small amount of sand in the
mix, which is where the name “salt and pepper” comes from. Best accomplished using our
GFRC Mix (see page 12).
T R O W E L E D — This is a finish that reflects the hand of the maker. Full of character
and variation, every piece will be different and unique. Any of our mixes can be used for
this technique using the trowel or cast recipe.
G R O U N D — This is similar to Polished, but more of the surface is removed to expose
the sand fully, or to expose decorative aggregates. This is the process to use if you want
to expose glass or other decorative aggregates. Our GFRC Mix or Craftsman Mix can be
used when applying this technique (see pages 10-14).
| FINISHES - Who are you?
It’s best to start any journey with the destination in mind. Much of the success of any artisan concrete project boils down to selecting the right materials. But what are the right
materials and recipes for you? The first question you should be asking is “what finish am I after?” The variety of finishes possible
with Buddy Rhodes products is virtually limitless. The list below represents some of the most popular choices. Choosing a finish provides a roadmap for the rest of the journey - the materials, tools and skill level required become much clearer.
PICK THE FINISH THAT IS RIGHT FOR YOUR PROJECT.
P| 5BUDDY RHODES CONCRETE PRODUCTS | Call us: 877-706-5303 | Email us at: [email protected]
FIN
ISH
ES
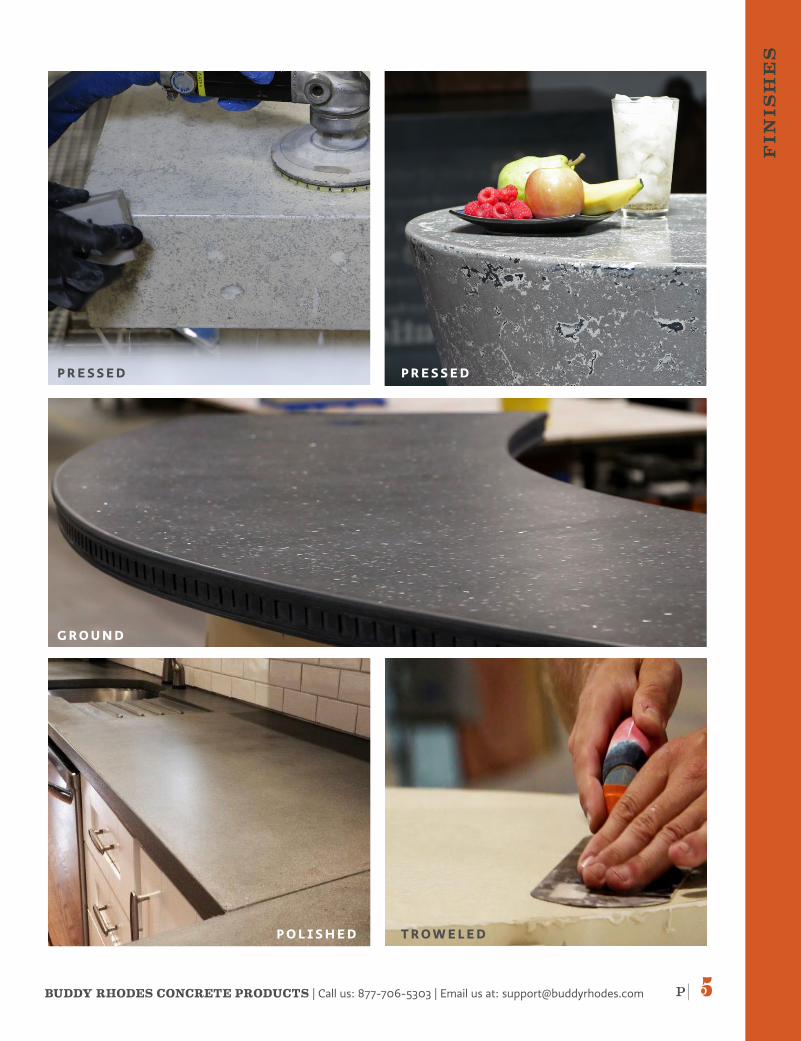
P R E S S E D P R E S S E D
G R O U N D
P O L I S H E D T R O W E L E D
P| 6
NA
ME
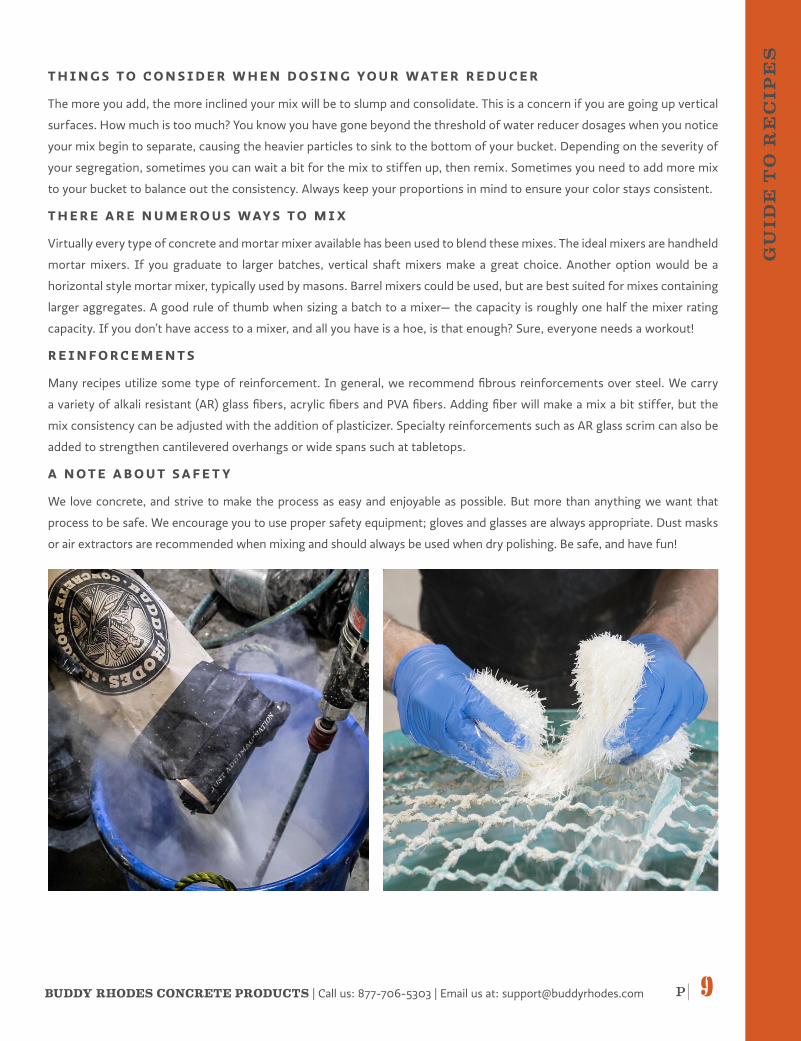
G L A Z E D — Glazes are topical color treatments that can be applied over
any of the finishes listed above. They will accent or enhance the finish you’ve
already achieved. Use glazes over a sprayed or lightly ground finish to create
a more monolithic look. If using a pressed or veined finish, apply the glaze to
create more movement and character in the piece. Learn more about glazes on
page 24.
C U S T O M
For every finish we discuss, there is an artisan out there coming up with something new. Concrete is a material of infinite
possibilities. These mixes and techniques can be mixed, matched, and manipulated to create infinite variations.
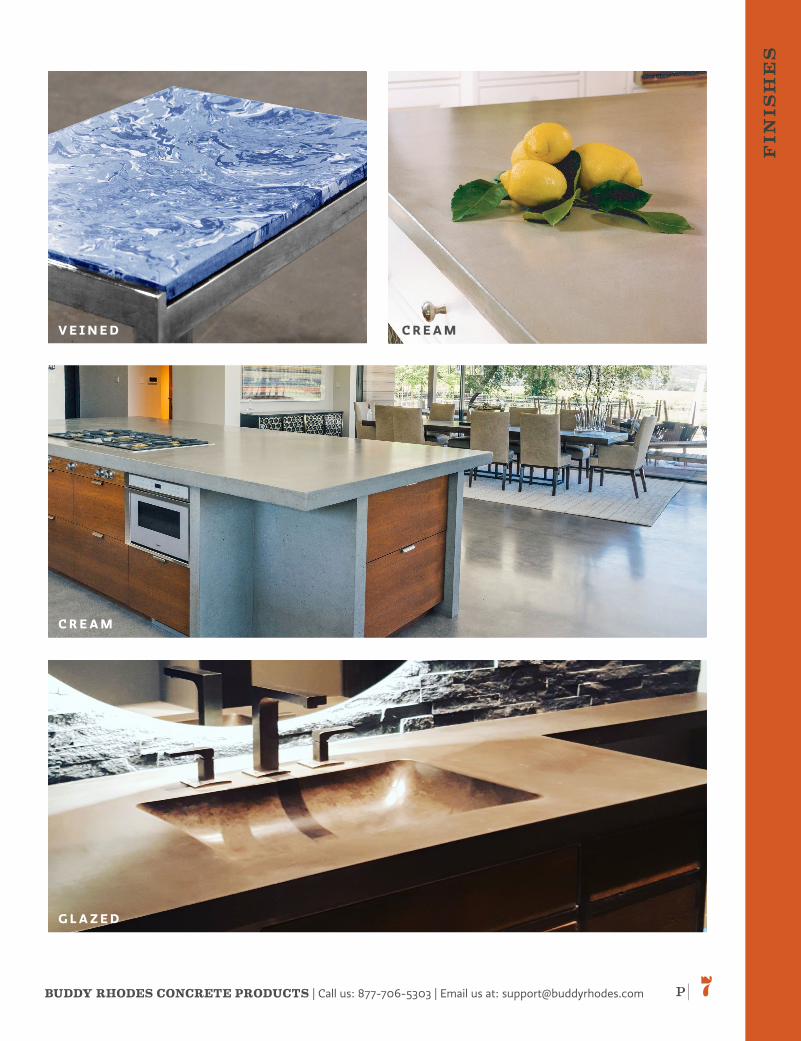
C R E A M — This finish is accomplished when very little processing is
done to a neatly cast piece. This finish requires significant attention to
detail during the mold building process. It shows loads of character,
while being soft and muted in appearance. Best achieved when using our
GFRC Mix (see page 12).
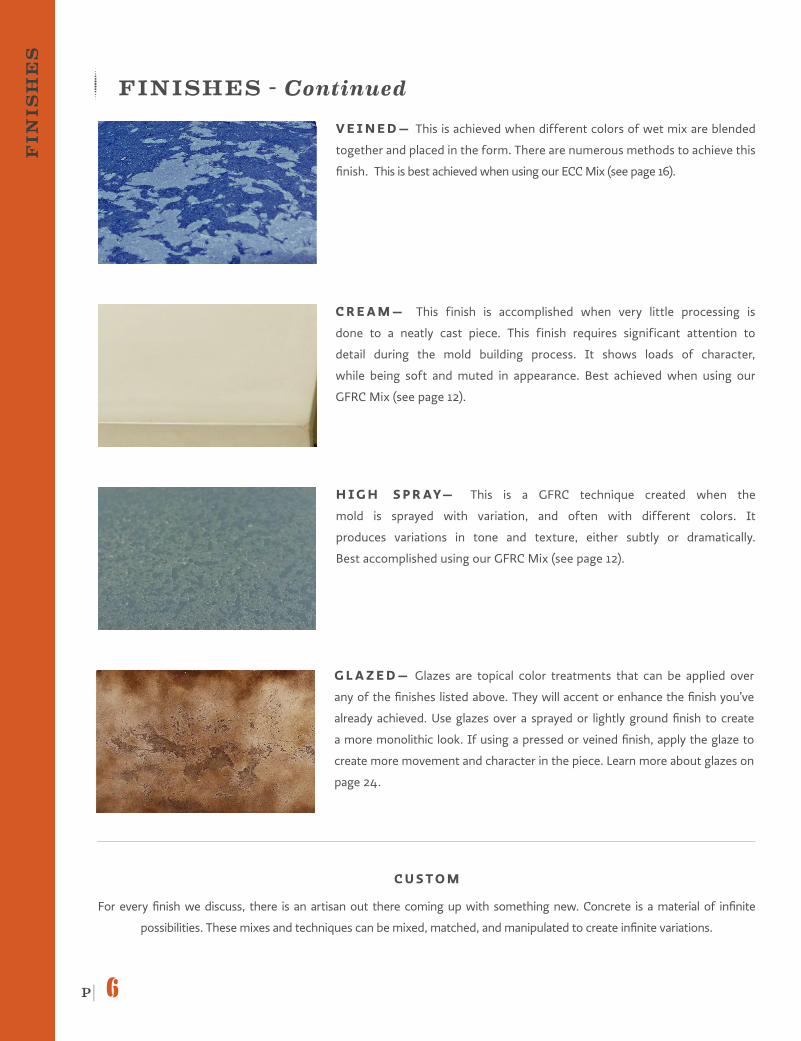
V E I N E D — This is achieved when different colors of wet mix are blended
together and placed in the form. There are numerous methods to achieve this
finish. This is best achieved when using our ECC Mix (see page 16).
| FINISHES - Continued
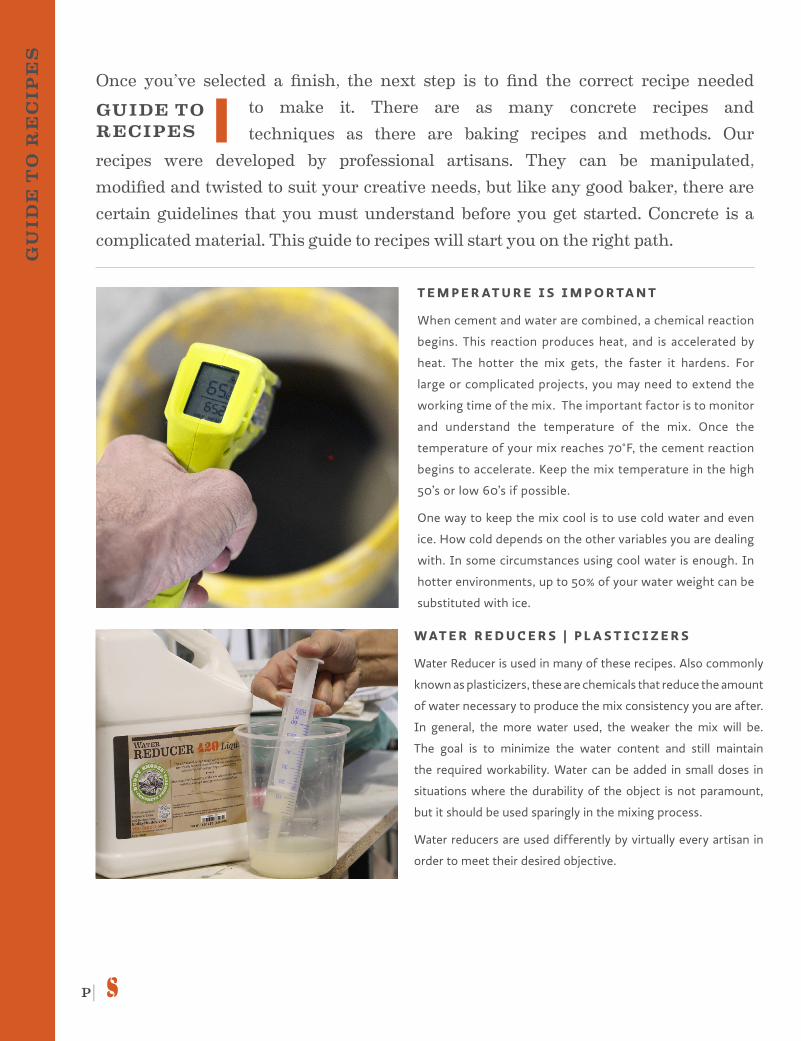
H I G H S P R AY— This is a GFRC technique created when the
mold is sprayed with variation, and often with different colors. It
produces variations in tone and texture, either subtly or dramatically.
Best accomplished using our GFRC Mix (see page 12).
FIN
ISH
ES
P| 7BUDDY RHODES CONCRETE PRODUCTS | Call us: 877-706-5303 | Email us at: [email protected]
NA
ME
FIN
ISH
ES
V E I N E D C R E A M
C R E A M
G L A Z E D
P| 8
GU
IDE
TO
RE
CIP
ES
Once you’ve selected a finish, the next step is to find the correct recipe needed to make it. There are as many concrete recipes and techniques as there are baking recipes and methods. Our
recipes were developed by professional artisans. They can be manipulated, modified and twisted to suit your creative needs, but like any good baker, there are certain guidelines that you must understand before you get started. Concrete is a complicated material. This guide to recipes will start you on the right path.
GUIDE TO RECIPES
WAT E R R E D U C E R S | P L A S T I C I Z E R S
Water Reducer is used in many of these recipes. Also commonly
known as plasticizers, these are chemicals that reduce the amount
of water necessary to produce the mix consistency you are after.
In general, the more water used, the weaker the mix will be.
The goal is to minimize the water content and still maintain
the required workability. Water can be added in small doses in
situations where the durability of the object is not paramount,
but it should be used sparingly in the mixing process.
Water reducers are used differently by virtually every artisan in
order to meet their desired objective.
T E M P E R AT U R E I S I M P O R TA N T
When cement and water are combined, a chemical reaction
begins. This reaction produces heat, and is accelerated by
heat. The hotter the mix gets, the faster it hardens. For
large or complicated projects, you may need to extend the
working time of the mix. The important factor is to monitor
and understand the temperature of the mix. Once the
temperature of your mix reaches 70°F, the cement reaction
begins to accelerate. Keep the mix temperature in the high
50’s or low 60’s if possible.
One way to keep the mix cool is to use cold water and even
ice. How cold depends on the other variables you are dealing
with. In some circumstances using cool water is enough. In
hotter environments, up to 50% of your water weight can be
substituted with ice.
P| 9BUDDY RHODES CONCRETE PRODUCTS | Call us: 877-706-5303 | Email us at: [email protected]
GU
IDE
TO
RE
CIP
ES
T H I N G S T O C O N S I D E R W H E N D O S I N G YO U R WAT E R R E D U C E R
The more you add, the more inclined your mix will be to slump and consolidate. This is a concern if you are going up vertical
surfaces. How much is too much? You know you have gone beyond the threshold of water reducer dosages when you notice
your mix begin to separate, causing the heavier particles to sink to the bottom of your bucket. Depending on the severity of
your segregation, sometimes you can wait a bit for the mix to stiffen up, then remix. Sometimes you need to add more mix
to your bucket to balance out the consistency. Always keep your proportions in mind to ensure your color stays consistent.
T H E R E A R E N U M E R O U S WAY S T O M I X
Virtually every type of concrete and mortar mixer available has been used to blend these mixes. The ideal mixers are handheld
mortar mixers. If you graduate to larger batches, vertical shaft mixers make a great choice. Another option would be a
horizontal style mortar mixer, typically used by masons. Barrel mixers could be used, but are best suited for mixes containing
larger aggregates. A good rule of thumb when sizing a batch to a mixer— the capacity is roughly one half the mixer rating
capacity. If you don’t have access to a mixer, and all you have is a hoe, is that enough? Sure, everyone needs a workout!
R E I N F O R C E M E N T S
Many recipes utilize some type of reinforcement. In general, we recommend fibrous reinforcements over steel. We carry
a variety of alkali resistant (AR) glass fibers, acrylic fibers and PVA fibers. Adding fiber will make a mix a bit stiffer, but the
mix consistency can be adjusted with the addition of plasticizer. Specialty reinforcements such as AR glass scrim can also be
added to strengthen cantilevered overhangs or wide spans such at tabletops.
A N O T E A B O U T S A F E T Y
We love concrete, and strive to make the process as easy and enjoyable as possible. But more than anything we want that
process to be safe. We encourage you to use proper safety equipment; gloves and glasses are always appropriate. Dust masks
or air extractors are recommended when mixing and should always be used when dry polishing. Be safe, and have fun!

P| 1 0
CR
AF
TS
MA
N M
IX
You will be hard-pressed to find a more enjoyable concrete mix to work with. The consistency of this mix can be that of clay or fluid like pancake batter. The choice
is yours and depends on your project. This mix can be pressed up vertical surfaces, trowels like butter, and can be made fluid
to conform to any shape. It is ideal for the newcomer to concrete, but is also revered by professionals as one of the easiest and more enjoyable mixes there is to work with.
CRAFTSMAN MIX
T H E P R E S S T E C H N I Q U E
The press technique is Buddy Rhodes’ signature technique. It is achieved by using his
Craftsman Mix with as little water as possible to create a dry, clay like mix. Buddy’s adventure
into concrete began with his search for a “self-hardening” clay; so it makes sense that a clay
like mix would be central to his signature technique. This mix is then hand packed into the
mold. Because the mix is so dry, voids are created naturally during placement. This results
in a veined look, unique to every piece. This is what we want— beautiful structural geology.
In many cases, the pressed technique is approached in a similar manner to the composition
of GFRC. For this, a thin surface layer is pressed into the form, followed by a backer mix
containing AR Glass Fiber. This gives the piece the necessary structural reinforcement.
Because this mix is often pressed up vertical walls, it is important to be cautious with
dosing water reducer. If too much water reducer is added, the mix will have a tendency
to slump down your vertical surfaces. Water reducer should only be used sparingly in the
surface mix to soften the mix for improved workability. You can be slightly more liberal when
adding water reducer to the backer mix to compensate for the glass fiber stiffening the mix.
M I X I N G I N S T R U C T I O N S F O R C R A F T S M A N M I X
• Combine water and pigment together and mix thoroughly.
• If you know the amount of water reducer required, add that to the water and pigment.
• Slowly add dry ingredients while mixing. Mix until fully blended.
For Backer Mixes:
• Slowly add the AR Glass Fiber* to the thoroughly mixed material. Blend until homogeneous. Temper with water reducer as needed for desired consistency.
*Mixing too long or at too high a speed after fiber has been added can filamentize
or damage the fiber, resulting in placement issues and reduced strengths.
Color: Bone White
One bag covers +/- 5 ft2 (0.5 m2) at 1” (2.5 cm) thick.
Total Cementitious Binder: 20.5 lb (9.29 kg) per bag.
P R E S S R E C I P E
• 50 lb (22.7 kg) Craftsman Mix
• 6.8-7.5 lb (3-3.4 kg)
Chilled Water
• 0 - 5 ml Water Reducer 420
• Pigment to taste
• 1.25 - 1.5 lb (0.56 - 0.68 kg)
Alkali Resistant Glass Fiber
(Backer/Structural Mix Only)
Ideal for Pressed Finish
Skill Required v v v v v
This mix is typically cast at 1.25” - 1.5” (3.2 cm - 3.8 cm) thick. It can be cast thinner, particularly with the use of AR
Glass Fibers in the backer mix, but consideration must be given in the handling and support of the piece.
P| 1 1BUDDY RHODES CONCRETE PRODUCTS | Call us: 877-706-5303 | Email us at: [email protected]
CR
AF
TS
MA
N M
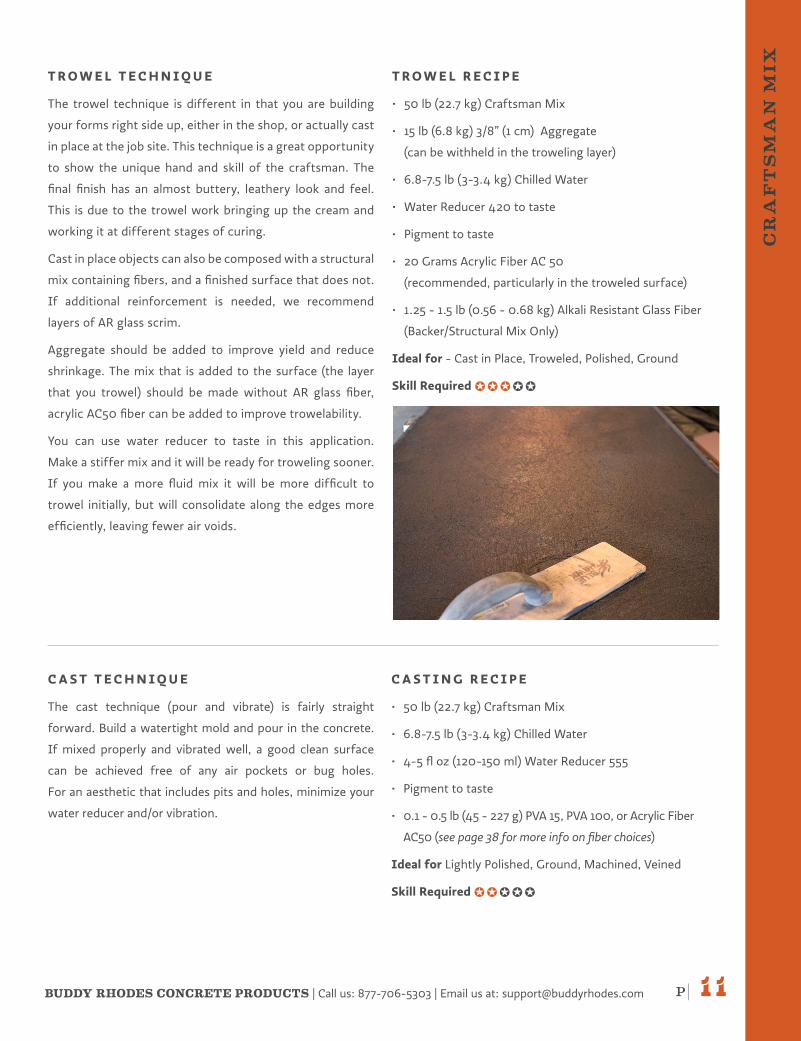
IXT R O W E L T E C H N I Q U E
The trowel technique is different in that you are building
your forms right side up, either in the shop, or actually cast
in place at the job site. This technique is a great opportunity
to show the unique hand and skill of the craftsman. The
final finish has an almost buttery, leathery look and feel.
This is due to the trowel work bringing up the cream and
working it at different stages of curing.
Cast in place objects can also be composed with a structural
mix containing fibers, and a finished surface that does not.
If additional reinforcement is needed, we recommend
layers of AR glass scrim.
Aggregate should be added to improve yield and reduce
shrinkage. The mix that is added to the surface (the layer
that you trowel) should be made without AR glass fiber,
acrylic AC50 fiber can be added to improve trowelability.
You can use water reducer to taste in this application.
Make a stiffer mix and it will be ready for troweling sooner.
If you make a more fluid mix it will be more difficult to
trowel initially, but will consolidate along the edges more
efficiently, leaving fewer air voids.
T R O W E L R E C I P E
• 50 lb (22.7 kg) Craftsman Mix
• 15 lb (6.8 kg) 3/8” (1 cm) Aggregate
(can be withheld in the troweling layer)
• 6.8-7.5 lb (3-3.4 kg) Chilled Water
• Water Reducer 420 to taste
• Pigment to taste
• 20 Grams Acrylic Fiber AC 50
(recommended, particularly in the troweled surface)
• 1.25 - 1.5 lb (0.56 - 0.68 kg) Alkali Resistant Glass Fiber
(Backer/Structural Mix Only)
Ideal for - Cast in Place, Troweled, Polished, Ground
Skill Required v v v v v
C A S T T E C H N I Q U E
The cast technique (pour and vibrate) is fairly straight
forward. Build a watertight mold and pour in the concrete.
If mixed properly and vibrated well, a good clean surface
can be achieved free of any air pockets or bug holes.
For an aesthetic that includes pits and holes, minimize your
water reducer and/or vibration.
C A S T I N G R E C I P E
• 50 lb (22.7 kg) Craftsman Mix
• 6.8-7.5 lb (3-3.4 kg) Chilled Water
• 4-5 fl oz (120-150 ml) Water Reducer 555
• Pigment to taste
• 0.1 - 0.5 lb (45 - 227 g) PVA 15, PVA 100, or Acrylic Fiber
AC50 (see page 38 for more info on fiber choices)
Ideal for Lightly Polished, Ground, Machined, Veined
Skill Required v v v v v

P| 1 2
GF
RC
MIX
GFRC (Glass Fiber Reinforced Concrete) is a simple composite. It typically consists of a surface layer (face/mist coat) without fiber, and a structural layer (backer mix) containing AR Glass Fibers. Our GFRC Mix can be sprayed, poured, pressed, or troweled. Due
to the absence of larger aggregate in the mix, it is an ideal base to add decorative aggregates to, or to build a
specific custom recipe from. In some cases the GFRC recipe contains fibers throughout, such as with SCC. The introduction of GFRC to our industry has made possible stronger and lighter weight pieces. The mix can be used to create many different looks; from a clean, almost machined finish to one with beautiful depth and movement.
O CREATE YOUR OWN GFRC BLEND
You can source local sands and cements
to create your own blend. Here is the
recipe for the blend, the only thing you
will need to add is the GFRC Admixture.
Your blend will contain the following:
• 24.6 lb (11.16 kg) Portland Cement
(We recommend Federal White)
• 21.8 lb (9.88 kg) 30/60 Mesh Silica Sand
• 3.6 lb (1.63 kg) GFRC Admixture
GFRC MIX
M I X I N G I N S T R U C T I O N S F O R G F R C
• Combine water and pigment together and mix thoroughly.
• Add 50% of the water reducer to the water. Slowly add dry ingredients
while continuing to blend. Add remainder of water reducer. Blend until
homogeneous
For Backer Mixes:
• After initial blending, slowly add the AR Glass Fiber to the mix. Blend until
homogeneous*. Temper with water reducer as needed for desired consistency.
If Using AC50 Acrylic Fiber:
• Acrylic fibers are monofilament and have more surface area than bundled
fibers. They can easily choke up a concrete mix if they are overdosed or not
carefully blended in. Some users find blending the fibers in the mix water
first provides optimal dispersion. Others prefer to slowly blend the fibers
into the concrete slurry later in the mixing process. Some experimentation is
suggested to determine the best solution for a specific mix design.
*Mixing too long or at too high a speed after fiber has been added can filamentize
or damage the fiber, resulting in placement issues and reduced strengths.
Color: Bone WhiteOne bag covers +/- 5 ft2 (0.5 m2) at 1” (2.5 cm) thick. One bag produces +/- 30 ft2 (2.8 m2) of mist/face coat when sprayed.Total Cementitious Binder: 26 lb (11.8 kg) per bag.This mix is typically cast at 0.75” - 1” (1.9-2.5 cm) thick. It can be cast at 0.5” (1.27 cm) thick, but consideration must be given in the handling and support of the piece.
P| 1 3BUDDY RHODES CONCRETE PRODUCTS | Call us: 877-706-5303 | Email us at: [email protected]
GF
RC
MIX
S P R AY R E C I P E
• 50 lb (22.7 kg) GFRC Blended Mix
• 8.3-8.6 lb (3.76-3.9 kg) Chilled Water
• 25 ml Water Reducer 420 (Additional may be required)
• Pigment to taste
• 0.1 lb (45 g) PVA 7, PVA 15, or Acrylic Fiber AC 50 (optional
in face coat, see page 38 for more info on fiber choices)
• 1.5 - 1.75 lb (0.68 - 0.79 kg) Alkali Resistant Glass Fiber
(Backer/Structural Mix Only)
Ideal for Cream, Polished, Ground, High Spray
Particularly useful for large complex shapes and 3D objects.
Skill Required v v v v v
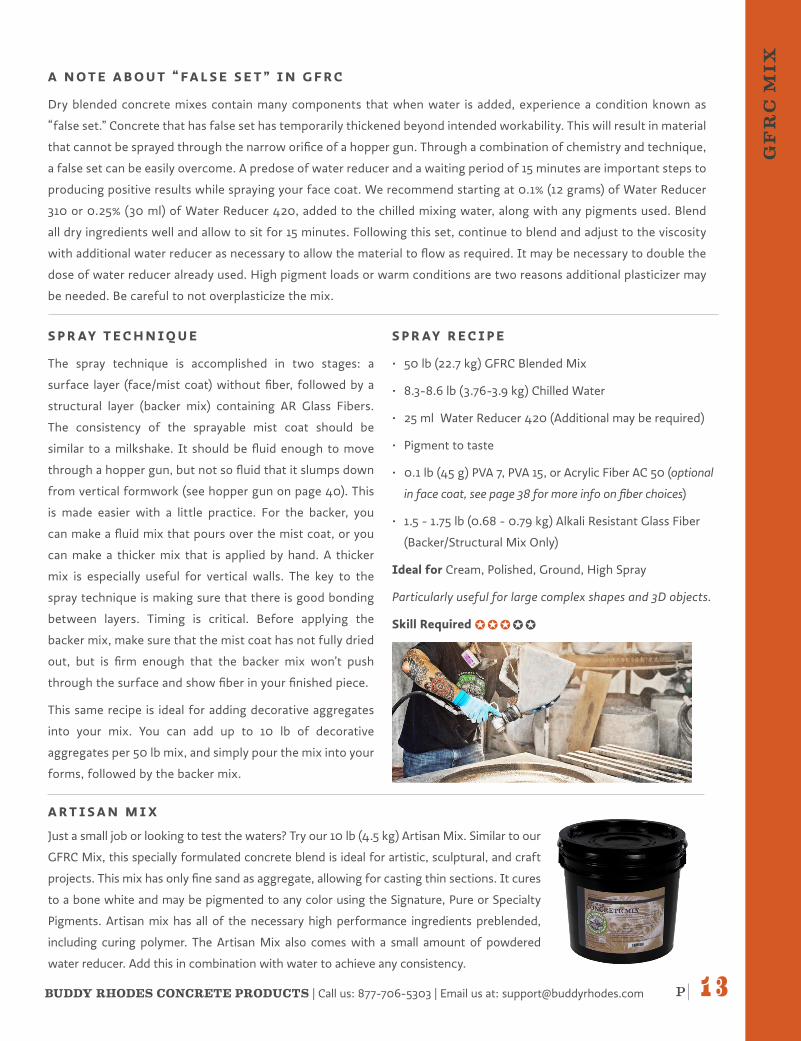
S P R AY T E C H N I Q U E
The spray technique is accomplished in two stages: a
surface layer (face/mist coat) without fiber, followed by a
structural layer (backer mix) containing AR Glass Fibers.
The consistency of the sprayable mist coat should be
similar to a milkshake. It should be fluid enough to move
through a hopper gun, but not so fluid that it slumps down
from vertical formwork (see hopper gun on page 40). This
is made easier with a little practice. For the backer, you
can make a fluid mix that pours over the mist coat, or you
can make a thicker mix that is applied by hand. A thicker
mix is especially useful for vertical walls. The key to the
spray technique is making sure that there is good bonding
between layers. Timing is critical. Before applying the
backer mix, make sure that the mist coat has not fully dried
out, but is firm enough that the backer mix won’t push
through the surface and show fiber in your finished piece.
This same recipe is ideal for adding decorative aggregates
into your mix. You can add up to 10 lb of decorative
aggregates per 50 lb mix, and simply pour the mix into your
forms, followed by the backer mix.
A N O T E A B O U T “ FA L S E S E T ” I N G F R C
Dry blended concrete mixes contain many components that when water is added, experience a condition known as
“false set.” Concrete that has false set has temporarily thickened beyond intended workability. This will result in material
that cannot be sprayed through the narrow orifice of a hopper gun. Through a combination of chemistry and technique,
a false set can be easily overcome. A predose of water reducer and a waiting period of 15 minutes are important steps to
producing positive results while spraying your face coat. We recommend starting at 0.1% (12 grams) of Water Reducer
310 or 0.25% (30 ml) of Water Reducer 420, added to the chilled mixing water, along with any pigments used. Blend
all dry ingredients well and allow to sit for 15 minutes. Following this set, continue to blend and adjust to the viscosity
with additional water reducer as necessary to allow the material to flow as required. It may be necessary to double the
dose of water reducer already used. High pigment loads or warm conditions are two reasons additional plasticizer may
be needed. Be careful to not overplasticize the mix.
A R T I S A N M I X
Just a small job or looking to test the waters? Try our 10 lb (4.5 kg) Artisan Mix. Similar to our
GFRC Mix, this specially formulated concrete blend is ideal for artistic, sculptural, and craft
projects. This mix has only fine sand as aggregate, allowing for casting thin sections. It cures
to a bone white and may be pigmented to any color using the Signature, Pure or Specialty
Pigments. Artisan mix has all of the necessary high performance ingredients preblended,
including curing polymer. The Artisan Mix also comes with a small amount of powdered
water reducer. Add this in combination with water to achieve any consistency.
P| 1 4
GF
RC
MIX
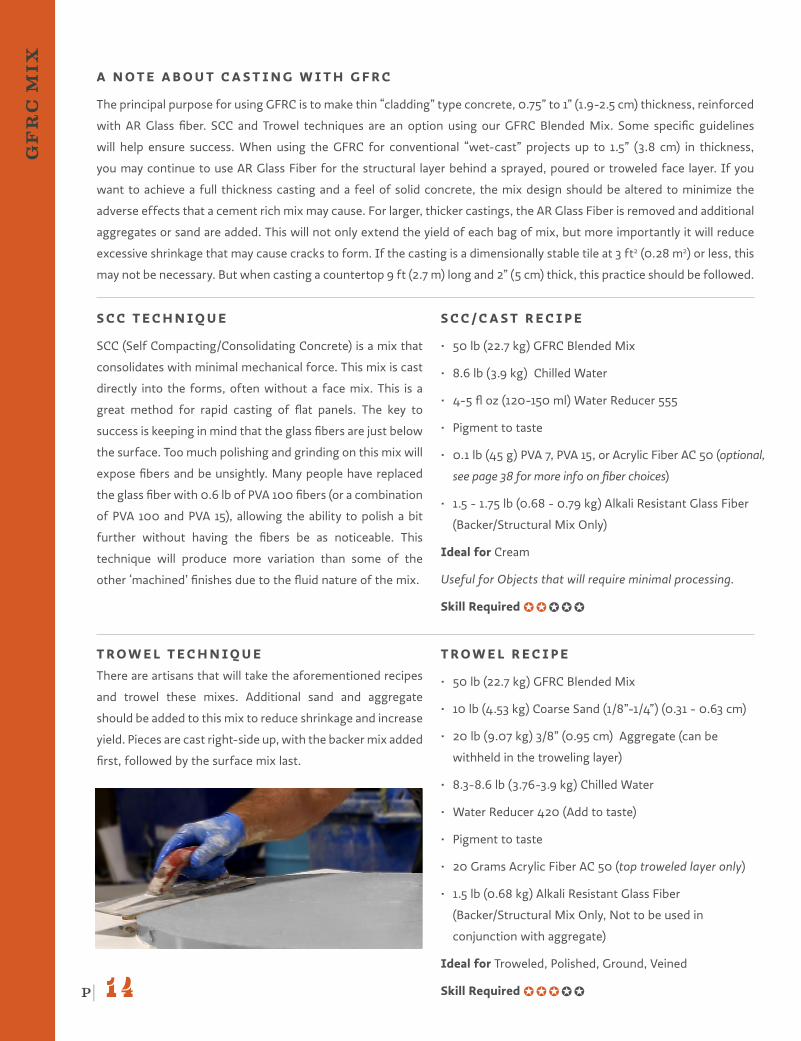
T R O W E L T E C H N I Q U E
There are artisans that will take the aforementioned recipes
and trowel these mixes. Additional sand and aggregate
should be added to this mix to reduce shrinkage and increase
yield. Pieces are cast right-side up, with the backer mix added
first, followed by the surface mix last.
T R O W E L R E C I P E
• 50 lb (22.7 kg) GFRC Blended Mix
• 10 lb (4.53 kg) Coarse Sand (1/8”-1/4”) (0.31 - 0.63 cm)
• 20 lb (9.07 kg) 3/8” (0.95 cm) Aggregate (can be
withheld in the troweling layer)
• 8.3-8.6 lb (3.76-3.9 kg) Chilled Water
• Water Reducer 420 (Add to taste)
• Pigment to taste
• 20 Grams Acrylic Fiber AC 50 (top troweled layer only)
• 1.5 lb (0.68 kg) Alkali Resistant Glass Fiber
(Backer/Structural Mix Only, Not to be used in
conjunction with aggregate)
Ideal for Troweled, Polished, Ground, Veined
Skill Required v v v v v
S C C T E C H N I Q U E
SCC (Self Compacting/Consolidating Concrete) is a mix that
consolidates with minimal mechanical force. This mix is cast
directly into the forms, often without a face mix. This is a
great method for rapid casting of flat panels. The key to
success is keeping in mind that the glass fibers are just below
the surface. Too much polishing and grinding on this mix will
expose fibers and be unsightly. Many people have replaced
the glass fiber with 0.6 lb of PVA 100 fibers (or a combination
of PVA 100 and PVA 15), allowing the ability to polish a bit
further without having the fibers be as noticeable. This
technique will produce more variation than some of the
other ‘machined’ finishes due to the fluid nature of the mix.
S C C /C A S T R E C I P E
• 50 lb (22.7 kg) GFRC Blended Mix
• 8.6 lb (3.9 kg) Chilled Water
• 4-5 fl oz (120-150 ml) Water Reducer 555
• Pigment to taste
• 0.1 lb (45 g) PVA 7, PVA 15, or Acrylic Fiber AC 50 (optional,
see page 38 for more info on fiber choices)
• 1.5 - 1.75 lb (0.68 - 0.79 kg) Alkali Resistant Glass Fiber
(Backer/Structural Mix Only)
Ideal for Cream
Useful for Objects that will require minimal processing.
Skill Required v v v v v
A N O T E A B O U T C A S T I N G W I T H G F R C
The principal purpose for using GFRC is to make thin “cladding” type concrete, 0.75” to 1” (1.9-2.5 cm) thickness, reinforced
with AR Glass fiber. SCC and Trowel techniques are an option using our GFRC Blended Mix. Some specific guidelines
will help ensure success. When using the GFRC for conventional “wet-cast” projects up to 1.5” (3.8 cm) in thickness,
you may continue to use AR Glass Fiber for the structural layer behind a sprayed, poured or troweled face layer. If you
want to achieve a full thickness casting and a feel of solid concrete, the mix design should be altered to minimize the
adverse effects that a cement rich mix may cause. For larger, thicker castings, the AR Glass Fiber is removed and additional
aggregates or sand are added. This will not only extend the yield of each bag of mix, but more importantly it will reduce
excessive shrinkage that may cause cracks to form. If the casting is a dimensionally stable tile at 3 ft2 (0.28 m2) or less, this
may not be necessary. But when casting a countertop 9 ft (2.7 m) long and 2” (5 cm) thick, this practice should be followed.
P| 1 5BUDDY RHODES CONCRETE PRODUCTS | Call us: 877-706-5303 | Email us at: [email protected]
GF
RC
MIX
P| 1 6
EC
C M
IX
O C R E AT E YO U R
O W N E C C B L E N D
You can source local sands
and cements to create your
own blend. Here is the
recipe for the blend, the
only thing you will need to
add is the ECC Admixture.
• 26.15 lb (11.86 kg)
Portland Cement
(We recommend Federal
White Cement)
• 7.1 lb (3.22 kg)
30/60 Mesh Silica Sand
• 9 lb (4.08 kg)
40/120 Mesh Silica Sand
• 7.75 lb (3.51 kg)
ECC Admixture
M I X I N G I N S T R U C T I O N S F O R E C C
• Combine water and pigment together and mix thoroughly.
• Add 50% of the water reducer to the water.
• Slowly add dry ingredients while continuing to blend.
• Slowly add PVA Fibers to the mix. Blend until homogeneous
• Temper with water reducer as needed for desired consistency.
If Using Acrylic Fiber:
• Acrylic fibers are monofilament and have more surface area than bundled fibers. They
can easily choke up a concrete mix if they are overdosed or not carefully blended in.
Some users find blending the fibers in the mix water first provides optimal dispersion.
Others prefer to slowly blend the fibers into the concrete slurry later in the mixing
process. Some experimentation is suggested to determine the best solution for a
specific mix design.
Color: Bone White
One Bag covers +/- 5 ft2 (0.5 m2) at 1” (2.5 cm) thick.
Total Cementitious Binder: 28.45 lb (12.9 kg) per bag.
This mix is typically cast at 0.75” - 1” (1.9 - 2.5 cm) thick. It can be cast at 0.5” (1.27 cm)
for objects like tiles, but consideration must be given in the handling and support of the piece.
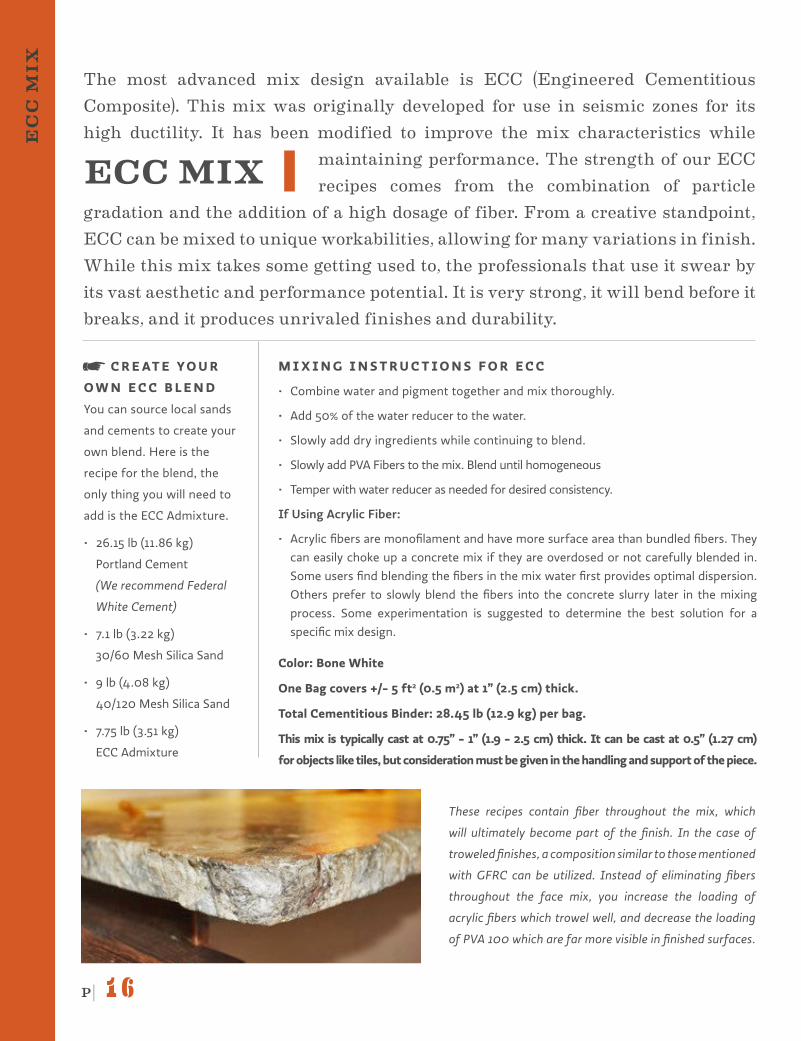
The most advanced mix design available is ECC (Engineered Cementitious Composite). This mix was originally developed for use in seismic zones for its high ductility. It has been modified to improve the mix characteristics while
maintaining performance. The strength of our ECC recipes comes from the combination of particle
gradation and the addition of a high dosage of fiber. From a creative standpoint, ECC can be mixed to unique workabilities, allowing for many variations in finish. While this mix takes some getting used to, the professionals that use it swear by its vast aesthetic and performance potential. It is very strong, it will bend before it breaks, and it produces unrivaled finishes and durability.
ECC MIX
These recipes contain fiber throughout the mix, which
will ultimately become part of the finish. In the case of
troweled finishes, a composition similar to those mentioned
with GFRC can be utilized. Instead of eliminating fibers
throughout the face mix, you increase the loading of
acrylic fibers which trowel well, and decrease the loading
of PVA 100 which are far more visible in finished surfaces.
P| 1 7BUDDY RHODES CONCRETE PRODUCTS | Call us: 877-706-5303 | Email us at: [email protected]
EC
C M
IX
C A S T T E C H N I Q U E
This recipe has a soft consistency that is not as fluid as the
Flowable mix, but easier to move around than the Clay
mix. It is ideal for casting and troweling. Many interesting
effects can be created using this recipe in different ways
during casting. It is often used in combination with the
Clay mix. They can be pressed together without having
color bleed between the mixes, opening up a world of
possibilities for finish and movement.
C A S T R E C I P E (S O F T )
• 50 lb (22.7 kg) ECC Blended Mix
• 8.9 lb (4.03 kg) Chilled Water
• 60-140 ml Water Reducer 420
• 110 Grams PVA RECS 15
• 220 Grams PVA RECS 100
• Pigment to taste
Ideal for Troweled, Polished, Ground, Veined
Skill Required v v v v v
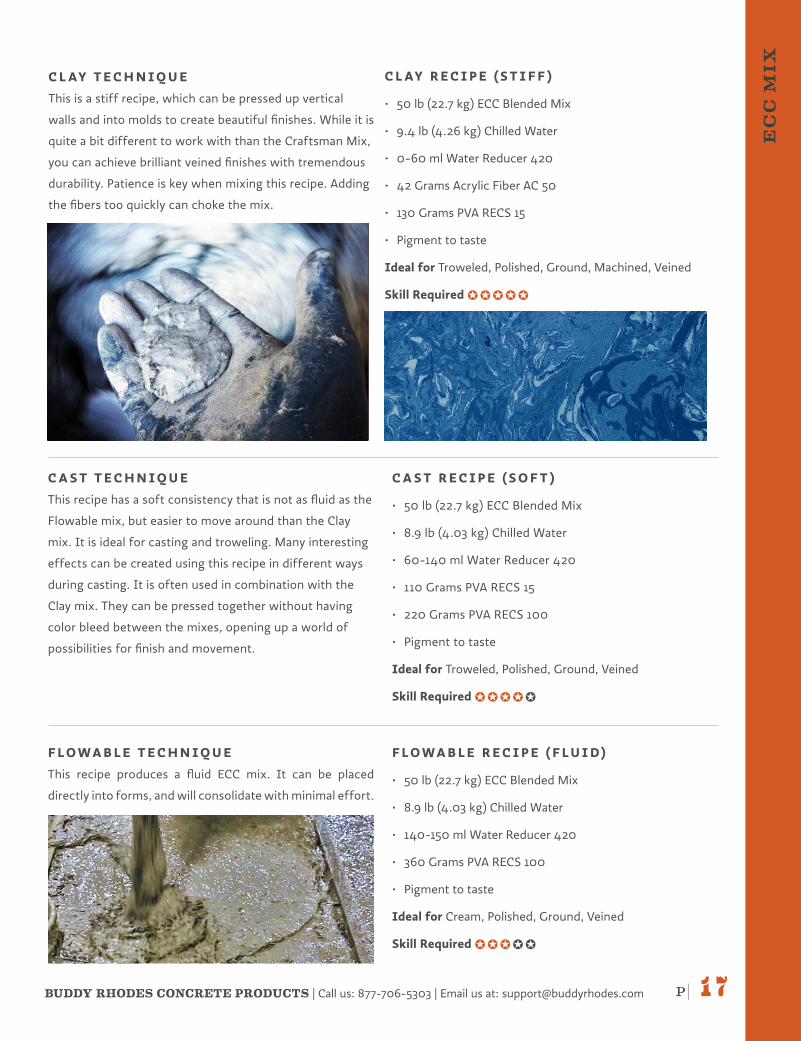
C L AY T E C H N I Q U E
This is a stiff recipe, which can be pressed up vertical
walls and into molds to create beautiful finishes. While it is
quite a bit different to work with than the Craftsman Mix,
you can achieve brilliant veined finishes with tremendous
durability. Patience is key when mixing this recipe. Adding
the fibers too quickly can choke the mix.
C L AY R E C I P E (S T I F F )
• 50 lb (22.7 kg) ECC Blended Mix
• 9.4 lb (4.26 kg) Chilled Water
• 0-60 ml Water Reducer 420
• 42 Grams Acrylic Fiber AC 50
• 130 Grams PVA RECS 15
• Pigment to taste
Ideal for Troweled, Polished, Ground, Machined, Veined
Skill Required v v v v v
F L O WA B L E T E C H N I Q U E
This recipe produces a fluid ECC mix. It can be placed
directly into forms, and will consolidate with minimal effort.
F L O WA B L E R E C I P E ( F L U I D)
• 50 lb (22.7 kg) ECC Blended Mix
• 8.9 lb (4.03 kg) Chilled Water
• 140-150 ml Water Reducer 420
• 360 Grams PVA RECS 100
• Pigment to taste
Ideal for Cream, Polished, Ground, Veined
Skill Required v v v v v

P| 1 8
VE
RT
ICA
L M
IX +
RA
MP
M I X I N G I N S T R U C T I O N S F O R V E R T I C A L M I X
In addition to the dry blended ingredients in a bag of Vertical Mix, it is critical to add RAMPTM Adhesion and Cure Promoter
in the mix. This liquid polymer ensures proper cure of Vertical Mix and improves the overall physical properties. It also
greatly improves bonding strength and enhances freeze/thaw resistance for exterior use.
• Begin by combining water, RAMPTM and pigment together and mixing thoroughly.
• Slowly add dry ingredients. Continue blending until homogeneous.
Color: Light Gray
One Bag covers +/- 8 ft2 (0.75 m2) at 0.75” (1.9 cm) thick.
Total Cementitious Binder: 27.5 lb (12.5 kg) per bag.
This mix is typically applied at 0.75” - 1” (1.9 - 2.5 cm) thick, but can be packed onto vertical
walls up to 4” (10 cm) thick in one application.
Buddy Rhodes Vertical MixTM is a flame rated (E84 – Class A) overlay that is troweled onto vertical surfaces and carved, sculpted or stamped to create
rock, stone, tile and other textures.
For interior or exterior areas, this zero slump formula is used for a variety of applications including creating themed structures for amusement parks, zoo &
aquarium displays, architectural panels, landscape elements and public sculpture. Vertical Mix is a unique material, up to 30% lighter than other bag mixes, fiber reinforced and with exceptional bonding strength to many surfaces.
VERTICAL MIX + RAMP
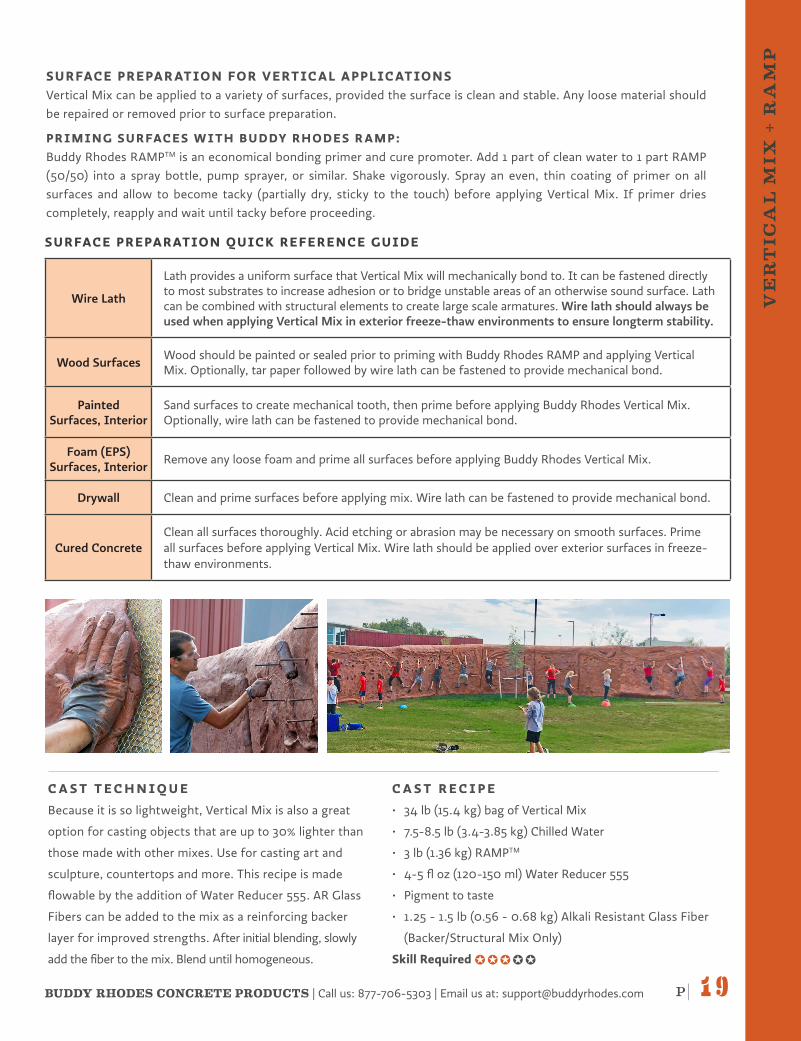
V E R T I C A L /C A R V I N G T E C H N I Q U E
This is the standard mix recipe used by vertical artisans to
create dramatic rockscapes and themed environments. It
will be stiff but airy in consistency, capable of hanging up
to 4” (10 cm) thick on sheer surfaces.
Carve details by hand
or add textures into
freshly applied mix
with rubber stamps
or rollers, Use Buddy
Rhodes Pigments or
topical Glazes for
unique color finishes.
V E R T I C A L /C A R V I N G R E C I P E
• 34 lb (15.4 kg) bag of Vertical Mix
• 7.5-8.5 lb (3.4-3.85 kg) Chilled Water
• 3 lb (1.36 kg) RAMPTM
• Pigment to taste
Skill Required v v v v v
P| 1 9BUDDY RHODES CONCRETE PRODUCTS | Call us: 877-706-5303 | Email us at: [email protected]
VE
RT
ICA
L M
IX +
RA
MP
C A S T T E C H N I Q U E
Because it is so lightweight, Vertical Mix is also a great
option for casting objects that are up to 30% lighter than
those made with other mixes. Use for casting art and
sculpture, countertops and more. This recipe is made
flowable by the addition of Water Reducer 555. AR Glass
Fibers can be added to the mix as a reinforcing backer
layer for improved strengths. After initial blending, slowly
add the fiber to the mix. Blend until homogeneous.
C A S T R E C I P E
• 34 lb (15.4 kg) bag of Vertical Mix
• 7.5-8.5 lb (3.4-3.85 kg) Chilled Water
• 3 lb (1.36 kg) RAMPTM
• 4-5 fl oz (120-150 ml) Water Reducer 555
• Pigment to taste
• 1.25 - 1.5 lb (0.56 - 0.68 kg) Alkali Resistant Glass Fiber
(Backer/Structural Mix Only)
Skill Required v v v v v
SURFACE PREPAR ATION FOR VERTICAL APPLICATIONS Vertical Mix can be applied to a variety of surfaces, provided the surface is clean and stable. Any loose material should
be repaired or removed prior to surface preparation.
PRIMING SURFACES WITH BUDDY RHODES R AMP: Buddy Rhodes RAMPTM is an economical bonding primer and cure promoter. Add 1 part of clean water to 1 part RAMP
(50/50) into a spray bottle, pump sprayer, or similar. Shake vigorously. Spray an even, thin coating of primer on all
surfaces and allow to become tacky (partially dry, sticky to the touch) before applying Vertical Mix. If primer dries
completely, reapply and wait until tacky before proceeding.
Wire Lath
Lath provides a uniform surface that Vertical Mix will mechanically bond to. It can be fastened directly to most substrates to increase adhesion or to bridge unstable areas of an otherwise sound surface. Lath can be combined with structural elements to create large scale armatures. Wire lath should always be used when applying Vertical Mix in exterior freeze-thaw environments to ensure longterm stability.
Wood SurfacesWood should be painted or sealed prior to priming with Buddy Rhodes RAMP and applying Vertical Mix. Optionally, tar paper followed by wire lath can be fastened to provide mechanical bond.
Painted Surfaces, Interior
Sand surfaces to create mechanical tooth, then prime before applying Buddy Rhodes Vertical Mix. Optionally, wire lath can be fastened to provide mechanical bond.
Foam (EPS) Surfaces, Interior
Remove any loose foam and prime all surfaces before applying Buddy Rhodes Vertical Mix.
Drywall Clean and prime surfaces before applying mix. Wire lath can be fastened to provide mechanical bond.
Cured ConcreteClean all surfaces thoroughly. Acid etching or abrasion may be necessary on smooth surfaces. Prime all surfaces before applying Vertical Mix. Wire lath should be applied over exterior surfaces in freeze-thaw environments.
SURFACE PREPARATION QUICK REFERENCE GUIDE
P| 2 0
CU
RIN
G
Concrete develops strength through a process called hydration. We want concrete to be as hard and dense as possible, so we create an environment where hydration is as efficient as possible. This is called curing. The recipes and techniques outlined in
previous pages can be used to make high quality concrete. But if the concrete is not properly cured, all that effort will be wasted.
CURING OVERVIEW
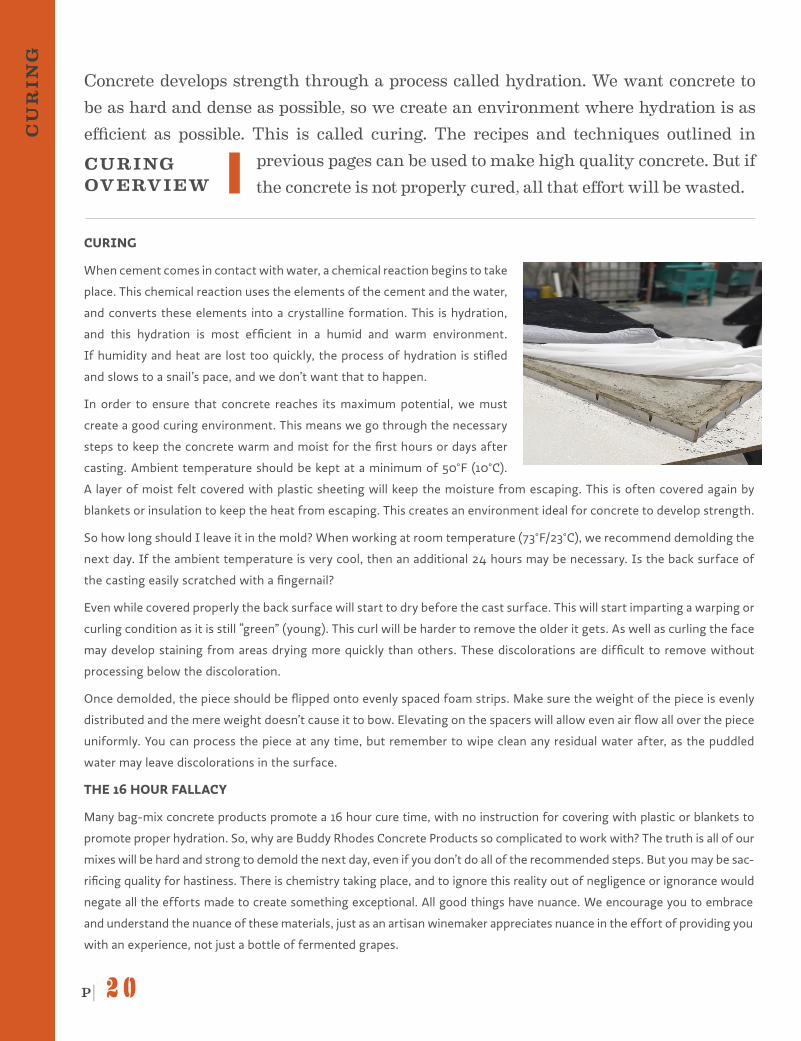
CURING
When cement comes in contact with water, a chemical reaction begins to take
place. This chemical reaction uses the elements of the cement and the water,
and converts these elements into a crystalline formation. This is hydration,
and this hydration is most efficient in a humid and warm environment.
If humidity and heat are lost too quickly, the process of hydration is stifled
and slows to a snail’s pace, and we don’t want that to happen.
In order to ensure that concrete reaches its maximum potential, we must
create a good curing environment. This means we go through the necessary
steps to keep the concrete warm and moist for the first hours or days after
casting. Ambient temperature should be kept at a minimum of 50°F (10°C).
A layer of moist felt covered with plastic sheeting will keep the moisture from escaping. This is often covered again by
blankets or insulation to keep the heat from escaping. This creates an environment ideal for concrete to develop strength.
So how long should I leave it in the mold? When working at room temperature (73°F/23°C), we recommend demolding the
next day. If the ambient temperature is very cool, then an additional 24 hours may be necessary. Is the back surface of
the casting easily scratched with a fingernail?
Even while covered properly the back surface will start to dry before the cast surface. This will start imparting a warping or
curling condition as it is still “green” (young). This curl will be harder to remove the older it gets. As well as curling the face
may develop staining from areas drying more quickly than others. These discolorations are difficult to remove without
processing below the discoloration.
Once demolded, the piece should be flipped onto evenly spaced foam strips. Make sure the weight of the piece is evenly
distributed and the mere weight doesn’t cause it to bow. Elevating on the spacers will allow even air flow all over the piece
uniformly. You can process the piece at any time, but remember to wipe clean any residual water after, as the puddled
water may leave discolorations in the surface.
THE 16 HOUR FALLACY
Many bag-mix concrete products promote a 16 hour cure time, with no instruction for covering with plastic or blankets to
promote proper hydration. So, why are Buddy Rhodes Concrete Products so complicated to work with? The truth is all of our
mixes will be hard and strong to demold the next day, even if you don’t do all of the recommended steps. But you may be sac-
rificing quality for hastiness. There is chemistry taking place, and to ignore this reality out of negligence or ignorance would
negate all the efforts made to create something exceptional. All good things have nuance. We encourage you to embrace
and understand the nuance of these materials, just as an artisan winemaker appreciates nuance in the effort of providing you
with an experience, not just a bottle of fermented grapes.
P| 2 1BUDDY RHODES CONCRETE PRODUCTS | Call us: 877-706-5303 | Email us at: [email protected]
PR
OC
ES
SIN
G
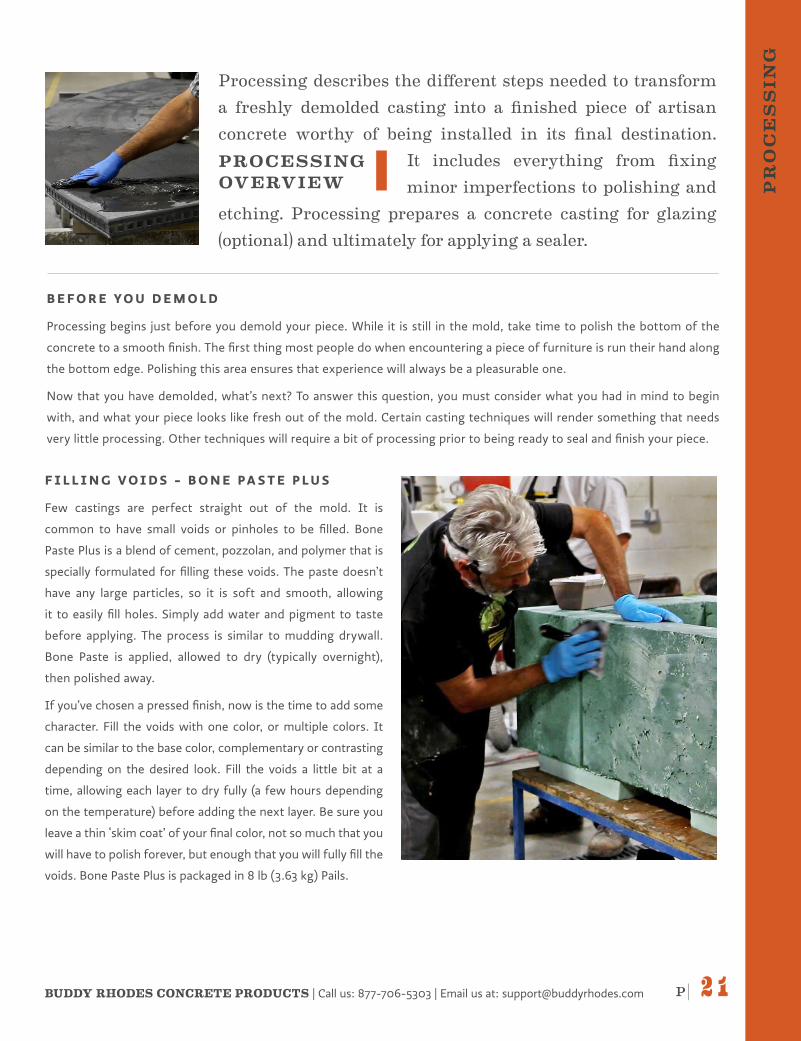
Processing describes the different steps needed to transform a freshly demolded casting into a finished piece of artisan concrete worthy of being installed in its final destination.
It includes everything from fixing minor imperfections to polishing and
etching. Processing prepares a concrete casting for glazing (optional) and ultimately for applying a sealer.
PROCESSING OVERVIEW
B E F O R E YO U D E M O L D
Processing begins just before you demold your piece. While it is still in the mold, take time to polish the bottom of the
concrete to a smooth finish. The first thing most people do when encountering a piece of furniture is run their hand along
the bottom edge. Polishing this area ensures that experience will always be a pleasurable one.
Now that you have demolded, what’s next? To answer this question, you must consider what you had in mind to begin
with, and what your piece looks like fresh out of the mold. Certain casting techniques will render something that needs
very little processing. Other techniques will require a bit of processing prior to being ready to seal and finish your piece.
F I L L I N G V O I D S - B O N E PA S T E P L U S
Few castings are perfect straight out of the mold. It is
common to have small voids or pinholes to be filled. Bone
Paste Plus is a blend of cement, pozzolan, and polymer that is
specially formulated for filling these voids. The paste doesn’t
have any large particles, so it is soft and smooth, allowing
it to easily fill holes. Simply add water and pigment to taste
before applying. The process is similar to mudding drywall.
Bone Paste is applied, allowed to dry (typically overnight),
then polished away.
If you’ve chosen a pressed finish, now is the time to add some
character. Fill the voids with one color, or multiple colors. It
can be similar to the base color, complementary or contrasting
depending on the desired look. Fill the voids a little bit at a
time, allowing each layer to dry fully (a few hours depending
on the temperature) before adding the next layer. Be sure you
leave a thin ‘skim coat’ of your final color, not so much that you
will have to polish forever, but enough that you will fully fill the
voids. Bone Paste Plus is packaged in 8 lb (3.63 kg) Pails.
P| 2 2
PO
LIS
HIN
G
The most important thing to understand before polishing is the “geology” of the concrete. The finished surface is the
“cream layer” consisting of very fine materials only. As you work your way into the slab, the next layer you will find is a fine
bit of sand; the “salt and pepper layer.” Going deeper you will begin to fully expose the sand particles in the “sand layer.”
Finally, you will enter the “aggregate layer” where your sand and any additional aggregate is fully exposed. Understanding
these layers will help you know how deep you must polish or grind to achieve the surface finish you want.
The choice of grinding and polishing tools, pads, and processes will reflect what you are trying to accomplish. To maintain
the cream layer, lightly polish the concrete using pads that are 200 grit or higher. The higher grits produce higher sheen.
To expose your aggregate, begin grinding with more aggressive grit pads, progressing to higher grits until reaching the
desired sheen and exposure.
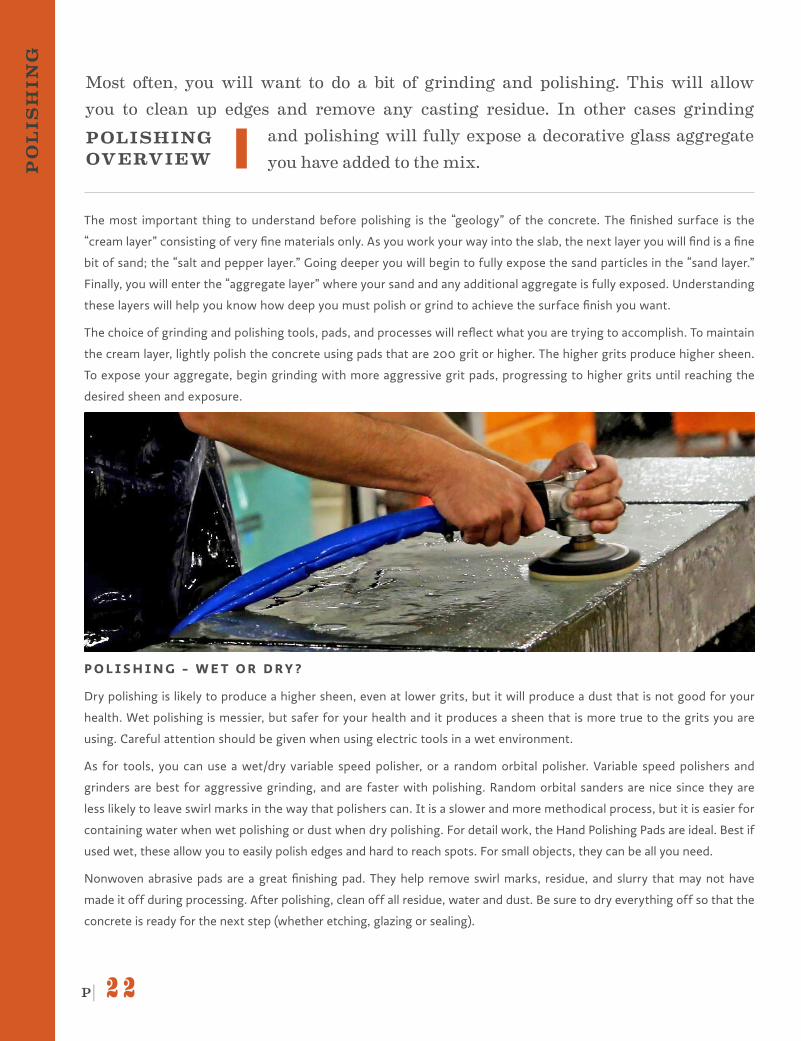
P O L I S H I N G - W E T O R D RY ?
Dry polishing is likely to produce a higher sheen, even at lower grits, but it will produce a dust that is not good for your
health. Wet polishing is messier, but safer for your health and it produces a sheen that is more true to the grits you are
using. Careful attention should be given when using electric tools in a wet environment.
As for tools, you can use a wet/dry variable speed polisher, or a random orbital polisher. Variable speed polishers and
grinders are best for aggressive grinding, and are faster with polishing. Random orbital sanders are nice since they are
less likely to leave swirl marks in the way that polishers can. It is a slower and more methodical process, but it is easier for
containing water when wet polishing or dust when dry polishing. For detail work, the Hand Polishing Pads are ideal. Best if
used wet, these allow you to easily polish edges and hard to reach spots. For small objects, they can be all you need.
Nonwoven abrasive pads are a great finishing pad. They help remove swirl marks, residue, and slurry that may not have
made it off during processing. After polishing, clean off all residue, water and dust. Be sure to dry everything off so that the
concrete is ready for the next step (whether etching, glazing or sealing).
Most often, you will want to do a bit of grinding and polishing. This will allow you to clean up edges and remove any casting residue. In other cases grinding
and polishing will fully expose a decorative glass aggregate you have added to the mix.
POLISHING OVERVIEW
P| 2 3BUDDY RHODES CONCRETE PRODUCTS | Call us: 877-706-5303 | Email us at: [email protected]
ET
CH
ING
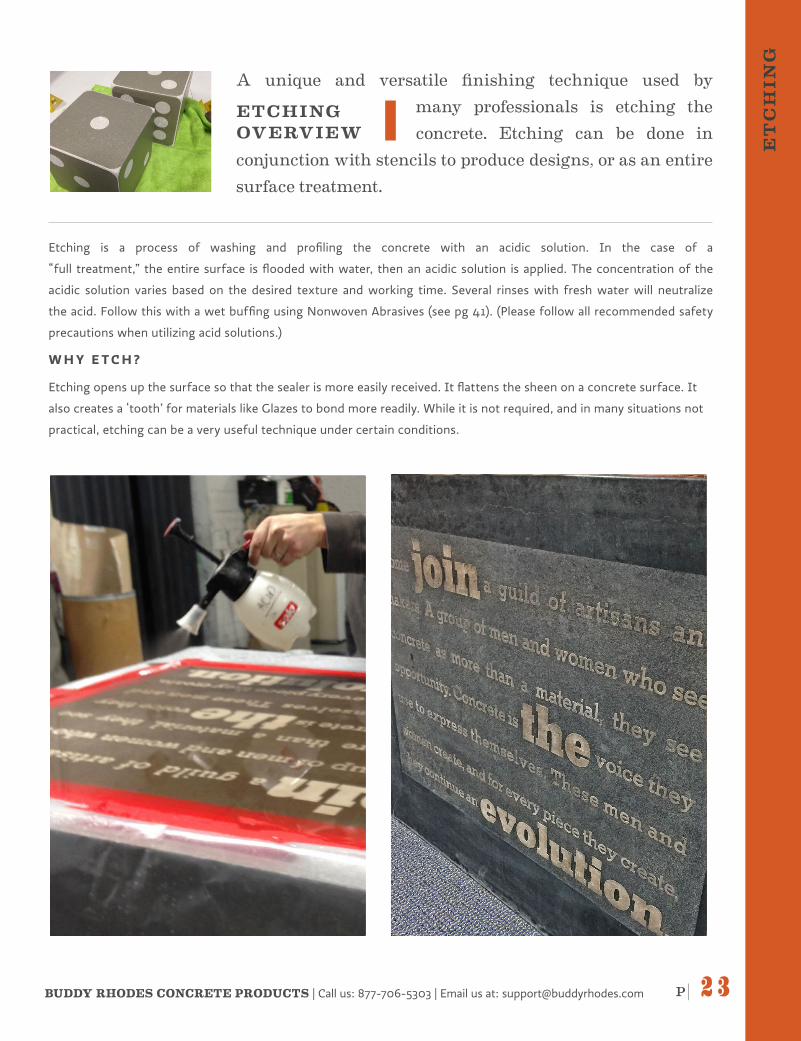
Etching is a process of washing and profiling the concrete with an acidic solution. In the case of a
“full treatment,” the entire surface is flooded with water, then an acidic solution is applied. The concentration of the
acidic solution varies based on the desired texture and working time. Several rinses with fresh water will neutralize
the acid. Follow this with a wet buffing using Nonwoven Abrasives (see pg 41). (Please follow all recommended safety
precautions when utilizing acid solutions.)
W H Y E T C H ?
Etching opens up the surface so that the sealer is more easily received. It flattens the sheen on a concrete surface. It
also creates a ‘tooth’ for materials like Glazes to bond more readily. While it is not required, and in many situations not
practical, etching can be a very useful technique under certain conditions.
A unique and versatile finishing technique used by many professionals is etching the concrete. Etching can be done in
conjunction with stencils to produce designs, or as an entire surface treatment.
ETCHING OVERVIEW
P| 2 4
GL
AZ
ING
H E L P F U L T I P S F O R A P P LY I N G G L A Z E S :
Whether applied over stencils to create patterns, used as a tint, or applied to create variation and movement, the
possibilities are endless. There are many techniques for application, which include rubbing with a microfiber cloth,
dabbing with a cloth, applying with a roller or brush, and so on.
• The material can be applied over polished concrete, but it will be far more durable on concrete that is matted or etched.
• When the glaze is wet, it is active. When you rub across a still wet area, it will remove the material.
• The longer the glaze has been dried, the harder it will be
to remove. Soon after drying, it can be removed with a
wet towel. If removed the next day it will require diamond
abrasives.
• Apply in thin layers. You will end up with a more durable finish
applying multiple thin layers as opposed to one thick layer.
• The first coat is the hardest. When the concrete is thirsty,
it is tough to keep from getting streaks. You can dilute the
glaze with 50% distilled water.
• A dilute version of the Black Glaze is a very effective way to
enhance virtually any color. In many cases, this will produce
the most durable ‘wet look’ effect you will find.
• Protect your piece with sealer. Glazes are fully UV stable, and
will stand up to a fair bit of abrasion, but a sealer should be
used to help protect them for the long haul.
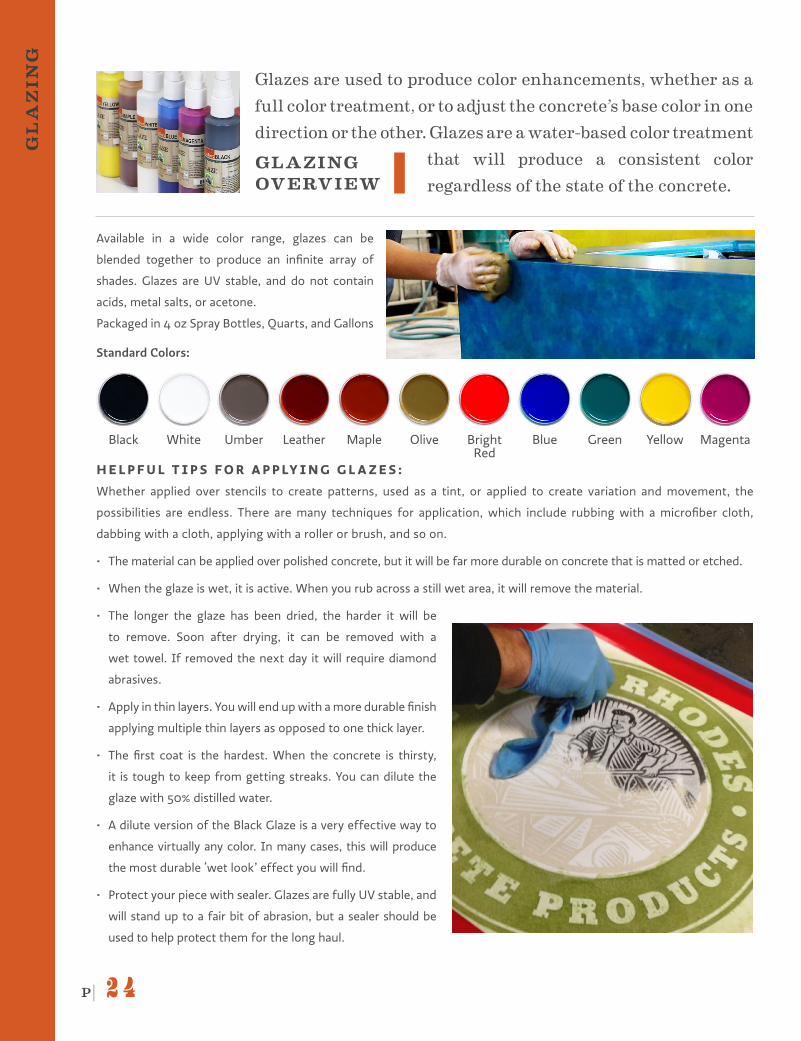
Glazes are used to produce color enhancements, whether as a full color treatment, or to adjust the concrete’s base color in one direction or the other. Glazes are a water-based color treatment
that will produce a consistent color regardless of the state of the concrete.
GLAZING OVERVIEW
Available in a wide color range, glazes can be
blended together to produce an infinite array of
shades. Glazes are UV stable, and do not contain
acids, metal salts, or acetone.
Packaged in 4 oz Spray Bottles, Quarts, and Gallons
Standard Colors:
Black White Umber Leather Maple Olive Bright Red
Blue Green Yellow Magenta

P| 2 5BUDDY RHODES CONCRETE PRODUCTS | Call us: 877-706-5303 | Email us at: [email protected]
SE
AL
ING
| B
R S
YS
TE
M
Concrete is an inherently porous material and often needs to be sealed for particular environments and uses. There are a multitude of systems and products on the market used for sealing concrete. There is no magic answer, and every sealer and system
has pros and cons. We offer 3 primary sealer technologies for concrete, developed after many years of experience, trial
and error, and observation. Like most things we value, concrete requires care and attention. Choice of sealer is often a balance between what best fits the needs of the finished piece and what best matches the skill level of the person applying it.
SEALING OVERVIEW
P E N E T R AT I N G S E A L E R S
We use penetrating sealers as a primer that will improve stain resistance and repel
liquids. This adds further protection if there is a failure of a primary/topical sealer,
or there is prolonged exposure to staining agents. Basic penetrating sealers may
be the easiest type to apply, but also offer the least protection. Consider how
the sealed surface will be used when determining which product is best for you.
A N O T E A B O U T S E A L E R S Concrete sealer technology is always improving. Below is a general description of the
different options. Visit our website to learn more about our latest sealer options, see application videos and more.
T O P I C A L /C O AT I N G S E A L E R S
When properly applied and cured, coating sealers offer great scratch resistance
and excellent adhesion. Coating sealers are easy to use, typically applied with
a high density roller. Polyurethane is the preferred coating chemistry for many
applications. Keep in mind that just like concrete, any polyurethane technology
cures faster in warm, humid conditions. Polyurethane sealers can remain
“gummy” for 24 to 48 hours following application of the final finish coat, so shop
conditions should be well controlled.
R E A C T I V E S E A L E R S
Reactive sealers penetrate into the concrete, convert weak material into
crystalline structures, and block penetration of foreign materials into the pore
structure. They do this while maintaining breathability, so you don’t have the
concern of the sealer “lifting” if moisture penetrates. Here’s the catch - reactive
sealers rely on the concrete itself for their performance. It is paramount that a
high performance mix design is used and proper curing and processing protocols
are followed. These are not like a classic topical or penetrating sealer that cures
to itself and sits on or in the concrete. The processing of the concrete, and the
application of the sealer must be controlled to maximize sealer performance.
P| 2 6
NA
ME
GA
LL
ER
Y
P| 2 7BUDDY RHODES CONCRETE PRODUCTS | Call us: 877-706-5303 | Email us at: [email protected]
NA
ME
GA
LL
ER
Y
P| 2 8
TH
E B
UD
DY
RH
OD
ES
CO
LO
R W
HE
EL
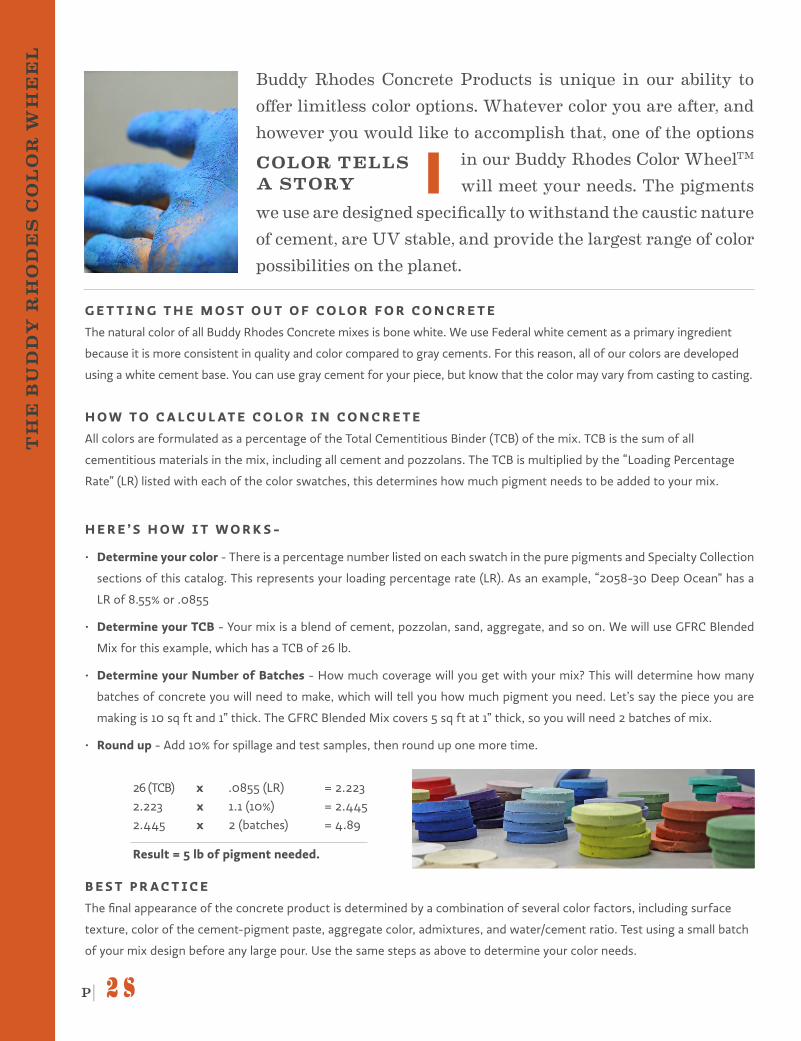
Buddy Rhodes Concrete Products is unique in our ability to offer limitless color options. Whatever color you are after, and however you would like to accomplish that, one of the options
in our Buddy Rhodes Color WheelTM
will meet your needs. The pigments we use are designed specifically to withstand the caustic nature of cement, are UV stable, and provide the largest range of color possibilities on the planet.
COLOR TELLS A STORY
G E T T I N G T H E M O S T O U T O F C O L O R F O R C O N C R E T E
The natural color of all Buddy Rhodes Concrete mixes is bone white. We use Federal white cement as a primary ingredient
because it is more consistent in quality and color compared to gray cements. For this reason, all of our colors are developed
using a white cement base. You can use gray cement for your piece, but know that the color may vary from casting to casting.
H O W T O C A L C U L AT E C O L O R I N C O N C R E T E
All colors are formulated as a percentage of the Total Cementitious Binder (TCB) of the mix. TCB is the sum of all
cementitious materials in the mix, including all cement and pozzolans. The TCB is multiplied by the “Loading Percentage
Rate” (LR) listed with each of the color swatches, this determines how much pigment needs to be added to your mix.
H E R E ’ S H O W I T W O R K S -
• Determine your color - There is a percentage number listed on each swatch in the pure pigments and Specialty Collection
sections of this catalog. This represents your loading percentage rate (LR). As an example, “2058-30 Deep Ocean” has a
LR of 8.55% or .0855
• Determine your TCB - Your mix is a blend of cement, pozzolan, sand, aggregate, and so on. We will use GFRC Blended
Mix for this example, which has a TCB of 26 lb.
• Determine your Number of Batches - How much coverage will you get with your mix? This will determine how many
batches of concrete you will need to make, which will tell you how much pigment you need. Let’s say the piece you are
making is 10 sq ft and 1” thick. The GFRC Blended Mix covers 5 sq ft at 1” thick, so you will need 2 batches of mix.
• Round up - Add 10% for spillage and test samples, then round up one more time.
26 (TCB) x .0855 (LR) = 2.223
2.223 x 1.1 (10%) = 2.445
2.445 x 2 (batches) = 4.89
Result = 5 lb of pigment needed.
B E S T P R A C T I C E
The final appearance of the concrete product is determined by a combination of several color factors, including surface
texture, color of the cement-pigment paste, aggregate color, admixtures, and water/cement ratio. Test using a small batch
of your mix design before any large pour. Use the same steps as above to determine your color needs.
P| 2 9BUDDY RHODES CONCRETE PRODUCTS | Call us: 877-706-5303 | Email us at: [email protected]
SIG
NA
TU
RE
CO
LL
EC
TIO
N
COAL
SMOKE
CHOCOLATE
SKY
STRAW
SLATE
MUSHROOM
MOSS
EARTH
UNIVERSE
WHEAT
ASH
BRICK
SAND
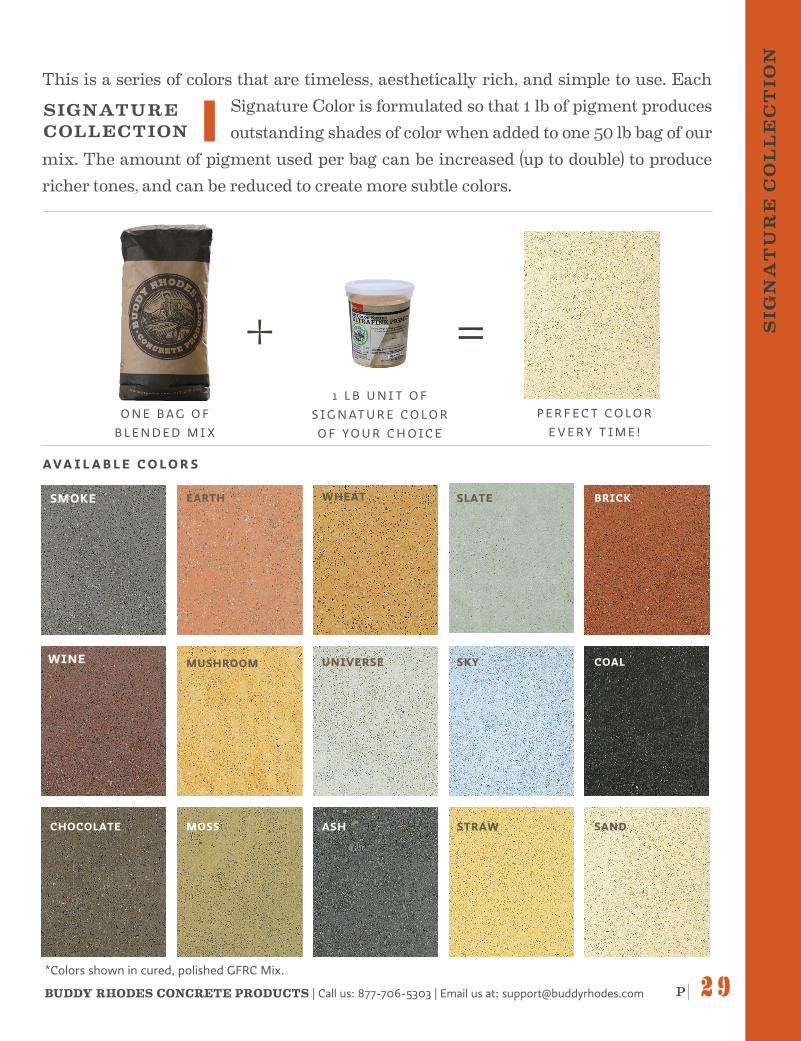
This is a series of colors that are timeless, aesthetically rich, and simple to use. Each Signature Color is formulated so that 1 lb of pigment produces outstanding shades of color when added to one 50 lb bag of our
mix. The amount of pigment used per bag can be increased (up to double) to produce richer tones, and can be reduced to create more subtle colors.
SIGNATURE COLLECTION
+ =
WINE
O N E B A G O F
B L E N D E D M I X
1 L B U N I T O F
S I G N AT U R E C O L O R
O F Y O U R C H O I C E
P E R F E C T C O L O R
E V E R Y T I M E !
AVA I L A B L E C O L O R S
*Colors shown in cured, polished GFRC Mix.
P| 3 0 Please Note: Color swatches shown are for approximation only. Test castings should be made to ensure pigment suitability for your particular project.
PU
RE
CO
LL
EC
TIO
N
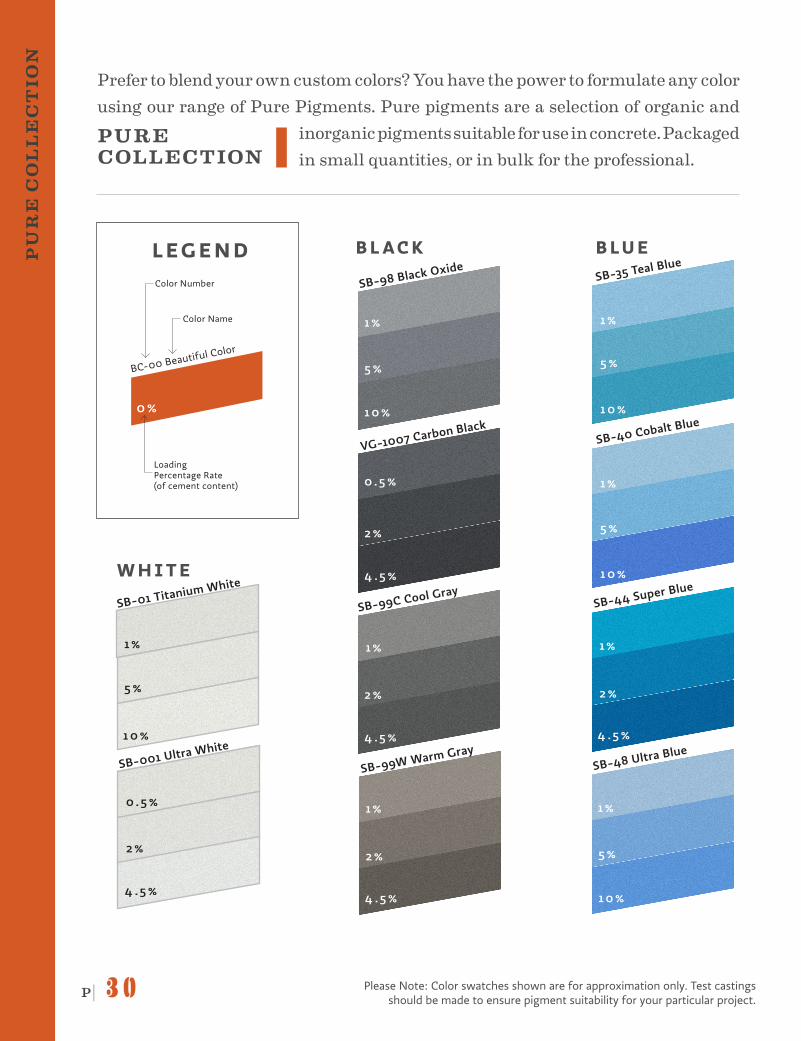
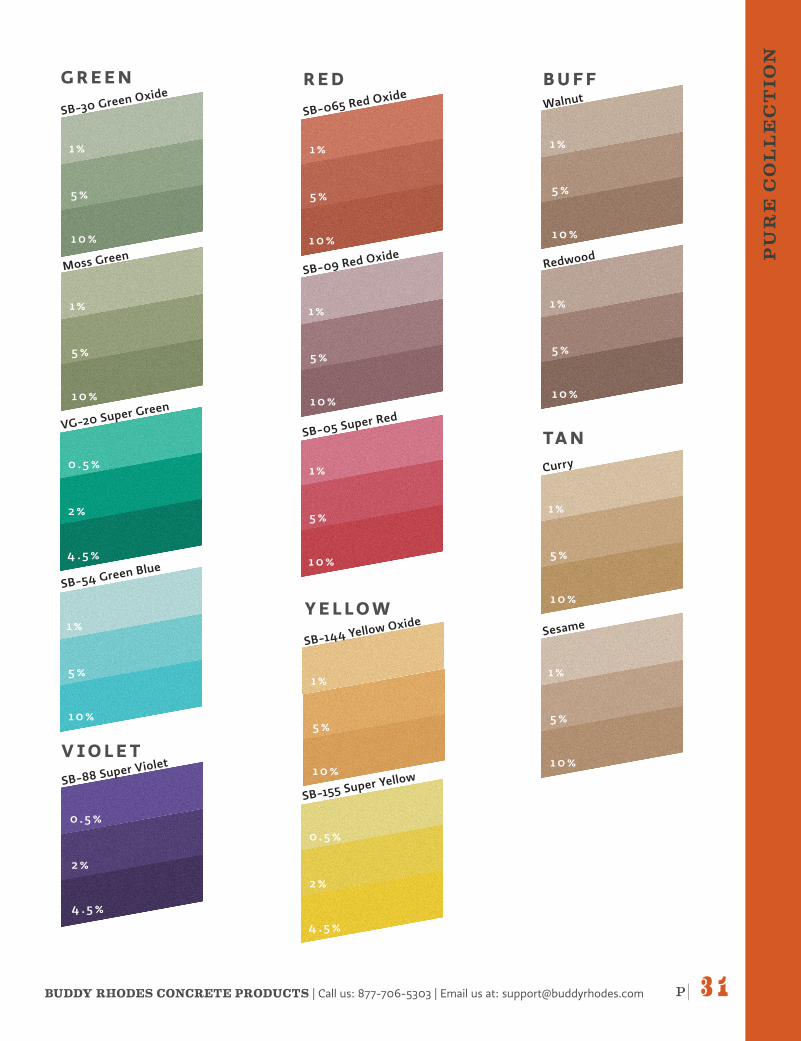
Prefer to blend your own custom colors? You have the power to formulate any color using our range of Pure Pigments. Pure pigments are a selection of organic and
inorganic pigments suitable for use in concrete. Packaged in small quantities, or in bulk for the professional.
PURE COLLECTION
B L AC K
1 %
5 %
1 0 %
SB-98 Black Oxide
0 .5 %
2 %
4 .5 %
VG-1007 Carbon Black
1 %
2 %
4 .5 %
SB-99C Cool Gray
SB-99W Warm Gray
1 %
2 %
4 .5 %
W H I T E
1 %
5 %
1 0 %
0 .5 %
2 %
4 .5 %
SB-01 Titanium White
SB-001 Ultra White
B L U E
1 %
5 %
1 0 %
SB-35 Teal Blue
1 %
5 %
1 0 %
SB-40 Cobalt Blue
SB-44 Super Blue
1 %
2 %
4 .5 %
SB-48 Ultra Blue
5 %
1 0 %
1 %
L E G E N DColor Number
Color Name
BC-00 Beautiful Color
0 %
Loading Percentage Rate(of cement content)
P| 3 1BUDDY RHODES CONCRETE PRODUCTS | Call us: 877-706-5303 | Email us at: [email protected]
PU
RE
CO
LL
EC
TIO
N
G R E E N
SB-30 Green Oxide
SB-54 Green Blue
5 %
1 0 %
1 %
0 .5 %
2 %
VG-20 Super Green
4 .5 %
Moss Green
5 %
1 0 %
1 %
5 %
1 0 %
1 %
V I O L E T SB-88 Super Violet
2 %
4 .5 %
0 .5 %
SB-144 Yellow Oxide
0 .5 %
2 %
SB-155 Super Yellow
4 .5 %
5 %
1 0 %
1 %
Y E L L O W
1 %
5 %
R E D
SB-065 Red Oxide
1 0 %
5 %
1 0 %
SB-09 Red Oxide
1 %
1 0 %
1 %
5 %
SB-05 Super Red
1 0 %
Walnut
5 %
1 0 %
1 %
B U F F
Redwood
5 %
1 0 %
1 %
5 %
1 0 %
Curry
1 %
TA N
5 %
1 0 %
Sesame
1 %
P| 3 2
NA
ME
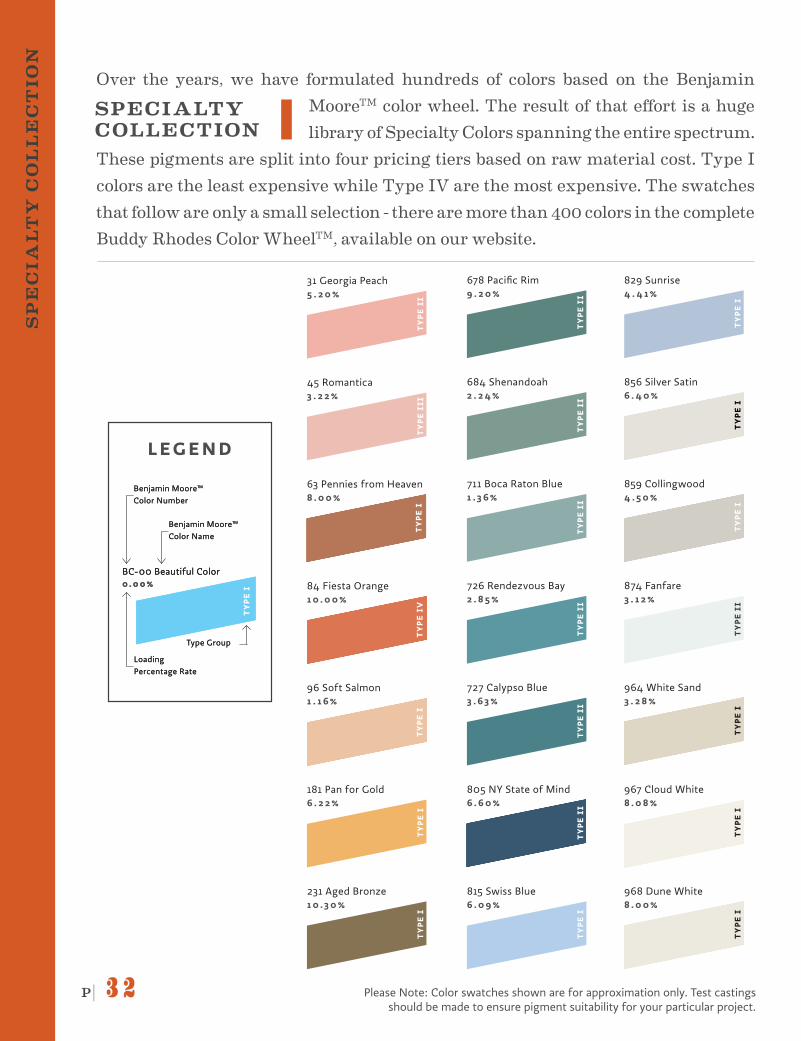
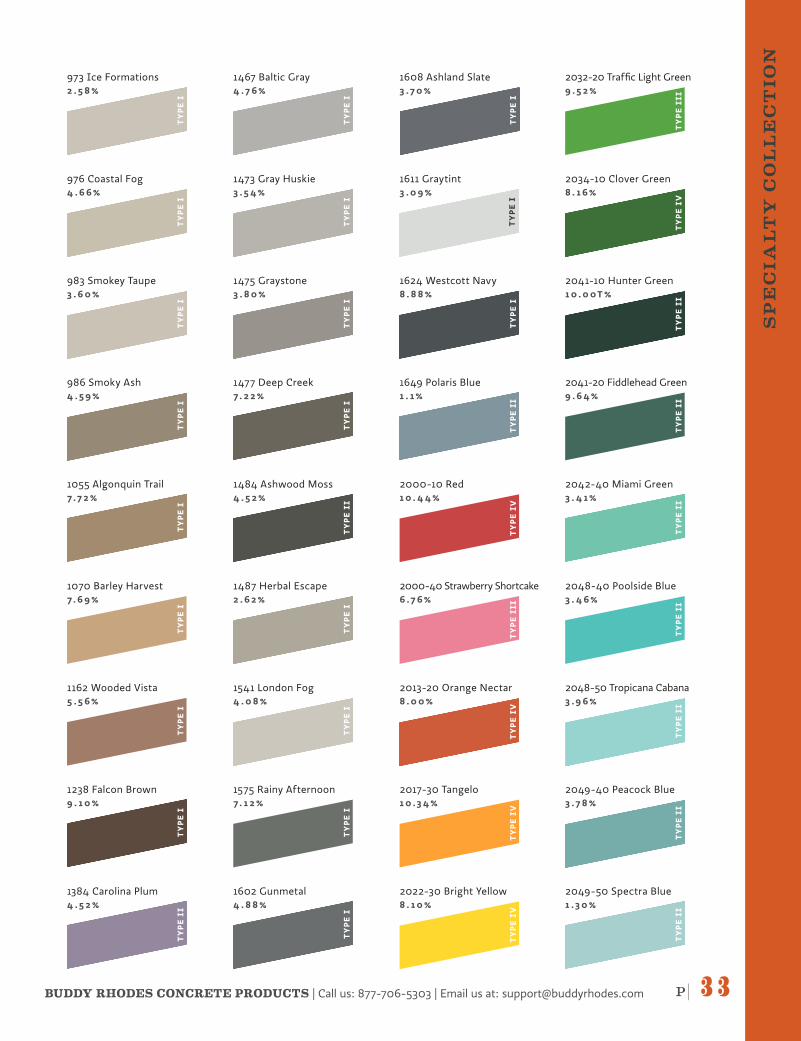
Over the years, we have formulated hundreds of colors based on the Benjamin MooreTM color wheel. The result of that effort is a huge library of Specialty Colors spanning the entire spectrum.
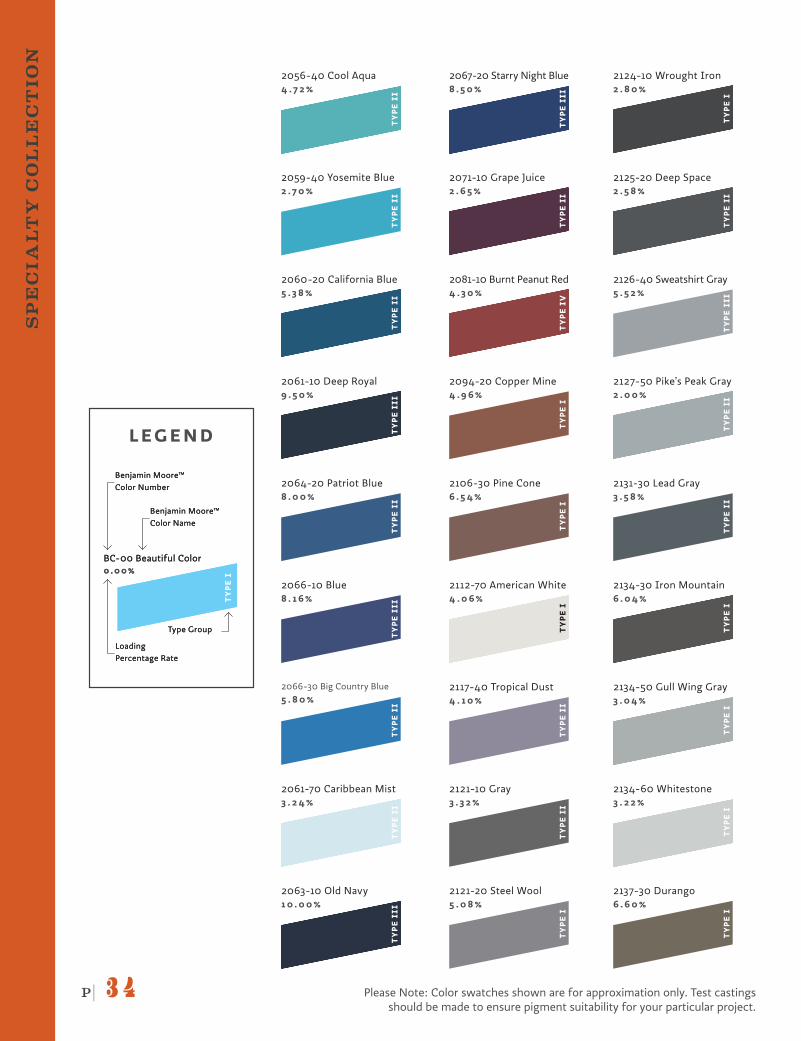
These pigments are split into four pricing tiers based on raw material cost. Type I colors are the least expensive while Type IV are the most expensive. The swatches that follow are only a small selection - there are more than 400 colors in the complete Buddy Rhodes Color WheelTM, available on our website.
SPECIALTY COLLECTION
BC-00 Beautiful Color 0 . 0 0 %
TY
PE
I
Benjamin Moore™ Color Number
Benjamin Moore™ Color Name
Loading Percentage Rate
Type Group
BC-00 Beautiful Color 0 . 0 0 %
TY
PE
I
Benjamin Moore™ Color Number
Benjamin Moore™ Color Name
Loading Percentage Rate
Type Group
L E G E N D
SP
EC
IAL
TY
CO
LL
EC
TIO
N
31 Georgia Peach 5 . 2 0 %
TY
PE
II
45 Romantica 3 . 2 2 %
TY
PE
III
63 Pennies from Heaven8 . 0 0 %
TY
PE
I
84 Fiesta Orange1 0 . 0 0 %
TY
PE
IV
678 Pacific Rim 9 . 2 0 %
TY
PE
II
684 Shenandoah 2 . 2 4 %
TY
PE
II
711 Boca Raton Blue 1 . 3 6 %
TY
PE
II
726 Rendezvous Bay 2 . 8 5 %
TY
PE
II
727 Calypso Blue 3 . 6 3 %
TY
PE
II
805 NY State of Mind 6 . 6 0 %
TY
PE
II
815 Swiss Blue 6 . 0 9 %
TY
PE
I
829 Sunrise 4 . 4 1 %
TY
PE
I
856 Silver Satin 6 . 4 0 %
TY
PE
I
859 Collingwood 4 . 5 0 %
TY
PE
I
874 Fanfare 3 . 1 2 %
TY
PE
II
967 Cloud White 8 . 0 8 %
TY
PE
I
Please Note: Color swatches shown are for approximation only. Test castings should be made to ensure pigment suitability for your particular project.
181 Pan for Gold 6 . 2 2 %
TY
PE
I
96 Soft Salmon1 . 1 6 %
TY
PE
I
231 Aged Bronze 1 0 . 3 0 %
TY
PE
I
964 White Sand 3 . 2 8 %
TY
PE
I
968 Dune White 8 . 0 0 %
TY
PE
I
P| 3 3BUDDY RHODES CONCRETE PRODUCTS | Call us: 877-706-5303 | Email us at: [email protected]
NA
ME
SP
EC
IAL
TY
CO
LL
EC
TIO
N
973 Ice Formations 2 . 5 8 %
TY
PE
I976 Coastal Fog 4 . 6 6 %
TY
PE
I
983 Smokey Taupe 3 . 6 0 %
TY
PE
I
986 Smoky Ash 4 . 5 9 %
TY
PE
I
1055 Algonquin Trail 7 .7 2 %
TY
PE
I
1070 Barley Harvest 7 . 6 9 %
TY
PE
I
1162 Wooded Vista 5 . 5 6 %
TY
PE
I
1238 Falcon Brown 9 . 1 0 %
TY
PE
I
1384 Carolina Plum 4 . 5 2 %
TY
PE
II
1467 Baltic Gray 4 .7 6 %
TY
PE
I
1473 Gray Huskie 3 . 5 4 %
TY
PE
I
1575 Rainy Afternoon 7 . 1 2 %
TY
PE
I
1475 Graystone 3 . 8 0 %
TY
PE
I
1477 Deep Creek 7 . 2 2 %
TY
PE
I
1484 Ashwood Moss 4 . 5 2 %
TY
PE
II
1487 Herbal Escape 2 . 6 2 %
TY
PE
I
1541 London Fog 4 . 0 8 %
TY
PE
I
1602 Gunmetal 4 . 8 8 %
TY
PE
I
1608 Ashland Slate 3 .7 0 %
TY
PE
I
1624 Westcott Navy 8 . 8 8 %
TY
PE
I
1649 Polaris Blue 1 . 1 %
TY
PE
II
2000-10 Red1 0 . 4 4 %
TY
PE
IV
2000-40 Strawberry Shortcake 6 .7 6 %
TY
PE
III
1611 Graytint 3 . 0 9 %
TY
PE
I
2017-30 Tangelo1 0 . 3 4 %
TY
PE
IV
2022-30 Bright Yellow8 . 1 0 %
TY
PE
IV
2013-20 Orange Nectar 8 . 0 0 %
TY
PE
IV
2032-20 Traffic Light Green9 . 5 2 %
TY
PE
III
2041-20 Fiddlehead Green9 . 6 4 %
TY
PE
II
2034-10 Clover Green 8 . 1 6 %
TY
PE
IV
2041-10 Hunter Green 1 0 . 0 0T %
TY
PE
II
2048-40 Poolside Blue3 . 4 6 %
TY
PE
II
2042-40 Miami Green 3 . 4 1 %
TY
PE
II
2048-50 Tropicana Cabana 3 . 9 6 %
TY
PE
II
2049-40 Peacock Blue 3 .7 8 %
TY
PE
II
2049-50 Spectra Blue 1 . 3 0 %
TY
PE
II
P| 3 4
NA
ME
SP
EC
IAL
TY
CO
LL
EC
TIO
N
2059-40 Yosemite Blue2 .7 0 %
TY
PE
II
2056-40 Cool Aqua 4 .7 2 %
TY
PE
II
2060-20 California Blue 5 . 3 8 %
TY
PE
II
2064-20 Patriot Blue 8 . 0 0 %
TY
PE
II
2066-10 Blue 8 . 1 6 %
TY
PE
III
2066-30 Big Country Blue 5 . 8 0 %
TY
PE
II
2061-10 Deep Royal 9 . 5 0 %
TY
PE
III
2061-70 Caribbean Mist 3 . 2 4 %
TY
PE
II
2063-10 Old Navy 1 0 . 0 0 %
TY
PE
III
2067-20 Starry Night Blue 8 . 5 0 %
TY
PE
III
2071-10 Grape Juice 2 . 6 5 %
TY
PE
II
2081-10 Burnt Peanut Red 4 . 3 0 %
TY
PE
IV
2117-40 Tropical Dust4 . 1 0 %
TY
PE
II
2094-20 Copper Mine 4 . 9 6 %
TY
PE
IBC-00 Beautiful Color 0 . 0 0 %
TY
PE
I
Benjamin Moore™ Color Number
Benjamin Moore™ Color Name
Loading Percentage Rate
Type Group
BC-00 Beautiful Color 0 . 0 0 %
TY
PE
I
Benjamin Moore™ Color Number
Benjamin Moore™ Color Name
Loading Percentage Rate
Type Group
L E G E N D
2121-20 Steel Wool 5 . 0 8 %
TY
PE
I
2121-10 Gray3 . 3 2 %
TY
PE
II
2124-10 Wrought Iron 2 . 8 0 %
TY
PE
I
2125-20 Deep Space 2 . 5 8 %
TY
PE
II
2127-50 Pike’s Peak Gray 2 . 0 0 %
TY
PE
II
2126-40 Sweatshirt Gray5 . 5 2 %
TY
PE
III
2134-30 Iron Mountain 6 . 0 4 %
TY
PE
I
2134-60 Whitestone 3 . 2 2 %
TY
PE
I
2131-30 Lead Gray3 . 5 8 %
TY
PE
II
Please Note: Color swatches shown are for approximation only. Test castings should be made to ensure pigment suitability for your particular project.
2112-70 American White 4 . 0 6 %
TY
PE
I
2106-30 Pine Cone 6 . 5 4 %
TY
PE
I
2134-50 Gull Wing Gray 3 . 0 4 %
TY
PE
I
2137-30 Durango6 . 6 0 %
TY
PE
I
P| 3 5BUDDY RHODES CONCRETE PRODUCTS | Call us: 877-706-5303 | Email us at: [email protected]
NA
ME
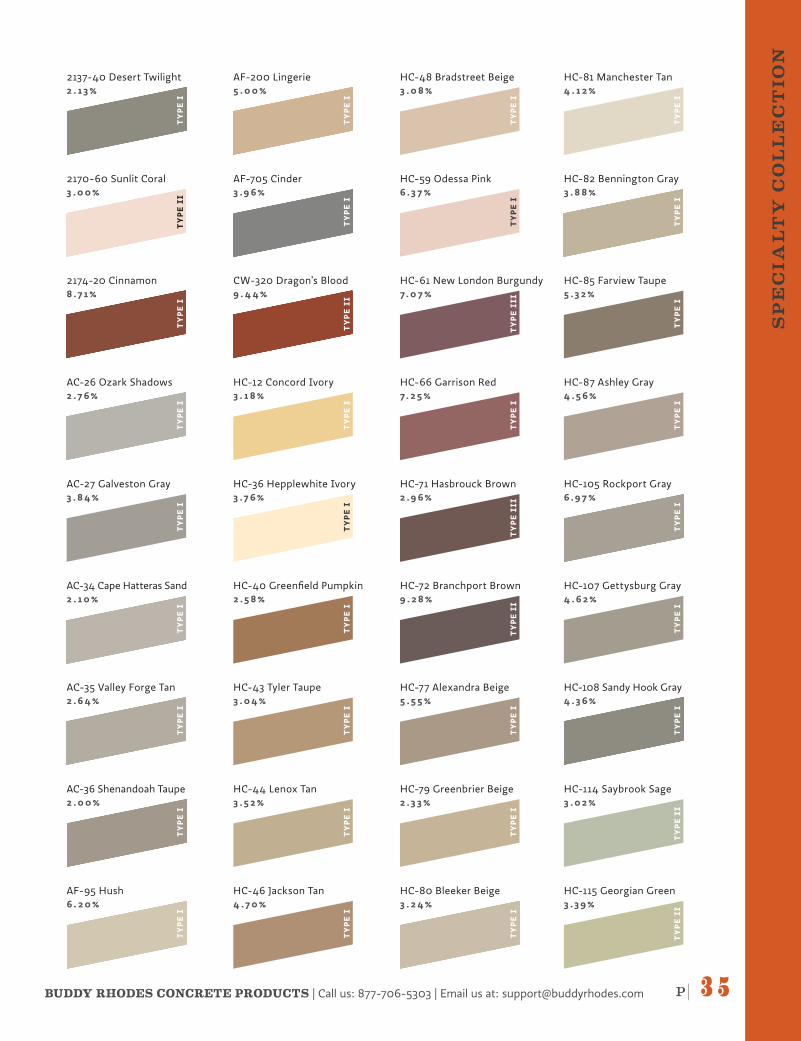
AF-200 Lingerie 5 . 0 0 %
TY
PE
I
SP
EC
IAL
TY
CO
LL
EC
TIO
N
2137-40 Desert Twilight 2 . 1 3 %
TY
PE
I2170-60 Sunlit Coral 3 . 0 0 %
TY
PE
II
2174-20 Cinnamon 8 .7 1 %
TY
PE
I
AC-26 Ozark Shadows 2 .7 6 %
TY
PE
I
AC-27 Galveston Gray 3 . 8 4 %
TY
PE
I
AC-34 Cape Hatteras Sand 2 . 1 0 %
TY
PE
I
AC-35 Valley Forge Tan 2 . 6 4 %
TY
PE
I
AC-36 Shenandoah Taupe 2 . 0 0 %
TY
PE
I
AF-95 Hush 6 . 2 0 %
TY
PE
IAF-705 Cinder 3 . 9 6 %
TY
PE
I
CW-320 Dragon’s Blood 9 . 4 4 %
TY
PE
II
HC-44 Lenox Tan 3 . 5 2 %
TY
PE
I
HC-40 Greenfield Pumpkin 2 . 5 8 %
TY
PE
I
HC-43 Tyler Taupe 3 . 0 4 %
TY
PE
I
HC-12 Concord Ivory 3 . 1 8 %
TY
PE
I
HC-36 Hepplewhite Ivory 3 .7 6 %
TY
PE
I
HC-46 Jackson Tan 4 .7 0 %
TY
PE
I
HC-48 Bradstreet Beige 3 . 0 8 %
TY
PE
I
HC-59 Odessa Pink 6 . 3 7 %
TY
PE
I
HC-71 Hasbrouck Brown 2 . 9 6 %
TY
PE
III
HC-72 Branchport Brown 9 . 2 8 %
TY
PE
II
HC-77 Alexandra Beige 5 . 5 5 %
TY
PE
I
HC-61 New London Burgundy 7 . 0 7 %
TY
PE
III
HC-66 Garrison Red 7 . 2 5 %
TY
PE
I
HC-80 Bleeker Beige 3 . 2 4 %
TY
PE
I
HC-79 Greenbrier Beige 2 . 3 3 %
TY
PE
I
HC-105 Rockport Gray 6 . 9 7 %
TY
PE
IHC-108 Sandy Hook Gray 4 . 3 6 %
TY
PE
I
HC-107 Gettysburg Gray 4 . 6 2 %
TY
PE
I
HC-114 Saybrook Sage 3 . 0 2 %
TY
PE
II
HC-115 Georgian Green 3 . 3 9 %
TY
PE
II
HC-85 Farview Taupe 5 . 3 2 %
TY
PE
I
HC-87 Ashley Gray 4 . 5 6 %
TY
PE
I
HC-82 Bennington Gray 3 . 8 8 %
TY
PE
I
HC-81 Manchester Tan 4 . 1 2 %
TY
PE
I
P| 3 6
NA
ME
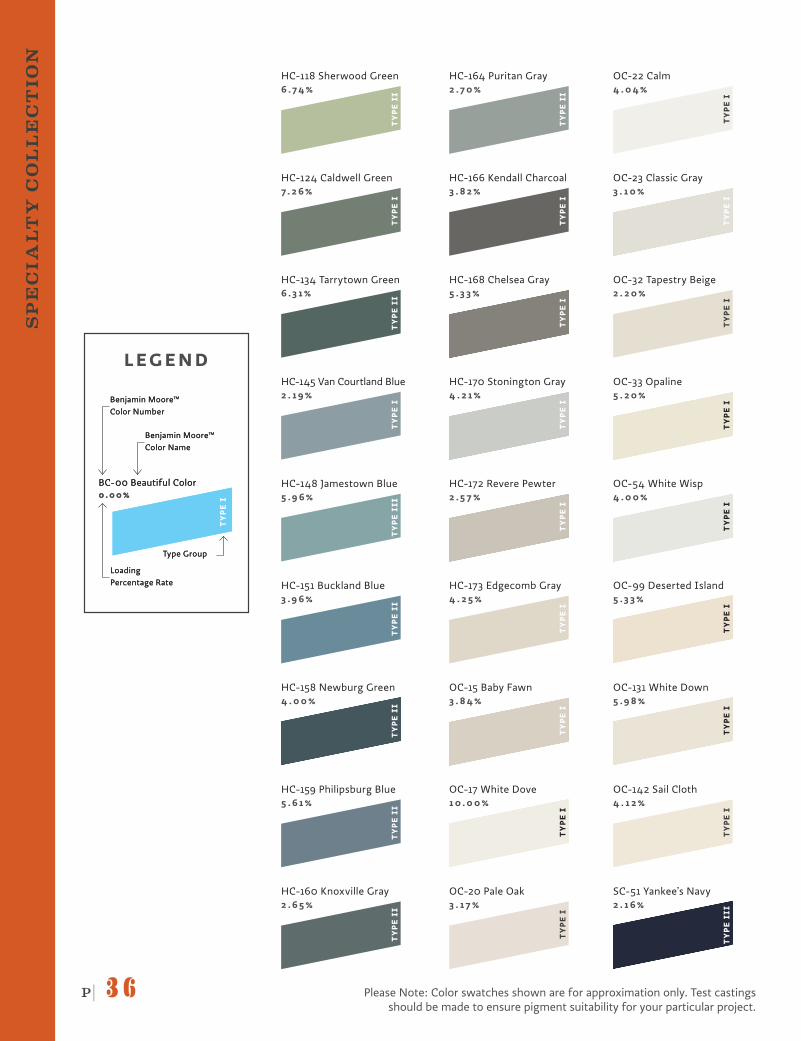
HC-134 Tarrytown Green 6 . 3 1 %
TY
PE
II
HC-148 Jamestown Blue 5 . 9 6 %
TY
PE
III
HC-124 Caldwell Green 7 . 2 6 %
TY
PE
I
BC-00 Beautiful Color 0 . 0 0 %
TY
PE
I
Benjamin Moore™ Color Number
Benjamin Moore™ Color Name
Loading Percentage Rate
Type Group
BC-00 Beautiful Color 0 . 0 0 %
TY
PE
I
Benjamin Moore™ Color Number
Benjamin Moore™ Color Name
Loading Percentage Rate
Type Group
L E G E N D
SP
EC
IAL
TY
CO
LL
EC
TIO
N
HC-158 Newburg Green 4 . 0 0 %
TY
PE
II
HC-151 Buckland Blue 3 . 9 6 %
TY
PE
II
HC-159 Philipsburg Blue 5 . 6 1 %
TY
PE
II
HC-164 Puritan Gray 2 .7 0 %
TY
PE
II
HC-160 Knoxville Gray 2 . 6 5 %
TY
PE
II
HC-168 Chelsea Gray 5 . 3 3 %
TY
PE
I
HC-170 Stonington Gray 4 . 2 1 %
TY
PE
I
HC-172 Revere Pewter 2 . 5 7 %
TY
PE
I
HC-166 Kendall Charcoal 3 . 8 2 %
TY
PE
I
HC-173 Edgecomb Gray 4 . 2 5 %
TY
PE
I
Please Note: Color swatches shown are for approximation only. Test castings should be made to ensure pigment suitability for your particular project.
HC-145 Van Courtland Blue 2 . 1 9 %
TY
PE
I
HC-118 Sherwood Green 6 .7 4 %
TY
PE
II
OC-17 White Dove 1 0 . 0 0 %
TY
PE
I
OC-15 Baby Fawn 3 . 8 4 %
TY
PE
I
OC-20 Pale Oak 3 . 1 7 %
TY
PE
I
OC-23 Classic Gray 3 . 1 0 %
TY
PE
I
OC-22 Calm 4 . 0 4 %
TY
PE
I
OC-33 Opaline 5 . 2 0 %
TY
PE
I
OC-32 Tapestry Beige 2 . 2 0 %
TY
PE
I
OC-54 White Wisp 4 . 0 0 %
TY
PE
I
SC-51 Yankee’s Navy 2 . 1 6 %
TY
PE
III
OC-131 White Down 5 . 9 8 %
TY
PE
I
OC-99 Deserted Island 5 . 3 3 %
TY
PE
I
OC-142 Sail Cloth 4 . 1 2 %
TY
PE
I
P| 3 7BUDDY RHODES CONCRETE PRODUCTS | Call us: 877-706-5303 | Email us at: [email protected]
NA
ME
SP
EC
IAL
TY
CO
LL
EC
TIO
N
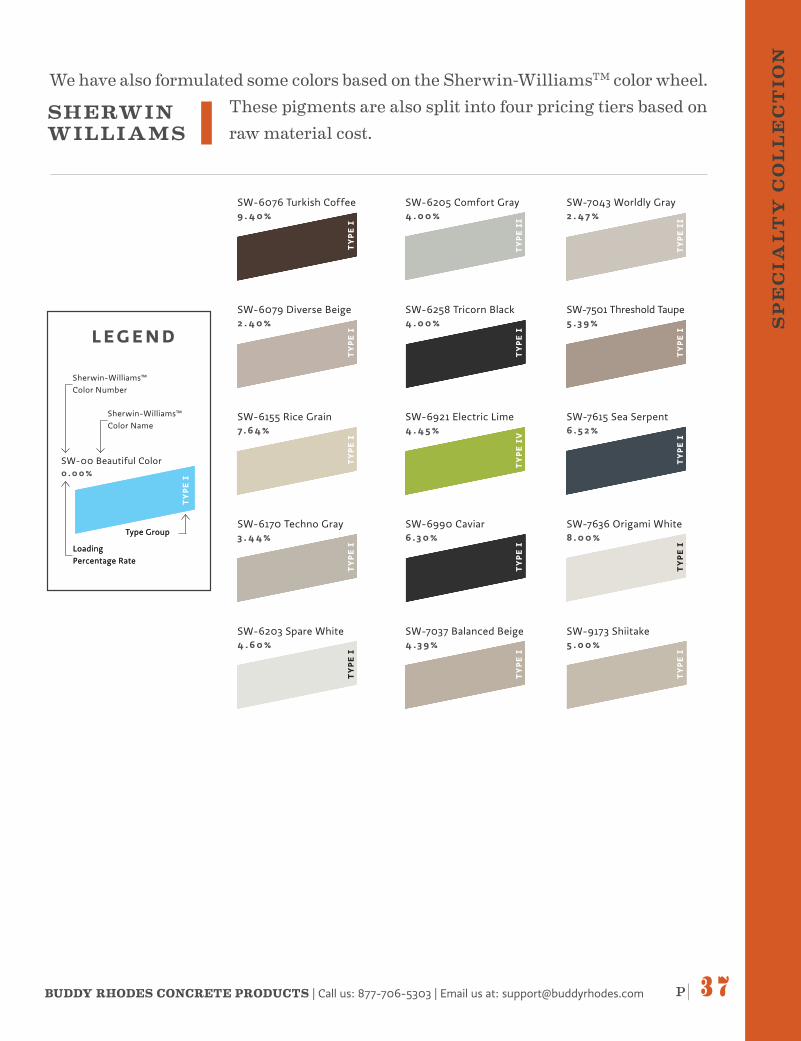
We have also formulated some colors based on the Sherwin-WilliamsTM color wheel. These pigments are also split into four pricing tiers based on raw material cost.
SHERWINWILLIAMS
Loading Percentage Rate
Type Group
L E G E N D
SW-00 Beautiful Color 0 . 0 0 %
TY
PE
IT
YP
E I
Sherwin-Williams™ Color Name
Loading Percentage Rate
Type Group
Sherwin-Williams™ Color Number
SW-7037 Balanced Beige 4 . 3 9 %
TY
PE
I
SW-7043 Worldly Gray 2 . 47 %
TY
PE
II
SW-7501 Threshold Taupe 5 . 3 9 %
TY
PE
I
SW-7615 Sea Serpent 6 . 5 2 %
TY
PE
I
SW-7636 Origami White 8 . 0 0 %
TY
PE
I
SW-9173 Shiitake 5 . 0 0 %
TY
PE
I
SW-6990 Caviar 6 . 3 0 %
TY
PE
I
SW-6076 Turkish Coffee 9 . 4 0 %
TY
PE
I
SW-6079 Diverse Beige 2 . 4 0 %
TY
PE
I
SW-6155 Rice Grain 7 . 6 4 %
TY
PE
I
SW-6170 Techno Gray 3 . 4 4 %
TY
PE
I
SW-6203 Spare White 4 . 6 0 %
TY
PE
I
SW-6205 Comfort Gray 4 . 0 0 %
TY
PE
II
SW-6258 Tricorn Black 4 . 0 0 %
TY
PE
I
SW-6921 Electric Lime 4 . 4 5 %
TY
PE
IV
P| 3 8
FIB
ER
RE
INF
OR
CE
ME
NT
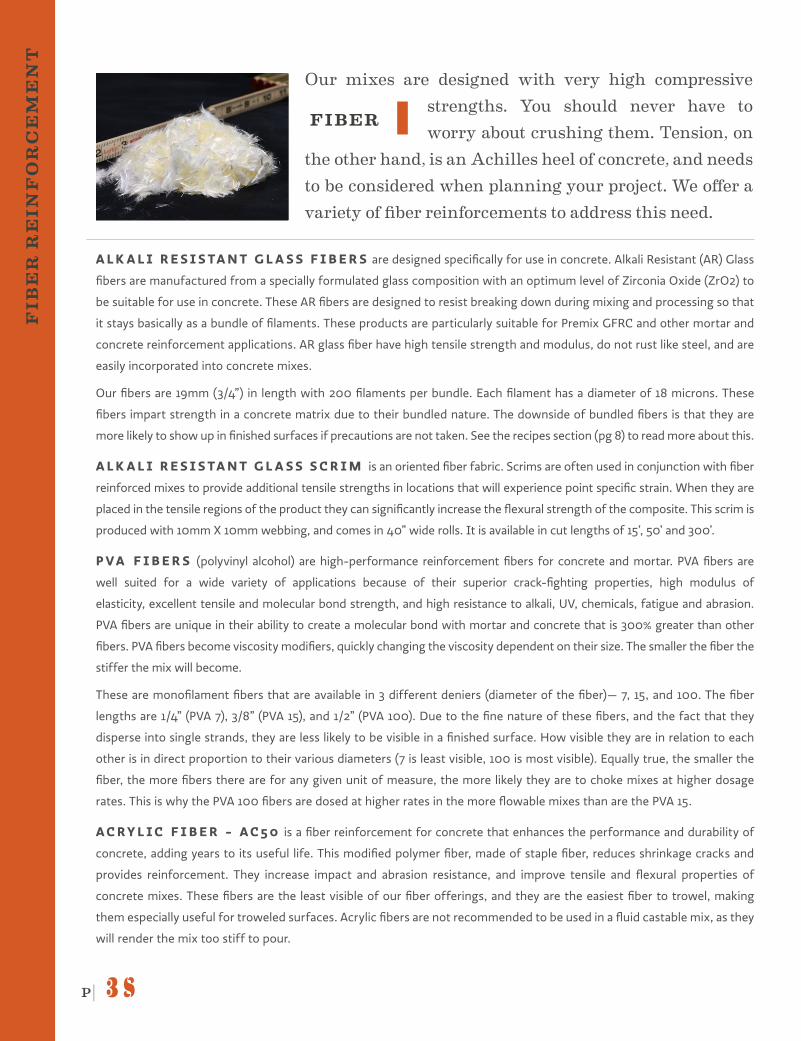
A L K A L I R E S I S TA N T G L A S S F I B E R S are designed specifically for use in concrete. Alkali Resistant (AR) Glass
fibers are manufactured from a specially formulated glass composition with an optimum level of Zirconia Oxide (ZrO2) to
be suitable for use in concrete. These AR fibers are designed to resist breaking down during mixing and processing so that
it stays basically as a bundle of filaments. These products are particularly suitable for Premix GFRC and other mortar and
concrete reinforcement applications. AR glass fiber have high tensile strength and modulus, do not rust like steel, and are
easily incorporated into concrete mixes.
Our fibers are 19mm (3/4”) in length with 200 filaments per bundle. Each filament has a diameter of 18 microns. These
fibers impart strength in a concrete matrix due to their bundled nature. The downside of bundled fibers is that they are
more likely to show up in finished surfaces if precautions are not taken. See the recipes section (pg 8) to read more about this.
A L K A L I R E S I S TA N T G L A S S S C R I M is an oriented fiber fabric. Scrims are often used in conjunction with fiber
reinforced mixes to provide additional tensile strengths in locations that will experience point specific strain. When they are
placed in the tensile regions of the product they can significantly increase the flexural strength of the composite. This scrim is
produced with 10mm X 10mm webbing, and comes in 40” wide rolls. It is available in cut lengths of 15’, 50’ and 300’.
P VA F I B E R S (polyvinyl alcohol) are high-performance reinforcement fibers for concrete and mortar. PVA fibers are
well suited for a wide variety of applications because of their superior crack-fighting properties, high modulus of
elasticity, excellent tensile and molecular bond strength, and high resistance to alkali, UV, chemicals, fatigue and abrasion.
PVA fibers are unique in their ability to create a molecular bond with mortar and concrete that is 300% greater than other
fibers. PVA fibers become viscosity modifiers, quickly changing the viscosity dependent on their size. The smaller the fiber the
stiffer the mix will become.
These are monofilament fibers that are available in 3 different deniers (diameter of the fiber)— 7, 15, and 100. The fiber
lengths are 1/4” (PVA 7), 3/8” (PVA 15), and 1/2” (PVA 100). Due to the fine nature of these fibers, and the fact that they
disperse into single strands, they are less likely to be visible in a finished surface. How visible they are in relation to each
other is in direct proportion to their various diameters (7 is least visible, 100 is most visible). Equally true, the smaller the
fiber, the more fibers there are for any given unit of measure, the more likely they are to choke mixes at higher dosage
rates. This is why the PVA 100 fibers are dosed at higher rates in the more flowable mixes than are the PVA 15.
A C RY L I C F I B E R - A C 5 0 is a fiber reinforcement for concrete that enhances the performance and durability of
concrete, adding years to its useful life. This modified polymer fiber, made of staple fiber, reduces shrinkage cracks and
provides reinforcement. They increase impact and abrasion resistance, and improve tensile and flexural properties of
concrete mixes. These fibers are the least visible of our fiber offerings, and they are the easiest fiber to trowel, making
them especially useful for troweled surfaces. Acrylic fibers are not recommended to be used in a fluid castable mix, as they
will render the mix too stiff to pour.
Our mixes are designed with very high compressive strengths. You should never have to worry about crushing them. Tension, on
the other hand, is an Achilles heel of concrete, and needs to be considered when planning your project. We offer a variety of fiber reinforcements to address this need.
FIBER
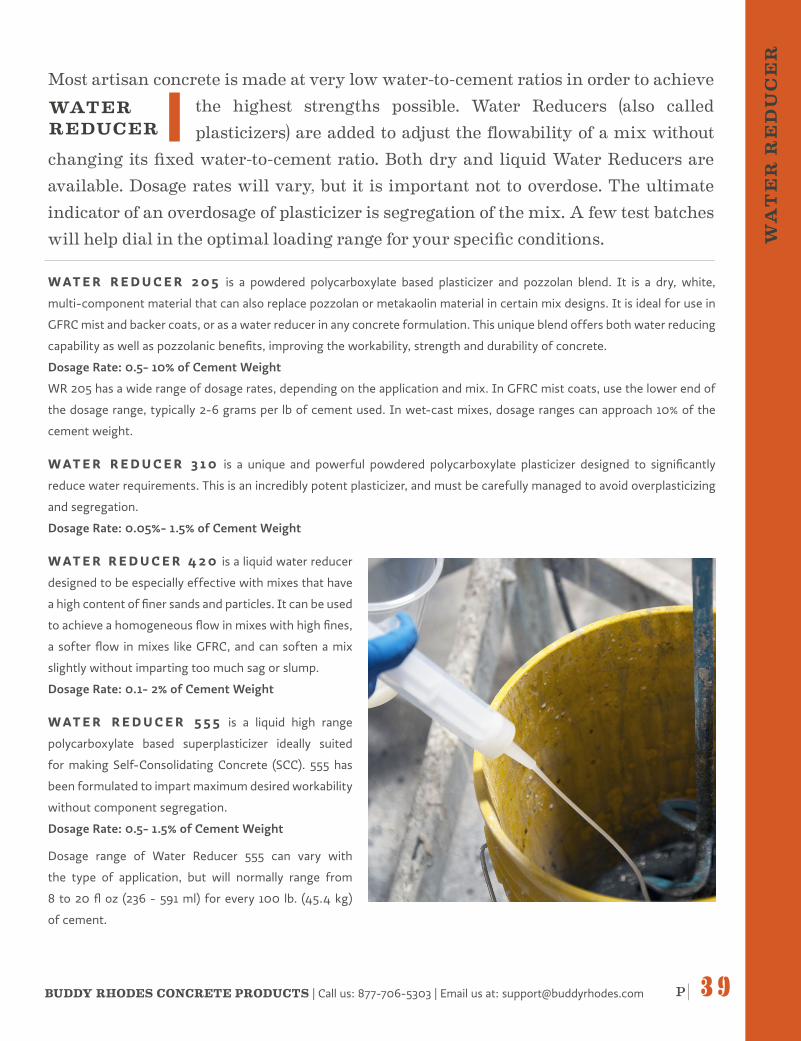
P| 3 9BUDDY RHODES CONCRETE PRODUCTS | Call us: 877-706-5303 | Email us at: [email protected]
NA
ME
WA
TE
R R
ED
UC
ER
WAT E R R E D U C E R 2 0 5 is a powdered polycarboxylate based plasticizer and pozzolan blend. It is a dry, white,
multi-component material that can also replace pozzolan or metakaolin material in certain mix designs. It is ideal for use in
GFRC mist and backer coats, or as a water reducer in any concrete formulation. This unique blend offers both water reducing
capability as well as pozzolanic benefits, improving the workability, strength and durability of concrete.
Dosage Rate: 0.5- 10% of Cement Weight
WR 205 has a wide range of dosage rates, depending on the application and mix. In GFRC mist coats, use the lower end of
the dosage range, typically 2-6 grams per lb of cement used. In wet-cast mixes, dosage ranges can approach 10% of the
cement weight.
WAT E R R E D U C E R 3 1 0 is a unique and powerful powdered polycarboxylate plasticizer designed to significantly
reduce water requirements. This is an incredibly potent plasticizer, and must be carefully managed to avoid overplasticizing
and segregation.
Dosage Rate: 0.05%- 1.5% of Cement Weight
WAT E R R E D U C E R 4 2 0 is a liquid water reducer
designed to be especially effective with mixes that have
a high content of finer sands and particles. It can be used
to achieve a homogeneous flow in mixes with high fines,
a softer flow in mixes like GFRC, and can soften a mix
slightly without imparting too much sag or slump.
Dosage Rate: 0.1- 2% of Cement Weight
WAT E R R E D U C E R 5 5 5 is a liquid high range
polycarboxylate based superplasticizer ideally suited
for making Self-Consolidating Concrete (SCC). 555 has
been formulated to impart maximum desired workability
without component segregation.
Dosage Rate: 0.5- 1.5% of Cement Weight
Dosage range of Water Reducer 555 can vary with
the type of application, but will normally range from
8 to 20 fl oz (236 - 591 ml) for every 100 lb. (45.4 kg)
of cement.
Most artisan concrete is made at very low water-to-cement ratios in order to achieve the highest strengths possible. Water Reducers (also called plasticizers) are added to adjust the flowability of a mix without
changing its fixed water-to-cement ratio. Both dry and liquid Water Reducers are available. Dosage rates will vary, but it is important not to overdose. The ultimate indicator of an overdosage of plasticizer is segregation of the mix. A few test batches will help dial in the optimal loading range for your specific conditions.
WATER REDUCER
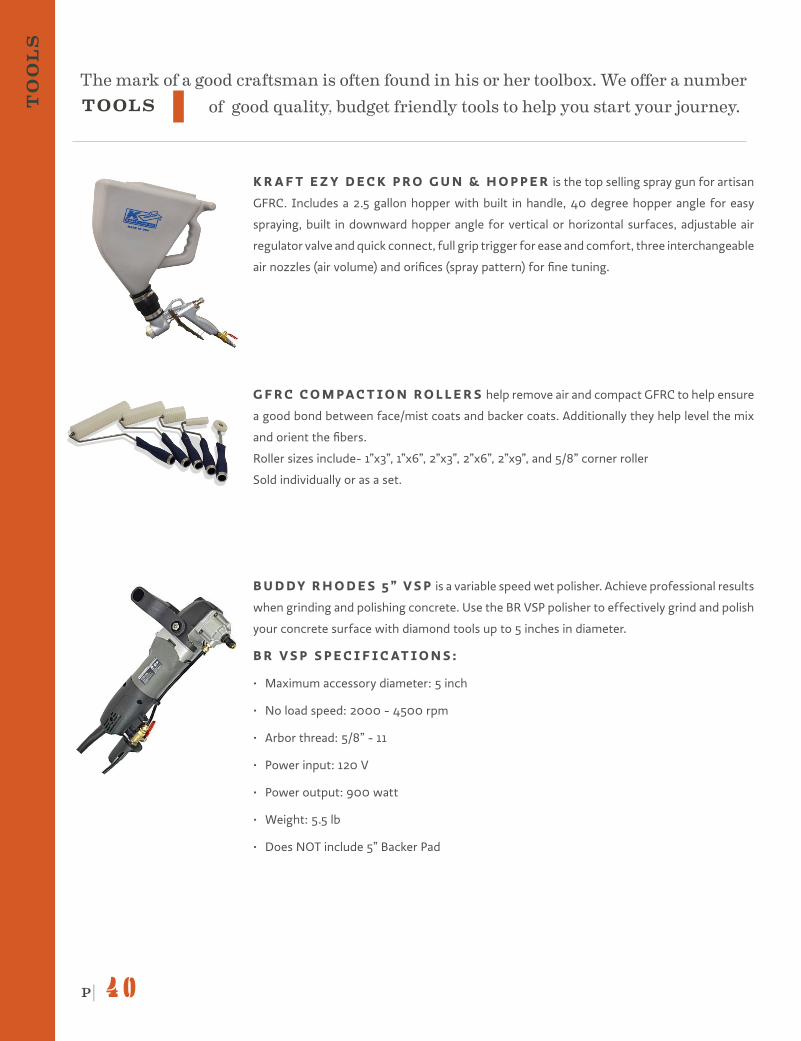
P| 4 0
TO
OL
S
The mark of a good craftsman is often found in his or her toolbox. We offer a number of good quality, budget friendly tools to help you start your journey.
K R A F T E Z Y D E C K P R O G U N & H O P P E R is the top selling spray gun for artisan
GFRC. Includes a 2.5 gallon hopper with built in handle, 40 degree hopper angle for easy
spraying, built in downward hopper angle for vertical or horizontal surfaces, adjustable air
regulator valve and quick connect, full grip trigger for ease and comfort, three interchangeable
air nozzles (air volume) and orifices (spray pattern) for fine tuning.
G F R C C O M PA C T I O N R O L L E R S help remove air and compact GFRC to help ensure
a good bond between face/mist coats and backer coats. Additionally they help level the mix
and orient the fibers.
Roller sizes include- 1”x3”, 1”x6”, 2”x3”, 2”x6”, 2”x9”, and 5/8” corner roller
Sold individually or as a set.
B U D DY R H O D E S 5 ” V S P is a variable speed wet polisher. Achieve professional results
when grinding and polishing concrete. Use the BR VSP polisher to effectively grind and polish
your concrete surface with diamond tools up to 5 inches in diameter.
B R V S P S P E C I F I C AT I O N S :
• Maximum accessory diameter: 5 inch
• No load speed: 2000 - 4500 rpm
• Arbor thread: 5/8” - 11
• Power input: 120 V
• Power output: 900 watt
• Weight: 5.5 lb
• Does NOT include 5” Backer Pad
TOOLS
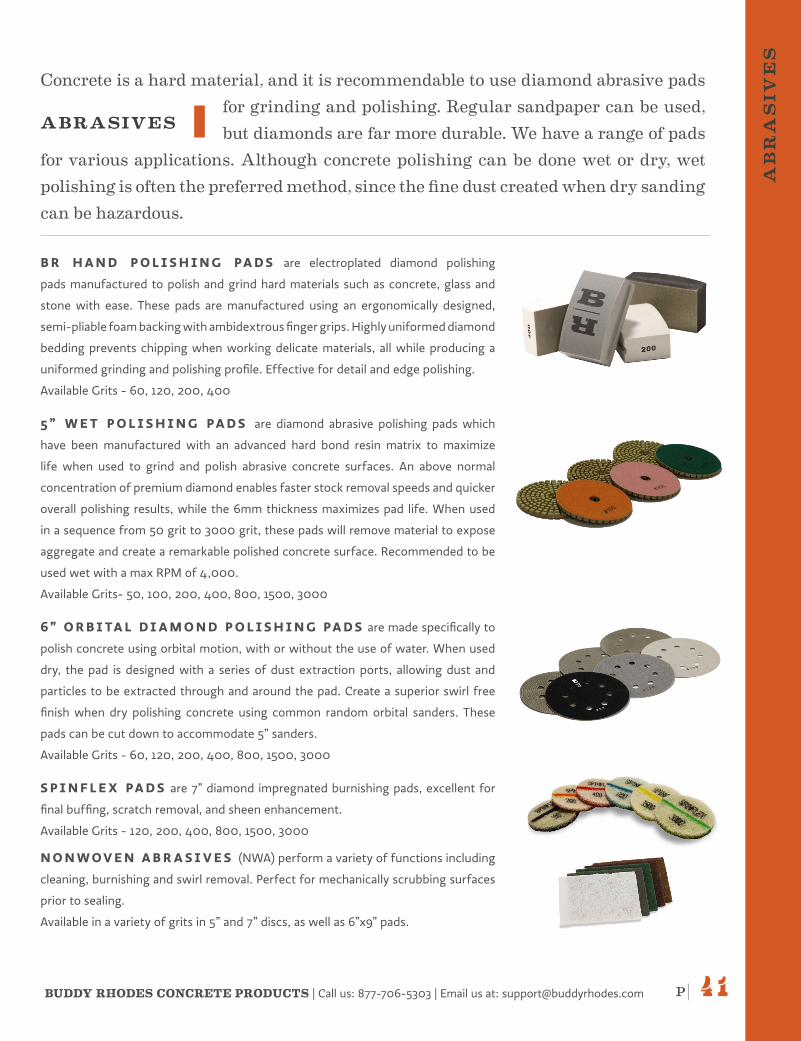
P| 4 1BUDDY RHODES CONCRETE PRODUCTS | Call us: 877-706-5303 | Email us at: [email protected]
NA
ME
AB
RA
SIV
ES
B R H A N D P O L I S H I N G PA D S are electroplated diamond polishing
pads manufactured to polish and grind hard materials such as concrete, glass and
stone with ease. These pads are manufactured using an ergonomically designed,
semi-pliable foam backing with ambidextrous finger grips. Highly uniformed diamond
bedding prevents chipping when working delicate materials, all while producing a
uniformed grinding and polishing profile. Effective for detail and edge polishing.
Available Grits - 60, 120, 200, 400
5 ” W E T P O L I S H I N G PA D S are diamond abrasive polishing pads which
have been manufactured with an advanced hard bond resin matrix to maximize
life when used to grind and polish abrasive concrete surfaces. An above normal
concentration of premium diamond enables faster stock removal speeds and quicker
overall polishing results, while the 6mm thickness maximizes pad life. When used
in a sequence from 50 grit to 3000 grit, these pads will remove material to expose
aggregate and create a remarkable polished concrete surface. Recommended to be
used wet with a max RPM of 4,000.
Available Grits- 50, 100, 200, 400, 800, 1500, 3000
6 ” O R B I TA L D I A M O N D P O L I S H I N G PA D S are made specifically to
polish concrete using orbital motion, with or without the use of water. When used
dry, the pad is designed with a series of dust extraction ports, allowing dust and
particles to be extracted through and around the pad. Create a superior swirl free
finish when dry polishing concrete using common random orbital sanders. These
pads can be cut down to accommodate 5” sanders.
Available Grits - 60, 120, 200, 400, 800, 1500, 3000
S P I N F L E X PA D S are 7” diamond impregnated burnishing pads, excellent for
final buffing, scratch removal, and sheen enhancement.
Available Grits - 120, 200, 400, 800, 1500, 3000
N O N W O V E N A B R A S I V E S (NWA) perform a variety of functions including
cleaning, burnishing and swirl removal. Perfect for mechanically scrubbing surfaces
prior to sealing.
Available in a variety of grits in 5” and 7” discs, as well as 6”x9” pads.
Concrete is a hard material, and it is recommendable to use diamond abrasive pads for grinding and polishing. Regular sandpaper can be used, but diamonds are far more durable. We have a range of pads
for various applications. Although concrete polishing can be done wet or dry, wet polishing is often the preferred method, since the fine dust created when dry sanding can be hazardous.
ABRASIVES
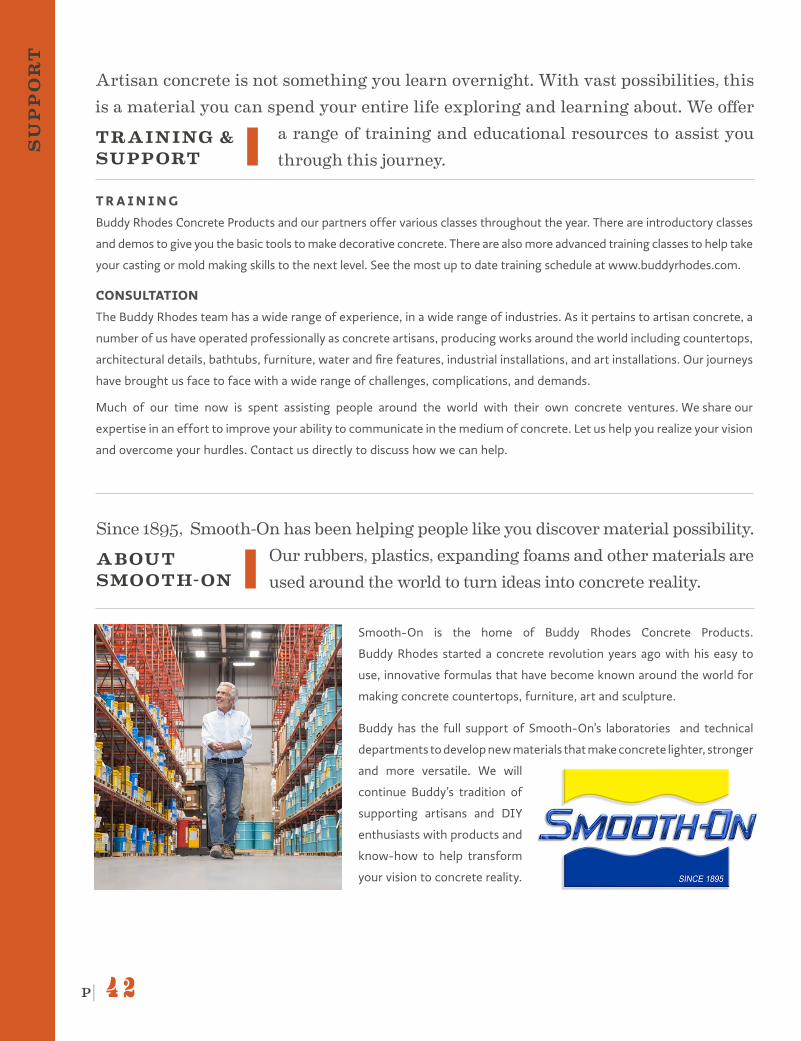
P| 4 2
SU
PP
OR
T
Artisan concrete is not something you learn overnight. With vast possibilities, this is a material you can spend your entire life exploring and learning about. We offer
a range of training and educational resources to assist you through this journey.
TRAINING & SUPPORT
Smooth-On is the home of Buddy Rhodes Concrete Products.
Buddy Rhodes started a concrete revolution years ago with his easy to
use, innovative formulas that have become known around the world for
making concrete countertops, furniture, art and sculpture.
Buddy has the full support of Smooth-On’s laboratories and technical
departments to develop new materials that make concrete lighter, stronger
and more versatile. We will
continue Buddy’s tradition of
supporting artisans and DIY
enthusiasts with products and
know-how to help transform
your vision to concrete reality.
Since 1895, Smooth-On has been helping people like you discover material possibility. Our rubbers, plastics, expanding foams and other materials are used around the world to turn ideas into concrete reality.
T R A I N I N G
Buddy Rhodes Concrete Products and our partners offer various classes throughout the year. There are introductory classes
and demos to give you the basic tools to make decorative concrete. There are also more advanced training classes to help take
your casting or mold making skills to the next level. See the most up to date training schedule at www.buddyrhodes.com.
CONSULTATION
The Buddy Rhodes team has a wide range of experience, in a wide range of industries. As it pertains to artisan concrete, a
number of us have operated professionally as concrete artisans, producing works around the world including countertops,
architectural details, bathtubs, furniture, water and fire features, industrial installations, and art installations. Our journeys
have brought us face to face with a wide range of challenges, complications, and demands.
Much of our time now is spent assisting people around the world with their own concrete ventures. We share our
expertise in an effort to improve your ability to communicate in the medium of concrete. Let us help you realize your vision
and overcome your hurdles. Contact us directly to discuss how we can help.
ABOUT SMOOTH-ON
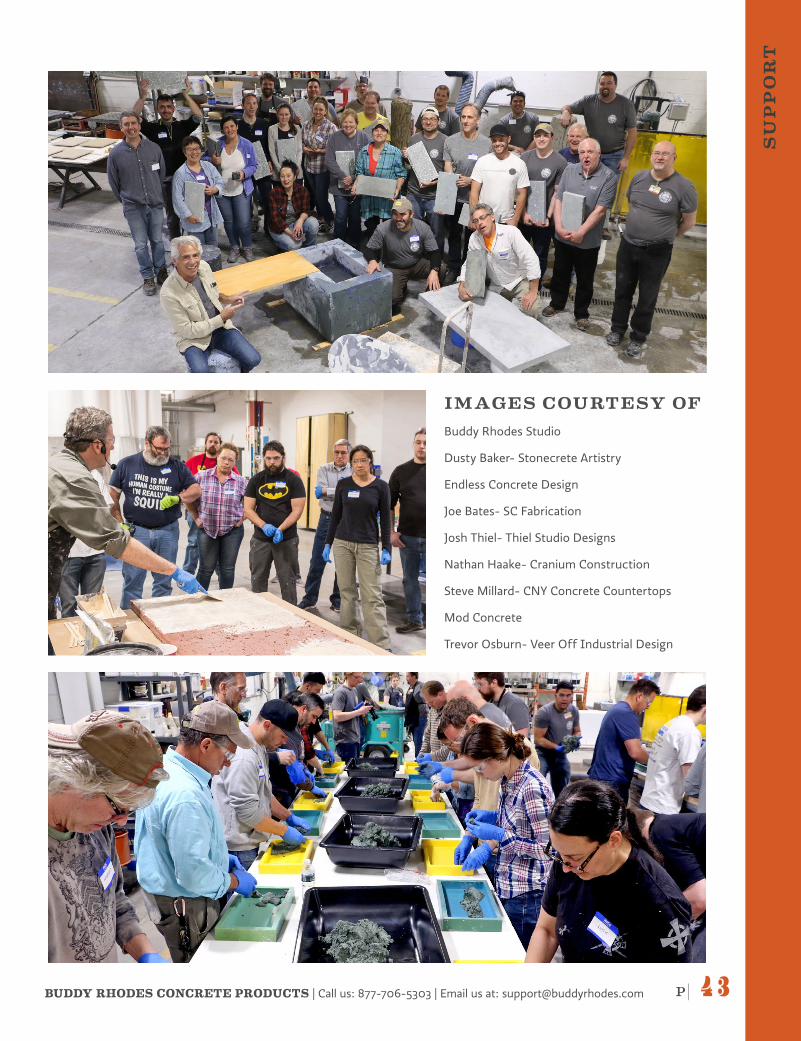
P| 4 3BUDDY RHODES CONCRETE PRODUCTS | Call us: 877-706-5303 | Email us at: [email protected]
NA
ME
SU
PP
OR
T
IMAGES COURTESY OFBuddy Rhodes Studio
Dusty Baker- Stonecrete Artistry
Endless Concrete Design
Joe Bates- SC Fabrication
Josh Thiel- Thiel Studio Designs
Nathan Haake- Cranium Construction
Steve Millard- CNY Concrete Countertops
Mod Concrete
Trevor Osburn- Veer Off Industrial Design
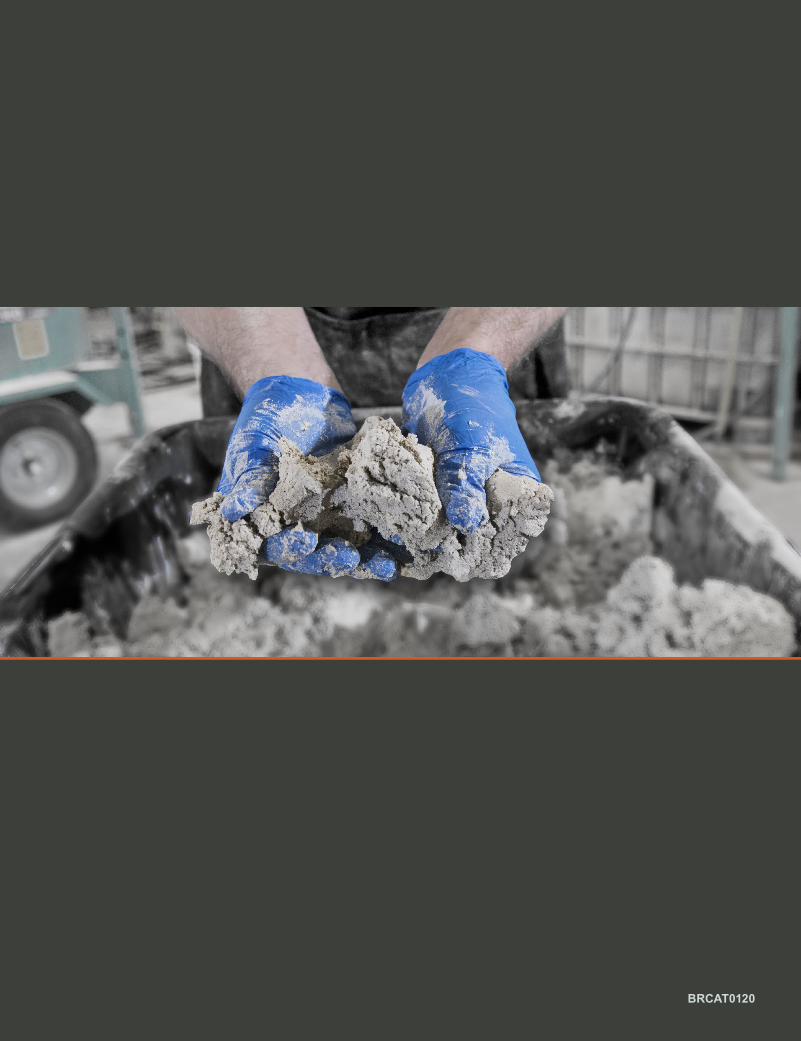
RR12122017
TO
OL
S A
ND
AB
RA
-S
IVE
S
BRCAT0120


