46
THE STONE AND TILE Care Guide The Capitol region’s first choice in marble and natural stone restoration
| Date post: | 26-Nov-2023 |
| Category: |
Documents |
| Upload: | khangminh22 |
| View: | 0 times |
| Download: | 0 times |
THE STONE AND TILECare Guide
The Capitol region’s first choice in marbleand natural stone restoration
contents3 Resources and Acknowledgements
4 Welcome Message
5 Stone and Tile Care 6 Floors 9 Countertops 11 Baths and Showers 13 Outdoors
15 Sealing and Protecting Stone
18 Grout Sealing and Color Sealing
20 Stain Management
26 10 Potential Problems and What To Do About Them
29 Tips for Selecting Stone 31 Helpful Tests for Stone Selection 33 MOHS Scale 34 A Note on Resining
35 Hiring and Working with a PRO 38 Stone Fabricators 39 Stone Restoration Contractors 42 Stone Maintenance Contractors 43 Tile & Grout Cleaning and Sealing Contractors 44 Tile Installers
Copyright 2021 SurpHaces, LLC. All Rights Reserved
The Stone and Tile Care GuideTable of Contents

| 3
RESOURCES AND ACKNOWLEDGEMENTS
This care guide is provided to you courtesty of your SurpHaces PRO Partner. SurpHaces is a professional resource and support organization for quality surface care PROS and their customers. At SurpHaces.com, consumers can find expert answers, solutions, and service providers for stone, tile, terrazzo, wood, carpet and interior textiles, polished concrete, metal, VCT, and more. The PROS in this network consist of skilled specialists in a variety of disci-plines including specification, installation, repair, restoration, and mainte-nance. Each one is concerned with the art and science of surface care, and
they provide solutions that take into account both the aesthetics of surfaces and other important considerations, such as surface functionality, safety, preservation, and sustainability.
Each PRO Partner company is vetted, has signed a pledge to professional integrity, and has earned the right to be designated as a Certified SurpHaces PRO Partner.
Thank you to Maurizio Bertoli, Fred Hueston, and the network of SurpHaces PRO Partners who contributed so much to the
development of this guide, and to the others who played such an important role and shared our vision to deliver reliable stone and tile
care information to the public.
When it comes to surface care, look for the badge of excellence.
| 4Visit us online at www.potomacstonecare.com for more details and helpful tips
Dear Reader,
Your natural stone and tile brings value, design, and functionality into your environment–whether in countertops, walls, floors, baths, vanities, or showers–both indoors and out, unlike any other surface treatment. We want to help you keep it looking its best.
We are all about restoring and maintaining your stone and tile, but just as importantly, we want to make sure our customers are armed with good, sound care information–which is why we are so pleased to present this Stone and Tile Care Guide. Feel free to pass it around liberally.
There is, unfortunately, a lot of misinformation out there. You might be surprised to know that much of the work we are called in to do is a result of improper stone care–especially from using the wrong kinds of cleaning products. Keep this guide on hand and refer to it. Give us a call or visit our website to learn about specific product recommendations. If you have any need for stone restoration or maintenance, please do consider using us. You won’t be disappointed.
Our sincerest regards,
The Capitol region’s first choice in marbleand natural stone restoration
(301) 765 - 3451 | www.potomacstonecare.com
| 5Visit us online at www.potomacstonecare.com for more details and helpful tips | 5
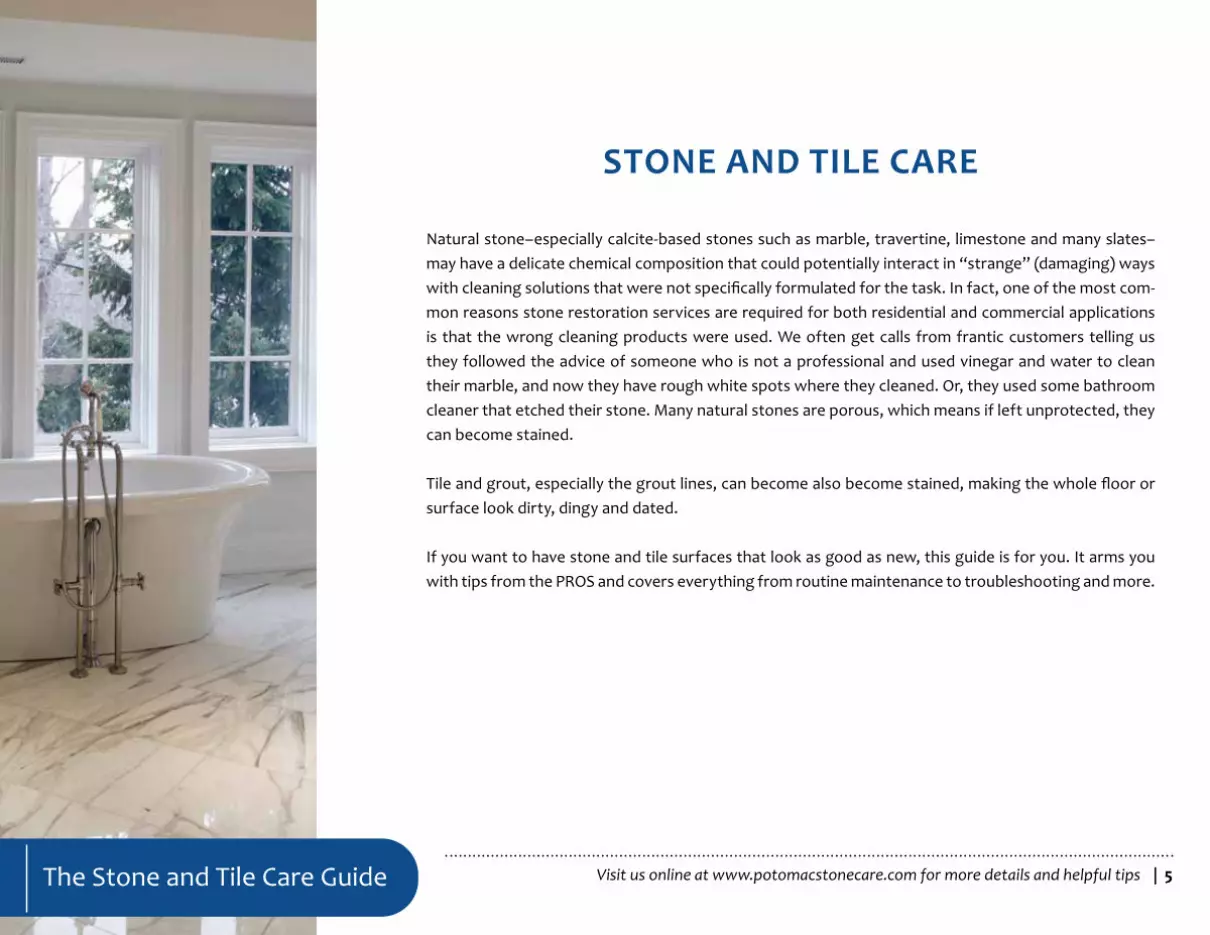
STONE AND TILE CARE
Natural stone–especially calcite-based stones such as marble, travertine, limestone and many slates–may have a delicate chemical composition that could potentially interact in “strange” (damaging) ways with cleaning solutions that were not specifically formulated for the task. In fact, one of the most com-mon reasons stone restoration services are required for both residential and commercial applications is that the wrong cleaning products were used. We often get calls from frantic customers telling us they followed the advice of someone who is not a professional and used vinegar and water to clean their marble, and now they have rough white spots where they cleaned. Or, they used some bathroom cleaner that etched their stone. Many natural stones are porous, which means if left unprotected, they can become stained.
Tile and grout, especially the grout lines, can become also become stained, making the whole floor or surface look dirty, dingy and dated.
If you want to have stone and tile surfaces that look as good as new, this guide is for you. It arms you with tips from the PROS and covers everything from routine maintenance to troubleshooting and more.
The Stone and Tile Care Guide
| 6Visit us online at www.potomacstonecare.com for more details and helpful tips
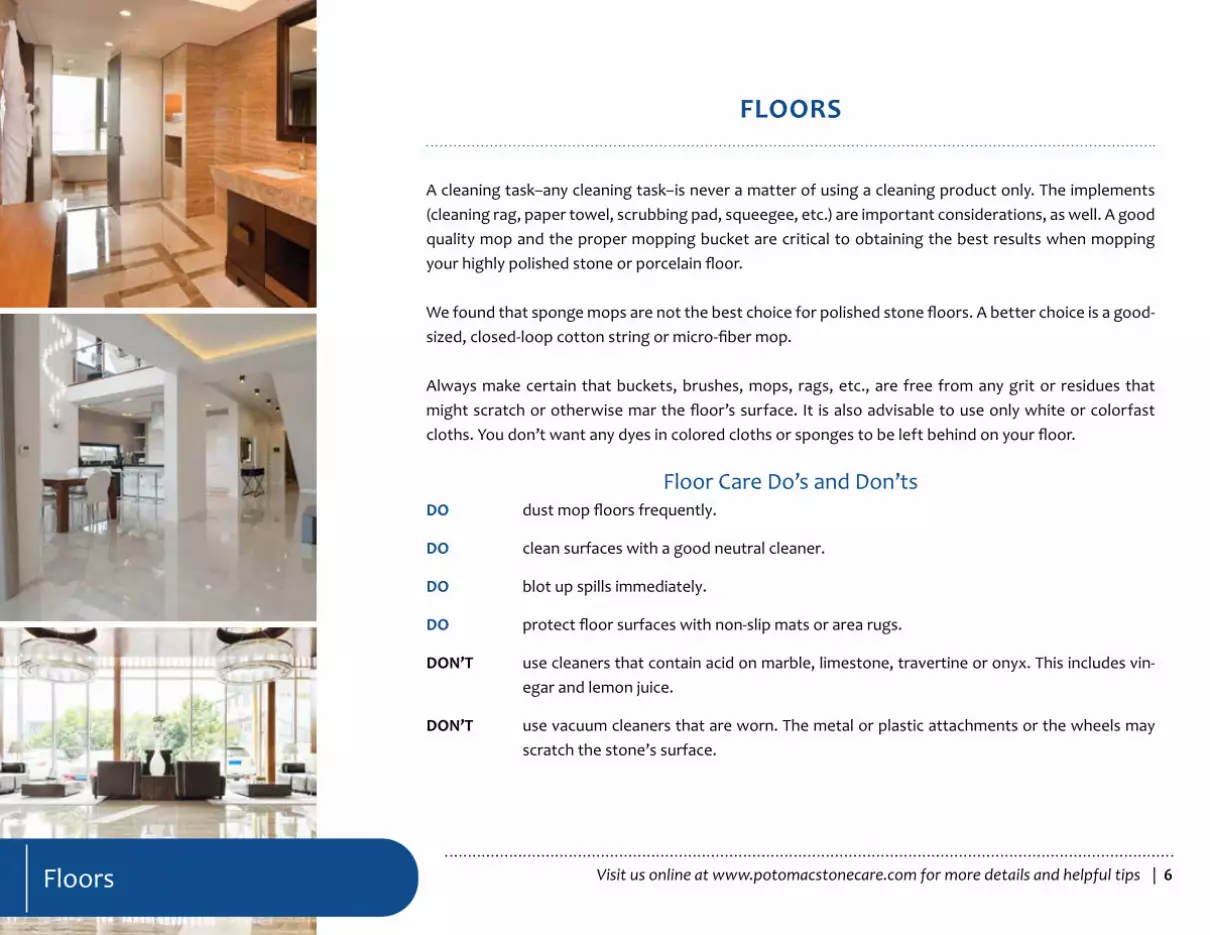
FLOORS
A cleaning task–any cleaning task–is never a matter of using a cleaning product only. The implements (cleaning rag, paper towel, scrubbing pad, squeegee, etc.) are important considerations, as well. A good quality mop and the proper mopping bucket are critical to obtaining the best results when mopping your highly polished stone or porcelain floor.
We found that sponge mops are not the best choice for polished stone floors. A better choice is a good-sized, closed-loop cotton string or micro-fiber mop.
Always make certain that buckets, brushes, mops, rags, etc., are free from any grit or residues that might scratch or otherwise mar the floor’s surface. It is also advisable to use only white or colorfast cloths. You don’t want any dyes in colored cloths or sponges to be left behind on your floor.
Floor Care Do’s and Don’tsDO dust mop floors frequently.
DO clean surfaces with a good neutral cleaner.
DO blot up spills immediately.
DO protect floor surfaces with non-slip mats or area rugs.
DON’T use cleaners that contain acid on marble, limestone, travertine or onyx. This includes vin-egar and lemon juice.
DON’T use vacuum cleaners that are worn. The metal or plastic attachments or the wheels may scratch the stone’s surface.
Floors
| 7Visit us online at www.potomacstonecare.com for more details and helpful tips | 7
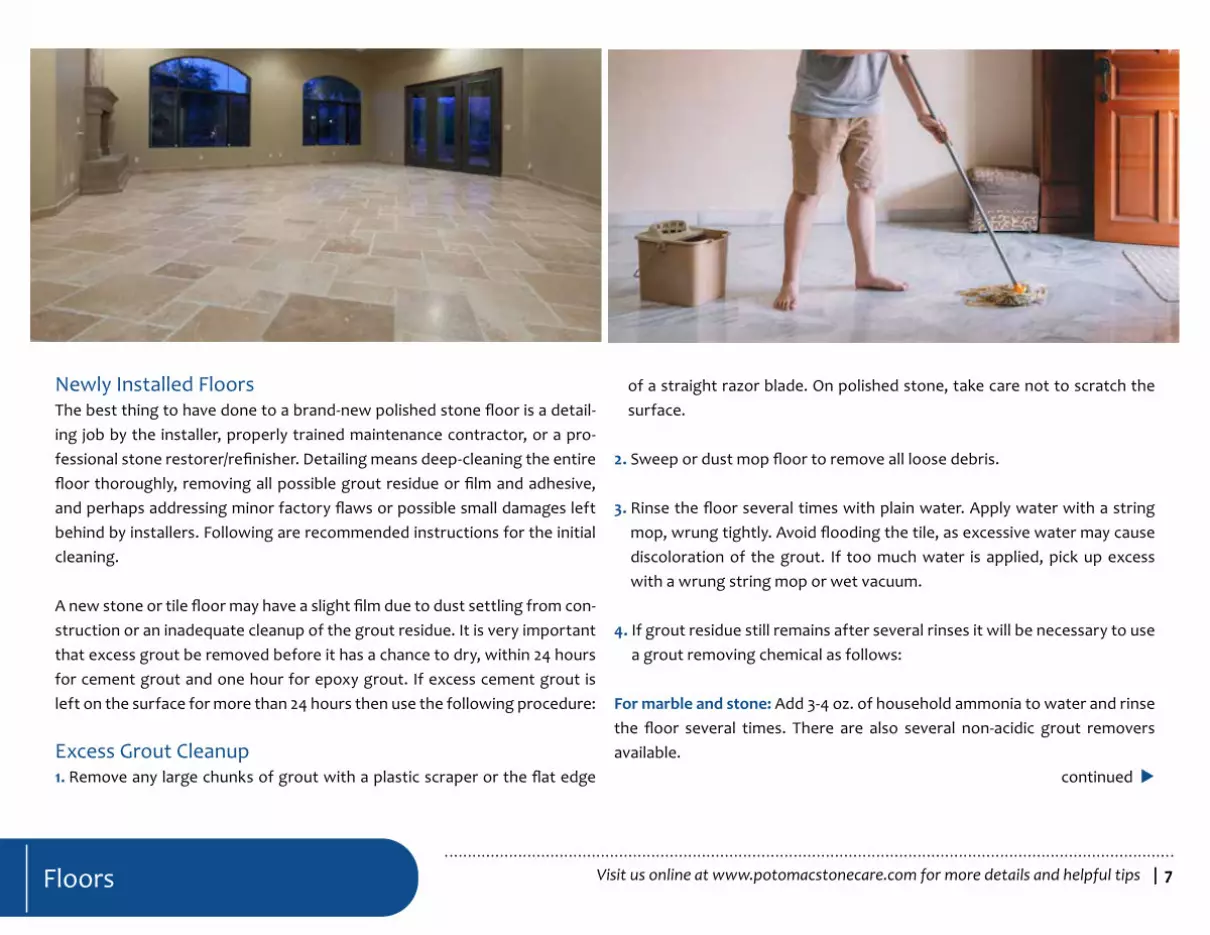
Newly Installed FloorsThe best thing to have done to a brand-new polished stone floor is a detail-ing job by the installer, properly trained maintenance contractor, or a pro-fessional stone restorer/refinisher. Detailing means deep-cleaning the entire floor thoroughly, removing all possible grout residue or film and adhesive, and perhaps addressing minor factory flaws or possible small damages left behind by installers. Following are recommended instructions for the initial cleaning.
A new stone or tile floor may have a slight film due to dust settling from con-struction or an inadequate cleanup of the grout residue. It is very important that excess grout be removed before it has a chance to dry, within 24 hours for cement grout and one hour for epoxy grout. If excess cement grout is left on the surface for more than 24 hours then use the following procedure:
Excess Grout Cleanup1. Remove any large chunks of grout with a plastic scraper or the flat edge
of a straight razor blade. On polished stone, take care not to scratch the surface.
2. Sweep or dust mop floor to remove all loose debris.
3. Rinse the floor several times with plain water. Apply water with a string mop, wrung tightly. Avoid flooding the tile, as excessive water may cause discoloration of the grout. If too much water is applied, pick up excess with a wrung string mop or wet vacuum.
4. If grout residue still remains after several rinses it will be necessary to use a grout removing chemical as follows:
For marble and stone: Add 3-4 oz. of household ammonia to water and rinse the floor several times. There are also several non-acidic grout removers available.
Floors
continued
| 8Visit us online at www.potomacstonecare.com for more details and helpful tips | 8Floors
For glazed ceramic/ porcelain: Mix a mild solution of 2-4 oz. of sulfamic acid and water. Rinse the floor several times. Repeat rinsing with ammonia and water solution to remove acid residue. Do NOT use any other acids besides sulfamic acid. There are several grout cleaners available which contain sulfa-mic acid. Ask us for recommendations.
Epoxy Grout CleanupEpoxy grouts are made from 100% epoxy resins. They have excellent chemi-cal resistance properties and are highly recommended for tile in kitchens and baths, as well as countertops and shower walls. If you choose to have epoxy grout installed, make sure your tile installer has experience working with these grouts.
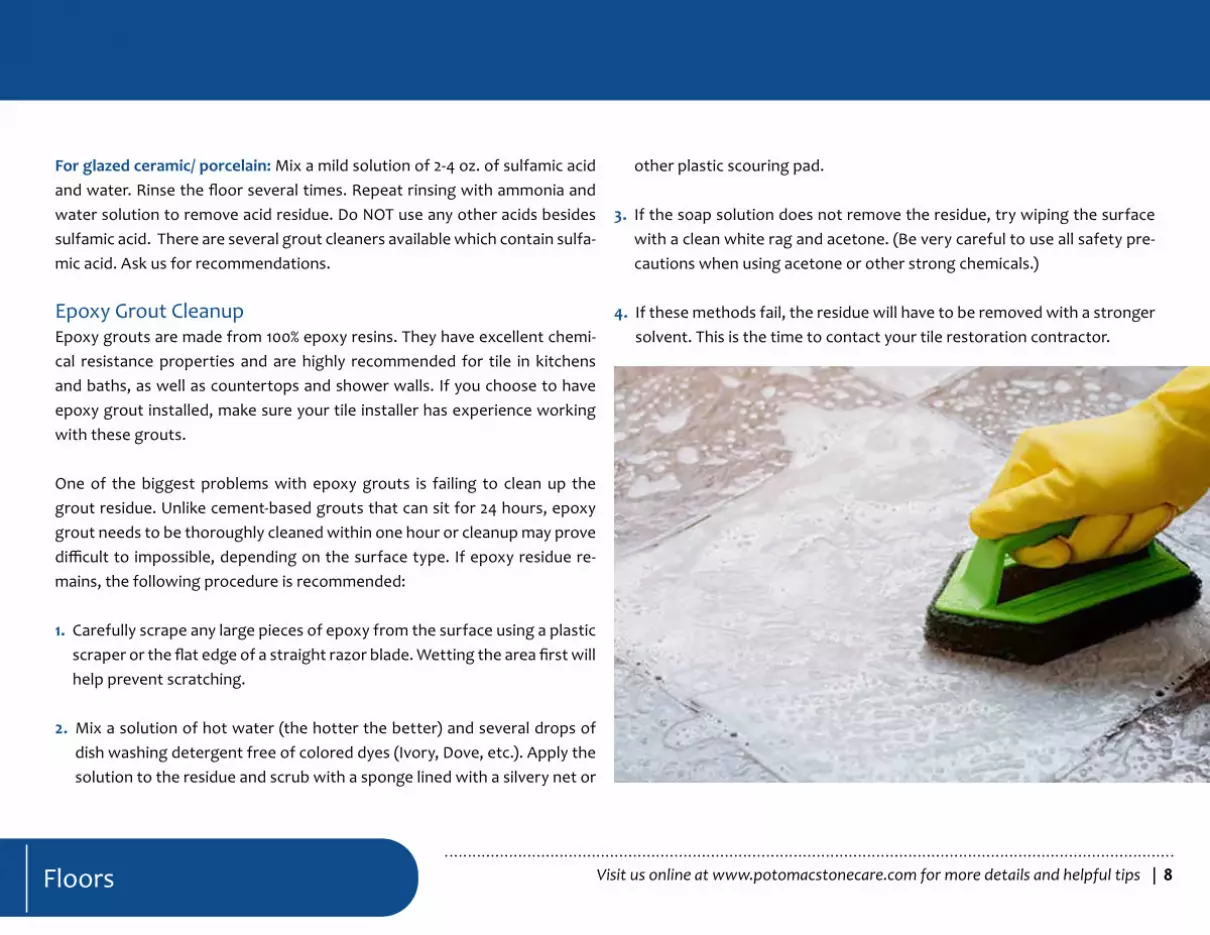
One of the biggest problems with epoxy grouts is failing to clean up the grout residue. Unlike cement-based grouts that can sit for 24 hours, epoxy grout needs to be thoroughly cleaned within one hour or cleanup may prove difficult to impossible, depending on the surface type. If epoxy residue re-mains, the following procedure is recommended:
1. Carefully scrape any large pieces of epoxy from the surface using a plastic scraper or the flat edge of a straight razor blade. Wetting the area first will help prevent scratching.
2. Mix a solution of hot water (the hotter the better) and several drops of dish washing detergent free of colored dyes (Ivory, Dove, etc.). Apply the solution to the residue and scrub with a sponge lined with a silvery net or
other plastic scouring pad.
3. If the soap solution does not remove the residue, try wiping the surface with a clean white rag and acetone. (Be very careful to use all safety pre-cautions when using acetone or other strong chemicals.)
4. If these methods fail, the residue will have to be removed with a stronger solvent. This is the time to contact your tile restoration contractor.
| 9Visit us online at www.potomacstonecare.com for more details and helpful tips | 9
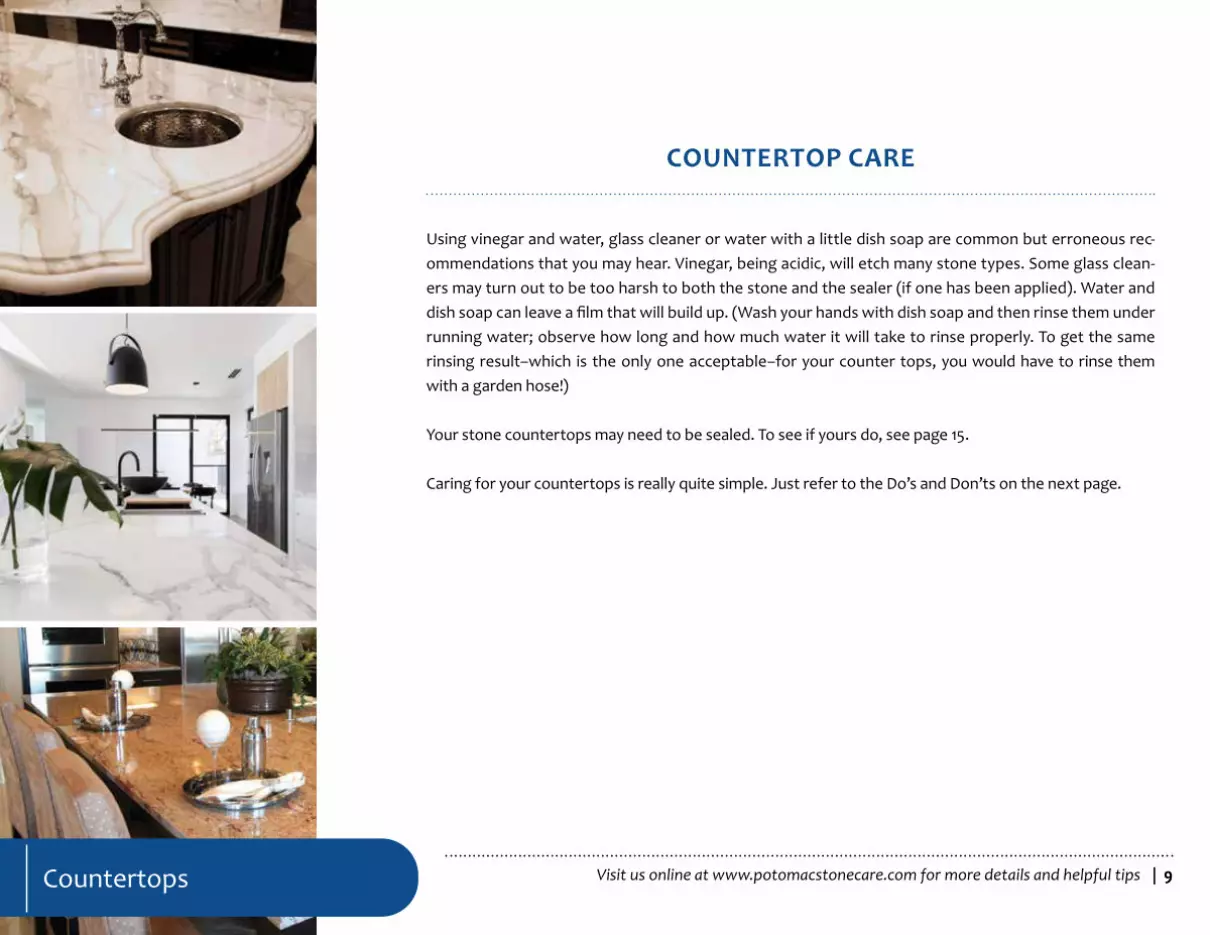
COUNTERTOP CARE
Using vinegar and water, glass cleaner or water with a little dish soap are common but erroneous rec-ommendations that you may hear. Vinegar, being acidic, will etch many stone types. Some glass clean-ers may turn out to be too harsh to both the stone and the sealer (if one has been applied). Water and dish soap can leave a film that will build up. (Wash your hands with dish soap and then rinse them under running water; observe how long and how much water it will take to rinse properly. To get the same rinsing result–which is the only one acceptable–for your counter tops, you would have to rinse them with a garden hose!)
Your stone countertops may need to be sealed. To see if yours do, see page 15.
Caring for your countertops is really quite simple. Just refer to the Do’s and Don’ts on the next page.
Countertops

| 10Visit us online at www.potomacstonecare.com for more details and helpful tips | 10
Countertop Care Do’s and Don’tsDO use coasters under drinking glasses–particularly those containing alcohol or citrus juices–
to avoid etching.
DON’T place hot items directly on the stone surface. Use trivets or mats under hot dishes. Many stones can withstand the heat, but some stone, especially if it has been resined, can be damaged. Play it safe.
DO use place mats under china, silver or other objects that can scratch the surface.
DO clean your kitchen countertop regularly with an appropriate stone-safe cleaner. Use a higher concentration near cooking and eating areas and diluted with water for less de-manding ssituations, such as areas of the countertop far from cooking and eating areas.
DON’T use any care products unless the label specifies it is safe for natural stone.
DON’T let any spills sit too long on the surface of your countertop. Clean spills up (by blotting only) as soon as you can. But, if you do have dried-on spills . . .
DON’T use any green or brown scouring pads for dried-on spills. The presence of silicon carbide grits in them may scratch even the toughest granite. You can safely use the sponges lined with a silvery net or other plastic scouring pads. REMEMBER: It’s very important to spray the cleaner and let it sit for a while to moisten and soften the soil before scrubbing. LET THE CLEANING AGENT DO THE WORK! It will make your job much easier and will be more effective.
DO have your countertops sealed, as needed. For marble and other acid-sensitive stones, ask us about anti-etch treatment solutions. (See Sealing and Protecting Stone on page 15.)
Countertops
| 11Visit us online at www.potomacstonecare.com for more details and helpful tips
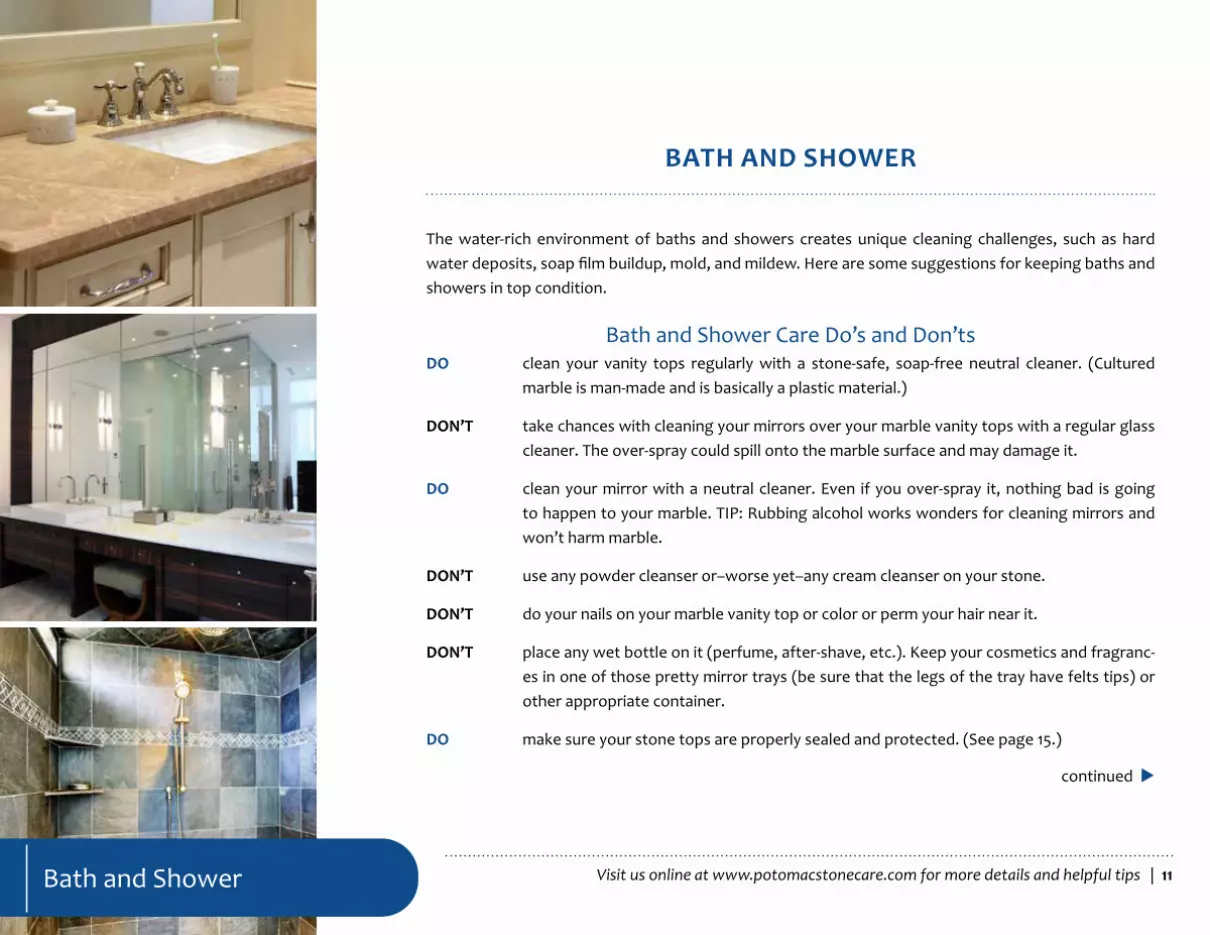
BATH AND SHOWER
The water-rich environment of baths and showers creates unique cleaning challenges, such as hard water deposits, soap film buildup, mold, and mildew. Here are some suggestions for keeping baths and showers in top condition.
Bath and Shower Care Do’s and Don’tsDO clean your vanity tops regularly with a stone-safe, soap-free neutral cleaner. (Cultured
marble is man-made and is basically a plastic material.)
DON’T take chances with cleaning your mirrors over your marble vanity tops with a regular glass cleaner. The over-spray could spill onto the marble surface and may damage it.
DO clean your mirror with a neutral cleaner. Even if you over-spray it, nothing bad is going to happen to your marble. TIP: Rubbing alcohol works wonders for cleaning mirrors and won’t harm marble.
DON’T use any powder cleanser or–worse yet–any cream cleanser on your stone.
DON’T do your nails on your marble vanity top or color or perm your hair near it.
DON’T place any wet bottle on it (perfume, after-shave, etc.). Keep your cosmetics and fragranc-es in one of those pretty mirror trays (be sure that the legs of the tray have felts tips) or other appropriate container.
DO make sure your stone tops are properly sealed and protected. (See page 15.)
Bath and Shower
continued
| 12Visit us online at www.potomacstonecare.com for more details and helpful tips
DO monitor your grout and caulk lines periodically and address any problem immediately.
DON’T use any soap film remover on your polished stone shower stall unless it expressly states it is safe for natural stone.
DO use a soap film remover specifically formulated to be effective at doing the job of cleaning soap scum and hard mineral deposits, while not negatively interacting with the chemistry of natural stone.
DON’T use any mildew stain remover on your polished stone shower stall unless it expressly states it is safe for natural stone.
DO clean mildew stains that appear on the grout lines of your shower enclosure with a mildew stain remover that has been formulated to be safe on natural stone, while being very ef-fective at removing mildew and other biological stains.
DON’T use any self-cleaners, such as SCRUBFREE® and the like, or any harsh disinfectant, such as LYSOL®.
DO clean your shower stall daily, after everybody in the home has taken a shower for the day. The easiest and most effective way is to spray the walls and floor of the stall with an ap-propriate cleaner and then squeegee.
DON’T use any regular toilet bowl cleaners if your toilet bowl is placed on a marble or other natu-ral stone floor. They are highly acidic. Possible spills will dig holes in your marble. Clean your bowl with a non-acidic toilet bowl cleaner.
Bath and Shower
| 13Visit us online at www.potomacstonecare.com for more details and helpful tipsOutdoors
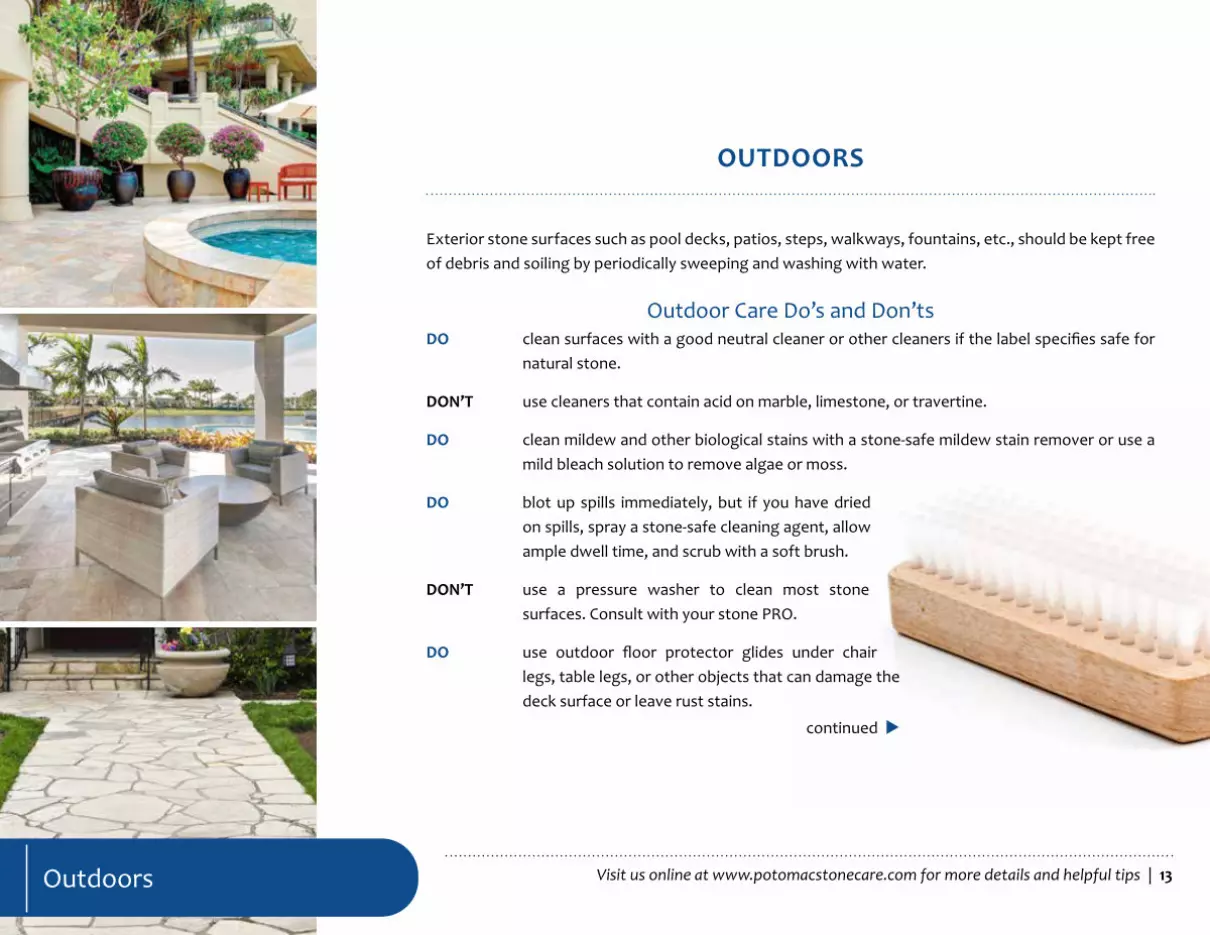
OUTDOORS
Exterior stone surfaces such as pool decks, patios, steps, walkways, fountains, etc., should be kept free of debris and soiling by periodically sweeping and washing with water.
Outdoor Care Do’s and Don’tsDO clean surfaces with a good neutral cleaner or other cleaners if the label specifies safe for
natural stone.
DON’T use cleaners that contain acid on marble, limestone, or travertine.
DO clean mildew and other biological stains with a stone-safe mildew stain remover or use a mild bleach solution to remove algae or moss.
DO blot up spills immediately, but if you have dried on spills, spray a stone-safe cleaning agent, allow ample dwell time, and scrub with a soft brush.
DON’T use a pressure washer to clean most stone surfaces. Consult with your stone PRO.
DO use outdoor floor protector glides under chair legs, table legs, or other objects that can damage the deck surface or leave rust stains.
continued

| 14Visit us online at www.potomacstonecare.com for more details and helpful tipsOutdoors
DO have your outdoor hardscape professionally cleaned and serviced periodically. A PRO can determine whether a sealer is needed, depending on the type and location of material.
DO adjust sprinkler heads to avoid spraying on your pool and patio area floors and hardscape.
DON’T use sunscreen spray, suntan oil spray, or bug spray near your pool and patio area floors and hardscapes.
DO monitor your surfaces periodically and address any problem immediately.
DON’T allow pool chemicals, outdoor kitchen cleaners, and other substances that could nega-tively interact with the chemistry of natural stone to come into contact with your surfaces.
| 15Visit us online at www.potomacstonecare.com for more details and helpful tipsSealing and Protecting
SEALING AND PROTECTING STONE
There are a variety of sealers and protective treatments available for stone. Some reduce porosity with no visible change to the look of the stone. Some enhance color. All of them inhibit staining. Anti-etch treatments are avail-able for acid-sensitive stone countertops. Contact us to learn more about which type of sealing and protective treatments will fit your needs.
Impregnating SealerAll stone is porous, some more than others. For most stone–especially very porous stones like hone-finished limestone or certain granites–sealing is highly recommended.
The application of an impregnating sealer to highly-polished marble and travertine, or polished high-density granites, may not be necessary–but when in doubt, consider this: it doesn’t hurt to have it sealed. If it turns out that sealing the stone does, in fact, prevent some staining, you’ve saved yourself the cost of a stain removal service.
What does an impregnating sealer do?Contrary to what your perception may be when you hear the word sealer, impregnating sealers are below-surface products that will not alter in any way, shape or form the original finish produced by the factory or offer pro-tection from etching. They will only go inside the stone by being absorbed by it (assuming that the stone is porous enough to allow this to happen) and
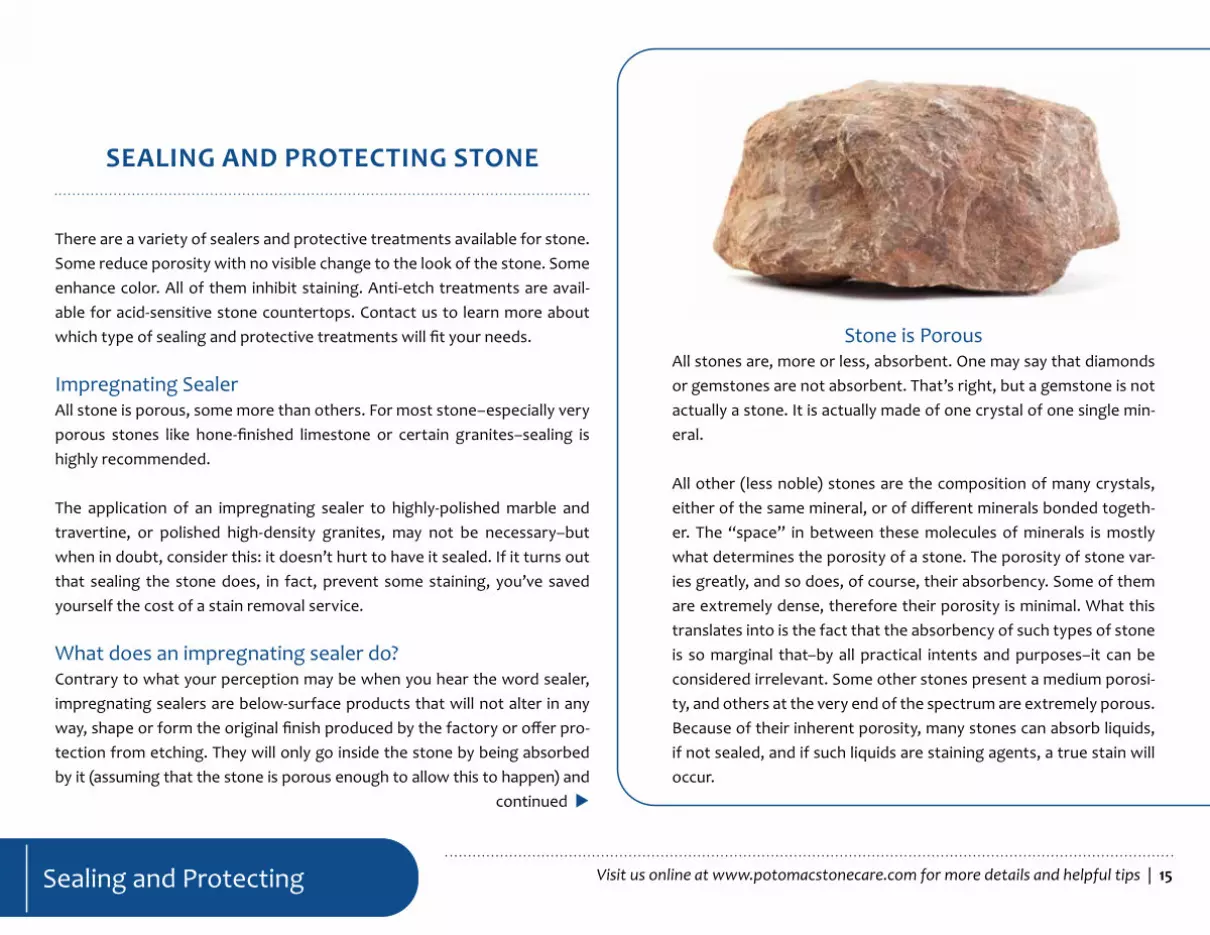
Stone is PorousAll stones are, more or less, absorbent. One may say that diamonds or gemstones are not absorbent. That’s right, but a gemstone is not actually a stone. It is actually made of one crystal of one single min-eral.
All other (less noble) stones are the composition of many crystals, either of the same mineral, or of different minerals bonded togeth-er. The “space” in between these molecules of minerals is mostly what determines the porosity of a stone. The porosity of stone var-ies greatly, and so does, of course, their absorbency. Some of them are extremely dense, therefore their porosity is minimal. What this translates into is the fact that the absorbency of such types of stone is so marginal that–by all practical intents and purposes–it can be considered irrelevant. Some other stones present a medium porosi-ty, and others at the very end of the spectrum are extremely porous. Because of their inherent porosity, many stones can absorb liquids, if not sealed, and if such liquids are staining agents, a true stain will occur.
continued
| 16Visit us online at www.potomacstonecare.com for more details and helpful tips
will clog its pores, thus reducing its natural absorbency rate. This will help prevent possible accidental spills of staining agents from being absorbed by the stone.
How many applications are needed?For some stones that are more porous than others, one application of impregna-tor/sealer may not be enough. But how will you know?
When sealer can no longer be absorbed by the stone, the stone is adequately sealed. On granites that need sealing, at least two applications are recommended. Very porous granites, sandstone, quartzite, etc., may require three or more appli-cations.
How long will it last?There is no absolute rule of thumb when it comes to the durability of any sealer. Generally speaking, in an interior environment, most quality impregnating sealers will last 2-5 years or more. Environment and usage plays a big role. Stones exposed to intense heat or direct sunlight, as well as surfaces that are subject to a lot of use or abuse, will probably need to be re-sealed more often. Some “granites” are so porous that no sealer will do a satisfactory job sealing them 100% for an extended amount of time.
When is it time to reseal?To find out if your stone is perfectly sealed, pour some water on it and wait for ap-proximately 20 minutes to half an hour, then wipe it dry and wait for a minute or two. If the surface of the stone did not darken, it means that the stone is still per-fectly sealed. Be sure to test various areas, especially those areas that get more use.
Sealing and Protecting
Sealing: DIY or Call in a PRO?Is sealing a job for you, or should you hire a quali-fied professional to do it for you? Consider the fol-lowing pros and cons.
You save on labor costs by doing it yourself. How-ever, consider the magnitude of the job and how comfortable you are with a DIY project. Are you prepared to get on your hands and knees to seal a floor? Are you willing to apply multiple applica-tions, if needed?
Has the floor or countertop been thoroughly and completely cleaned? If not, you take the chance of sealing in dirt and debris. Also, keep in mind that sealer not completely removed from the surface of stone may cause problems, including a haze on the stone that may develop as the sealer dries completely. Once it is dried on the surface, sealer can be very difficult to remove.
Individual sealers perform differently in various environments and on certain stones. Hiring a PRO to do the job may end up saving you in the end. Your PRO will know which is the best sealer for the job and will get the job done efficiently.
continued

| 17Visit us online at www.potomacstonecare.com for more details and helpful tips
Etch Protection Treatments Specialty treatments are available now for acid-sensitive stone, which means you can have the most elegant marble in places that would otherwise not be recommended.
The calcium in marble and certain other stone types undergoes a chemical reaction when coming into contact with acidic substances–lemon juice, vin-egar, wine or mixed drinks, cleaners, and the like. The damage is referred to as etching and typically appears as a dull spot on the stone finish. It is frequently, but erroneously, referred to as water spots. Stone countertops, bar tops, restaurant tables, vanity tops, desks and similar surfaces that see a lot of use are especially subject to etching. Today, very effective high-tech treatments are available for even the most acid-sensitive stones that provide an invisible barrier to protect the surface of the stone while still allowing the stone to breathe. These treatments also have the added benefit of providing protection from stains. Ask your stone PRO for more information.
Color Enhancing SealingWhile impregnating sealers will not alter the appearance of your stone, a col-or-enhancing (impregnating) sealer will protect the stone while bringing out its color, giving it a wet (i.e. darker, not glossy) look. It will, at the same time, provide good protection from water-based staining. Color enhancing sealers are typically used on tumbled marble, low-honed limestone and travertine, honed (black) granite, etc.
Avoid Waxes and Other DIY Coatings Stay away from do-it-yourself topical coatings. They may look great at first, but can quickly begin showing unsightly signs of wear, scratches, and dull-ness and can also act like magnets, trapping contaminants.
Sealing and Protecting
| 18Visit us online at www.potomacstonecare.com for more details and helpful tips
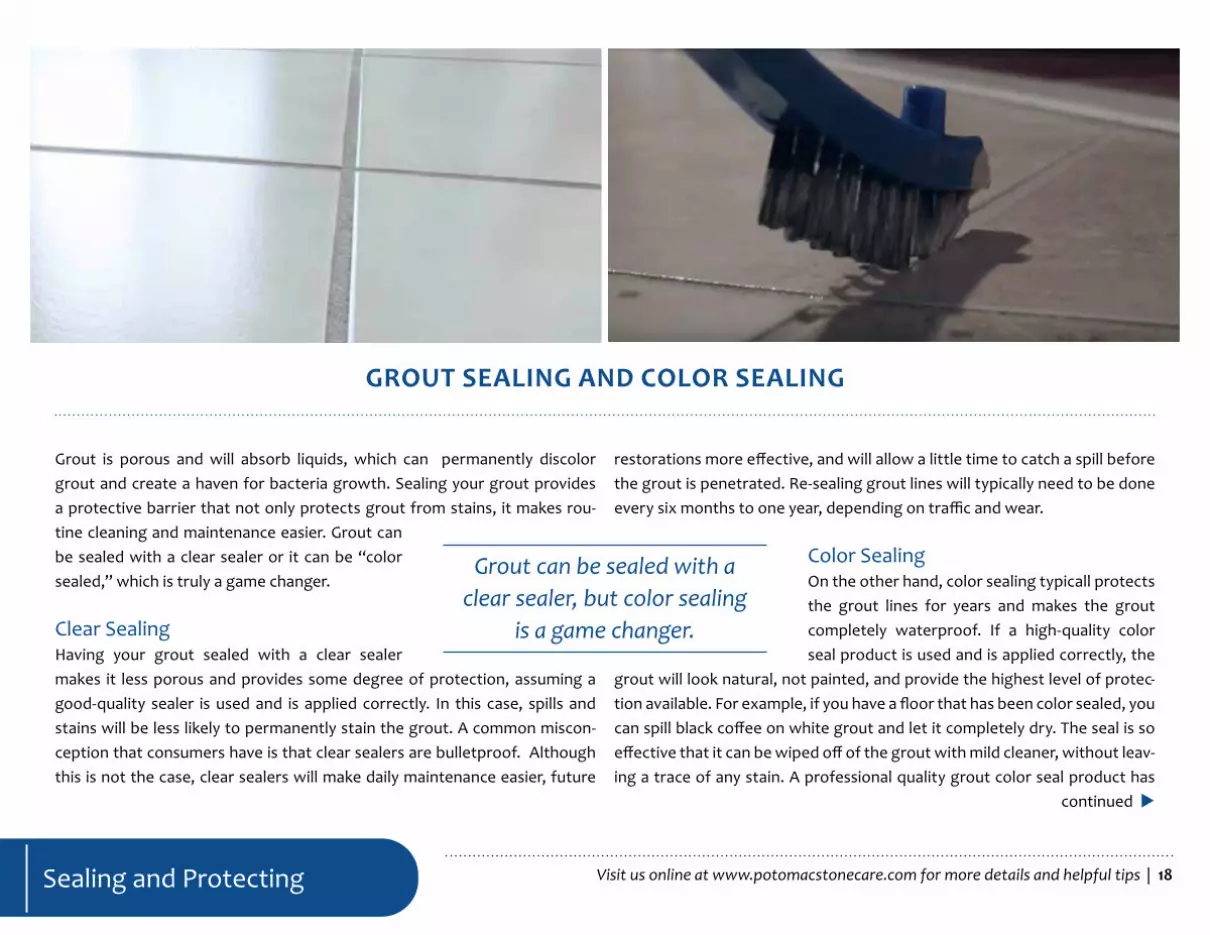
GROUT SEALING AND COLOR SEALING
Grout is porous and will absorb liquids, which can permanently discolor grout and create a haven for bacteria growth. Sealing your grout provides a protective barrier that not only protects grout from stains, it makes rou-tine cleaning and maintenance easier. Grout can be sealed with a clear sealer or it can be “color sealed,” which is truly a game changer.
Clear SealingHaving your grout sealed with a clear sealer makes it less porous and provides some degree of protection, assuming a good-quality sealer is used and is applied correctly. In this case, spills and stains will be less likely to permanently stain the grout. A common miscon-ception that consumers have is that clear sealers are bulletproof. Although this is not the case, clear sealers will make daily maintenance easier, future
restorations more effective, and will allow a little time to catch a spill before the grout is penetrated. Re-sealing grout lines will typically need to be done every six months to one year, depending on traffic and wear.
Color SealingOn the other hand, color sealing typicall protects the grout lines for years and makes the grout completely waterproof. If a high-quality color seal product is used and is applied correctly, the
grout will look natural, not painted, and provide the highest level of protec-tion available. For example, if you have a floor that has been color sealed, you can spill black coffee on white grout and let it completely dry. The seal is so effective that it can be wiped off of the grout with mild cleaner, without leav-ing a trace of any stain. A professional quality grout color seal product has
Sealing and Protecting
continued
Grout can be sealed with a clear sealer, but color sealing
is a game changer.
| 19Visit us online at www.potomacstonecare.com for more details and helpful tips
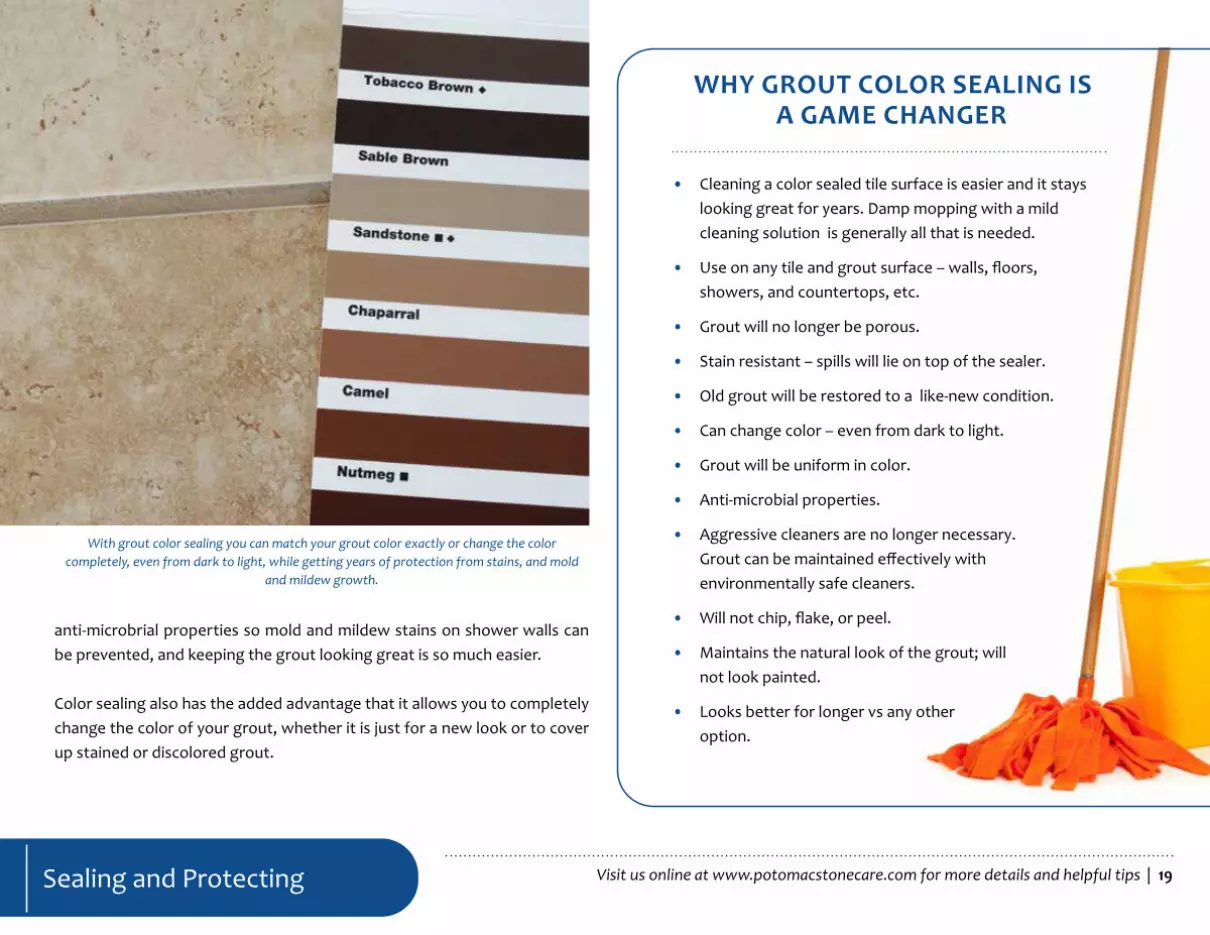
anti-microbrial properties so mold and mildew stains on shower walls can be prevented, and keeping the grout looking great is so much easier.
Color sealing also has the added advantage that it allows you to completely change the color of your grout, whether it is just for a new look or to cover up stained or discolored grout.
WHY GROUT COLOR SEALING IS A GAME CHANGER
• Cleaning a color sealed tile surface is easier and it stays looking great for years. Damp mopping with a mild cleaning solution is generally all that is needed.
• Use on any tile and grout surface – walls, floors, showers, and countertops, etc.
• Grout will no longer be porous.
• Stain resistant – spills will lie on top of the sealer.
• Old grout will be restored to a like-new condition.
• Can change color – even from dark to light.
• Grout will be uniform in color.
• Anti-microbial properties.
• Aggressive cleaners are no longer necessary. Grout can be maintained effectively with environmentally safe cleaners.
• Will not chip, flake, or peel.
• Maintains the natural look of the grout; will not look painted.
• Looks better for longer vs any other option.
Sealing and Protecting
With grout color sealing you can match your grout color exactly or change the color completely, even from dark to light, while getting years of protection from stains, and mold
and mildew growth.

| 20Visit us online at www.potomacstonecare.com for more details and helpful tips
LET’S TALK ABOUT STAINS
An Important Rule of Thumb About Stains A true stain is always darker than the darker than the surrounding material. If it appears as a lighter col-or, it is not a stain, but either a mark of corrosion (etching) made by an acid or a caustic mark (bleaching) made by a strong base (alkali). In other words, a lighter color “stain” is always surface damage and has no relation whatsoever with the absorbency rate of the damaged material–stone or otherwise. There is not a single exception to this rule.
Let’s start by saying that a stain is a discoloration. So far, so good. The fact is, however, that not all dis-colorations are stains. To illustrate the point, let’s take, for example, a piece of common fabric. Fabric is typically absorbent. Therefore, if we spill some liquid onto it, the material will absorb it. If it is only water, it will leave a temporary “stain.” Once the water evaporates, the fabric will go back to its original color. But, if coffee or cooking oil is spilled on the fabric, a stain will occur, because the fabric will absorb the staining agent and change its color in a permanent way–unless we do something to remove the agent from the fabric.
On the other hand, if bleach is spilled on that same fabric, a discoloration will occur, but it can hardly be defined as a stain, because it is actually permanent damage to the dye that originally gave the fabric its color.
As with the fabric example, when it comes to natural stone there are stains that are true stains and there are “stains” that are actually discolorations caused by something else. A stain is a discoloration of the stone produced by a staining agent that was actually absorbed by the stone. Other “discolorations” have nothing to do with the porosity (absorbency) of the stone, rather they are a result of damage to
Stain Management
continued
| 21Visit us online at www.potomacstonecare.com for more details and helpful tips
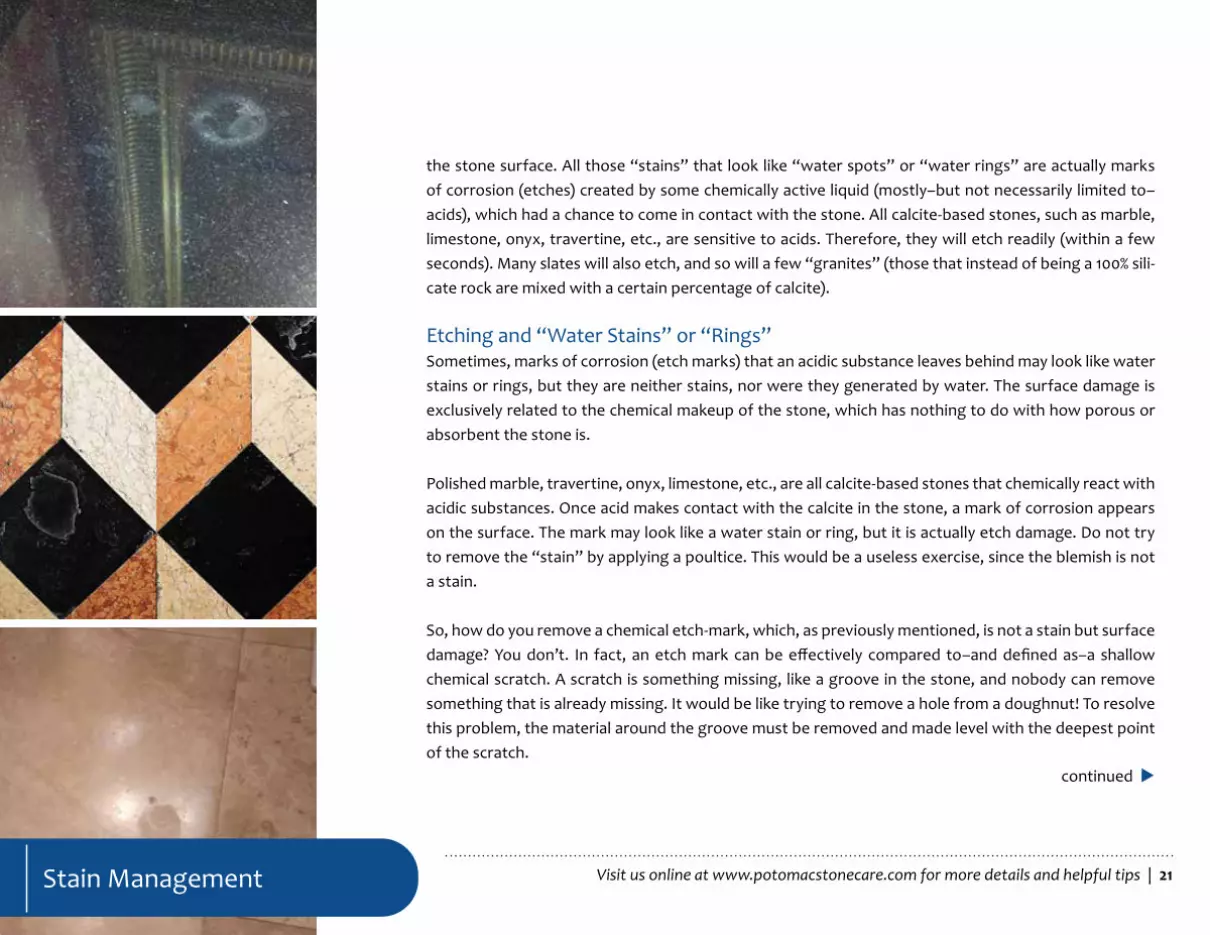
the stone surface. All those “stains” that look like “water spots” or “water rings” are actually marks of corrosion (etches) created by some chemically active liquid (mostly–but not necessarily limited to–acids), which had a chance to come in contact with the stone. All calcite-based stones, such as marble, limestone, onyx, travertine, etc., are sensitive to acids. Therefore, they will etch readily (within a few seconds). Many slates will also etch, and so will a few “granites” (those that instead of being a 100% sili-cate rock are mixed with a certain percentage of calcite).
Etching and “Water Stains” or “Rings”Sometimes, marks of corrosion (etch marks) that an acidic substance leaves behind may look like water stains or rings, but they are neither stains, nor were they generated by water. The surface damage is exclusively related to the chemical makeup of the stone, which has nothing to do with how porous or absorbent the stone is.
Polished marble, travertine, onyx, limestone, etc., are all calcite-based stones that chemically react with acidic substances. Once acid makes contact with the calcite in the stone, a mark of corrosion appears on the surface. The mark may look like a water stain or ring, but it is actually etch damage. Do not try to remove the “stain” by applying a poultice. This would be a useless exercise, since the blemish is not a stain.
So, how do you remove a chemical etch-mark, which, as previously mentioned, is not a stain but surface damage? You don’t. In fact, an etch mark can be effectively compared to–and defined as–a shallow chemical scratch. A scratch is something missing, like a groove in the stone, and nobody can remove something that is already missing. It would be like trying to remove a hole from a doughnut! To resolve this problem, the material around the groove must be removed and made level with the deepest point of the scratch.
Stain Management
continued
| 22Visit us online at www.potomacstonecare.com for more details and helpful tips
Technically, this is a small stone restoration project. Is this a task for the non-professional? The answer is maybe. If your stone is polished marble, travertine or onyx, then there’s hope. If your stone is marble or travertine that has a honed or soft matte finish, hone-finished slate (like a chalkboard), or mixed “granite,” you probably should hire a professional stone restoration contractor. If your stone has a cleft-finish, for example, slate with a rippled surface texture, then nobody can actually do anything about the etch damage, other than attempting to mask it by applying a good-quality stone color enhancer.
While marble and other calcite-based stones are vulnerable to acids, granite is much more resistant. In fact, the only acid that will etch polished granite is hydrofluoric acid, commonly found in rust removers.
If the etch is light (the depth is undetectable by the naked eye and it looks and feels smooth), then a polishing compound for marble will work quite well–without requiring the experience of a professional. In this case, no specific tools are needed other than a piece of terry cloth.
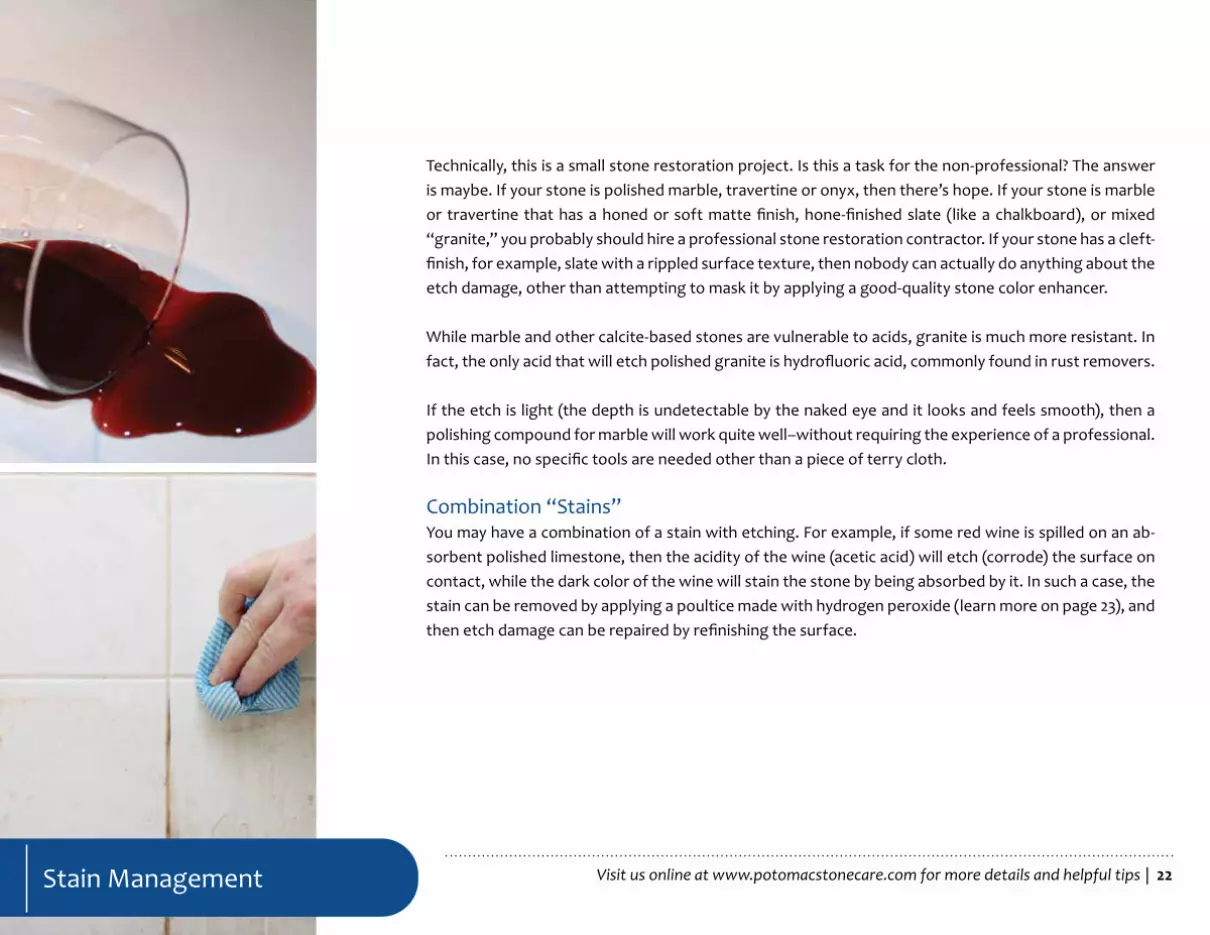
Combination “Stains”You may have a combination of a stain with etching. For example, if some red wine is spilled on an ab-sorbent polished limestone, then the acidity of the wine (acetic acid) will etch (corrode) the surface on contact, while the dark color of the wine will stain the stone by being absorbed by it. In such a case, the stain can be removed by applying a poultice made with hydrogen peroxide (learn more on page 23), and then etch damage can be repaired by refinishing the surface.
Stain Management
| 23Visit us online at www.potomacstonecare.com for more details and helpful tips
HOW TO REMOVE A STAIN
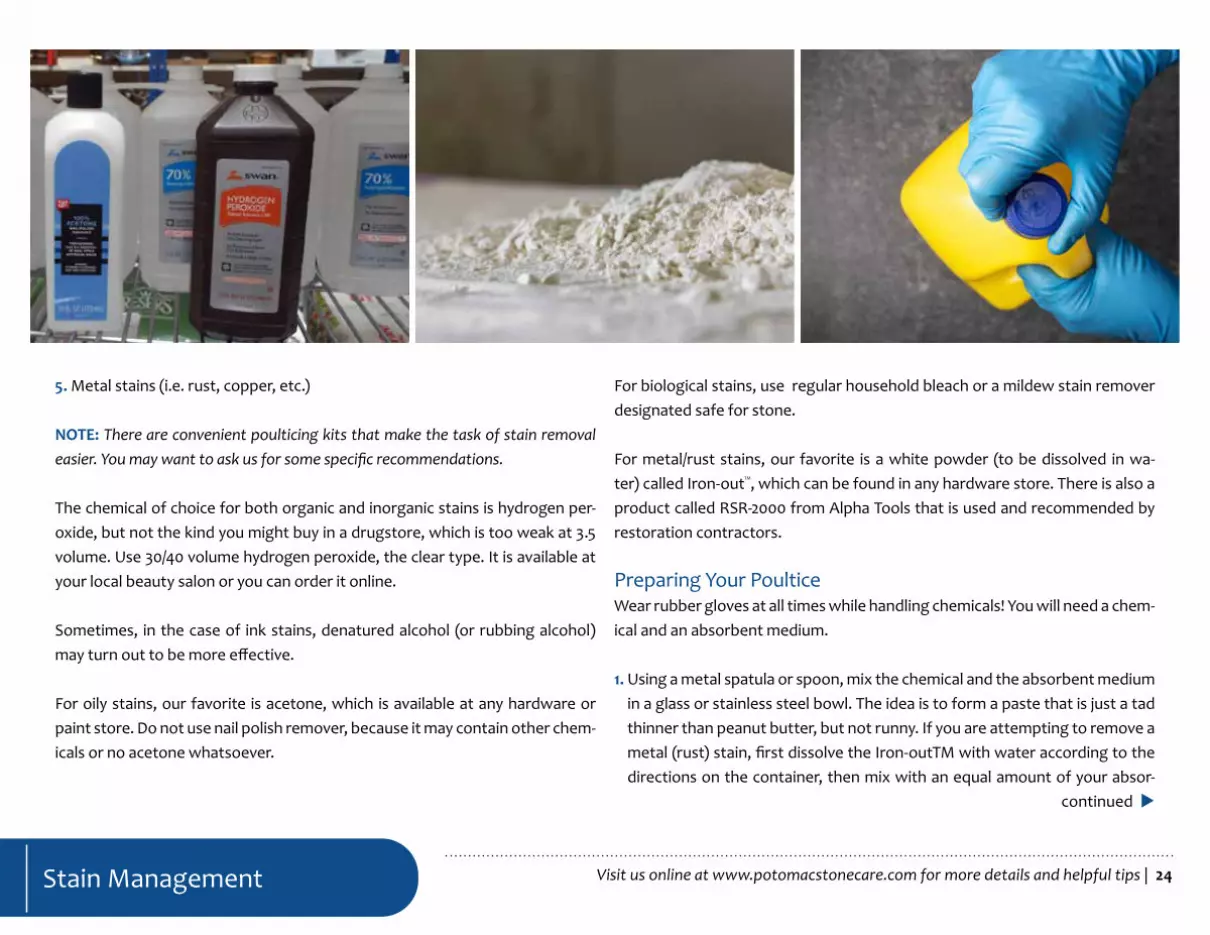
The Poulticing MethodWhat’s a poultice? It is the combination of a very absorbent medium (it must be more absorbent than the stone) mixed with a chemical. Since the chemical will be interacting with the stain, selecting the appropri-ate chemical for the type of stain to be removed is important. The concept is to re-absorb the stain out of the stone. The chemical will attack the stain inside the stone, and the absorbent agent will pull both the chemical and the stain out together. The absorbent agent can be the same all the time, regardless of the nature of the stain to be removed, but the chemical will be different, depending on the nature of the staining agent. The absorbent part of a poultice could be (in order of preference): talcum powder (baby powder) or a paper towel (*see page 25), and for larger projects, diatomaceous earth (the white stuff in-side your swimming pool filter) or household flour.
As we said before, the chemical must be selected in accordance with the nature of the staining agent.
There Are Five Major Classifications of Stains:1. Organic stains (i.e. coffee, tea, coloring agents of dark sodas and other drinks, gravy, mustard, etc.)
2. Inorganic stains (i.e. ink, color dyes, dirt–water spilling over from flower or plant pots, etc.)
3. Oily stains (i.e. any type of vegetable oil, certain mineral oils–motor oil, butter, margarine, melted animal fat, etc.)
4. Biological stains (i.e. mildew, mold, etc.)
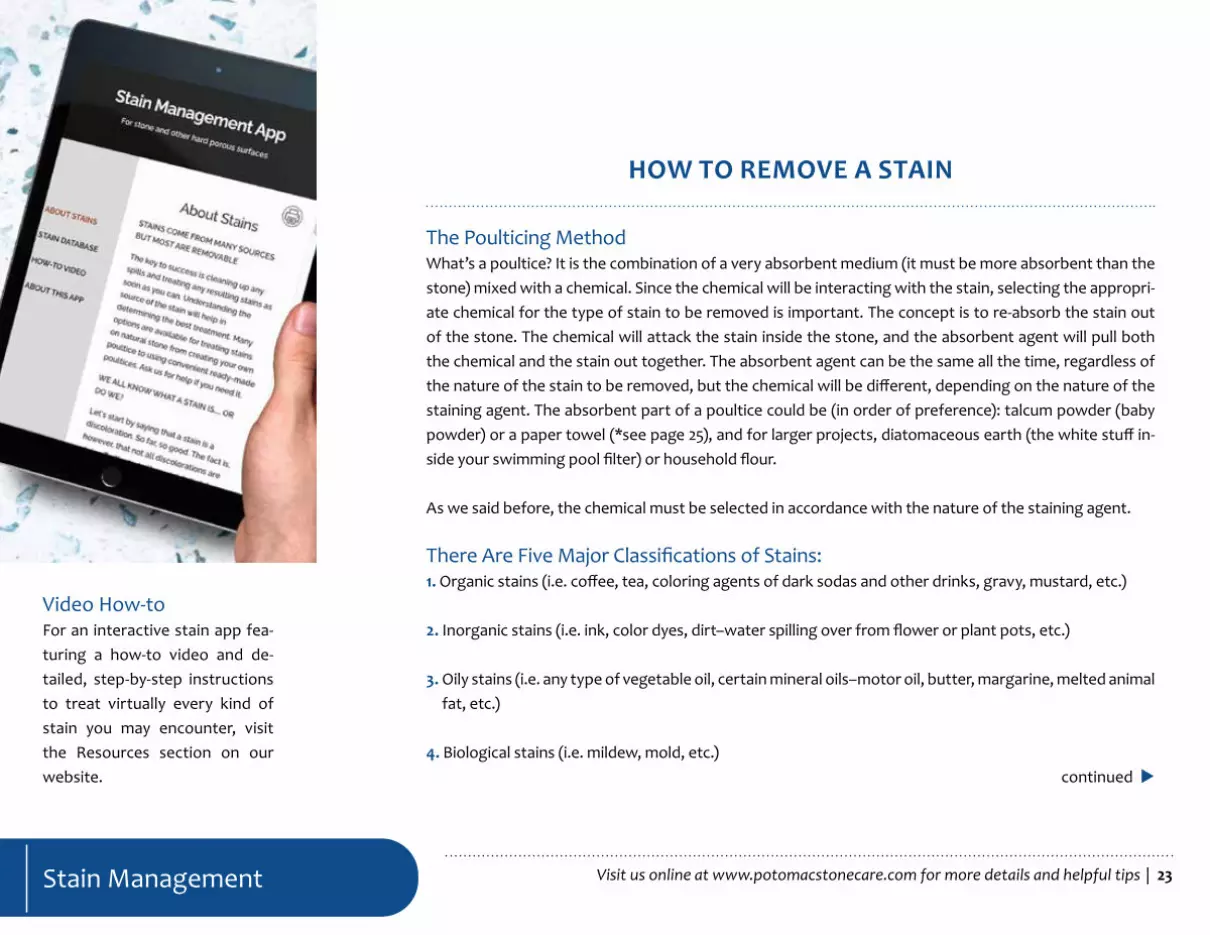
Video How-toFor an interactive stain app fea-turing a how-to video and de-tailed, step-by-step instructions to treat virtually every kind of stain you may encounter, visit the Resources section on our website.
Stain Management
continued
| 24Visit us online at www.potomacstonecare.com for more details and helpful tips
5. Metal stains (i.e. rust, copper, etc.)
NOTE: There are convenient poulticing kits that make the task of stain removal easier. You may want to ask us for some specific recommendations.
The chemical of choice for both organic and inorganic stains is hydrogen per-oxide, but not the kind you might buy in a drugstore, which is too weak at 3.5 volume. Use 30/40 volume hydrogen peroxide, the clear type. It is available at your local beauty salon or you can order it online.
Sometimes, in the case of ink stains, denatured alcohol (or rubbing alcohol) may turn out to be more effective.
For oily stains, our favorite is acetone, which is available at any hardware or paint store. Do not use nail polish remover, because it may contain other chem-icals or no acetone whatsoever.
For biological stains, use regular household bleach or a mildew stain remover designated safe for stone.
For metal/rust stains, our favorite is a white powder (to be dissolved in wa-ter) called Iron-out™, which can be found in any hardware store. There is also a product called RSR-2000 from Alpha Tools that is used and recommended by restoration contractors.
Preparing Your PoulticeWear rubber gloves at all times while handling chemicals! You will need a chem-ical and an absorbent medium.
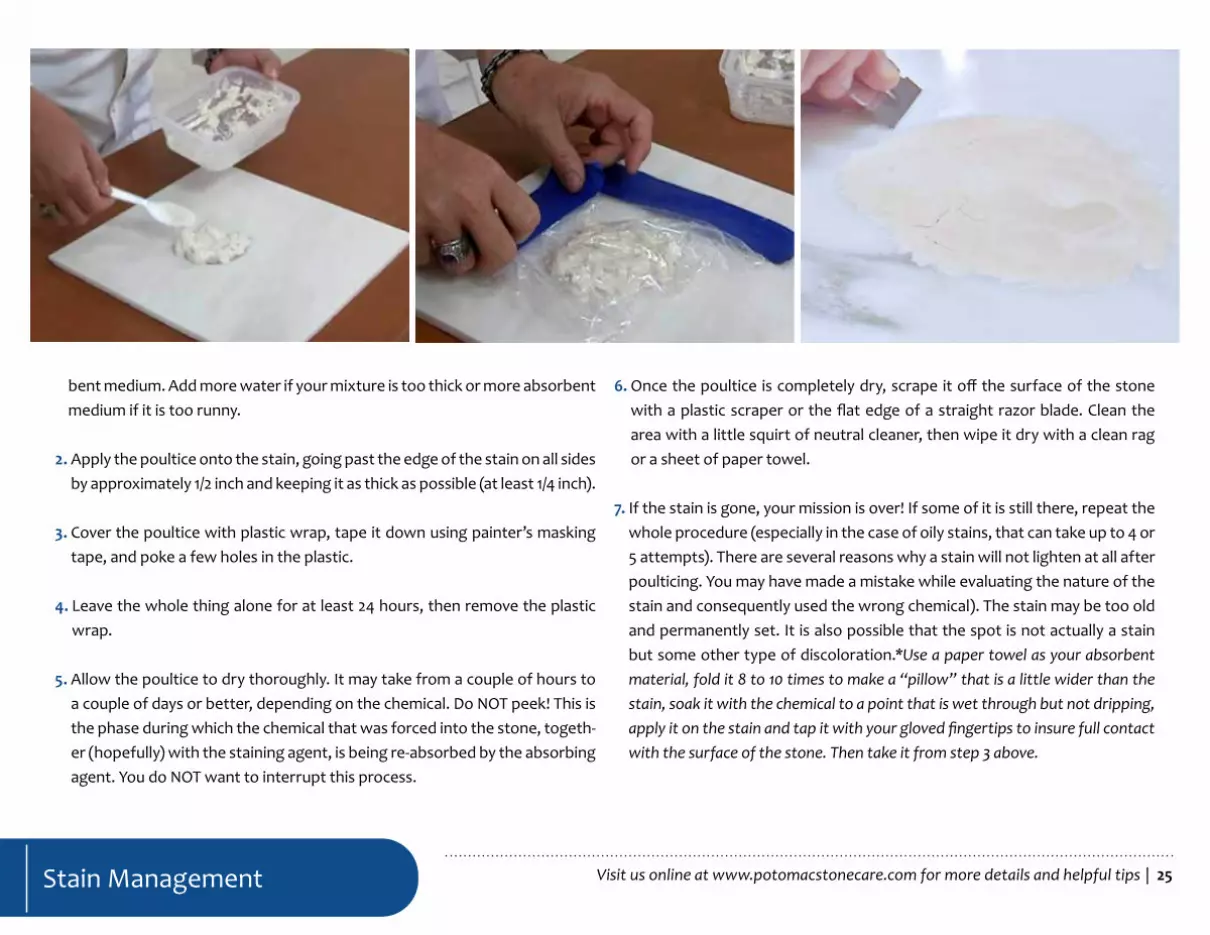
1. Using a metal spatula or spoon, mix the chemical and the absorbent medium in a glass or stainless steel bowl. The idea is to form a paste that is just a tad thinner than peanut butter, but not runny. If you are attempting to remove a metal (rust) stain, first dissolve the Iron-outTM with water according to the directions on the container, then mix with an equal amount of your absor-
Stain Management
continued
| 25Visit us online at www.potomacstonecare.com for more details and helpful tips
bent medium. Add more water if your mixture is too thick or more absorbent medium if it is too runny.
2. Apply the poultice onto the stain, going past the edge of the stain on all sides by approximately 1/2 inch and keeping it as thick as possible (at least 1/4 inch).
3. Cover the poultice with plastic wrap, tape it down using painter’s masking tape, and poke a few holes in the plastic.
4. Leave the whole thing alone for at least 24 hours, then remove the plastic wrap.
5. Allow the poultice to dry thoroughly. It may take from a couple of hours to a couple of days or better, depending on the chemical. Do NOT peek! This is the phase during which the chemical that was forced into the stone, togeth-er (hopefully) with the staining agent, is being re-absorbed by the absorbing agent. You do NOT want to interrupt this process.
6. Once the poultice is completely dry, scrape it off the surface of the stone with a plastic scraper or the flat edge of a straight razor blade. Clean the area with a little squirt of neutral cleaner, then wipe it dry with a clean rag or a sheet of paper towel.
7. If the stain is gone, your mission is over! If some of it is still there, repeat the whole procedure (especially in the case of oily stains, that can take up to 4 or 5 attempts). There are several reasons why a stain will not lighten at all after poulticing. You may have made a mistake while evaluating the nature of the stain and consequently used the wrong chemical). The stain may be too old and permanently set. It is also possible that the spot is not actually a stain but some other type of discoloration.*Use a paper towel as your absorbent material, fold it 8 to 10 times to make a “pillow” that is a little wider than the stain, soak it with the chemical to a point that is wet through but not dripping, apply it on the stain and tap it with your gloved fingertips to insure full contact with the surface of the stone. Then take it from step 3 above.
Stain Management

| 26Visit us online at www.potomacstonecare.com for more details and helpful tips
10 POTENTIAL STONE PROBLEMS AND WHAT TO DO ABOUT THEM
Marble, granite, limestone and other decorative stones are durable materials that will last a lifetime. However, if stone is not installed correctly or properly cared for, problems may result that will shorten its life. The following are the most common problems that may occur:
1. Loss of ShineThe loss of the high polish on certain marble and granite can be attributed to wear. This is especially true of marble, since it is much softer than granite. Dirt and sand tracked in on the bottoms of the shoes can act like sandpaper on a stone floor surface and will wear the polish off over time. A stone restoration professional can restore the polish using a number of different techniques.
2. Etching The dull, whitish spot created when liquids containing acids are spilled on marble is called etching. Mar-ble and limestone etch very easily. Granite is very acid-resistant and will rarely etch. To prevent etching, avoid using cleaners and chemicals that contain acids. Light etching can be removed with a little effort and a good marble polishing compound. Deep etching or large areas will require the services of a resto-ration professional.
3. StainsSome stone surfaces can become stained easily if they are not properly sealed. Many foods, drinks, ink, oil and rust can cause stains. Most stains on stone can be removed. For some more difficult stains, pro-fessional techniques by a stone restoration provider may be the only hope. Permanent stains can occur.
10 Potential Stone Problems
continued
| 27Visit us online at www.potomacstonecare.com for more details and helpful tips
For more information, see the Stain Management section in this guide or visit our website.
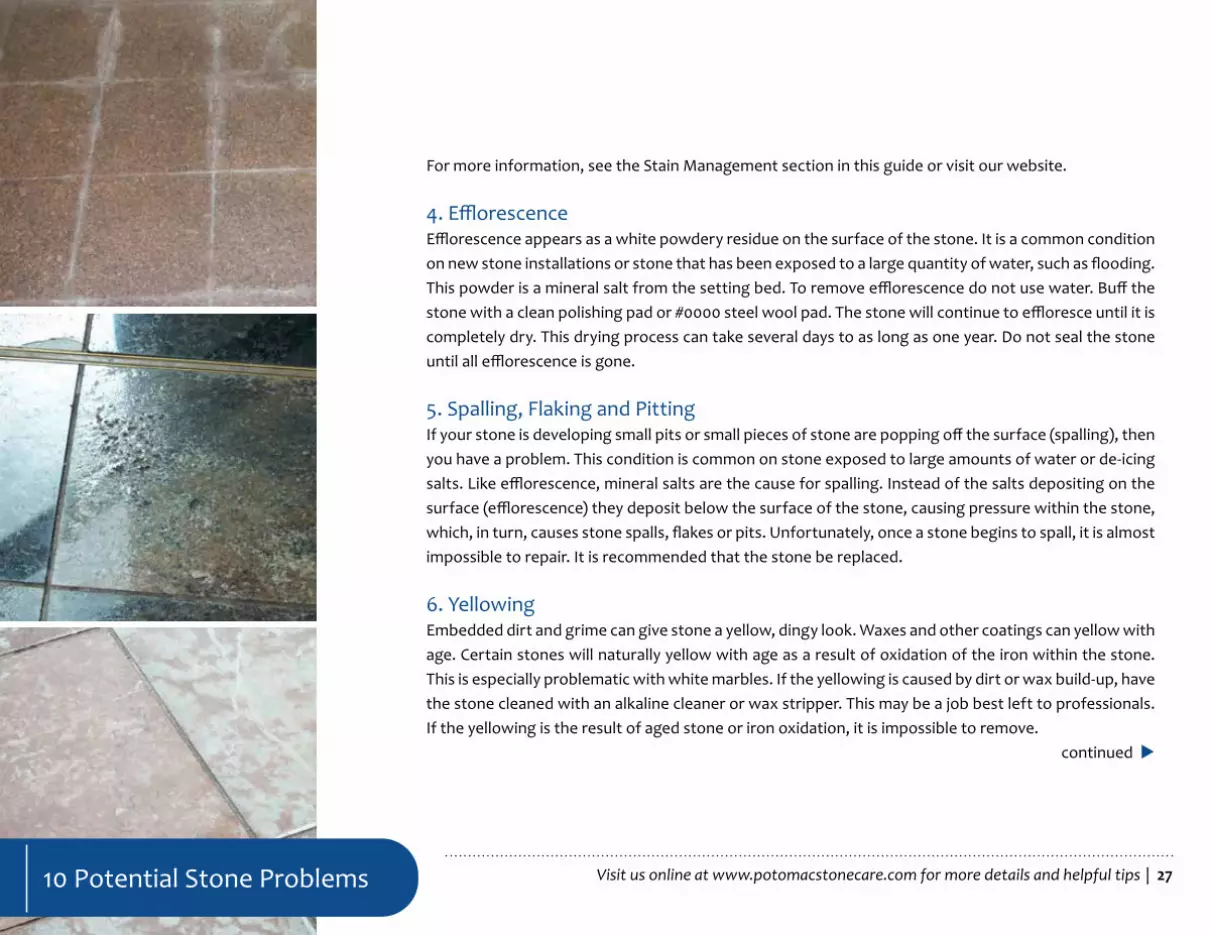
4. EfflorescenceEfflorescence appears as a white powdery residue on the surface of the stone. It is a common condition on new stone installations or stone that has been exposed to a large quantity of water, such as flooding.This powder is a mineral salt from the setting bed. To remove efflorescence do not use water. Buff the stone with a clean polishing pad or #0000 steel wool pad. The stone will continue to effloresce until it is completely dry. This drying process can take several days to as long as one year. Do not seal the stone until all efflorescence is gone.
5. Spalling, Flaking and PittingIf your stone is developing small pits or small pieces of stone are popping off the surface (spalling), then you have a problem. This condition is common on stone exposed to large amounts of water or de-icing salts. Like efflorescence, mineral salts are the cause for spalling. Instead of the salts depositing on the surface (efflorescence) they deposit below the surface of the stone, causing pressure within the stone, which, in turn, causes stone spalls, flakes or pits. Unfortunately, once a stone begins to spall, it is almost impossible to repair. It is recommended that the stone be replaced.
6. YellowingEmbedded dirt and grime can give stone a yellow, dingy look. Waxes and other coatings can yellow with age. Certain stones will naturally yellow with age as a result of oxidation of the iron within the stone. This is especially problematic with white marbles. If the yellowing is caused by dirt or wax build-up, have the stone cleaned with an alkaline cleaner or wax stripper. This may be a job best left to professionals. If the yellowing is the result of aged stone or iron oxidation, it is impossible to remove.
continued
10 Potential Stone Problems
| 28Visit us online at www.potomacstonecare.com for more details and helpful tips
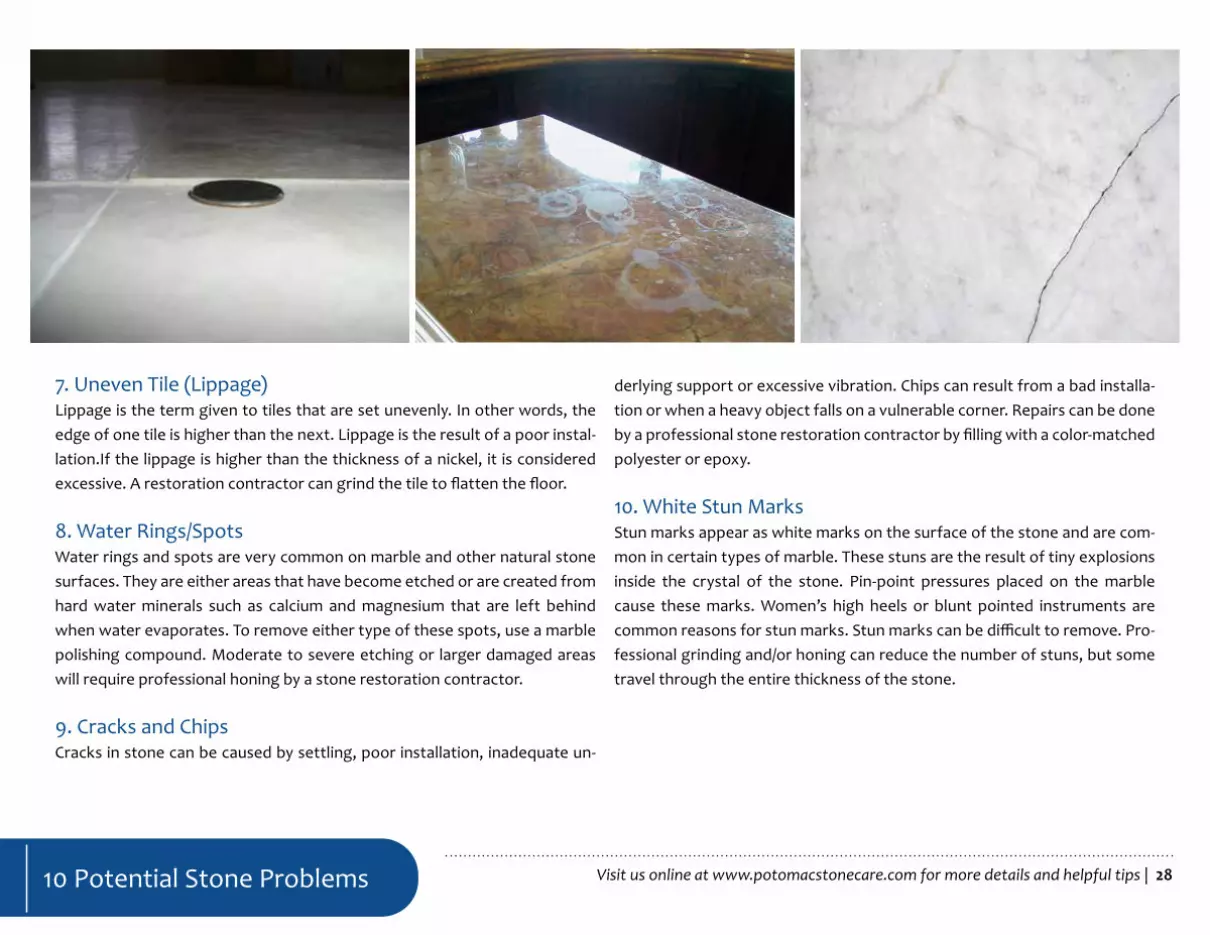
7. Uneven Tile (Lippage)Lippage is the term given to tiles that are set unevenly. In other words, the edge of one tile is higher than the next. Lippage is the result of a poor instal-lation.If the lippage is higher than the thickness of a nickel, it is considered excessive. A restoration contractor can grind the tile to flatten the floor.
8. Water Rings/SpotsWater rings and spots are very common on marble and other natural stone surfaces. They are either areas that have become etched or are created from hard water minerals such as calcium and magnesium that are left behind when water evaporates. To remove either type of these spots, use a marble polishing compound. Moderate to severe etching or larger damaged areas will require professional honing by a stone restoration contractor.
9. Cracks and ChipsCracks in stone can be caused by settling, poor installation, inadequate un-
derlying support or excessive vibration. Chips can result from a bad installa-tion or when a heavy object falls on a vulnerable corner. Repairs can be done by a professional stone restoration contractor by filling with a color-matched polyester or epoxy.
10. White Stun MarksStun marks appear as white marks on the surface of the stone and are com-mon in certain types of marble. These stuns are the result of tiny explosions inside the crystal of the stone. Pin-point pressures placed on the marble cause these marks. Women’s high heels or blunt pointed instruments are common reasons for stun marks. Stun marks can be difficult to remove. Pro-fessional grinding and/or honing can reduce the number of stuns, but some travel through the entire thickness of the stone.
10 Potential Stone Problems
| 29Visit us online at www.potomacstonecare.com for more details and helpful tips
TIPS FOR SELECTING STONE
Newly installed natural stone can be absolutely stunning but look worn and dull a year or two later. Smart stone selection takes into account more than a stone’s sparkle, lazy ribbon-like veining, or velvety ruggedness. You must also consider whether your selection will hold up to its intended use and pur-pose. Consider the strengths and weaknesses of a stone, as well as your own expectations about signs of wear and how often it will need to be profes-sionally restored. Here is some information that can help point you in the right direction when it comes to stone selection.
Marble and Other Calcite Based Stones–will etch when acid comes in con-tact with them. Special care will need to be taken if marble, travertine, lime-stone, or other stones containing calcium carbonate are installed in kitchens or other places where the spilling of acidic liquids is highly likely. New topical treatments are available through specially certified applicators that provide
an etch-resistant protective barrier. Marbles and other calcite-based stones are relatively soft stones as well, so this should also be considered.
Granite is an excellent choice for kitchen countertops since it is not vulner-able to acids. In addition, granite is very hard, around 7 on the Mohs scale, so it doesn’t scratch easily. (Refer to the Lemon Juice and Oil Test on page 28 for making your final selection.)
Soapstone is a very soft stone made of a variety of impure talc. Talc, which is a 1 on the Mohs scale. It is a dense mineral that develops a warm patina as it wears and is often stain resistant.
Sandstone is a porous, durable sedimentary rock composed of cemented sand-sized grains, predominantly quartz. It is categorized by the most popu-
Tips for Selecting Stone
continued
| 30Visit us online at www.potomacstonecare.com for more details and helpful tips
lar bonding agents such as silica, calcium, clay, and iron oxide. Sandstone is commonly used for flooring, counter tops, and vertical surfaces in both inte-rior and exterior environments.
Quartzite is a natural stone. Sandstone that is subjected to heat and pres-sure forms quartzite. Quartzite’s appearance can be veined like marble, have more solid coloring, look like crushed crystals, or a combination of these fea-tures. On the Mohs scale of hardness, quartzite is usually around a 7 or 8 out of 10, which means it is harder than glass.
Quartzite is also very durable, but subject to staining or etching like most nat-ural stones. Since quartzite is porous, sealing it can help inhibit staining, but sealers cannot prevent etching. There are new solutions now available on the market for quartzite countertop etch protection. Maintenance require-
ments include frequent cleaning with a stone-safe, pH-neutral cleaner and periodic professional restoration services, which may include honing, polish-ing, cleaning, and re-sealing.
Quartz Surface (Engineered Stone) True quartz is a mineral, and in its powdered form, it is the main ingredient for the engineered stone commonly refered to as quartz surface. With pat-terns mimicking marble and other natural stone, engineered stone / quartz surface requires less maintenance than natural stone. Quartz surface does not require sealer, because it is not porous, but this doesn’t necessarily mean the product is impervious to damage. The good news is that it does not dam-age easily. The bad news is that once it is damaged, it is more problematic to restore than natural stone, because it is made with colored resin.
Tips for Selecting Stone
| 31Visit us online at www.potomacstonecare.com for more details and helpful tips
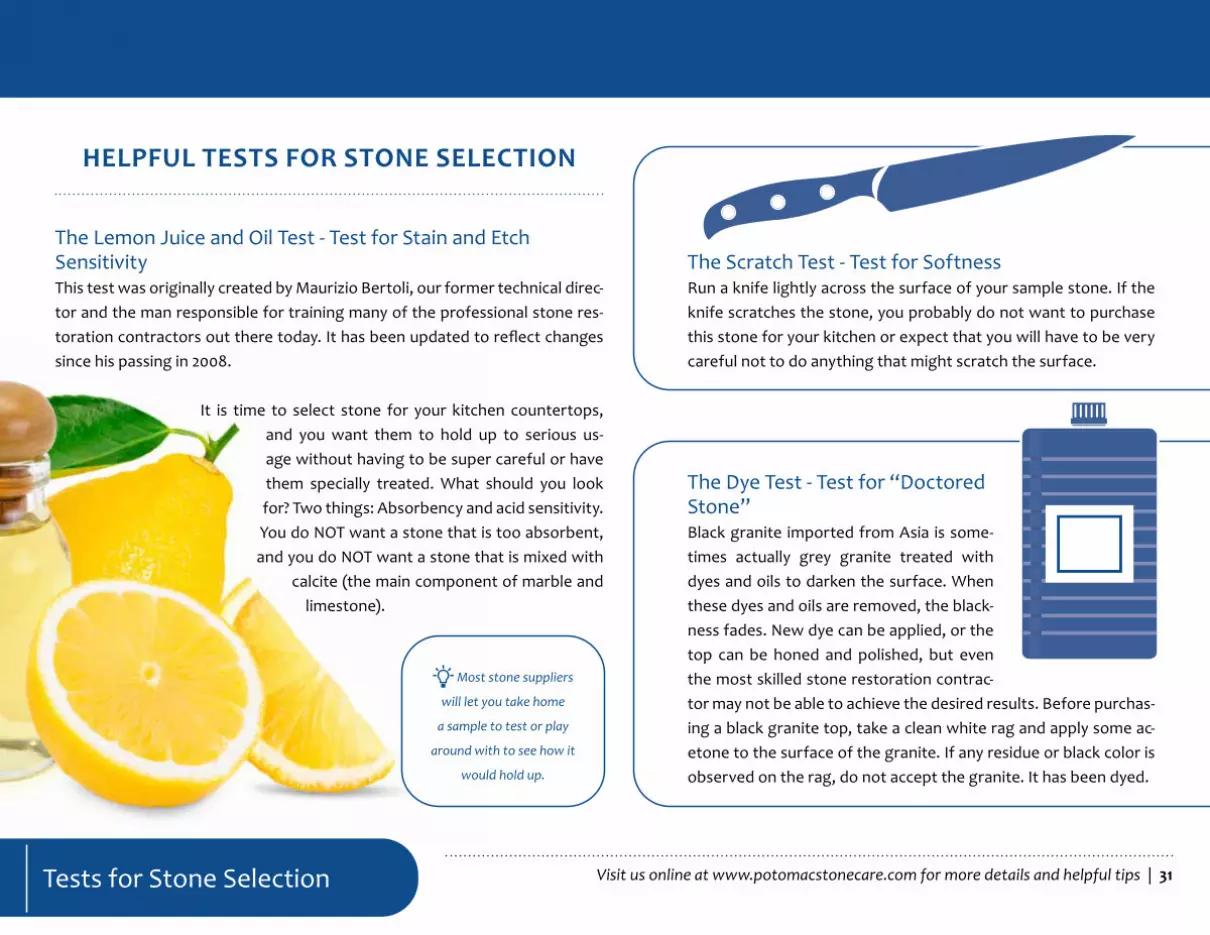
HELPFUL TESTS FOR STONE SELECTION
The Lemon Juice and Oil Test - Test for Stain and Etch SensitivityThis test was originally created by Maurizio Bertoli, our former technical direc-tor and the man responsible for training many of the professional stone res-toration contractors out there today. It has been updated to reflect changes since his passing in 2008.
It is time to select stone for your kitchen countertops, and you want them to hold up to serious us-age without having to be super careful or have them specially treated. What should you look for? Two things: Absorbency and acid sensitivity. You do NOT want a stone that is too absorbent, and you do NOT want a stone that is mixed with
calcite (the main component of marble and limestone).
The Scratch Test - Test for SoftnessRun a knife lightly across the surface of your sample stone. If the knife scratches the stone, you probably do not want to purchase this stone for your kitchen or expect that you will have to be very careful not to do anything that might scratch the surface.
Most stone suppliers
will let you take home
a sample to test or play
around with to see how it
would hold up.
The Dye Test - Test for “Doctored Stone”Black granite imported from Asia is some-times actually grey granite treated with dyes and oils to darken the surface. When these dyes and oils are removed, the black-ness fades. New dye can be applied, or the top can be honed and polished, but even the most skilled stone restoration contrac-tor may not be able to achieve the desired results. Before purchas-ing a black granite top, take a clean white rag and apply some ac-etone to the surface of the granite. If any residue or black color is observed on the rag, do not accept the granite. It has been dyed.
Tests for Stone Selection

| 32Visit us online at www.potomacstonecare.com for more details and helpful tips
But, what if you have your heart set on a luxurious marble or some other calcium-based stone that does not pass the lemon juice and oil test?
You have options if you decide to choose a vulnerable surface. You could, of course, embrace a more European mindset by accept-ing imperfections and appreciating the signs of use and wear as a natural indication that people actually live in the home and love to make use of the kitchen.
However, if maintaining a pristine, virtually perfect pol-ished surface is your objective, either plan on a pro-fessional coming in periodically to hone and polish away any damage from acidic substances or have the stone treated with an etch protection treatment.
An etch protection treatment will provide an invisible barrier that will protect your stone from stains and etching for years. These treatments are applied only through trained applicators.
Feel free to reach out to us if you have questions.
Tests for Stone Selection
The lemon juice and oil test will help you determine thesuitability of any stone you are considering...Start by collecting a sample or samples of any stone you are considering. Line
them up on a table or countertop, dust them thouroughly, then spill a few drops of lemon juice and cooking oil on each one of them. If you no-tice that the surface immediately turns dark when the juice and the oil touch the stone, eliminate that stone as an appropriate candidate.
If you notice that the juice and oil take a little time to get absorbed (a half minute or better), then you have a stone whose absorbency can
be effectively controlled with a good-quality impregnator.
If you finally notice that some samples will not absorb within, say, half an hour or so, then you may have a winner. That stone will not even need to be sealed.
Now, how do we eliminate the word ‘may’ from the equation? The answer is another question: Why use lemon juice instead of, say, plain water? You’re not just looking to determine the absorbency of the samples. You also want to determine that your samples are 100% silicate rocks. Some-times a stone may be improperly traded as one type of material when it is actually another. If there’s even a little calcite in the stone, the citric
acid will cause a chemical reaction, and you will notice a dull spot with the same shape as the drop of lemon juice. In such cases, once again, these stones would not be appropriate for a kitchen countertop. If, instead, it’s still nice and shiny under where the drops were, then you elimiated the ‘may’ factor!
| 33Visit us online at www.potomacstonecare.com for more details and helpful tips
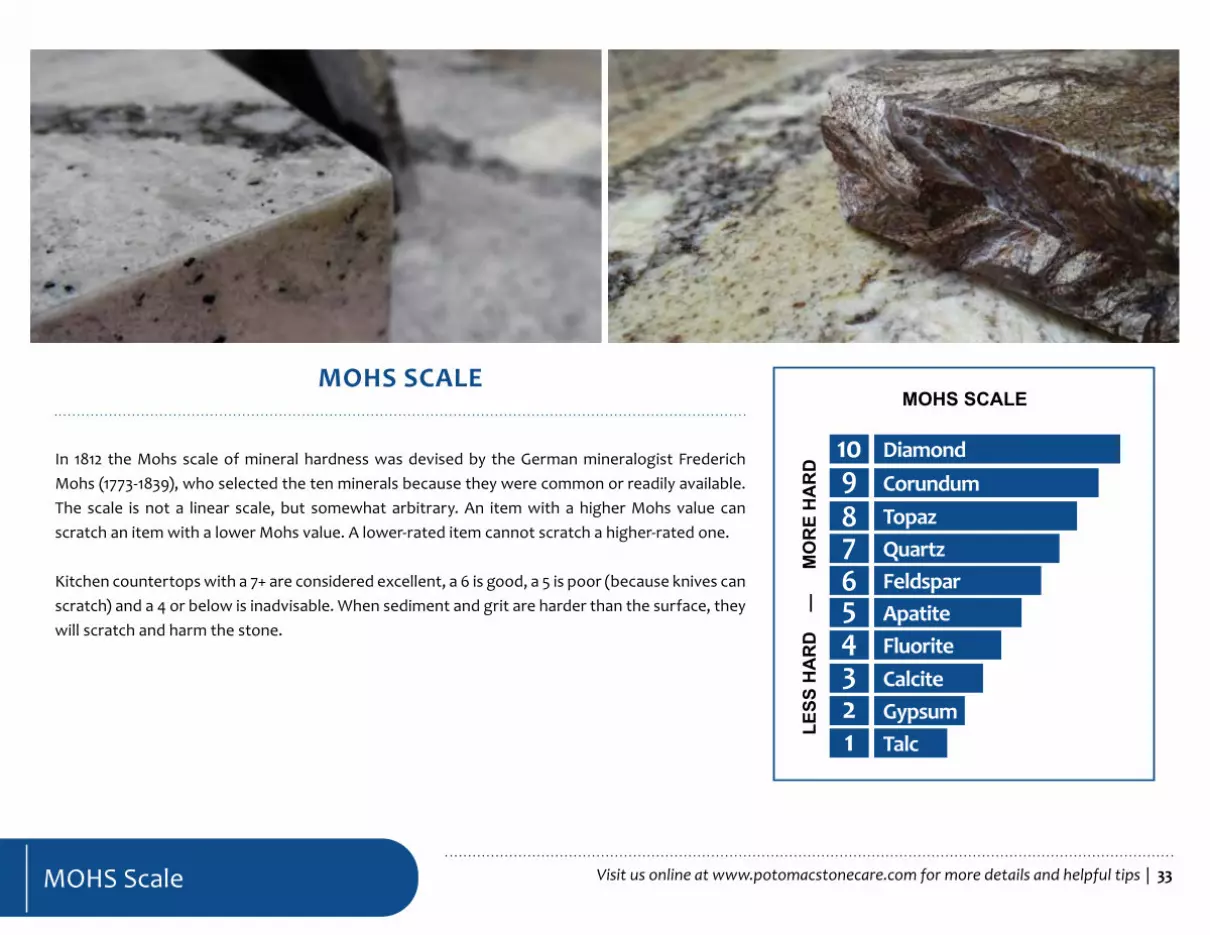
MOHS SCALE
LESS
HA
RD
—
M
OR
E H
AR
D
MOHS SCALE
In 1812 the Mohs scale of mineral hardness was devised by the German mineralogist Frederich Mohs (1773-1839), who selected the ten minerals because they were common or readily available. The scale is not a linear scale, but somewhat arbitrary. An item with a higher Mohs value can scratch an item with a lower Mohs value. A lower-rated item cannot scratch a higher-rated one.
Kitchen countertops with a 7+ are considered excellent, a 6 is good, a 5 is poor (because knives can scratch) and a 4 or below is inadvisable. When sediment and grit are harder than the surface, they will scratch and harm the stone.
MOHS Scale

| 34Visit us online at www.potomacstonecare.com for more details and helpful tips
A NOTE ON RESINING
Resining is a procedure that was introduced to the stone world by the Italians not too long ago to improve on the natural characteristics of certain stones, namely certain granites that are either too porous, or inherently prone to having a high percentage of natural flaws, such as fissures, pitting, etc.
The “resining” of a slab is not done by the factories that process blocks into slabs. It is rather done by separate high-tech facilities where the slabs are de-livered as they come out from the gang-saw, before one of their two sides is further processed by grinding, honing and polishing. The slabs are enclosed in a vacuum-filled chamber, and a flowing resin is applied. The vacuum envi-ronment helps the resin get deeplyabsorbed into the stone. After proper cur-ing time, the slabs are sent back to the original processing plants where they are calibrated, ground, honed and polished. The resin is totally eliminated from the polished surface of the slab and exposed only as a filler where there are natural pits in the stone. Without the resin, these pits would be other-wise unfilled and more or less obvious.
Is there anything wrong with such a procedure? Not really. There is indeed a lack of data about the long term effect (if any) of the resin inside the stone, but there are solid reasons to believe that nothing bad will come from it. Res-in has been used in the stone industry for a few generations already. Once cured, the resin is chemically inert (thus totally safe) and will not react with most chemicals.
However...There a Few Things to be Taken into Consideration:1. Sometimes the “resining” process is used to “upgrade” slabs. Translation:
by resining the low-grade slabs they will become “good.” If the resining is done to eliminate the absorbency of the stone or to fill the natural pits, that is okay, but if it is done to mask some bad slab . . . well, you fill in the blanks. This is just another reason why the reputation of your fabricator is paramount. A reputable fabricator will never knowingly buy “doctored” slabs!
2. While you could put a hot pot or pan right out of the stove onto “granite,” if the slab has been resined, irreparable damage may occur. Granite is heat resistant. Resin is not.
3. Certain resins may turn out to be photosensitive, which means the color of the resin can become altered over time if exposed to UV rays.
Resined slabs are NOT recommended for outdoor kitchens and where they will be in direct sunlight. All in all, resining is good (with the limitations listed above). Even granites that wouldn’t normally make the list of preferred stones would become more than acceptable if resined.
Resining

| 35Visit us online at www.potomacstonecare.com for more details and helpful tips
HIRING A PRO
What stone or tile related services might you need as a homeowner or business? There are various disci-plines within the stone and tile industry, each offering a variety of services.
What are the criteria you need to look for when you need to hire someone? What questions do you need to ask before you hire a company?
According to Consumer Reports, the biggest mistake consumers make is “being seduced by the price alone.” Would you hire the cheapest surgeon in town to operate on you or a member of your family? There is a saying, “Some of the most expensive work you will ever pay for is cheap work.” You should always think long term. Consider the consequences that saving a few dollars now will have over 3, 5 or 10 years. Your most important tool in evaluating the cost of a project is the value of what you are getting for your money. Low prices are usually a trade-off for cutting corners in materials, workmanship, warranty or adequate insurances. Remember that most average jobs can look good when completed. The true test is how they hold up. Did the contractor use the proper methods and materials to give you a professional quality result? These differences are usually the difference between a lower and a higher estimate.
General Tips for Hiring a Stone or Tile Service ContractorWhen hiring any contractor, you want to have confidence that they will get the job done to your expec-tatations. Check their online reviews. Don’t hesitate to ask for references or to verify their insurance. See what professional organizations they are affiliated with and confirm they are a member in good standing. Trust your gut feeling–are you comfortable with the contractor? This is much more important than you might think.
When you work with a Certified SurpHaces PRO Partner, you can be assured that they have been vetted as trained, and reputable, signed a Pledge of Professional Integrity and have demonstrated that they are appropriately licensed and insured.
continued
Hiring a PRO
| 36Visit us online at www.potomacstonecare.com for more details and helpful tipsHiring a PRO
1. Be sure that you understand what services different companies provide and that you are selecting a company that provides the type of services you need. For more information, see the sections in this guide entitled Stone Fabricators, Stone Restoration Contractors, Stone Maintenance Contrac-tors, Tile and Grout Cleaning and Sealing Contractors, and Tile Installers.
2. Create a list of potential service providers by asking friends, family, co-workers, and related stone and tile industry professionals if there is a ser-vice provider they would recommend or doing an online search. Be sure to peruse the websites of potential service providers, and check what their customers are saying about them in online reviews.
3. Once you have decided on prospective candidates, schedule appointments for consultations or estimates. If you are looking for a new installation, many fabricators and some installers have showrooms where you can go to discuss your budget and expectations, learn about various design options, and make material selections. If you are looking for restoration, maintenance, or cleaning and sealing services, most contractors will pro-vide a free consultation and estimate. You must have confidence that the restoration contractor understands the stone, has qualified technicians, proper equipment and the experience to meet reasonable expectations.
4. Be sure you are available at the scheduled time. It can be very frustrating for a contractor to set aside time for an estimate only to find that the pro-spective client is not available. On the other hand, if the contractor is not available for the scheduled appointment (and you don’t get a phone call),
they obviously do not deserve your project.
5. During the consultation, explain your expectations and let the service pro-vider address any concerns you may have. Give them as much information as possible. Ask the service provider to explain their procedures, as well as any alternative options. A competent and informed contractor should be more than happy to answer any question you may have.
6. Keep in mind, when choosing a fabricator or installer, that a poor installa-tion, the wrong stone for the environment, and doctored or poor quality stone are just some of the problems that can result in a very unsatisfac-tory, frustrating, and often costly experience. On the other hand, a qual-ity natural stone installation will be visually stunning and practical while adding value to your property and will be easy to properly maintain. When choosing a contractor who provides restoration, maintenance, or cleaning and sealing services, the stakes are not quite as high, because most dam-age can be repaired, but it’s still best to take your time and very carefully choose who will provide professional services to an existing installation.
7. Regarding the cost of the project, be sure when you are comparing esti-mates that you are comparing apples to apples. According to Consumer Reports, the biggest mistake consumers make is “being seduced by the price alone.” Would you hire the cheapest surgeon in town to operate on you or a member of your family? There is a saying, “Some of the most ex-pensive work you will ever pay for is cheap work.” You should always think long-term. Consider the consequences that saving a few dollars now will
continued

| 37Visit us online at www.potomacstonecare.com for more details and helpful tips
have over 3, 5 or 10 years. Your most important tool in evaluating the cost of a project is the value of what you are getting for your money. Low prices could be a trade-off for cutting corners in materials, workmanship, war-ranty or adequate insurances. Remember that most jobs can look good when completed, but the true test is how they hold up. Did the contractor use the proper methods and materials to give you a professional quality result? These differences could be what makes the difference between a lower and a higher estimate.
8. See what professional organizations service providers are affiliated with and confirm they are a members in good standing. Are they part of any professional organizations? Verify this, as well.
9. Ask for references, and don’t hesitate to check them.
10. Does the service provider carry insurance? Ask for proof by having them show you a certificate of insurance–or if the job is large enough–have their insurance company send you one. Be sure they carry both liability and workman’s compensation insurance. Any reputable company will carry these insurances.
11. Trust your gut feeling–are you comfortable with the service provider? This is much more important than you might think.
12. Once you choose your contractor, schedule the job, and be sure to ask about turnaround time so you can make arrangements to postpone nor-
mal activities in the work space, if necessary. Don’t be surprised if the service provider is booked ahead for several weeks or even months. Be patient–a good contractor may be busy, and you will need to wait your turn.
Hiring a PRO

| 38Visit us online at www.potomacstonecare.com for more details and helpful tipsHiring a PRO
STONE FABRICATORS
Skilled technicians make a rectangle slab of stone conform to your creative vision, matching the specifications of each element in your kitchen design, from cabinets, sinks, and cooktops to faucets and other features. Fabrica-tors finish edges so that they have a clean, elegant appearance that matches with the surface finish. Your reputable fabricator should be knowledgeable about the properties of stone and why some stones, although beautiful, may not be suitable for some environments. Their advice will be especially help-ful as you select material. They will let you know in advance about what to expect from different materials, such as pits, fissures, resins, sealers, and stain protection options, as well as what to expect concerning the installa-tion, for example, seam placement, their policies on correcting any damage that may occur during installation, whether any part of the job is subcon-tracted, whether they do plumbing and electrical work or can recommend a reputable contractor to perform those services, removing old materials,
and other considerations. Your fabricator should also provide instructions for caring for and maintaining your investment. Refer to page 29 for tips on selecting stone.
| 39Visit us online at www.potomacstonecare.com for more details and helpful tips
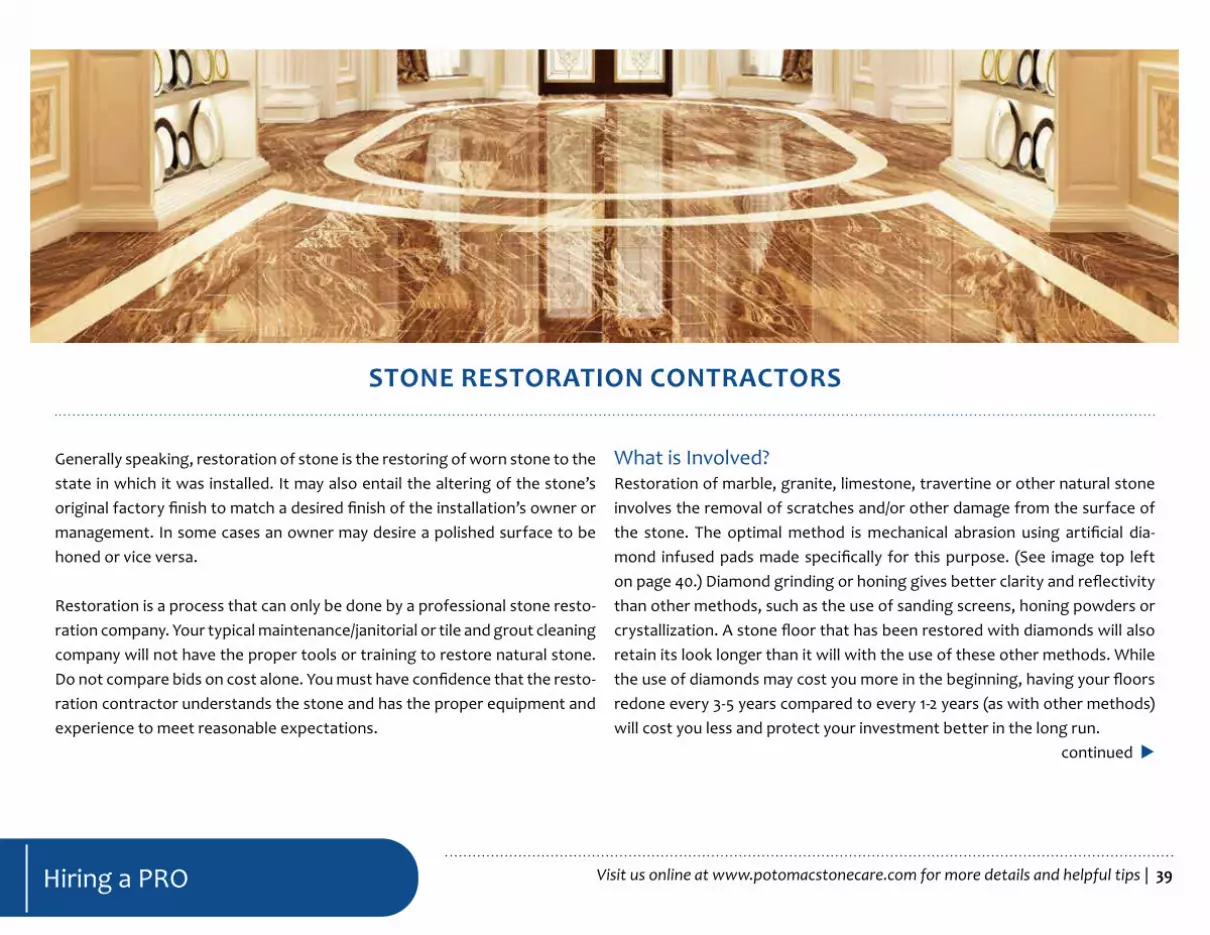
STONE RESTORATION CONTRACTORS
Generally speaking, restoration of stone is the restoring of worn stone to the state in which it was installed. It may also entail the altering of the stone’s original factory finish to match a desired finish of the installation’s owner or management. In some cases an owner may desire a polished surface to be honed or vice versa.
Restoration is a process that can only be done by a professional stone resto-ration company. Your typical maintenance/janitorial or tile and grout cleaning company will not have the proper tools or training to restore natural stone. Do not compare bids on cost alone. You must have confidence that the resto-ration contractor understands the stone and has the proper equipment and experience to meet reasonable expectations.
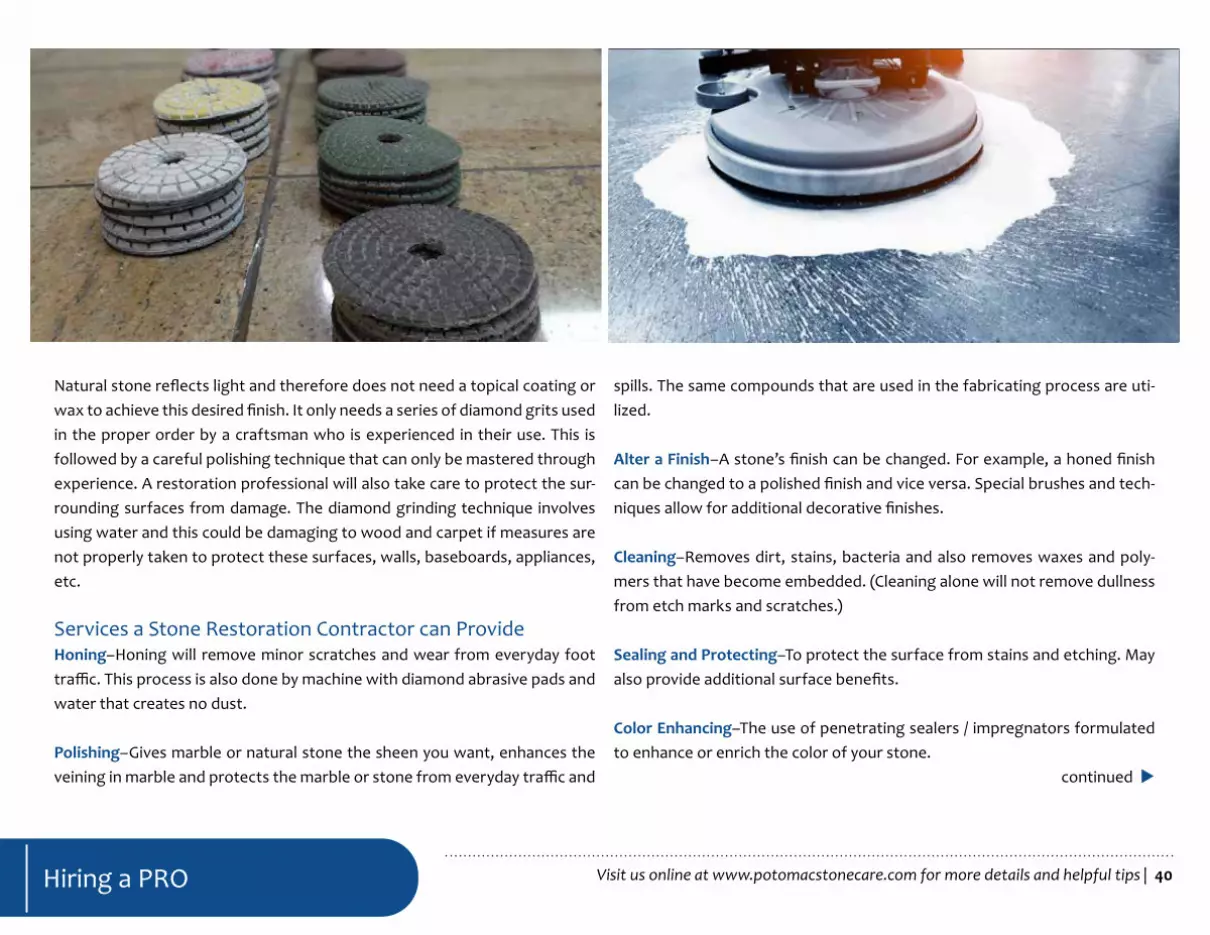
What is Involved?Restoration of marble, granite, limestone, travertine or other natural stone involves the removal of scratches and/or other damage from the surface of the stone. The optimal method is mechanical abrasion using artificial dia-mond infused pads made specifically for this purpose. (See image top left on page 40.) Diamond grinding or honing gives better clarity and reflectivity than other methods, such as the use of sanding screens, honing powders or crystallization. A stone floor that has been restored with diamonds will also retain its look longer than it will with the use of these other methods. While the use of diamonds may cost you more in the beginning, having your floors redone every 3-5 years compared to every 1-2 years (as with other methods) will cost you less and protect your investment better in the long run.
Hiring a PRO
continued
| 40Visit us online at www.potomacstonecare.com for more details and helpful tips
Natural stone reflects light and therefore does not need a topical coating or wax to achieve this desired finish. It only needs a series of diamond grits used in the proper order by a craftsman who is experienced in their use. This is followed by a careful polishing technique that can only be mastered through experience. A restoration professional will also take care to protect the sur-rounding surfaces from damage. The diamond grinding technique involves using water and this could be damaging to wood and carpet if measures are not properly taken to protect these surfaces, walls, baseboards, appliances, etc.
Services a Stone Restoration Contractor can ProvideHoning–Honing will remove minor scratches and wear from everyday foot traffic. This process is also done by machine with diamond abrasive pads and water that creates no dust.
Polishing–Gives marble or natural stone the sheen you want, enhances the veining in marble and protects the marble or stone from everyday traffic and
spills. The same compounds that are used in the fabricating process are uti-lized.
Alter a Finish–A stone’s finish can be changed. For example, a honed finish can be changed to a polished finish and vice versa. Special brushes and tech-niques allow for additional decorative finishes.
Cleaning–Removes dirt, stains, bacteria and also removes waxes and poly-mers that have become embedded. (Cleaning alone will not remove dullness from etch marks and scratches.)
Sealing and Protecting–To protect the surface from stains and etching. May also provide additional surface benefits.
Color Enhancing–The use of penetrating sealers / impregnators formulated to enhance or enrich the color of your stone.
Hiring a PRO
continued
| 41Visit us online at www.potomacstonecare.com for more details and helpful tips
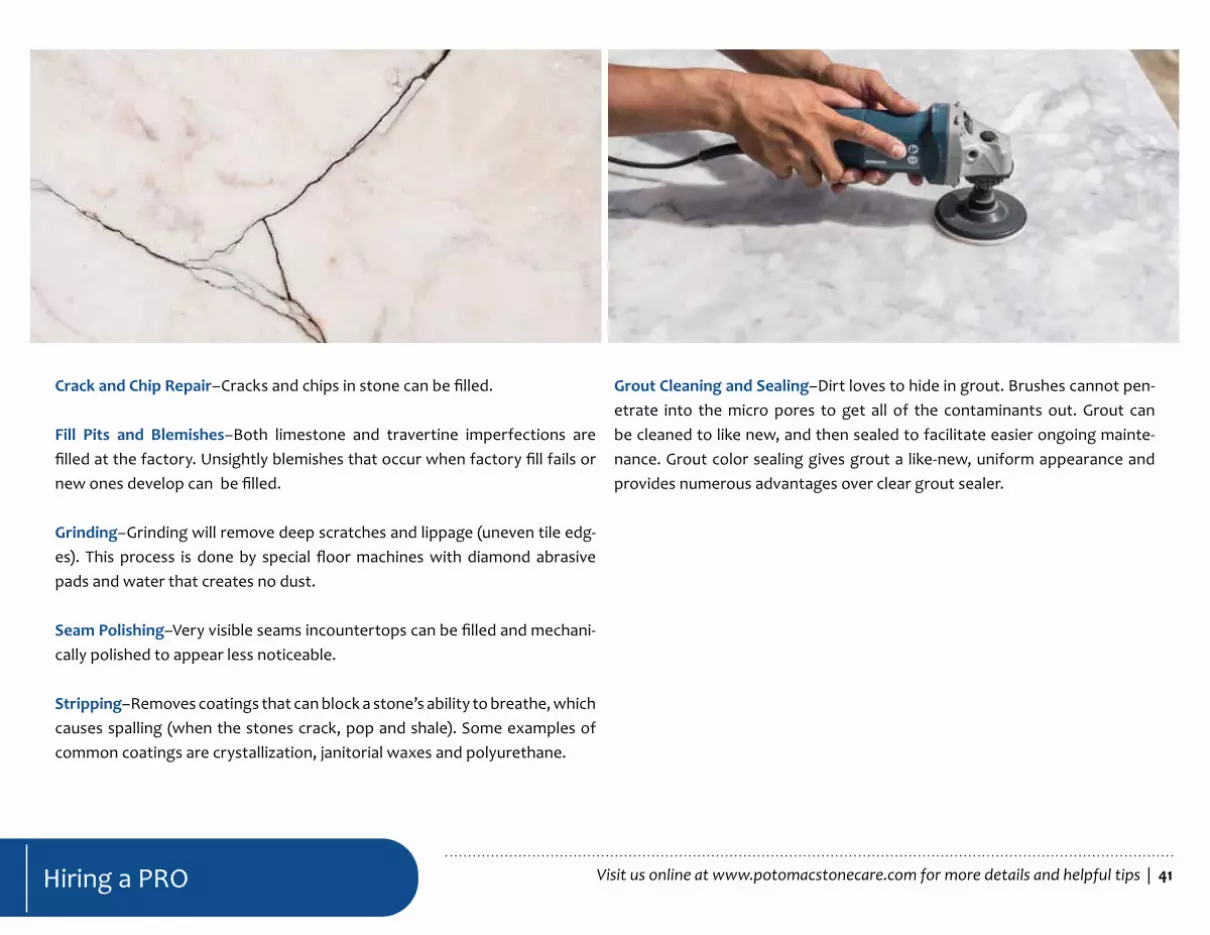
Crack and Chip Repair–Cracks and chips in stone can be filled.
Fill Pits and Blemishes–Both limestone and travertine imperfections are filled at the factory. Unsightly blemishes that occur when factory fill fails or new ones develop can be filled.
Grinding–Grinding will remove deep scratches and lippage (uneven tile edg-es). This process is done by special floor machines with diamond abrasive pads and water that creates no dust.
Seam Polishing–Very visible seams incountertops can be filled and mechani-cally polished to appear less noticeable.
Stripping–Removes coatings that can block a stone’s ability to breathe, which causes spalling (when the stones crack, pop and shale). Some examples of common coatings are crystallization, janitorial waxes and polyurethane.
Grout Cleaning and Sealing–Dirt loves to hide in grout. Brushes cannot pen-etrate into the micro pores to get all of the contaminants out. Grout can be cleaned to like new, and then sealed to facilitate easier ongoing mainte-nance. Grout color sealing gives grout a like-new, uniform appearance and provides numerous advantages over clear grout sealer.
Hiring a PRO

| 42Visit us online at www.potomacstonecare.com for more details and helpful tipsHiring a PRO
STONE MAINTENANCE CONTRACTORS
In commercial settings, a customized professional maintenance program is required to keep the finish of natural stone floors looking great all the time. Maintenance services include scheduled cleaning, specific procedures, and inspections performed on a daily, weekly, or other regular basis. With a well-planned maintenance program, your stone floors can always look like new, without the need for periodic restoration, even with heavy traffic and usage.
Not all stone restoration contractors provide on-going maintenenace servic-es. However, do look for a maintenance contractor that has been specifically educated in natural stone restoration and maintenance. Most cleaning and janitorial companies do not have the expertise to properly maintain stone.
By far, besides foot traffic, one of the most common causes of damage to marble and other calcite-based stones is the wrong cleaning product has
been used on or near the stone, which resulted in etching–sometimes so se-vere there is nothing that can be done, short of having a restoration contrac-tor mechanically polish out the damage.
A properly trained stone maintenance professional will know which cleaning products to use and which to avoid, and can advise you accordingly. They will also know to look for and recognize various potential problems and be able to point them out to you before they become serious.

| 43Visit us online at www.potomacstonecare.com for more details and helpful tips
TILE & GROUT CLEANING AND SEALING CONTRACTORS
Regular cleaning and janitorial services may clean tile and grout floors and surfaces, but their methods, equipment, and solutions are very limited com-pared to those of a professional tile and grout cleaning and sealing contrac-tor. To state it plainly, mops and scrub brushes simply cannot achieve the dramatic results many home and business owners need.
Grout lines inevitably become dark. Tile grout can get little dings and stains over the course of time with regular use and traffic. With some intense scrub-bing, grout lines can be sanitized, but keeping grout clean longer than a week or two can be an especially challenging and time-consuming task that never ends. Even extremely clean, sanitized tile and grout can look as if it were poorly maintained if the grout lines have become discolored. Professional tile and grout cleaning, sealing, and restoration contractors can provide long lasting solutions to such common problems.
A professional tile and grout cleaning and sealing contractor will use effec-tive methods to deep clean and sanitize tile and grout floors and surfaces, leaving them fresh, clean, and inviting. They will also provide grout sealing options (Refer to page 18).
Some tile and grout cleaning contractors will provide tile and grout repair and restoration services and can resolve a host of tile and grout problems, such as fixing grout cracks or filling in missing grout, as well as tile repair and replacement.
Hiring a PRO

| 44Visit us online at www.potomacstonecare.com for more details and helpful tips
TILE INSTALLERS
Ceramic, porcelain, or natural stone tile is an excellent choice for flooring, walls, countertops, fireplace surrounds, and more–for both interior and ex-terior applications. Keep in mind as you are planning the installation that your choice of installer is as important a consideration as your choice of tiles and design.
Why is it so important to be choosy about your installer? Consider the cost of a poor installation...
Problems Resulting From a Poor InstallationTile Flooring and Walls• Cracked tiles• Uneven grout lines
• Loose tile• Hollow tile, which can result in cracks and tiles popping out• The use of the wrong grout or setting material may result in failure• Lippage–one tile higher or lower than the adjacent tile
Hiring a PRO
| 45Visit us online at www.potomacstonecare.com for more details and helpful tips
ON A FINAL NOTE
With proper care, especially using the right kinds of cleaning products, your natural stone and tile countertops, walls, floors, baths, vanities, and other surfaces can remain beautiful and elegant for many years of use. Keep this Stone and Tile Care Guide handy so that you will always know what to do when problems arise. Share it with your friends, family, or anyone you think might utilize this valuable, free, downloadable resource. Feel free to give us a call or use our website contact form to ask about specific care recommendations.
Final Note

When it comes to surface care, look for the badge of excellence


