
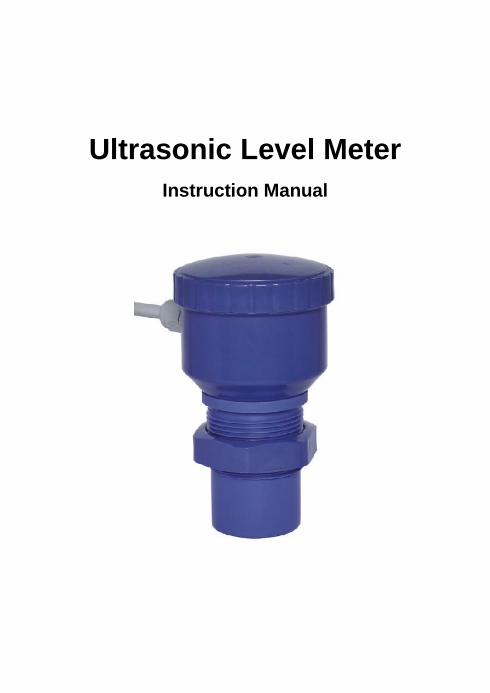
Ultrasonic Level Meter
Instruction Manual

- 1 -
CONTENS
Ⅰ.General information …………………………2
II. Characteristics…………………………….…..2
III. Specifications……………………….….……..3
IV. Menu operation and parameters setting …4
Ⅴ.Installation and precaution……………….....5
Ⅵ.Wiring diagrams ……………………..……….8
VII. Trouble shooting……………….…………..10
Manufacturer Certificate……………………....13
Guarantee log…………………………….……..14
Ⅰ.General information

- 2 -
Ultrasonic level measuring instrument, taking the advantages of
various many level measuring instruments, is a universal one
characterized by total digitalized and humanized design. It has perfect
level monitoring, data transmission and man-machine communication.
It is featured by strong anti-interference performance; free setting of
upper and lower limits and online output regulation, on-site indication,
optional analog, switching value, and RS485 output and easy connection
with main unit. The cover, made of waterproof engineering plastics, is
small and firm with ABS probe. Therefore, it is applicable for various
fields concerning level measuring and monitoring. According to the
practical situation, it also can add other modules, such as RS 485,
current output; it can be match with PLC better.
II. Characteristics
●DC12-24V wide work voltage
●Backup and recovery parameter set
●Free adjustment of the range of analog output
●Set a filter value to remove
●Custom serial port data format
●Optional increment/difference distance measurement to measure air
space or liquid level
●1-15 transmitted pulse intensity depending on working conditions
More choices depend on your requirement, as bellowing:
● 3 NPN output
● 2 relay output
● Voltage output
● RS485output connect with PC
● Explosion-proof

- 3 -
III. Specifications
Range:8m
Blind zone:<0.3m
Measure error: 0.3%F.S
Display: LED or LCD
Display resolution:1mm
Frequency::20~350KHz
Power: 12-24VDC
Power consumption:<1.5W
Output (optional):
4~20mA RL>600Ω(standard)
1~5V\1~10V
RS485
3 NPN
2 relays (AC: 5A 250V DC: 10A 24V)
Material:ABS
Installation:G1 1/2(M47mm)
Electrical interface:PG7
Admission cable:1.5m
Operating surroundings:normal temperature, normal pressure
Protection degree:IP65(others optional)
IV. Menu operation and parameters setting
- 4 -
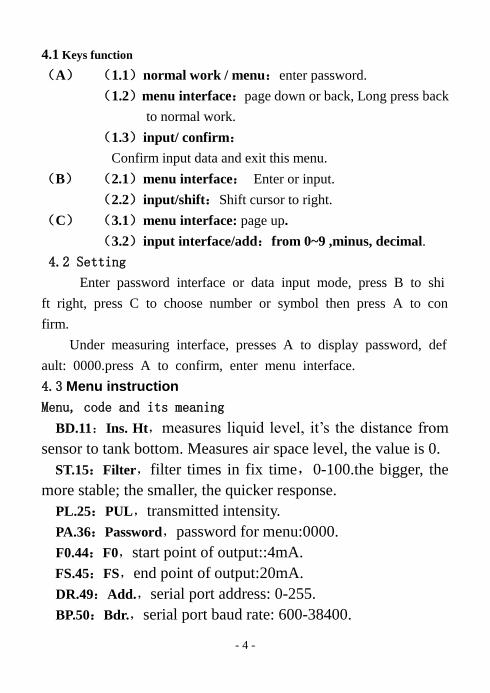
4.1 Keys function
(A) (1.1)normal work / menu:enter password.
(1.2)menu interface:page down or back, Long press back
to normal work.
(1.3)input/ confirm:
Confirm input data and exit this menu.
(B) (2.1)menu interface: Enter or input.
(2.2)input/shift:Shift cursor to right.
(C) (3.1)menu interface: page up.
(3.2)input interface/add:from 0~9 ,minus, decimal.
4.2 Setting
Enter password interface or data input mode, press B to shi
ft right, press C to choose number or symbol then press A to con
firm.
Under measuring interface, presses A to display password, def
ault: 0000.press A to confirm, enter menu interface.
4.3 Menu instruction
Menu, code and its meaning
BD.11:Ins. Ht,measures liquid level, it’s the distance from
sensor to tank bottom. Measures air space level, the value is 0.
ST.15:Filter,filter times in fix time,0-100.the bigger, the
more stable; the smaller, the quicker response.
PL.25:PUL,transmitted intensity.
PA.36:Password,password for menu:0000.
F0.44:F0,start point of output::4mA.
FS.45:FS,end point of output:20mA.
DR.49:Add.,serial port address: 0-255.
BP.50:Bdr.,serial port baud rate: 600-38400.

- 5 -
1L.54:No.1 D,No.1 switch output D.
1H.55:No.1 H,No.1 switch output H.
2L.56:No. 2 D,No.2 switch output D.
2H.57:No.2 H,No.2 switch output H.
3L.58:No.3 D,No.3 switch output D.
3H.59:No.3 H,No.3 switch output H.
Ⅴ、Installation and precaution
5.1 sensor installation
5.1.1 Sensor should be placed where there is no obstacle between
emission surfaces and measured liquid, it also should be far way from
feeding throats, chartⅠ.
5.1.2 Tank shape should be considered. Some type of container will
bring second echo, especially conical and spherical tank. A good
installation place will solve the problem, chart Ⅱ.
5.1.3 Lever meter can be installed by flange or ¢61 hole,
whatever installation way, make sure the sensor bottom through the
chartⅠ chart Ⅱ
- 6 -
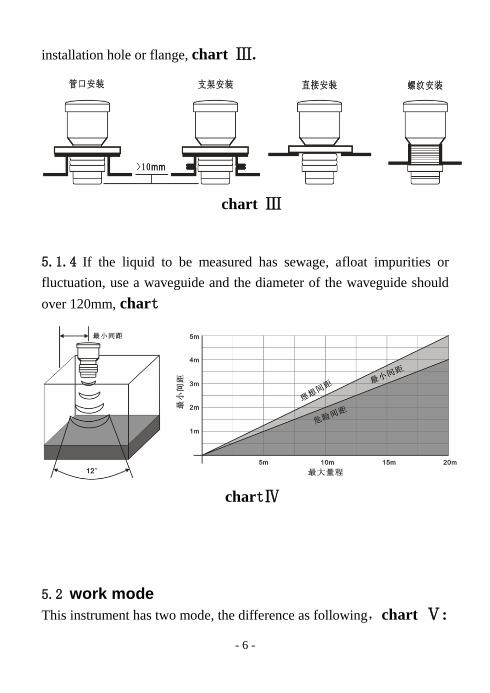
installation hole or flange, chart Ⅲ.
5.1.4 If the liquid to be measured has sewage, afloat impurities or
fluctuation, use a waveguide and the diameter of the waveguide should
over 120mm, chart
5.2 work mode
This instrument has two mode, the difference as following,chart Ⅴ:
chartⅣ
chart Ⅲ

- 7 -
5.2.1 Measure liquid level
B(Installation Height)is the distance from bottom
of container to sensor surface,A is the distance
between sensor surface and liquid surface,D is the
height of liquid,D= B(Installation Height)-A,
display value is bottom of container to liquid
surface(D).
5.2.2 Measure air distance
Set BD =0,display value is distance from sensor
surface to liquid surface(A).
5.3
DC24V power is better. When it’s from switch power, the DC negative
must contact ground. Refer to the tags attached on the instrument for
wiring. In order to keep it working reliable and display precise , please
electrify >15 minutes before work. When operated outdoors, it should
be placed under a sun screen to avoid direct under sunshine and rain.
Lightning proof measures should also be taken outdoor.
Ⅵ、Wiring diagrams
chart Ⅴ
图八

- 8 -
6.1 Definition of lead
Definition of lead pin/color applied
Supply + 2/red ■Yes/□No
Supply - 1/black ■Yes/□No
Current output yellow ■Yes/□No
Voltage output □Yes/□No
Serial output
□Yes/□No
Output controlⅠ
(NPN) Green □Yes/□No
Output control Ⅱ
(NPN) Blue □Yes/□No
6.2 Wiring diagram of current (voltage) output connecting
with secondary instrument
6.3 serial output connecting with PC
Supply ﹢
Output ﹢
Output —
Supply —
DC24V ﹢
Input ﹢(3 wire for power ﹢)
Input —
GND —
Level meter Secondary instrument

- 9 -
Power Level meter RS-485 PC
6.4 NPN output wiring diagram
Conventional relay TTL output
VII. Trouble shooting
Supply +
Output A
Output B
Supply —
Serial port
A
B
D
C

- 10 -
1、Not working,no display, no sound
Probable reason:
① Power is not connected or “+””-”polarities are connected reversely
② Too low voltage resulting no working or too high resulting damage
Remedy:
① Check to ensure correct wiring as instructed.
② Use 12-24V DC supply, or contact with distributor
2、No display, sensor has sound
Probable reason:
① Turning off
② Connected to high voltage, damaging display chip
Remedy:
① Press “B” to turn on display;
②contact with distributor.
3、With sound and display, but the values not change with distance
① Too low input voltage
② Sensor or power driver damaged
Remedy
①12-24V DC supply
②Contact with distributor
4、With display ,but value is irregular fluctuation
Probable reason
① Deflective installation
② improper setting of pulse intensity, leading to great residual
vibration or diffraction
③ more than 2 instruments work together, interfering each other
④ too much electromagnetic disturbance in working area
⑤ There are bubbles or debris on liquid

- 11 -
Remedy
① Adjust the axis of sensor vertical to surface to be measured
② in general, range of 1-3m, transmit intensity is 2-5
③ try to eliminate interference
④ find out disturbance source and shield
⑤ eliminate bubbles or debris
5、Big error
Probable reason
①Non vertical installation, leading to multiple reflection ②installed
too close to wall, sonic wave reflected midway③ check “BD”④
check temperature display
Remedy
①Adjust installation positions several times.② correctly set “BD”
③adjust temperature (“TE”) to proper value.
6、Abnormal current output
Probable reason
①Too large load resistance ②FS, AL or AH changed. ③ undesired
supply rectification and filtering ④ electrify time is not enough
Remedy
①Lower load resistance ②readjust parameter③ replace with DC
regulated supply with larger capacity ④electrify >15 minutes before
work
7、Abnormal RS485 output
Probable reason
①Reverse connecting of A and B ②incorrect parameter of serial ports,
its not match with main unit
Remedy
① Change wiring, ②reset parameter, same with main unit

- 12 -
8、Abnormal control output
Probable reason
①Wrong parameter. Setting ②external current-limiting resistor too
large ③external current-limiting resistor too small, damaging the level
meter
Remedy
① Reset parameter
②decrease current-limiting resistor ③ contact with distributor
Manufacturer Certificate
Product :Ultrasonic level meter

- 13 -
Mode :MH-A
Main specification
Sense range:FS= m
Unusable area:≤■300mm ≤□400mm;□500mm;□other
Accuracy:■±0.3%×max range;□±2mm;□other
Display resolution:1mm
Output:□0-20mA;■4-20mA;□0-5V;□1-5V;
□0-10V;□1-10V;□RS485;□other
■upper and lower limit switch;
Working temperature:■normal;□-10-60℃;□other
Working pressure:■normal;□other
Working humidity:≤80%RH
Storage temperature:-40—85℃
Storage humidity:≤70%RH
Working voltage:12-24V DC
Normal power consumption:<1.5W
Inspected by:
Delivery date: 09. 16th, 15
Guarantee log
Purchaser Telephone

- 14 -
Address Post code
Product Type
Item No. Delivery
date
Repair
record
Notes
1. According to THREE GUARANTEES, When there
are problems with the product under correct operation,
it can be refunded, changed and repaired free of
charge within one week, three months and one year
respectively from the day it was bought.
2. For the problems caused by improper use, only the
cost of material will be charged.
3. The product can not be dismantled or unsealed without
manufacturer’s agreement; otherwise the repair
service is not available.
4. The freight out and home in relation to repair will be
paid by customer.


