11
Amplified Buzzer w/ Volume Control (review with diagram)
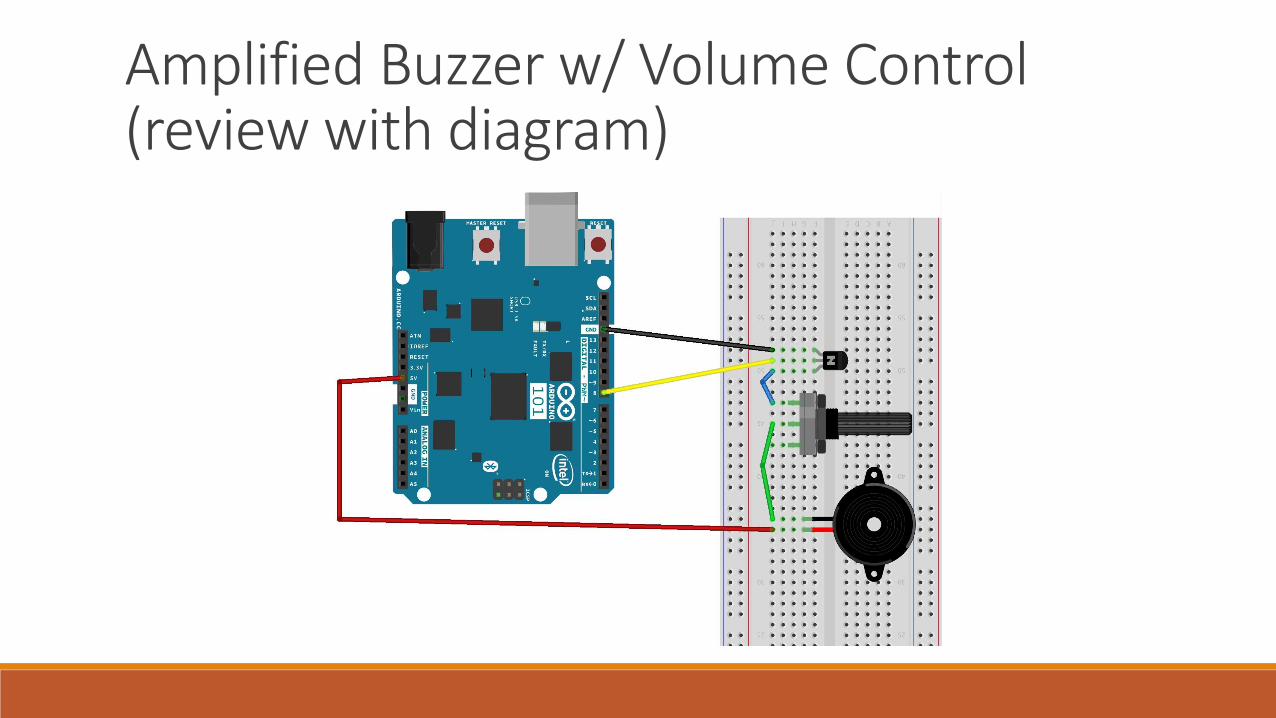
Amplified Buzzer w/ Volume Control (review with diagram)

Headphone Audio w/ Volume Control

Push ButtonDigital input
Current is allowed to flow through from the AC side to the BD side when the button is pushed down, so input will read as “1” when pushed and “0” otherwise

Pull down resistorsNeeded for sensors with only two connections (legs)
◦ Photoresistor, push button
A 10k resistor goes between the sensor and the ground (GND), diverting current to the input pin on the Arduino

Make a tone beep when the push button is pressed down.
Exercise 1

File > Examples > Digital > Debounce
Debounce

ServoServos can be rotated to specific angles
Unlike the stepper motor, these remember what angle they are rotated to when you turn them off an on again
The servo in your kit rotates about 120 degrees

Servo (cont’d)Connections:
◦ Brown – GND
◦ Red – 5V
◦ Orange – analog pin (marked with ~)

Servo (cont’d)When you write a sketch using the servo, you will need to include the servo library
Sketch > Include Library > Servo
Next you will need to declare a variable of type “Servo”◦ Ex: Servo myservo;
In setup, use the function myservo.attach(pin) to tell the Arduino which pin will be controlling the servo (the one connected to the orange wire)
Use the function myservo.write(angle) to turn the servo to an angle

File > Examples > Servo > Sweep
Yellow connector tab must be switched from 3.3 to 5V
White button must be pressed down – green LED will turn on
Examples

Use a push button with the servo
Write an if condition so that if the button is pushed, the servo rotates to a certain angle
Else the servo rotates to another angle
Exercise 2


