HADS-DEX Tool Installation Instructions Created 02/06/2016 Submitted to: Murray Chalker (Department of Health) Intergy Consulting Contact Details (Support): We can discuss any enquiries regarding this document. Please contact: Account Manager Name David Crotty Telephone (02) 8090 7644 Mobile 0416 143 234 Email [email protected]
Transcript
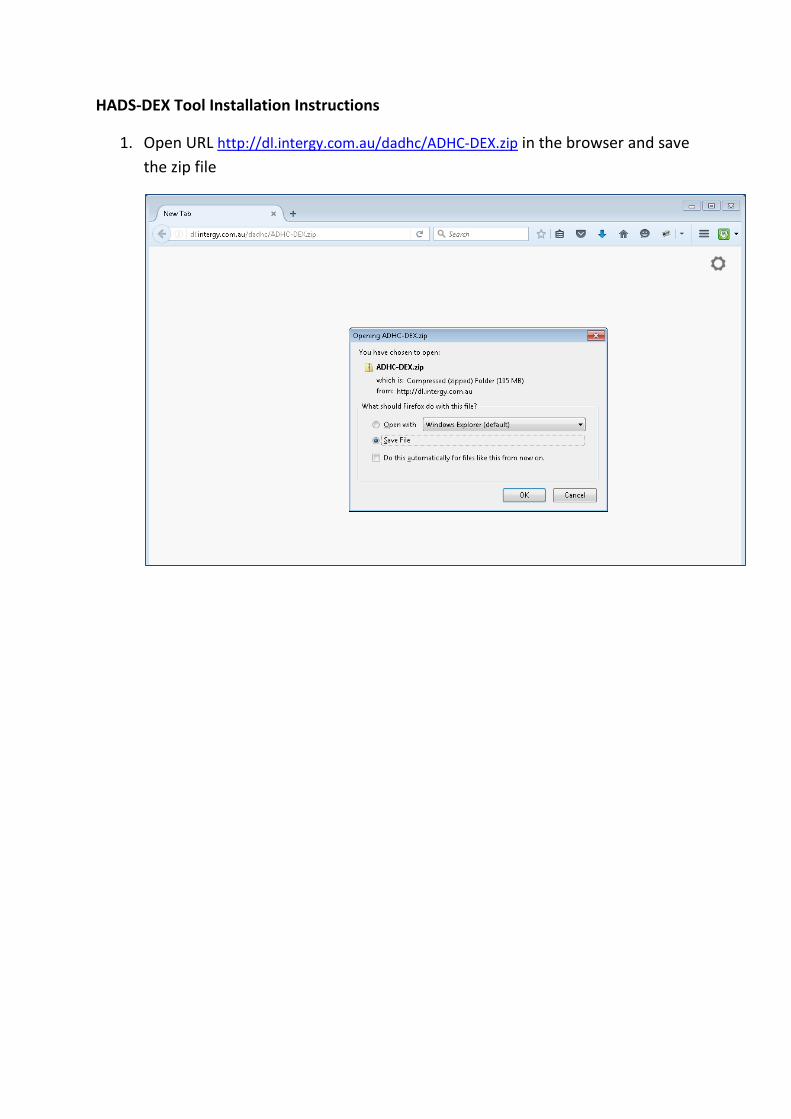
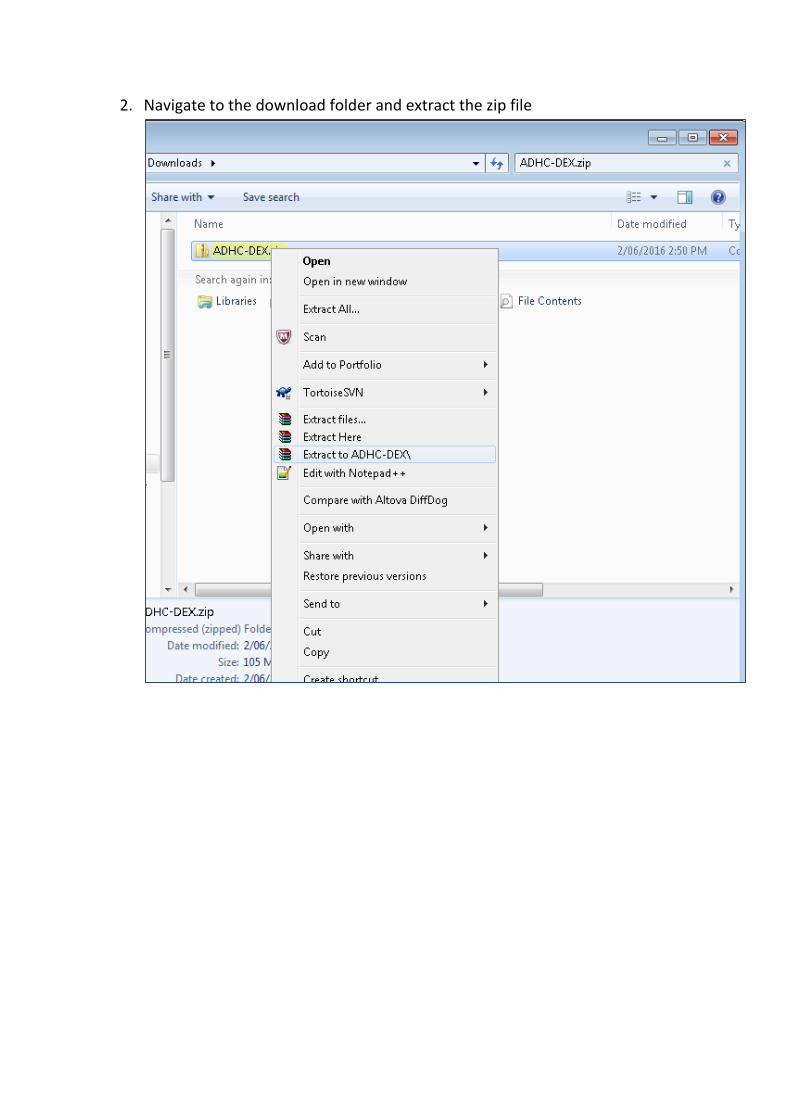
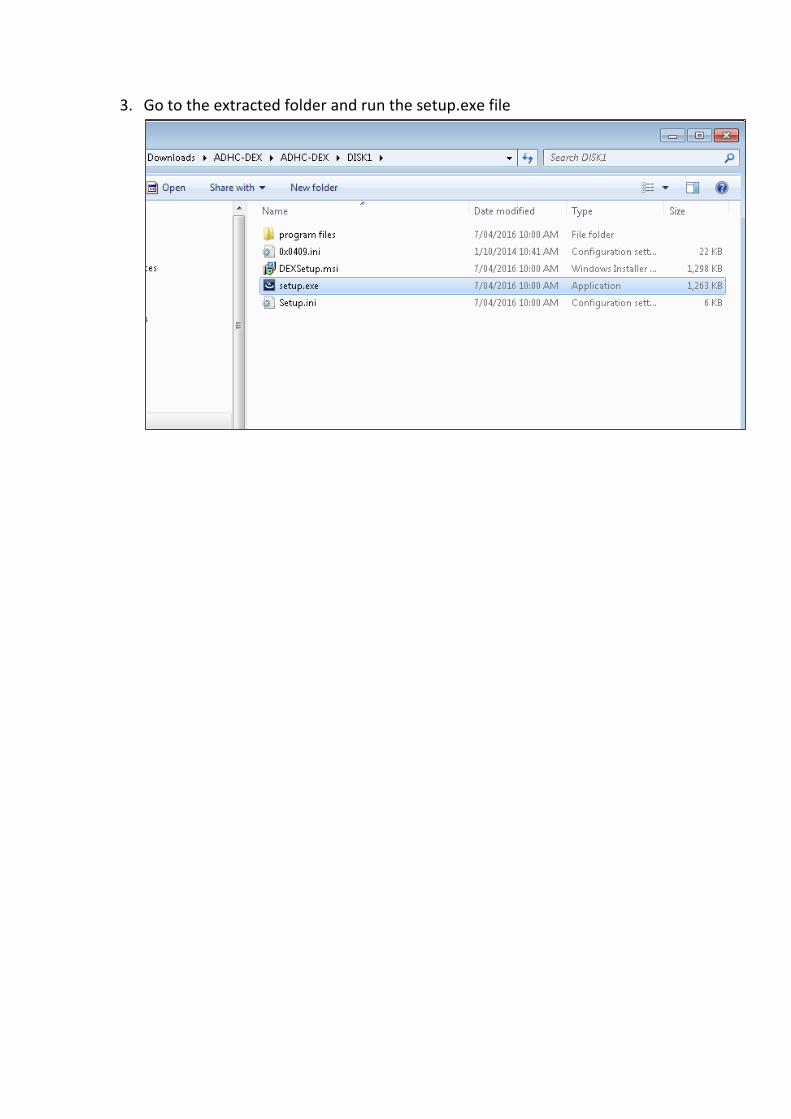
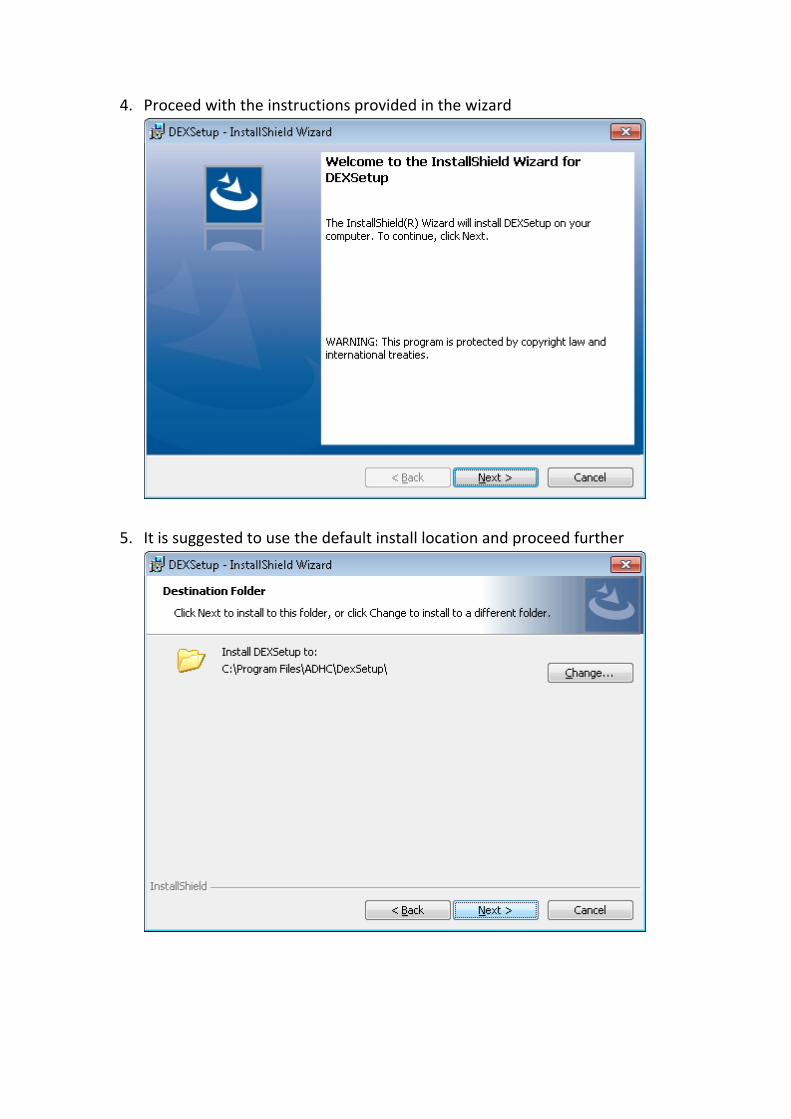
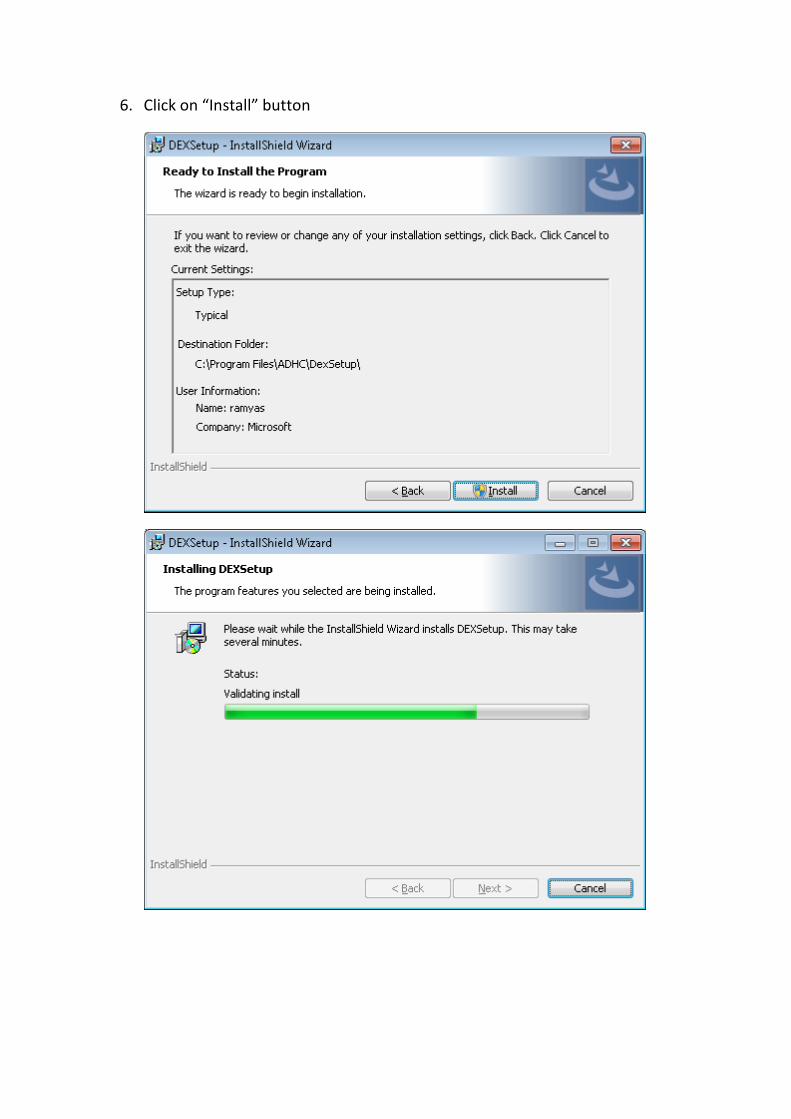
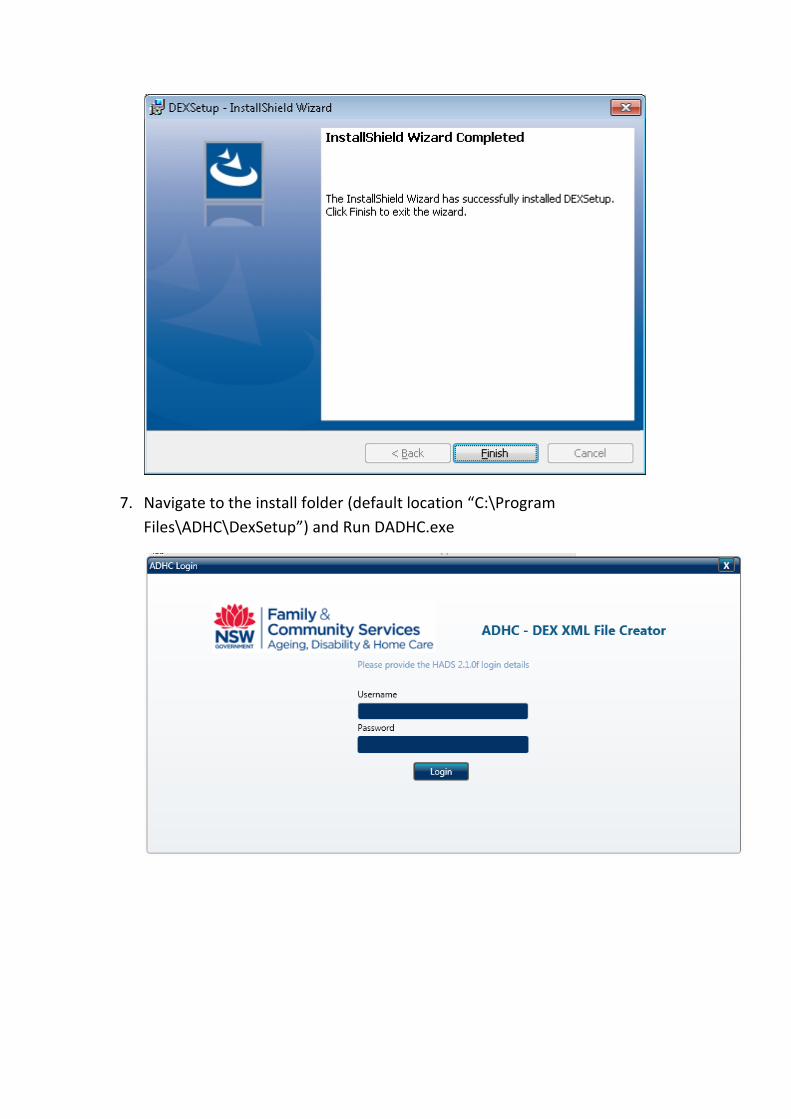
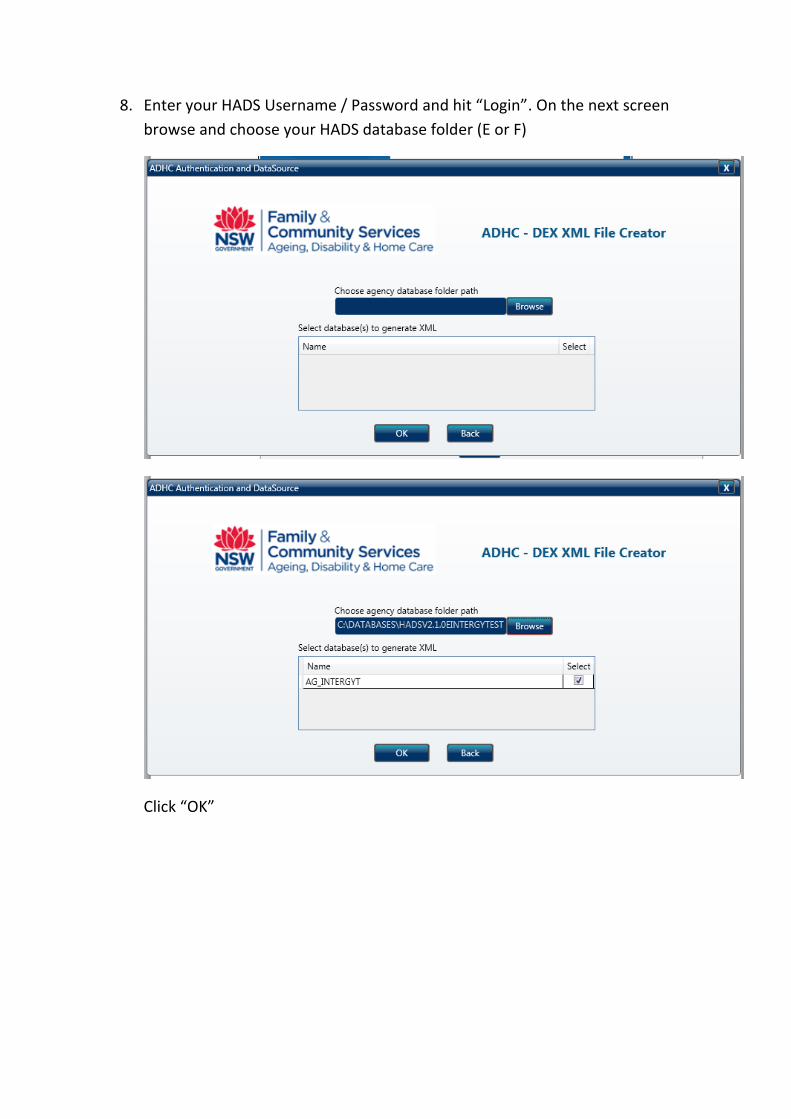
HADS-DEX Tool Installation Instructions
Created 02/06/2016
Submitted to: Murray Chalker (Department of Health)
Intergy Consulting Contact Details (Support):
We can discuss any enquiries regarding this document.
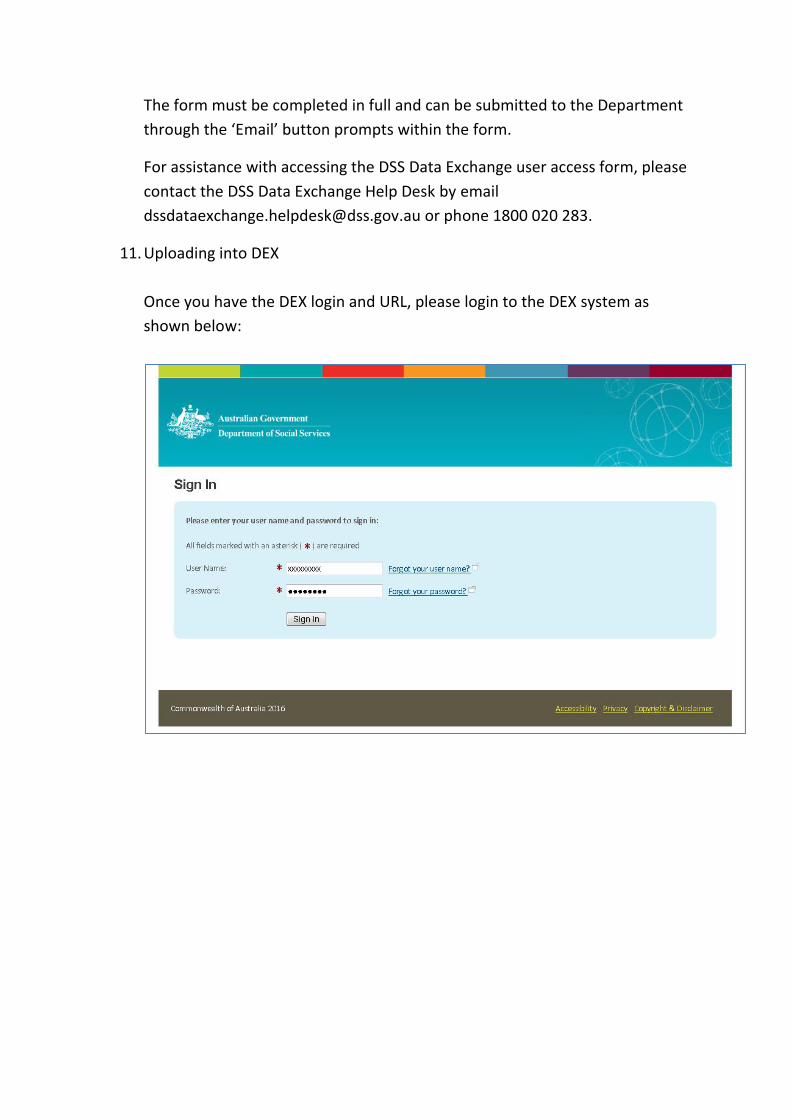
From the Dashboard -> choose “Upload Files” as shown below:
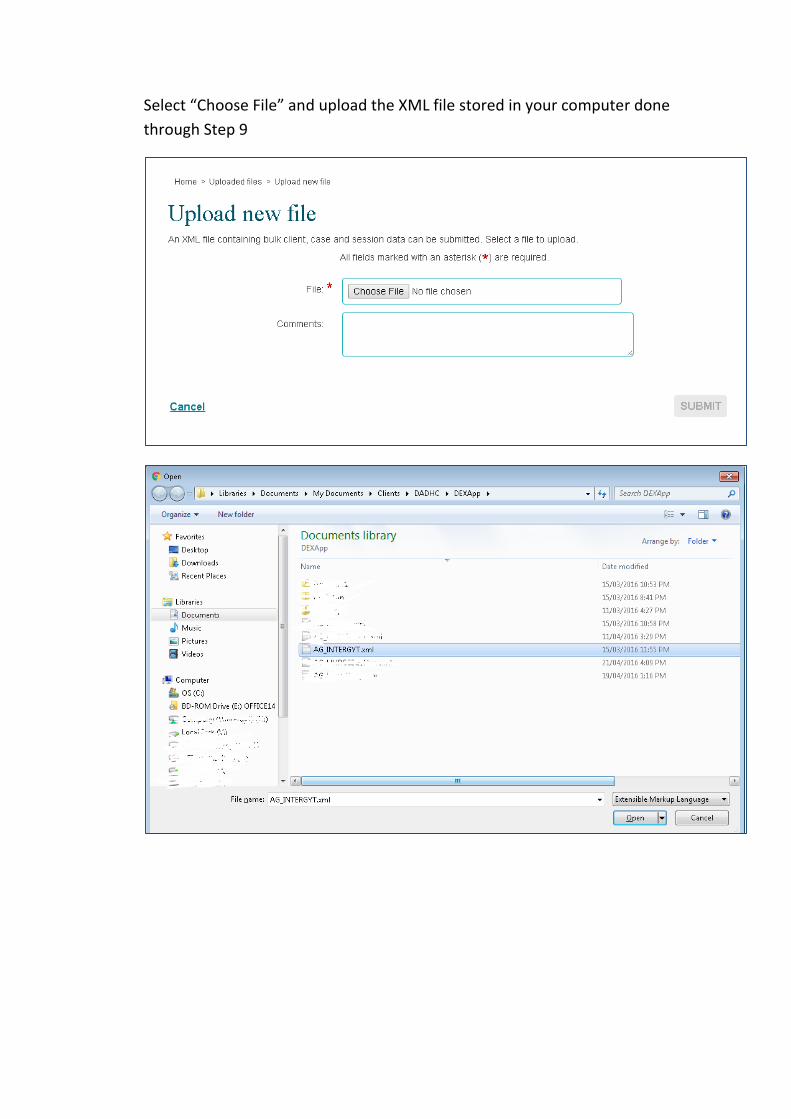
Click on “UPLOAD NEW FILE” in the above screen.
Select “Choose File” and upload the XML file stored in your computer done
through Step 9
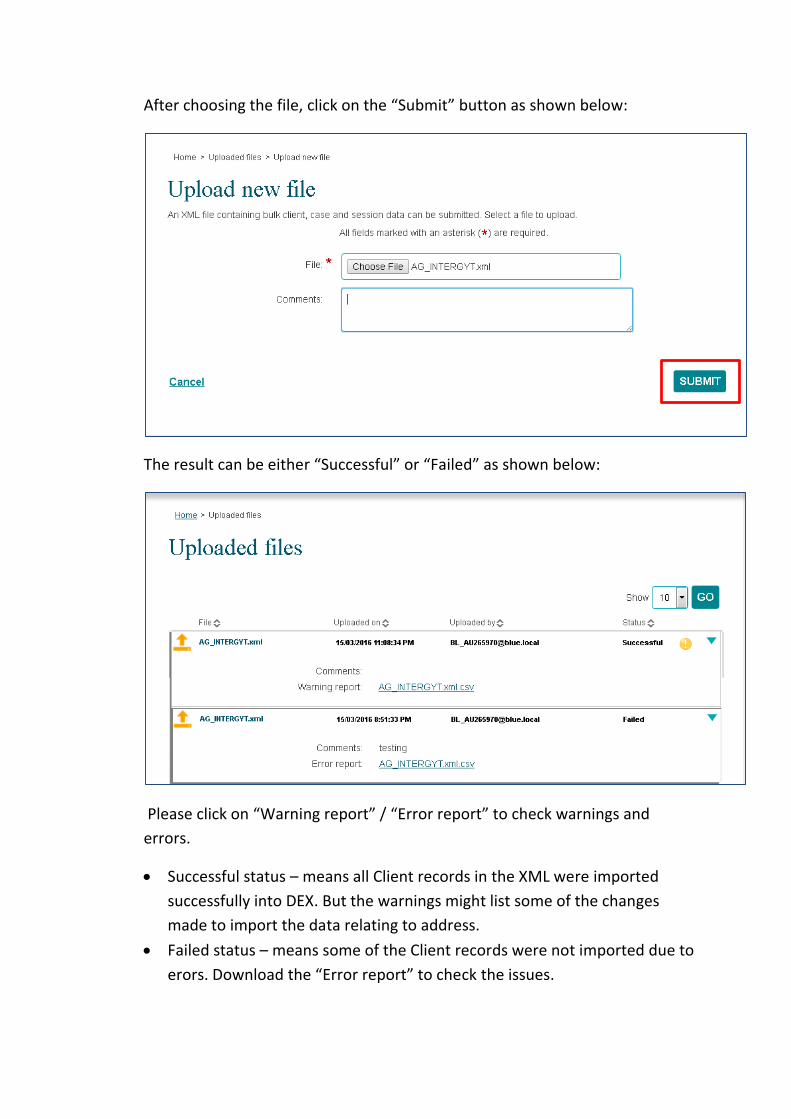
After choosing the file, click on the “Submit” button as shown below:
The result can be either “Successful” or “Failed” as shown below:
Please click on “Warning report” / “Error report” to check warnings and
errors.
Successful status – means all Client records in the XML were imported
successfully into DEX. But the warnings might list some of the changes
made to import the data relating to address.
Failed status – means some of the Client records were not imported due to
erors. Download the “Error report” to check the issues.
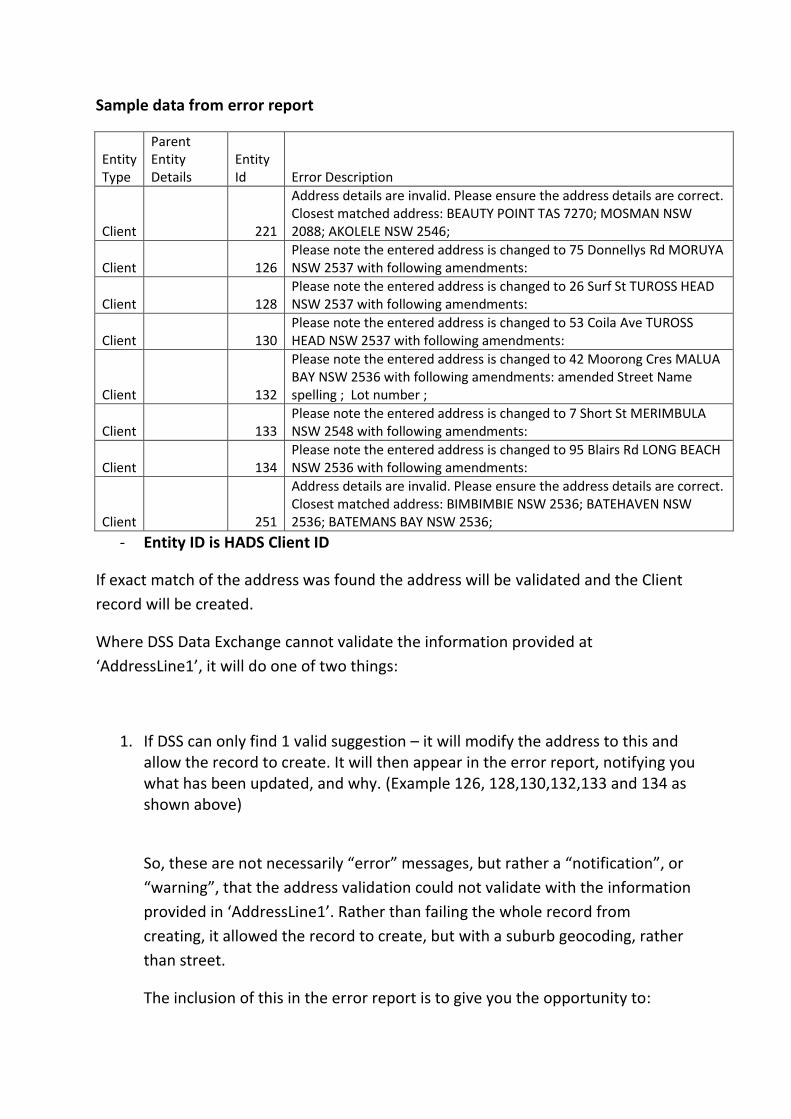
Sample data from error report
Entity Type
Parent Entity Details
Entity Id Error Description
Client
221
Address details are invalid. Please ensure the address details are correct. Closest matched address: BEAUTY POINT TAS 7270; MOSMAN NSW 2088; AKOLELE NSW 2546;
Client
126 Please note the entered address is changed to 75 Donnellys Rd MORUYA NSW 2537 with following amendments:
Client
128 Please note the entered address is changed to 26 Surf St TUROSS HEAD NSW 2537 with following amendments:
Client
130 Please note the entered address is changed to 53 Coila Ave TUROSS HEAD NSW 2537 with following amendments:
Client
132
Please note the entered address is changed to 42 Moorong Cres MALUA BAY NSW 2536 with following amendments: amended Street Name spelling ; Lot number ;
Client
133 Please note the entered address is changed to 7 Short St MERIMBULA NSW 2548 with following amendments:
Client
134 Please note the entered address is changed to 95 Blairs Rd LONG BEACH NSW 2536 with following amendments:
Client
251
Address details are invalid. Please ensure the address details are correct. Closest matched address: BIMBIMBIE NSW 2536; BATEHAVEN NSW 2536; BATEMANS BAY NSW 2536;
- Entity ID is HADS Client ID
If exact match of the address was found the address will be validated and the Client
record will be created.
Where DSS Data Exchange cannot validate the information provided at
‘AddressLine1’, it will do one of two things:
1. If DSS can only find 1 valid suggestion – it will modify the address to this and allow the record to create. It will then appear in the error report, notifying you what has been updated, and why. (Example 126, 128,130,132,133 and 134 as shown above)
So, these are not necessarily “error” messages, but rather a “notification”, or
“warning”, that the address validation could not validate with the information
provided in ‘AddressLine1’. Rather than failing the whole record from
creating, it allowed the record to create, but with a suburb geocoding, rather
than street.
The inclusion of this in the error report is to give you the opportunity to:
Select one of the closest matched addresses DSS has found, update the
address in HADS and re-upload the XML file
Go in via the web portal and “overwrite” or
Just ignore and leave what it was changed to.
2. If DSS cannot find a suitable replacement, it will fall back on the suburb/state/postcode (mandatory items) and validate using those data items instead. (Example 221 and 251 as shown above)
Now these are “true” address failures in your error report, and these are the
ones with the error description of “Address details are invalid”. These Client
records would not have created at all, and are a true failed record. This
means that either no valid alternative could be found, usually a mismatch
between suburb and postcode. These will need to be checked, modified in


![IN DEX. []](https://static.documents.pub/doc/80x56/61851db3a8c3ca232b4bd3f7/in-dex-.jpg)


