11
How I created my front cover Juwayriyah

How I created my front cover
Juwayriyah
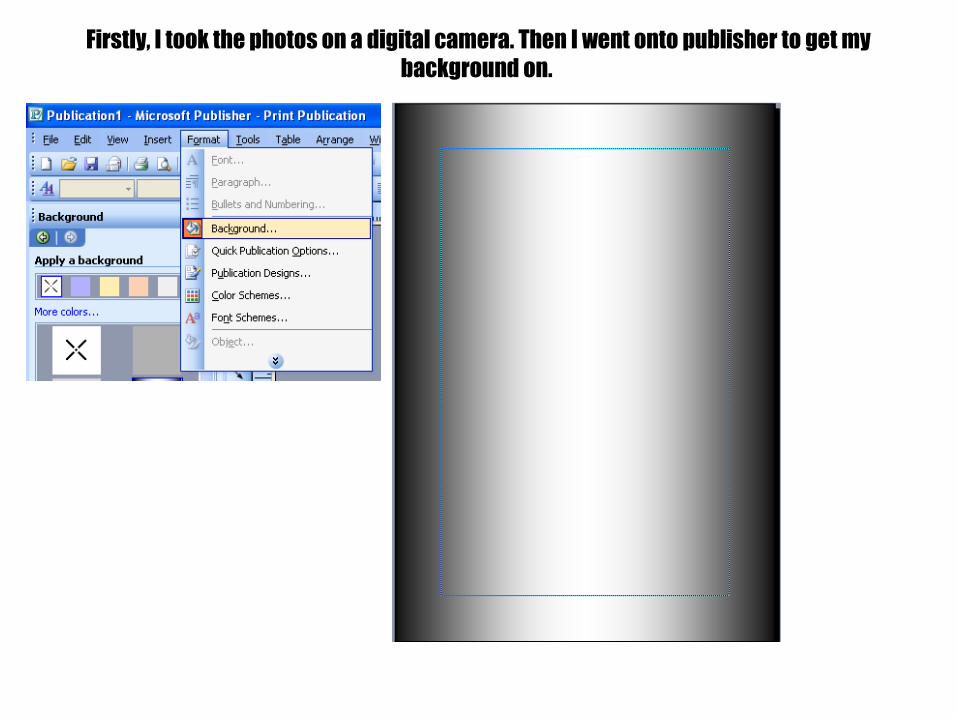
Firstly, I took the photos on a digital camera. Then I went onto publisher to get my background on.

Added the masthead
I got the font style from: www.1001fonts.com/dancing-fonts.html

Header and footer

Main image insertedOpened the image in Photoshop
Went onto the magic eraser tool.
Most of the background was gone, so I just needed to
remove the smaller areas.

Clicked on this to get rid of her badge. I did this by selecting the colour that I wanted
after clicking on this tool. So firstly, I wanted to get rid of the badge that was
showing on her top, so I clicked on her top.
I then clicked on the brush tool and changed the brush type to ‘soft round 13
pixels’

I coloured over her top and did the same for the part of badge that was on her neck and skirt.
Once that was all done and the badge was no longer visible, I needed to get rid of the excess bit of background that was left after using the
magic eraser tool.
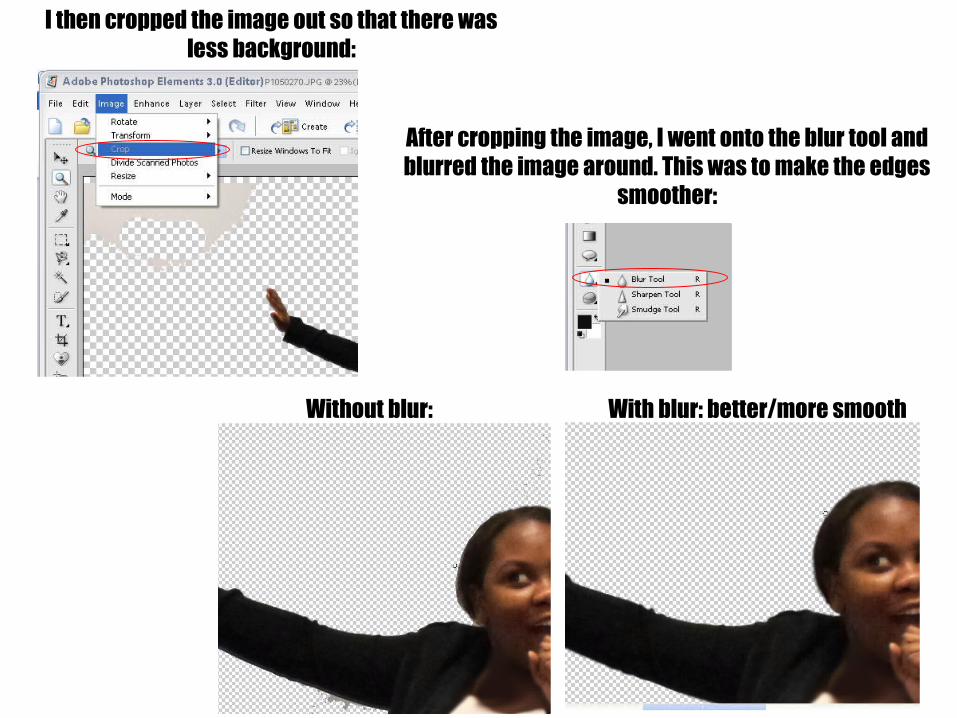
I then cropped the image out so that there was less background:
After cropping the image, I went onto the blur tool and blurred the image around. This was to make the edges
smoother:
Without blur: With blur: better/more smooth

The image was fully edited. So I changed the contrast to make her face a little brighter. I did this by clicking onto ‘enhance’ tab
and then brightness.
Then I added the insert. For this I had to edit the image, so I used the magic eraser tool
and normal eraser to do this on Photoshop.
I then dragged it onto the publisher document

Added the rest…I added the coverlines, the flash and the barcode:
coverlines
Image (poster)
Flash
InsertDate

Final (changed into a jpeg)


