14
Reviewer’s Tutorial pg. 1 `

Reviewer’s Tutorial
pg. 1
`

Reviewer’s Tutorial
pg. 2
Contents
1. Review ............................................................................................................... 4
2. Support ............................................................................................................ 10
2.1 Open A New Ticket ......................................................................................... 11
Reviewer’s Tutorial
pg. 3
Reviewer’s Tutorial
pg. 4
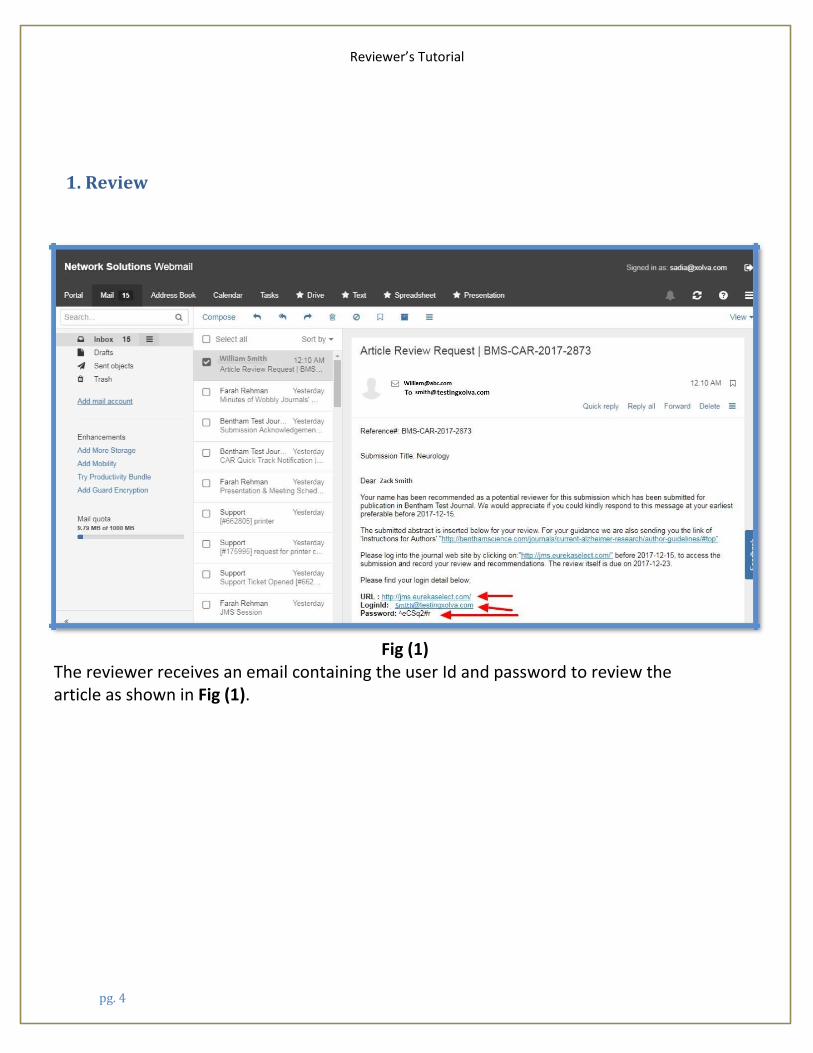
1. Review
Fig (1)
The reviewer receives an email containing the user Id and password to review the article as shown in Fig (1).

Reviewer’s Tutorial
pg. 5
Fig (1.1)
Entering the URL “Jms.eurekaselect.com”, Sign in page appears. Enter “E-mail” and “Password” in appropriate fields and click on the “Sign in” button for login as shown in Fig (1.1).

Reviewer’s Tutorial
pg. 6
After login, the Reviewer’s Dashboard appears, which has two panels, as shown in Fig (2) Manuscript Requested for Review: In this panel, 1.1 Clicking on the “View Abstract” button, Reviewer can view the abstract. 1.2 Clicking on the “Yes, I agree to review” button, review form appears as
shown in Fig (3), at this stage reviewer is agreed to do the review. 1.3 If you do not want to do the review, then click on the “Decline” button.
Fig (2)
Reviewer’s Tutorial
pg. 7
Archived Submission: In this panel, Reviewer can view the manuscripts that have been reviewed by the reviewers and shows the current manuscript status.

Reviewer’s Tutorial
pg. 8
Fig (3)
3

Reviewer’s Tutorial
pg. 9
1 Clicking on “review version button”, Manuscript to Review panel appears as shown in Fig (3).
2 reviewer can download the manuscript by clicking on the “Download” button.
3 It is mandatory to fill all the fields except for the Upload File. You can
complete the review process by clicking on the “save” button, as shown in “Fig (3)”.
*Note: On reviewing the manuscript, the reviewer gives his evaluation in this
form.
Fig (4) Once you fill the Reviewer Evaluation form, thank you message appears as shown in “Fig (4)”. You can go back to the dashboard by clicking on the “Back to Dashboard” button.
Reviewer’s Tutorial
pg. 10
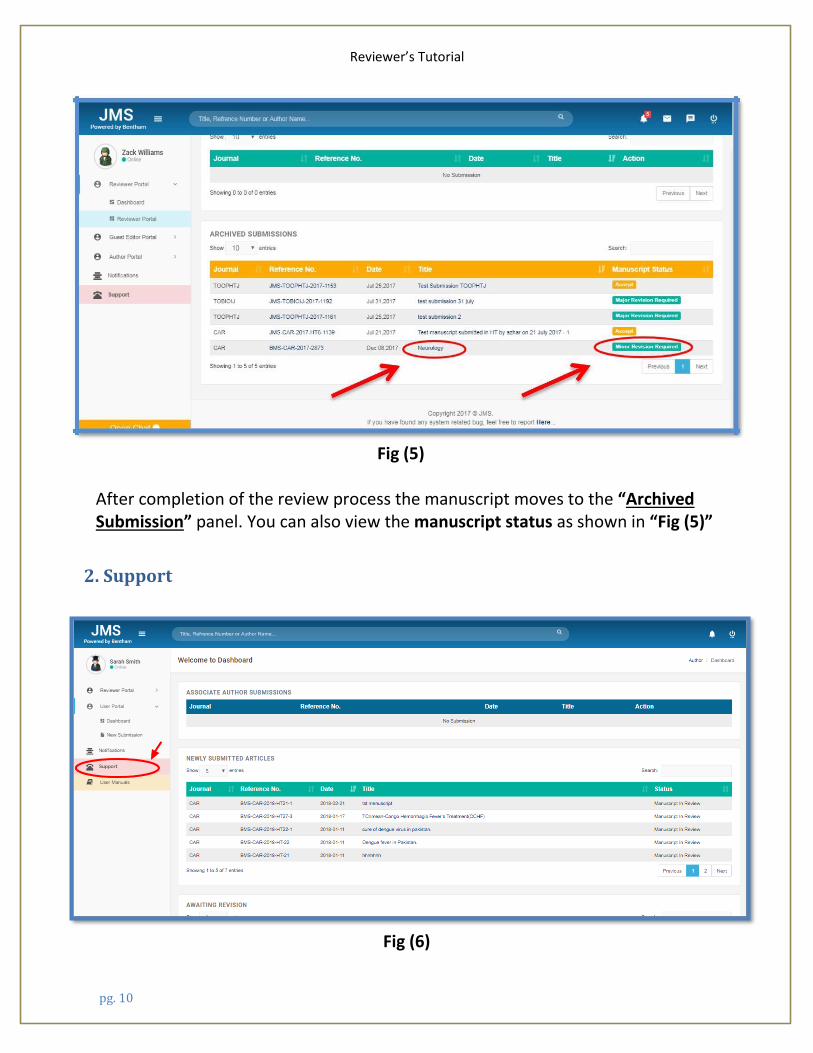
Fig (5) After completion of the review process the manuscript moves to the “Archived Submission” panel. You can also view the manuscript status as shown in “Fig (5)”
2. Support
Fig (6)

Reviewer’s Tutorial
pg. 11
In case of any query/suggestion, you can use our online support system to create a ticket. Our Support department will reply as soon as possible. To generate a new ticket, click on the “support” option given in the left panel as shown in Fig (6).
2.1 Open A New Ticket
Fig (7) As shown in Fig (7).
The desired “Help Topic”. Can be selected, which leads to “Ticket Details”.

Reviewer’s Tutorial
pg. 12
The details can be provided in the “reason for opening the ticket”. The file can be uploaded by clicking on “Select File” link or drag and drop the file.
The “Reset” button clears all the boxes and gives a reset option.
Clicking on “Create Ticket” button, a new ticket is generated.
To cancel the ticket, then click on the “cancel” button.
Fig (8)
Reviewer’s Tutorial
pg. 13
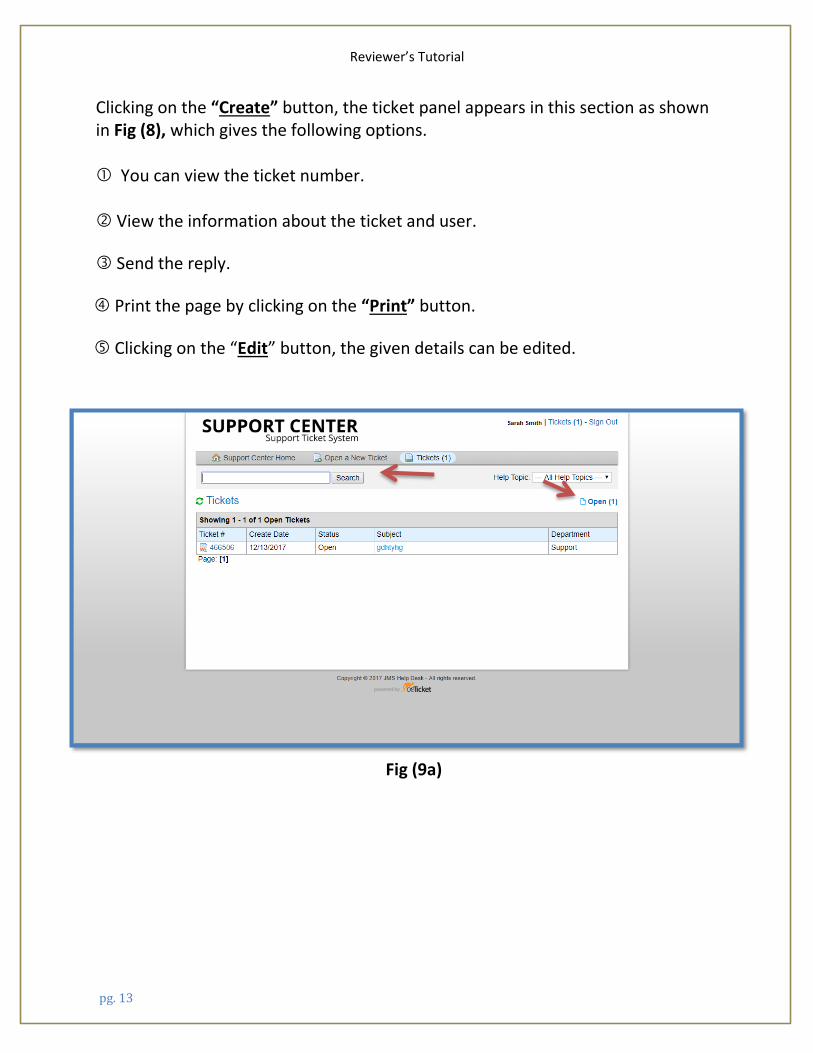
Clicking on the “Create” button, the ticket panel appears in this section as shown in Fig (8), which gives the following options. You can view the ticket number. View the information about the ticket and user.
Send the reply.
Print the page by clicking on the “Print” button.
Clicking on the “Edit” button, the given details can be edited.
Fig (9a)

Reviewer’s Tutorial
pg. 14
Fig (9b) A specific ticket can be searched by entering the ticket number. Clicking on the “Search” button display all the tickets. Open tickets can be viewed by clicking on the “Open” link as shown in Fig (9a) or closed by clicking on the “Closed” link as shown in Fig (9b).


