26
SYMANTEC BACKUPEXEC2010 WITH StorTrends 1

SYMANTEC BACKUPEXEC2010 WITH StorTrends
1

Index
1. Introduction 3 2. Test Environment 3 3. System Requirement 4 4. Storage Requirement 4 5. Installation of Symantec Backup EXEC 2010 4 6. Installing Backup EXEC Remote Agent in Windows 10 7. Backup Configuration for SAN Volume 13 8. Installing Backup EXEC Remote Agent in Linux 15 9. Backup Configuration for NAS Volume 21 10. Restore Backup 22 11. Appendix – 1 … Errors while configure Backup EXEC 24 12. Conclusion 26
2

Introduction The purpose of this document is to understand the Symantec BackupEXEC support with StorTrends Server.
This document explores the setup and testing of BackupEXEC2010 with ISCSI Volume in iTX Storage Server.
Test Environment The test environment consist of one StorTrends 3200i Windows Server 2003 and Windows XP Client machine, The setup is shown in the below figure.
3

System Requirement
Processor: Intel Pentium, Xeon, AMD, or compatible.
Memory: Recommended: 1 GB RAM
Disk space: 1.44 GB (Typical installation) , 2.32 GB (Includes all options) Storage Hardware: storage media drives, robotic libraries, removable storage devices, and non-removable
hard drives. Storage Requirement:
1. StorTrends Box 3200i 2. iTX 2.7.1030v3.16 Build
Installation of Backup Exec to a local computer
1. From the installation media browser, click Installation, and then click Start the Backup Exec Installation.
If the Microsoft.NET Framework 3.5 SP1 is not already installed on this computer, Backup Exec installs it. The installation of the Microsoft.NET Framework may take some time.
4
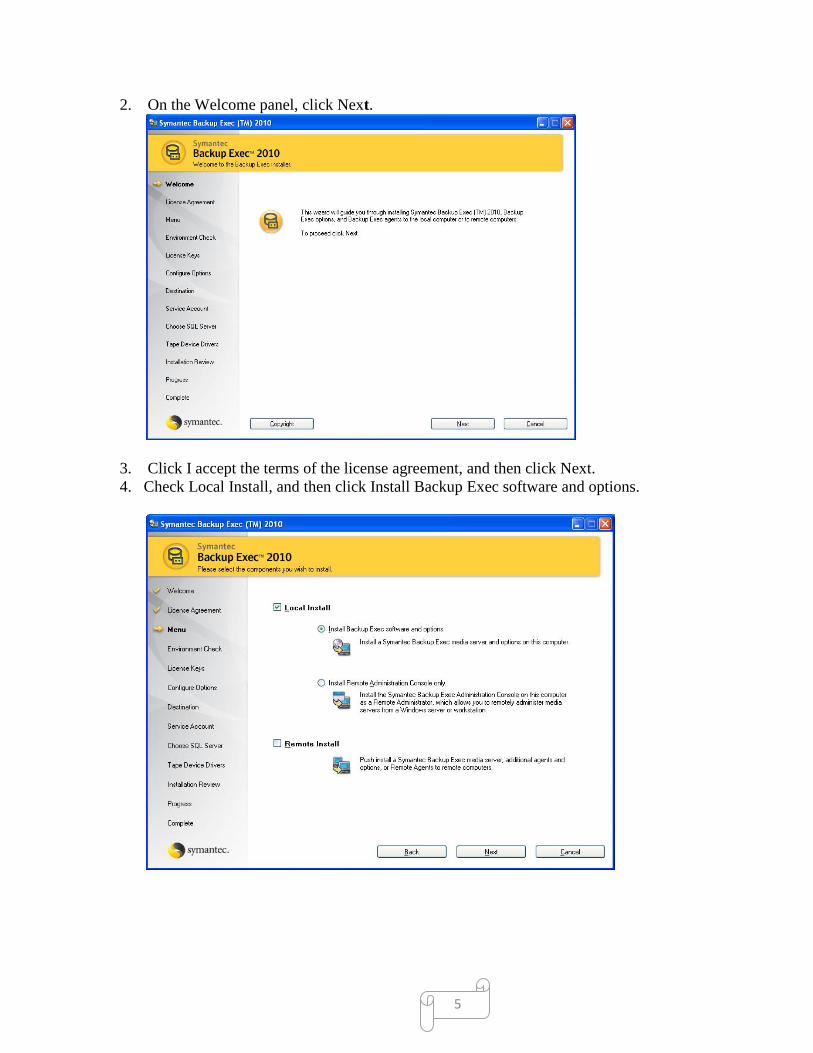
2. On the Welcome panel, click Next.
3. Click I accept the terms of the license agreement, and then click Next. 4. Check Local Install, and then click Install Backup Exec software and options.
5
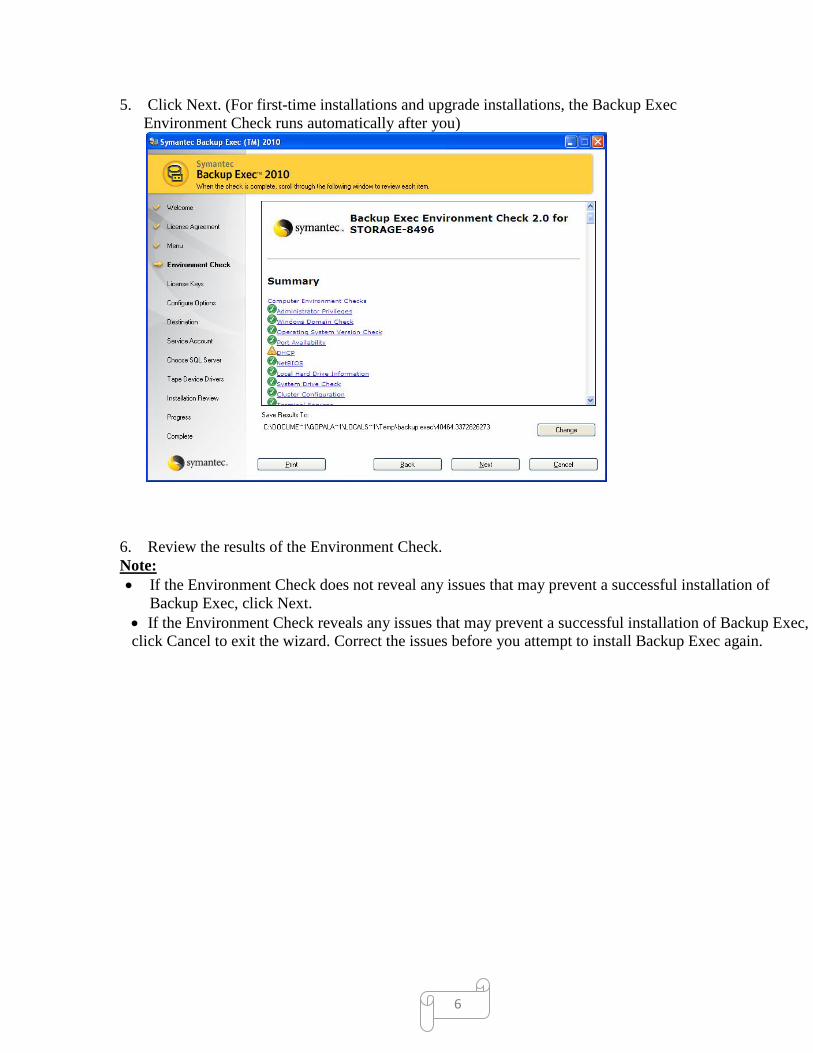
5. Click Next. (For first-time installations and upgrade installations, the Backup Exec Environment Check runs automatically after you)
6. Review the results of the Environment Check. Note: • If the Environment Check does not reveal any issues that may prevent a successful installation of
Backup Exec, click Next. • If the Environment Check reveals any issues that may prevent a successful installation of Backup Exec, click Cancel to exit the wizard. Correct the issues before you attempt to install Backup Exec again.
6
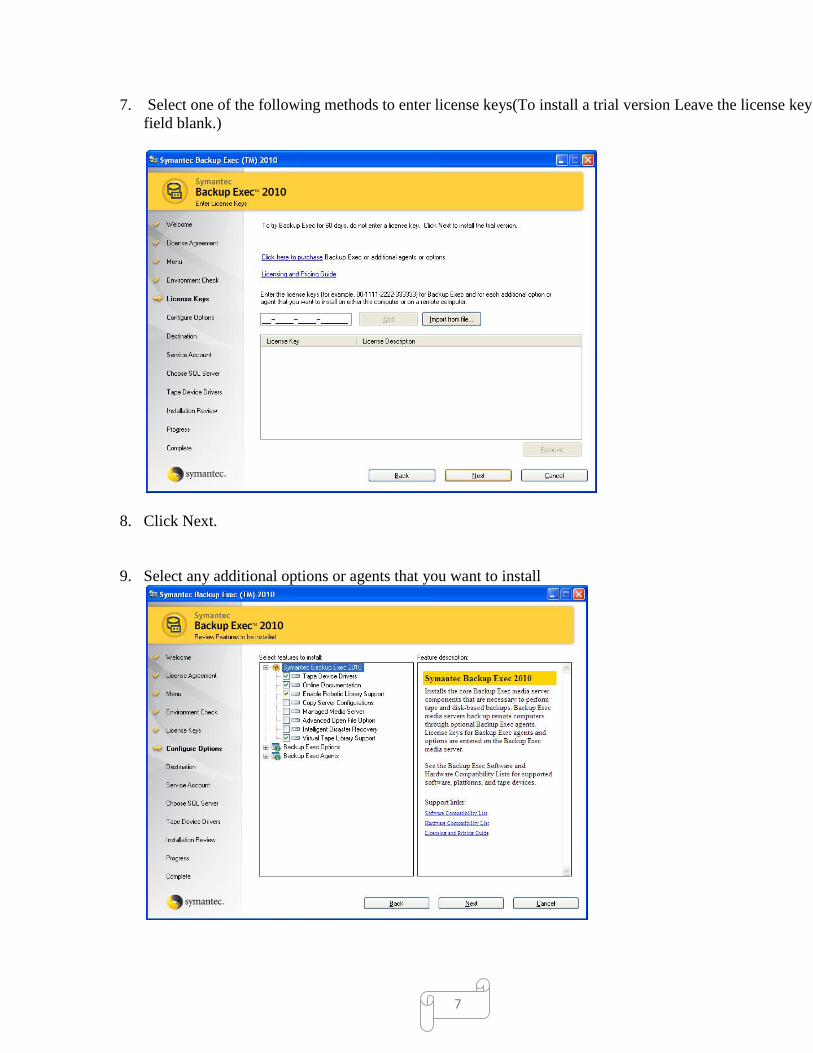
7. Select one of the following methods to enter license keys(To install a trial version Leave the license key field blank.)
8. Click Next.
9. Select any additional options or agents that you want to install
7

10. Click Next.
11. Provide a user name, password, and domain for an Administrator account that the Backup Exec system services can use, and then click Next.
12. On the Choose SQL Server panel, Click Create a local Backup Exec SQL Express instance to store the database on.
13. Click Next.
8

14. If you are prompted, select how the Symantec Device Driver Installer should install device drivers for the tape storage devices that are connected to the server, and then click Next.
15. Click Install to start installation
16. Click Finish to close the installation wizard.
9

Installation of Backup Exec Remote Agent in Windows :
1. In Windows machine, Run Setup.exe in Backup EXEC from CD, Click Next from welcome screen
2. Select the Installation type and click next
10

3. In this screen select installation option and click next
4. Add the Backup EXEC server IP address and click next
11

5. Click Install to start Remote Agent for windows installation
6. Click finish and start the remote agent.
12

Backup Configuration for SAN Volume: 1. Once the Backup EXEC Remote Agent started it publish to Backup Server. In Backup server
configure New Backup Job option
2. Go to the Backup Exec media server and check the remote selections listed on the Backup tab. Expand the Windows Systems icon.
13

3. Select the backup drive/path then click Run Now
4. Once the job is submitted to Backup EXEC server, it will take backup based on schedule to the tape drive.
14

Installation of Backup Exec Remote Agent in Linux:
1. On a StorTrends host, copy the remote agent file for Linux and extract the same using the following
command. [root@AMI-30 ~]# tar zxvf RALUS_RMALS_RAMS-2896.9.tar.gz
2. At the command prompt, type: installralus and press <Enter> as shown below
[root@AMI-30 BackupEXEC]#./installralus
3. Type the LINUX server IP address or Hostname and press Enter
4. RALUS performs the initial system check , press Enter to continue
15

5. RALUS will check and install the following rpms on Linux server, press Enter to continue
6. Installation requirement checks completed successfully
7. To configure RALUS with user friendly configuration press "Y"
16

8. The installation utility will ask for the Media Server IP address or Hostname to display the remote agent
as a selection in the media server's backup selection tree Note: A host name can be used, however make sure that the Linux server can resolve the host name properly. Its recommended to add the Windows host entry in the /etc/hosts file on the Linux server.
9. To display the remote agent on more than one media server choose "Y" and press Enter or Simply type "N" and press Enter to continue
10. The installation utility will now ask to create "beoper" group
17

Note: beoper is a group that is used by Remote Agent for Linux and Unix Servers to authenticate the Backup Exec logon account, as the members of this group are given permissions to back up and restore the Linux server, press Enter to continue.
11. If the beoper group is not found, the installation utility will ask to create one.
Type "Y" and press Enter
12. Installation utility will now prompt to specify any specific Group ID.
Group ID: All Linux users have a user ID and a group ID and a unique numerical identification number called a userid (UID) and a groupid (GID) respectively. Groups can be assigned to logically tie users together for a common security, privilege and access purpose. Its recommended not to assign any Group ID. Type "N" and press Enter.
13. Note the "beoper" group has been created successfully
18

14. Installation utility will now ask to add the user root to the beoper group
Type "Y" and press Enter. User root has been successfully added to the beoper group.
15. Installation utility shows successful installation of RALUS.
16. The RALUS configuration has also completed successfully
19

17. Finally, Symantec Backup Exec Remote Agent for Linux and Unix Server has completely successfully.
18. Reboot the server
Note: Stop NDMP Service in StorTrends box, Backup EXEC will use Port 10000
19. Use the following commands to stop and start the RALUS service
To Stop: /etc/init.d/VRTSralus.init stop To Start: /etc/init.d/VRTSralus.init start
20. RALUS configuration file. The ralus.cfg file can be edited for either troubleshooting or configuration purposes as shown. The file is located in the following location: /etc/VRTSralus/ralus.cfg
20

Backup Configuration for NAS Volume:
1. Go to the Backup Exec media server and check the remote selections listed on the Backup tab. Expand the Linux/ Unix Server icon.
2. Select the backup drive/path then click Run Now
3. Once the job is submitted to Backup EXEC server, it will take backup based on schedule to the tape
drive.
21

Restore Backup:
1. Click Restore button in menu bar 2. It opens a pop-up window for Restore Wizard. Click Next
3. Select the backup folder/file from the tape and click next, Give the user credentials for restoring backup and give the Restore job name
22

4. Select the restore option to run immediate or schedule the job and click finish
23

Appendix – 1
Errors Configure Backup EXEC
Configuring User Defined Selections in Symantec Backup EXEC 2010, we get the following error messages. All the bellow errors caused because of NDMP Service. User Defined Selections use the Port 10000 to communicate with client, which was already used by NDMP service in our StorTrends box.
1. Try to connect the NAS Share in User-defined selections, it fails to connect the share
To resolve the above issue Stopped NDMP service
24

2. Shares are disabled after stop the NDMP service in StorTrends.
To resolve the above issue give the exact share path (ex. \\10.0.5.1\nas).
25

3. Add the Share path in user defined selections, it fails to login as shown in figure
To resolve this issue stopped the NDMP service in StorTrends
Conclusion:
Using Symantec Backup EXEC 2010 we can successfully take backup and restore the data from the StorTrends Server.
26


![The Symantec Technology Enabled Program · 3 Symantec Technology Enabled Program - Guide Current as of January 2011 [3] ©2010 Symantec Introduction The Symantec Technology Enabled](https://static.documents.pub/doc/80x56/5e3847d9624da92d94786754/the-symantec-technology-enabled-program-3-symantec-technology-enabled-program-.jpg)


