78
Panasonic Voice Processing System MODEL NO. KX-TVPI 50 Summary of Operations for Subscribers
Panasonic
Voice Processing System
MODEL NO. KX-TVPI 50
Summary of Operations for Subscribers

Introduction The Voice Processing system (VPS) is a convenient, easy-to-use telecommunications system. With it, recorded messages can be sent, received and retrieved at any time from any touch-tone telephone in the world. The VPS ensures that important calls will never go unanswered and will receive an appropriate response without fail.
n Summary of Functions of the Voice Processing System (VPS)
The following functions are available by calling the system.
l You can specify the telephone number of a person to whom you want a message sent and the time you wish it delivered. Then, at the preset time, the system calls the number you specified and plays your recorded message automatically. (See “Recording External Delivery Messages” on page 2-13.)
l If you are out, the system will record incoming calls for you. You can retrieve your messages whenever you wish. (See “Receiving Messages” on page l-3.)
l You can specify the number of an extension for your calls to be forwarded to. Then you can take your calls in another room or at another desk. (See “Alternate Extension Transfer Status Setting” on page 3-5 and “Setting Up the Alternate Exten- sion” on page 3-6.)
l You can have the system tell you the name of the caller before you actually take a call. In this way you can make sure you receive only important calls. (See “Setting Call Screening” on page 3-4.)
l The system’s interview mailbox function is ideal if you wish to collect information in the form of replies to questions. When a caller accesses this function, the system plays your prerecorded questions to him or her and then records the replies. Since you can record any sort of questions you choose, this feature gives you a very powerful and flexible data gather- ing tool.
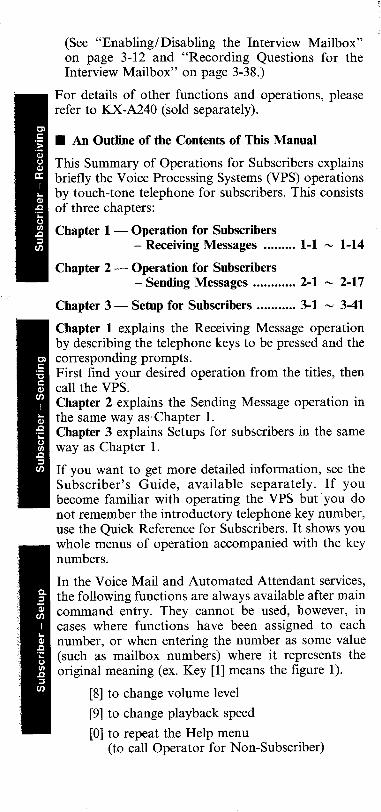
(See “Enabling/Disabling the Interview Mailbox” ’ on page 3-12 and “Recording Questions for the Interview Mailbox” on page 3-38.)
For details of other functions and operations, please refer to KX-A240 (sold separately).
n An Outline of the Contents of This Manual
This Summary of Operations for Subscribers explains briefly the Voice Processing Systems (VPS) operations by touch-tone telephone for subscribers. This consists of three chapters:
Chapter 1 - Operation for Subscribers - Receiving Messages . . . . . . . . . l-l - 1-14
Chapter 2 - Operation for Subscribers - Sending Messages . . . . . . . . . . . . 2-l - 2-17
Chapter 3 - Setup for Subscribers . . . . . . . . . . . 3-l - 3-41
Chapter 1 explains the Receiving Message operation by describing the telephone keys to be pressed and the corresponding prompts. First find your desired operation from the titles, then call the VPS. Chapter 2 explains the Sending Message operation in the same way as Chapter 1. Chapter 3 explains Setups for subscribers in the same way as Chapter 1.
If you want to get more detailed information, see the Subscriber’s Guide, available separately. If you become familiar with operating the VPS but you do not remember the introductory telephone key number, use the Quick Reference for Subscribers. It shows you whole menus of operation accompanied with the key numbers.
In the Voice Mail and Automated Attendant services, the following functions are always available after main command entry. They cannot be used, however, in cases where functions have been assigned to each number, or when entering the number as some value (such as mailbox numbers) where it represents the original meaning (ex. Key [l] means the figure 1).
[8] to change volume level
[9] to change playback speed
[0] to repeat the Help menu (to call Operator for Non-Subscriber)

[*I to back up [#] [l] to dial by name [#] [2] Bulletin Board Service [#] [3] Department Dialing [#] [5] Login [#] [6] Voice Mail Service [#] [7] to restart (Subscriber’s main command) [#] [8] to call transfer [#] [9] to exit the menu
Note: The service access commands ( m m- a m) do not work while a message is being received.
Some of the Text in This Manual Is Enclosed in Boxes: The system provides voice prompts to persons accessing it. In order to distinguish these voice prompts from the rest of the text in the manual, they are enclosed in boxes like the one shown below.
(Example)
Good morning/Good afternoon/Good evening You have reached the voice processing system.
W Available Options: l Guide to the Voice Processing System . . . . . . KX-A240
- Overview of Voice Processing System Functions
This manual covers the features of the various VPS functions, explains the duties of the manag- ers and describes the basics of system operation for users.
- Detailed Edition for Managers This manual explains in detail the tasks of the System Administrator, the System Manager, the Message Manager and the Bulletin Manager. It covers the topics of configuration, installation, initial settings and daily maintenance by the managers and also includes a troubleshooting guide.
- Detailed Edition for Subscribers & Non-Subscribers
This manual describes precisely the operation of the VPS for both subscribers and non- subscribers. It offers detailed information on the various services provided by the VPS (Voice Mail Service, Automated Attendant Service, Bulletin Board Service and Interview Service).

l Work Sheets . . . . . . . . . . . . . . . . . . . . . . . . . . . . . . . . . . . . . . . . . . . . . W-A241 Used for setting parameters of the system or mailbox for reference use in the future.
****************** Quick Tip *********e********
When you finish your call, make sure to follow the prompt provided by the system to complete the current operation before actually hanging up the phone.
- If you have to hang up before the prompt is finished -
l Press m m. Then hang up the phone.
l If you forget to press m @B before hanging up the phone, the line will remain engaged until the prompt finishes playing. It is therefore necessary to wait about 30 seconds or so before calling the same number back again.
In addition to subscribers to the system, other persons who will be using it should also be informed of the above. The above operation works whenever the system is providing voice prompt. ********************x**************************
Note: Please cut out the Quick Reference Card from pages M-3-43 through M-3-46 to use it. You may make as many photocopies of these pages (M-3-43 through M-3-46) as you require to make additional cards.

This
Chapter 1 Operation for
Subscribers Receiving Messages chapter tells you how to receive messages and
what you can do with the received messages: Replying immediately, transferring messages
with or without your additional message, and replaying messages.
Contents
Voice Mail Service Entry ........................... 1-2
Receiving Messages .................................... l-3
Immediate Reply ........................................ 1-4 Message Transfer ...................................... 1-5
Message Transfer with Additional Message ................................................ l-6
Repeating Messages ................................... 1-7
Rewinding Messages ................................... 1-8 Fast Forwarding Messages ......................... 1-9
Erasing Messages ....................................... l-10 Replaying Previous Messages ..................... l-l 1
Playing the Next Message .......................... 1-12 Scanning Messages .................................... 1-13

Voice Mail Service Entry (main command)
1
-2
3
Dial an extension number which is connected to the Voice Mail Service.
Good morning/Good afternoon/Good evening You have reached the voice processing system.
Please enter the mailbox number of the person for whom you wish to leave a message. To enter by name, please press a pound sign and [I]. If you are using a rotary telephone, please wait a moment. To call the operator, press [O].
Press the star a key. Then enter your mailbox number.
Please enter the password, followed by a pound sign.
Enter the password, if you have the password. Now, you are in the subscriber’s main command menu.
1-2 Subscriber - Receiving

Receiving Messages
1 2
Go to the subscriber’s main command menu.
Check the announcement of the number of mes- sages.
To receive a message, press [l J.
3 Press 0 to use the Receiving Messages menu.
4 R’ h evrew t e number of messages, and the mes- sage information.
5 Review the message.
To repeat this message, press [I J. To play the next message, press [2]. To erase this message, press [3/. To reply, press [4]. To transfer this message, press [7]. For help, press [O].
6 Press a to show the whole menu (for Help).
To repeat this message, press [I]. To replay the previous message, press [I] twice. To play the next message, press [2]. To erase this message, press [3]. To reply, press [4]. To rewind, press [S]. To fast forward, press [6]. To transfer this message, press [7]. For message scan, press [#].
The VPS will then provide information about the message sender and the recording date of the message.
**********************************************
Hint Step 6 - Y.ou do not have to listen to the
whole menu, if you do not wish to.
**********************************************
Subscriber - Receiving l-3

Immediate Reply
1
2
Go to the Receiving Messages menu. (See steps 1 - 5 in Receiving Messages)
Press m for Immediate Reply.
To call message sender, press [I]. To record a message, press [2].
3 Press 0 to record a message.
4 5
6
I’ll deliver this message to the mailbox . . . .
Please leave me a message at the tone. To end recording, press [I]. To pause and restart recording, press [2].
Record your message at the tone.
Press 0 to end recording.
~
Press 0 to accept the message.
Your recording has been accepted.
****************************x******************
Hint Step 3 - You can call the message sender by
pressing [ 11. Step 5 - You can pause/restart recording by
pressing [2]. Step 6 - You can change the message by
pressing [ 11. ********************************x**************
l-4 Subscriber - Receiving

Message Transfer
1
2
3
4
6
Go to the Receiving Messages menu. (See steps 1 - 5 in Receiving Messages)
Press 0 to use the Message Transfer menu.
Enter the mailbox number of the intended recip- ient.
(To repeat this information, press [3].) (To cancel message transfer, press [*I.)
Press 0 to accept.
Press 0 to transfer the message.
To add your comment, press [I J. Otherwise, press [2].
**********************************************
Hint Step 3 - You can enter by name by pressing
[#] first. Step 6 - You can add the mailbox number by
pressing [2]. You can review the mailing list by pressing [3]. You can cancel message transfer by pressing[ *].
**********************************************
Subscriber - Receiving 1-5

Message Transfer with Additional Message
l-6 Same as Message Transfer.
7 Press 0 to record a comment.
To add your comment before this message,
To add your comment after this message,
8
9
Choose 0 or m and press it.
Please state your comment at the tone. To end recording, press [I]. To pause and restart recording, press [2].
Speak your comment and press 0 to end recording.
To review your comment, press [I]. To accept, press [2]. To record a new one, press [3].
10 Press m if th e comment is acceptable.
***********************************************
Hint Step 9 - You can press [2] to pause/restart
recording. Step 10 -You can press [3] to change your
comment. You can press [l] to review your comment.
*****************x****************************
l-6 Subscriber - Receiving

Repeating Messages
1 2
Go to the subscriber’s main command menu.
Check the announcement of the number of mes- sages.
To receive a message, press [I]. To deliver a message, press [2]. For other features, press [3 J. For help at any time, press [O].
3 4
5
Press 0 to use the Receiving Messages menu.
Review the number of messages, and the mes- sage information.
Review the message.
To repeat this message, press [I]. To play the next message, press [2]. To erase this message, press [3].
To transfer this message, press [7].
6 Press 0 to repeat the message.
Subscriber - Receiving 1-7

Rewinding Messages
1 2
3 4
5 6
Go to the subscriber’s main command menu.
Check the announcement of the number of mes- sages.
To receive a message, press [I J. To deliver a message, press [2].
Press m to use the Receiving Messages menu.
Review the number of messages, and the mes- sage information.
Review the messages.
While playing a message, press m to rewind.
1-8 Subscriber - Receiving

Fast Forwarding Messages
1 2
3 4
5 6
Go to the subscriber’s main command menu.
Check the announcement of the number of mes- sages.
To receive a message, press [I]. To deliver a message, press [2].
Press 0 to use the Receiving Messages menu.
Review the number of messages, and the mes- sage information.
Review the messages.
While playing a message, press m for fast for- warding.
Subscriber - Receiving 1-9

Erasing Messages
1 2
3 4
5
6
Go to the subscriber’s main command menu.
Check the announcement of the number of mes- sages.
To receive a message, press [I]. To deliver a message, press (21. For other features, press [3]. For help at any time, press [O].
Press 0 to use the Receiving Messages menu.
Review the number of messages, and the mes- sage information.
Review the message.
To repeat this message, press [I]. To play the next message, press [2/. To erase this message, press [3]. To reply, press [4]. To transfer this message, press [7]. For help, press [O].
Press m for erasing messages.
All messages are erased.
or
The message is erased.
l-10 Subscriber - Receiving

Replaying Previous Messages
1 2
3 4
5
6
Go to the subscriber’s main command menu.
Check the announcement of the number of mes- sages.
To receive a message, press [I]. To deliver a message, press [2].
Press 0 to use the Receiving Messages menu.
Review the number of messages, and the mes- sage information.
Review the message.
To repeat this message, press [I]. To play the next message, press [2].
To transjer this message, press [7].
Press 0 twice continuously to replay the pre- vious message.
Subscriber - Receiving 1-11

Playing the Next Message
Go to the subscriber’s main command menu.
Check the announcement of the number of mes- sages.
To receive a message, press [I]. To deliver a message, press [2].
Press 0 to use the Receiving Messages menu.
Review the number of messages, and the mes- sage information.
Review the message.
To repeat this message, press [I]. To play the next message, press [2/. To erase this message, press [3]. To reply, press [4]. To transfer this message, press [7]. For help, press [O].
Press m to play the next message.
I-12 Subscriber - Receiving

Scanning Messages
1
2
3
4
5
Go to the Receiving Messages menu. (See steps 1 - 5 in Receiving Messages)
Press m for the Help menu.
To repeat this message, press [I J. To replay the previous message, press [I] twice. To play the next message, press [2]. To erase this message, press [3]. To reply, press [4]. To rewind, press [SJ. To fast forward, press [6]. To transfer this message, press (71. For message scan, press [#].
Press m for scanning messages.
These are the brief segments of your messages. I
Review top 4 seconds of the message.
To replay the information of the previous message, press [I]. To play the information of the next message, press [2 /. To play the message, press [*I.
or
To replay the previous message, press 1. To play the next message, press 2. To play the entire message, press [I].
Press 0, m or 0 .
Subscriber - Receiving 1-13

Scanning Messaees
**********************************************
Hint Step 2 - If you do not want to listen to the
Help menu, you can go to step 4 directly.
**********************************************
1-14 Subscriber - Receiving

Chapter 2 Operation for
Subscribers - Sending Messages
This chapter tells you how to send messages: recording and delivery.
Contents
Voice Mail Service Entry ........................... 2-2 Call Transfer .............................................. 2-3
Message Delivery ....................................... 2-4 Recording Messages ................................... 2-6
Recording Messages (for Non-Subscribers) . . . . . . . . . . . . . . . . . . . . . . . . . . . . . 2-7
Recording Messages (from a rotary phone) . . . . . . . . . . . . . . . . . . . . . . . . . . . . . 2-8
Setting Delivery Time, Urgent/Private Status . . . . . . . . . . . . . . . . . . . . . . . . . . . . . . . . . . . . . . . . . . . . . . . . . . . . . 2-9
Checking Mailbox Distribution . . . . . . . . . . . . . . . . . . 2-11 Recording External Delivery Messages . . . . . . 2-13 Checking External Message Delivery
Status . . . . . . . . . . . . . . . . . . . . . . . . . . . . . . . . . . . . . . . . . . . . . . . . . . . . . 2-16

Voice Mail Service Entry (main command)
1
2
3
Dial an extension number which is connected to the Voice Mail Service.
Good morning/Good afternoon/Good evening You have reached the voice processing system.
Please enter the mailbox number of the person for whom you wish to leave a message. To enter by name, please press a pound sign and [I/. If you are using a rotary telephone, please wait a moment. To call the operator, press [O].
Press the star m key. Then enter your mailbox number.
Please enter the password, followed by a pound sign.
Enter the password, if you have the password. Now, you are in the subscriber’s main command menu.
2-2 Subscriber - Sending

Call Transfer
1 Go to the subscriber’s main command menu.
To receive a message, press [I].
3 Press m for the Help menu.
To receive a message, press [l]. To deliver a message, press [2]. For other features, press [3]. For call transfer, press [4]. To change voice level at any time, press [8]. To change playback speed at any time, press [9]. To end this call, press [*c/.
4 Press a for call transfer.
5 Enter the extension number.
**********************************************
Hint Step 3 - You can skip hearing the Help menu.
**********************************************
Subscriber - Sending 2-3

Message Delivery
1 2
3
4
5
Go to the subscriber’s main command menu.
Review the number of messages.
To receive a message, press [I].
Press 0 for Message Delivery.
Please enter the mailbox number of the person for whom you wish to leave a message. To enter by name, please press a pound sign [#] and [I].
Enter the mailbox number of your intended recipient.
Mailbox . . . . . This is for . . . . . If this mailbox number is correct, press [I]. Otherwise, press [2]. (To repeat mailbox information, press [3].) (To cancel message delivery, press [ $1.)
Press 0 to accept the number if it is correct.
To cancel message delivery, press [*I.
2-4 Subscriber - Sending

Message Delivery
6
7 8
9
Press 0 to record a message.
Please leave me a message at the tone. To end recording, press [I]. To pause and restart recording, press [2].
Speak your message at the tone.
Press 0 to end recording.
1 To erase and exit, press (JF].
Press a to accept.
Your recording has been accepted.
To set delivery time or private status, press [I]. Otherwise, press [2 J.
Press m to end message delivery, or hang up.
a********************************************* Hint
Step 4 - You can enter by name if you press [#] first.
Step 5 - You can add mailbox numbers by pressing [2]. You can review the mailing list by pressing [3]. You can cancel message transfer by pressing [*I.
**********************************************
Subscriber - Sending 2-5

Recording Messages
1
2 3
Go to the Recording Messages Menu.
Please leave me a message at the tone. To end recording, press [I]. To pause and restart recording, press [2 J.
Speak your message after the tone.
Press 0 to end recording.
Press 0 to accept.
1 Your recording has been accepted.
**********************************************
Hint Step 1 - There are many ways to get to the
Recording Messages menu. If you just want to record a message in a mailbox, see the Message Delivery menu.
**********************************************
2-6 Subscriber - Sending

Recording Messages (for Non-Subscribers)
2
3 4
5
Call the VPS and get to the Voice Mail Service.
Good morning/Good afternoon/Good evening You have reached the Voice processing system.
Please enter the mailbox number of the person for whom you wish to leave a message. To enter by name, please press a pound sign [#/ and [I]. If you are using a rotary telephone, please wait a moment. To call the operator, press [O].
Enter the mailbox number.
Mailbox . . . . . Please leave me a message at the tone. To end recording, hang up or press [I] for more features. To pause and restart recording, press [2].
Speak your message at the tone.
P ress 0 to end recording.
To review, press [I]. To accept, press [2]. To record a new one, press [3]. To add, press [4]. To erase and exit, press [*I.
Press m to accept.
Your recording has been accepted.
Subscriber - Sending 2-7

Recording Messages (from a rotary phone)
1
2
Call the VPS and get to the Voice Mail Service.
Good morning/Good afternoon/Good evening You have reached the voice processing system.
I Please enter the mailbox number of the person for whom you wish to leave a message. To enter by name, please press a pound sign [#/ and [I]. If you are using a rotary telephone, please wait a moment. To call the operator, press [OJ.
Wait a moment.
1 Welcome to the general delivery mailbox. (
Please leave me a message at the tone.
Speak your message.
Hang up the phone.
2-8 Subscriber - Sending

Setting Delivery Time, Urgent/Private Status
1 -9
10 After the recording,
To set delivery time or private status, press [I]. Otherwise, press [2].
11 Press 0 to set message type.
If this is an urgent message, press [l]. Otherwise [2].
(This prompt will be played when the timed noti- fication of the intended mailbox is enabled.)
12 Press 0 for the next menu.
If you wish to specify the delivery time, press [I]. Otherwise, press [2].
13 Press 0 to set the delivery time.
Please enter the delivery time, followed by a pound sign.
14 Enter the delivery time and a .
Please enter [I] for AM, or [2] for PM.
15 Select 0 or H .
Please enter the day of the month followed by a pound sign.
16 Enter the day and m .
This message will be delivered on . at . . . AM (PM). I
Same as Message Delivery.
Subscriber - Sending 2-9
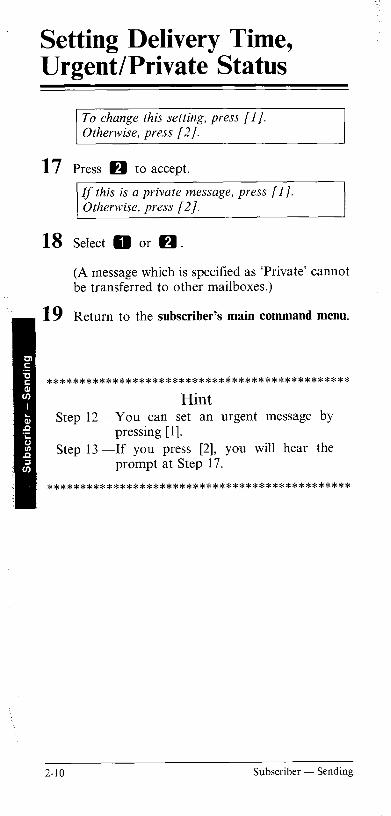
Setting Delivery Time, Urgent/Private Status
To change this setting, press [I]. Otherwise, press [2].
17 Press m to accept.
If this is a private message, press [I]. Otherwise, press [2 J.
18 Select 0 or H .
(A message which is specified as ‘Private’ cannot be transferred to other mailboxes.)
19 R eturn to the subscriber’s main command menu.
************************************y**********
Hint Step 12 -You can set an urgent message by
pressing [ 11. Step 13 -If you press [2], you will hear the
prompt at Step 17.
**********************************************
2-10 Subscriber - Sending

Checking Mailbox Distribution
5 Select 0 or H .
****************x*****************************
Hint Step 4 - You can press another key for
another feature.
****************x*****************************
2-12 Subscriber - Sending

Recording External Delivery Messages
1 2 3
3
4
5
Go to the subscriber’s main command menu.
Press m for Other Features.
Press Q for the Help menu.
To check mailbox distribution, press [I]. For automated attendant status, press [2]. For mailbox management, press [3]. (To set up message waiting nottyication, press [4 J.) (For external message delivery, press [S].) (To record guest messages, press [6].) (For interview mailbox management, press r71.j
(Prompts in parentheses ( ) are available if these functions are authorized.)
Press m for External Message Delivery.
Press 0 to record an external delivery mes- sage.
You can enter any digits from a key-pad. Please enter the telephone number and wait a moment.
Enter the telephone number.
This telephone number is .
Subscriber - Sending 2-13

Recording External Delivery Messages
6
To change the telephone number, press [I]. To accept, press [2]. To review, press [3]. To add more digits to the number, press [4]. To insert a pause, press [S]. To set dial mode, press [6]. To insert a wait for dial tone, press [7].
Press m to accept the number.
Please enter the 4 digits password. Zf you don’t need a password, press [#/. I
Enter the password
Please say the receiver’s name at the tone. To end recording, press [I]. I
Record your name.
Please enter the time for external message
Enter the time and press a m sign.
Please enter [I J for AM, or [2] for PM.
Select 0 or m .
Please enter the day of the month, followed by a pound sign.
2-14 Subscriber - Sending

Recording External Delivery Messages
11
12 13
Enter the Date and press a a sign.
The telephone number is
The password is . /Password is unassigned.
This external message delivery is scheduled to call . . . on . . . . at . (right away).
To change this setting, press [l]. Otherwise, press [2].
Press 0 to accept the setting.
Record your message. (See Recording Messages.)
********************************************
Hint Step 3 - You can skip hearing the Help menu. Step 6 - You can press another key for
another feature. Step 12 -You can press [0] for the Help menu.
You can change the setting by pressing [ 11. You can review the external message delivery by pressing [3].
**********************************************
Subscriber - Sending 2-15

Checking External Message Delivery Status
1 2 3
4
Go to the subscriber’s main command menu.
Press m for Other Features.
Press a for the Help menu, then press m for External Message Delivery.
To record an external delivery message,
To check external message deltvery status,
Press m to check external message delivery status.
This external message delivery is(was) scheduled to call . on at
or
I was unable to reach
or
The external delivery message for . has been erased, because message retention time has expired.
or
Your message is now being delivered to . .
If you wish to reschedule, press [I]. Otherwise, press [2].
2-16 Subscriber - Sending

Checking External Message Delivery Status
5 Press m for the Help menu.
(If you wish to reschedule, press (1 J.) To check the next message, press /2]. To repeat this schedule, press [3/. To replay the previous message, press [4/.
6 Press lil to reschedule the setting.
If you wish to cancel this external message delivery, press [I J. Otherwise. uress /21.
7 Select 0 or 0 .
**********x*******x***************************
Hint Step 3 - You can skip hearing the Help menu. Step 5 - You can skip hearing the Help menu. Step 6 - You can press another key for
another feature. Step 7 - If you select [2], you can change the
setting.
******************x***************************
Subscriber - Sending 2-17

Chapter 3 Setup for
Subscribers This chapter describes the setup procedures using the
touch-tone telephone for subscribers.
Contents Voice Mail Service Entry .............................. 3-2 Setting the Call Blocking Status .................... 3-3 Setting the Call Screening Status .................. 3-4 Alternate Extension Transfer Status Setting . 3-5 Setting Up the Alternate Extension ............... 3-6 Recording Personal Bulletin Messages .......... 3-8 Setting Personal Bulletin Board Status .......... 3-10 Enabling/Disabling the Interview Mailbox ..... 3-12 Customizing Your Mailbox ............................ 3-13 Changing Mailbox Parameters ...................... 3-16 Entry of the Personal Group Distribution
List ........................................................... 3-19 Deleting from the Personal Group Distribution
List ........................................................... 3-21 Setting Up a Guest Mailbox .......................... 3-23 Deleting a Guest Mailbox ............................. 3-25 Listing Guest Mailboxes ................................ 3-26 Message Waiting Lamp Notification Setting . 3-27 Setting Timed Message Notification .............. 3-29 Setting Immediate Message Notification ....... 3-31 Notification Telephone Number Assignment . . 3-33 Recording a Message in a Guest Mailbox ..... 3-35 Setting Answer Length for the Interview
Mailbox .................................................... 3-36 Recording Questions for the Interview
Mailbox .................................................... 3-38 Erasing Questions from the Interview
Mailbox .................................................... 3-40 Quick Reference Cards for Subscriber .......... 3-43

Voice Mail Service Entry (main command)
1
2
3
Dial an extension number which is connected to the Voice Mail Service.
Good morning/Good afternoon/Good evening You have reached the voice processing system.
Please enter the mailbox number of the person for whom you wish to leave a message. To enter by name, please press a pound sign and [I J. If you are using a rotary telephone, please wait a moment. To call the operator, press [O].
Press the star m key. Then enter your mailbox number.
Please enter the password, followed by a pound sign. I
Enter the password, if you have the password. Now, you are in the subscriber’s main command menu.
3-2 Subscriber - Setup

Setting the Call Blocking Status
1 2
3
4 5
6
Go to the subscriber’s main command menu.
Press m for Other Features.
To check mailbox distribution, press [l]. For automated attendant status, press [2]. For mailbox management, press [3].
Press m for automated attendant status.
To set call transfer status, press [I]. To set alternate extension transfer status, press [2]. For other options, press (01.
Press 0 to set the call transfer status.
Review current status.
Call blocking is enabled.
Or
Call blocking is disabled. Call screening is enabled/disabled.
To enable call blocking, press [I]. To disable, press (21.
Press 0 to enable the call blocking.
Call blocking is enabled.
**********************************************
Hint Step 6 - You can disable the call blocking by
pressing [2].
Subscriber - Setup 3-3

Setting the Call Screening Status
1 -5 Same as for the Setting call blocking status.
To enable call blocking, press [I]. To disable, press [2/.
6 Press m to disable the call blocking.
1 Call screening is (enabled/disabled). I
To enable call screening, press [l]. To disable, press [2].
7 Press 0 to enable the call screening status.
or
Press m to disable the call screening status.
Call blocking is disabled. Call screening is enabled/disabled
3-4 Subscriber - Setup

Alternate Extension Transfer Status Setting
1 2
Go to the subscriber’s main command menu.
Press m for Other Features.
To check mailbox distribution, press [I]. For automated attendant status, press [2]. For mailbox management, press [3/.
3 Press m for Automated Attendant status.
To set call transfer status, press [I]. To set alternate extension transfer status,
4
5
Press m to set the alternate extension transfer status.
Review current status.
Alternate extension transfer is enabled/ disabled
To enable alternate extension transfer, press [I]. To disable, press [2].
6 Press 0 to enable the status.
or
Press 0 to disable the status.
Alternate extension transfer is enabled/ disabled.
Subscriber - Setup 3-5

Setting Up the Alternate Extension
1 2
3
4
Go to the subscriber’s main command menu.
Press E) for Other Features.
To check mailbox distribution, press [I]. For automated attendant status, press (21. For mailbox management, press (31.
Press m for Automated Attendant status.
To set call transfer status, press [I].
Press m for other options.
To set call transfer status, press [I]. To set alternate extension transfer status, press [2]. To set up alternate extension, press [3]. To record a personal bulletin message, press [4]. To set personal bulletin board status, press (51. To set message reception mode, press [6].
5 Press a to set up the alternate extension.
Alternate extension is unassigned.
Or
Current alternate extension is
To change this setting, press [I]. Otherwise, press [2].
3-6 Subscriber - Setup

Setting Up the Alternate Extension
6 Press 0 to set the extension.
Please enter the alternate extension followed by a pound sign.
7 Enter the extension number.
8 Review the number you have just entered.
9 Press H to accept.
*********c************************************ Hint
Step 6 - You can accept the status by pressing r-4.
*************************c*********************
Subscriber - Setup 3-7

w :
Recording Personal Bulletin Messages
Go to the subscriber’s main command menu.
Press m for Other Features.
Press a for Automated Attendant status.
To set call transfer status, press [I]. To set alternate extension transfer status,
Press 0 for the Help menu, then press m to record personal bulletin messages.
Personal bulletin menu is not recorded. To record a bulletin menu, press [I]. Otherwise, press [2].
Press 0 record a bulletin menu.
Please state the bulletin message at the tone.
To end recording, press [I]. To pause and restart recording, press [2/.
Review the message.
Press m to accept.
3-8 Subscriber - Setup

Recording Personal Bulletin Messages
Review the next message.
The bulletin message . is /The bulletin message is not recorded.
To change this message, press [I J. Otherwise, press [2 J.
10 Press 0 to record a message.
To record a new message, press [I J. To erase this message, press [2].
11 Press 0 t o record a new message.
12 Pl ease state the bulletin message at the tone.
To end recording, press [l]. To pause and restart recording, press [2].
13 Review the message.
14 Press m to accept the message.
**********************************************
Hint Step 3 - You can skip hearing the Help menu. Step 4 - If you have recorded a bulletin menu,
you can go to Step 9 directly. Step 10 -You can review the next message by
pressing [2]. Step 11 -You can erase the message by
pressing [2]. Step 12 -You will return to Step 9.
x*********************************************
Subscriber - Setup 3-9
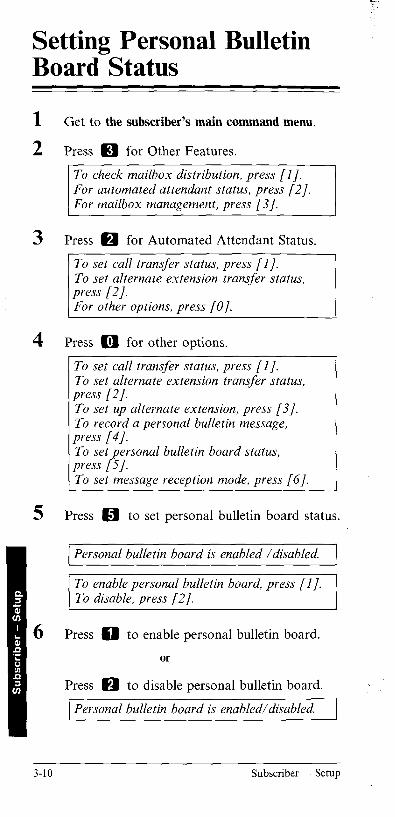
Setting Personal Bulletin Board Status
1 2
3
4
5
6
Get to the subscriber’s main command menu.
Press IE) for Other Features.
To check mailbox distribution, press [I]. For automated attendant status, press [2]. For mailbox management, press [3].
Press m for Automated Attendant Status.
To set call transfer status, press [I].
Press a for other options.
To set call transfer status, press [l]. To set alternate extension transfer status, press [2]. To set up alternate extension, press [3]. To record a personal bulletin message, press [4]. To set personal bulletin board status, press [SJ. To set message reception mode, press [6].
Press m to set personal bulletin board status.
Personal bulletin board is enabled /disabled.
To enable personal bulletin board, press [I]. To disable, press [2].
Press 0 to enable personal bulletin board.
or
Press a to disable personal bulletin board.
Personal bulletin board is enabled/disabled.
3-10 Subscriber - Setup
Setting Personal Bulletin Board Status
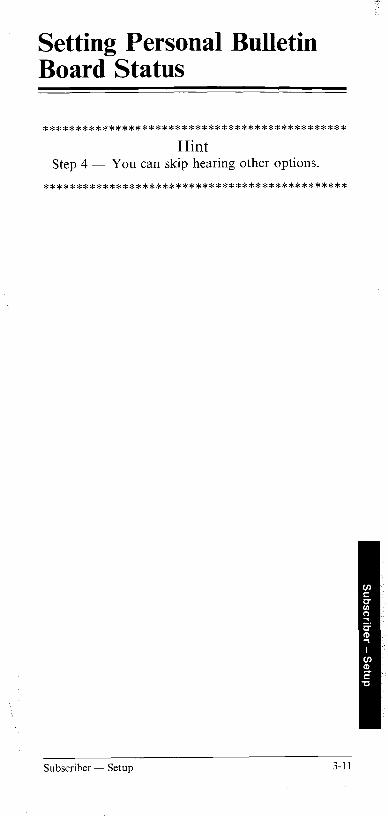
******************************x****************
Hint Step 4 - You can skip hearing other options.
**********************************************
Subscriber - Setup 3-11

Enabling/Disabling the Interview Mailbox
1 2 3
Go to the subscriber’s main command menu.
Press m for Other Features.
Press m for setting Automated Attendant Sta- tus.
4
5
6
To set call transfer status, press [l J. To set alternate extension transfer status,
Press m for other options.
To set call transfer status, press [I]. To set alternate extension transfer status, press [2]. To set up alternate extension, press [3]. To record a personal bulletin message, press [4]. To set personal bulletin board status, press [.5]. To set message reception mode, press [6].
Press m to set message reception mode.
Current message reception mode is interview mode/message recording mode.
To set to interview mode, press [l]. To set to message recording mode, press
L [Il.
1
Press 0 to set the message reception mode to Interview mode.
Current message reception mode is interview mode.
**********************************************
Hint Step 6 - You can disable the interview
mailbox by pressing [2].
*******************************a**************
3-12 Subscriber - Setup

Customizing Your Mailbox
1 2 3
4 5
6
7
8
Go to the subscriber’s main command menu.
Press m for Other Features.
Press m for Mailbox Management.
Press 0 to customize your mailbox.
Review the current personal greeting.
Current personal greeting is . . /Personal greeting is not recorded.
To change the personal greeting, press [I]. To accept, press [2]. To erase the greeting, press [3].
Press 0 to set the personal greeting.
Please state your greeting at the tone. To end recording, press [I]. To pause and restart recording, press [2 J.
Record your greeting and press 0 .
The personal greeting is .
To change the personal greeting, press [I]. To accept, press [2]. To erase the greeting, press (31.
Press m to accept the greeting.
Subscriber - Setup 3-13

Customizing Your Mailbox
9 Review the current password status.
Current password is /Password is unassigned.
To change this setting, press [I]. Otherwise, press [2].
10
11 12
13 14
Press 0 to set the mailbox password.
Please enter the password, followed by a pound sign.
Enter the password and a pound sign a .
Review the password.
The password you just entered is __.. To change this setting, press [l]. Otherwise, press (21.
Press H to accept.
Review the owner’s name.
Current owner’s name is . . /No owner’s name is recorded.
To change the name, press [l]. To accept, press [2]. To erase the name, press [3].
3-14 Subscriber - Setup

Customizing Your Mailbox
15
16
17
Press 0 to record the owner’s name.
Please say your name at the tone.
Record your name.
>I
Review the owner’s name and accept it by press- ing m.
***********************y***********************
Hint Step 3 - You can skip hearing the Help menu. Step 6 - You can accept the greeting and go
to Step 9 directly by pressing [2]. You can erase the greeting by pressing [3].
Step 8 - You can change your greeting by pressing [ 11.
Step 10 -You can accept the password and go to Step 13 directly by pressing [2].
Step 15 -You can accept the owner’s name by pressing [2]. You can erase the name by pressing 131.
**********************************************
Subscriber - Setup 3-15

..___
Changing Mailbox Parameters
1 2 3
4
5
6 7
Go to the subscriber’s main command menu.
Press a for Other features.
Press a for Mailbox Management.
To customize your mailbox, press [I]. To change the mailbox parameters,
To set the group distribution lists, press [3]. For guest account management, press (41.
Press 0 to change the mailbox parameters.
Your messages are retrieved beginning with the most recent message / the oldest
To change this setting, press [I].
Press 0 to set the retrieval order.
To retrieve messages beginning with the most
Select 0 or a
Review the retrieval order and accept it by press- ing H.
3-16 Subscriber - Setup

Changing Mailbox Parameters
8
9
10 11
12
13
14
Review the setting and accept it by pressing EB.
The first part of your message will be played with time and date stamp and sender’s name during message scanning.
Only the first part of your message will be played during message scanning.
To change this setting, press [l J. Otherwise, press [2/.
Press 0 to set message scanning information.
To play the first part of your message with time and date stamp and sender’s name,
To play only the first part of your message,
Select 0 or 0
Review the information and accept it by pressing Ea.
Review the call duration time setting.
The current call duration time of external message delivery is . .._ minutes. To change this setting, press [I]. Otherwise, press [2].
Press 0 to set the call duration time.
Please enter the call duration time from 1 to 9 minutes.
Enter the call duration time.
Subscriber - Setup 3-17

Changing Mailbox Parameters
15 Review the call duration time and accept it by pressing 0 .
External message delivery redialing is set to
16 Press ED to set external message delivery redial.
To set external message delivery redialing to ‘YES’, press [I]. To set to ‘No’, press [2].
17 Select 0 or a.
**********************************************
Hint Step 3 - Step 5 -
Step 7 -
Step 9 -
You can skip hearing the Help menu. You can press [2] to accept the current order and go to step 7 (or step 8) directly. If you have not been authorized to use external delivery, you would go to step 8 directly. You can press [2] to accept the current setting and exit.
Step 13 -You can press [2] to accept the current setting and go to step 15.
Step 16 -You can press [2] to accept the current setting and go to step 8.
**********************************************
3-18 Subscriber - Setup

Entry of the Personal Group Distribution List -
1 G o to the subscriber’s main command menu.
2 Press m for Other Features.
3 Press m for Mailbox Management.
To customize your mailbox, press [I]. To change the mailbox parameters,
i;; To set the group distribution lists, press [3/. For guest account management, press [4/.
4 Press H to set the group distribution list.
If there is a list,
Group distribution list number . has been already set.
then
Please enter the group number I through 8.
(If there is no group list, the first prompt will not be heard.)
5 E nter the group number.
Group number is Mailbox . . This is for . .
To add members to the list, press [l]. To delete members from the list, press [2].
6 Press 0 to add members to the list.
1 You have members left to enter. I
Please enter the mailbox number, followed by a pound sign.
Subscriber - Setup 3-19

Entry of the Personal Group Distribution List
7 Enter the mailbox number to be added.
1 Mailbox . This is for . . I
To change this mailbox number, press [I]. Otherwise, press (21.
8 Press 0 to accept the number.
To continue adding members, press [I]. To end, press [2].
9 Press m to end adding members.
**********************************************
Hint Step 3 - You can skip hearing the Help menu. Step 6 - You can press [0] for the Help menu.
You can press [3] to review the group.
Step 8 - You can change the number by pressing [l].
Step 9 - You can continue adding members by pressing [l].
**********************************************
3-20 Subscriber - Setup

Deleting from the Personal Group Distribution List
1 2 3
4
5
6
7
Go to the subscriber’s main command menu.
Press m for Other Features.
Press m for Mailbox Management.
To customize your mailbox, press [I]. To change the mailbox parameters,
To set the group distribution lists, press [3]. For guest account management, press [4].
Press m to set the group distribution list.
Group distribution list number . . has been already set.
1 Please enter the group number I through 8. 1
Enter the group number.
Group number is Mailbox . This is for . .
To add members to the list, press [I]. To delete members from the list, press [2].
Press m to delete members from the list.
To delete all members from the list, press [I J. Otherwise, press [2].
Press m to delete a member.
Mailbox ___. , this is for . .
To delete this number, press [I]. Otherwise, press [2 J.
Subscriber - Setup 3-21

Deleting from the Personal Group Distribution List -
8 Press 0 to delete the mailbox.
The member is deleted from the list.
w*********************************************
Hint Step 3 - You can skip hearing the Help menu. Step 7 - You can delete all members by
pressing [ 11. Step 8 - You can keep the mailbox by
pressing [2].
*********************es***********************
3-22 Subscriber - Setup

Setting Up a Guest Mailbox
1 2
3
4
5
6
Go to the subscriber’s main command menu.
Press m for Other Features.
To check mailbox distribution, press [I]. For automated attendant status, press [2/. For mailbox management, press [3/.
Press m for Mailbox Management.
To customize your mailbox, press [I]. To change the mailbox parameters,
To set the group distribution lists, press [3]. For guest account management, press (41.
Press a for Guest Account Management.
To set up a guest mailbox, press [I]. To delete a guest mailbox, press [2]. To list guest mailboxes, press [3].
Press 0 to set up a guest mailbox.
Please enter the guest mailbox number [I] through [4].
Enter the guest mailbox number.
No guest mailbox is, assigned.
Or
Guest mailbox _... is (are) assigned.
Please say the guest’s name at the tone. To end recording, press [I].
Subscriber - Setup 3-23

Setting Up a Guest Mailbox
7
8
9
Record the guest’s name.
Please enter the 4 digit guest password.
Enter the password.
Guest number . is for . . . . . The password is .
To change this setting, press [l]. Otherwise, press [2].
Press m to accept the setting.
**********************************************
Hint Step 3 - You can skip hearing the Help menu. Step 9 - You can change the setting by
pressing [ 11.
**********************************************
3-24 Subscriber - Setup

Deleting a Guest Mailbox
1 Go to the subscriber’s main command menu.
2 Press m for Other Features.
3 Press m for Mailbox Management.
To customize your mailbox, press [I]. To change the mailbox parameters, press (21. To set the group distribution lists, press [3]. For guest account management, press [4].
4 Press a for Guest Account Management.
To set up a guest mailbox, press (I]. To delete a guest mailbox, press [2]. (To list guest mailboxes, press [3].)
5 Press m to delete a guest mailbox.
Guest mailbox . . is (are) assigned.
Please enter the guest mailbox number [I] through [4].
6 Enter the guest mailbox number.
This guest is . To delete this guest mailbox, press (I]. _- _
7
1 Otherwise, press /2/.
Press 0 to delete the guest mailbox.
Guest mailbox . . . . is deleted.
**********************************************
Hint Step 7 - If the mailbox that you want to
delete is being accessed, you cannot delete it at this time.
Subscriber - Setup 3-25

Listing Guest Mailboxes
1 2 3
4
5
Go to the subscriber’s main command menu.
Press m for Other Features.
Press m for Mailbox Management.
To customize your mailbox, press [IJ. To change the mailbox parameters,
To set the group distribution lists, press [3]. For guest account management, press [4 J.
Press a for Guest Account Management.
To set up a guest mailbox, press (I]. To delete a guest mailbox, press f2/. To list guest mailboxes, press [3J.
Press m to list guest mailboxes.
Guest number . . . . is for . . . . The password is . .
. . . . messages were recorded./ One message was recorded./ There are no messages.
***************************x********************
Hint Step 5 - If the guest mailbox is not opened,
“No guest mailbox is assigned.” will be played.
**********************************************
3-26 Subscriber - Setup

Message Waiting Lamp Notification Setting - Either Timed Message Notification or Immediate Message Notification can be set to onerate together with Message Waiting Lamp Notification.
1 Go to the subscriber’s main command menu.
To receive a message, press [I].
2 Press m for Other Features.
To check mailbox distribution, press [l]. For automated attendant status, press [2]. For mailbox management, press [3].
3 Press a to listen to the Help menu.
To check mailbox distribution, press [I]. For automated attendant status, press [2]. For mailbox management, press [3]. (To set up message waiting notiJj:cation, press [4].) (For external message delivery, press IS].) (To record guest messages, press [6].) (For interview mailbox management, press [ 71.)
(Prompts in parentheses ( ) are available if these functions are authorized.)
4 Press a to set Message Waiting Notification.
To notify with a message waiting lamp, press [I]. Otherwise, press [2].
5 Press 0 to enable Message Waiting Lamp Notification.
You can be nottyied with a message waiting lamp.
Subscriber ~ Setup 3-21

Message Waiting Lamp Notification Setting
To set timed message notification, press [I]. To set immediate message notification, press PI. To assign a telephone number, press [3].
6 To set Timed Message Notification, follow the steps 4 to 11 on pages 3-29 and 3-30.
6’ To set Immediate Message Notification, follow the steps 5 to 7 on pages 3-31 and 3-32.
**********************************************
Hint Step 3 - You do not have to listen to the
Help menu, if you do not want to.
**********************************************
3-28 Subscriber - Setup
Setting Timed Message Notification
You have to assign the telephone number to be called beforehand. (See Notification Telephone Number Assignment.)
1
2
3
4
Go to the subscriber’s command menu and press m for Other Features.
To check mailbox distribution, press [I]. For automated attendant status, press [2]. For mailbox management, press [3].
Press m for the Help menu, then a for Mes- sage Notification.
To notify with a message waiting lamp, press [I J. Otherwise, press [2].
Press m for sub menu.
To set timed message notgication, press [I]. To set immediate message notification, press [2/. To assign a telephone number, press (31. 1
Press 0 for setting timed message notification.
1 First notification time is I
IS econ d t’f’ t’ t’ no I zca 2on zme is . . . I
Messages will be forwarded by outdialing./ Message will be forwarded to a pager.
or
Timed message notlyication is disabled.
To change this setting, press [l]. Otherwise, press [2].
Subscriber - Setup 3-29

Setting Timed Message Notification
5 Press 0 to set timed message notification.
To enable timed message notification, press [I]. To disable, press [2/.
6 Press m to enable timed message notification.
Timed message notification is enabled. 1
7
8
9
Review notification parameters.
To change this setting, press f I]. Otherwise, press [2].
Press 0 to change setting.
Please enter the new time, followed by a pound sign. For help, press [O].
Enter the time with four numbers: if you want to set the time to 10:25, you must enter ‘1025’.
10 Press 0 / a to specify AM/PM respectively.
11 Press m to accept the time.
*********x************************************
Hint Step 2 - You can skip hearing the Help menu. Step 7 - You can hear the entire menu by
pressing [0] (for Help). Step 8 - You can delete this setting by
pressing [3].
***************c******************************
3-30 Subscriber - Setup

Setting Immediate Message Notification
You have to assign the telephone number to be called beforehand. (See Notification Telephone Number Assignment.)
I 2 3
4
5
Go to the subscriber’s main command menu.
Press a for Other Features.
Press a for the Help menu, then press a for Message Notification.
To nottfy with a message waiting lamp, press [I]. Otherwise, press [2].
Press a for sub menu.
To set timed message notfication, press [I]. To set immediate message notification
To assign a telephone number, press [3].
Press a to set immediate message notification.
Immediate message nottjication is disabled.
To change this setting, press [I]. Otherwise, press [2].
6 Press 0 to set immediate message notification.
To enable immediate message nottfication, press [l]. To disable, press [2].
Subscriber - Setup 3-31

Setting Immediate Message Notification
7 Press 0 1 a to enable/disable immediate message notification.
Immediate message notification is enabled/ disabled.
**********************************************
Hint Step 3 -You can skip hearing the Help menu. Step 6 -You can disable by pressing [2]. Step 7 -If you set the Immediate message
notificaion enable, it is a good idea to record in your Personal Greeting as follows: “If your message is urgent, press [l] after recording it to make it an urgent message.”
*********************************************a
3-32 Subscriber - Setup

Notification Telephone Number Assignment
7 Enter the telephone number.
This telephone number is . .
To change the telephone number, press [I]. To accept, press [2/. To review, press [3]. To add more digits to the telephone number, press [4]. To insert a pause, press [S]. To set dial mode, press [6]. To insert a wait for dial tone, press [7].
Press a to accept the number.
For notification by outdialing, press [I]. For a pager, press [2].
9 Select 0 or a .
**********************************************
Hint Step 3 - You can skip hearing the Help menu. Step 8 - You can press another key for
another feature.
**********************************************
3-34 Subscriber - Setup

Recording a Message in a Guest Mailbox
1 Go to th e su SW b ‘b er’s main command menu.
2 Press m for Other Features.
3 Press m for the Help menu, then press m for the Guest Account.
) Guest mailbox . . . . is assigned. I
1 No guest mailbox is assigned.
Please enter a guest mailbox number [I] through [4].
Enter the guest mailbox number ( 0 - a ).
1 This guest is . . I
. . messages were recorded./ One message was recorded./ There are no messages.
To deliver your message to this guest, r press [I]. Otherwise, press [2].
5 Press 0 to deliver your message.
6 Go to Recording Messages menu.
*********************************x*************
Hint Step 3 - You can skip hearing the Help menu. Step 5 - You can cancel the delivery by
pressing [2].
*x********************************************
Subscriber - Setup 3-35

Setting Answer Length for the Interview Mailbox
1 Go to the subscriber’s main command menu.
2 Press m for Other Features.
3 Press a for the Help menu, then press 0 for Interview Mailbox management.
To record the question, press [I]. To set the answer length, press [2]. To erase the question, press [3].
4 Press W to set the answer length.
5 Review question No. 1 and its answer length.
Question No. . No question is recorded. Answer length is seconds.
or
Question No. . Answer length is . . seconds.
To change the length of the answer, press (11. To skip to the next question, press [2]. To skip back to the previous question, press [3]. To go directly to a question, please press a pound sign [#] now.
6 Press 0 to set or change the length.
Please select the answer length.
I
For 4 seconds, press [l]. For 8 seconds, press [2]. For 16 seconds, press [3]. For 32 seconds, press [4/.
3-36 Subscriber - Setup

Setting Answer Length for the Interview Mailbox
7
8
9 10 11
Press 0 , m, m or m for the desired message length.
Check the length that you have just entered.
To change this setting, press [I]. Otherwise, press [2].
Accept the length by pressing m .
Review the next question and its answer length.
Repeat steps 5 - 9.
**********************************************
Hint Step 3 - You can skip hearing the Help menu. Step 6 - You can jump to the question by
pressing a [#] sign first, then the question number and [#] sign.
**********************************************
Subscriber - Setup 3-37

Recording Questions for the Interview Mailbox -
1 2 3
4 5
Go to the subscriber’s main command menu.
Press m for Other Features.
Press a for the Help menu, then press 0 for Interview Mailbox Management.
To record the question, press [I]. To set the answer length, press [2]. To erase the question, press [3].
Press 0 to record questions.
Review the question.
Question No. 1
No question is recorded.
(Recorded question message)
To change this question, press [I].
To skip back to the previous question,
To go directly to a question, please press a
Press 0 to record the question.
Please state the question at the tone. To end recording, press [I J. To pause and restart recording press [2].
3-38 Subscriber - Setup

Recording Questions for the Interview Mailbox
7 Press 0 to end recording.
8 Press m to accept the question.
9 Review the next question.
10 Repeat steps 5 - 8.
**********************************************
Hint Step 3 - You can skip hearing the Help menu. Step 4 - If the question is already recorded, it
will be reviewed. Step 7 - You can jump to the question by
pressing [#I, then question number and [#I.
Step 8 - You can change the message by pressing [ 11.
**********************************************
Subscriber - Setup 3-39

Erasing Questions from the Interview Mailbox
1 G o to the subscriber’s main command menu.
2 Press m for Other Features.
3 Press m for the Help menu, then press 0 for Interview Mailbox Management.
To record the question, press [I]. To set the answer length, press [21. To erase the question, press [3].
4 Press IE) to erase the question.
Question No. 1
No question is recorded.
or
(Recorded question message)
5 Review question No. 1.
To erase this question, press [I]. Otherwise, press [2]. To skip back to the previous question, press [31. To go directly to a question, please press a pound sign [#] now.
6 Press 0 to erase the question.
The question is erased.
7 Review the next question.
8 Repeat steps 5 - 6.
3-40 Subscriber - Setup

Erasing Questions from the Interview Mailbox
**********************************************
Hint Step 3 - You can skip hearing the Help menu. Step 6 - You can jump to the question by
pressing [#I, then the question number and [#I.
**********************************************
Subscriber - Setup 3-41


Please cut here.
Please cut here. \
_--------_-___(
WS Quick Reference
Voice Mail Tel. Your Mailbox No. Note: Use #6 to get to Voice Mail from
other VPS smvices. - To l+ave Message Only -
pseMadbox No. or e 0
To Open Mailbox 1. Press m, then Mailbox NO. 2. Enter Password and e
,- Mailbox Menu - ED Receive Messages H Deliver Messages m Other Features (see back) m Call Transfer =End Call
Printed in Japan EQQX9838YA
I
WS Quick Reference
Voice Mail Tel. Your Mailbox No. Note: Use #6 to get to Voice Mail from
other VPS services. - To Leave Message Only - /
Enter Mailbox No. or e 0 Name
I
To Open Mailbox 1. Press m, then Mailbox No. I
2. Enter Password and e
Printed in Japan
1
- Other Features Menu - 0 Mailbox Distribution Status m Set Automated Attendant
Status m Mailbox Management m Message Notification* m External Message Delivery* a Guest Account* 0 Interview Mailbox -
Management* * If authorized by system administrator
Commands
_ ..- Dial by Name Bulletin Board Department Dial
#R Restart (MaSea@ T& &
_- ----- ------_
1
- Other Features Menu - 0 Mailbox Distribution Status Q Set Automated Attendant
Status m Mailbox Management m Message Notification* m External Message Delivery* m Guest Account* 0 Interview Mailbox
Management* * If authorized bv svstem administrator
commauds
El 1 #l
Dial by Name
#R Restart (Main Menu)
#B Bulletin Board
JKL El 5
#L L.Qgin TLN El a #T
Transfer
El 0
#D Dzmrtmmt Dial
#M Voice Mail
#X Exit
\------ _-------
Please cut here.
J
Please cut here.
r(


