WebAccess Handbook This handbook contains directions on using tools and resources in WebAccess at CSM. Contents Logging in to WebAccess ...........................................................................................2 Setting up your Shell .................................................................................................3 Docking Blocks or Menus ...........................................................................................3 Course Settings.........................................................................................................5 Editing your Profile ....................................................................................................7 It is very important that you edit your profile before you make your course available to students ...................................................................................................................7 Creating a Welcome Message ....................................................................................8 Adding Files to WebAccess ........................................................................................9 Adding a YouTube Video to your course ................................................................... 16 If you decide to use forums ..................................................................................... 21 Other Ideas for Participation ............................................................................. 22 Adding Assignments to WebAccess .......................................................................... 24 Submission settings .............................................................................................. 25 Groups submission settings .................................................................................. 27 Notifications ........................................................................................................ 28 Grade ................................................................................................................. 28 Adding a Book to WebAccess ................................................................................... 30 Moodle: Course grade weighted by category ............................................................ 33 Creating a Quiz in WebAccess .................................................................................. 36
Transcript
WebAccess Handbook
This handbook contains directions on using tools and resources in WebAccess at CSM.
Contents
Logging in to WebAccess ........................................................................................... 2
Setting up your Shell ................................................................................................. 3
Docking Blocks or Menus ........................................................................................... 3
Editing your Profile .................................................................................................... 7
It is very important that you edit your profile before you make your course available to students ................................................................................................................... 7
Creating a Welcome Message .................................................................................... 8
Adding Files to WebAccess ........................................................................................ 9
Adding a YouTube Video to your course ................................................................... 16
If you decide to use forums ..................................................................................... 21
Other Ideas for Participation ............................................................................. 22
Adding Assignments to WebAccess .......................................................................... 24
Created by Alexis Alexander for CSM Spring 2014 Page | 3
Setting up your Shell
Docking Blocks or Menus
All menus (sometimes called
blocks) can be docked; docked
menus become left-side tabs
Here is the setting menu docked.
Docking menus that you use often will make editing and other functions easier for you to
accomplish
Created by Alexis Alexander for CSM Spring 2014 Page | 4
The Settings block has some important tools. This settings
menu is “docked”
Use Edit Settings to set up the format for your course
Grades is the link to the Grade book in WebAccess
You can back up and save a copy of your course here
Don’t forget to edit your Profile!
Created by Alexis Alexander for CSM Spring 2014 Page | 5
Course Settings
All of the other course settings have been collapsed
Use this drop down to Make your course visible
Click on each heading to expand
it
Created by Alexis Alexander for CSM Spring 2014 Page | 6
Topics Format: use this format if you are using your shell just as an additional resource for students and don’t need a separate block for each week. You can simply add as many blocks as you need for each topic, for example: Homework, Handouts, Lecture notes, etc.
Weekly Format: this is the default format; it is set up with a start date and a block for each week in the semester
Here is an example of some commonly used options,
expanded.
You can change the format of the course here
Created by Alexis Alexander for CSM Spring 2014 Page | 7
Editing your Profile
It is very important that you edit your profile before you make your course available to students
Click here to edit your profile
Don’t forget to upload a photo
here, using “Add” or simply dragging and
dropping
Created by Alexis Alexander for CSM Spring 2014 Page | 8
Creating a Welcome Message
When your students open your WebAccess shell they may not know how to proceed. Creating a “Welcome” message in the top block of the page will help guide your students on what they will need to do for your course
The following are suggested items to include in welcome message and should be placed in the very top area of your course, which is called “Block Zero”:
• Introduce yourself! A brief introduction to you and the course is a great way to connect you to your students
• Contact information: Provide students with ways to communicate with you. • Have virtual office hours? Post those here. • Learning objectives: Providing students with your learning objectives gives
students an idea of the goals they are expected to meet for the course. • How to get started: Provides students with assistance in locating course
material in the WebAccess shell. You could also include a link to the course syllabus
Some other things you might consider adding are
• Textbook Information. Your WebAccess shell could be one place students look to find out ISBN info about the textbook.
• Exam information. Listing exam dates and assignment deadlines is helpful to your students
• Course FAQ’s: What do students really need to know about your course?
To edit Block Zero, click the “tiny pencil” button, which looks like a tiny pencil!
Created by Alexis Alexander for CSM Spring 2014 Page | 9
Adding Files to WebAccess
Files are a resource, use the “Add and activity or resource” link
When you are done, be sure to save
changes
Remember, on the web it is very important to make
things readable, you can do this by using headings and making sure there is white space between paragraphs,
keep it clean and simple
Created by Alexis Alexander for CSM Spring 2014 Page | 10
These are all of the activities and
resources in WebAccess
Choose one by using the radio
button next to the name of the
resource
You must name your Resource and write a brief description
Created by Alexis Alexander for CSM Spring 2014 Page | 11
Each activity or resource has an “activity completion”
component, this means you can track completion of items and also let students know when
they have completed something
Click add file to upload your file
You can browse for your file on your computer, use existing files in the
Server Files area or Google docs or Dropbox
Created by Alexis Alexander for CSM Spring 2014 Page | 12
Don’t forget to test your link to make sure it works before proceeding.
The uploaded file appears here
Once again, you can enable completion tracking if you choose
The files will appear here as a link
Created by Alexis Alexander for CSM Spring 2014 Page | 13
nk to an external website
WebAccess is also a great tool to enhance your students’ learning experiences, as it can provide them interesting resources to view and use.
To do this, you may want to link to an external website.
It is not necessary to close your WebAccess course shell when to go out to the Internet to find an external website
Use your browser to open a new tab
Turn editing on, click on Ad an Activity or
Resource, and choose URL
In Firefox, clicking on this + sign allows you to open a new tab so
that you can look for your resource and go back and forth from your course shell to your
search
Created by Alexis Alexander for CSM Spring 2014 Page | 14
Now find your online resource
Go to the website you want to use as a reference
Select and copy the URL (web
address)
Created by Alexis Alexander for CSM Spring 2014 Page | 15
Save and return to course, and you will see your link
Don’t forget to test your link to make sure it works before proceeding.
Give your resource a good name and then Paste the link in the External URL Box
You can choose how your resource displays here
Created by Alexis Alexander for CSM Spring 2014 Page | 16
Adding a YouTube Video to your course
YouTube has a ton of great videos you can embed in WebAccess
First search for the video that you want
For example here are a bunch of biology videos
Created by Alexis Alexander for CSM Spring 2014 Page | 17
First click share
Then click embed
Copy this embed code, this is what
you need to put the video in your shell
Created by Alexis Alexander for CSM Spring 2014 Page | 18
Back in WebAccess, you should create a webpage in your course where you will embed your video. Click on “Add a Resource or Activity” and choose Page
Give your resource a name and then paste the code in the bottom box click the HTML button FIRST to get to code view, that is
very important!
After you paste in the code and
click Update, the video will appear
Created by Alexis Alexander for CSM Spring 2014 Page | 19
Two more tools you might like to use are “Assignments” and “Forums”
Forums allow for asynchronous discussion, such as question and answer boards.
Assignments allow students to upload papers, etc, online, and make grading so much easier for you!
Adding a Forum to WebAccess
Forums are an activity in WebAccess, so you will find them in the Add a Resource or Activity link
Created by Alexis Alexander for CSM Spring 2014 Page | 20
Give your forum a name
The directions for your forum go
here
If you decide to give students points for forum participation, set the
parameter for that here
Once again, the settings for the forum are collapsed
You should turn forum tracking on to help you keep track, you can also rate forum
posts to give students points for participation
Created by Alexis Alexander for CSM Spring 2014 Page | 21
If you decide to use forums
If you decide to use forums in your course, and I hope you will as forums provide many advantages and support for students, you should also include specific instructions and guidelines on how to use the forum for students.
Below is an example of information you might provide. Notice that there is also an example of a rubric provided.
Each week we will have at least one discussion forum. You must post THREE times in each forum to get the maximum number of points for your participation. Each substantive and complete post is worth 25 points.
As the instructor, I will facilitate student discussions but I will not address every single post. In most cases, I might share a related idea, intervene when the discussion goes off-track, or tie student comments together to help deepen student learning. Consequently, I will not directly answer questions in the discussion area unless they are addressed to me. I will check the discussions daily during the week, and occasionally on the weekends.
Some characteristics I consider to be part of excellent discussion contributions are outlined below. I will consider these characteristics when assessing the quality and level of student participation.
• Submit initial post(s) early in the week, and subsequent responses to the posts of other learners at timely intervals throughout the duration of the session. The goal is to have a dynamic discussion around the topic that lasts throughout the entire session.
• Posts and responses should be thorough and thoughtful. Just posting an "I agree" or "Good ideas" will not be considered adequate. Support statements with examples, experiences, or references. Be brief — keep each post and response to one or two short paragraphs. Keep in mind that fellow learners will be reading and responding to you, too.
• Make certain that all posts and responses address the question, problem, or situation as presented for discussion. This does not mean you should not extend the topic, but do not stray from the topic.
• Discussions occur when there is dialogue; therefore, you need to build upon the posts and responses of other learners to create discussion threads. Make sure to revisit the discussion forum and respond (if necessary) to what other learners have posted to your initial responses.
• When relevant, add to the discussion by including prior knowledge, work experiences, references, web sites, resources, etc. (giving credit when appropriate).
Created by Alexis Alexander for CSM Spring 2014 Page | 22
• Contributions to the discussions (posts and responses) should be complete and free of grammatical or structural errors.
What do I mean by a substantive post?
The following are some ideas to set the stage for substantive participation for the development of your critical thinking skills:
1. Ensure that the posting contributes to the overall discussion thread that is being developed. Your response must contain some reference back to the original discussion question. Stay on track by always referring back to that original discussion question.
2. Try to use your posting to add value to the discussion. This is more effective than simply responding to meet a requirement.
3. Check to see that the posting expands on the main theme (in the discussion question, or assignment posting).
4. Make sure your posting is at least 50-150 words.
Other Ideas for Participation
• Share a related experience. • Comment on others' experiences. • Ask students questions about their ideas/experiences. • Consider an idea being discussed, and offer a different perspective on it. • Describe an interesting idea from the week's reading, and explain what
insights you gained from it. • Ask the group a question about the week's reading. • Disagree (respectfully, of course) with a point that someone else has
made. • Discuss a related issue on which you would like some feedback. • Describe how you have applied the recent course concepts to your
personal/professional life. • Share another resource you have used as you explored the course topics.
Created by Alexis Alexander for CSM Spring 2014 Page | 23
Here is a suggested rubric for forum discussion posts
Criteria Unsatisfactory Satisfactory Exemplary
Quantity and Timeliness
Does not submit at least one post early in the session and/or does not submit at least two responses to other learners at various times during the session.
Submits at least one thoughtful post early in the session and at least two responses to other learners at various times during the session.
Submits two or more thoughtful posts early in the session and more than two responses to other learners at various times during the session.
Demonstrates knowledge and understanding of content and applicability to professional practice
Post(s) and responses show little evidence of knowledge and understanding of course content and applicability to professional practice.
Post(s) and responses show evidence of knowledge and understanding of course content and applicability to professional practice.
Post(s) and responses show evidence of knowledge and understanding of course content and applicability to professional practice and include other resources that extend the learning of the community.
Generates learning within the community
Posts do not attempt to elicit responses and reflections from other learners and/or responses do not build upon the ideas of other learners to take the discussion deeper.
Posts attempt to elicit responses and reflections from other learners and responses build upon the ideas of other learners to take the discussion deeper.
Posts elicit responses and reflections from other learners and responses build upon and integrate multiple views from other learners to take the discussion deeper.
Created by Alexis Alexander for CSM Spring 2014 Page | 24
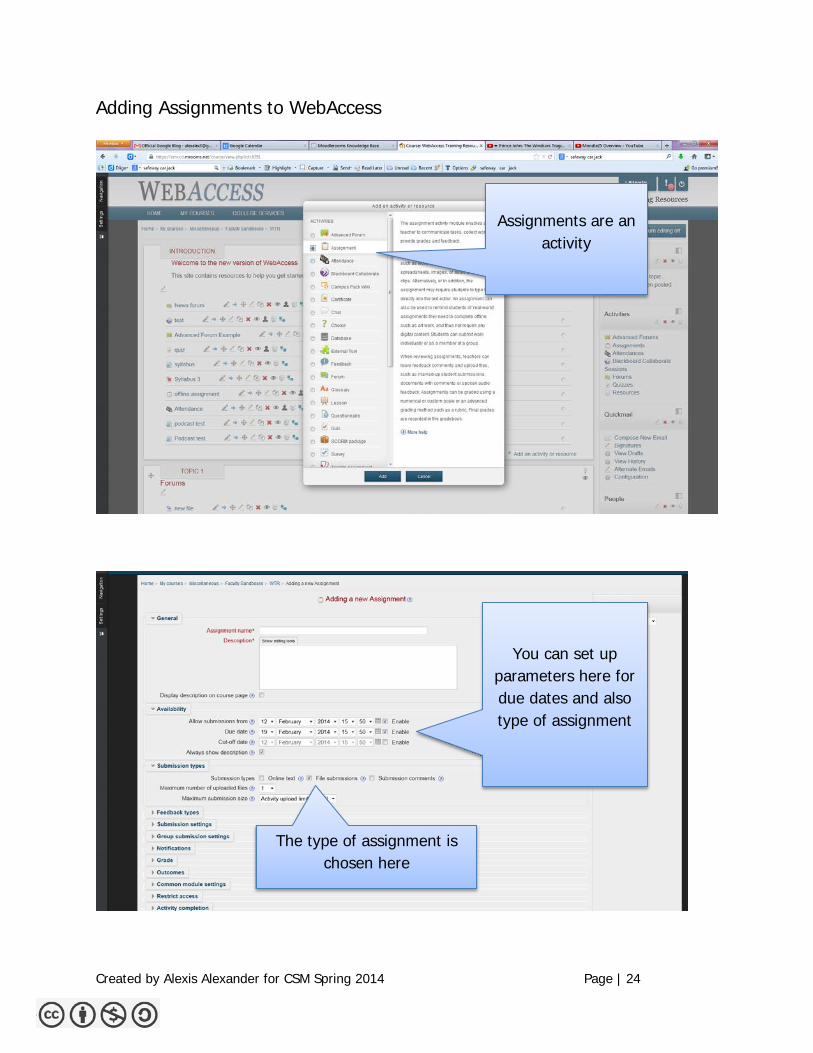
Adding Assignments to WebAccess
Assignments are an activity
You can set up parameters here for due dates and also type of assignment
The type of assignment is chosen here
Created by Alexis Alexander for CSM Spring 2014 Page | 25
Submission settings (the following is from http://docs.moodle.org/25/en/Assignment_settings)
(This setting is collapsed by default)
Submission settings
Require students click submit button
Students can upload draft versions of the assignment until such time as they are ready to submit. Once they click the submit button they indicate to the teacher that they have finished working on the assignment. In earlier versions of Moodle this was called "Send for marking".)
They can then longer edit their submission. If they need to change it, they must ask the teacher who can revert the assignment to draft status.
To revert to the draft stage, click on the assignment activity and then View/Grade all Submissions. Locate the student and click the action icon in the Edit column. Select Revert the submission to draft.
If this setting is No, then students do not have to to click a submit button and are able to make changes to uploaded files at any time.
If this setting is No but the teacher wishes to grade students work, then you can stop students from making further changes by using Prevent submission changes. Prevent submission changes can also be used in cases where students have neglected to click the Submit button and grading has commenced. To prevent submission changes, click on the assignment activity, then click on the View/Grade all submissions button. On the grading table, locate the student and click the action icon in the Edit column. Select Prevent submission changes.
Created by Alexis Alexander for CSM Spring 2014 Page | 26
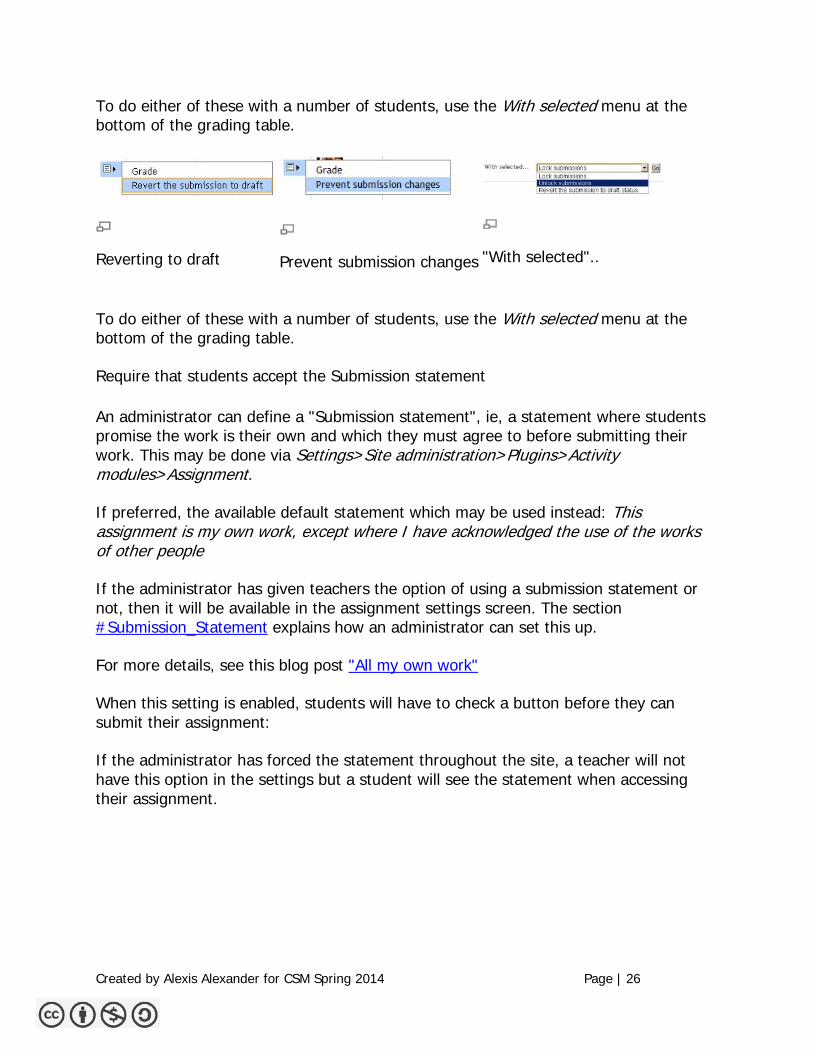
To do either of these with a number of students, use the With selected menu at the bottom of the grading table.
Reverting to draft
Prevent submission changes
"With selected"..
To do either of these with a number of students, use the With selected menu at the bottom of the grading table.
Require that students accept the Submission statement
An administrator can define a "Submission statement", ie, a statement where students promise the work is their own and which they must agree to before submitting their work. This may be done via Settings>Site administration>Plugins>Activity modules>Assignment.
If preferred, the available default statement which may be used instead: This assignment is my own work, except where I have acknowledged the use of the works of other people
If the administrator has given teachers the option of using a submission statement or not, then it will be available in the assignment settings screen. The section #Submission_Statement explains how an administrator can set this up.
For more details, see this blog post "All my own work"
When this setting is enabled, students will have to check a button before they can submit their assignment:
If the administrator has forced the statement throughout the site, a teacher will not have this option in the settings but a student will see the statement when accessing their assignment.
Created by Alexis Alexander for CSM Spring 2014 Page | 27
Maximum attempts
New feature in Moodle 2.5!
If a student is allowed to resubmit, this setting will determine how many times they can resubmit before they are no longer allowed to do so. (For example, if a student has to keep trying until they get a pass grade, the teacher might decide that ten attempts is enough even though they have not yet passed!)
Groups submission settings
(This setting is collapsed by default)
Group submission settings
Students submit in groups
If this box is ticked, then students are able to collaborate on an assignment. This might involve for example, working in the same online text area, or one student uploading an MS Powerpoint which another student downloads, improves and re-uploads to the common assignment area.
When grading, the teacher may choose to give a common grade and feedback to all students in the group or to give individual grades and feedback to each member.
If no groups have been made, then Moodle will make a default group of every student in the course.
For more details see this Youtube video Group Assignment 2.4
Require all group members submit
This setting will only appear if the teacher has ticked the "Require students click submit button" earlier. The assignment will not be classed as "submitted" until all members of
Created by Alexis Alexander for CSM Spring 2014 Page | 28
the group have made a contribution. When one student has submitted, the other members of the group will be able to see who still has to submit.
Grouping for student groups
If a particular grouping is selected here, then the gradebook will display any other groups and non-grouped students in the "default group", while naming the group(s) that are in the chosen grouping. If "none" is selected, then the gradebook will display the names of all groups and put any non-grouped students in the "default group". See this forum post on grouping for student groups for examples of how this might be used.
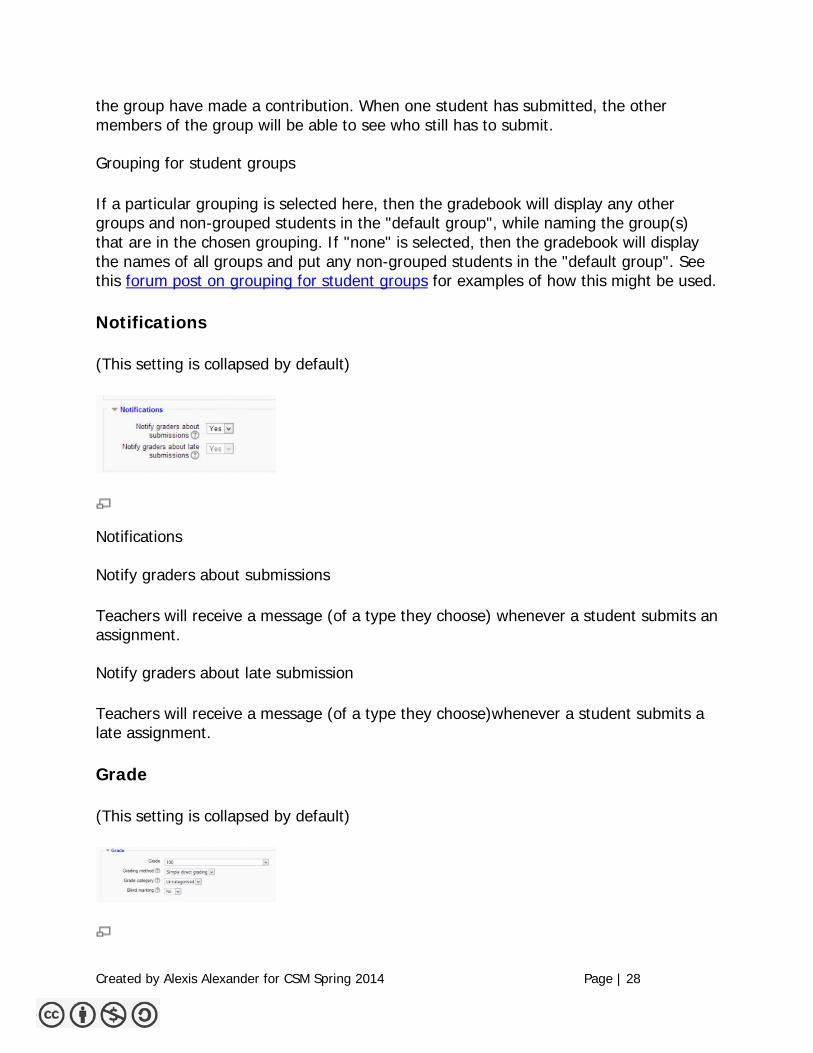
Notifications
(This setting is collapsed by default)
Notifications
Notify graders about submissions
Teachers will receive a message (of a type they choose) whenever a student submits an assignment.
Notify graders about late submission
Teachers will receive a message (of a type they choose)whenever a student submits a late assignment.
Created by Alexis Alexander for CSM Spring 2014 Page | 29
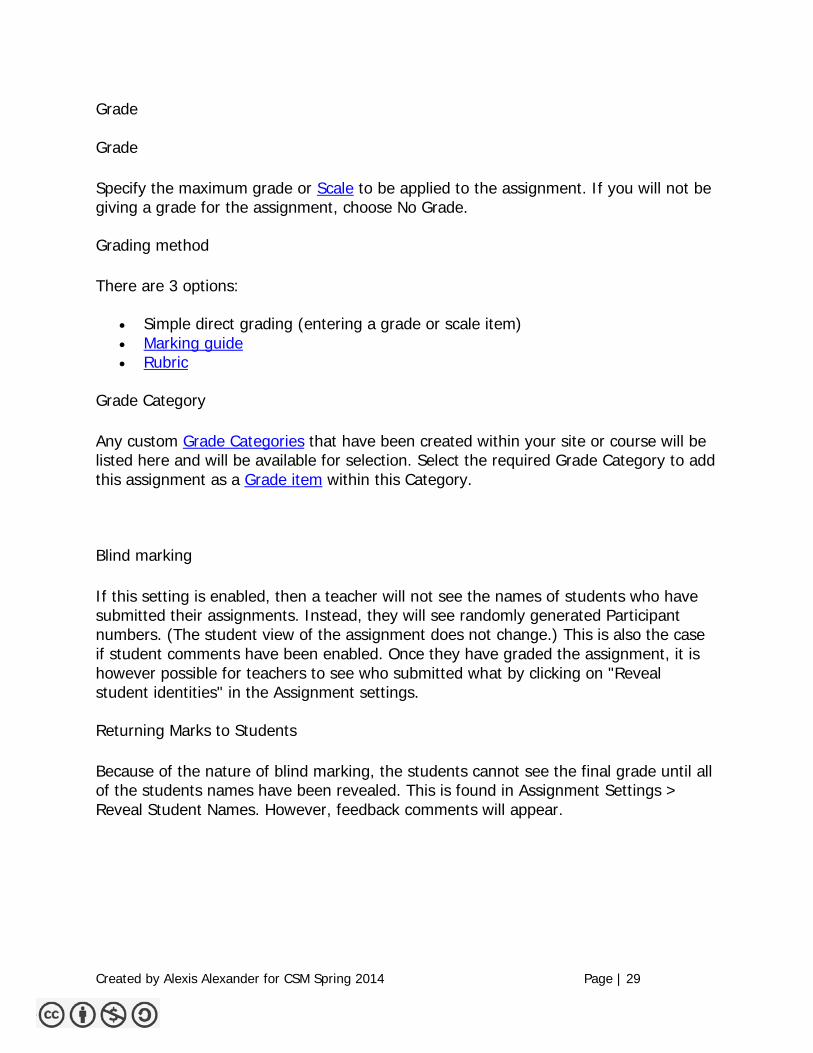
Grade
Grade
Specify the maximum grade or Scale to be applied to the assignment. If you will not be giving a grade for the assignment, choose No Grade.
Grading method
There are 3 options:
• Simple direct grading (entering a grade or scale item) • Marking guide • Rubric
Grade Category
Any custom Grade Categories that have been created within your site or course will be listed here and will be available for selection. Select the required Grade Category to add this assignment as a Grade item within this Category.
Blind marking
If this setting is enabled, then a teacher will not see the names of students who have submitted their assignments. Instead, they will see randomly generated Participant numbers. (The student view of the assignment does not change.) This is also the case if student comments have been enabled. Once they have graded the assignment, it is however possible for teachers to see who submitted what by clicking on "Reveal student identities" in the Assignment settings.
Returning Marks to Students
Because of the nature of blind marking, the students cannot see the final grade until all of the students names have been revealed. This is found in Assignment Settings > Reveal Student Names. However, feedback comments will appear.
Created by Alexis Alexander for CSM Spring 2014 Page | 30
Adding a Book to WebAccess
WebAccess offers a tool called a “book” that allows you to add multiple pages of related content. This is a great way to organize information for students to view.
To add a Book:
Turn editing on in your WebAccess shell and then click on Add an Activity or Resource/Book
Give your book a name and write a brief description of what the book is
for in the Summary Box
Click on Save and Display
Created by Alexis Alexander for CSM Spring 2014 Page | 31
.
When you create and save a page, you will go to this screen. A table of contents appears on the right, you add a new page just by clicking on the red plus sign
You can add live links, text, graphics and any other type of objects to
pages in your book
Pages in the book are called
“Chapters”, so don’t get confused!
Created by Alexis Alexander for CSM Spring 2014 Page | 32
To add a video, use the html button
All videos on YouTube, and on lots of other free video sites, have Embed Code
Created by Alexis Alexander for CSM Spring 2014 Page | 33
Moodle: Course grade weighted by category
In many courses, the teacher may want to assign different elements of performance (such as daily work and tests) to defined percentages in determining a course grade.
Moodle calls this Aggregation method of computing course grades Weighted mean of grades because the course grade is computed by weights that the teacher assigns to categories (or items).
Note:
• Once your gradebook is set up, you can put activities into categories when you create or edit the activity (like an assignment or quiz).
• You can also change item categories from the Categories and items view of the gradebook.
• You can keep an item from being factored into the course grade by not placing it in a weighted category
• Category weights do not have to add to 100. If you have two categories with weights of 1 and 2, the second is given twice as much value in computing the course grade.
1. From the view menu in the gradebook, select "Categories and items". 2. Next to the name of your course change the Aggregation to Weighted mean
of grades.
3. From the same "Categories and items" view, click the button "Add category"
Created by Alexis Alexander for CSM Spring 2014 Page | 34
So for example let’s say homework is going to be 40% of the total grade
Keep Aggregation type as "Simple weighted mean of
grades”
Save changes
Back in this screen I want to
change the weight of
this category to 40.00 and
save changes
Created by Alexis Alexander for CSM Spring 2014 Page | 35
Once the categories are set up you can start adding grade items to each category
So my course is set up as
Weighted mean of grades
In this screen I have added
two categories and given
each a different weight
For example, here I am
adding a grade item called
homework 1 to the Homework
category
And this is how it appears
Created by Alexis Alexander for CSM Spring 2014 Page | 36
Creating a Quiz in WebAccess
After you turn editing on, click on Add an Activity or Resource /Quiz
Give your quiz a name and write a brief introduction, this can also
include directions
about the quiz
All elements are collapsed
Created by Alexis Alexander for CSM Spring 2014 Page | 37
How many times will you allow students to take the
quiz?
What sort of feedback do you want students to see,
and at what point?
This is the screen where you actually begin to create the quiz,
Created by Alexis Alexander for CSM Spring 2014 Page | 38
Questions are organized into categories. Initially each course has only one category called "Default". It is good practice to create more categories to organize your questions. This not only makes it easier to find questions, but makes the use of random questions and matching question easier. You can create a hierarchy of categories because you can create subcategories inside parent categories. To add or edit categories click on the "Categories" tab.
Questions can also be imported, using the question bank tool in the settings menu
If you forget to create categories, you can always go back and
create them and move your questions around
Created by Alexis Alexander for CSM Spring 2014 Page | 39
Here are the various question formats you can import
Here are the types of questions you can create
Created by Alexis Alexander for CSM Spring 2014 Page | 40
Adding a True/False Question
Give your question a name that will allow you to
recognize it if you intend to use it again
Edit the grade if needed
There are many opportunities to
supply feedback in online quizzes
Use the arrows to transfer your
question to the quiz
Created by Alexis Alexander for CSM Spring 2014 Page | 41
Use the preview icon to take a look at how your question will appear and
edit various features
Multiple choice questions can have
more than one answer, but you cannot use “all of the above” if you have choose to shuffle answers
Created by Alexis Alexander for CSM Spring 2014 Page | 42