

- 19 - 115.310 V3.0
GB Instructions Manual
For Gymna treatment and general practice couches models
Classic, Advanced and Luxe.
TABLE OF CONTENTS
1. Introduction ................................................................ 19
2. Use of the manual ........................................................ 19
3. Warranty .................................................................... 19
4. Liability....................................................................... 19
5. Setting up ................................................................... 19
6. Safety precautions ....................................................... 20
7. Height adjustment........................................................ 20
8. Adjustment of the Classic top sections ............................ 20
9. Adjustment of the Advanced and Luxe top sections .......... 21
10. Adjustment of the arm supports..................................... 21
11. Adjustment of the fold-down sections ............................. 21
12. Cleaning and disinfecting .............................................. 22
13. User maintenance ........................................................ 22
14. Malfunctions ................................................................ 22
15. Ending life cycle ........................................................... 22
16. Technical data ............................................................. 23
17. Optional accessories ..................................................... 23
18. Tilting safety precautions .............................................. 24
19. Tilting adjustments....................................................... 24
20. Tilting with battery supply ............................................. 24
21. Tilting optional accessories ............................................ 24
1. Introduction
Thank you for choosing a Gymna treatment and general
practice couch. This product incorporates reliability, ease
of use, safety and durability. The Gymna couches are
exclusively designed in order to hold patients in different
positions and may only be operated by qualified
(para)medical personnel.
In order to use this treatment and general practice couch
correctly and safely, it is important that you read these
instructions carefully before starting to use the couch.
2. Use of the manual
General
Please make sure that this instructions manual is always accessible
to the personnel involved with the use of this equipment.
The manual describes the correct use of different models and types.
Some texts and/or illustrations are therefore not relevant to your
Gymna couch.
Explanation of the symbols
= Safety instructions
= Tips for use
• = Instructions
3. Warranty
The warranty period for your Advanced and Luxe couch is three
years, except for the imitation leather upholstery, which is
guaranteed for one year.
The warranty period for your Classic couch is two years, except for
the imitation leather upholstery, which is guaranteed for one year.
The above-mentioned warranty is not applicable in the following
cases:
a. In the event of improper use of the couch;
b. In the event of non-observance of the precautions of this
instructions manual;
c. If repair and maintenance are carried out by non-qualified
service personnel who are unauthorized by the manufacturer.
4. Liability
The manufacturer cannot be held responsible for any consequences
incurred by the user, the patient or by the couch itself as a result of
e.g.
a. A wrong diagnosis;
b. Incorrect use of the couch or any of its accessories;
c. The wrong interpretation or non-observance of this user
manual;
d. A lack of maintenance of the couch;
e. Or maintenance works of the couch and/or repairs performed
by persons unauthorized to do so by the manufacturer.
After a period of 10 (ten) years after introduction of the couch (or
any of its accessories), the manufacturer can no longer be held
responsible for any flaws in the couch or its accessories and he will
no longer be obliged to supply any spare parts or accessories.
5. Setting up
Lifting up
• While lifting the couch, it should be handled by the metal frame
exclusively.
Moving the couch
• Push the pedal A down completely with your foot.
• The couch is now resting on its castors.
The easiest way to operate the pedal is if you are standing
alongside the couch.
Never leave the couch on its castors; the pedal A must always
remain in the vertical position.
The couch may only be moved around when it is not carrying a
patient.

115.310 V3.0 - 20 - GB
6. Safety precautions
Generalities
The maximum lifting capacity of the couch (150 kg) may not be
exceeded.
Disconnect the plug from the power socket if there is any liquid
on or in the motor housing. Have the couch checked by a qualified
person or by a qualified agency.
Use original Gymna accessories, consumables and spare parts
only.
Electrical adjustments
The following rules apply to electrical adjustable couches:
Observe the mains voltage. Before connecting to the mains,
check whether the required mains voltage and frequency, indicated
on the model identification plate of the couch (refer to chapter 14.
Malfunctions), match those of your local circuit. If this is not the
case: do not connect but contact your local Gymna dealer
immediately.
Arrange the mains power cable in such a way that it can not be
jammed between the moving parts of the couch and so that the risk
of tripping over it is as low as possible.
An electrical adjustable couch may not be used in so-called wet
rooms with high humidity (hydrotherapy).
Switch off electrically adjustable treatment couches when not in
use.
Getting trapped
Do not allow unqualified people, particularly children, near the
treatment couch unless supervised.
Always make sure that, during the treatment and when working
with the couch, nobody, beside yourself (the therapist) and the
patient, comes near the couch in order to prevent the danger of
getting trapped.
When operating the footswitch, be careful not to get caught
between the footswitch itself and the frame as it is being lowered.
You should therefore not place the footswitch under the frame.
Always make sure that the patient keeps his/her hands on the
top sections of the couch or on the arm supports.
Make sure that the patient does not operate the handles by
accidental moves of hands, legs or feet.
In the lowest position of the couch, the arm supports and/or
the head section comes very close to the floor if both are adjusted
to the maximum setting.
Always make sure that neither yourself (the therapist) nor anyone
else can get trapped in between the arm and/or the head support
and the floor.
Danger for toppling over
Patients having a weight above 80 kg may not be seated on the
head support, as this would cause the couch to topple over.
Have the patient seated at
the foot end.
7. Height adjustment
Circuit switch (not for Classic)
• The entire top section moves up or down, when the circuit
switch A is activated.
Footswitch
• Advanced and Luxe models; push the footswitch B to set the
height.
• Classic models; push the supplied footswitch C to set the
height.
Hydraulic height adjustment
• The entire top section moves up when foot pedal E is pushed
downwards repeatedly.
• The top section moves down if foot pedal E is pushed upwards.
8. Adjustment of the Classic top
sections
Generalities
Always use both hands when adjusting the different sections:
one hand to operate the handle and the other to support the
section.
Duo and Duoplus Classic
• Push handle A upwards to set the head section.
- 21 - 115.310 V3.0
Trio Classic
• Push handle B upwards to set the leg section.
Make sure that the patient does not operate
the handles by accidental moves of hands, legs
or feet.
Traction Classic
• Use lever C to release the sliding top section.
Handle vertical: the top section cannot move.
Handle horizontal: the top section is released.
Make sure that the sliding top section is fixed when the patient
steps up or down to or from the couch.
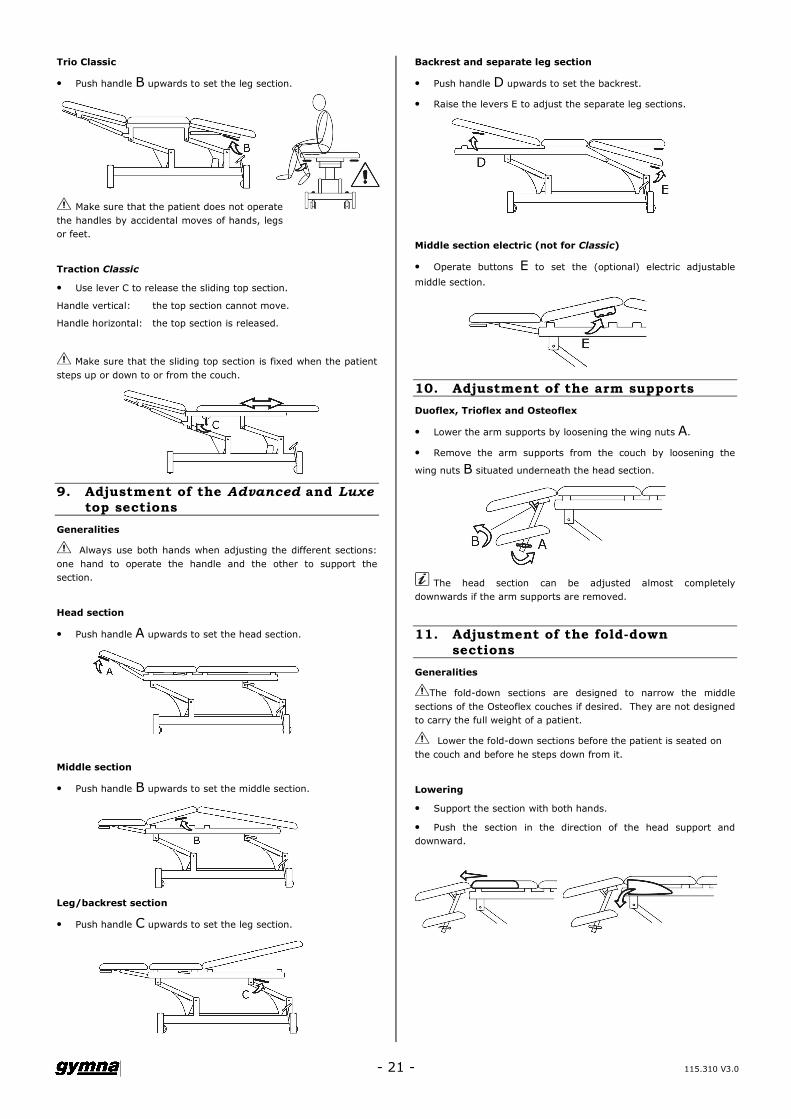
9. Adjustment of the Advanced and Luxe
top sections
Generalities
Always use both hands when adjusting the different sections:
one hand to operate the handle and the other to support the
section.
Head section
• Push handle A upwards to set the head section.
Middle section
• Push handle B upwards to set the middle section.
Leg/backrest section
• Push handle C upwards to set the leg section.
Backrest and separate leg section
• Push handle D upwards to set the backrest.
• Raise the levers E to adjust the separate leg sections.
Middle section electric (not for Classic)
• Operate buttons E to set the (optional) electric adjustable
middle section.
10. Adjustment of the arm supports
Duoflex, Trioflex and Osteoflex
• Lower the arm supports by loosening the wing nuts A.
• Remove the arm supports from the couch by loosening the
wing nuts B situated underneath the head section.
The head section can be adjusted almost completely
downwards if the arm supports are removed.
11. Adjustment of the fold-down
sections
Generalities
The fold-down sections are designed to narrow the middle
sections of the Osteoflex couches if desired. They are not designed
to carry the full weight of a patient.
Lower the fold-down sections before the patient is seated on
the couch and before he steps down from it.
Lowering
• Support the section with both hands.
• Push the section in the direction of the head support and
downward.

115.310 V3.0 - 22 - GB
Raising
• Support the section with both hands.
• Push the section upwards and then backwards.
• Make sure the section is secured in place by pushing on top of
it.
12. Cleaning and disinfecting
Always disconnect the plug from the power socket first before
cleaning.
Cleaning the frame
• The metal parts of the frame can be cleaned using a soft dry
cloth.
• In the case of persistent stains, a damp cloth can be used.
• Always use a PH-neutral soap solution.
Cleaning the upholstery
• Clean using lukewarm water and a microfibre cloth.
• Remove more stubborn marks with a pH-neutral soap.
• NEVER use detergents, solvents (alcohol), strong soap,
bleaching or scouring agents: these can affect the synthetic leather
and reduce the lifespan!
• Do not use leather maintenance products containing oil or
grease.
Baby shampoo is particularly suitable as a cleanser.
Disinfecting the upholstery
• The support surfaces can be disinfected with a wide range of
disinfectants,
e.g. Biguanid-Fläche, Descosept AF, Antifect® AF/FF/FC10,
Buraton® 10F/3025, Lyso® AM/Plus, Hexaquart® plus, Meliseptol®,
Biguamed® Perfekt, Biguacid plus, etc.
13. User maintenance
Generalities
In order to preserve the operating comfort and the correct
functioning of your couch, we strongly recommend an annual
inspection and service to be carried out by qualified personnel.
Consult your local Gymna dealer for this.
You can perform a certain number of simple maintenance activities
yourself in order to extend the life cycle:
Always disconnect the plug from the power socket first before
starting any maintenance activities.
Mains power cable
Regularly check the power cable for damage. A damaged power
cable must be replaced immediately. Consult your local Gymna
dealer.
Hinges
All hinged parts must be lubricated at least every 6 months, or
earlier if function becomes troublesome. As lubricant, penetrating
oil available on the market is to be used (apply sparingly).
Castors mechanism
The castor mechanism must be lubricated at least every 6 months,
or earlier if function becomes troublesome.
• First remove any remaining dirt and grease.
• The new grease must be applied between the tangent planes of
the axes and the varnished frame at the front and rear (refer to the
figure below). To do this, use machinery grease available on the
market (apply sparingly).
Front (not for Classic) Rear
14. Malfunctions
The top sections cannot be adjusted
The supporting gas springs might “stick” if the couch has not been
used for a long time
• In such cases you have to push the appropriate lever with one
hand, than wait a few seconds and pull the top section upwards
with the other hand.
The electric adjustments do not function properly
• Check the power cable for any damage.
• Check all the plugs and connections.
• Check the hand or foot switch together with the wiring for
damage.
Persisting problems
If problems persist, please contact the
dealer.
When doing this, do not forget to
mention the serial and version number
as they appear on the identification
plate (refer to the illustration).
15. Ending life cycle
Generalities
Hand in the couch to an authorized company, specialized the in
processing of waste and recycling of mechanical components. In
countries where a “taking back” regulation is in force, your local
Gymna dealer will be obliged to help you to do this.
Material information
In the event you prefer to destroy the couch yourself or take the
responsibility for this, please observe the procedures given below
concerning the components used.
• The frames are manufactured in painted or chromium-plated
steel.
• The cushions are manufactured in chipboard, PE-foam and a
PUR- or PVC upholstery. The foam and the upholstery are to be
considered as “small chemical waste”.
- 23 - 115.310 V3.0
• Actuator(s), gas springs and the hydraulic pumps are to be
considered as if they were “kitchen and electrical household
appliances“.
• Packaging and the instruction manual can be recycled.
• Defective storage batteries (Tilting) must be recycled. Do not
dispose of used batteries with household waste or throw into fire or
water. Do not open batteries and dispose of it through the
available collection points.
IMPORTANT
In any event: please consult the local rules and regulations.
16. Technical data
General
Max. lifting capacity : 150 kg
Mains power supply : 220-240 V∼, 50/60 Hz
110-130 V∼, 50/60 Hz
100 V∼, 50/60 Hz
Insulation class : II
Humidity proof : IP54 (splashing waterproof)
Class or Classification : I
These products meet the essential require-ments of
the Medical Device Directive of the European
Commission (93/42/EEC).
Classic models
Dimensions : 197 x 67 cm
Height adjustment : ± 47 – 100 cm
Power consumption : 1.0 A, 253 W
Advanced and Luxe models
Dimensions : 200 x 67 cm
Height adjustment : ± 45 – 95 cm
± 62 – 110 cm (Tilting)
Power consumption : 1.5 A, 380 W
0.8 A, 203 W (Tilting)
17. Optional accessories
Paper holder
The special dispenser must be attached at the rear end of the
undercarriage. There is also a special model that can be attached
to the back section of the Duo and Duoplan Advanced and Luxe.
Follow the instructions supplied.
Set gynaecological leg supports
They have to be mounted at the rear end of the couch (not possible
on Tilting and Bobath models). Follow the instructions supplied.
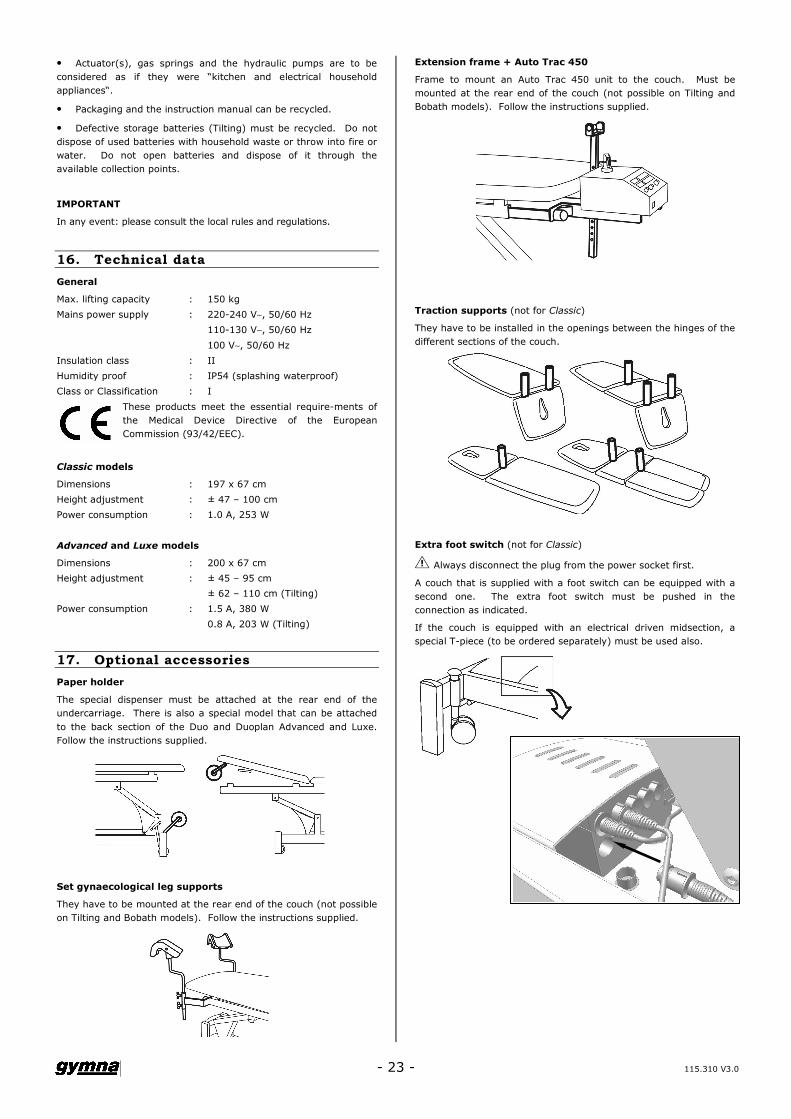
Extension frame + Auto Trac 450
Frame to mount an Auto Trac 450 unit to the couch. Must be
mounted at the rear end of the couch (not possible on Tilting and
Bobath models). Follow the instructions supplied.
Traction supports (not for Classic)
They have to be installed in the openings between the hinges of the
different sections of the couch.
Extra foot switch (not for Classic)
Always disconnect the plug from the power socket first.
A couch that is supplied with a foot switch can be equipped with a
second one. The extra foot switch must be pushed in the
connection as indicated.
If the couch is equipped with an electrical driven midsection, a
special T-piece (to be ordered separately) must be used also.
115.310 V3.0 - 24 - GB
18. Tilting safety precautions
Generalities
The Tilting may be moved around while the patient is
positioned on the couch, provided that the patient is strapped-in
carefully.
The Tilting may not be placed in a vertical position if the foot
supports are in the downward position. Erect them in order to
avoid contact with the metal frame.
Use original Gymna accessories, consumables and spare parts
only.
Measures to be taken before tilting
• Lock the four castors.
• Erect the foot supports.
• Strap the patient with the aid of the special strapping belts.
• Place the height adjustment in its lowest position.
Commence tilting.
Measures to be taken during tilting
• Constantly check the security of the strapping.
• Never adjust the foot supports during tilting.
• The foot supports can almost reach the floor. Take care that
your own feet do not get trapped between the feet supports and
floor.
19. Tilting adjustments
Height
• Push the button on the hand switch to set
the desired height.
Tilting
• Push the button on the hand switch to set
the desired tilting position.
The tilting position can be read off the protractor under the
head section.
Foot support
• Pull the pin on the lateral side in order to unlock the foot
supports.
• Set the foot supports in the desired position.
• Release the pin in order to relock the support.
20. Tilting with battery supply
Capacity
Depending on the model, the Tilting treatment couch can be
equipped with a battery supply. This will allow you to make the
necessary adjustments without the mains power supply. If the
battery is fully charged, you will be able to perform approximately
five complete adjustments.
Charging
A beeping signal will inform you that it is time to charge the
battery. Lowering the couch at that moment will remain possible.
Do not allow the battery to become fully discharged.
The battery will be charged automatically from the moment the
plug has been connected to the mains socket. The complete
charging procedure takes about 8 hours.
Life cycle
A substantial drop in operating period per charge indicates that the
battery must be replaced.
When exchanging batteries, it is important to use the original
Gymna batteries only. Contact your local dealer.
Disposal: see chapter 15 ‘Ending life cycle’.
21. Tilting optional accessories
Working table and arm supports
They have to be installed into the metal T-pieces at the lateral side
of the Tilting.
• First place the T-pieces at the same level before proceeding to
the installation of the working table.
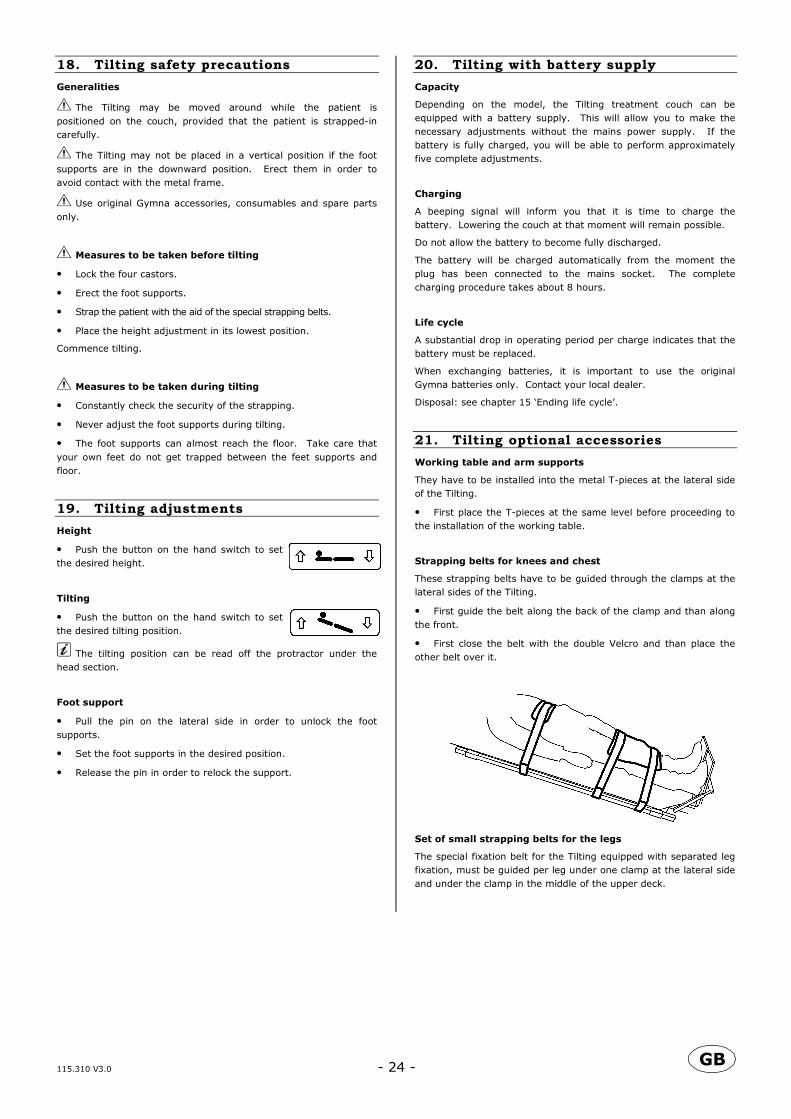
Strapping belts for knees and chest
These strapping belts have to be guided through the clamps at the
lateral sides of the Tilting.
• First guide the belt along the back of the clamp and than along
the front.
• First close the belt with the double Velcro and than place the
other belt over it.
Set of small strapping belts for the legs
The special fixation belt for the Tilting equipped with separated leg
fixation, must be guided per leg under one clamp at the lateral side
and under the clamp in the middle of the upper deck.


