nView Multiple Display Support Windows 98 nVIDIA's nView offers the same essential features that were found with nView. nView’s multiple display features for Microsoft Windows® 98 features the following: • Standard (nView disabled) • Clone nVIDIA's multiple display support technology offers the ability to connect two display devices to one physical graphics card. This feature can be useful for a variety of reasons including the following: Added work space for your desktop occupying two monitors. This feature is great for users of multiple window programs in desperate need of extra desktop real estate. Ideal for: • Engineering or mechanical CAD applications • Graphic design • Financial applications such as Stock Trading • Digital video editing • Entertainment Classroom environment: one computer display can be situated in front of the teacher while the other display is projected to the rest of the students in the class. Presentations: ideal for both the speaker who can use visual aid from his laptop and still project his presentation to the audience simultaneously. Before you Begin: 1. The monitors we are referring to is a generic term for an output display device such as an analog computer monitor, digital LCD or Flat Panel, television or projector. Please consult the output device manufacture for further details on compatibility. 2. Both monitors that will be plugged into the multi-dispalay card must meet DDC compliancy. For further details about this compliancy, please contact the monitor manufacture. 3. Make sure the two monitors are turned on before powering on or rebooting the Windows OS so that it can be detected as a new device. 4. Both monitors must be plugged directly into the graphics card by way of either the DB15 (VGA), S-Video, RCA or DVI connector. There can be no intermediary devices such as a switch box or VCR during the initial installation process. Note: the NVIDIA reference driver used in this nView guide is version 27.30
Transcript
nView Multiple Display Support
Windows 98
nVIDIA's nView offers the same essential features that were found with nView. nView’s multiple display features for Microsoft Windows® 98 features the following:
• Standard (nView disabled) • Clone
nVIDIA's multiple display support technology offers the ability to connect two display devices to one physical graphics card. This feature can be useful for a variety of reasons including the following:
Added work space for your desktop occupying two monitors. This feature is great for users of multiple window programs in desperate need of extra desktop real estate. Ideal for:
• Engineering or mechanical CAD applications • Graphic design • Financial applications such as Stock Trading • Digital video editing • Entertainment
Classroom environment: one computer display can be situated in front of the teacher while the other display is projected to the rest of the students in the class.
Presentations: ideal for both the speaker who can use visual aid from his laptop and still project his presentation to the audience simultaneously.
Before you Begin:
1. The monitors we are referring to is a generic term for an output display device such as an analog computer monitor, digital LCD or Flat Panel, television or projector. Please consult the output device manufacture for further details on compatibility.
2. Both monitors that will be plugged into the multi-dispalay card must meet DDC compliancy. For further details about this compliancy, please contact the monitor manufacture.
3. Make sure the two monitors are turned on before powering on or rebooting the Windows OS so that it can be detected as a new device.
4. Both monitors must be plugged directly into the graphics card by way of either the DB15 (VGA), S-Video, RCA or DVI connector. There can be no intermediary devices such as a switch box or VCR during the initial installationprocess.
Note: the NVIDIA reference driver used in this nView guide is version 27.30
Enabling Extended Desktop
By default, after the display drivers have been installed and rebooted, the OS will detect one monitor. Power down the computer. Depending on the model of the video card, connect the second monitor to the secondary connector on the card. You may need to use the DVI to DB15 adapter that comes with the video card in order to attach properly. Power on both monitors followed by the computer. The secondary monitor will be detected by Windows as another device. Follow through with the onscreen instructions or install using the drivers from the monitor manufacture.
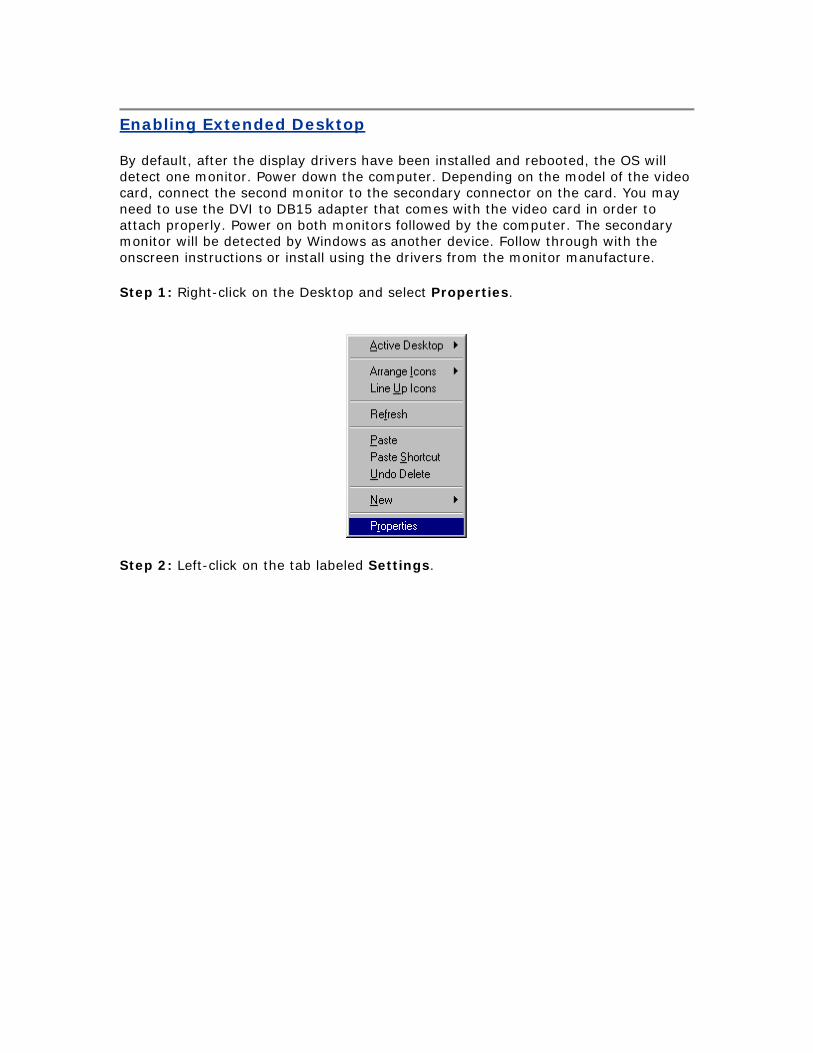
Step 1: Right-click on the Desktop and select Properties.
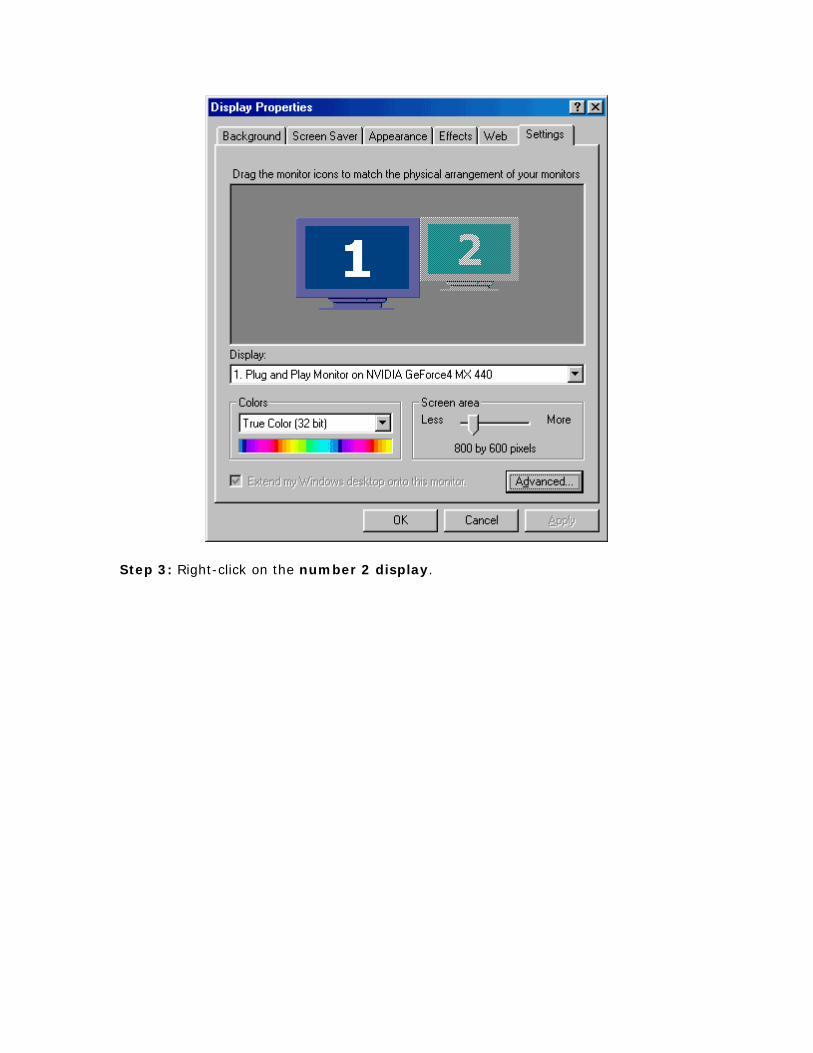
Step 2: Left-click on the tab labeled Settings.
Step 3: Right-click on the number 2 display.
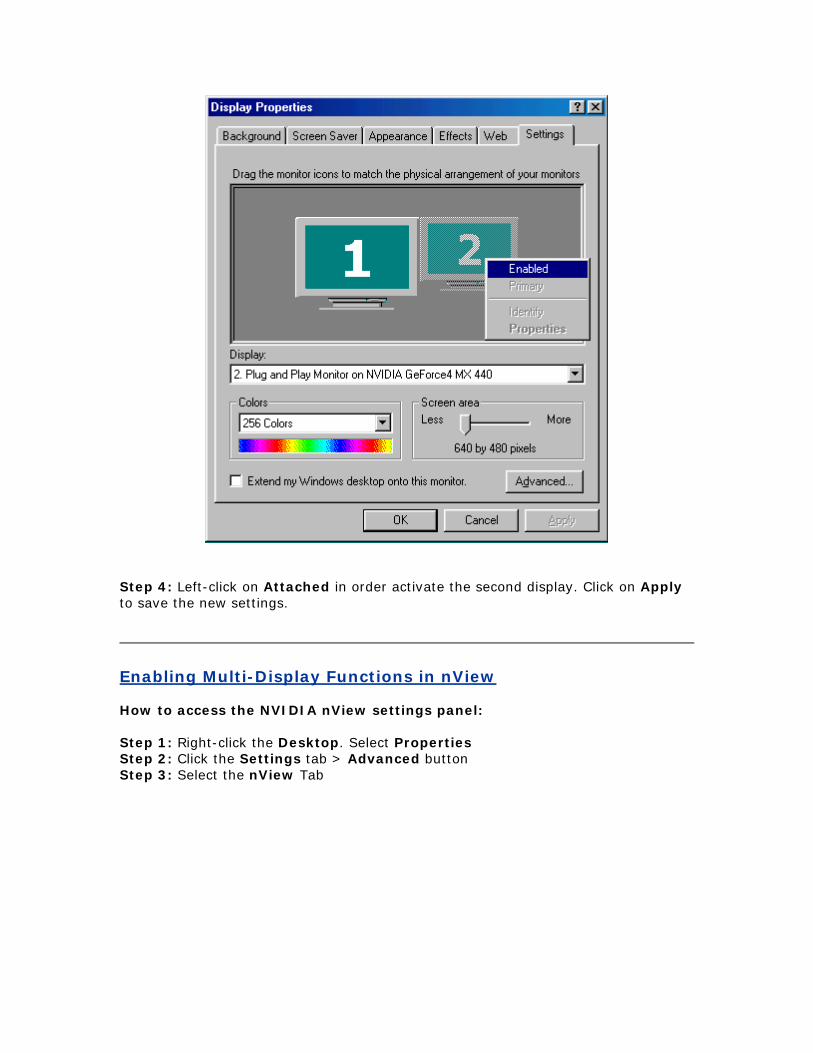
Step 4: Left-click on Attached in order activate the second display. Click on Apply to save the new settings.
Enabling Multi-Display Functions in nView How to access the NVIDIA nView settings panel: Step 1: Right-click the Desktop. Select Properties Step 2: Click the Settings tab > Advanced button Step 3: Select the nView Tab
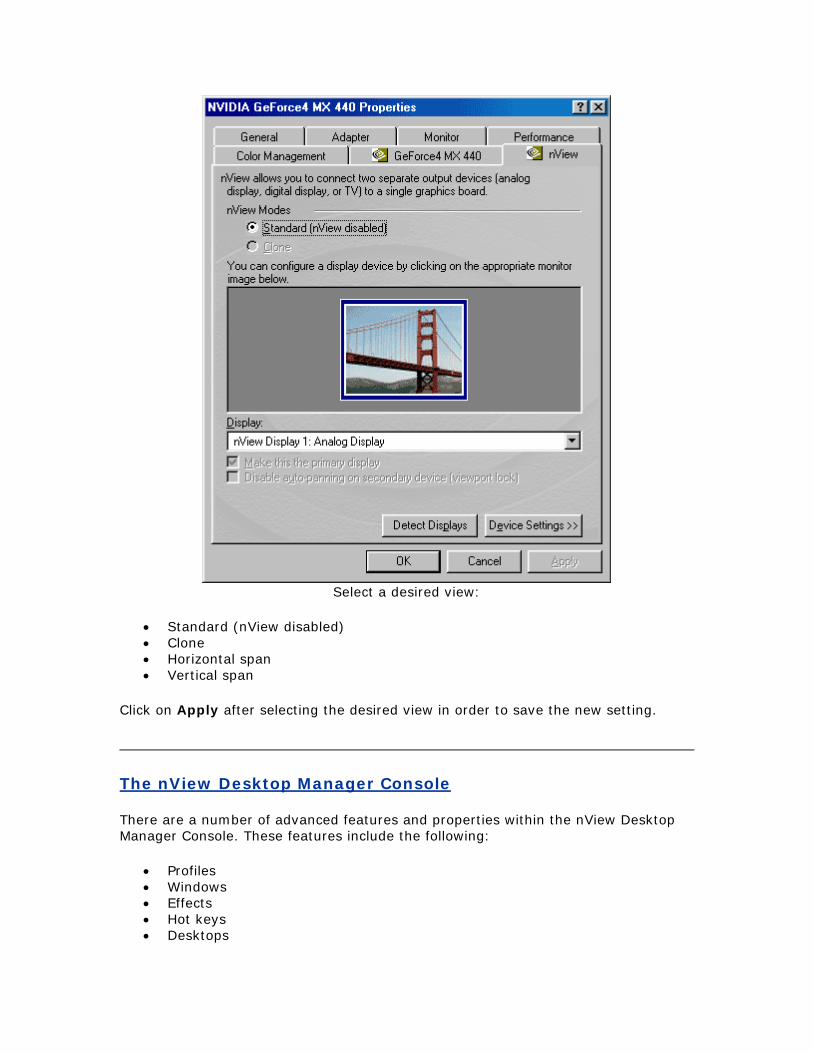
Click on Apply after selecting the desired view in order to save the new setting.
The nView Desktop Manager Console
There are a number of advanced features and properties within the nView Desktop Manager Console. These features include the following:
• Profiles • Windows • Effects • Hot keys • Desktops
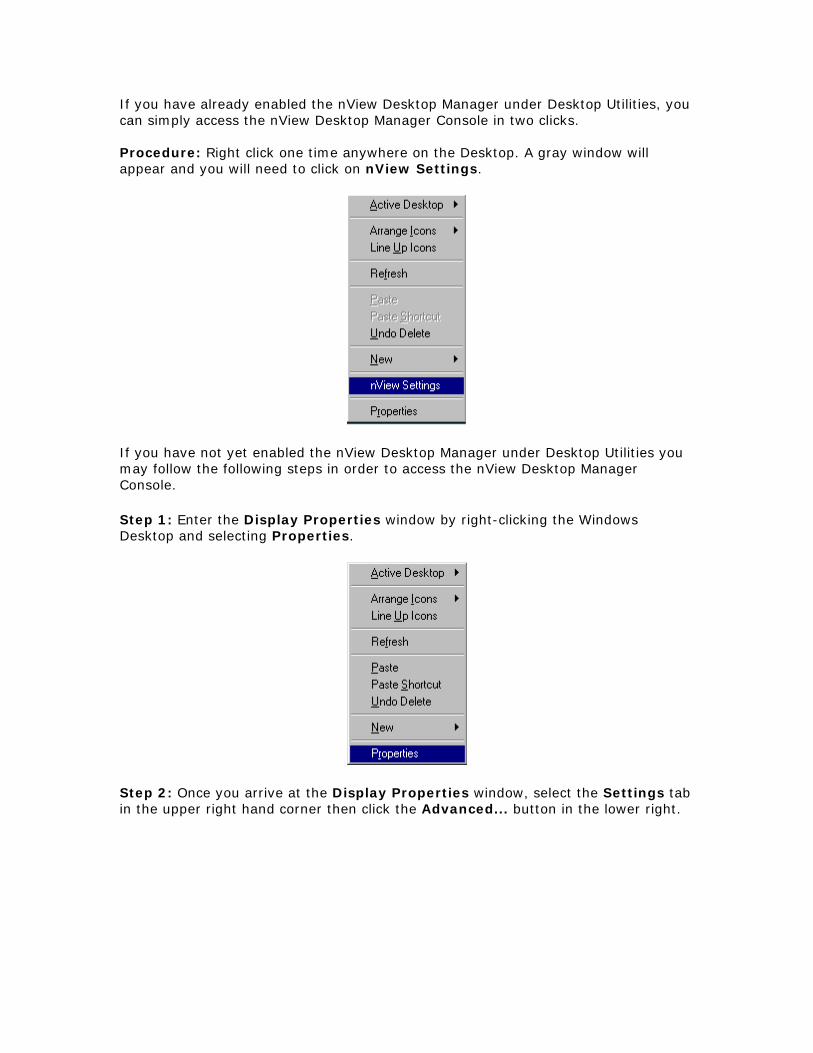
If you have already enabled the nView Desktop Manager under Desktop Utilities, you can simply access the nView Desktop Manager Console in two clicks. Procedure: Right click one time anywhere on the Desktop. A gray window will appear and you will need to click on nView Settings.
If you have not yet enabled the nView Desktop Manager under Desktop Utilities you may follow the following steps in order to access the nView Desktop Manager Console.
Step 1: Enter the Display Properties window by right-clicking the Windows Desktop and selecting Properties.
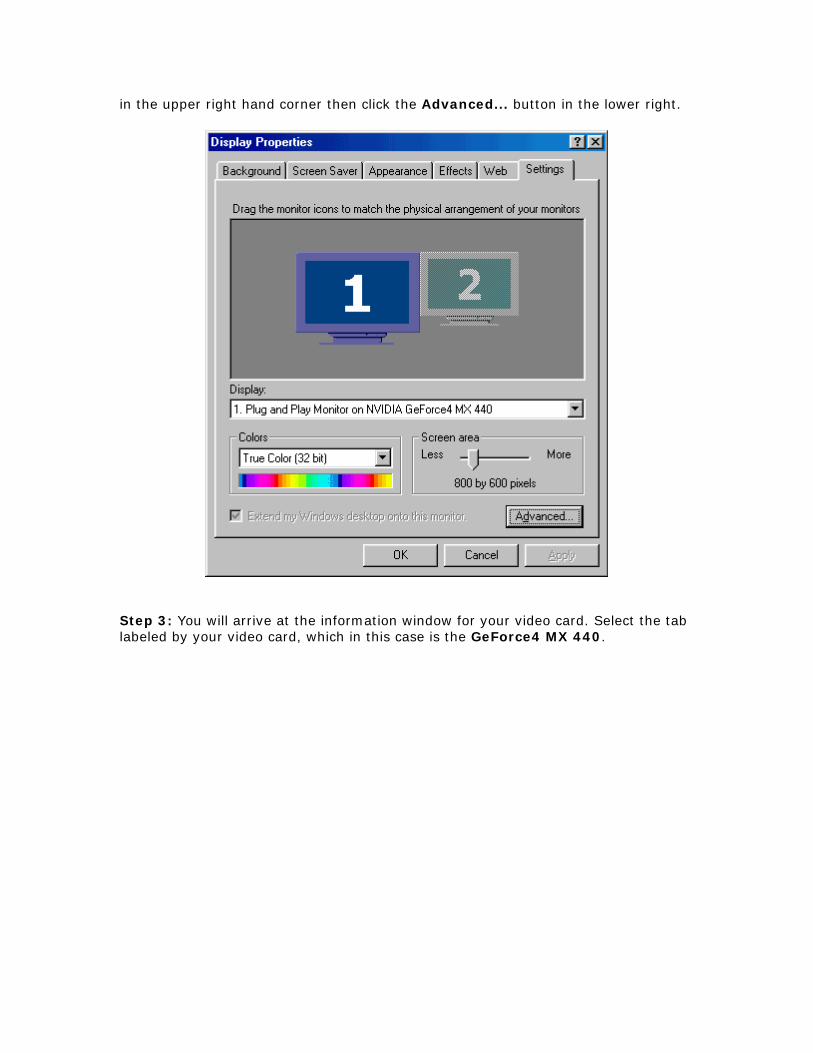
Step 2: Once you arrive at the Display Properties window, select the Settings tab in the upper right hand corner then click the Advanced... button in the lower right.
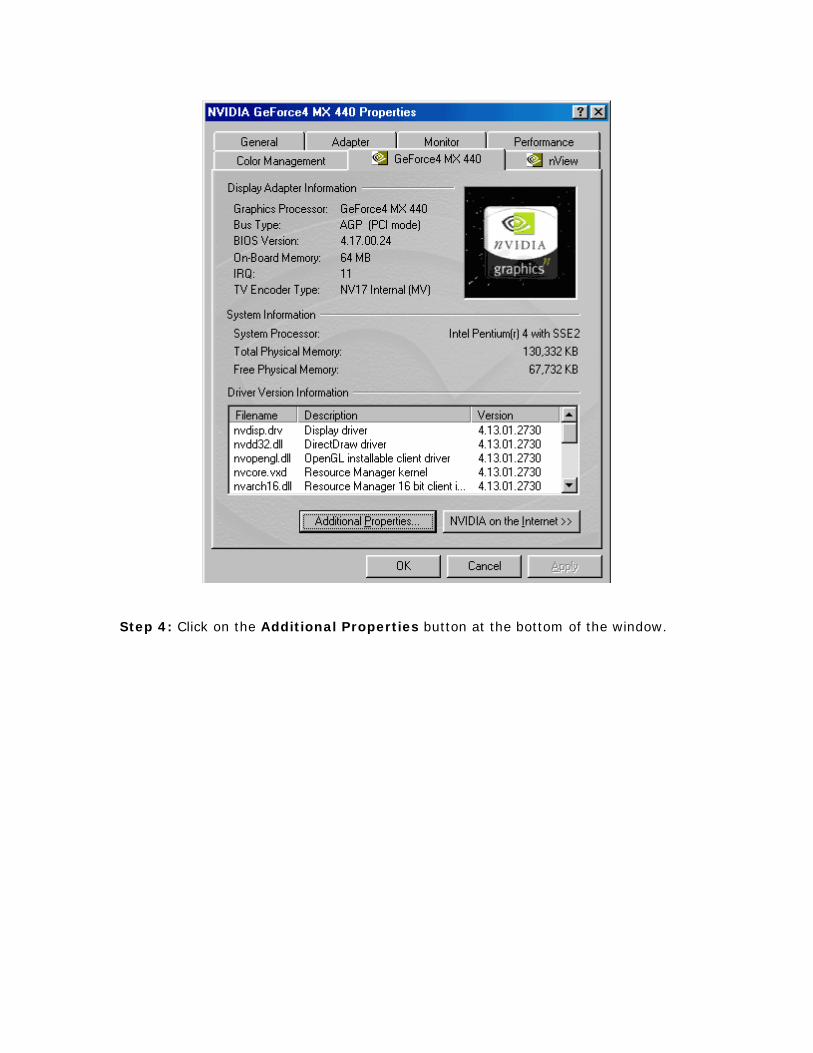
Step 3: You will arrive at the information window for your video card. Select the tab labeled by your video card, which in this case is the GeForce4 MX 440.
Step 4: Click on the Additional Properties button at the bottom of the window.
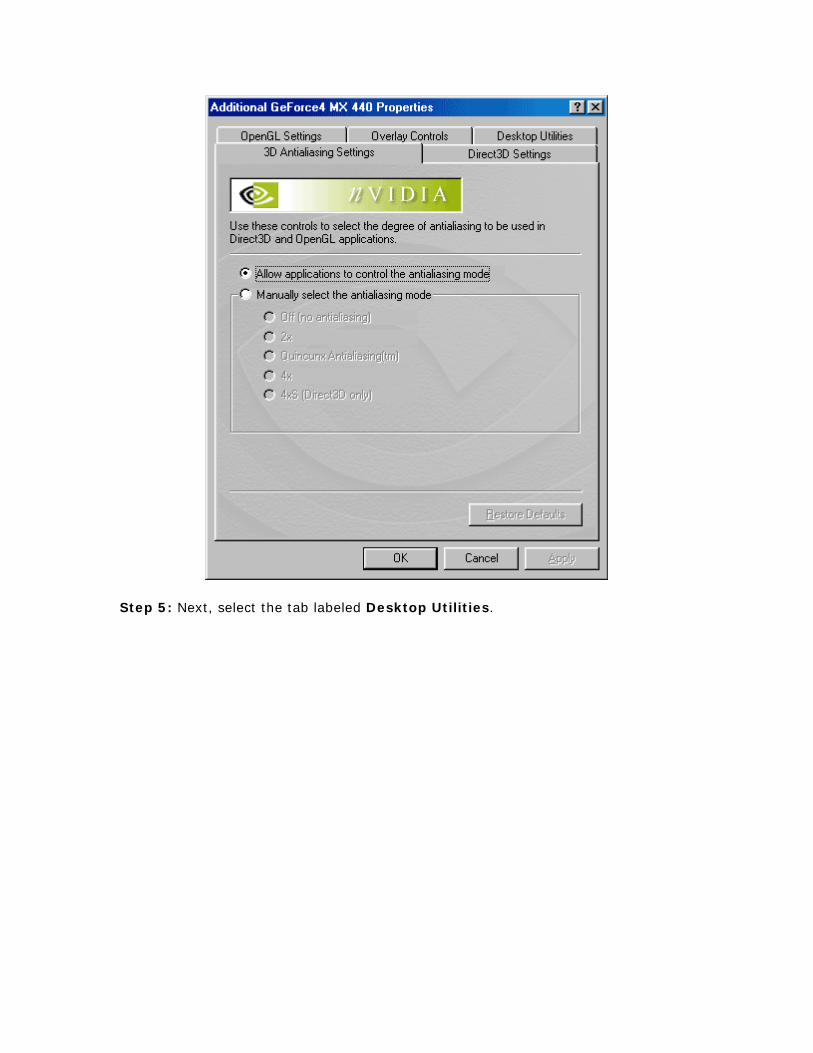
Step 5: Next, select the tab labeled Desktop Utilities.
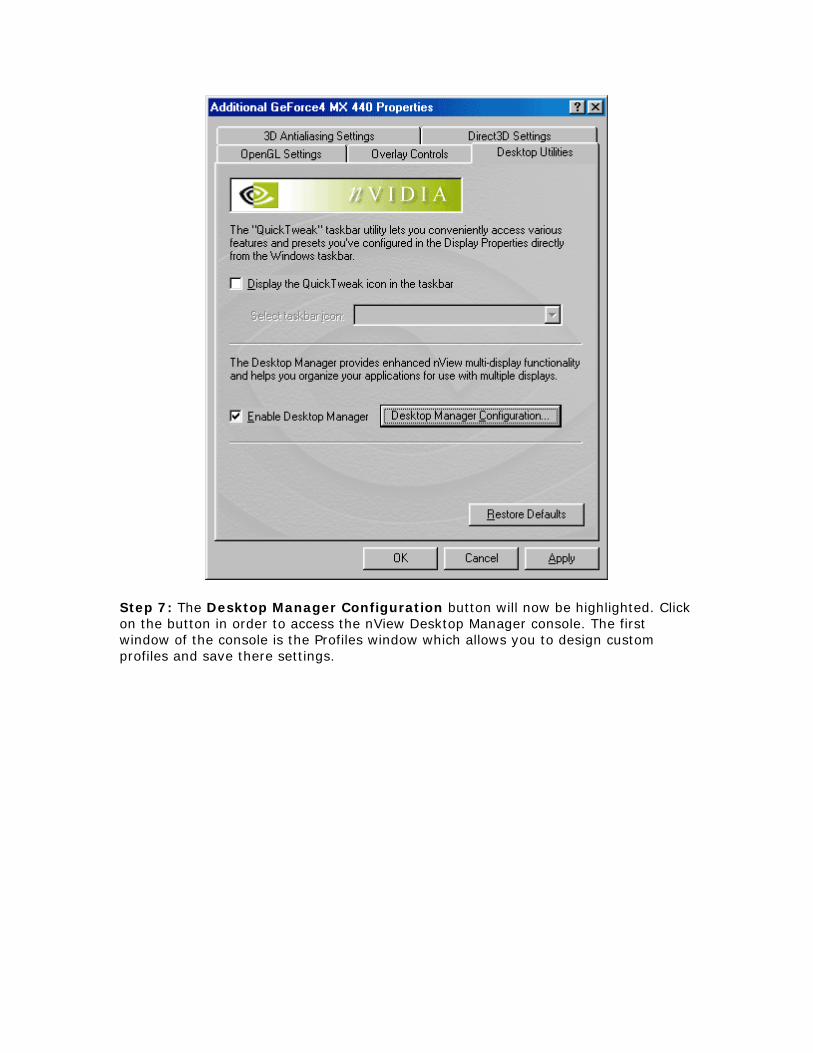
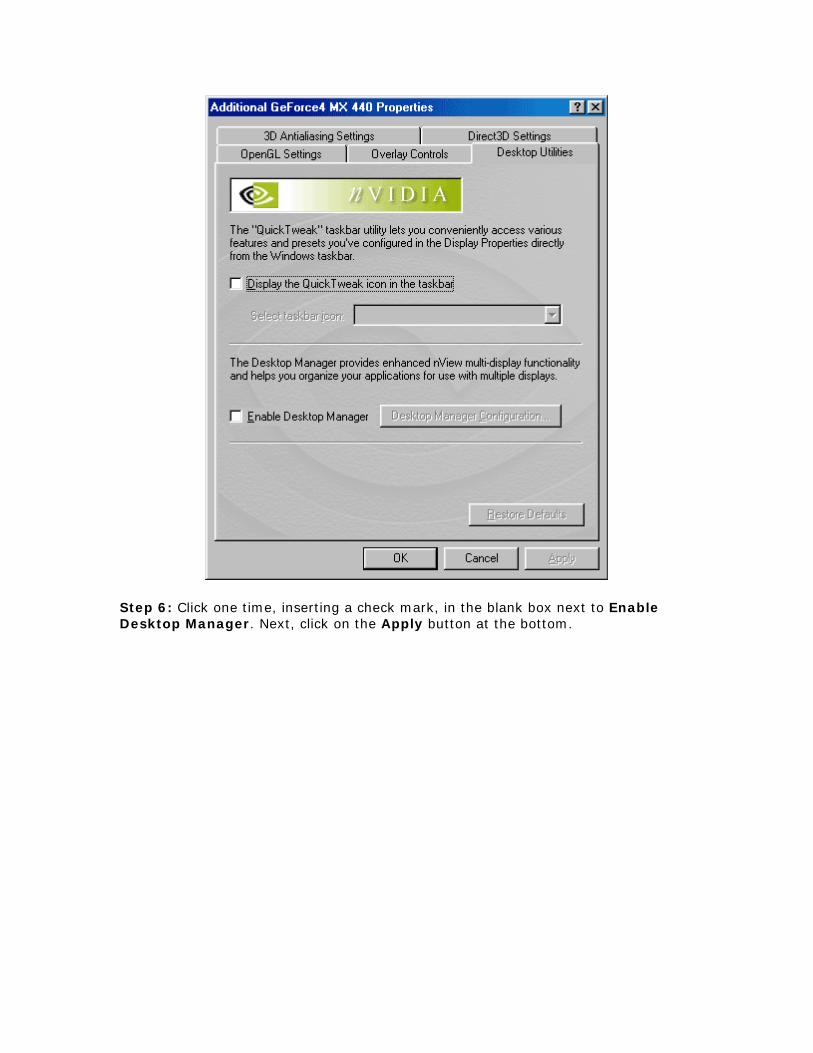
Step 6: Click one time, inserting a check mark, in the blank box next to Enable Desktop Manager. Next, click on the Apply button at the bottom.
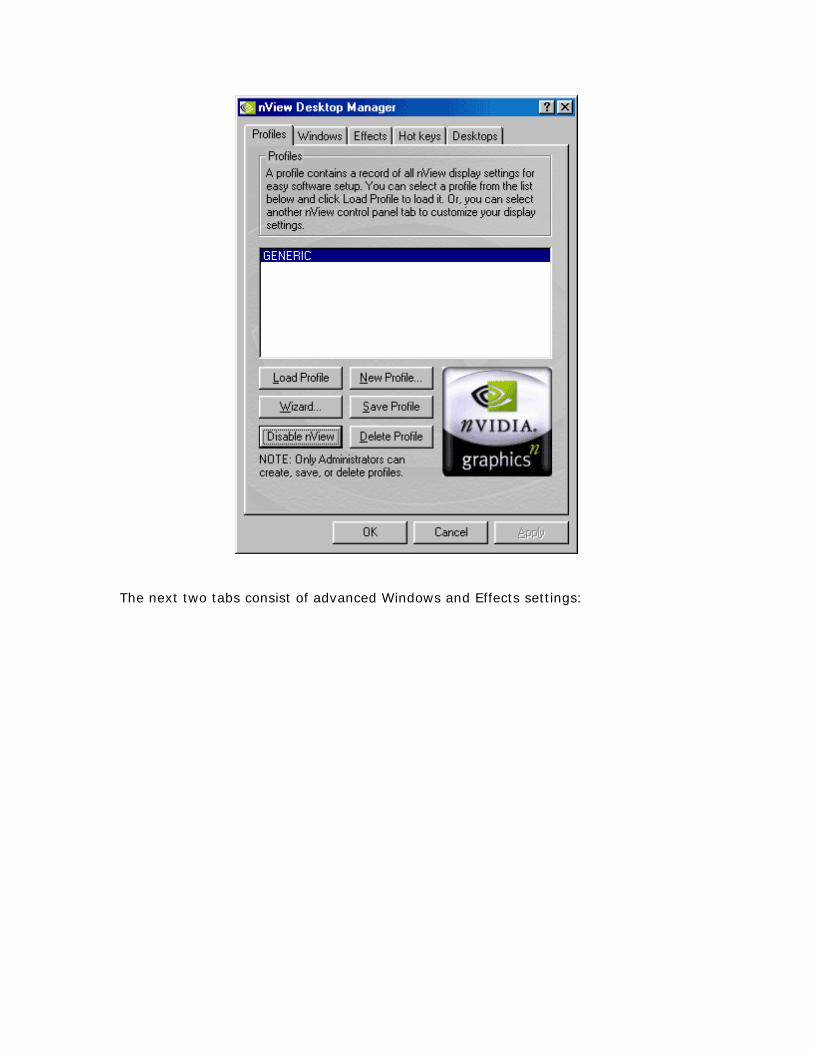
Step 7: The Desktop Manager Configuration button will now be highlighted. Click on the button in order to access the nView Desktop Manager console. The first window of the console is the Profiles window which allows you to design custom profiles and save there settings.
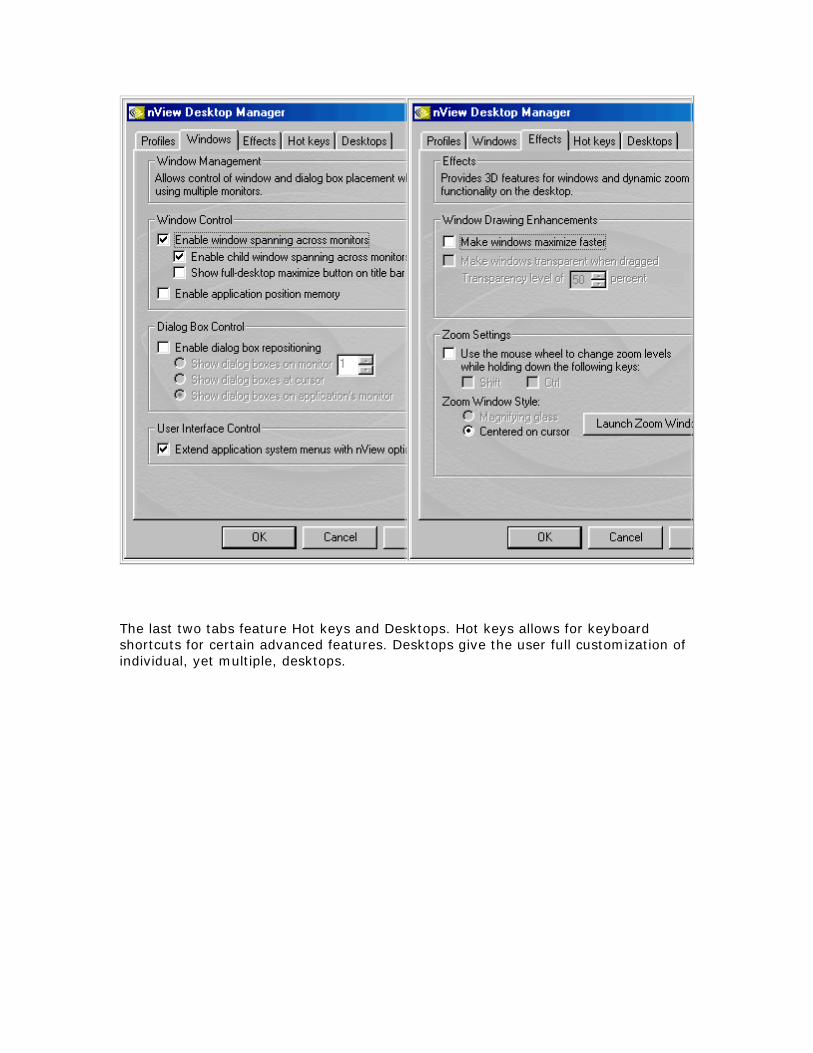
The next two tabs consist of advanced Windows and Effects settings:
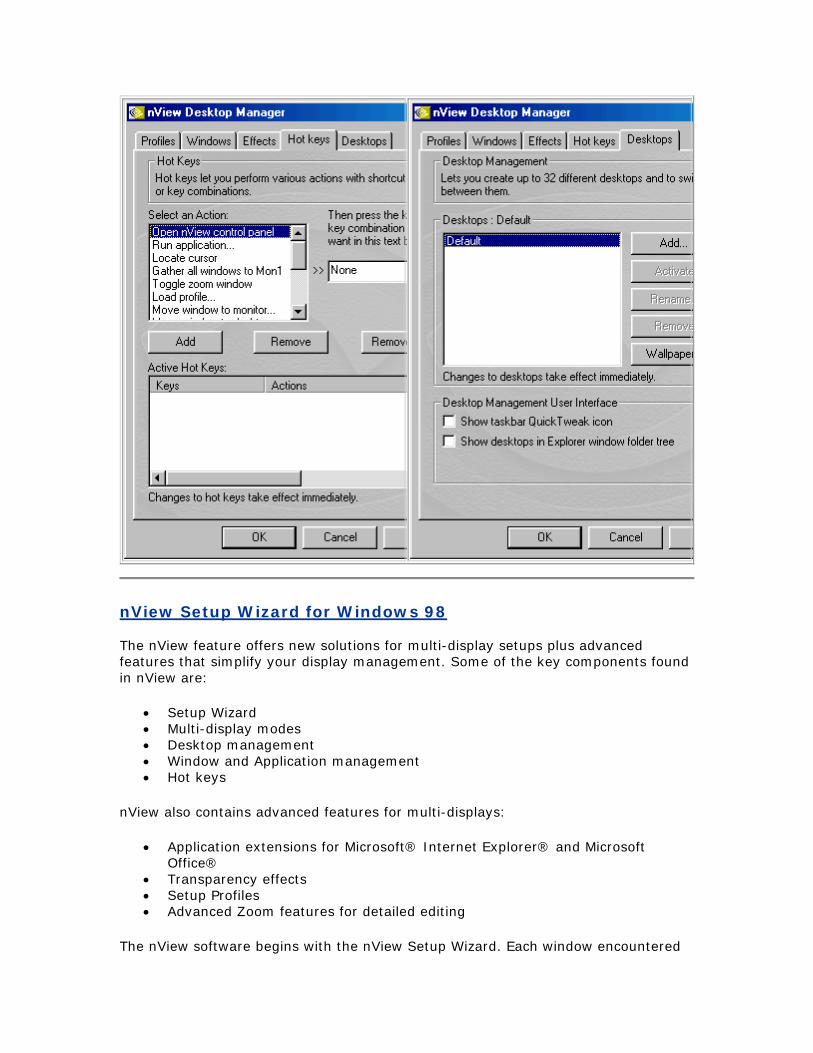
The last two tabs feature Hot keys and Desktops. Hot keys allows for keyboard shortcuts for certain advanced features. Desktops give the user full customization of individual, yet multiple, desktops.
nView Setup Wizard for Windows 98 The nView feature offers new solutions for multi-display setups plus advanced features that simplify your display management. Some of the key components found in nView are:
• Setup Wizard • Multi-display modes • Desktop management • Window and Application management • Hot keys
nView also contains advanced features for multi-displays:
• Application extensions for Microsoft® Internet Explorer® and Microsoft Office®
• Transparency effects • Setup Profiles • Advanced Zoom features for detailed editing
The nView software begins with the nView Setup Wizard. Each window encountered
during the setup procedure is full of information and sometimes options. Be sure to read all the instructions carefully in order to insure the best possible configurations for your needs.
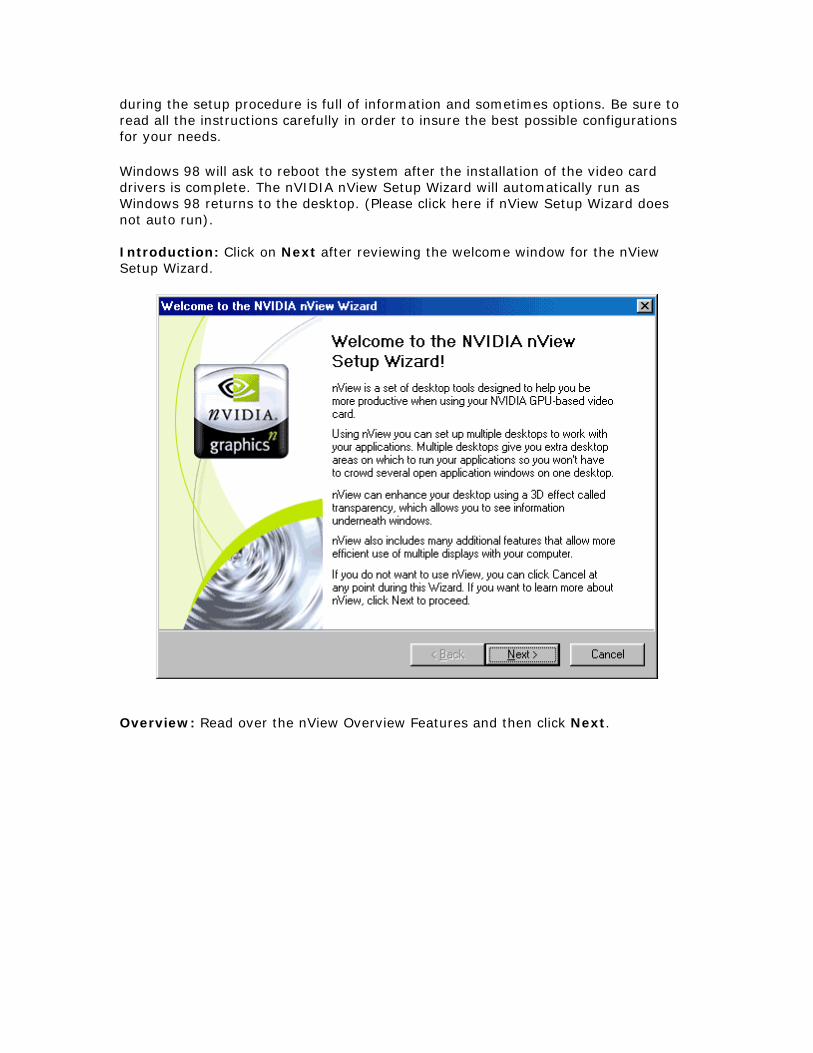
Windows 98 will ask to reboot the system after the installation of the video card drivers is complete. The nVIDIA nView Setup Wizard will automatically run as Windows 98 returns to the desktop. (Please click here if nView Setup Wizard does not auto run). Introduction: Click on Next after reviewing the welcome window for the nView Setup Wizard.
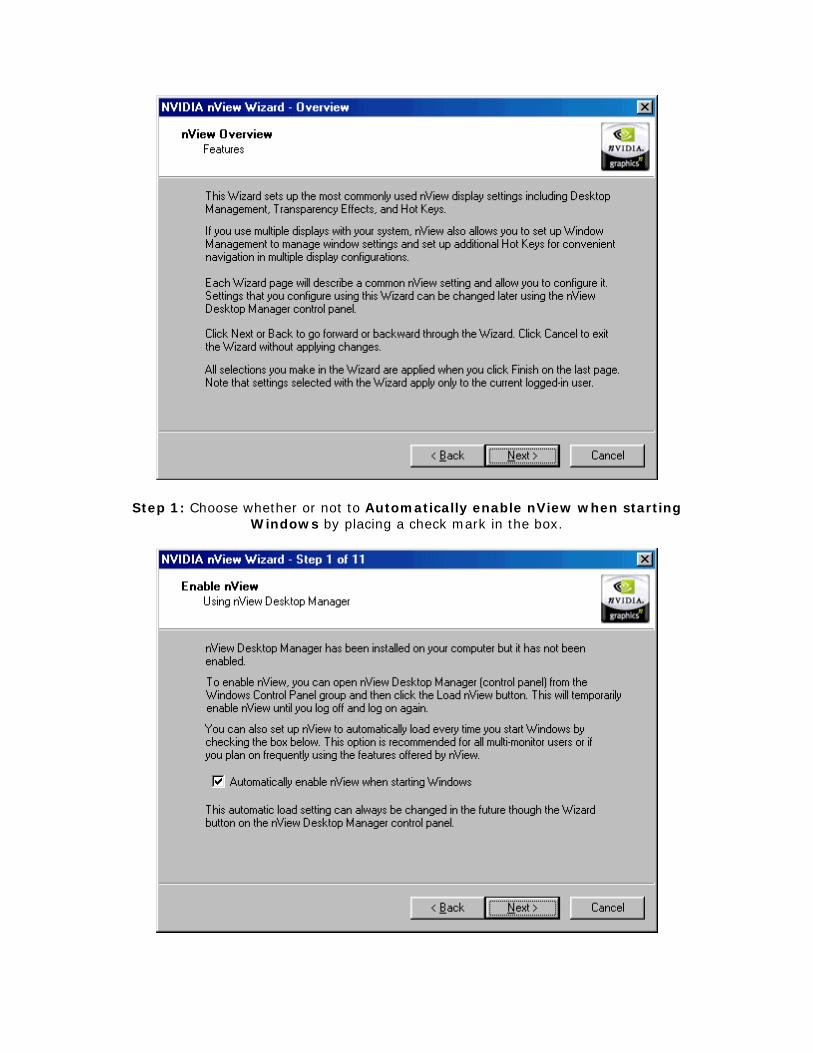
Overview: Read over the nView Overview Features and then click Next.
Step 1: Choose whether or not to Automatically enable nView when starting Windows by placing a check mark in the box.
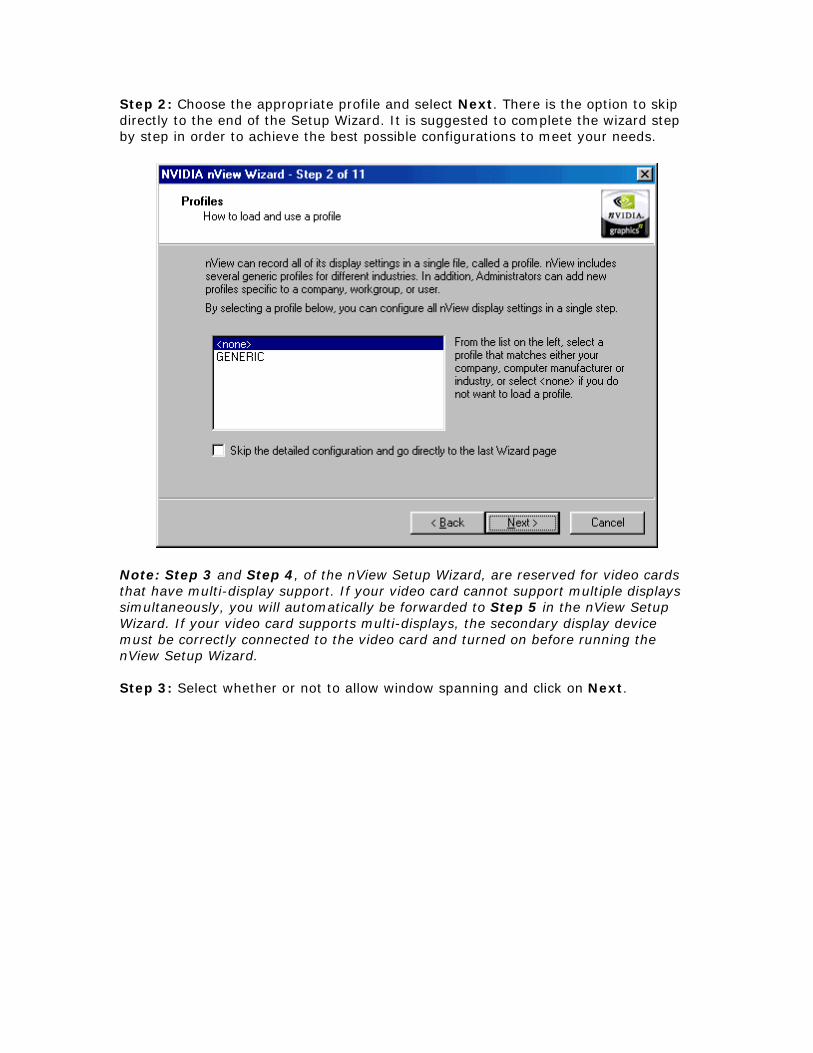
Step 2: Choose the appropriate profile and select Next. There is the option to skip directly to the end of the Setup Wizard. It is suggested to complete the wizard step by step in order to achieve the best possible configurations to meet your needs.
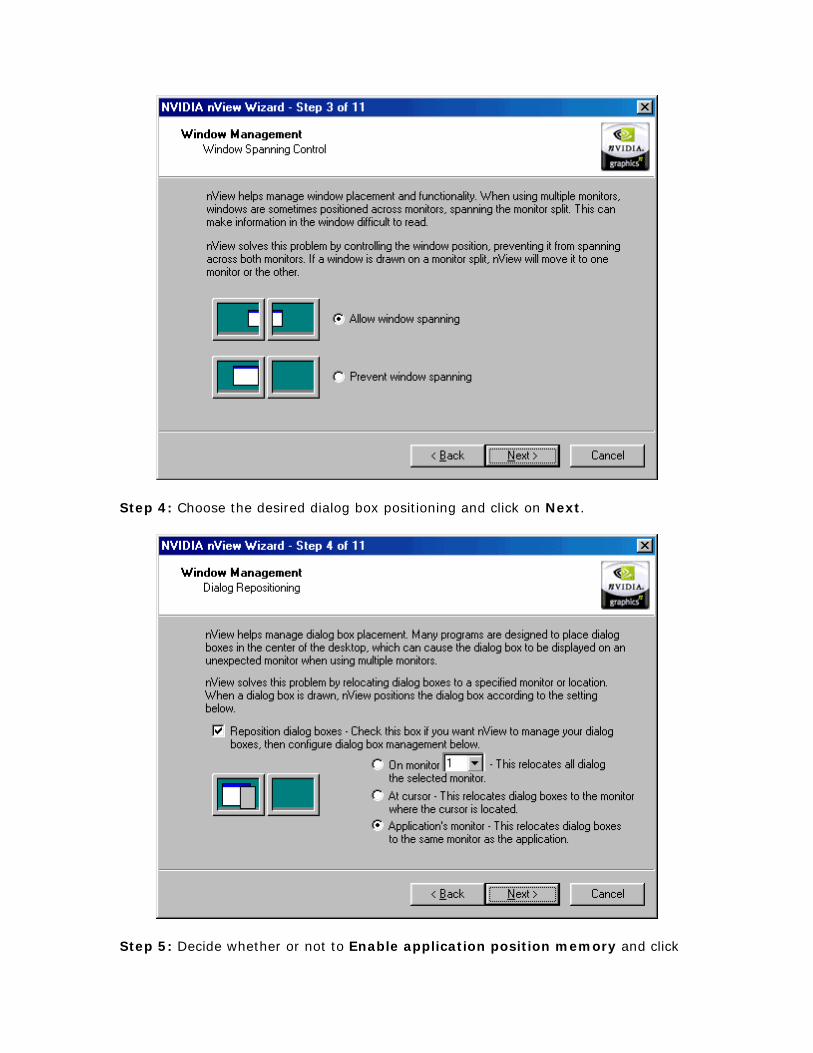
Note: Step 3 and Step 4, of the nView Setup Wizard, are reserved for video cards that have multi-display support. If your video card cannot support multiple displays simultaneously, you will automatically be forwarded to Step 5 in the nView Setup Wizard. If your video card supports multi-displays, the secondary display device must be correctly connected to the video card and turned on before running the nView Setup Wizard. Step 3: Select whether or not to allow window spanning and click on Next.
Step 4: Choose the desired dialog box positioning and click on Next.
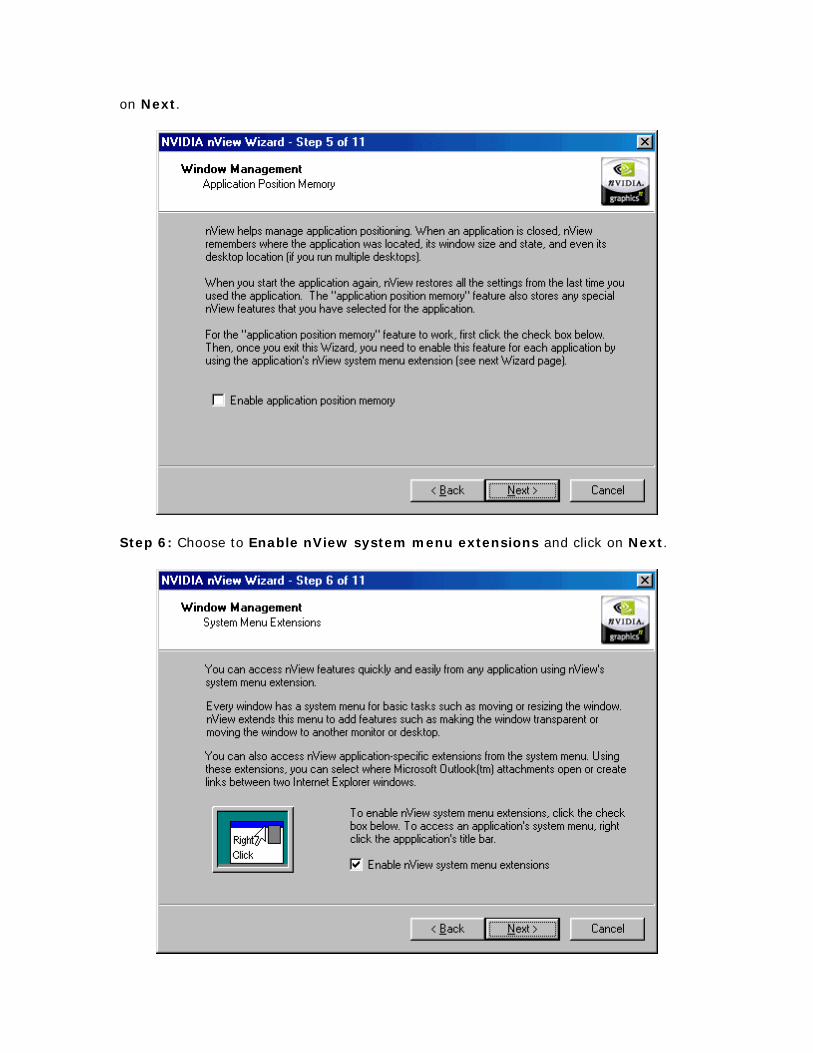
Step 5: Decide whether or not to Enable application position memory and click
on Next.
Step 6: Choose to Enable nView system menu extensions and click on Next.
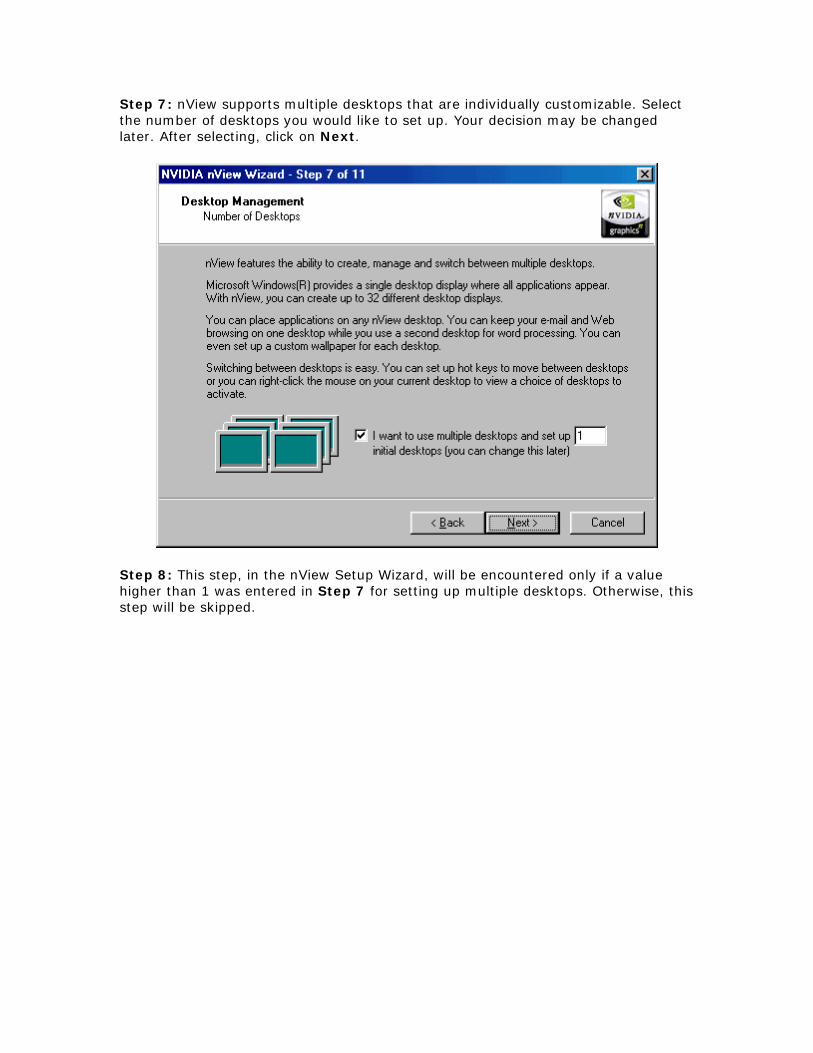
Step 7: nView supports multiple desktops that are individually customizable. Select the number of desktops you would like to set up. Your decision may be changed later. After selecting, click on Next.
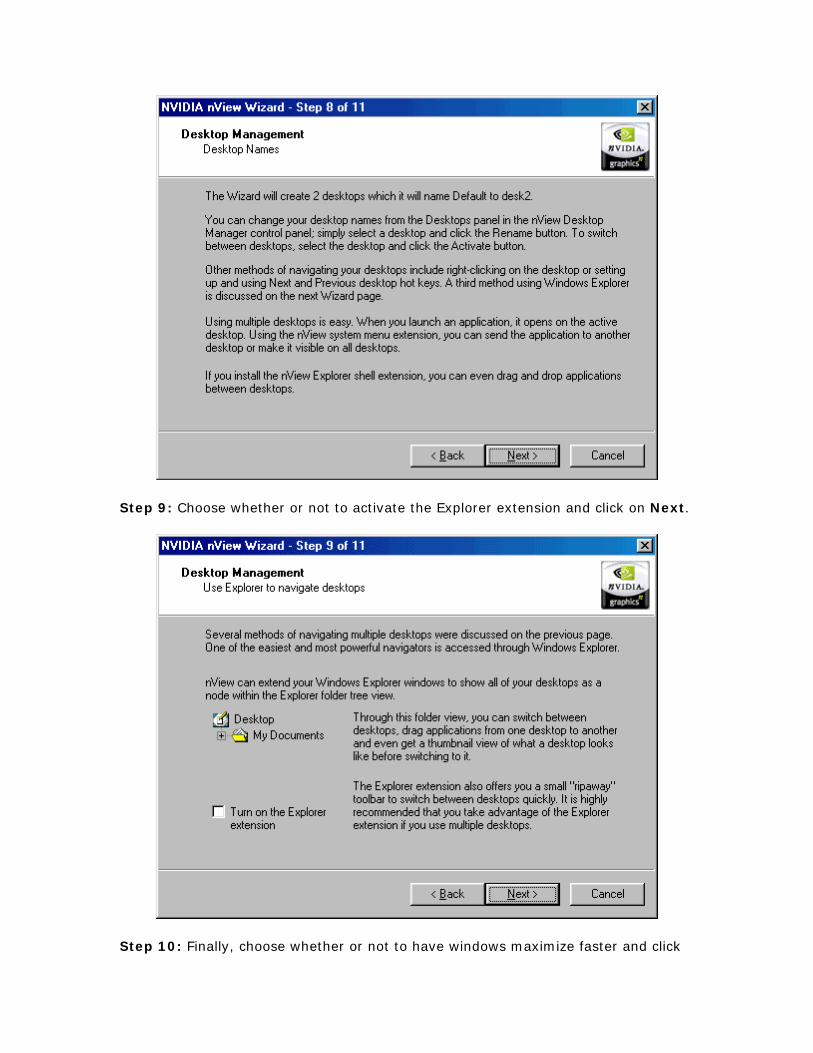
Step 8: This step, in the nView Setup Wizard, will be encountered only if a value higher than 1 was entered in Step 7 for setting up multiple desktops. Otherwise, thisstep will be skipped.
Step 9: Choose whether or not to activate the Explorer extension and click on Next.
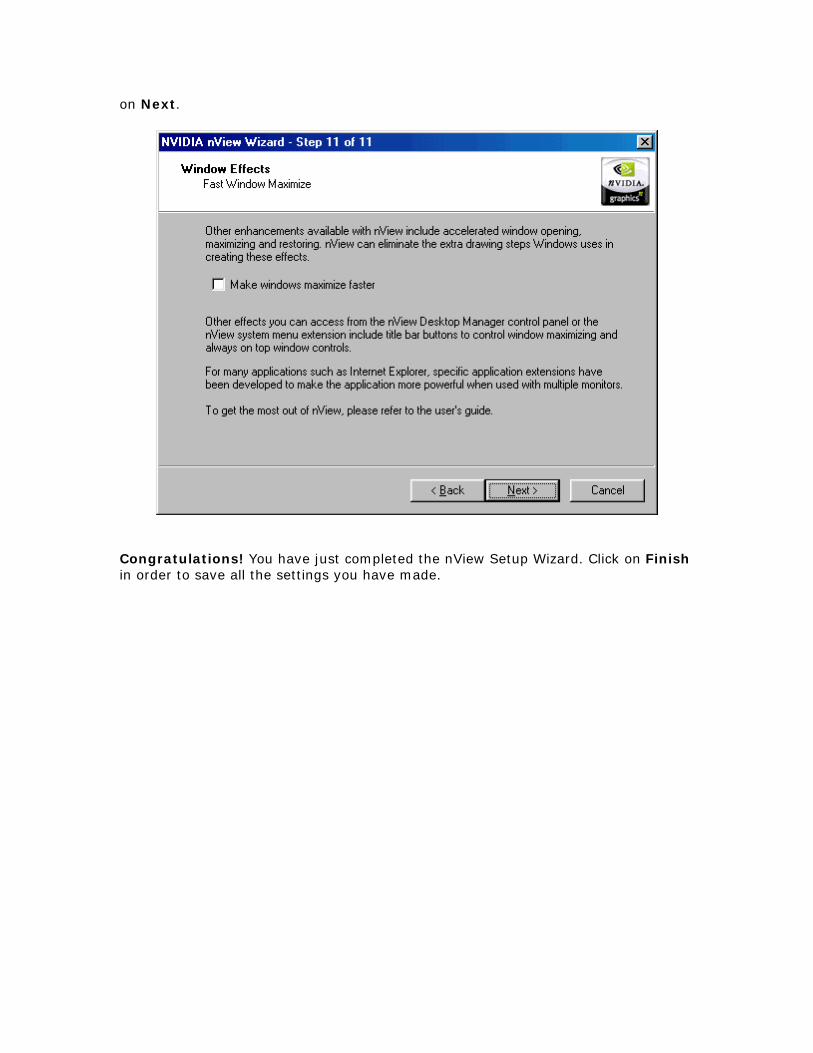
Step 10: Finally, choose whether or not to have windows maximize faster and click
on Next.
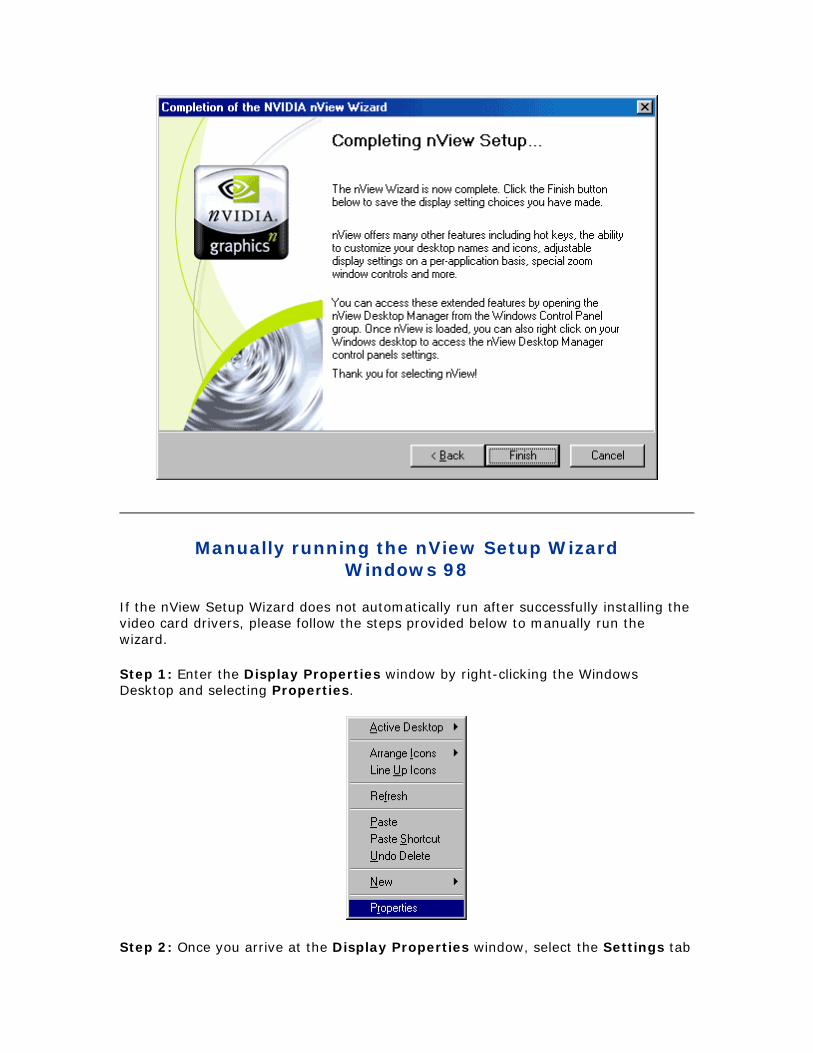
Congratulations! You have just completed the nView Setup Wizard. Click on Finish in order to save all the settings you have made.
Manually running the nView Setup Wizard Windows 98
If the nView Setup Wizard does not automatically run after successfully installing the video card drivers, please follow the steps provided below to manually run the wizard.
Step 1: Enter the Display Properties window by right-clicking the Windows Desktop and selecting Properties.
Step 2: Once you arrive at the Display Properties window, select the Settings tab
in the upper right hand corner then click the Advanced... button in the lower right.
Step 3: You will arrive at the information window for your video card. Select the tab labeled by your video card, which in this case is the GeForce4 MX 440.
Step 4: Click on the Additional Properties button at the bottom of the window.
Step 5: Next, select the tab labeled Desktop Utilities.
Step 6: Click one time, inserting a check mark, in the blank box next to Enable Desktop Manager. Next, click on the Apply button at the bottom.
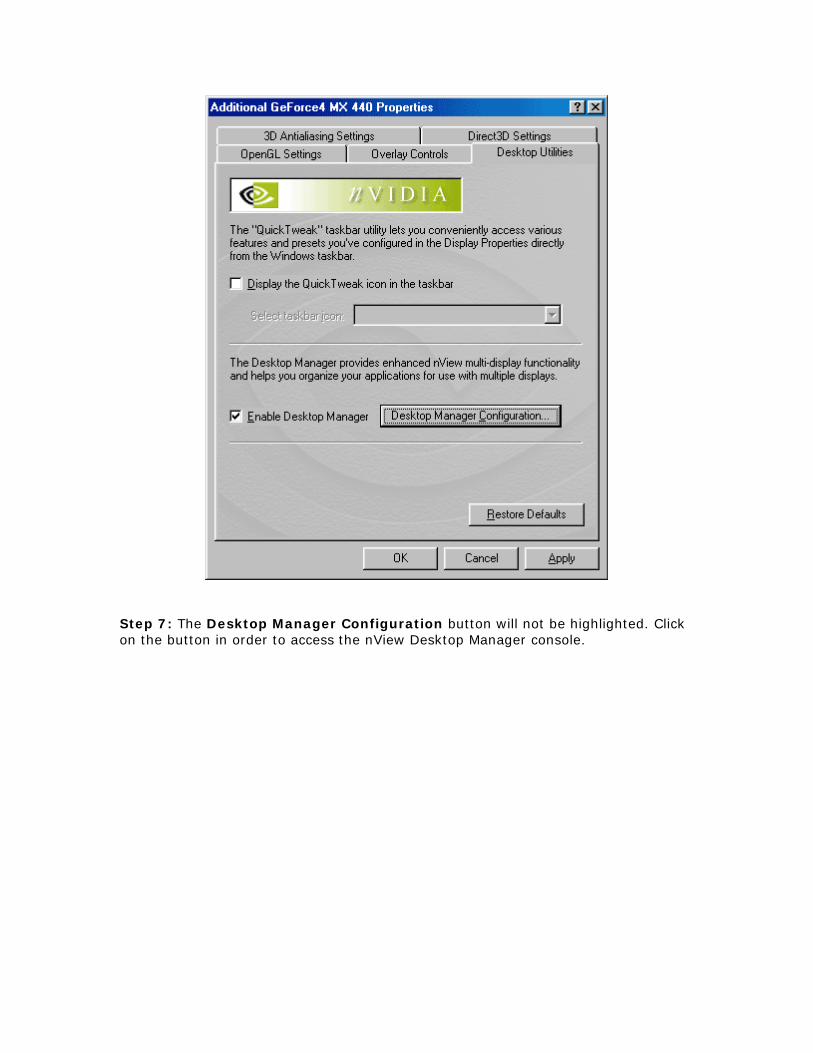
Step 7: The Desktop Manager Configuration button will not be highlighted. Click on the button in order to access the nView Desktop Manager console.
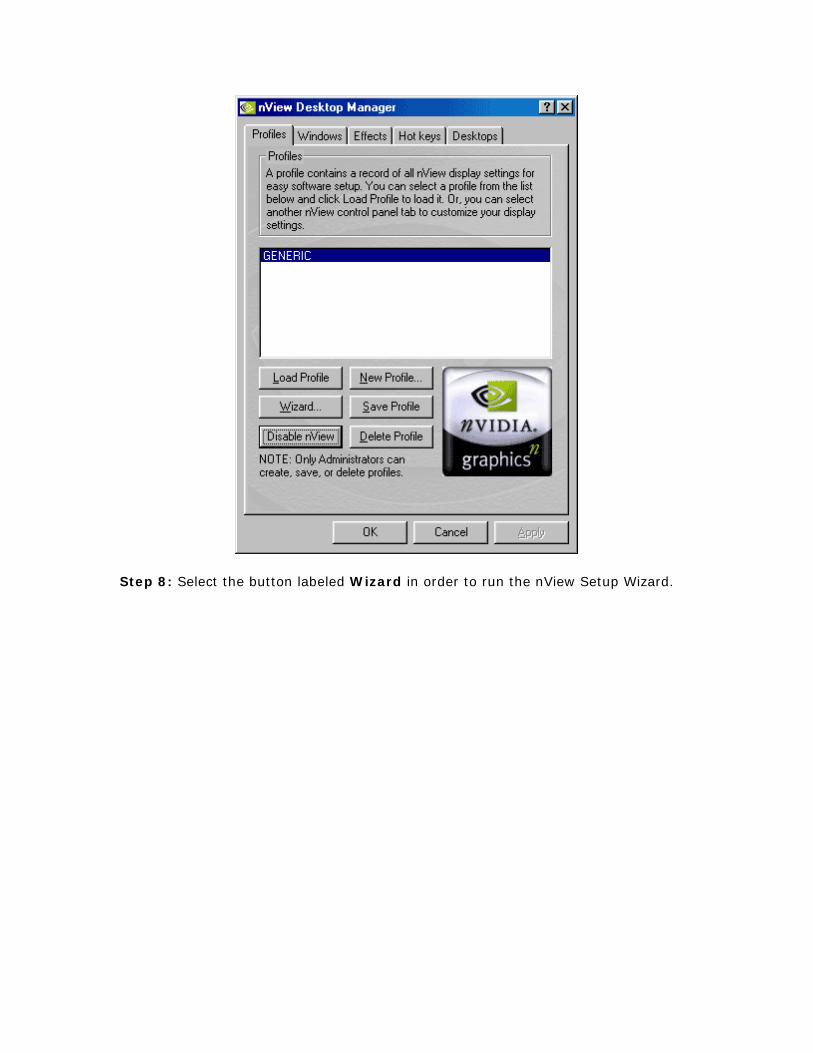
Step 8: Select the button labeled Wizard in order to run the nView Setup Wizard.